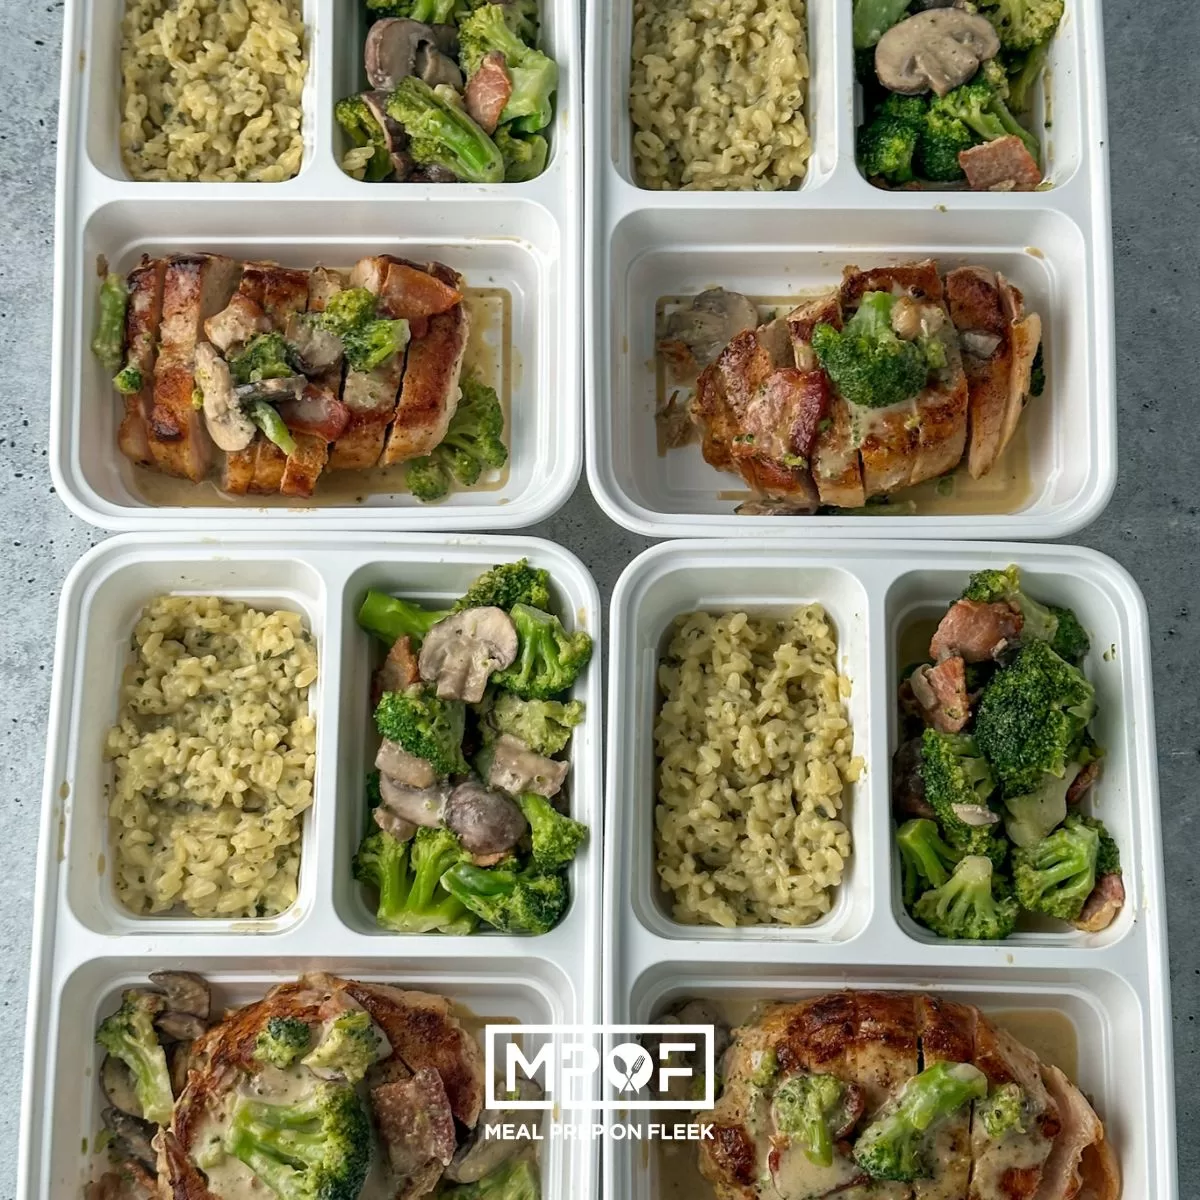
Skillet Bacon Broccoli Pork Chops Meal Prep
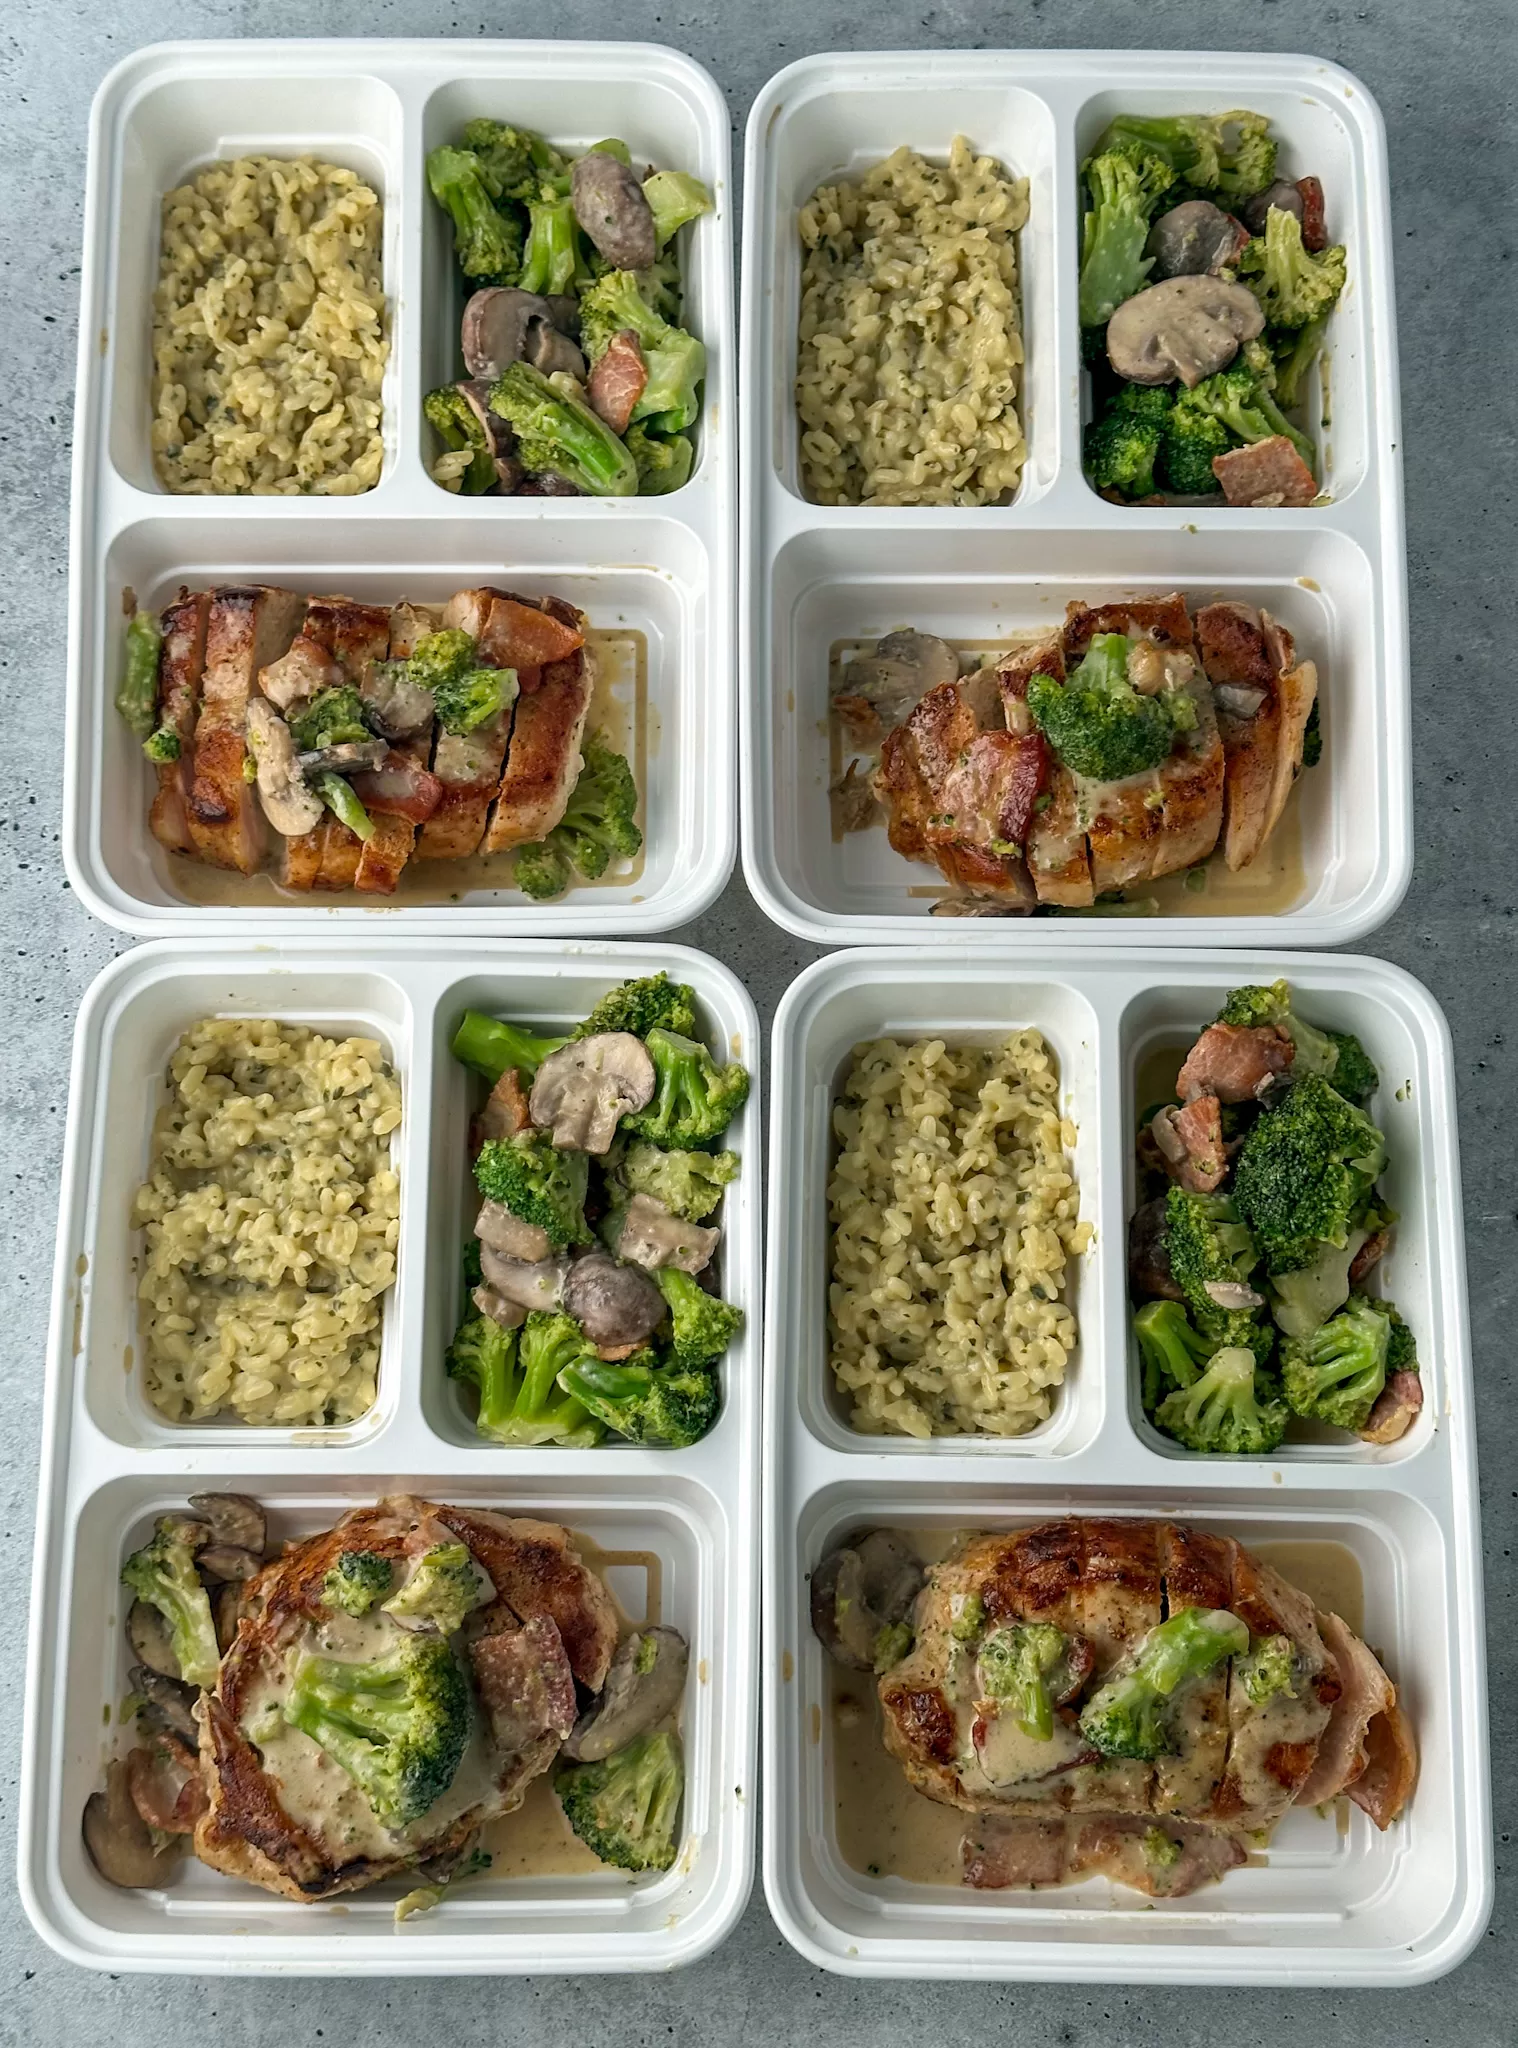
Skillet pork chops with bacon and broccoli cooks in one pan and can be made gluten-free if need be!
Yes, we paired bacon with pork. That means double pork for this meal prep. And doubly delicious! Everything cooks in one pan and tastes like you spent hours on it. Bacon and broccoli and pork are made for each other.
Skillet Bacon Broccoli Pork Chops Meal Prep Ingredients

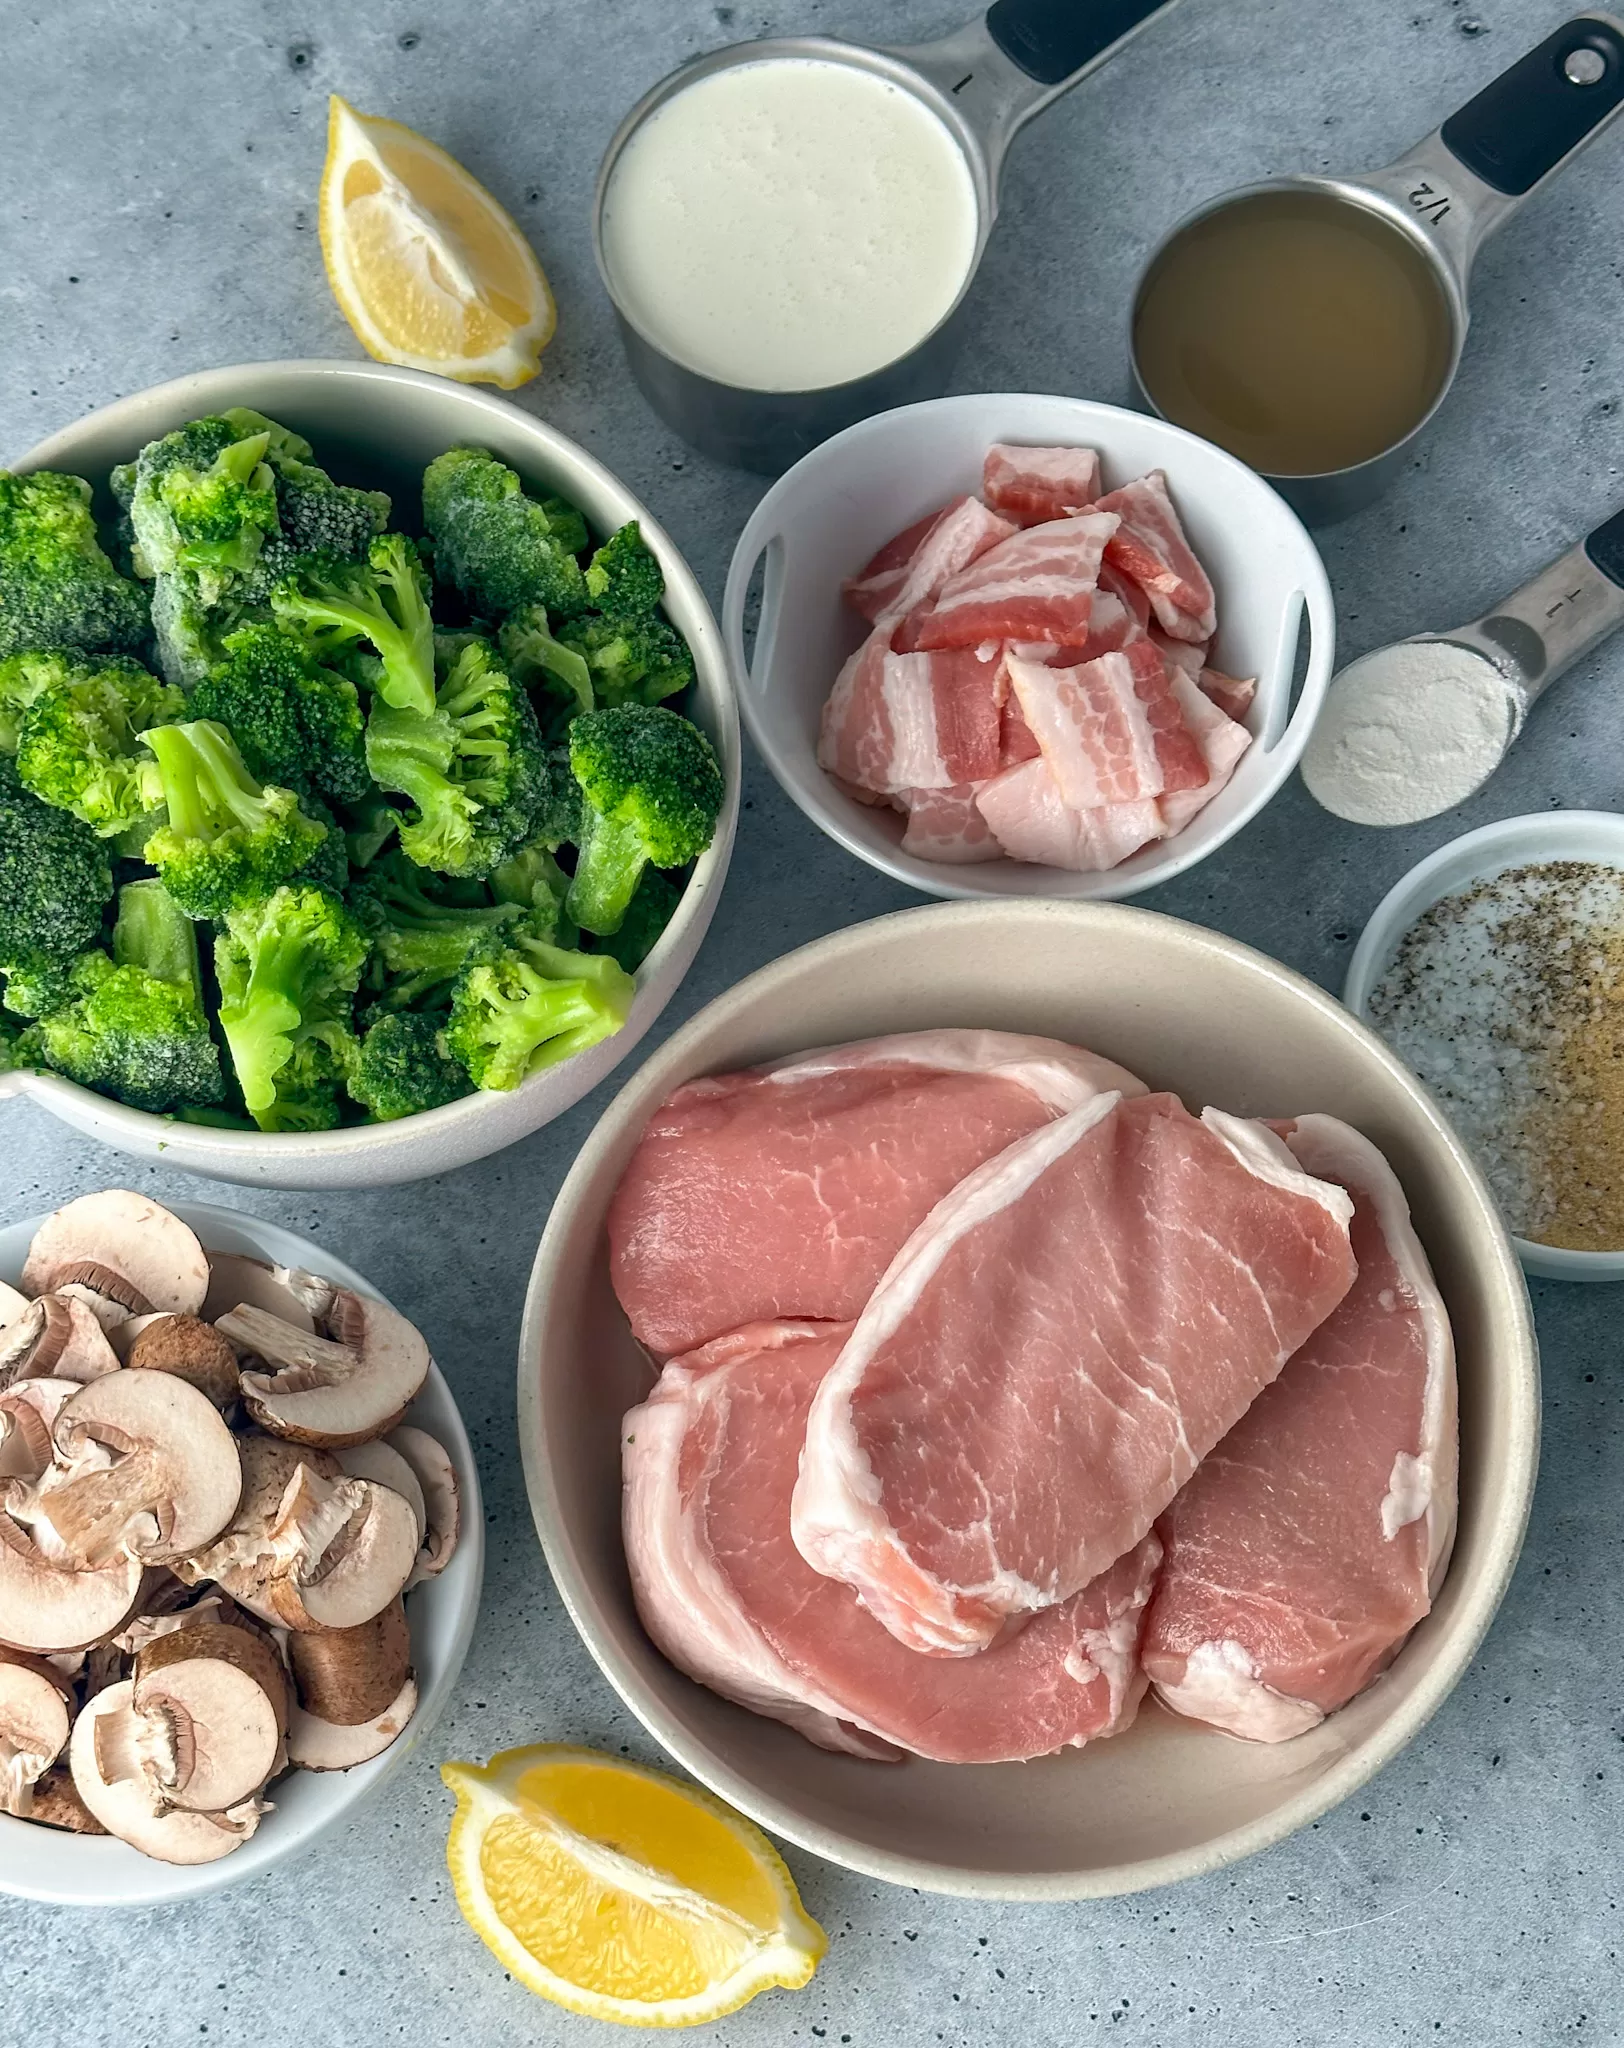
- 4 pork chops, boneless or bone-in, about 1 pound
- 1 tbsp olive oil
- Salt, to taste
- Black pepper, to taste
- 4 slices bacon cut into bite-sized pieces
- 1 tbsp unsalted butter
- 1 tbsp all-purpose flour
- ½ cup low-sodium chicken broth
- 2 tsp lemon juice
- 1 cup half-and-half
- 2 cups broccoli florets fresh or frozen
- 1 cup baby bella mushrooms, sliced
- 1 tsp garlic powder
- Garlic risotto, optional, cooked according to package directions, such as Lundberg
How to Make Skillet Bacon Broccoli Pork Chops
This recipe starts by cooking the bacon, setting it aside, and then cooking the pork chops in some of the rendered bacon fat. Doing this adds a whole lot of flavor. Then, you will remove the pork chops from the pan after they're cooked, add some butter, chicken stock, salt, pepper, the cream, and the bacon, which you've crumbled. Let it simmer a little bit and then add in the broccoli and mushrooms and cook until they're tender. Add the pork back in and you're good to go.
How to Store and Serve Skillet Bacon Broccoli Pork Chops
Meal prepping this recipe is easy and it will keep for 4 days in airtight sealed containers. Reheat in the oven at a low temperature (325 or 350 F), covered, for 15 minutes or so until heated all the way through. You can also microwave this, but sometimes chicken can get a little tough in the microwave if you accidentally overdo it.
We've suggested a side dish such as a prepared garlic risotto (there are lots of boxed rice dishes), but you can also cook your own brown or white rice, or cauliflower rice. Mashed potatoes would be divine with this pork dish, or even egg noodles.
You can also freeze this entire dish with no problem whatsoever. So, if for some reason you want to prep for four servings but freeze half, future you will be happy. Just keep it in an airtight container or in an airtight sealed bag that is freezer safe. Defrost in the refrigerator and then reheat, or put the whole frozen meal in the freezer, covered, until it's completely steaming hot again.
Substitutions and Customizations
Feel free to make this dish with bone-in or boneless pork chops; either will work but boneless ones will take longer.
Brussels sprouts or cauliflower can be swapped for broccoli. Don't lose the mushrooms, though! Green beans would also work. All of these vegetables would cook at about the same rate.
Feel free to use chicken thighs or chicken breasts instead of pork-boneless or bone-in. Either would also taste great here.
Make this prep gluten-free by swapping the all-purpose flour for rice flour or cornstarch.

MORE GREAT PORK MEAL PREPS!
- Crispy Pork Chops and Roasted Vegetables
- One Skillet Honey Dijon Pork Chops with Apples and Onions
- Sheet Pan Pork Tenderloin Meal Prep
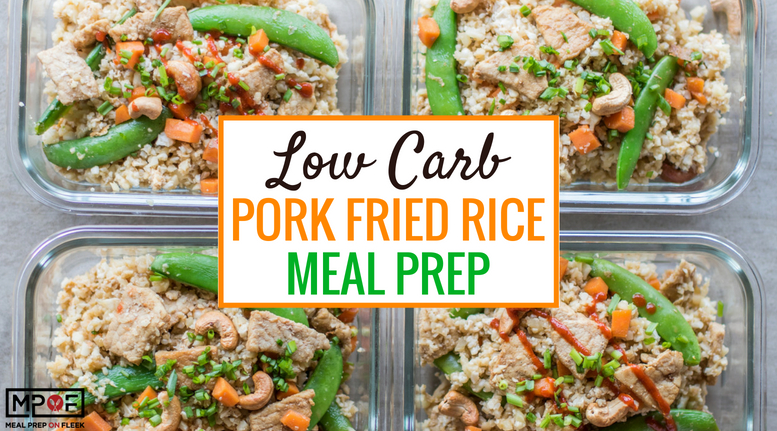
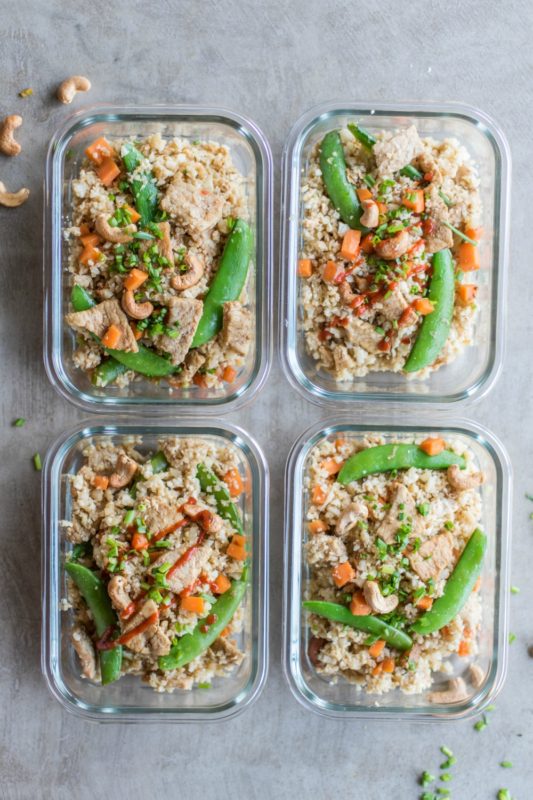
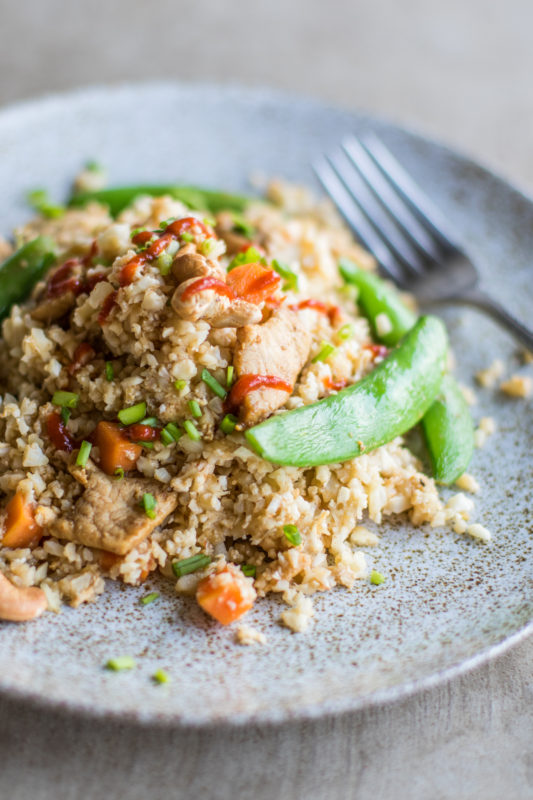
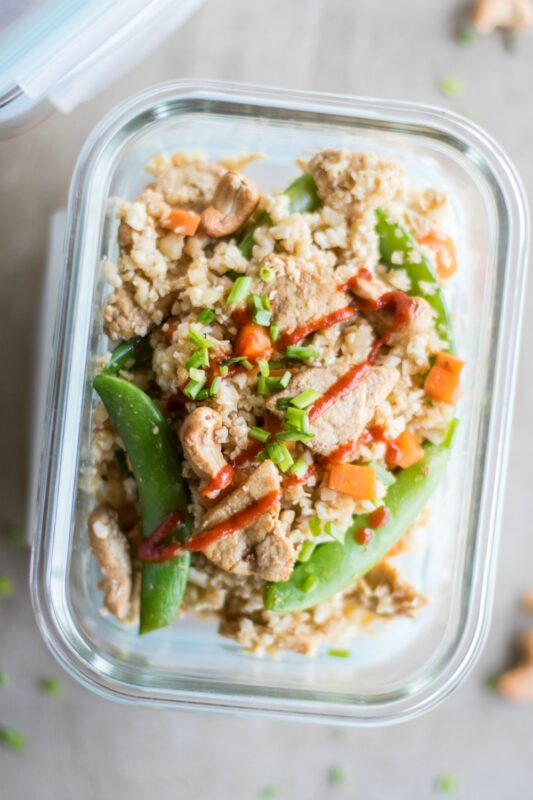
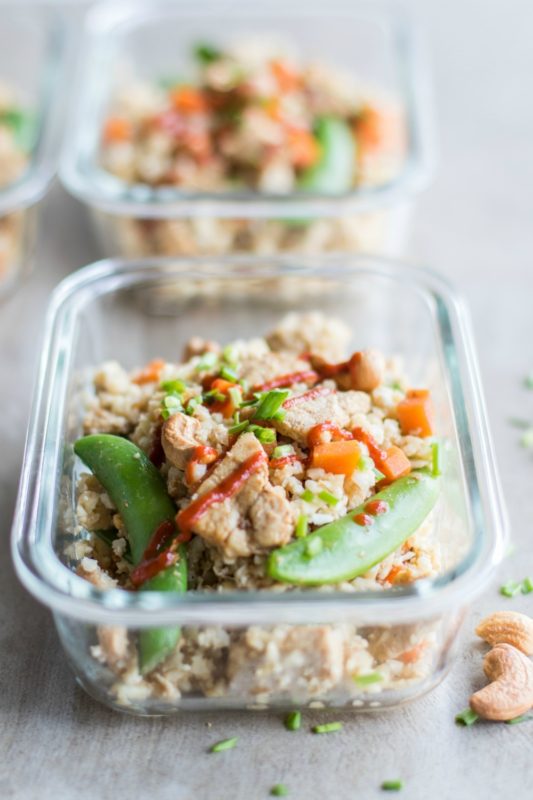
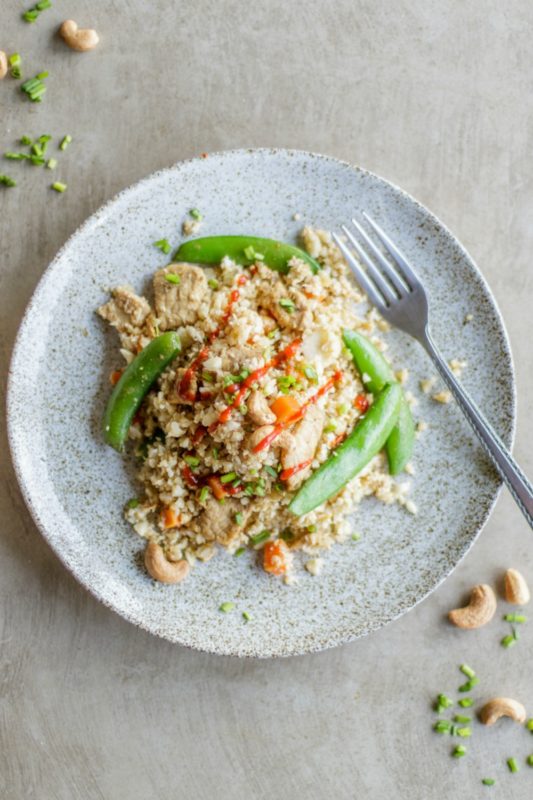
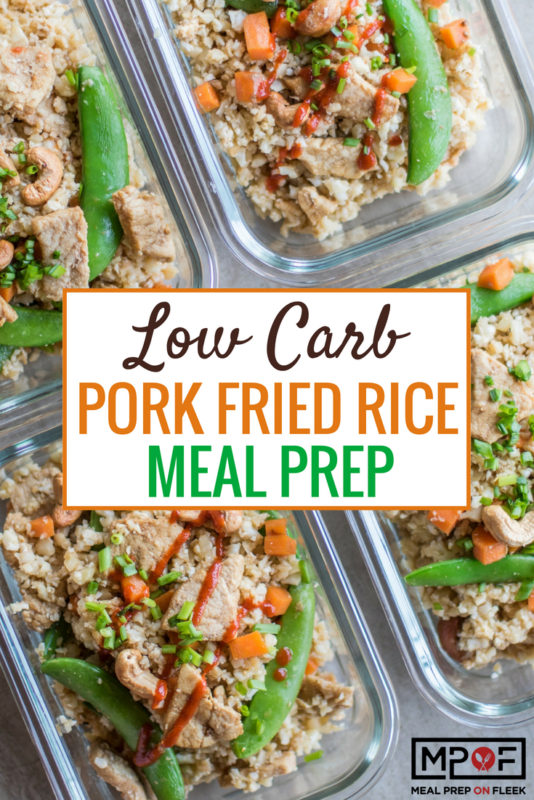
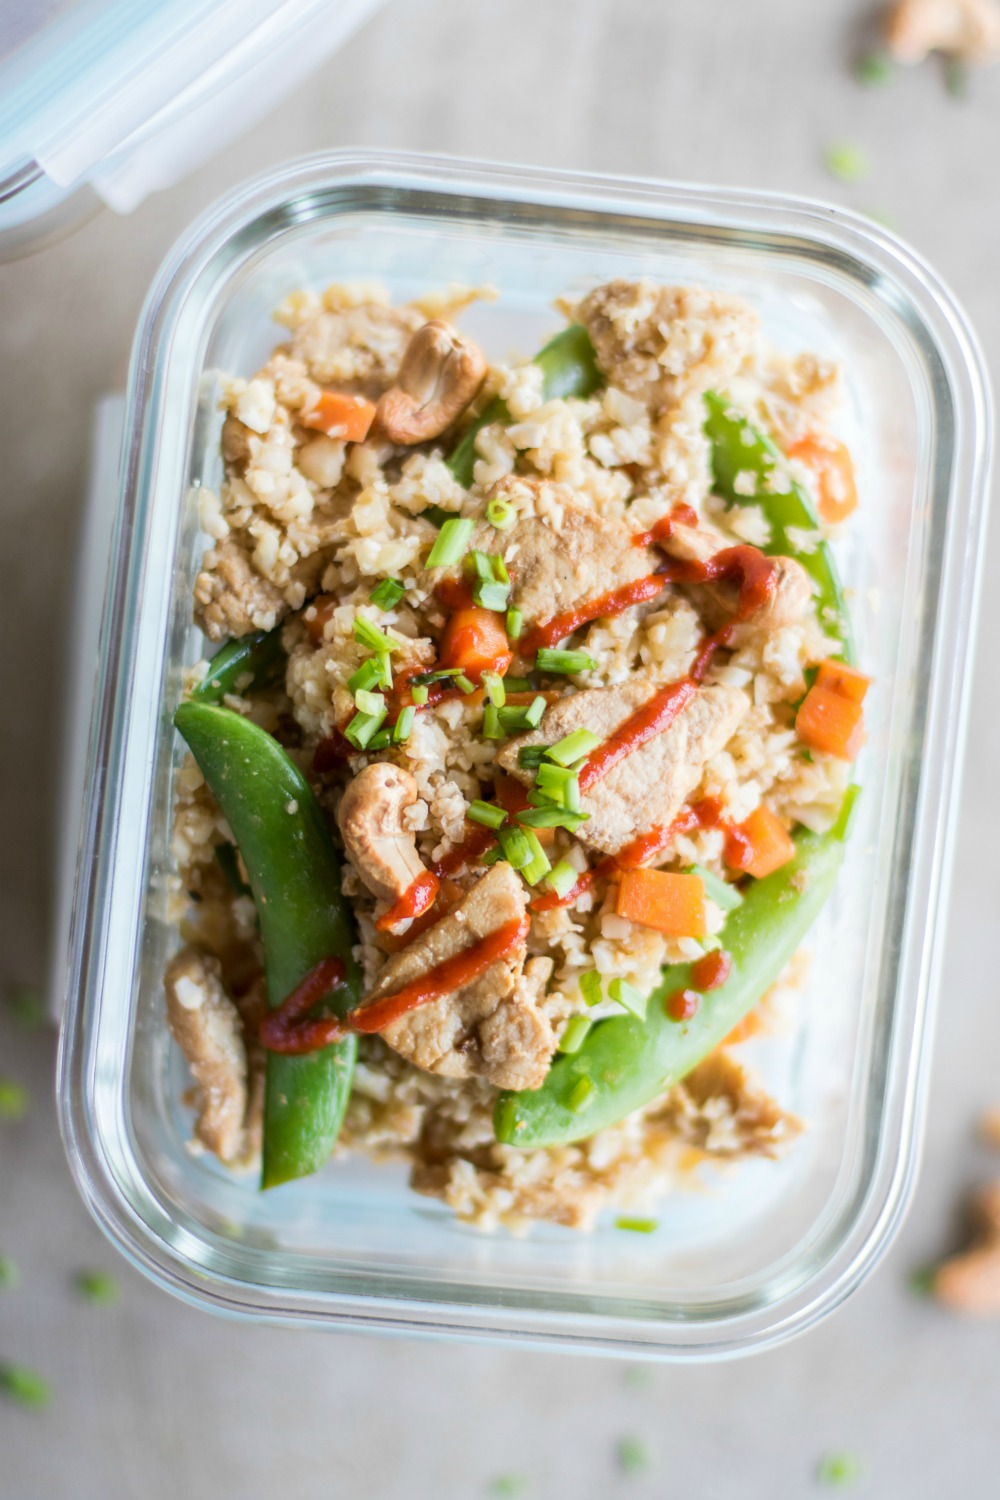
- Low-Carb Pork Fried Rice Meal Prep

Ingredients
- 1 pound pork chops bone-in, 4
- 1 tablespoon olive oil
- Salt to taste
- Black pepper to taste
- 4 slices bacon cut into bite-sized pieces
- 1 tablespoon unsalted butter
- 1 tablespoon all-purpose flour
- ½ cup low-sodium chicken broth
- 2 teaspoon lemon juice
- 1 cup half-and-half
- 2 cups broccoli florets fresh or frozen
- 1 cup baby bella mushrooms sliced
- 1 teaspoon garlic powder
- Garlic risotto optional, cooked according to package directions
Instructions
- Pat pork chops dry and season with salt, pepper, and olive oil on both sides.
- Cook bacon cut into bite-size pieces in a skillet over medium-high heat; cook until crispy and remove onto a plate with a slotted spoon. Reserve about 1 tablespoon of the rendered bacon fat in the skillet and discard the rest.
- Place pork chops into skillet and cook over medium heat until browned on both sides (4-5 minutes per side) Set aside, covered on a plate.
- Add in a tablespoon of butter to the pan and sprinkle the flour in, stirring about 30 seconds. Whisk in chicken broth, lemon juice, garlic powder, salt, and pepper. Stir in cream and return bacon crumbles to the pan.
- Add in broccoli and mushrooms and cook 6-8 minutes, or just until tender. Return the pork chops to the pan.
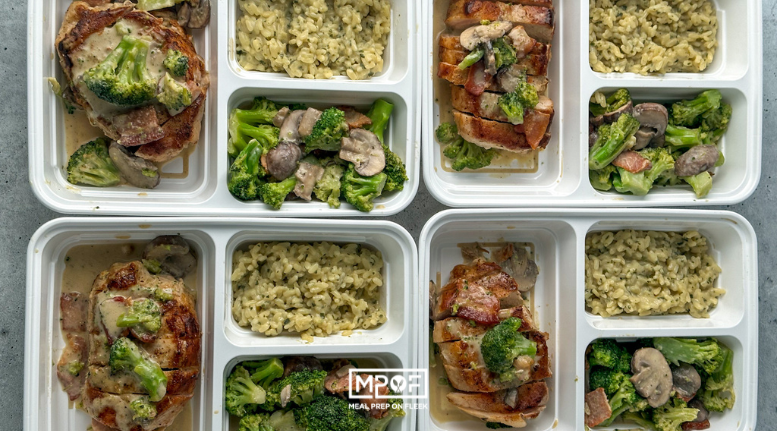
- Divide the pork chops into 4 meal prep containers. Cut into slices if desired. Drizzle over sauce and broccoli mixture.
- Serve the broccoli and mushrooms in one side compartment and garlic risotto in the other, optional.
Video
Nutrition
Crockpot Mississippi Chicken Thighs with Noodles
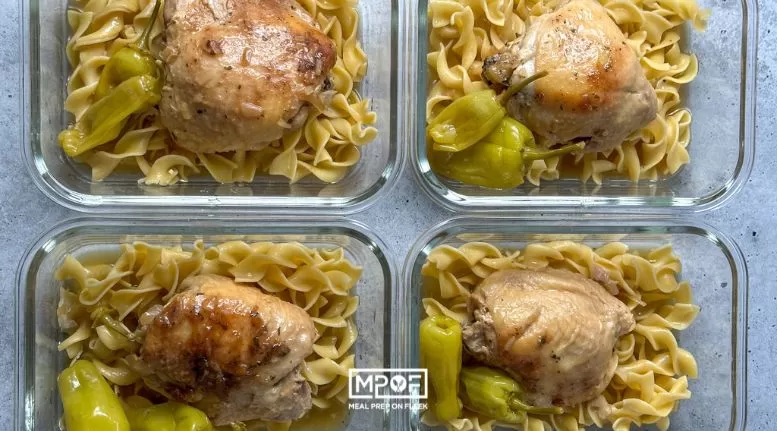
Crockpot Mississippi Chicken Thighs rely on some great shortcuts for a flavorful meal that cooks while you work!
We love chicken recipes, and we especially love crockpot meals with chicken. There are so many meal prepping shortcuts waiting for us in the grocery store. But sometimes we might not know where to look, or what to do with them, or what they might even be!
In this case of this slow cooker recipe, we're talking about three things in particular that make for a TON of flavor. The first one is ranch dressing mix. This is that little packet you can often find in the grocery store alongside the salad dressings. Little known secret? It makes for awesome chicken seasoning. Another shortcut is the famous Lipton onion soup packet. Combine both of these with the juices from a jar of pepperoncini peppers, and you've got one flavorful meal ready to roll!
Crockpot Mississippi Chicken Thighs with Noodles Ingredients

- 1 pound chicken thighs bone-in
- 1 packet ranch dressing mix
- 1 packet onion soup mix
- 12 ounces pepperoncini peppers
- ½ cup reserved pepperoncini juice
- 8 ounces egg noodles
How to Make Crockpot Mississippi Chicken Thighs
You'll love this. Put the chicken in the slow cooker and sprinkle the ranch dressing mix and onion soup mix over the top. Add the pepperoncini peppers and ½ cup of the juice from the jar. Cover, and set it on high for 4 hours or low for 7. In the last 20 minutes or so before it's going to be ready, remove the lid and add the noodles. If it looks dry at this point, feel free to add a little chicken stock or water. Cover, and let it cook for another 20 to 25 minutes or until the noodles are tender.
How to Store and Serve Mississippi Chicken Thighs
Once it's prepped, simply transfer to the meal prep containers and cover the portions tightly. It should keep for 4 to 5 days. Serve this with some green veggies alongside. Steam up some broccoli or green beans, perhaps, or make a nice big green salad with lots of fresh veggies. It's up to you.
Substitutions and Customizations
The recipe calls for bone-in chicken thighs but you can use boneless ones if you like. Just know that they will cook faster. Similarly, you can use bone-in chicken breasts, or boneless chicken breasts but you may need to adjust the time slightly. Experiment and see what works best for your slow cooker; they can vary a bit from model to model.
You could also use jarred roasted red peppers in this dish for something a little different, instead of pepperoncini peppers.
Feel free to use brown or white rice (or cauliflower rice) instead of egg noodles. You can prep it in the slow cooker if you want, toward the end of the cooking process if you like, or whip up a pot of rice on the stovetop.
To double this recipe, just double the amount of seasonings, pepperoncini peppers (and their liquid), and egg noodles. Voila!
MORE SLOW COOKER CHICKEN RECIPES TO TRY!
- Crockpot Chicken Piccata and Green Beans
- Slow Cooker Lemon Garlic Chicken Meal Prep
- Crockpot BBQ Chicken Meal Prep Recipe

Equipment
- 1 slow cooker
Ingredients
- 1 pound chicken thighs bone-in
- 1 packet ranch dressing mix
- 1 packet onion soup mix
- 12 ounces pepperoncini peppers
- ½ cup reserved pepperoncini juice
- 8 ounces egg noodles
Instructions
- Add the chicken to the slow cooker and sprinkle over the ranch seasoning mix, onion soup mix, pepperoncini peppers, and juice.
- Cover and cook on low for 7 hours or on high for 4 hours
- Add the dry egg noodles to the slow cooker and stir. Continue cooking 20-25 minutes until noodles are tender.
- Divide into 4 meal prep containers. Serve the chicken thighs whole over the pasta or shredded with pepperoncini peppers.
Video
Nutrition
Meal Prep Menu 2023 Week 42
Meal Prep Menu 2023: Week 42! Bring on the planning and break out your pots and pans, we've got what you need to make this week's healthy meal preps a breeze!
Get your weekly meal prep recipes finished in no time flat with 2023: Week 42's delicious and easy meal prep menu. Breakfast gets prepped ahead of time for Pineapple Overnight Oats (yes!). Dinner comes together easy with Baked Pasta Primavera and Sheet Pan Italian Sausage and Peppers. Try your hand at Vegan Baba Ghanoush-that's our fourth meal!
Every recipe requires fresh, whole ingredients-just the way we like it-and can be customized to fit your dietary needs.
Our weekly meal prep menus are the perfect solution for busy individuals looking to eat healthy, delicious meals without the hassle of cooking every day. Every week, we offer a selection of nourishing dishes made with fresh, whole ingredients for healthy meal preps. Each menu targets the 1800-2000 calorie range.
NOTE: Meal Prep Menu 2023: Week 42 is designed to give you ideas. We aren't about to tell you how many calories you should consume every day. (In fact, we don't really like the word "should.") Please calculate your macros HERE and then adjust the menu items' portion sizes as needed.
This week's recipes:
- Pineapple Coconut Oats
- Sheet Pan Italian Sausages & Peppers
- Baked Pasta Primavera
- Vegan Baba Ghanoush
Don't forget to leave a comment on each recipe to let us know how you liked them! We love seeing your photos in the Meal Prep Facebook group too!
How to customize:
- Pineapple Coconut Oats
- Use plant-based protein to make this recipe vegan.
- Use mango or berries or any fruit.
- Sheet Pan Italian Sausages & Peppers
- Use plant-based sausages to make this vegan.
- Try this any type of sausage.
- Baked Pasta Primavera
- Gluten-free pasta isn't necessary unless you are gluten-free.
- Use dairy-free mozzarella to make this vegan.
- Vegan Baba Ghanoush
- No alterations here.
If you have any questions or need ideas for alternate swaps, head over to our Facebook Group to ask or email me at [email protected]!
How to alter the macros:
- Pineapple Coconut Oats
- Increase the protein by adding an additional scoop of powder.
- Reduce the fat by using regular milk in place of coconut milk.
- Sheet Pan Italian Sausages & Peppers
- Reduce the fat and increase the protein by using chicken sausage in this dish.
- You could also sub the sausages for cubed chicken breast.
- Baked Pasta Primavera
- Reduce the fat by using low-fat mozzarella and a low-fat sauce.
- Add chicken or tofu to increase protein.
- Vegan Baba Ghanoush
- Increase the protein by serving with a few grilled chicken pieces.
*Please note that any changes to ingredients will alter the macros on each recipe.
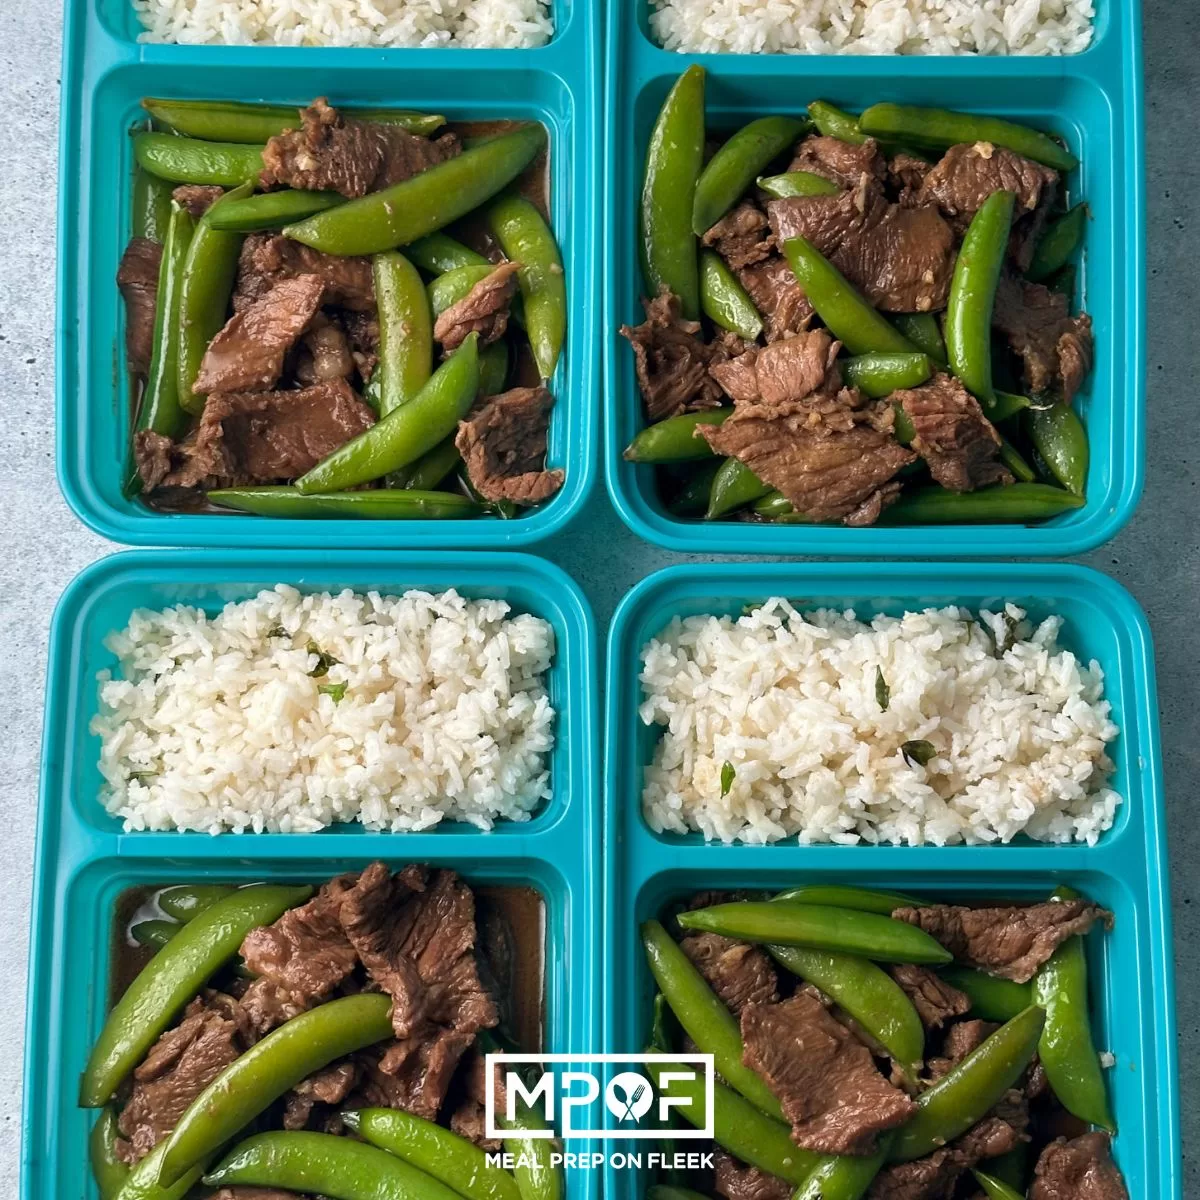
Crockpot Beef with Sugar Snap Peas
Slow cooked beef with sugar snap peas is savory and a tad sweet, and simmers away in your slow cooker all day for an easy meal prep!
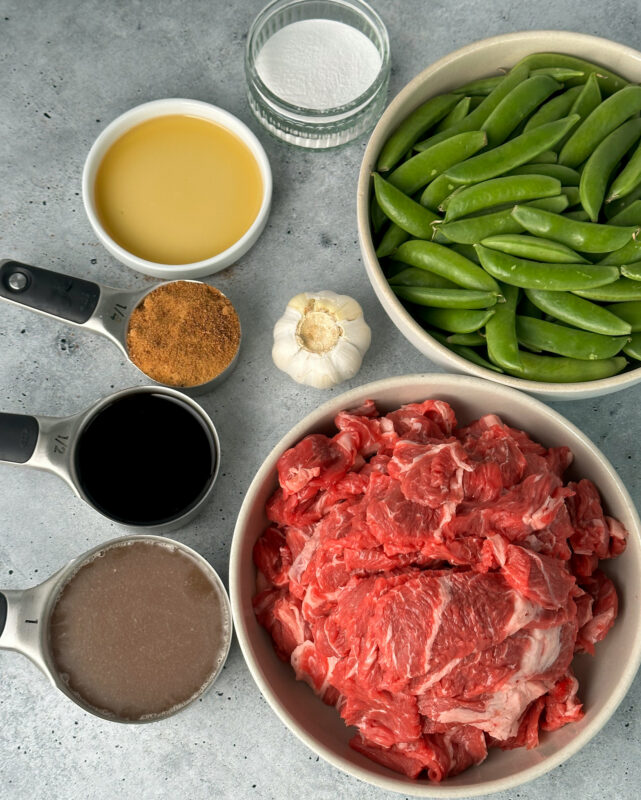
Ok, we love this recipe a lot. Imagine combining thinly sliced chuck roast and combining it with beef broth, coconut aminos, brown sugar, some garlic, sesame oil, and a little cornstarch for thickening. It's umami loaded and delicious! It's very much a paleo-friendly recipe; make it with cauliflower rice if you want!
Crock Pot Beef with Sugar Snap Peas Ingredients
- 2 lb boneless beef chuck roast, sliced thin
- 1 cup beef broth
- ½ cup coconut aminos
- ¼ cup brown coconut sugar
- 3 garlic cloves, minced
- 1 tablespoon sesame oil
- 2 tablespoon cornstarch or arrowroot powder
- 1 pound sugar snap peas, trimmed
- Fresh basil leaves finely chopped, optional for garnish
- White rice, optional for serving

How to Make Slow Cooker Beef with Sugar Snap Peas
Right in the slow cooker, whisk together beef broth, coconut aminos, coconut sugar, garlic, and sesame oil. Add the beef slices and toss to coat. Then, either cook on low or high (high will be faster, naturally) and just about 20 minutes before the dish is ready, whisk together cornstarch and water in a small bowl. Add to the slow cooker, along with the sugar snap peas. And then let it finish up. While that's happening, cook some rice and dinner is prepped!
How to Store and Serve Slow Cooker Beef

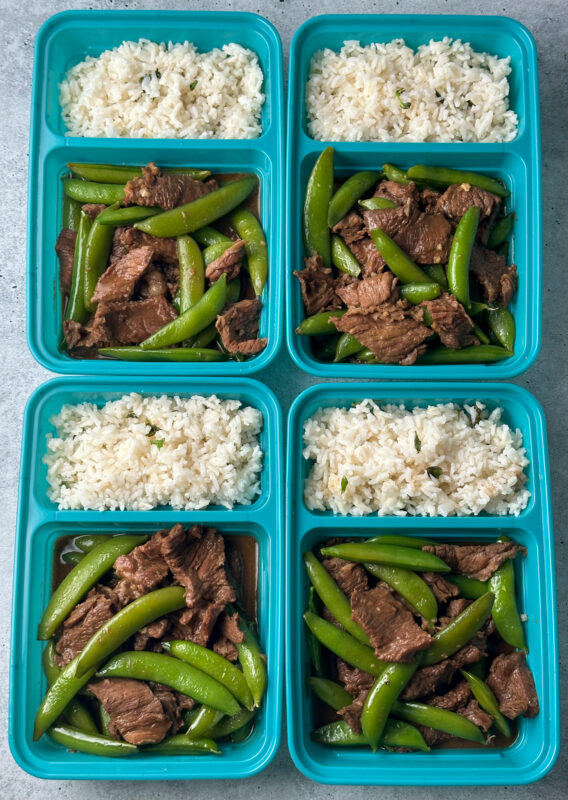
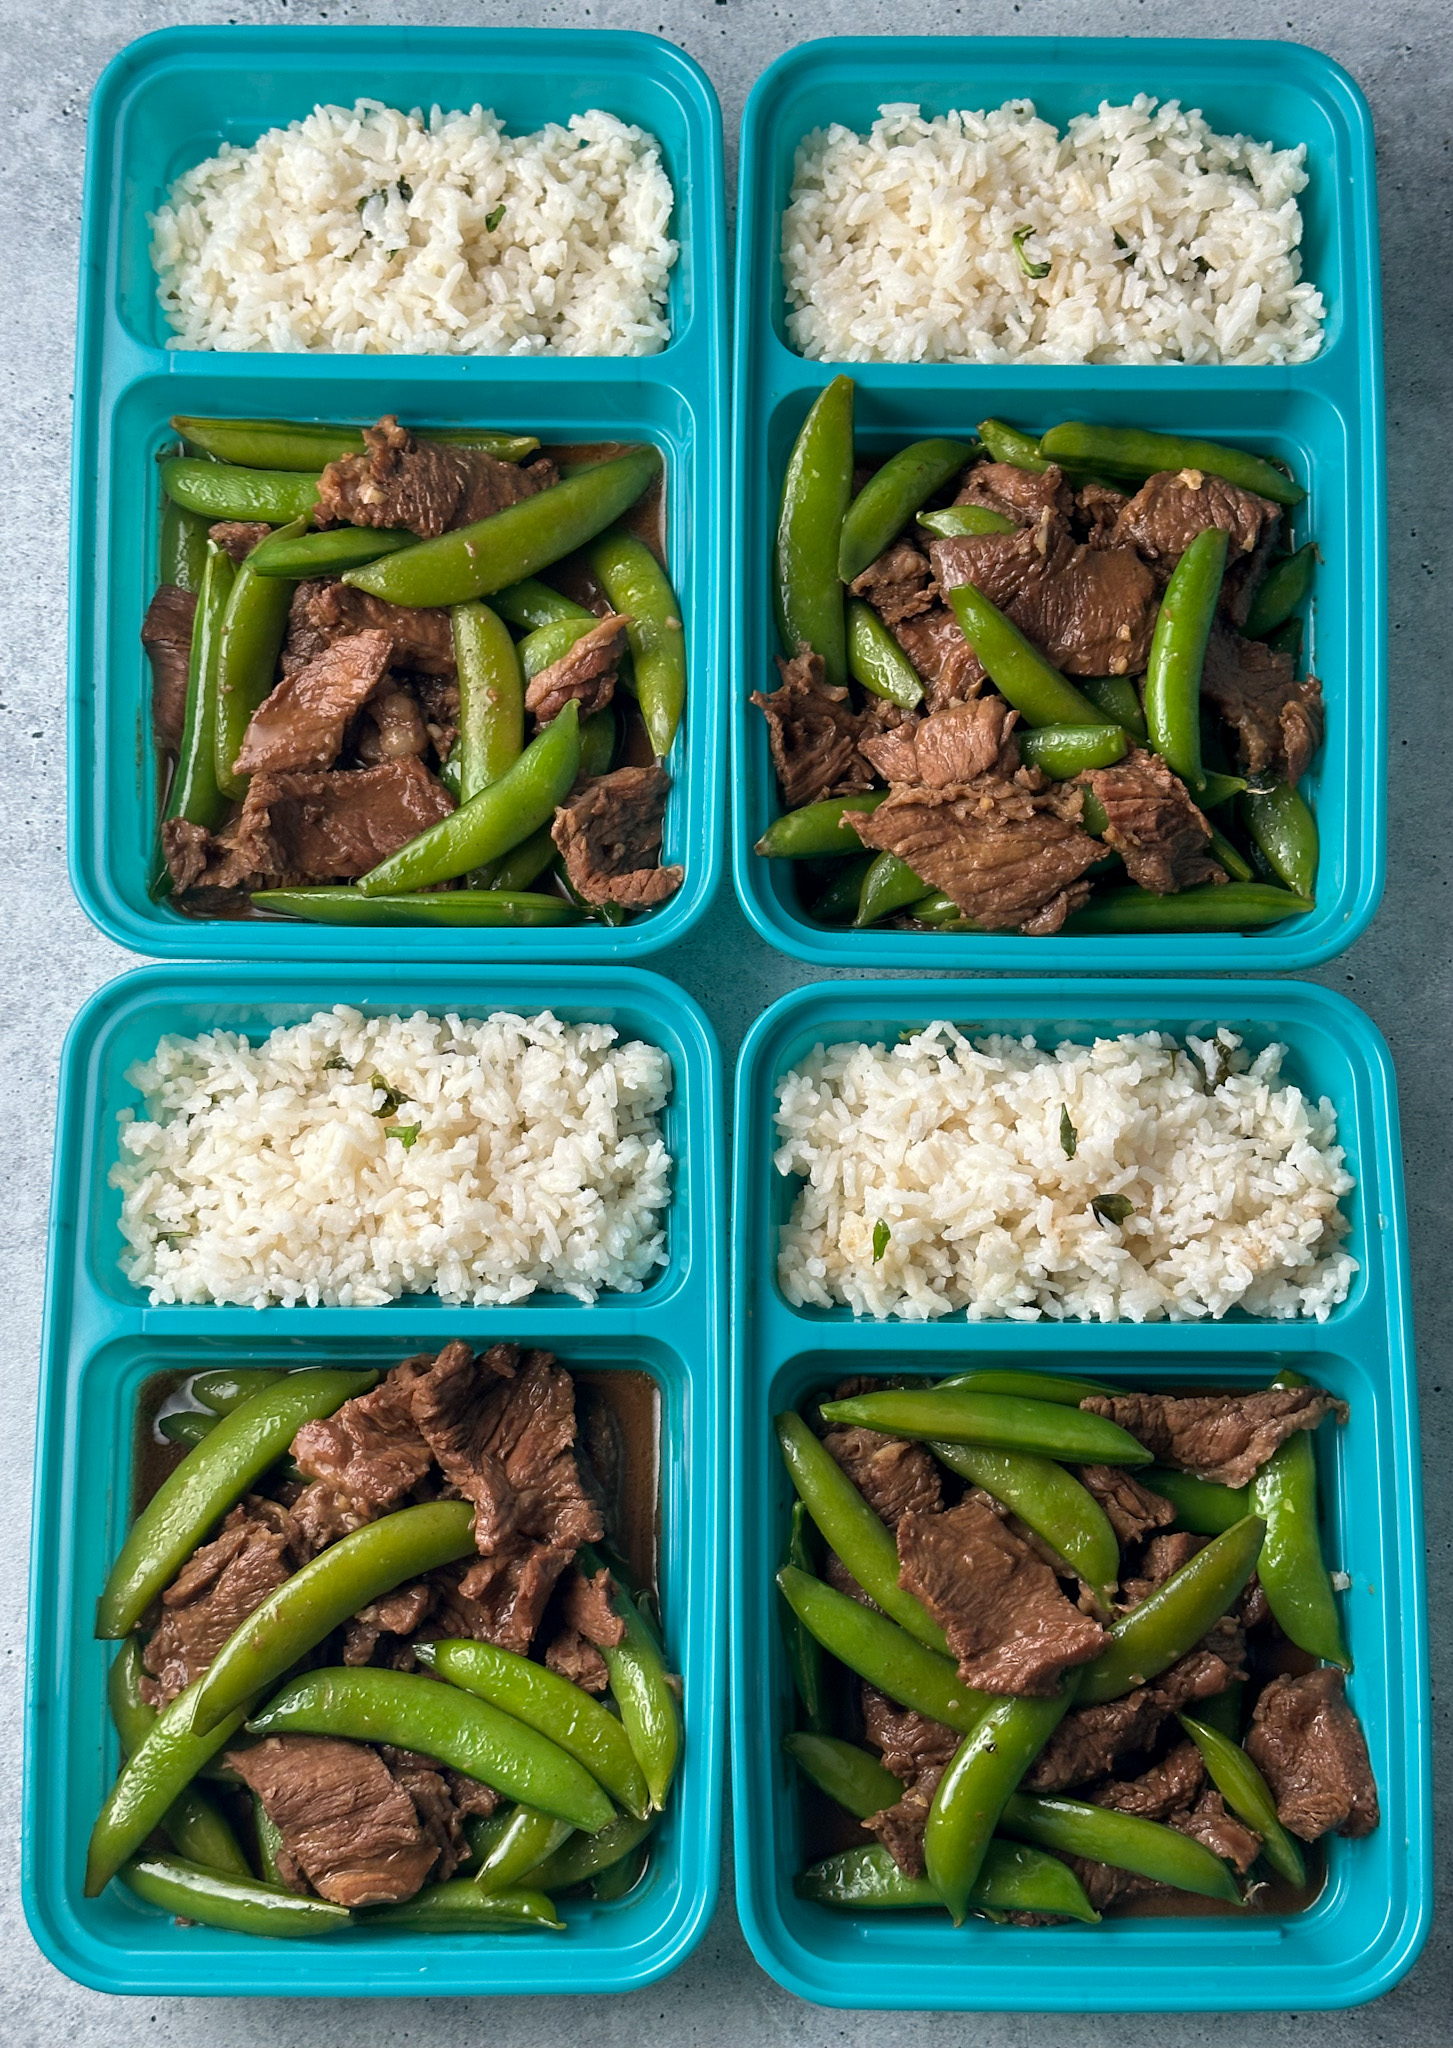
The main dish cooks all in the slow cooker, and once it's ready just portion it in the main compartments of meal planning containers. Add the rice to the side compartment, cover, and chill in the fridge. This will keep for up to 4 days. Reheat the dish in the microwave or the oven, as desired.
Substitutions and Customizations
You can make this dish with chicken or pork, too, and it will be delicious. Feel free to serve with rice, as desired, or cauliflower rice. You can also make this with quinoa or farro if desired, for a different taste. And instead of sugar snap peas, you can use green beans or even snow peas. Both will work well, but the snow peas will cook faster than sugar snaps and green beans, so put them in during the last ten minutes so they retain some of their crispiness.
MORE SLOW COOKER RECIPES!

Equipment
- 1 slow cooker
Ingredients
- 2 pounds boneless beef chuck sliced thinly
- 1 cup beef broth low sodium preferred
- ½ cup coconut aminos
- ¼ cup coconut brown sugar
- 3 cloves garlic minced
- 1 tablespoon sesame oil
- 2 tablespoon cornstarch or arrowroot powder
- 4 tablespoon water
- 1 pound sugar snap peas trimmed
- ½ cup fresh basil leaves finely chopped, for garnish
- White rice cooked, optional, for serving
Instructions
- In the slow cooker, whisk together beef broth, coconut aminos, coconut sugar, garlic, and sesame oil.
- Place beef slices in the liquid and toss to coat.
- Cover with the lid and cook on high 3-4 hours or low 5-6 hours.
- Just before the last remaining 20 minutes of cooking, make a slurry with cornstarch and water in a small bowl. Pour this slurry into the crockpot, and add in the sugar snap peas.
- Cook white rice according to package instructions and portion it into the side compartments of meal prep containers. Garnish with freshly chopped basil leaves.
- Distribute the beef and sugar snap peas evenly among the main compartment of the meal prep containers.
Video
Nutrition
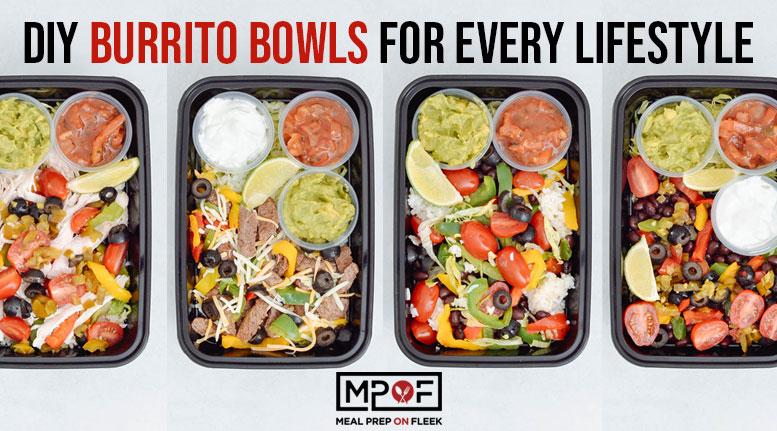
DIY Burrito Bowls For Every Diet
Thank you to GoodCook for sponsoring this DIY Burritos Bowls For Every Diet post, and thank YOU for supporting the brands that help make Meal Prep On Fleek possible. All opinions are our own.

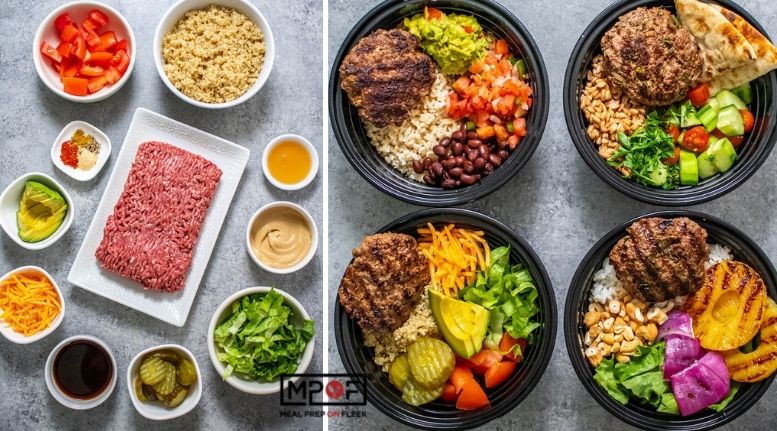
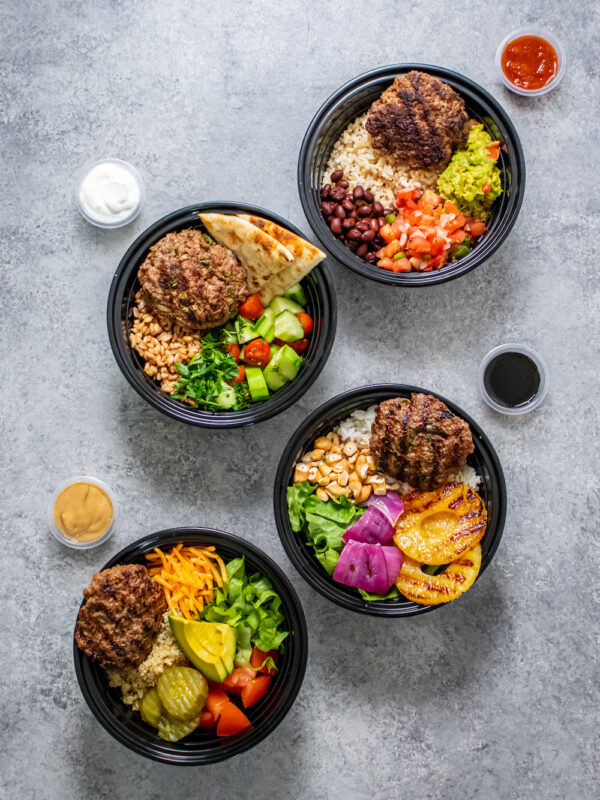
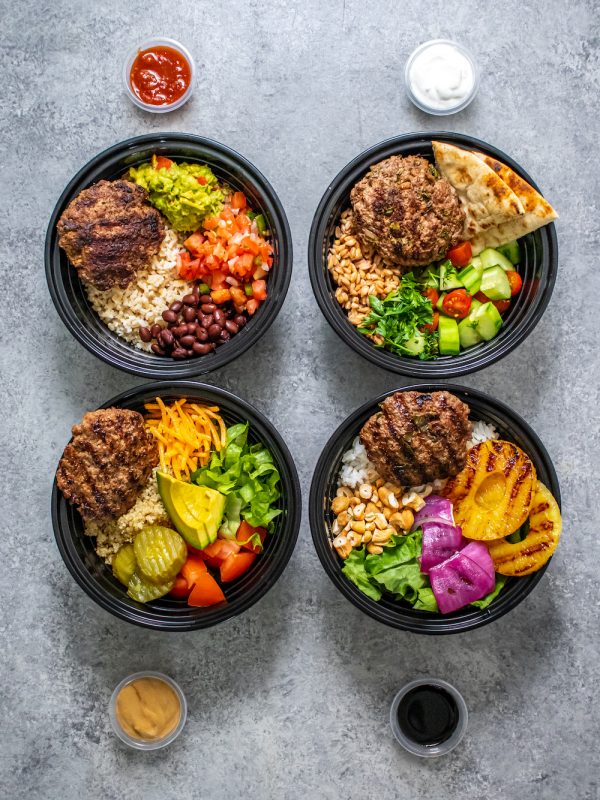
Whether you are following a Keto, Gluten-Free, Vegan, Vegetarian, or Whole30 style of eating, we are here to show you how to make a DIY Burrito Bowl at home. This recipe will let you customize for every diet while saving you both time and money. Oh, and let's not forget calories, too!

Let's be honest here. Who doesn't love a gooood Chipotle burrito bowl? They have so many great options to choose from and their flavors are really on point! But, what we don't love is the amount of money we spend on the bowls and the calories! By now you know that we are all about intuitive eating, but if you like to frequent Chipotle just as much as us, you know those calories add up. QUICK!
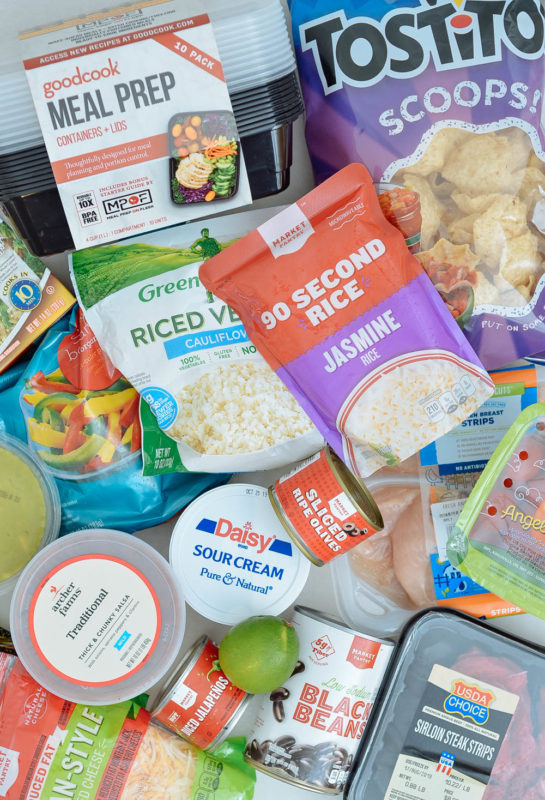
Instead of stopping there at lunch or for dinner. We are here to show you how to make your own burrito bowls at home. Not only are we showing you how to customize the burrito bowls for almost every diet out there, but we are also helping you save money by grabbing all of the ingredients, plus your GoodCook meal prep containers, at Target.
The flavor combinations don't stop with just these either! There are so many other great things to add in like:
- Shrimp
- Onions
- Pico
- Salsa Verde
- Etc.
The list goes on. Don't let this list cap you. Head to Target and see just how many great options there are for these burrito bowls and your meal prep this weekend!
Are you ready to dive in? Let's GO!

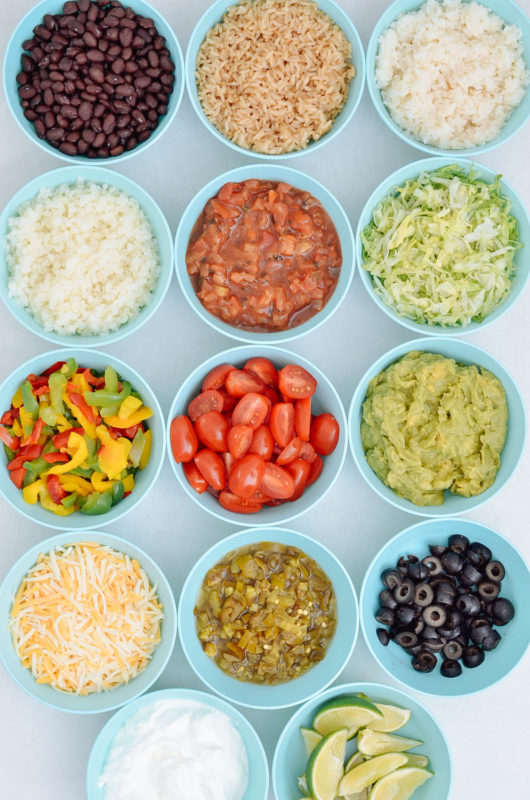
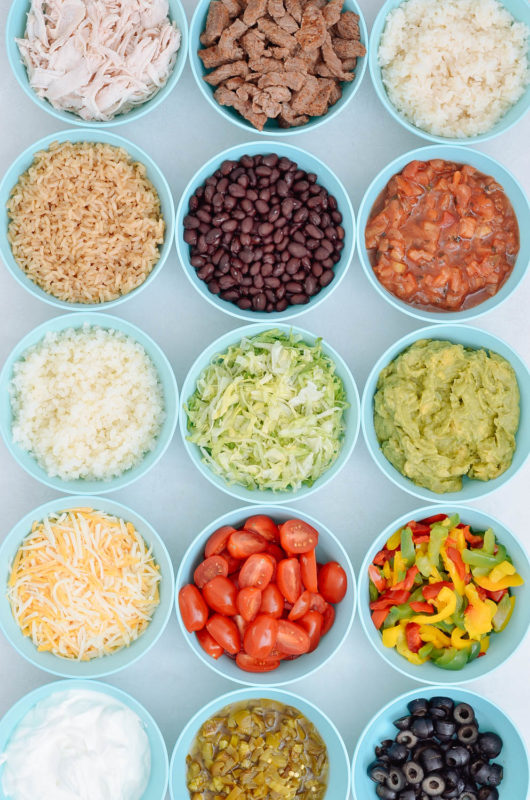
Here are some base ingredients:
- White Rice
- Brown Rice
- Cauliflower Rice
- Lettuce

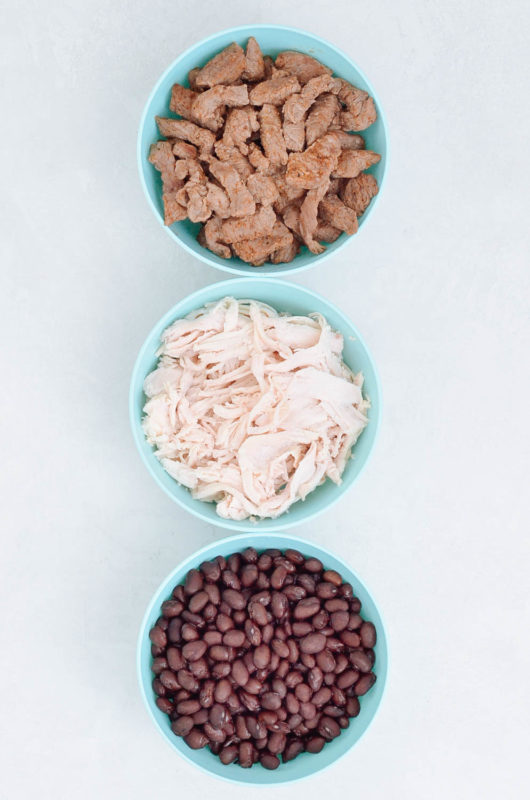
Next up we have protein options.
- Taco seasoned steak
- Shredded chicken breast (cooked with salt and lime juice)
- Low sodium black beans

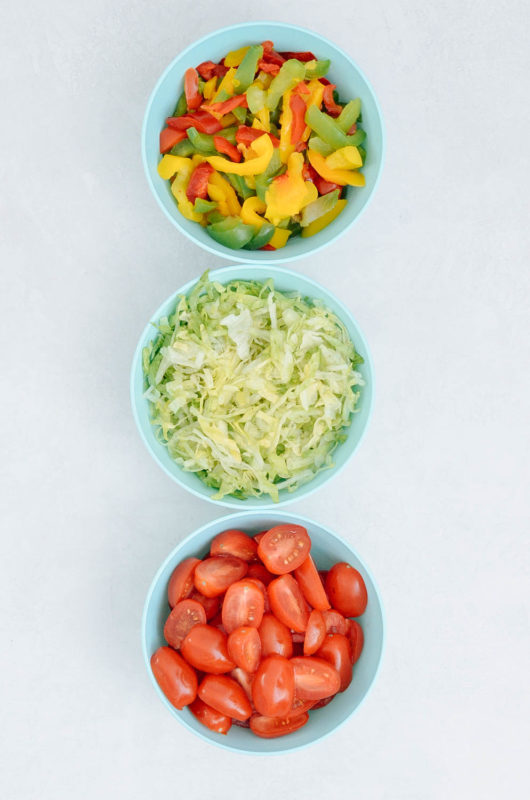
Now it's time to add some veggies!
- Fajita veggies
- Shredded lettuce
- Sliced tomatoes

Lastly, we have the most important part! The toppings!
- Sour Cream
- Fresh guacamole
- Shredded Cheese
- Salsa
- Olives
- Diced jalapenos
Now that we have our foundation ingredients for the DIY Burrito Bowls For Every Diet in place, let's dive into the specific items for each.
Keto

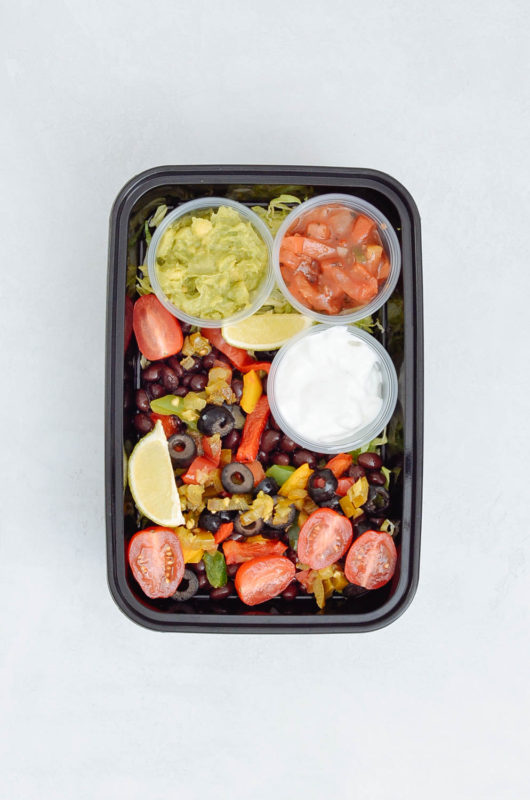
For a keto burrito bowl, you will use the higher fat, low to no carb ingredients. Here we have chicken, steak, guacamole, fajita veggies, salsa, cauliflower rice, lettuce, cheese, olives, sour cream, jalapenos, and fresh lime. You can mix and match until your hearts desire.

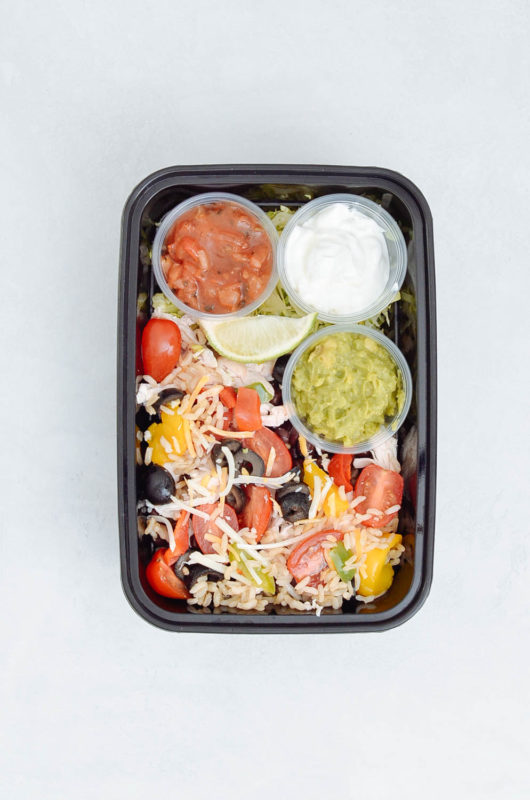
In our bowl, we included lettuce, steak, fajita veggies, shredded cheese, black olives, salsa, guacamole, sour cream, and fresh lime.
Whole30

For a whole30 burrito bowl, you will use the freshest ingredients possible. You want to make sure that there are no hidden sugars, unapproved oils, etc in the ingredients that you buy. This is probably the hardest burrito bowl to make, but it can be done! Some options include chicken, steak, guacamole, fajita veggies, fresh salsa, cauliflower rice, olives, jalapenos, lettuce, tomato, and lime.

For our bowl, we included lettuce, cauliflower rice, shredded chicken, fajita veggies, tomatoes, black olives, jalapenos, salsa, fresh guacamole, and lime.
Vegetarian

For the vegetarian burrito bowl, you can go with almost everything minus the chicken and steak! Beans, brown rice, white rice, cauliflower rice, salsa, lettuce, fajita veggies, tomatoes, guacamole, shredded cheese, jalapenos, olives, sour cream, and fresh lime.

In our vegetarian burrito bowl, we added lettuce, black beans, fajita veggies, olives, jalapenos, tomatoes, guacamole, salsa, sour cream, and fresh lime.
Vegan

Minus the shredded cheese and sour cream, everything for the vegan burrito bowl is the same as the vegetarian bowl.

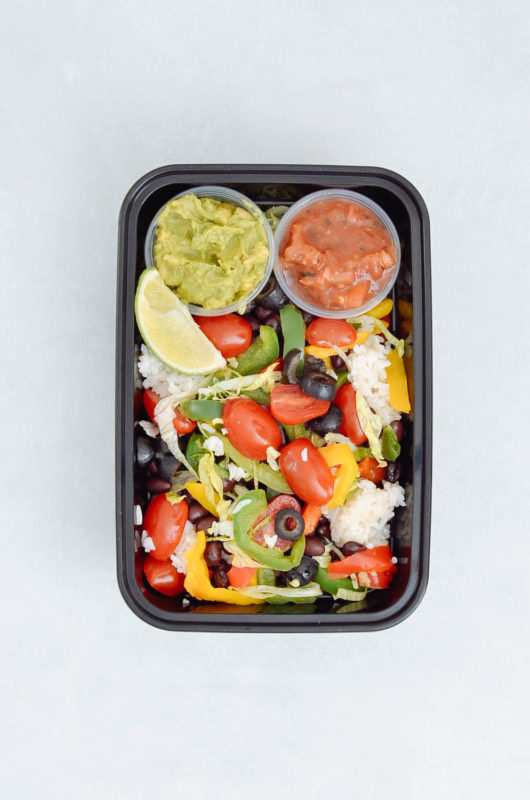
In the vegan burrito bowl, we added lettuce, white rice, fajita veggies, tomatoes, black beans, olives, salsa, guacamole, and fresh lime.
Gluten Free

Of all of the burrito bowls, the gluten-free burrito bowl is the easiest to make because you can use everything here! There are no limitations when it comes to the bowl based on this shopping haul! Chicken, steak, white rice, brown rice, cauliflower rice, black bean, salsa, shredded lettuce, guacamole, shredded cheese, tomatoes, fajita veggies, sour cream, jalapenos, and olives are all fair game!

In the gluten-free burrito bowl, we added lettuce, shredded chicken, brown rice, fajita veggies, tomatoes, olives, shredded cheese, salsa, sour cream, guacamole, and fresh lime juice.

With one shopping haul from Target to get all of the ingredients and your meal prep containers, you will be on your way to a week's worth of burrito bowls for a fraction of the cost as takeout.
The other fun thing about this haul is that it works great for parties, too! No matter what kind of lifestyle your guest has there is guaranteed to be a combination that they can enjoy. Place all of the prepared ingredients into your meal prep containers for serving and you have yourself a party!

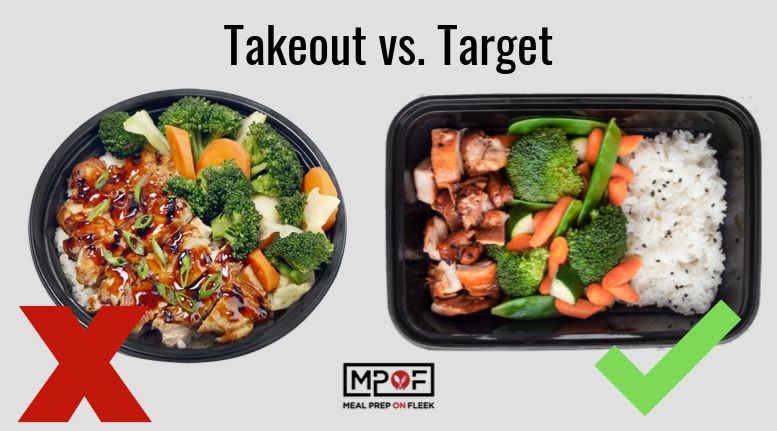
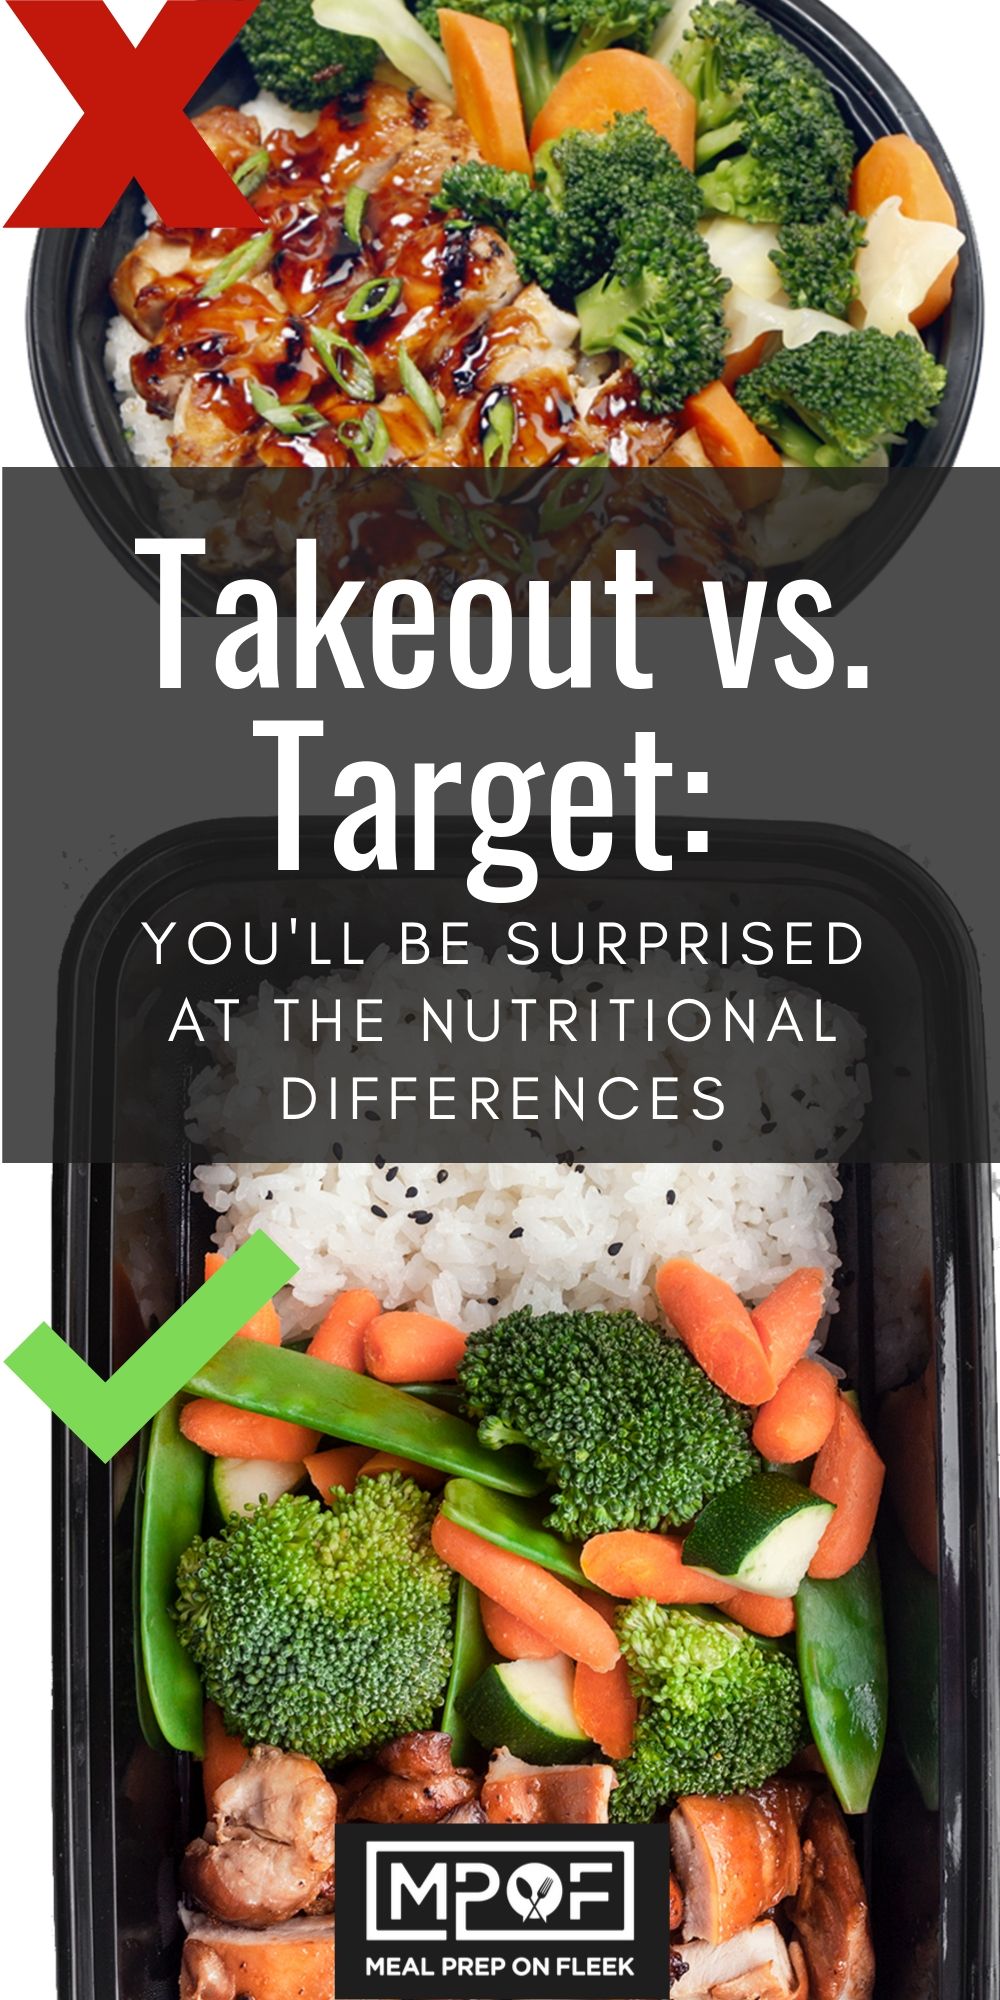
Takeout vs. Target: You'll be surprised at the nutritional differences
Thank you to GoodCook for sponsoring this Takeout vs. Target post, and thank YOU for supporting the brands that help make Meal Prep On Fleek possible. All opinions are our own.

Skip the weekend take-out and make these easy recipes during meal prep to enjoy all week! They have less sodium, fewer calories, and much less fat. Your wallet and your waistline will be thanking you later.
Who doesn't love takeout? It's easy - you just call in an order, pick it up and eat it at your desk. But, if we are being honest, making it at home is almost just as easy. Chances are, it's healthier too. Plus, you can cook it up during your meal prep on Sunday and have it ready for any meal of the week; lunch or dinner. Gone are the days when you have to wait until Friday or Saturday night to binge on cartons of takeout. Instead, you can feel good about enjoying any of these three recipes any day or time.
We have skipped the frying in favor of baking (on a sheet pan), significantly reduced the sodium (hello less bloating and lethargy), and made the recipes extremely cost-effective by shopping for all of the ingredients at Target. It's a triple win!
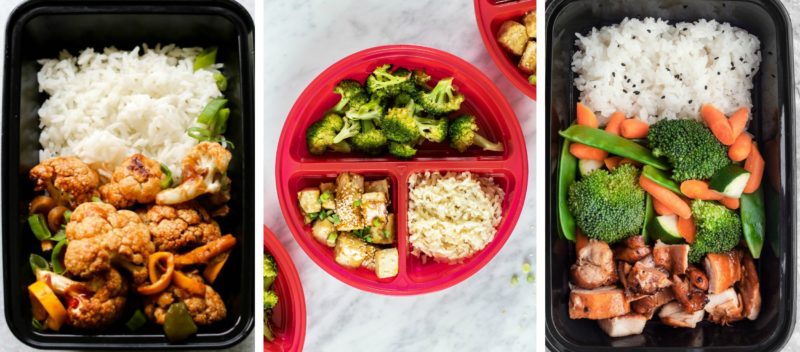
We created two vegetarian friendly recipes; one a traditional tofu recipe and one is a spin on sweet and sour shrimp. The third recipe is the tried and go-to recipe for most people that are trying to be healthy, but still enjoy takeout; Teriyaki Chicken and Rice. All three recipes are a guaranteed home run in flavor and nutrition.
Plus, we have everything portioned controlled thanks to our Good Cook meal prep containers. There will be no more guessing whether or not you are eating too much or not. We all know what happens when we eat straight from the takeout box, don't we?
Are you ready to take the takeout remix challenge and put these recipes to the test? Let's get cooking!
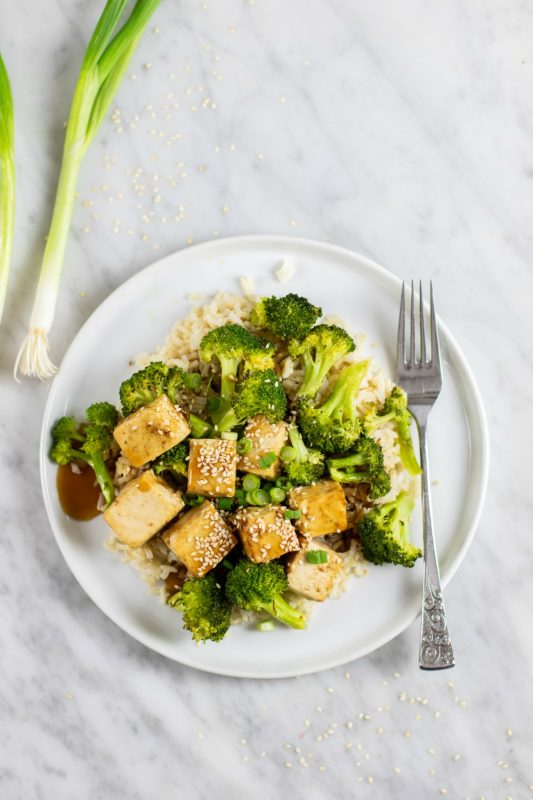
Crispy Tofu & Broccoli

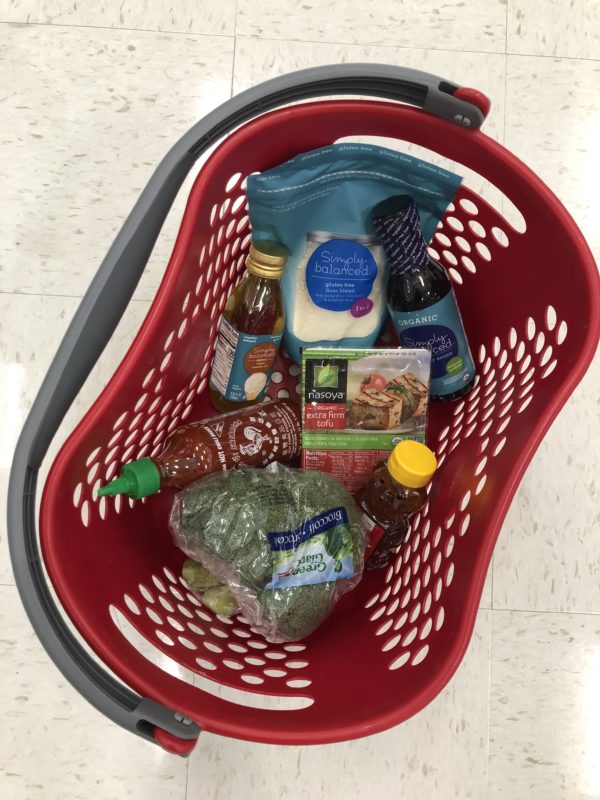
Here's what you will need to grab at Target:

Ingredients
1 package extra-firm tofu
1 tablespoon sesame oil
3 tablespoons coconut aminos (or 2 tablespoons tamari)
1 tablespoon arrowroot
6 cups broccoli
1 tablespoon sesame oil
Salt and pepper, to taste
Teriyaki Sauce
½ cup coconut aminos
2 tablespoons honey
2 tablespoons of rice wine vinegar
1 teaspoon sriracha
¼ teaspoon ginger
Pinch of sea salt, to taste
Meal Prep Containers
Once you have all of your ingredients, it's time to get cooking!

Instructions
- Press tofu by placing it on a cutting board between several sheets of paper towels, and placing a heavy plate or another cutting board on top. Allow it to sit for 20-30 minutes to drain all excess moisture. This step is important for ensuring crispy edges on the tofu.
- Preheat oven to 435℉.
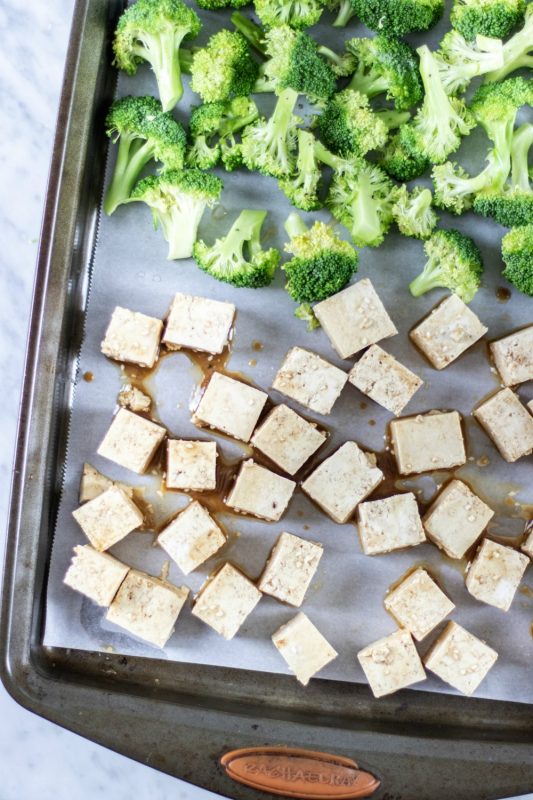
- Cut tofu into 1-inch cubes, and place in a bowl. Drizzle tofu with sesame oil, coconut aminos, and arrowroot, and gently toss to evenly coat.
- Add chopped broccoli to a bowl, drizzle with sesame oil, and season with salt and pepper.
- On a large baking tray, add tofu, making sure to leave some space around the cubes for baking. Add broccoli to the other end of the baking tray.
- Bake tofu and broccoli for 25 minutes, tossing once midway for even browning and crisping.
- To make the teriyaki sauce, add all ingredients to a saucepan and whisk while heating over medium heat. Allow it to boil for about 1 minute while whisking to thicken.
- Serve crispy tofu and broccoli over rice or cauliflower rice, drizzled with teriyaki sauce.
Nutritional comparison:
- Takeout: 813 calories, 46g Fat, 85g Carbs, 18g Protein, 3,300mg Sodium
- Target Remix: 437 calories, 13.8g Fat, 64.3g Carbs, 16.9g Protein, 810mg Sodium
This homemade version has just about half the calories, a third of the fat, and a quarter of the sodium!
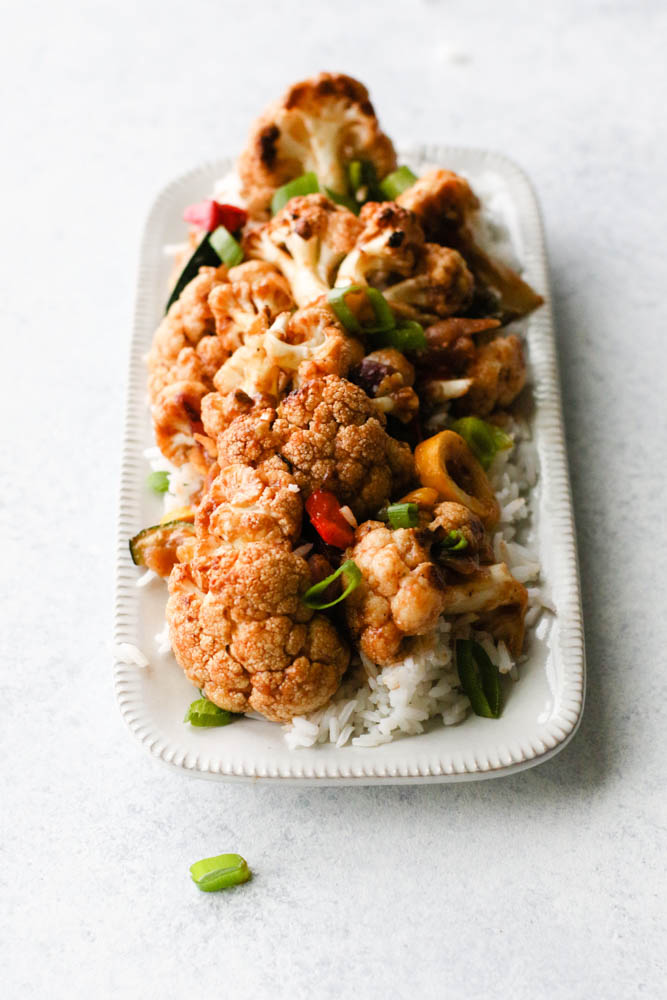
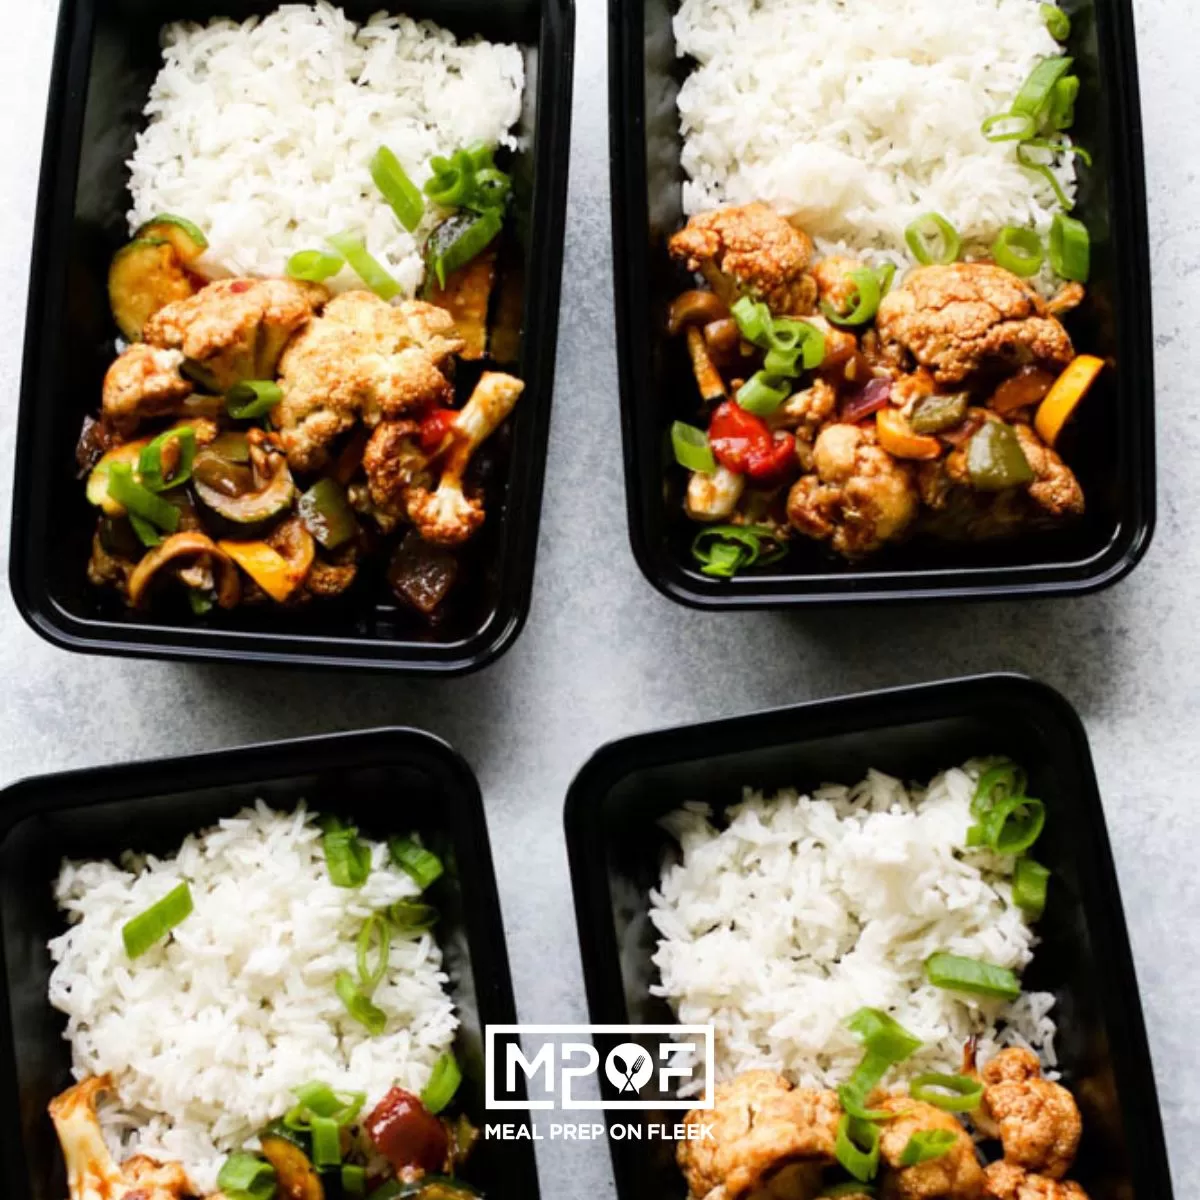
Sweet & Sour Cauliflower Bites

Here's what you will need to grab from Target:

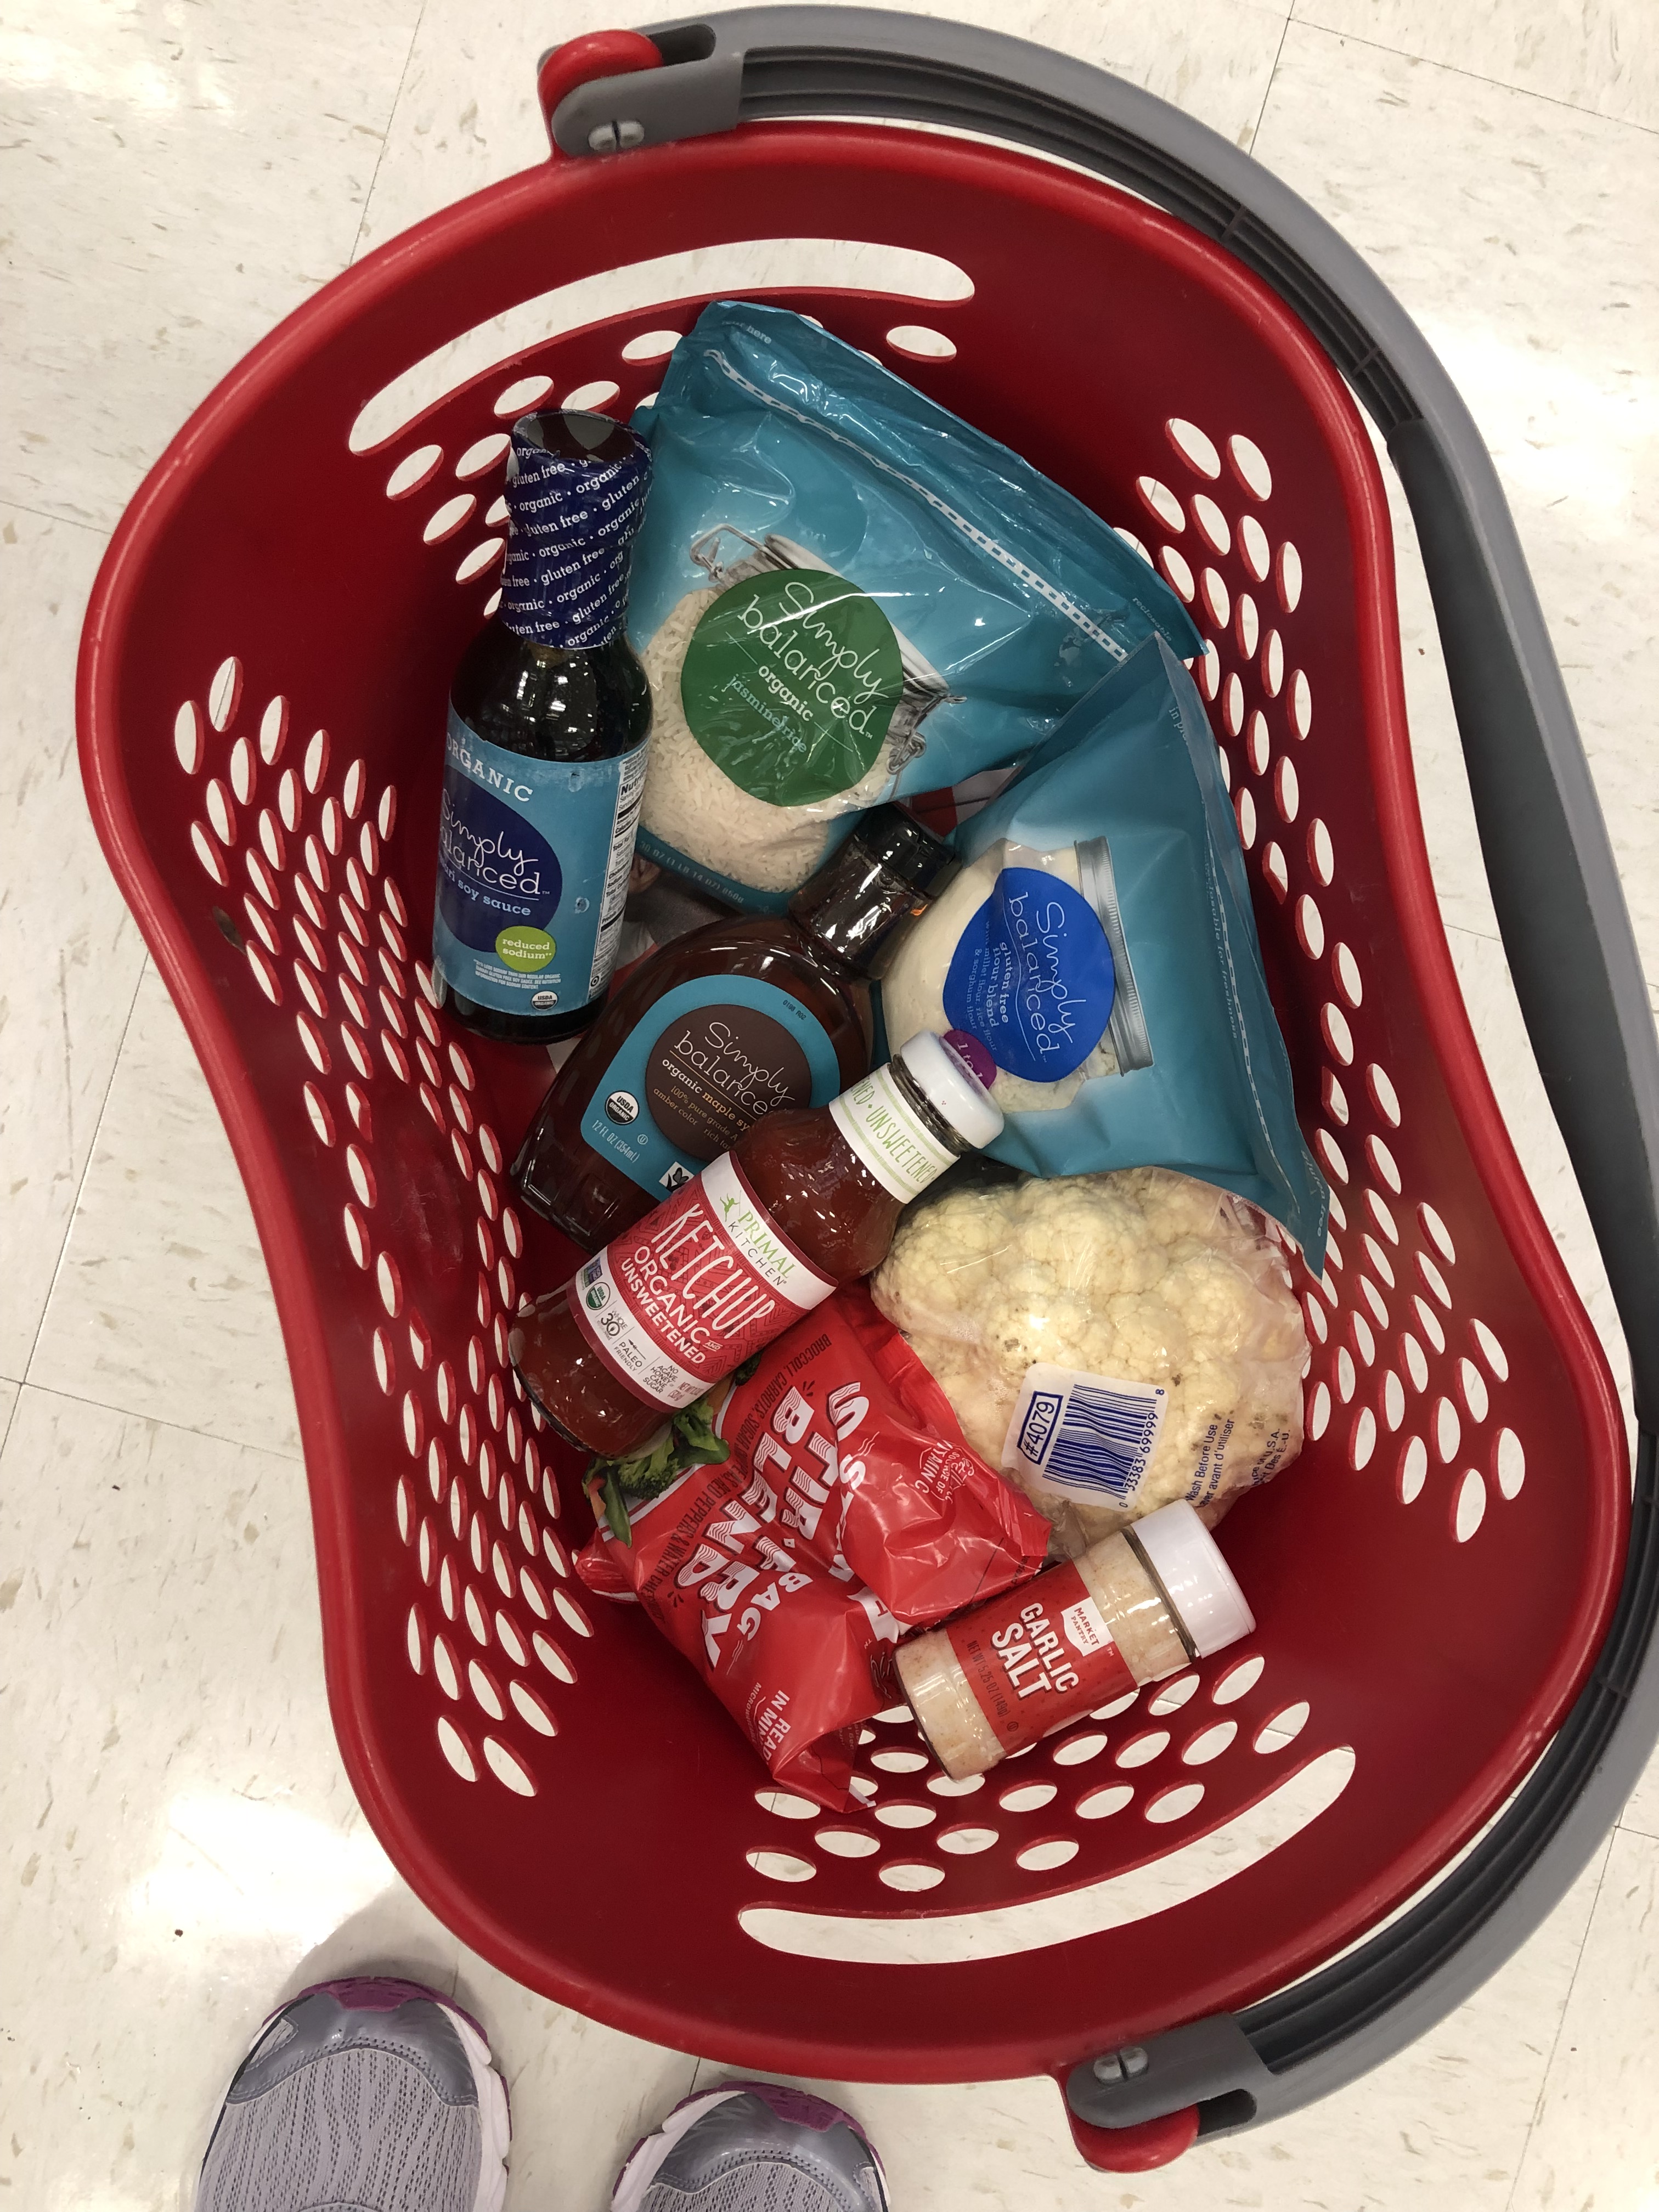
Ingredients:
- 1 large head of cauliflower, broken into large florets
- 2 cups mixed seasonal veggies
- 2 TBS avocado oil
- 2 TBS gluten-free (GF) flour
- 2 cups cooked jasmine rice
- Diced scallion
Sweet and Sour Sauce:
- 2 TBS maple syrup
- 2 TBS Tamari lite
- 2 TBS apple cider vinegar
- 1 teaspoon garlic powder
- 2 TBS ketchup
- Filtered water, as needed, to thin
Meal Prep Containers:
Instructions:
- Preheat oven to 400℉ and line a baking sheet with parchment paper.
- Add the cauliflower to a large bowl and toss with avocado oil and GF flour.
- Add cauliflower and seasonal veggies to the baking sheet and bake for 20-25 minutes, until the cauliflower is tender-crisp but not soggy.
- Meanwhile, whisk together the sweet and sour sauce by adding all ingredients to a small bowl and mixing with a fork.
- Once the cauliflower is done baking, remove from the oven and toss with the sauce to lightly coat.
- To assemble, divide jasmine rice and cauliflower/veggie mixture between meal prep containers and top with diced scallions.
- Store in the fridge for 4-5 days.

Nutrition Comparison:
- Takeout: 530 calories, 2.5g Fat, 101g Carbs, 10g Protein, 520mg Sodium
- Target Remix: 296 calories, 7.2g Fat, 52g Carbs, 8.1g Protein, 375mg Sodium
That's half the carbs, more healthy fats, and a third less sodium! Plus, this recipe is plant-based, vegan-friendly, and guarantees a serving of veggies! Compared to sweet and sour shrimp, which would be 870 calories, 154g carbs, 18g fat, 18g protein, and 1,100mg sodium, this version is much healthier!

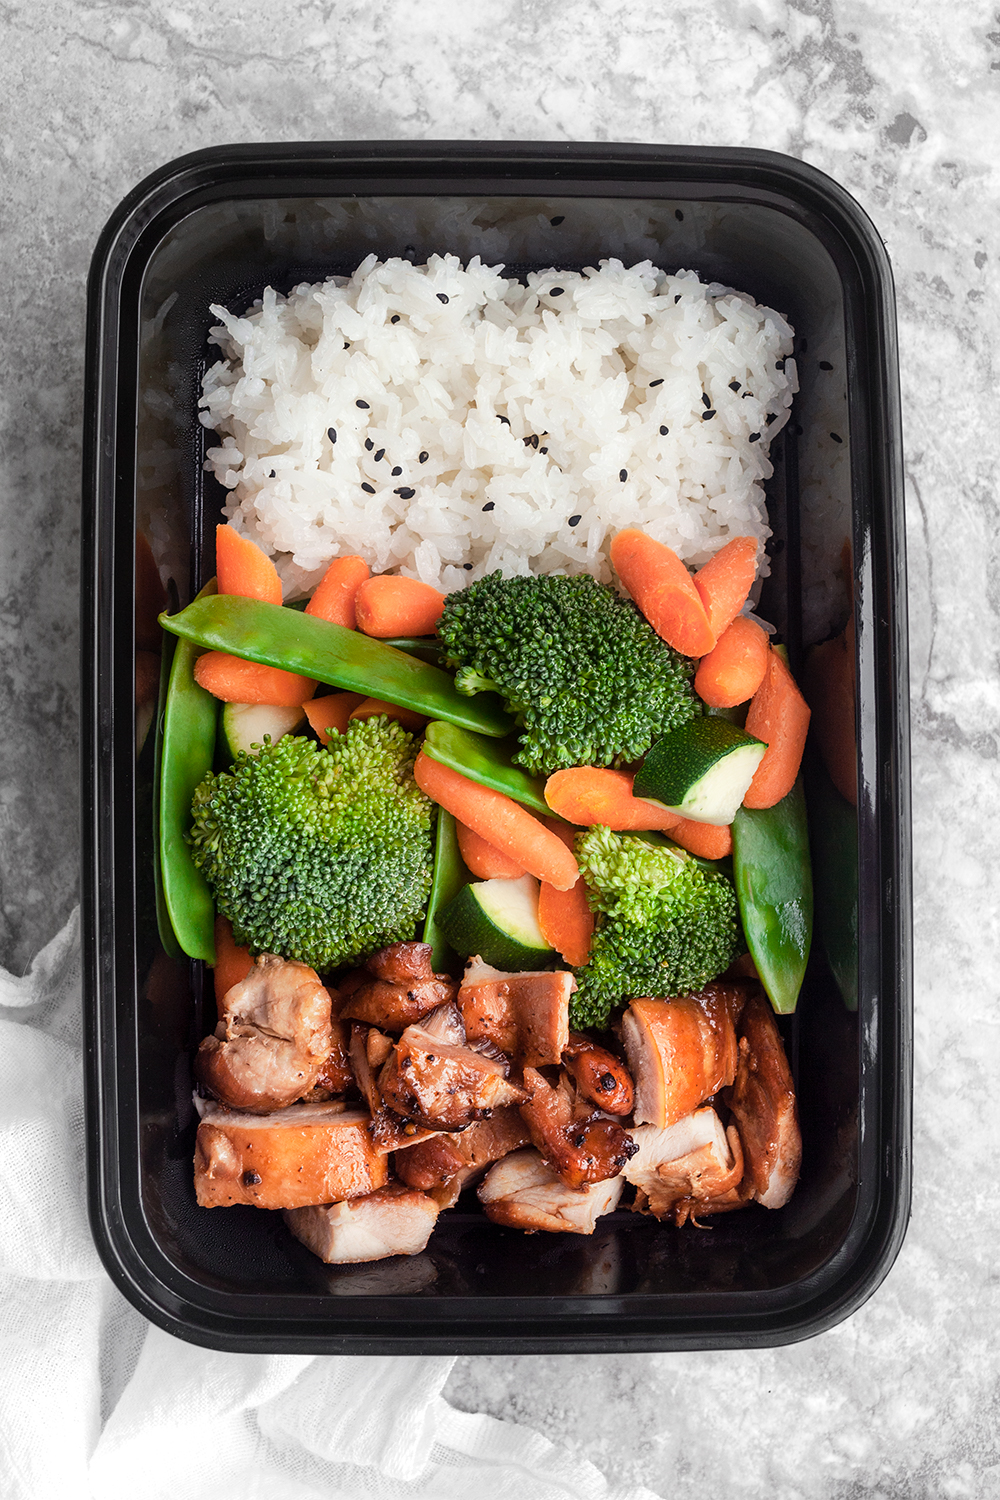
Chicken Teriyai and Veggies
Ingredients:
Meal Base
5 lbs. Chicken Thighs (boneless; skinless)
1 Medium Zucchini (cut into bite-sized pieces)
2 C. Cooked White Rice
1 C. Broccoli Florets
½ C. Snow Peas
½ C. Sliced Carrots
Optional: 1 Tbsp. Black Sesame Seeds
Teriyaki Sauce Base
¾ C. Water
⅓ C. Tamari
⅓ C. Coconut Sugar
2 Tbsp. Rice Vinegar
1 Tbsp. Arrowroot Powder (or cornstarch)
½ Tbsp. Garlic Powder
½ Tbsp. Grated Fresh Ginger
½ tsp. Red Chili Flakes
1 tsp. Onion Powder
Meal Prep Containers: Black, single compartment meal prep containers

Instructions
- Combine all teriyaki sauce ingredients (except for arrowroot powder and sesame oil) into a small pot over medium/high heat until it reaches a boil. Then, create a slurry by ladling out 1 cup's worth of the hot liquid into a bowl and add arrowroot powder, whisking well until completely smooth.
- Next, whisk the slurry back into the pot and lower the heat to a simmer. Let it reduce/thicken for about 10-15 minutes, stirring consistently until the sauce can coat the back of a spoon. Once the sauce has finished cooking, stir in the sesame oil, remove from the stove, and let it cool for a minimum of 5 minutes to further set.
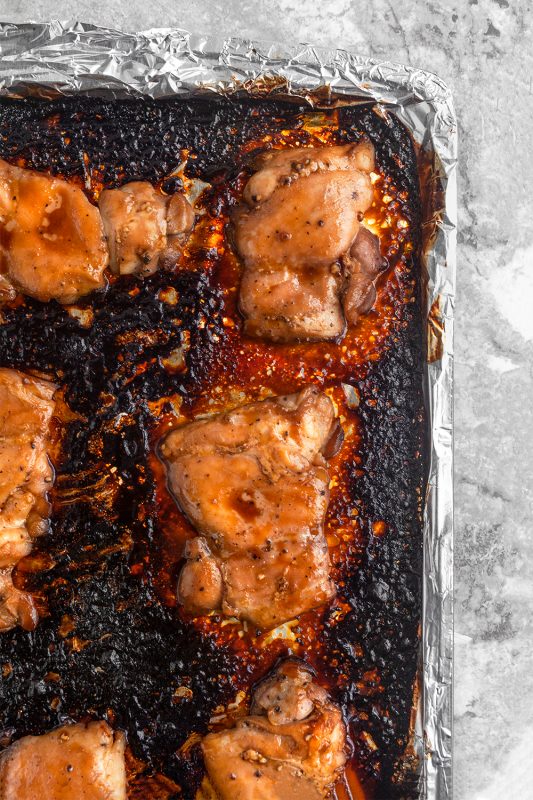
- Preheat the oven to 400℉ and line a sheet pan with foil.
- Place chicken thighs on the lined sheet pan and pour about ⅓ of the teriyaki sauce over the chicken. Flip the thighs and pour another ⅓ of the sauce over them, ensuring they are well-coated.
- Optional: Reserve the remaining ⅓ of the teriyaki sauce for serving with the meal.
- Place the chicken on the middle oven rack and cook for 15 minutes. Then, flip the chicken and cook for another 10-15 minutes or until it reaches an internal temperature of 165℉.
- When the chicken is nearly done, steam the carrots for about 5 minutes, then add the remaining veggies and steam for another 5-8 minutes, or until the broccoli and snow peas are vibrant green and all veggies are tender but still firm.
- Once the chicken is done, slice or dice it into bite-sized pieces and serve with rice and veggies. Optionally, drizzle with extra teriyaki sauce and sprinkle with sesame seeds.
- Store and enjoy!

Nutritional comparison:
- Takeout: 738 calories, 105g Carbs, 15g Fat, 50g Protein, 2,540mg Sodium
- Target Remix: 424 Calories, 51g Carbs, 7g Fat, 39g Protein, 1,511mg Sodium
This homemade version has half the carbs, half the fat, 1,000mg less sodium, and is much more flavorful, colorful, and delicious!
Have we convinced you to give takeout at home a try?
If so, head to Target, grab all of your ingredients, plus your meal prep containers and then head home to start cooking! We would love to see what you make, so don't forget to tag us on Instagram, @Mealpreponfleek, so we can share your healthy takeout remix!

18 Meal Preps Under $5 per Serving
One of the reasons many people get into meal prepping is to save money. A recent study suggests the average American spends around $13 on lunch 5 days per week by eating fast food or at quick restaurants. Let's be honest, $13 for lunch is probably on the modest side compared to some people's spending habits. That's around $65 per week and $260 per month. If you could have the same meal, or better, at even $5 per meal that would only be $25 per week and $100 per month. That would be a savings of $40 per week and $160 per month. That's huge! In order to help you get on track with your finances by making quality meals for meal prepping that you and your entire family will enjoy, we have put together a simple list of 18 recipes under $5 per serving!
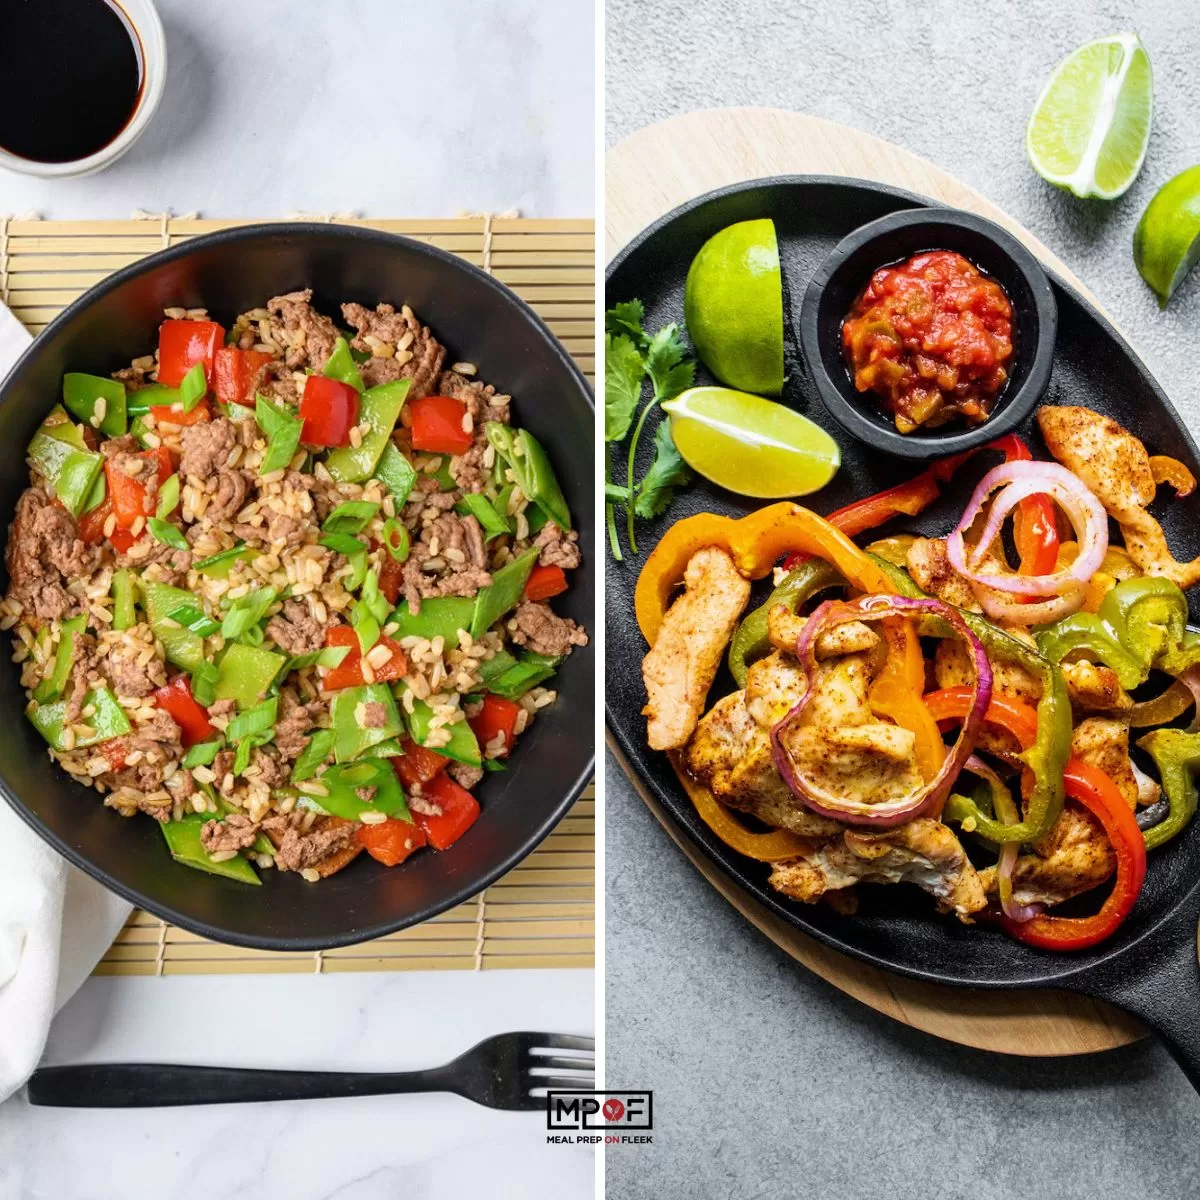
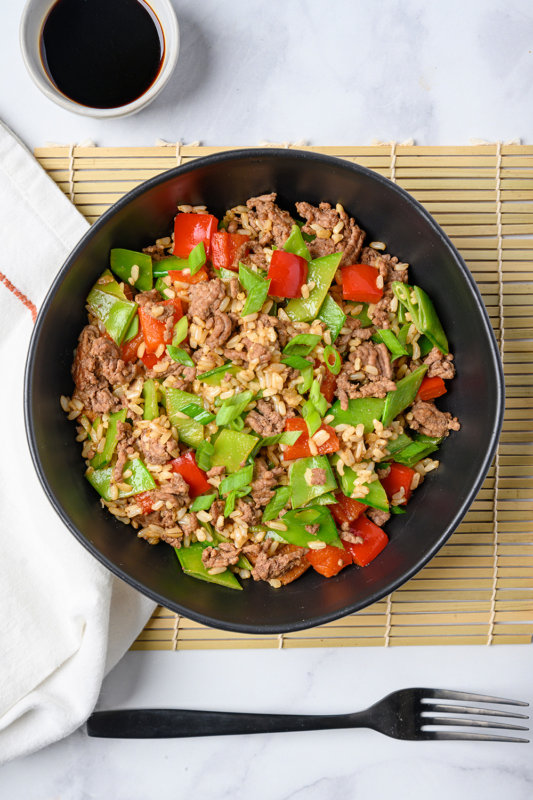
Beef & Vegetable Fried Rice
The versatility of Ground Beef has made it one of America's all-time favorite go-to cuts. From burgers to lasagna, tacos to meatloaf, pasta sauce to wraps, Ground Beef offers quick, easy and delicious options for any meal and any occasion.
(Carbs: 46g - Protein: 32g - Fat: 11g)

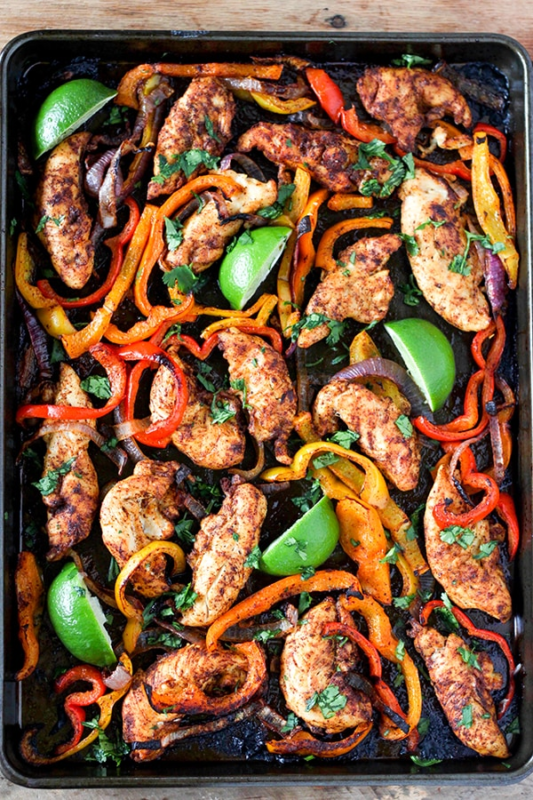
Sheet Pan Chicken Fajitas
Simplify prep and clean up with these sheet pan chicken fajitas and let the oven do all the work. They're ready in a flash and great for all kinds of diets!
(Carbs: 11g - Protein: 38g - Fat: 8g)

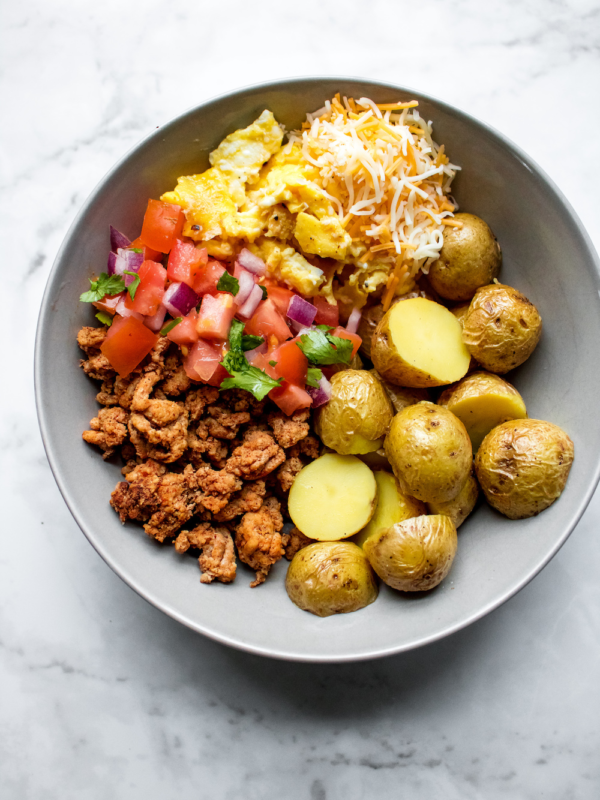
Breakfast Taco Bowls
No need to wait for lunch to enjoy taco flavor! These breakfast bowls are chock full of protein and hearty air-fried potatoes to start the day off strong.
(Carbs: 24g - Protein: 40g - Fat: 24g)

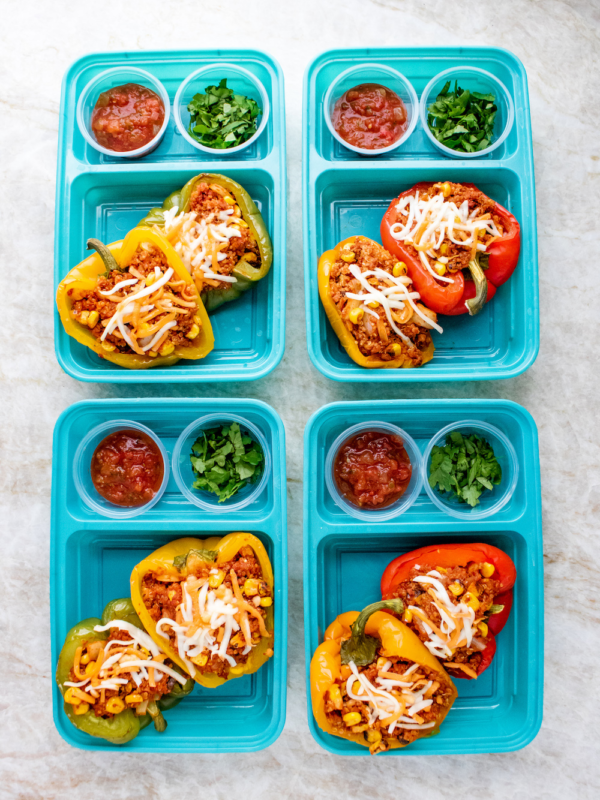
Cajun Stuffed Peppers
These spicy, Cajun-style stuffed peppers are high protein, high fiber meals with staying power. Paleo-compliant and zero added sugars make this recipe ideal for Whole30 lifestyles.
(Carbs: 20g - Protein: 27g - Fat: 22g)

Chicken Zucchini Burgers
Ground chicken makes a great alternative for these paleo and whole30 compliant Chicken Zucchini Burgers. High protein. Gluten Free.
(Carbs: 55g - Protein: 40g - Fat: 15g)

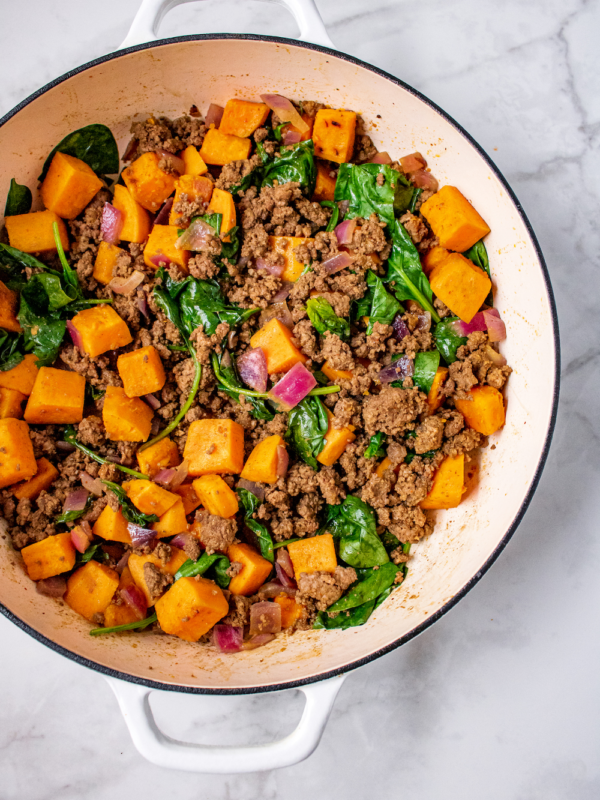
Taco Seasoned Ground Beef & Sweet Potato Hash
This one-pan sweet potato and ground beef hash is full of protein, fiber, and vitamins to start the day off right. Seasoned with taco seasonings and served with salsa, you don't have to wait until dinner to get your taco fix!
(Carbs: 23g - Protein: 38g - Fat: 23g)

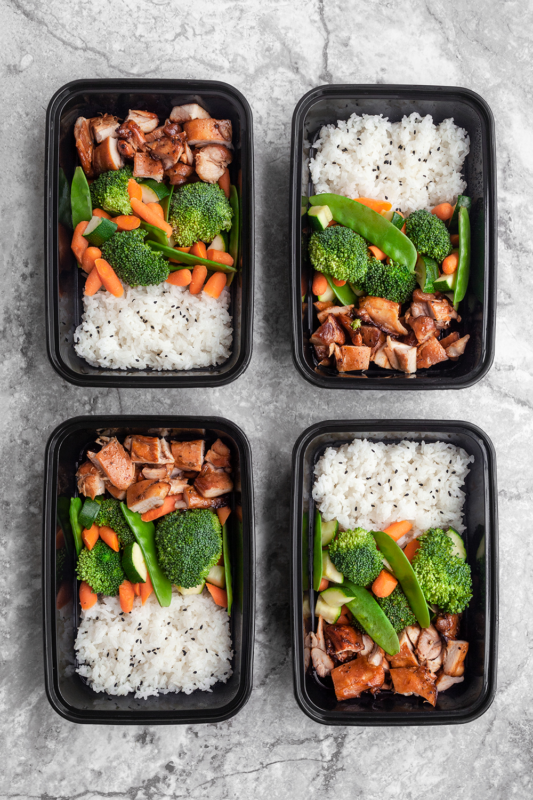
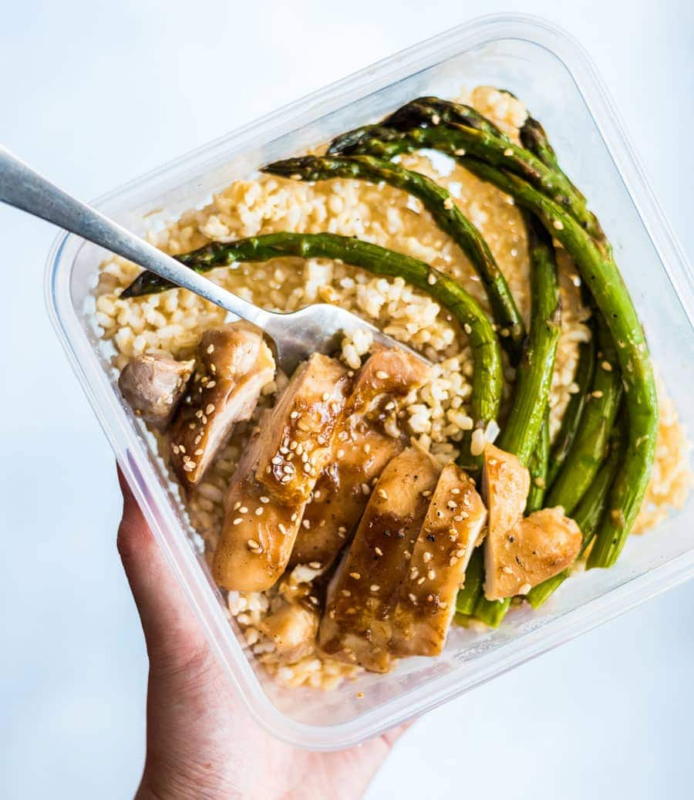
Teriyaki Chicken & Vegetables
This easy to make sheet pan teriyaki chicken and classic sides really come together and packs in the flavor thanks to its delicious, homemade teriyaki sauce! Plus, it's gluten-free compliant!
(Carbs: 51g - Protein: 40g - Fat: 7g)

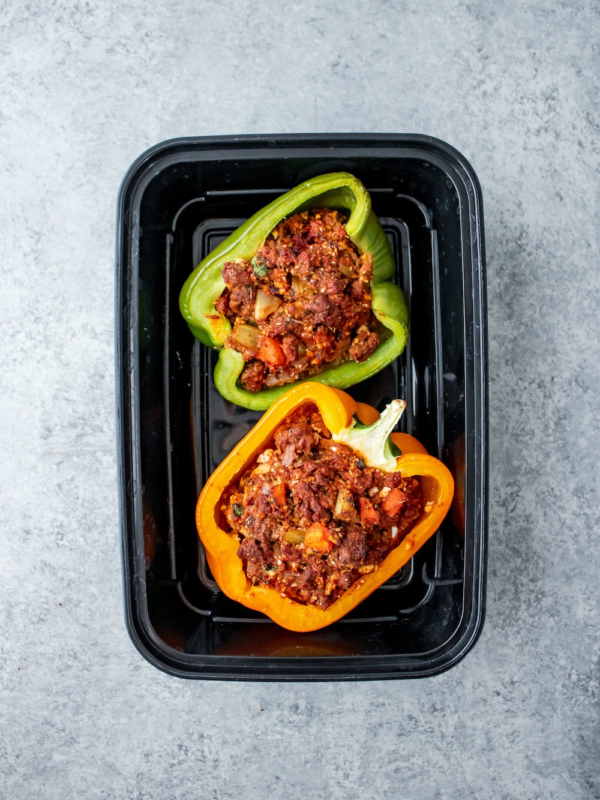
Vegetarian Chorizo & Quinoa Stuffed Peppers
You won't miss the meet with this smoky and spicy vegetarian stuffed peppers! Chewy quinoa and soy chorizo provide hearty texture along with fire roasted corn for a southwestern inspired dish that feeds hunger without a ton of calories.
(Carbs: 57g - Protein: 14g - Fat: 14g)

Sheet Pan Chicken & Asparagus
This sheet pan chicken and asparagus are perfect for your weekly meal-prep as well, because it tastes great no matter if it's hot or cold!
(Carbs: 9g - Protein: 30g - Fat: 11g)

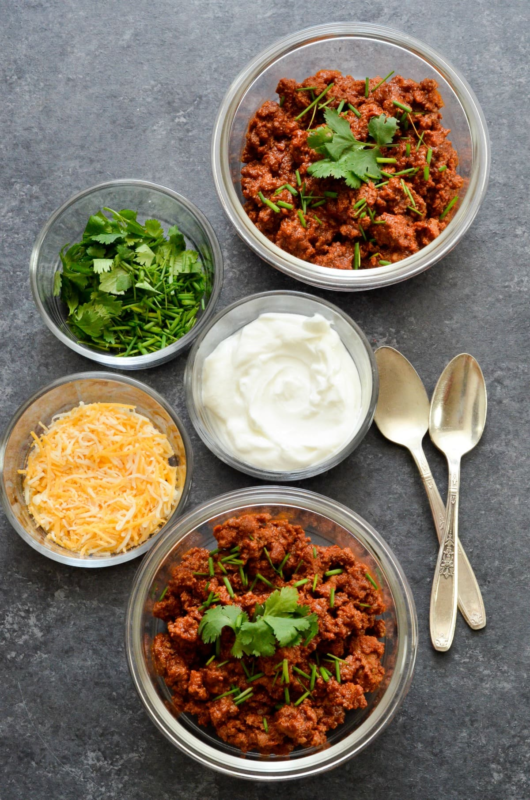
10-Minute Chili
It doesn't get any easier than this! Keeping a recipe on hand for 10-Minute Chili Meal Prep makes for a fast and easy Sunday meal prep, a quick 10-minute weeknight dinner, or even a fast game day meal. Paleo. Gluten-free. Whole30.
(Carbs: 7g - Protein: 23g - Fat: 18g)

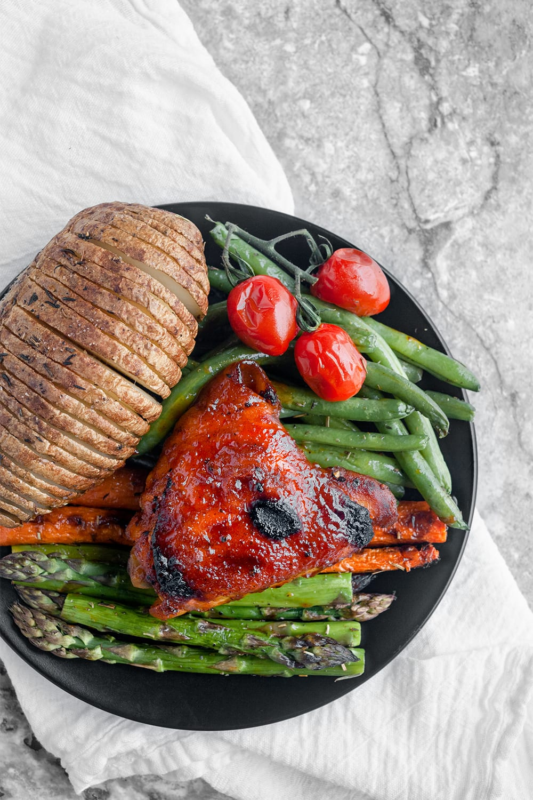
Oven Baked BBQ Chicken
Bursting with classic BBQ flavors that taste (and look) like it was just freshly grilled, you'll love this easy, oven-baked BBQ chicken and veggies meal prep recipe!
(Carbs: 53g - Protein: 38g - Fat: 26g)

One Pot Bacon Cheeseburger Pasta
Satisfy your cravings for a bacon cheeseburger in a comforting pasta dish with this easy One Pot Bacon Cheeseburger Pasta recipe. Perfect for a weeknight dinner that the whole family will love.
(Carbs: 63g - Protein: 43g - Fat: 41g)

Related: If you enjoyed this recipe, you should check out these other meal prep recipes with pasta
Sweet & Sour Mushrooms
This vegan twist on an Asian takeout favorite lets mushrooms do the heavy lifting for a hearty texture and dose of antioxidants with bell peppers and fresh pineapple!
(Carbs: 76g - Protein: 11g - Fat: 9g)

Garlic & Herb Chicken Drumsticks w/ Patty Pan Squash
This One Pan Garlic and Herb Chicken Drumsticks With Patty Pan Squash meal prep recipe is full of rich, buttery herb flavors with both the drumsticks and patty pan squash cooked in a single pan.
(Carbs: 7g - Protein: 29g - Fat: 24g)

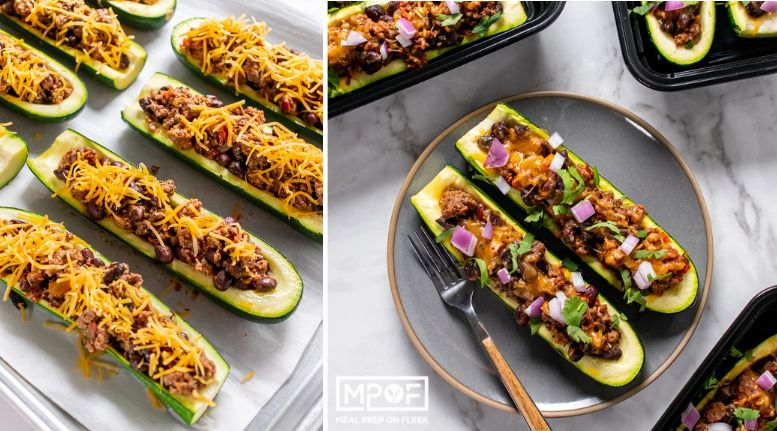
Mexican Zucchini Boats
These Mexican Stuffed Zucchini Boats, aka Taco Zucchini Boats are a delicious and healthy twist on traditional Mexican cuisine.
(Carbs: 22g - Protein: 38g - Fat: 20g)

Slow Cooker Stuffed Cabbage Soup
The slow cooker does the work in this high-protein beef and cabbage soup. Full of vegetables and fiber-rich brown rice, this soup is a complete meal with plenty of servings for easy reheating on busy days!
(Carbs: 44g - Protein: 33g - Fat: 13g)

Low Carb Buffalo Chicken Mini Bell Peppers
Mini peppers are stuffed with high-protein Buffalo chicken in this low-carb snack. Cream cheese, cheddar cheese, and mayonnaise add a rich creamy texture, while hot sauce adds a spicy kick! They're like stuffed pepper sliders.
(Carbs: 8g - Protein: 15g - Fat: 22g)

BBQ Pulled Mushrooms
These barbecue pulled mushrooms are a meatless way to enjoy the sweet and savory smoked flavor of barbecue. Served over rich polenta with a side of creamy coleslaw, this recipe is sure to please vegetarians and meat-eaters alike!
(Carbs: 60g - Protein: 8g - Fat: 15g)

Meal Prep Menu 2023, Week 41
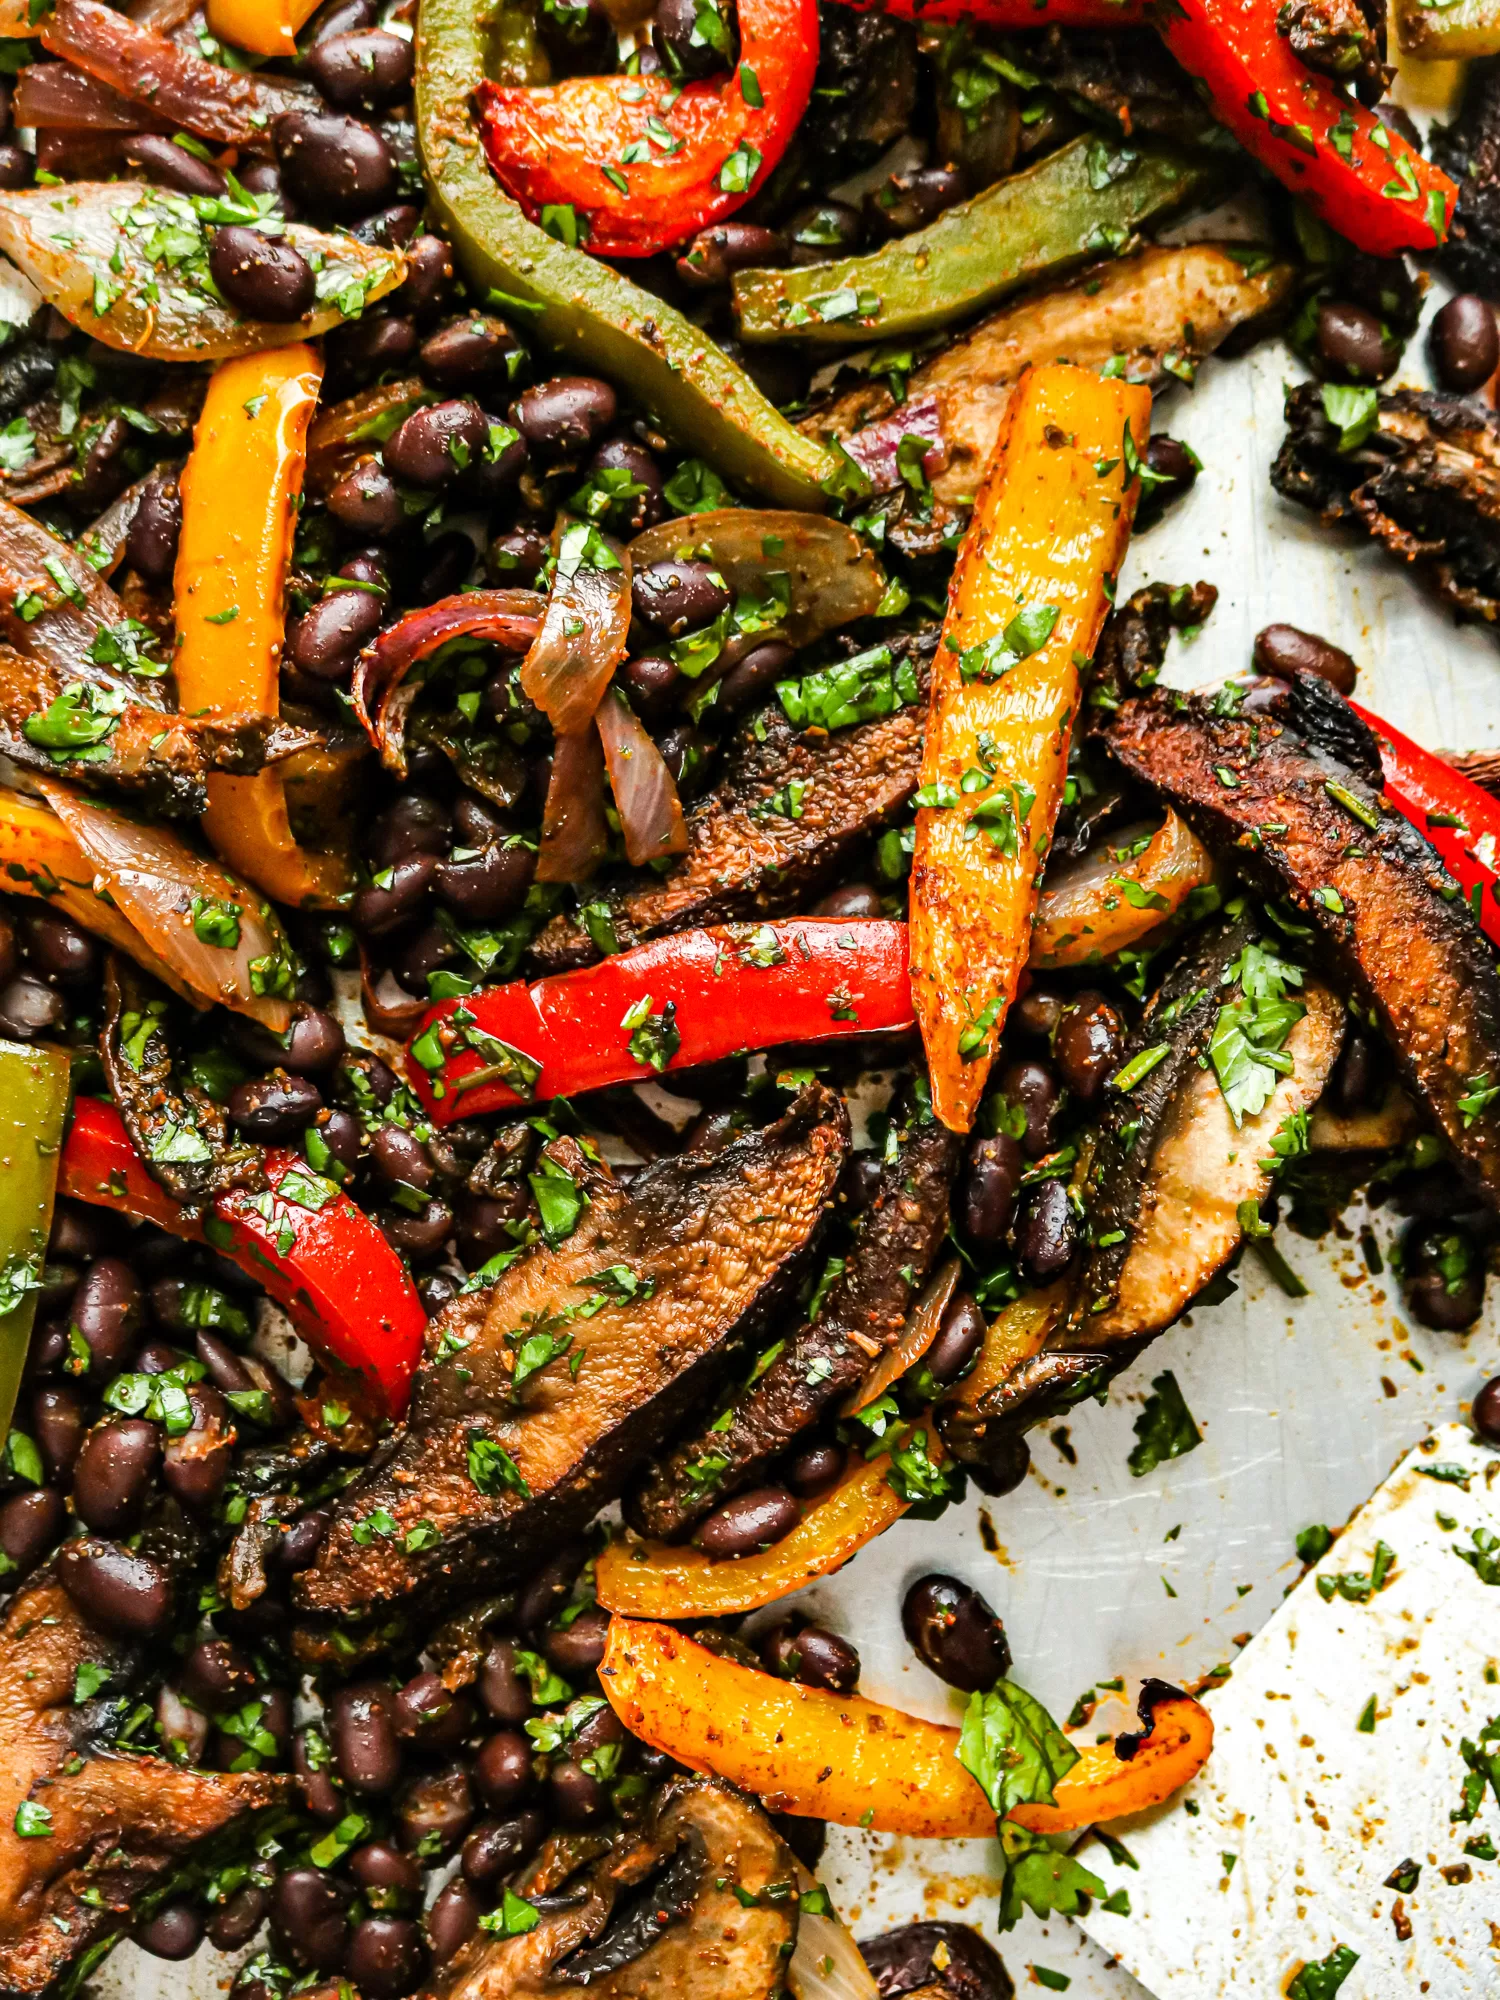
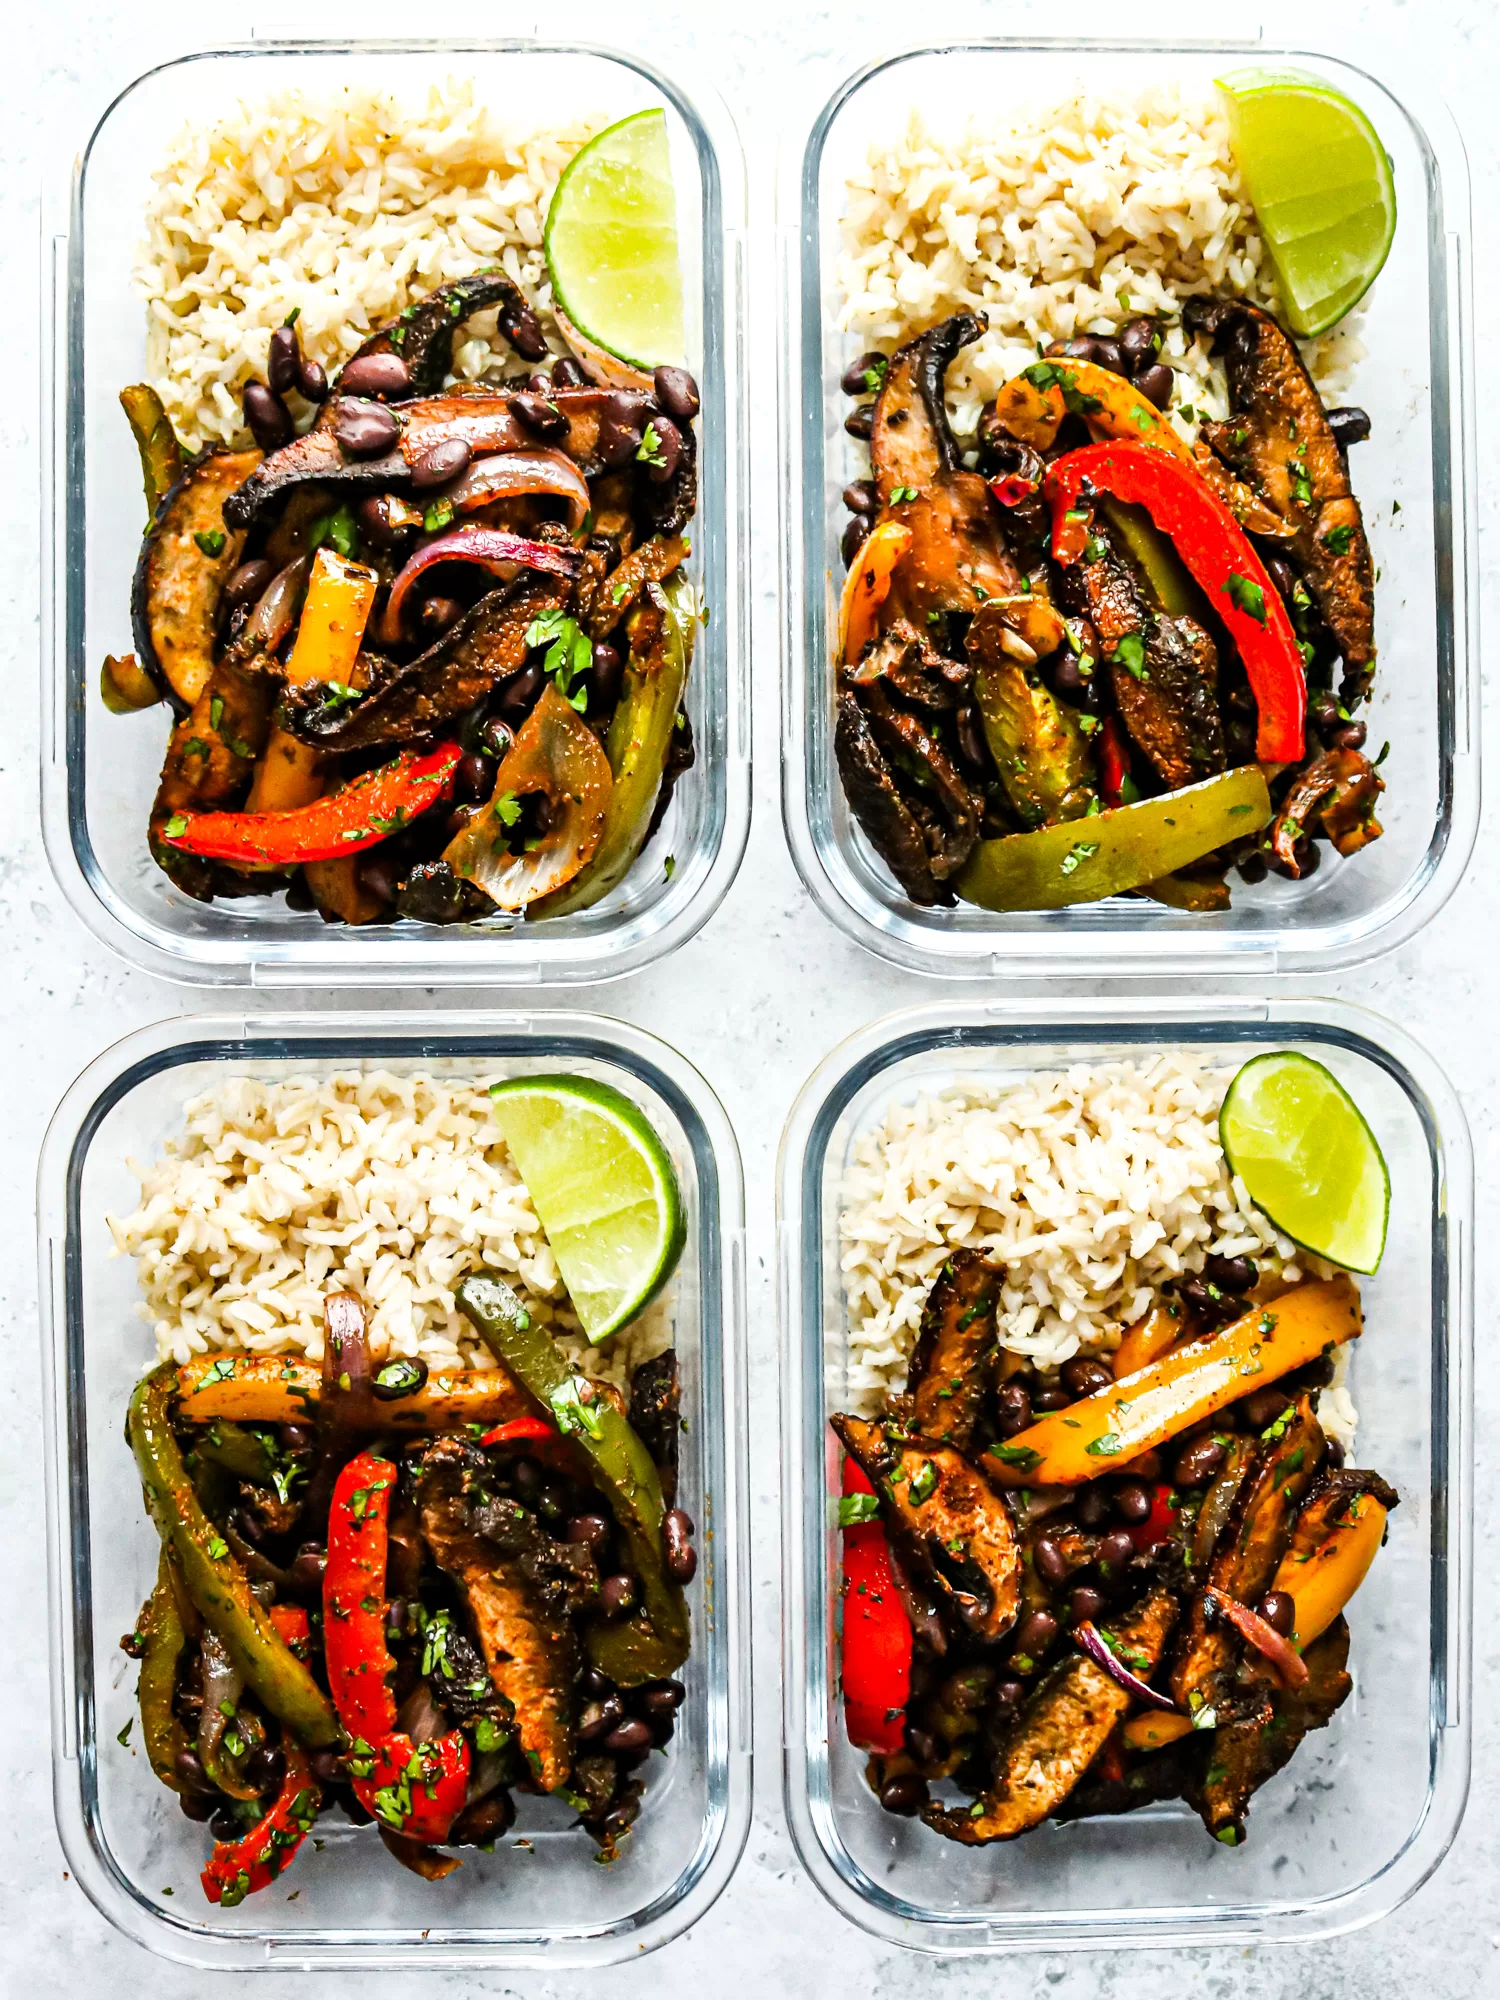
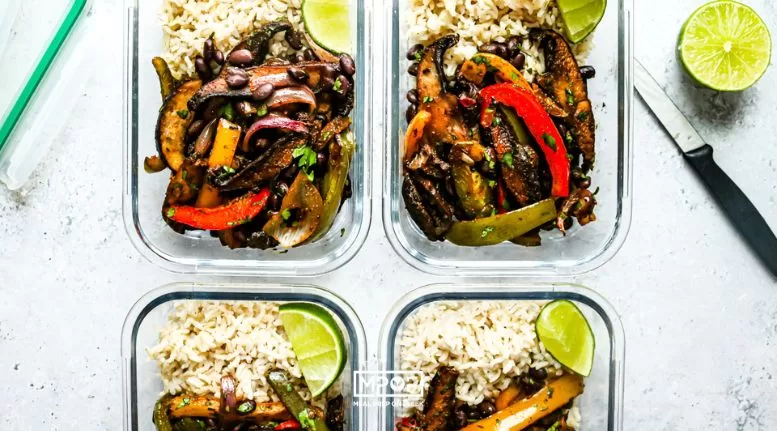
Portobello Mushroom Fajita Bowls
Portobello mushroom fajita bowls make for a healthy meal prep you can assemble quickly and take on the go! No tortilla required!
Vegetarian, hearty, and packed with the umami goodness of portobello mushrooms, these fajita bowls are easy to make. We love how these flavors just seem like they're made for each other. And we also love how this dish is great to pack for an on-the-go lunch, or a dinner you have to just reheat and eat! Gluten free, too, and suitable for both vegetarians and vegans.
Portobello Mushroom Fajita Bowls Ingredients

- 1 cup brown rice
- 4 large portobello mushrooms
- ½ green bell pepper sliced ½-inch thick
- ½ red bell pepper sliced ½-inch thick
- ½ yellow bell pepper sliced ½-inch thick
- ½ red onion sliced ½-inch thick
- ¼ cup olive oil
- 2 tsp chili powder
- 1 tsp dried oregano
- 1 tsp ground cumin
- 1 tsp garlic powder
- 1 tsp kosher salt or to taste
- ½ tsp smoked paprika
- 14.5 ounces canned black beans, drained and rinsed
- ⅓ cup chopped cilantro
- Sliced avocado, optional, for serving
- Salsa, optional, for serving
- Lime wedges, optional, for serving
How to Make Portobello Mushroom Fajita Bowls

Ok, we know this looks like a lot of ingredients, but don't panic. A LOT of them are spices you're likely to already own, and some of them are pantry staples such as rice and beans. So, we start by preheating the oven and prepping a sheet pan with nonstick spray.
Then cook the rice, and while that's going on, toss the mushrooms with oil along with bell peppers, onions, spices, and salt. Spread it all out on the sheet pan and roast all the veggies for 25 to 30 minutes. Once it's ready, remove from the oven, add the black beans and cilantro; stir everything together so the flavors are good and combined. That's pretty much it!

How to Store and Serve Mushroom Fajita Bowls

Well, we love a good bowl, because it's basically a one-dish meal. All your veggies and food groups and flavors in one bowl. You can prep and store this in the fridge in airtight containers for up to 4 days. Feel free to freeze it, too, which will work with no problem (Yes! You can freeze rice!). This is easy to reheat in a casserole dish in the oven, covered with foil, or in the microwave. It's your call!
Serve them just as they are, or offer toppings alongside such as sliced lime wedges, additional cilantro, sour cream (or plain yogurt, Greek or otherwise), salsa, avocado slices, or maybe even shredded cheese. Tortilla chips would be fun for dipping, or you can even wrap them up in tortillas like very stuffed burritos. So many options!
Substitutions and Alterations
You could use other types of mushrooms, just as long as they are hearty enough. They may take less time to cook because portobello mushrooms tend to be pretty substantive. Just keep an eye on them and cook for less time, and check them.
Any kind of bell pepper works, so if you only have red or green, that's fine. But we like all the colors going on here.
Add some chicken thighs to the sheet pan ingredients and shred the chicken before tossing it all together and serving.
Use brown or white rice, or feel free to cook up some cauliflower rice to make this a lower-carb option.
MORE GREAT MUSHROOM DISHES!
- Mushroom Carnitas Burrito Bowls
- Portobello Mushroom Bacon and Feta Egg Cups
- Honey Garlic Mushroom Meatballs

Ingredients
- 1 cup brown rice
- 4 large portobello mushrooms
- ½ green bell pepper sliced ½-inch thick
- ½ red bell pepper sliced ½-inch thick
- ½ yellow bell pepper sliced ½-inch thick
- ½ red onion sliced ½-inch thick
- ¼ cup olive oil
- 2 teaspoon chili powder
- 1 teaspoon dried oregano
- 1 teaspoon ground cumin
- 1 teaspoon garlic powder
- 1 teaspoon kosher salt or to taste
- ½ teaspoon smoked paprika
- 14.5 ounces canned black beans drained and rinsed
- ⅓ cup chopped cilantro
- Sliced avocado optional, for serving
- Salsa optional, for serving
- Lime wedges optional, for serving
Instructions
- Preheat oven to 425°F. Spray a large sheet pan with nonstick cooking spray or oil.
- Cook rice according to package directions; set aside.
- Use a spoon to remove the gills from the mushrooms and cut into ½-inch thick slices. Toss with the bell peppers, onion, olive oil, spices and salt; arrange in an even layer on the sheet pan.
- Transfer pan to oven and roast for 25 to 30 minutes.
- Remove pan from oven and add the black beans and cilantro to the pan, stirring to combine.
- Divide the cooked brown rice between 4 meal prep containers and top each with a quarter of the mushroom fajitas.
- Cover and refrigerate up to 5 days. To serve, heat to steaming and top with sliced avocado, salsa, and a lime wedge, if desired.
Video
Nutrition
Meet Mark Sisson | Mark's Daily Apple and Primal Blueprint

Mark Sisson is an American fitness author and blogger, and a former distance runner, triathlete and Ironman competitor. Sisson finished 4th in the February 1982 Ironman World Championship. Sisson was born in Maine and is the oldest of four siblings. (Wiki)
We had the pleasure of catching up with Mark to get his thoughts on life, being an entrepreneur, what motivates him, and his experimentation with the Keto Diet. Here is what gives Mark the edge:
Lifestyle
MPOF: What does Mark Sisson do for his birthday?
Mark: I don't do anything really. For me it's just another day. I'm not trying to avoid the inevitable or make it feel like something that it's not. In some respects everyday feels like my birthday. On the other hand, my wife tries to make a big deal of it. So, this year we had a family dinner with about 16 family memebers.
But, I didn't take the day off… I just went with the flow.
MPOF: What is the first 5-30 minutes of your day like? Do you have a morning routine?
Mark: Typically I wake up without an alarm clock. I sleep on a Chilipad, which is a water circulating cooling device that keeps my mattress cool, so I sleep well at night. As I wake up, the pad warms up to match the circadian rhythm of my body, and I usually get up around 6:30am.
Then I feed the dogs, make a robust pot of coffee, read the WSJ and LA Times and try to do all the puzzles in the LA Times.
I don't have breakfast. Just a cup of coffee then I cruise into the day from there.
MPOF: Why coffee? Why not tea or some other caffeinated drink?
Mark: I just like the coffee. I like the taste of it and the pageantry of making it. This is a part of my life that keeps me grounded. If I had all the money in the world and had access to any great morning concoction, I'd still have a cup of coffee every day.
You may have seen the headlines that, coffee is helping people live longer. There has been resurgence in looking at the benefits of coffee… maybe it's the anti-aging benefits, anti-inflammatory, or cognition benefits of coffee.
MPOF: Do you have a particular brand of coffee that you like?
Mark: I pretty much like all brands of coffee. As long as it's a dark roasted and the more robust the better. My favorite brand would be Caveman, but I'm not the kind of snob that won't go to Starbucks or whatever is closest. All I add is a little heavy whipping cream and maybe a pinch of sugar.
MPOF: What is your work schedule like?
Mark: My commute is literally down the hall, because I work out of my house. So, I'm typically at my desk well before 8am.
MPOF: I saw you have a pebble mat and a leaning post at your desk. Tell me about that.
Mark: Yeah, it's kind of a cool thing. It looks like a welcome mat but it's made from a couple hundred smooth rocks that are glued onto the mat in a way that, when I stand on it, it gives a different sensation on the bottom of my feet. (Mark works barefoot) And with the leaning seat, it's not just about standing up at a desk, it's about how many postural changes you can make throughout the day that's going to lead you to greater alertness and posture, but may decrease inflammation and back pain, may open up the hips, and more.
Fitness
MPOF: What types of exercise routines do you have?
Mark: I go to the gym or go paddling. My favorite thing is paddling, but that takes more time then I usually allocate to exercising. If I go to the gym, it only takes about an hour. The great thing about the gym, to me, the that there is a social component to the guy. So, it's very much a social time for me.
My workout is geared towards not getting injured…because at my age, injury is a very real thing. But my favorite thing to do is play Ultimate Frisbee. I've played every Sunday, unless I'm out of town, for the past 13 years. I look forward to it all week.
If I had to pick one preferred exercise, I would have to pick sprints. It's my favorite type of exercise because it's efficient; you can do it in a very short period of time and be "energetically tired." Because they are sprints, you're increasing bone mass, bone density, build muscle mass, and increase aerobic capacity. All the things I want to keep, or at least not lose as I get older.

MPOF: How do you set yourself up for success mentally?
Mark: The time spent in the gym is easy to get through. It's easy for me, it's just not fun. Unlike paddling or Frisbee, where if I have to do it then get back to work, it's like damn.
MPOF: Is there anything else you do to set yourself up for success mentally?
Mark: I think it is part of our make up… maybe it's in our DNA? I just always feel compelled to always be doing something, to producing something or creating. Sometimes I think it's to a fault because I have so much going on. It forces me to wake up in the morning going, "I have to get to this/that."
MPOF: You have basically been a guinea pig for your tests and experiments with regard to health and wellness. How do you determine what you're going to try next?
Mark: I keep educating myself and keep doing research. As I recognize a place in the world for me to explore that topic, or develop a product in that category, I do so. For example, when I was writing my book, I couldn't get a publisher to publish it, so I self published… and because I self published that book, I self published the next seven books that I wrote and started a publishing company. Now I've published over 25 other books by other authors just because I saw there was a need for it.
Food and the Keto Diet
MPOF: Is there anything you're tried that you thought, nope this is not for me?
Mark: Well yeah, a lot of thing. I've had business failures that I thought I would try, and made the wrong choices early on, and had to pivot away from that. Or, in terms of eating strategies, I used to be a carb centric consuming endurance athlete for most of my life. I thought that consuming 500-1000g of carbs per day was what I needed to do to fuel my body for all the miles I'm putting on my body.
We're a big fan of the N=1 strategy - the experiment of one. You educate yourself, you find out about the latest techniques and strategies, and then mindfully you engage in them and observe what the effects are.
MPOF: How does Keto and the Keto Reset book fit into the N=1 Strategy?
Mark: Keto is a recent shortened version of the word Ketosis. There is also Ketogenesis which is a term for the process by which your liver takes fat and produces ketones.
"Keytones are a type of fuel that your muscles can use, the heart can use, and the brain can use."
Ketosis is the presence of excess ketones in the blood stream. It was the point at which your body was making so many of these ketone bodies as a byproduct of the fat metabolism. But ketosis isn't the goal.
The goal of ketosis is to be metabolically efficient, or metabolic flexibility, to be able to burn fat and at a relatively high level of output. For the purpose of generating ketones and have your brain use those ketones so it doesn't have to rely on glucose and to have your muscles s good at burning fat that they really don't need glucose.
So for me, it has become more of a lifestyle where I've trained my body to be very efficient at converting food to energy, less reliant on carbohydrates, to a point where the body start to take on repair and restoration characteristics.
BTW… I'm not advocating for people to be in ketosis all the time. I'm not in ketosis all the time. I spent two months deep in ketosis to experience it and write the book, but I like to eat other kinds of foods.
Get deeper into Mark's thoughts on Keto, click here
MPOF: What's the difference between High Fat Low Carb (HFLC) and Keto?
Mark: There are degrees of participation here. I was HFLC for 10 years. Pretty much anyone who is primal is eating a high amount of healthy fat and moderate amount of healthy carbs. But that won't get you into ketosis.
Going keto is like the next level of participation of this strategy. And I call it a strategy because it's a tool that you can use when you need to burn fuel more efficiently and ultimately with less free radical damage.
In the Keto Reset Diet book, we ease into it. We spend 21 days getting people in to a low carb routine so they become better at burning fat. Then there is a mid-term exam halfway through the book to help people gauge how they feel. If they pass the mid-point test, then we spend the next 6 weeks in keto. That where you get the maximum efficiency and utility. You really need to be in ketosis for 6 weeks.
MPOF: Is it something that's manageable outside the home? Eating out for example.
Mark: Well there are two thing about keto that are great:
- Your appetite is mitigated so you don't feel like you need to find a restaurant to satisfy cravings. If there is not a restaurant around you can just skip a meal. The really cool thing is that when you're in keto, if you skip a meal, you're more keto than ever.
- I've never found a restaurant (other than fast food) that didn't have something that fit my eating style. It's a simple as using a couple kind words and making a request to the waiter. "Can you make me an ommlett, cooked in butter, and I'll pay extra for the butter." Or "Can you make me a big salad with a whole bunch of olive oil and vinegar."
Motivation and Success
MPOF: If someone was to come to you and say, Im struggling t get started, what are three tips you'd give them to get started:
Mark:
- Cut out all the sugar in your life.
- I think that the less amount of glucose/sugar you eat in your life the longer you'll live and the healthier you'll be.
- Cut out industrial seed oils (corn oil, soybean oil, canola oil)
- Defer to avocado oil, coconut oil, extra virgin olive oil
- I don't care what program you're engaging in, make vegetables the basis of your diet. They are one of the healthiest things you can eat.
MPOF: When you think about success who is the first person that comes to mind and why?
Mark: Richard Branson is one of the great business idols because he took the concept of a brand and he grew it across multiple different channels. He took it from music, to airlines, to resorts, and clothing. He took the Virgin brand and applied it to a lifestyle brand. That's what I'm trying to do that with Primal.
Follow Mark Sisson Online at:
Inspired by this interview? Here are a few more Expert Interviews on Meal Prep on Fleek:
- Mark Sisson - Mark's Daily Apple and Primal Blueprint
- Beneil Dariush - UFC Lightweight Fighter
- Alexia Clark - Fitness Model and Athlete
- Melissa Rifkin - Registered Dietitian
- Dana Angelo White - Registered Dietitian, Sports & Nutrition Coach
- Danica from Kale and Carrot Sticks - Binge Eating and Recovery
The Biggest Low-Carb Diet Mistakes You're Probably Making
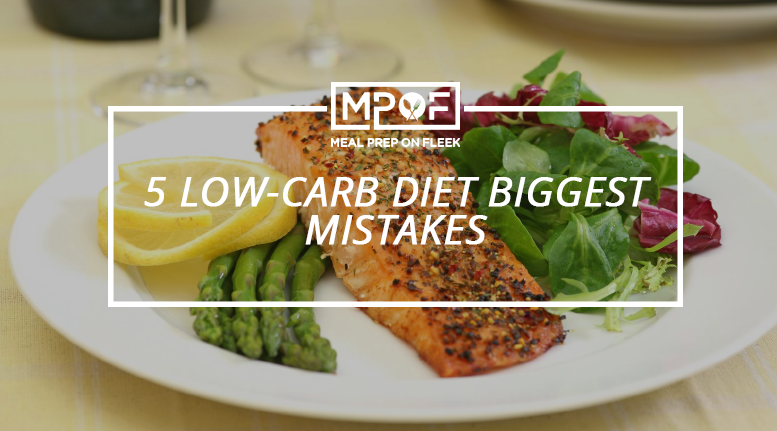
It is the primary goal of many to follow a diet, such as the low-carb diet, which supposedly assists in how to live a healthy lifestyle. However, many people do not get the results they anticipate because they are making a few simple but big mistakes! These mistakes prevent them from achieving the success they desire when adhering to the low carb diet. We're gonna have a look at 5 low-carb diet biggest mistakes!
1. Consequences Of A High Carb Diet
Generally, a low-carb diet is considered to be anything under 100 to 150 grams daily, as there is no strict type of low-carb diet. Consuming real foods as opposed to processed foods make a significant difference in results! A low-carb diet is beneficial in curbing diabetes and weight gain thus avoiding the negative consequences of a high carb diet.
Yet, many are guilty of having fond feelings towards the foods which taste good as opposed to the foods which do their bodies right. An occasional sinful indulgence shouldn't hurt too much but continuous indulgences negatively impact how to live a healthy lifestyle. High carbohydrate foods include cakes, candies, bread, cereals, and pasta.
2. Consuming A High Protein Diet
Is consuming high amounts of protein a bad thing? How can too much protein be bad for you when protein is the essential building block of muscle tissue? Protein is also required for providing the body with fuel for energy! Yet low-carb dieters often overdo it when they consume animal-based proteins.

This, in turn, causes the body to convert the excess protein into glucose. I'm sure you're getting the picture already. The weight loss experienced would be temporary if proteins are consumed in high amounts. If one continues to eat high amounts of lean animal proteins, one will soon notice increased weight instead of the reverse.
3. Low-fat Consumption Risks
Many people think that fat is all bad. This is a big mistake, especially if you're on a low-carb diet! You're already cutting off the excess carbs, you're gonna need the fats to balance things out. Otherwise, you'll end up malnourished and suffer from deficiency ailments. Be mindful of the symptoms of unhealthy trans fats which could lead to:
- Type 2 diabetes
- Heart disease
- Increased 'bad' cholesterol
- Stroke
Avoid unhealthy trans fats and use monounsaturated and omega 3 fats instead. While on a low-carb diet, it is advisable to consume at least 70% healthy fats. Of course, to achieve this you would have to add foods which contain healthy fats to your meals such as avocado. Remember on a low-carb diet, fats provide the energy you require.
4. Lack Of Sodium - Symptoms
Low insulin levels fuel the mechanisms that make low-carb dieting possible. While on a low carb diet, insulin levels drop while excess water and sodium are removed from the body. This is awesome for relieving bloating within a few days!

However, bear in mind that sodium is a useful electrolyte. It is necessary for maintaining the fluid balance within your body and nerve and muscle function. If sodium levels are extremely too low, this may result in mild to severe symptoms, such as:
- Constipation
- Headaches
- Muscle cramps
- Light-headedness
- Vomiting
- Nausea
- Shock
- Fatigue
- Dizziness
- Coma
- Death
5. Ultra Low-carb Diet - Cause And Side Effects
The fact is your body is designed to burn carbs for energy. When you drastically reduce carbs, fats are then converted to your body's energy source. This fat can be obtained from your diet or your body's stored fat. As a result, while your body adjusts to accommodate your change to a low-carb diet you may experience the 'keto flu'.
This 'keto flu' will have you feeling under the weather at the beginning of your low-carb diet. You may experience symptoms such as:
- Irritability
- Cramping
- Headaches
- Brain fog
- Constipation
- Dizziness
Your body will do its first set of adjustments within a four day period. It will take several weeks for your body to fully adjust to your new diet. Don't allow yourself to give in and abandon your low-carb diet.
Sacrificing the carbs which aren't good for you simply spares you from experiencing obesity, diabetes and all the other related ailments associated. Ensure you supplement your diet properly and you shall surely see the benefits of a low-carb diet.
Are you currently on a low-carb diet? Let us know about the benefits you've experienced so far!

Meal Prep Menu 2023, Week 40
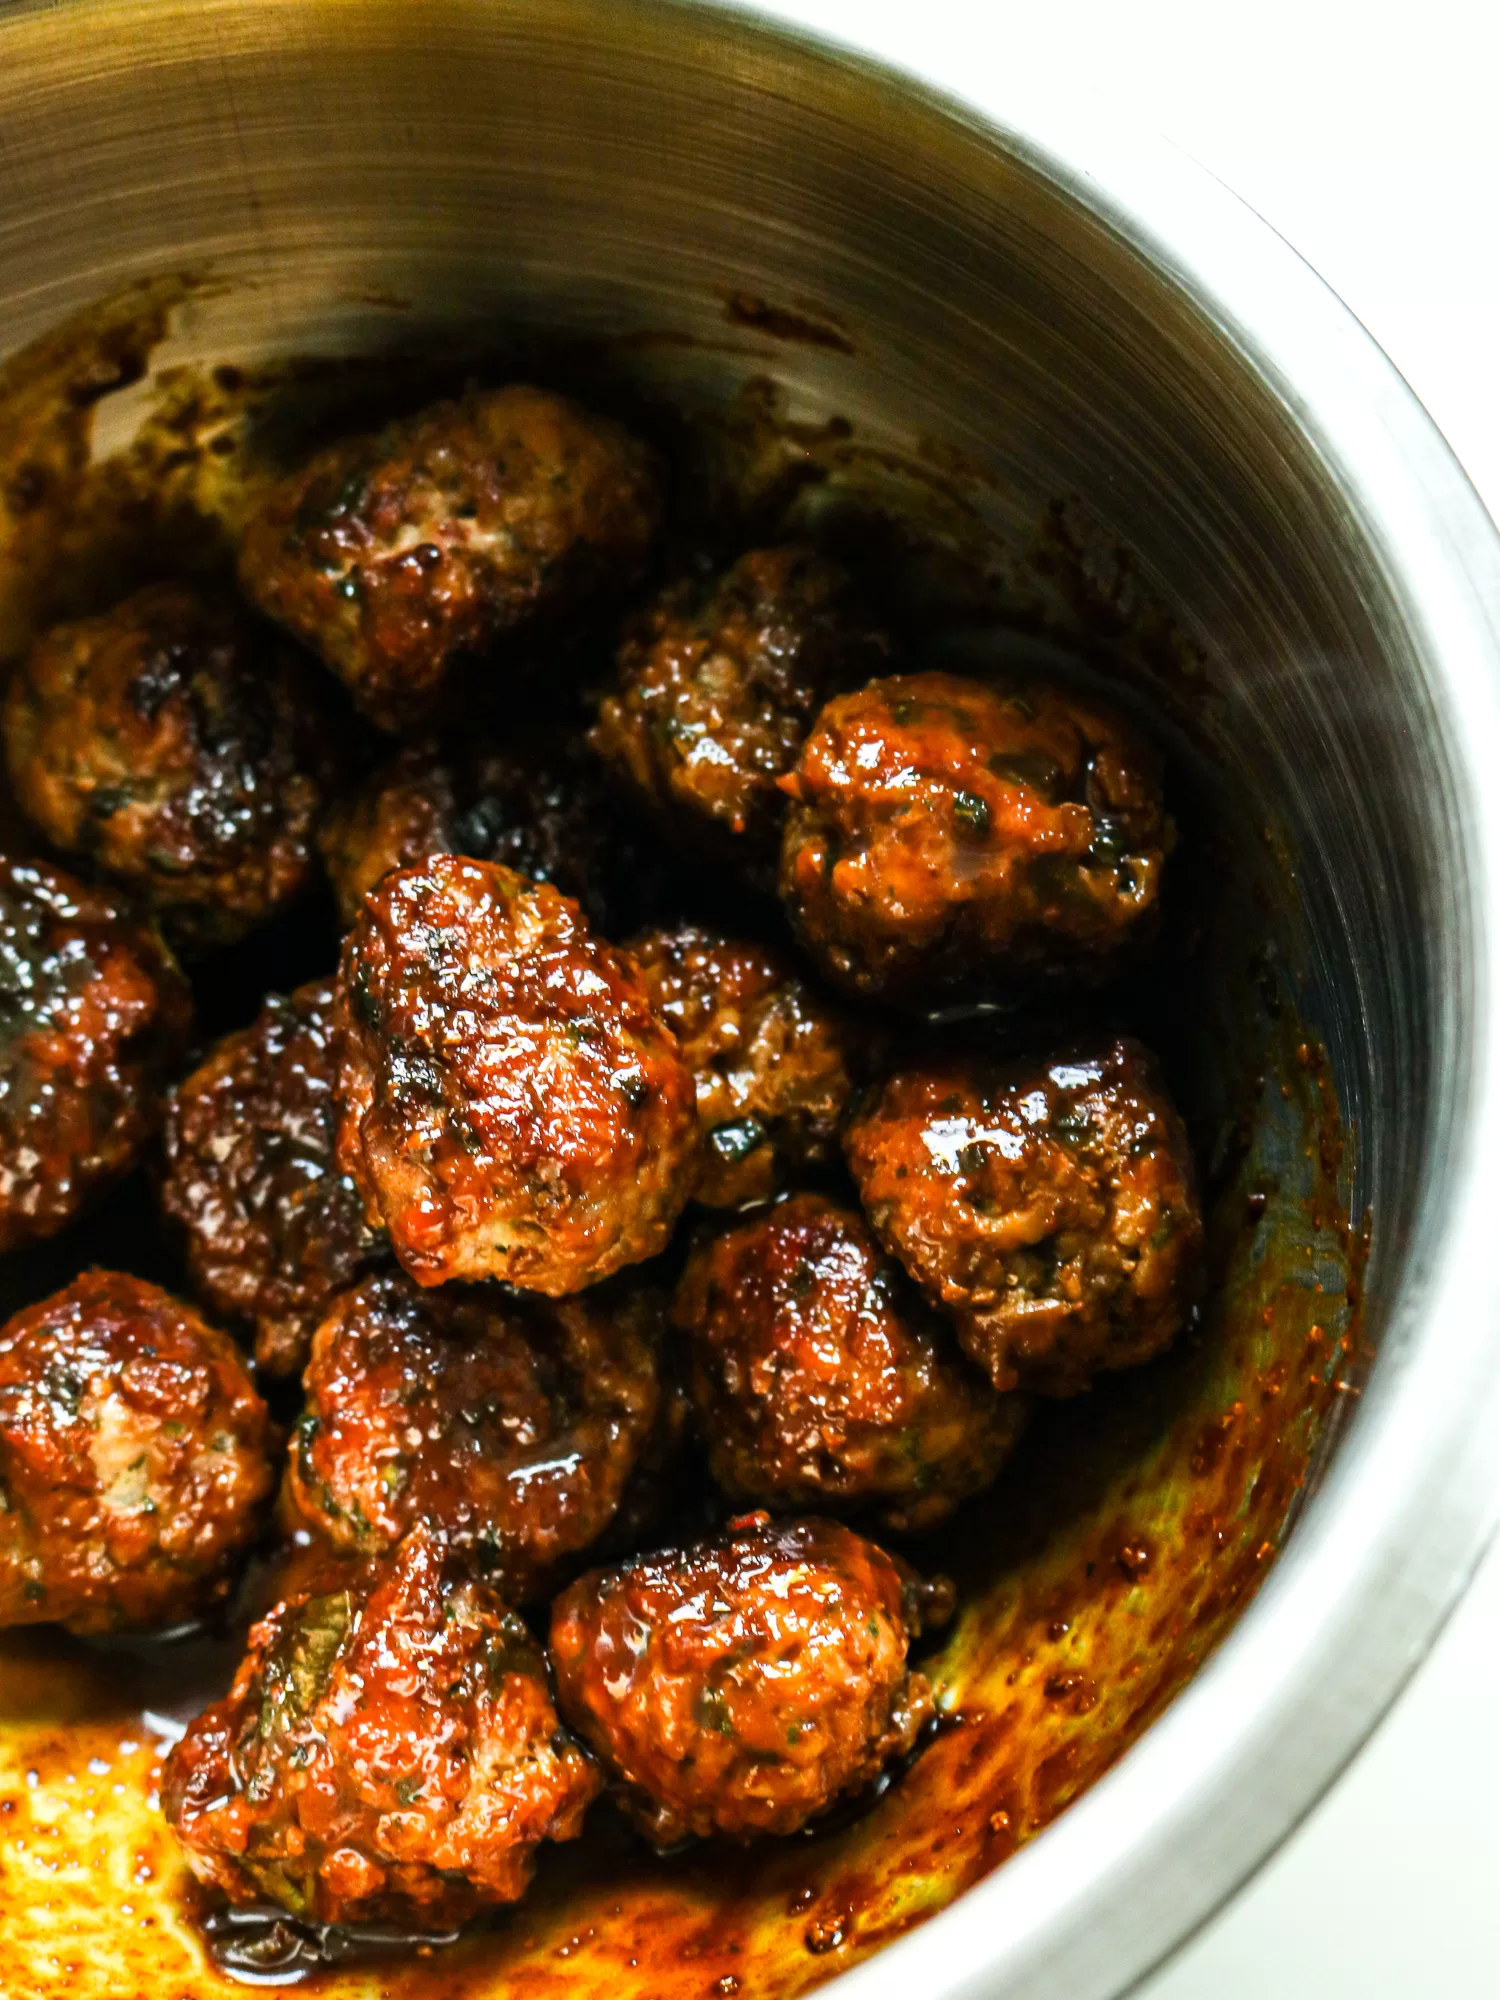
Hoisin Glazed Meatballs
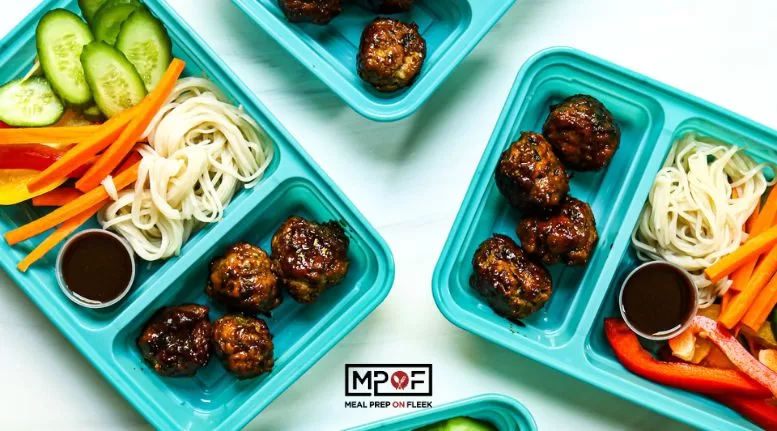
Hoisin meatballs! Glaze these pork meatballs for a healthy meal prep for lunch, dinner, or even a high-protein, gluten-free snack!
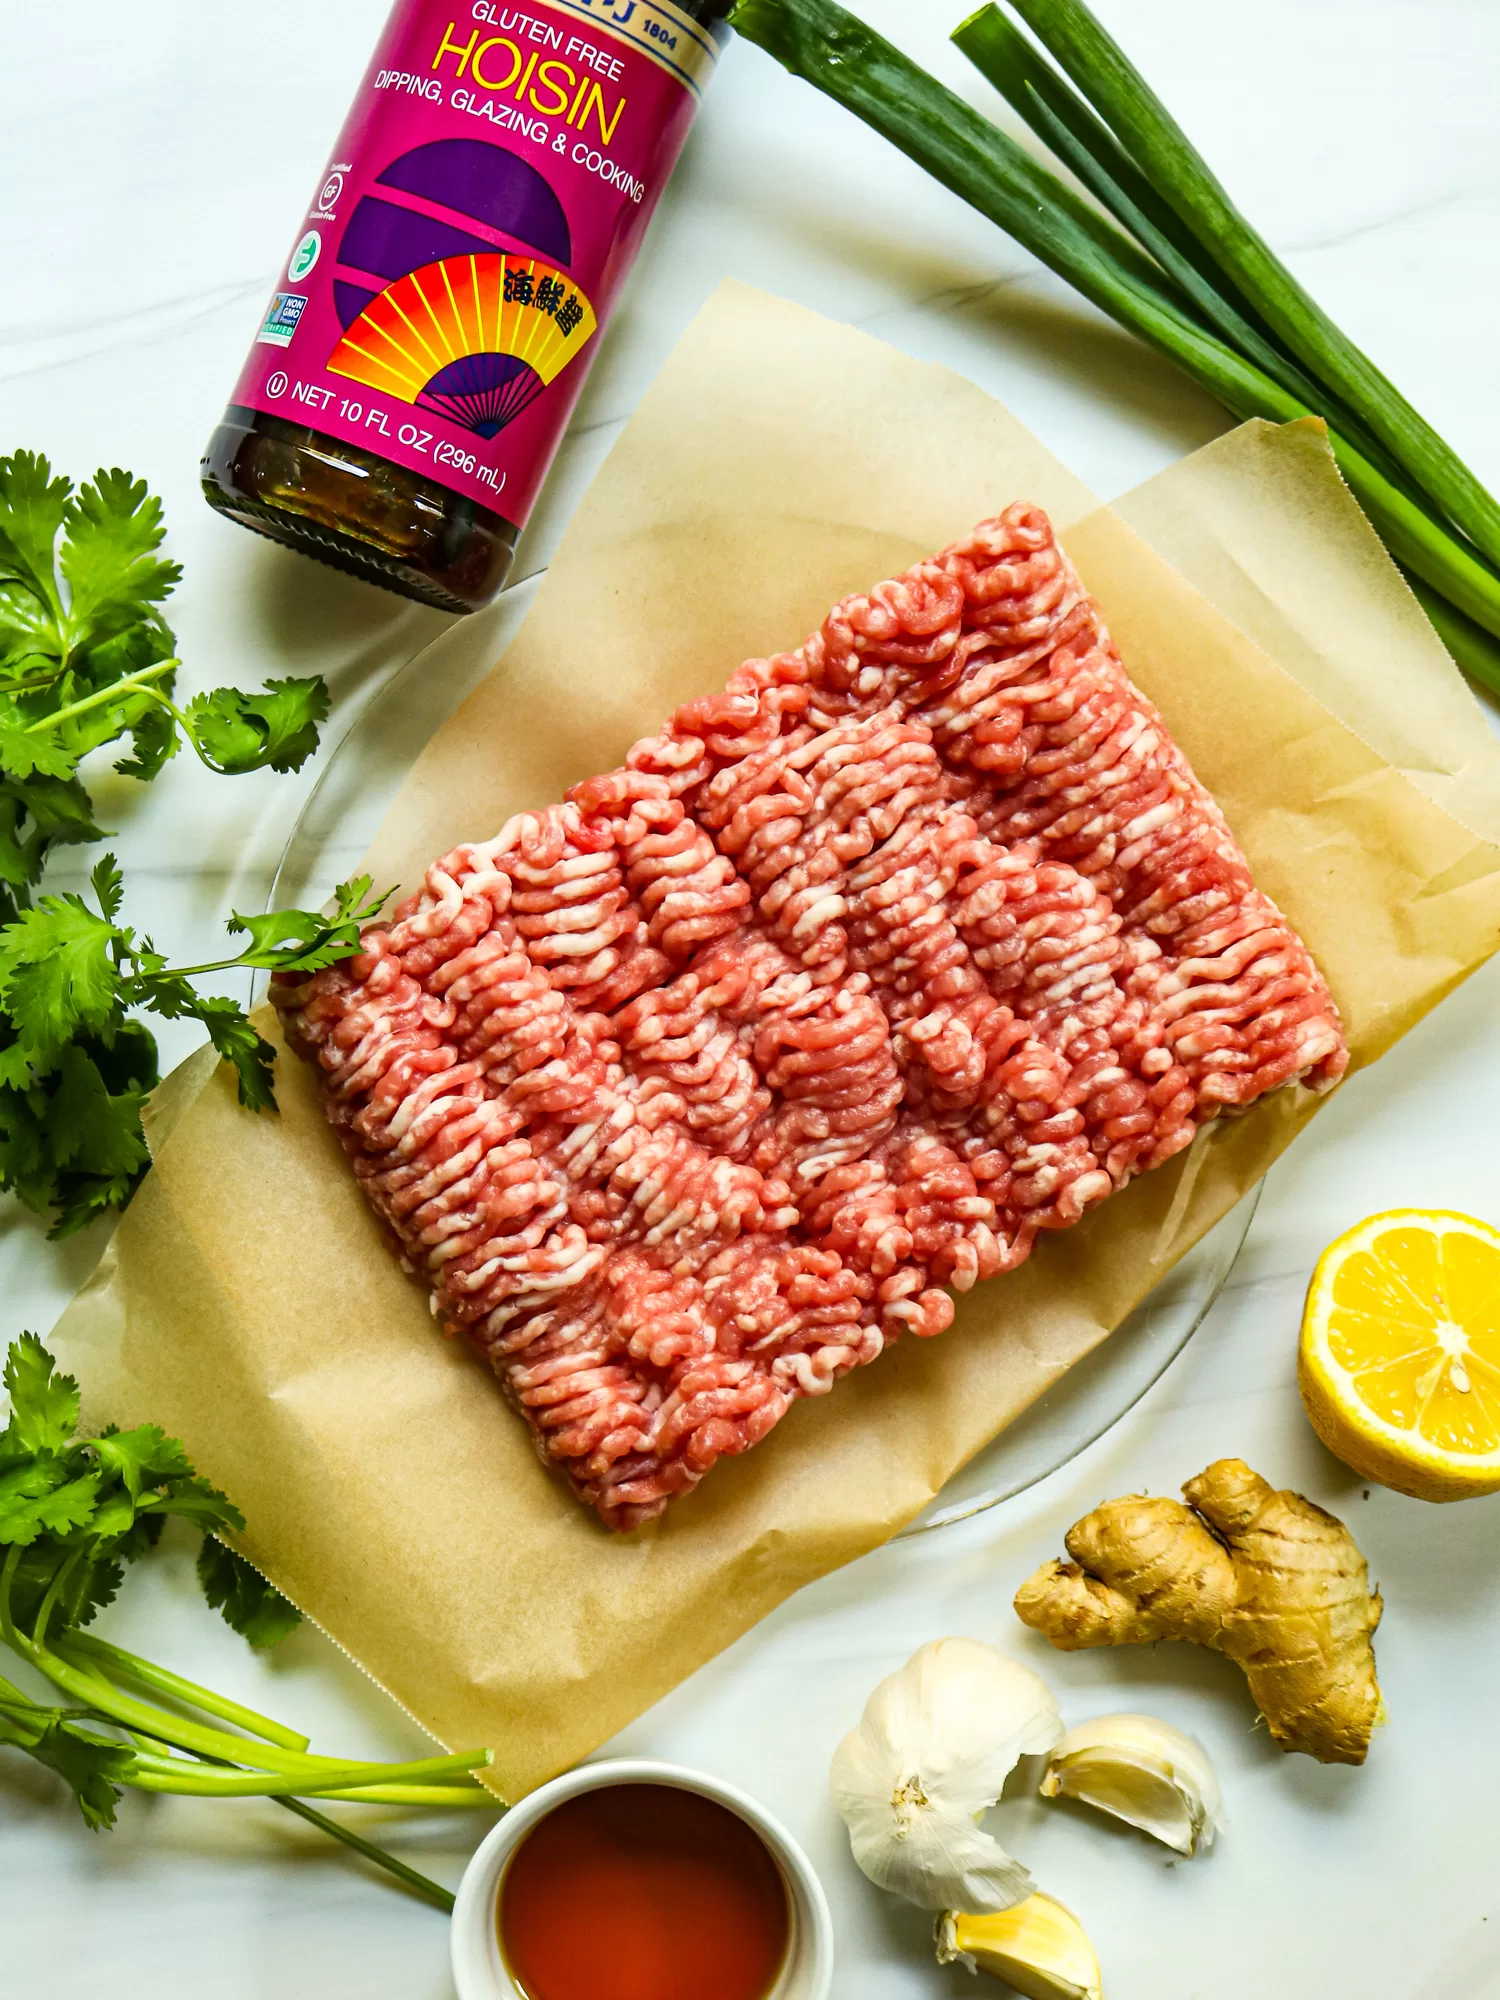
Perhaps you've used hoisin sauce before. It's sweet, thick, tangy, and delicious and used a lot in Chinese cooking. It also happens to be gluten-free (usually, although read the labels if that's a concern), and serves well as a glaze for these really flavorful pork meatballs that you can easily meal prep. Because, you know, meatballs, right?
Hoisin Glazed Meatballs Ingredients

- 1 lb. ground pork
- ¼ cup finely minced green onion
- ¼ cup finely minced cilantro
- 1 Tbsp. fresh minced garlic
- 1 Tbsp. fresh minced ginger
- 1 ½ Tbsp. fish sauce
- 2 tsp. sugar, or sweetener of choice
- 1 tsp. lemon zest
- 1-2 Tbsp. avocado oil
- Gluten-free hoisin sauce
- Cooked brown rice noodles, optional, for serving
- Sliced fresh veggies such as peppers, carrots, etc., optional, for serving
How to Make Hoisin Glazed Meatballs

These come together quickly in a big bowl. Love that. Combine the ground pork plus everything up to the lemon zest-the green onions, garlic, ginger, cilantro, fish sauce, sugar, and lemon zest. Cook them in a skillet with hot avocado oil until they're browned all the way around. Then, drain them, and get them ready to meal prep. These smell SO good when they're cooking!

How to Store and Serve Hoisin Glazed Meatballs
These are so awesome to meal prep. We love popping them into prep containers with some cooked rice noodles and sliced fresh veggies. Regular rice or cauliflower rice would be great here, too. Other noodles such as soba or even regular spaghetti works in a pinch.
You can eat these at room temperature, cold, or hot; all three ways are equally good. But having that flexibility is helpful for this healthy meal prep because that means you can take them with you and eat them for lunch, and not have to worry about reheating. Keep them in an airtight container in the fridge for 4 to 5 days. Reheat in the oven, a hot skillet, or the air fryer (yes, we suggest a lot of air fryer activity these days. That's because they're awesome. Check out our air fryer guide!)
Serving with some lime quarters would be really delicious, too.
Substitutions and Alterations
So, first of all, you can bake these meatballs instead. Do them on a rimmed baking sheet lined with foil (contains your messes) at 375 for about 15 to 20 minutes.
Otherwise, feel free to use beef, turkey, or chicken instead of ground pork, or combine some of these meats for extra flavor. All good.
You can make these meatballs smaller and serve them as appetizers, speared with toothpicks for serving. They'll cook faster that way, too.
Use lime zest instead of lemon zest if desired.
Skip the sugar altogether if you don't want or need it, but it does help provide some balance. You could use a granulated keto sugar if need be!
MORE MEATBALL MEAL PREP RECIPES!

Ingredients
- 1 pound ground pork
- ¼ cup green onion finely minced
- ¼ cup cilantro finely minced
- 1 tablespoon garlic finely minced
- 1 tablespoon ginger finely minced
- 1 ½ tablespoon fish sauce
- 2 teaspoon sugar or sweetener of choice
- 1 teaspoon lemon zest
- 2 tablespoon avocado oil
- ¼ c hoisin sauce or more as needed
- Cooked brown rice noodles optional, for serving
- Vegetables optional, fresh and sliced, for serving
Instructions
- In a large bowl, add pork through lemon zest. Use your hands to gently mix until well-combined. Shape into 16 1-inch meatballs.
- Add oil to a heavy skillet. Heat pan over medium heat. Once oil is hot, add the meatballs in a single layer, working in batches if necessary, and cook for 4 minutes. Flip and continue cooking for 10 to 15 minutes more, rotating often, or until golden brown on all sides and cooked through (internal cooking temperature should reach 160°F).
- Transfer meatballs to a paper towel-lined plate to drain briefly, then into a clean mixing bowl. Toss with hoisin sauce to taste while meatballs are still hot.
- If desired, divide meatballs into meal prep containers with cooked brown rice noodles, sliced vegetables, and extra hoisin.
Video
Nutrition
Tools & Tactics To Track Your Fitness Progress
If you have been around here for awhile, you know that Meal Prep on Fleek is a website for those who have a goal to be in better shape-inside and out. For most of us, that includes a fitness program. Though there are different reasons for wanting to be in better shape, there is one thing that we probably all have in common:
We all hate to waste time, and we all want to see progress in whatever we endeavor.
So, you may be asking yourself, why should you track your fitness progress?
Reason #1- You should track your fitness progress because by doing so, you will see if you have moved forward in your goals. No one wants to expend hard work to remain stagnant.
Reason #2- You should track your progress so that you have a record of what you have done. You can adjust things if you find something amiss in your efforts to accomplish the goal that you have set for yourself. (Note: If you have not set a goal, do that first!!)
If you don't track your progress, something similar to this scenario can happen and we probably all can relate (be honest!):
- You decide that you want to be healthier and finally get fit
- You do a workout and meal prep every day for several days
- Every day you step on the scale and see your number go down and your motivation coming up. You are elated!!
- The weekend has the International Food Festival coming to town and you can't miss that! You step on the scale before work on Monday morning only to find your weight is higher than the day you started
- You are deflated; you can't believe you ever even tried. You wolf down a pizza single handedly
In the above scenario, if you were tracking your progress, you would know that an occasional "going off the rails" happens when someone is looking to change their lifestyle (emphasis on the word LIFESTYLE!)
This it the key when tracking your fitness progress;
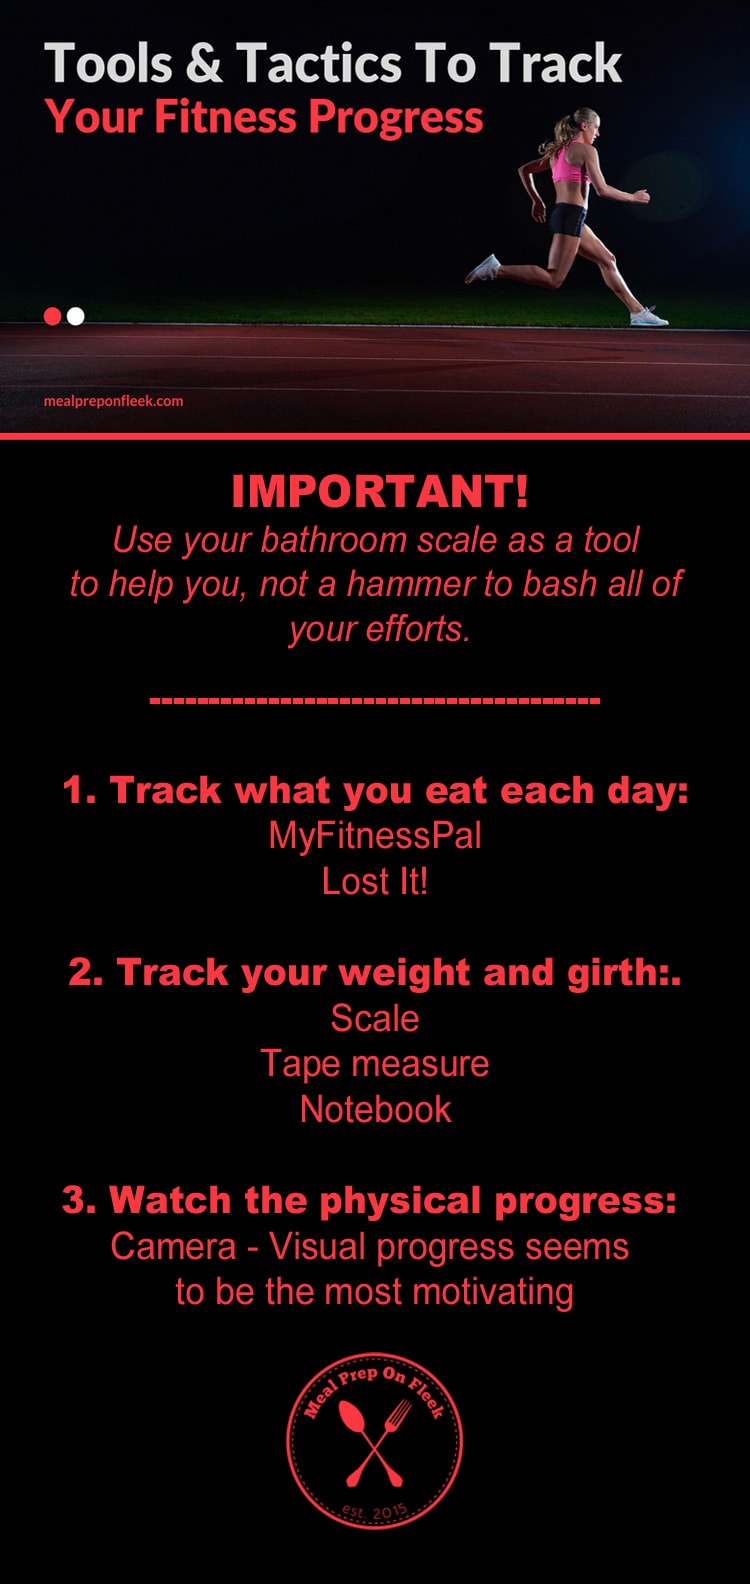
Don't Stalk Your Scale! Instead, use your bathroom scale as a tool to help you, not a hammer to bash all of your efforts.
The following are some Tools & Tactics To Track Your Fitness Progress. These tricks will allow you to monitor your new lifestyle almost effortlessly;
Food & Exercise
Track what you have been eating each day. Log each thing you put in your mouth. Especially don't forget the mindless handfuls of things that you don't usually notice. For example, the handful of M&M's that you grabbed from the reception desk candy dish on the way to the copier room. Yes, even those. This track record of food will be a great asset to see which foods and which food arrangements have worked best for you. You can then adjust as you evaluate. And you can see how much your nutritional habits have changed; very motivating!
Similarly, do this for your exercise routine. What exercises you do? How many calories did you burn? If you are into weight training, how many pounds did you lift? Write it down so that you have a record of what you want to beat next time.
You can use a notebook and pen for this, but might I suggest one of the many apps that are out there that you can put on your phone to make it easy and convenient? There are two I might suggest: Lose It! and MyFitnessPal. All three track calories, exercise, and food intake. They also have a barcode nutrition scanner. MyFitnessPal even has a recipe importer which is nice. You can import all the delicious recipes that you find right here on Meal Prep On Fleek!!
If you're looking for a Meal Planner that also provides weekly meal prep recipes, try the Workweek Lunch Meal Planner HERE.
Weight & Measurements
At the risk of sounding obvious, you are going to want to track your weight and girth. This sounds almost unnoteworthy, but this is actually what trips people up the most, derailing many a great intention. Our bodies are very complex things, and there are so many variables that can go into weight and measurement. For example, females may be more "puffy" certain times of the month. Men can find inaccurate weight measurements if they are gaining muscle; muscle weighs more than fat. Because of these things, tracking should not be done daily, but rather monthly to help keep you the most motivated.
Again, the tools used might seem obvious, but there are some rules that you should follow in using them to help you get a more consistent reading. Make sure you use your scale (or tape measure) on the same day each month and at the same time. Wear the same clothes and use the same bathroom scale. Track your progress in your app or notebook.
Physique
Finally, probably the best way to see your progress in living color, is to use the camera on your phone to take a picture each month to really see how you did. The camera doesn't lie! Visual progress seems to be the most motivating (or convicting-but let's not go there…)for most people. Again, consistency will be your key, so here are your steps to take to keep a great photo journal:
- Take your photo on the same day of the month at the same time of day
- Use workout clothes that will show your midriff or underwear to take your photo
- Keep your feet together and your arms loosely to your side
- Take a front view and a side view
- Make a specific folder on your phone to import your monthly photos
- Set your calendar to remind you of your next photo "appointment" and keep it!
- Though you might be tempted, DO NOT DELETE any photos. Remember that this will be your greatest motivation.
We hope you found some good information here to keep you motivated and organized as you work to accomplish your particular body goals!
Comment below and let us know what's working for you!

11 Best Muffin Recipes
Best Muffin Recipes make your mornings brighter, your afternoons sweeter, and can totally be a part of healthy meal prepping!
Do you know the Muffin Man? Have you seen him?
Ok, joking aside, after much research, we have produced a list of muffin recipes that will give him a run for his money! Muffin recipes can be sweet, filling, healthy, fluffy, warm, and even meal-prep friendly. They're great because they are quick to put together using every day pantry ingredients and can be stored in an airtight freezer-friendly container for up to 3 months, which makes them great for your meal prepping needs. Oh, and they freeze great, too!
We have put together a list of the 11 best muffin recipes for you and your family to enjoy!
Peanut Butter Chocolate Muffins
These intense chocolate muffins are a chocolate lovers' dream, paired with a swirl of creamy peanut butter and low-glycemic sweetener making them great for breakfast.
(Carbs: 47g - Protein: 25g - Fat: 36g)

Paleo Blueberry Muffins
Skip all the guilt when you bake these paleo blueberry muffins. We love these because they're super easy to make and still paleo.
(Carbs: 7g - Protein: 3g - Fat: 10g)

Healthy Oatmeal Muffins
Make a batch of these Healthy Oatmeal Muffins so you can wake up and head out the door in the morning with a few of these portable treats! They're so moist!
(Carbs: 18g - Protein: 1g - Fat: 4g)

Morning Glory Muffins
These hearty muffins combine crunchy walnuts, crushed pineapple, shredded carrots, and almond flour for a gluten-free breakfast that satisfies hunger with fiber and healthy fats. Vanilla monk fruit adds sweetness without spiking insulin.
(Carbs: 22g - Protein: 17g - Fat: 29g)

Savory Breakfast Muffins
These grab-and-go muffins will keep you full with breakfast sausage and eggs in every bite and the texture of a muffin! This gluten-free recipe uses almond flour and flax breading for easy preparation.
(Carbs: 24g - Protein: 19g - Fat: 16g)

Cinnamon Apple Muffins
These apple cinnamon muffins are the perfect breakfast recipe sweetened with low glycemic monk fruit sweetener. They bake up in just 35 minutes, and each serving contains 2 muffins (and a lot of protein!) for a filling breakfast that will keep you satisfied.
(Carbs: 25g - Protein: 22g - Fat: 28g)

Paleo Maple Bacon Banana Bread Muffins
This Paleo Maple Pecan Banana Bread Muffin recipe is made in one bowl with a few simple ingredients. Gluten-Free, Grain-Free, and Sugar-Free. They are better than anything you will find in your local bakery and one of the best muffin recipes.
(Carbs: 9g - Protein: 7g - Fat: 16g)

Cinnamon Roll Muffin
Cinnamon Rolls Muffins are a sweet muffin recipe that is made from almond flour and mixed with stevia. They have a warm cinnamon and erythritol center to give them a true cinnamon roll flavor. It is the perfect keto-friendly recipe for the true sweet breakfast lover.
(Carbs: 9g - Protein: 9g - Fat: 20g)

Jordan Marsh's Blueberry Muffins
A must-have classic muffin recipe from the Jordan Marsh stores of yesteryear! Fluffy, warm, and a perfect ratio of blueberry-to-muffin.
(Carbs: 42g - Protein: 4g - Fat: 9g)

Allrecipe's Muffins
These basic muffins can be made as-is, or you can add one of several different ingredients for a variety of muffins. All options are delicious!
(Carbs: 30g - Protein: 3g - Fat: 6g)

Jenn Segal's Blueberry Muffins
Bursting with fresh blueberries with a tender crumb and sparkling sugar crust, these really are the best blueberry muffins. Fresh blueberries is the trick!
(Carbs: 39g - Protein: 4g - Fat: 9g)

Meal Prep Menu 2023: Week 39
8 High Protein Snack Ideas
High protein snacks will save the day when you're hangry (or even just hungry)!
Everyone loves a good snack. Even better, people love having a snack that tastes delicious and one that is healthy. High-protein snacks tend to be the healthier option, as opposed to snacking on chips, pretzels, candy, cookies, doughnuts, or other high-carb foods. Protein snacks keep us full longer while offering our bodies what it needs to maintain optimal health. Diets high in protein improve our muscles, bones, hair, nails, blood sugar levels, and our waistlines. We have put together 8 super easy, yet delicious, high-protein snacks perfect for your meal prepping and snacking needs!
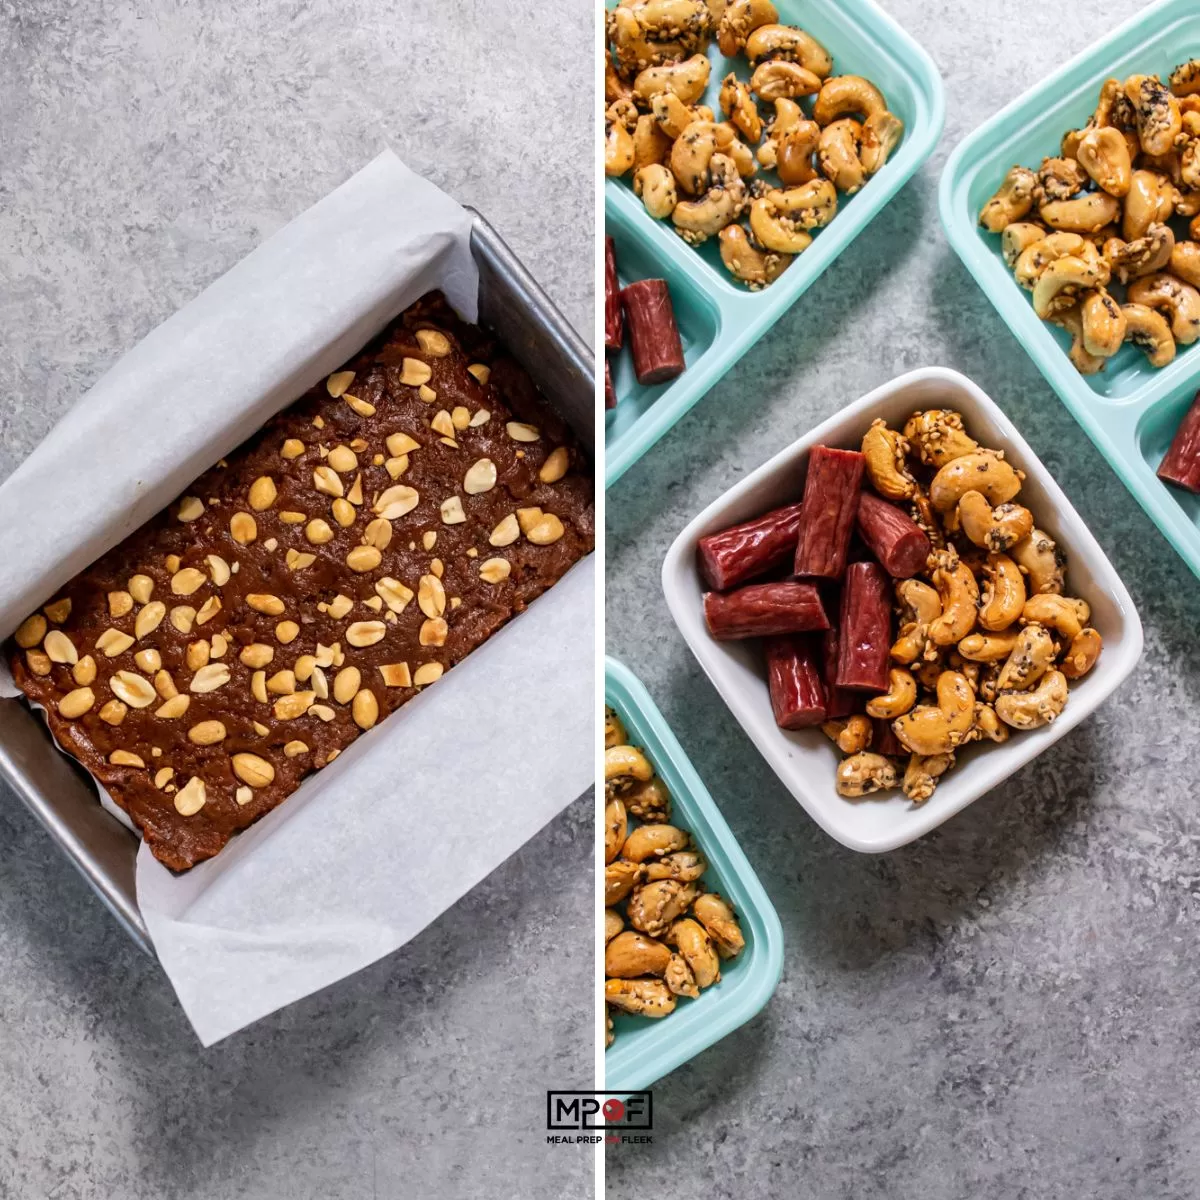
Everything Bagel Cashews
If you love the flavor of an everything bagel but don't want the heavy carb load, then these cashews are for you! Dried onion, sesame seeds, and poppy seeds create the nutty, herb flavor of the popular bagel, but on heart-healthy cashews. This is a travel-friendly snack that curbs hunger in a pinch. And who doesn't love a nut that tastes like a bagel?!
(Carbs: 9g - Protein: 10g - Fat: 22g)

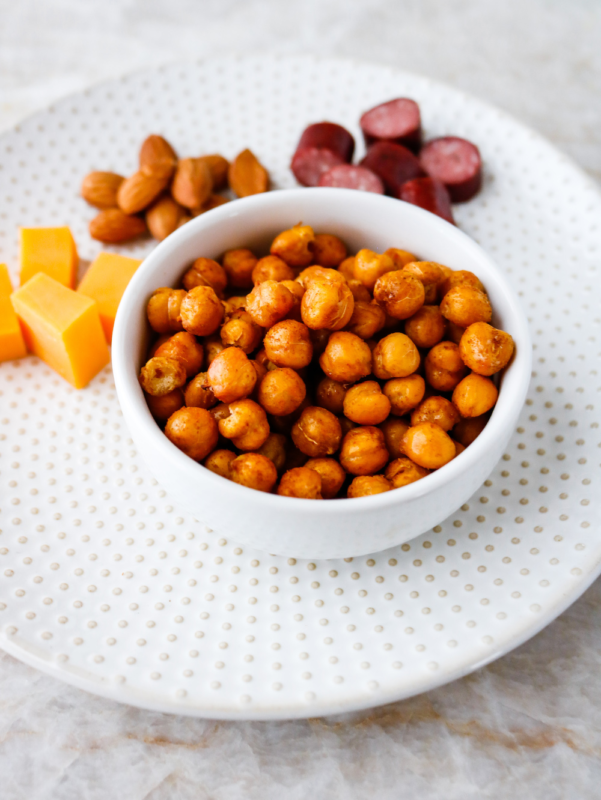
Air Fryer Cinnamon Sugar Chickpeas
These crispy air-fried cinnamon-sugar chickpeas are made with minimal oil and are ready to eat in under 30 minutes. Once cooked they are paired with cheese, jerky and raw almonds to create a salty-sweet snack box that satisfies!
(Carbs: 27g - Protein: 20g - Fat: 11g)

Air Fryer Egg Rolls
Ditch takeout and make these gluten-free air fryer eggrolls that cook up crisp using Paleo-friendly coconut wrappers. They fry in just 3 minutes with a veggie and chicken filling that keeps you feeling full; yet another good high protein snack!
(Carbs: 36g - Protein: 10g - Fat: 24g)

Turkey Bacon Ranch Pinwheel
A high protein and low-calorie snack to keep you on track! This healthy combination tastes indulgent and will keep cravings at bay. Serve with fruit or vegetable sticks for an energizing snack or light meal.
Pro Tip: Save time making this dish by using precooked bacon pieces.
(Carbs: 4g - Protein: 16g - Fat: 18g)

Protein Freezer Waffles
These protein-freezer waffles are so easy and delicious! This recipe is made with only six ingredients and is high in protein. Double or triple the batch and keep them in the freezer for upcoming weeks. Waffles are a great snack, especially if you smear your favorite nut butter across the top!
(Carbs: 49g - Protein: 26g - Fat: 16g)

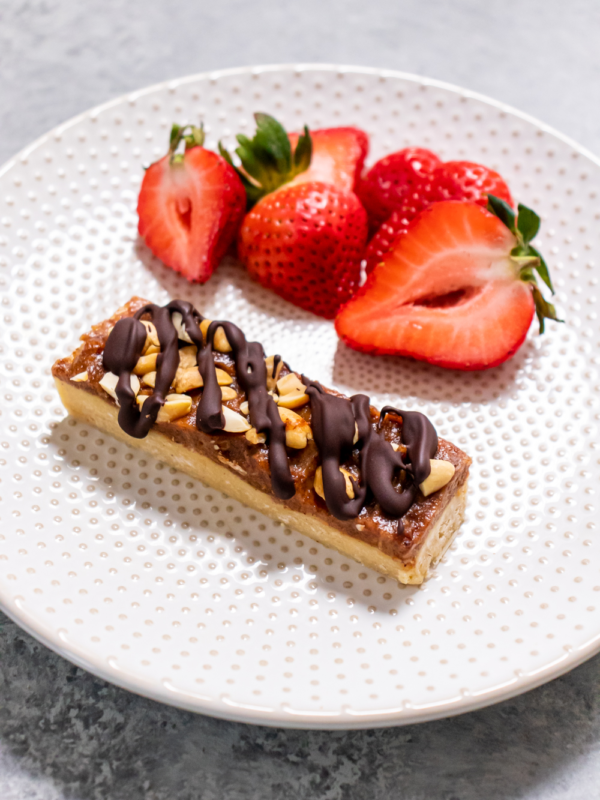
Vegan Snickers Protein Bars
Get your sweet fix without all the sugar! These gluten-free, vegan protein bars contain less sugar and more protein than a typical candy bar for a hunger-curbing snack with zero guilt. They look SO good and are not hard to make. (They'll also save you money, so this makes them both high protein and money saving!)
(Carbs: 37g - Protein: 17g - Fat: 13g)

Protein Almond Butter Cups
What's better than a peanut butter cup? An almond butter cup that is amped up with protein and finished off with a dark chocolate layer! This easy recipe comes together with just four ingredients. We never want you to NOT eat chocolate around here!
(Carbs: 8g - Protein: 6g - Fat: 12g)

Keto Bacon Sausage Meatballs
Italian sausage gets the meatball treatment. Then, it's wrapped in bacon for an easy meal prep packed with protein and flavor. Great for breakfast, lunch, snack, or even dinner, with some veggie sides (cauliflower rice, anyone?)
(Carbs: 2g - Protein: 12g - Fat: 7g)

Keto Ranch Dressing
Keto ranch dressing can be made very easily and it's so delicious, you'll never go back to the premade stuff!
Sure, it's easy to buy a ranch dressing. After all, it's one of America's most beloved salad dressings. But a keto ranch dressing is a little trickier to come by, without spending a chunk of change.
If you've never made ranch from scratch before, be prepared to fall in love with it. There's just no comparison to store-bought! The beauty of making a dressing from scratch is that you know everything that goes into it. And in this case, it's a handful of dried herbs, some mayo and buttermilk, and a bit of salt. There's no sugar, preservatives, or other weird and unpronounceable ingredients that probably have no business being on your salad. Or around veggies at all. You'll be so glad you did, and then you'll be looking for excuses to use it. Try it on a salad or as a dip for veggies or even as a dip for french fries (you'd be surprised how good that is!).
Keto Ranch Dressing Ingredients
- ⅔ cup mayonnaise
- ¼ cup buttermilk
- 1 teaspoon dried chives
- ½ teaspoon dried dill
- ½ teaspoon dried parsley
- ¼ teaspoon dried garlic
- ¼ teaspoon granulated onion
- Salt to taste

How to Make Keto Ranch Dressing
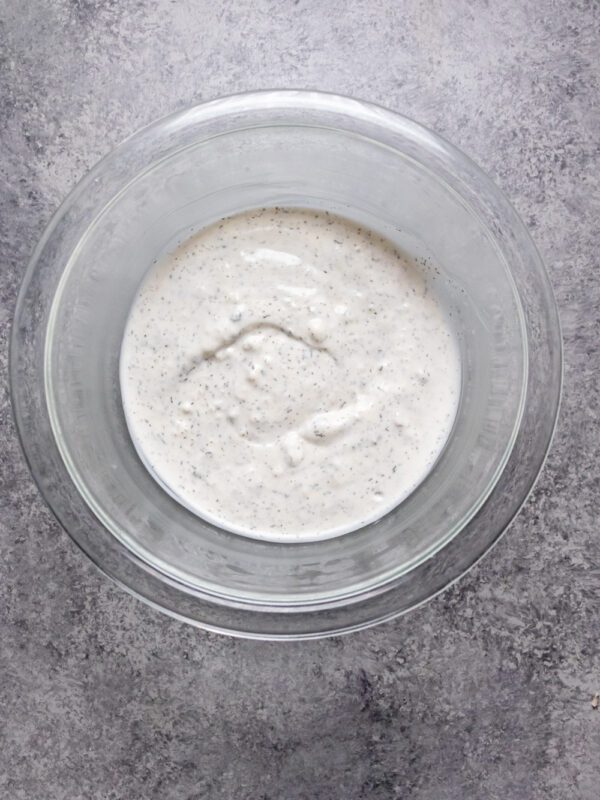
Get yourself a medium sized bowl. Add all the ingredients to it and stir until everything is evenly combined. Ta-da! You've got ranch dressing, keto-style!

How to Store and Serve Keto Ranch Dressing
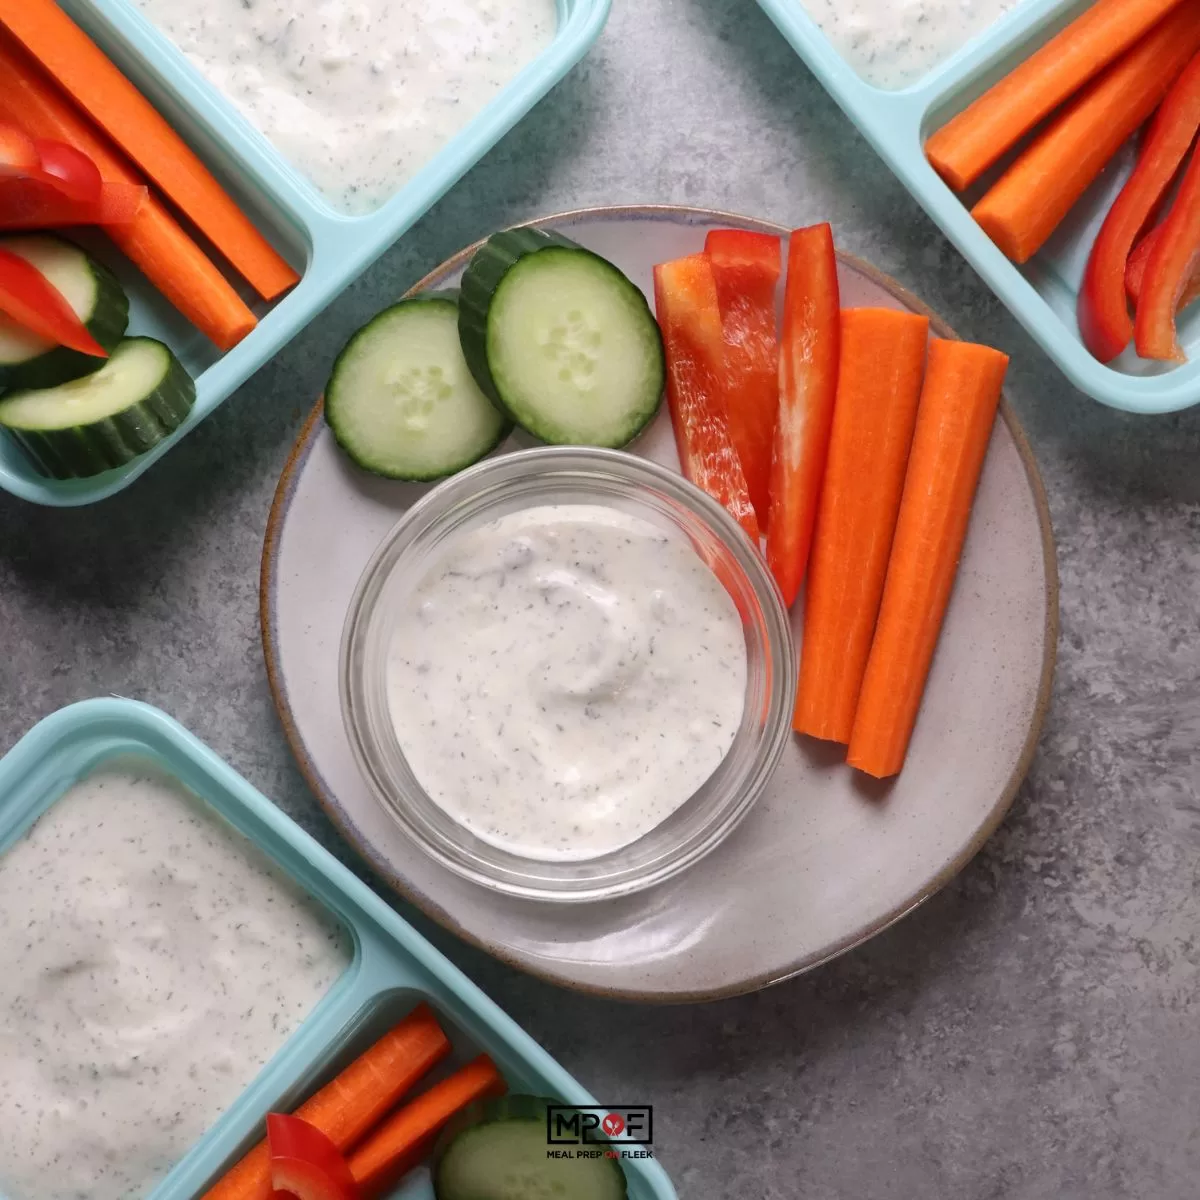
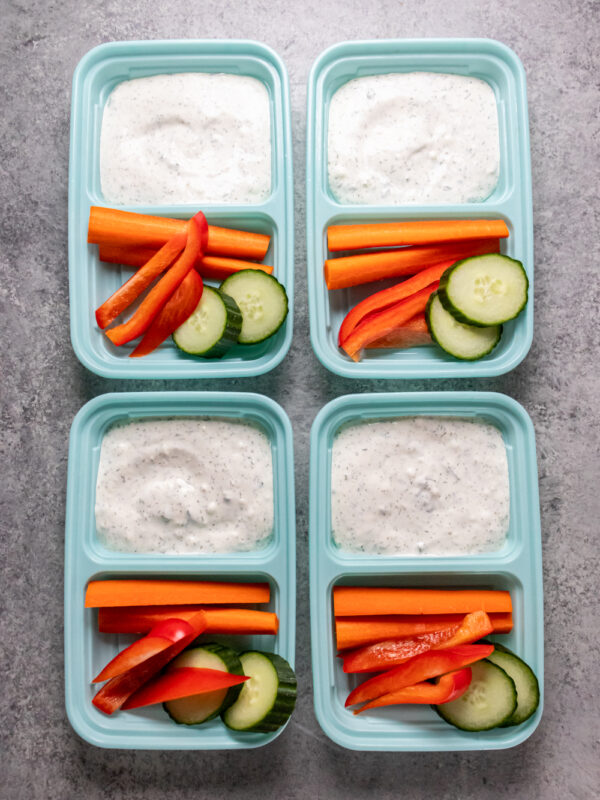
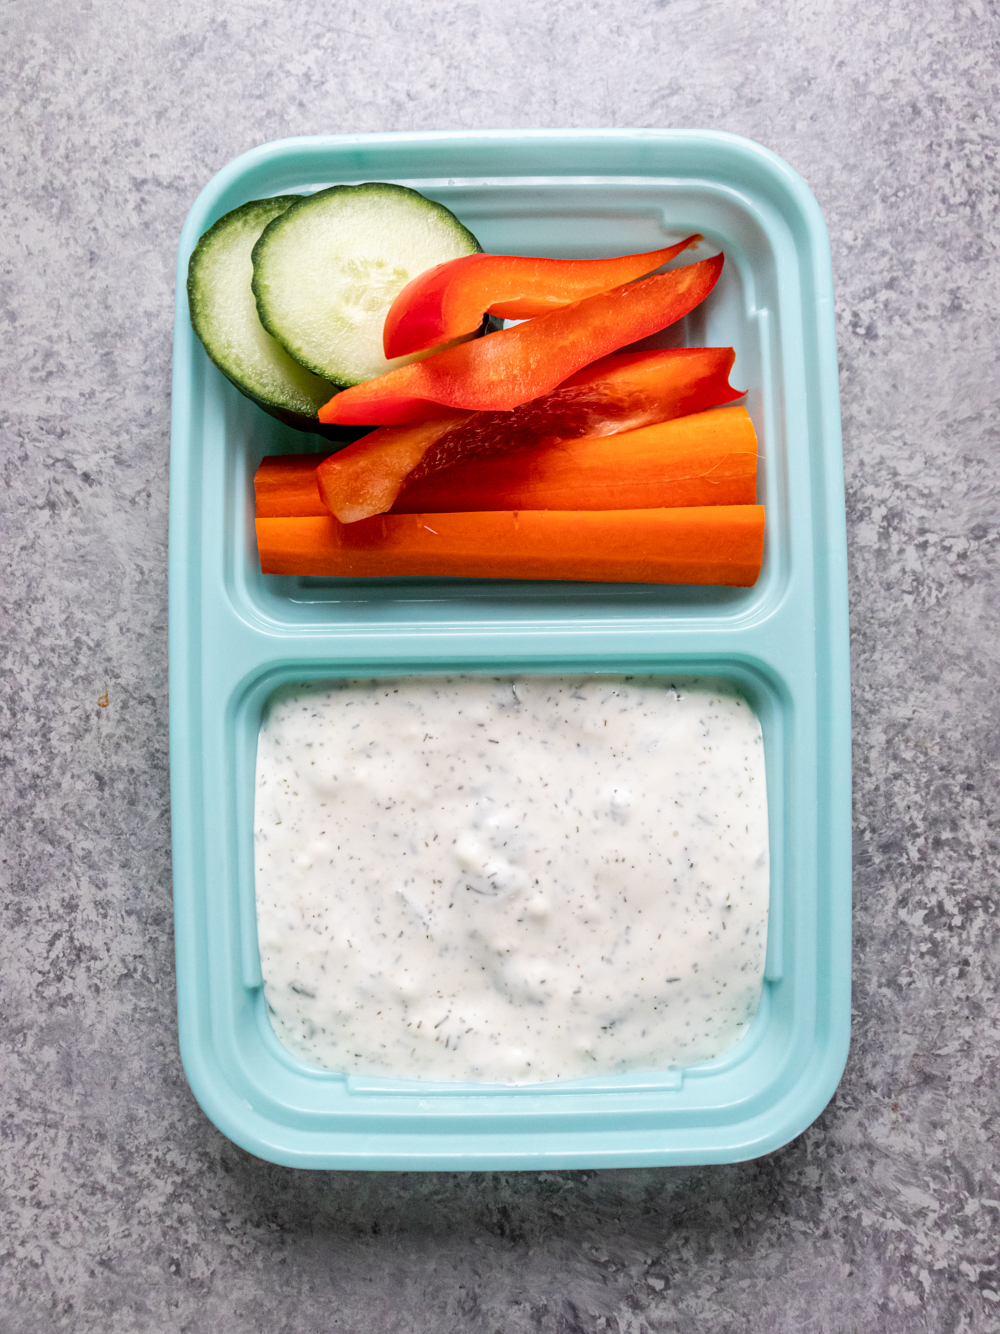
Once you've made the dressing you can meal prep it, as you see here. We love it with cut-up veggies like colorful bell peppers, carrots, and cucumbers. You can also serve it with celery, cherry tomatoes, sliced zucchini, halved mushrooms, and sugar snap peas. I mean, almost any veggie tastes good when it's dipped into ranch dressing. Oh! Don't forget broccoli and cauliflower! Those florets have perfect nooks and crannies for ranch dressing to sink into!
In terms of storage, this keto ranch dressing will keep in an airtight container for up to a week. If you don't want to meal prep it, as we've done here, store it in a glass jar with an airtight lid. I like to use jelly jars or old jam or other small jars I've saved for this purpose.

Substitutions and Alterations
This dressing is pretty awesome as the recipe is written, but you can make some substitutions. You can certainly use fresh versions of all the dried herbs, which would make the flavors a lot brighter and the herbal notes more pronounced. You wouldn't need too much though; you could double the amount of each herb and it would be very flavorful. Just make sure it's all finely chopped.
If you don't have buttermilk, you can always make it with whole milk and a bit of lemon juice or apple cider vinegar (no more than a tablespoon). Or, you can substitute the buttermilk for plain yogurt (Greek or otherwise) or even sour cream; you'd just need to thin it out with water a bit so that it can be easily blended and it's not too thick to pour.
MORE RANCH RELATED RECIPES!


Ingredients
- ⅔ cup mayonnaise
- ¼ cup buttermilk
- 1 teaspoon dried chives
- ½ teaspoon dried dill
- ½ teaspoon dried parsley
- ¼ teaspoon dried garlic
- ¼ teaspoon granulated onion
- Salt to taste
Instructions
- Combine ingredients for dressing in a mixing bowl. Stir until well combined and smooth.
- Divide dressing between 4 MPOF snack containers. Divide sliced vegetables between remaining containers. Refrigerate.
Nutrition
How Eating Fat Can Make You Thin (The Keto Diet Explained)
Most people are convinced that eating fat will make them fat. That is the main reason why in the grocery stores there are so many low-fat products right? Everyone knows that fat has almost double the calories per gram than carbohydrates or protein, that is the reason, right?
Well, not exactly. No wonder people think like that, as that is what big companies have marketed for decades. Let's get one thing clear. One will gain fat thanks to excessive calories. The problem is that it's very easy to overeat from carbohydrates, and it is very easy to get addicted to spikes in blood sugar during the day.
Why Fat?
And here is where the fat comes into play. Fat makes all the meals more pleasing and helps you feel full. No wonder that the popularity of the high-fat keto diet has skyrocketed in popularity. Who wouldn't want to enjoy bacon and lose fat? I know I sure want that.
What is the keto diet?
The ketogenic diet is a very low-carb, moderate protein and high-fat diet. The keto diet was developed during the 1920s for epilepsy treatment. Research has shown many positive effects on human body, in addition to helping with epilepsy. The research also clearly shows that the keto diet is one of the most effective dietary approaches for encouraging fat loss.
So how does the keto diet work? Once you cut out the carbs from your daily menu and start focusing on fats, you will force your body to switch from using carbohydrates as a main source of energy to using fat as a main source of energy. Unlike most diets that focus on calorie restriction, the goal of the keto diet is to cut off your body's supply of glucose from carbohydrates.
What is Ketosis?
This metabolic state is called ketosis. In other words, once your body is in ketosis, it will use fats for energy, instead of glucose. And ketosis is the very state you want to be if your dream is to get rid of those excess pounds that have been bugging you.
In order to transition your body into ketosis and remain there, you need to go very low carb. The amount of carbs depends whether you are just starting out or already fat-adapted. If you are just starting out, we would suggest to cut down your carbs as low as a maximum of 20 grams per day. Following this rule, you will be in ketosis usually during a week (this can depend on the individual).
Once an individual is fat-adapted, one can slightly increase the carb intake up to 30-50 grams per day, but from personal experience, I would not suggest that. Just focus on high-fat foods and you will feel awesome.
What foods are best on a Keto diet?
The one main reason why the keto diet is so effective and enjoyable is that of the keto diet foods. They are fulfilling and enjoyable. The low carb keto foods are not rocket science. You can get everything needed from the nearest grocery store.
Make sure to check out our printable keto diet food list, that you can take with you to your next grocery shopping trip.
Keto foods, in a nutshell, are fats and oils from natural sources, organic and grass-fed protein sources (if possible), above the ground vegetables and leafy greens, full-fat dairy products, nuts and seeds and stevia-based flavorings. Examples of keto foods are Heavy cream, mayonnaise, butter, oils, lettuce, spinach, zucchini, eggplant, broccoli, avocado, beef jerky, fatty fish, beef, cheese, greek yogurt and so on.
The reason why you should very precisely follow what you eat is that this will make or break your ketosis journey - as eating more carbs than supposed to will bring you out of ketosis very quickly and slow down your body's fat burning capabilities.
Although there is big variety when it comes to foods that you can eat, you should be aware of things that are not suitable for the keto diet. Foods to avoid during the keto diet include starchy vegetables, grains, beans, any kind of low-fat products and fruits.

How it differs from other diets?
Keto diet comes with a lot of benefits. Some are more related to physical conditions and others are strongly mental. Here are some ideas and benefits you can get out of the diet.
Fat loss - Despite the controversial term, one thing is clear: sticking to a ketogenic diet can be very effective for losing weight fairly quickly. While the ketogenic diet is excellent for fat loss - thanks to ketosis which is utilizing the stored fat as a primary energy source, there are many other benefits that may be even more drastic than losing weight fast already is.
Eliminating cravings - This probably one of the biggest reasons why people fell off the diet wagon(s), no matter what diet. In keto diet, you will be avoiding all the sugary foods thanks to what you don't experience big spikes in blood sugar. The other part of the equation is that you will be mainly eating fatty foods which are very filling and satisfying.
Improved cognition - Some positive side effects of the keto diet are: increased memory, improved cognition, clarity, fewer migraines. Keto diet is known for its awesome effects on your memory and cognition. Scientists have discovered that it not only increases cognition but also enhances memory and it also has shown improvement at all stages of dementia. Being in ketosis will also result in more stable blood sugar.
Reduced appetite - Another big challenge, when it comes to following diets, is the fight with the hunger feeling. Unlike many other diets, during ketosis, when you are consuming fat as a primary source of energy, higher levels of a hormone called leptin is released. Leptin is an amazing hormone that helps to regulate your energy balance by restraining the hunger feeling.
First steps to get started with the keto diet
Eating bacon and losing fat sounds great? Are you ready to jump on the keto wagon? That's awesome! Here are some tips to get you started right now!
- Prepare your mind and body - In order to take full advantage of the keto diet, it would be beneficial if you start thinking and planning your diet. Look over your everyday life, what foods do you usually eat, in what time, with whom and so on. If you would start following a diet, would you still want to eat out? Would you take your lunch with you? This is a vital factor, as you will have the ability to assess your current situation and plan out your weeks or months.
- First weeks will be tough - Be prepared mentally. No diet is easy when you start out. As with other diets, the keto diets have some so-called side-effects. I am talking about the keto flu, which affects most people during their first weeks. Symptoms often include fatigue, some headaches and feeling weak. To cope with that just drink plenty of water, bone broth and you will be in ketosis no time. A good solution to speed up the process is exogenous ketones, but I would suggest looking into that once you have experienced ketosis and have loosed some weight.
- Reduce your carbohydrate intake - This is the most vital part of the keto diet. Start slowly removing carbs from your daily intake. It will be harder than you think if you haven't done that before. The goal is to lower your daily carb intake down to a maximum of 20 grams of carbs per day. In this way, you will be in ketosis probably during 7 days (this can vary between individuals and your eating habits).
- Get enough fats - Going low carb is just one part of the game. The second, an important part is to get enough high-quality fats, so you can get your body into a magical state called ketosis. Pick fatty cuts of meats, add coconut or olive oil and spice them up with full-fat mayonnaise. Eating fats will help you feel satisfied, full and happy. If you are feeling down, hungry or don't see any results, then recheck if you have eaten enough fats to start with.
- Don't forget to eat your veggies - It's easy to focus only on protein and fats. One thing to remember is that leafy vegetables are nutrient-dense, low in carbs and perfect for your digestive system. So, make sure you combine your fats with vegetables.
Keto Diet Takeaway
As you can probably understand, the keto diet has lots of awesome benefits, not a merely fat loss. Although it's very effective for fat loss. Keto diet is also so powerful because it is a sustainable way of eating, it can improve your mental state and at the end of the day is enjoyable.

_
Article Courtesy Of Alex Reed.
[blog_subscription_form]
Broccoli Cheddar Egg Wraps
Broccoli and cheddar egg wraps will make your mornings go a lot more smoothly-or your lunch! Healthy meal prep that's loaded with protein and veggies!
Broccoli and cheddar are a match made in heaven. Think about broccoli-cheddar soup and how awesome that is. These flavors really just love each other. (Have you had our Broccoli Cheddar Stuffed Chicken Breasts?) Add eggs into the mix, fill some wraps, and roll them up. Boom, you've got a breakfast meal prep. Or maybe one for lunch, or even dinner.
Broccoli Cheddar Egg Wraps Ingredients

- 8 large eggs
- ½ cup milk
- Kosher salt, to taste
- Freshly cracked black pepper, to taste
- 1 cup shredded sharp cheddar cheese
- 1 tablespoon olive oil
- ⅓ cup finely diced onion
- 2 cups broccoli florets, finely chopped
- 4 whole-grain wraps, 8 inches diameter
How to Make Broccoli Cheddar Egg Wraps

These are pretty easy to do. In a medium bowl, whisk together the eggs and milk, and add some salt and pepper. Fold in the shredded cheese. Then, in a skillet over medium heat, add the oil, and heat it up. Cook the onions and broccoli until they soften a bit, but are still tender. Pour the eggs over the veggies and stir gently, cooking until they're just set. Once they're done, add them to four whole-grain wraps and wrap them up! Done and done!
How to Serve and Store Broccoli Cheddar Egg Wraps

Once these are prepped, they're good to go in meal prep containers with some slices of oranges. There's something really refreshing about eating oranges with this wrap. Trust us! Keep them in the fridge in airtight containers for up to 4 days.
You can reheat these in the microwave or the oven if desired, but the beauty of these wraps is that you can just eat them right out of the fridge! They're pretty much a complete meal but if you wanted to make this a dinner or a hearty lunch, serve with a soup or a nice green salad.
These egg wraps can also be frozen for the ultimate in meal prepping. Wrap them in plastic wrap (or foil) and transfer them to a sealed container or zip-close bag. (Hint: If you wrap them in foil, you can pop them right in the oven from frozen. Score!) Reheat at 350 degrees for 15 minutes or so, or pop in the microwave for 2 to 3 minutes. (Microwaves vary in strength, so err on the side of caution first.)

Substitutions and Alterations
First, you can use any kind of wrap that works for you. If you need one that's gluten-free or leans keto, go for it.
Use any other kind of cheese here, such as Monterey jack, shredded mozzarella, havarti, or a spicy cheese! (Or douse the eggs with a little hot sauce in the pan before transferring them to the wraps).
You can also use frozen broccoli in this dish. Just make sure you press out any excess liquid because it will give off more water than fresh broccoli. It's also great with cauliflower.
A little bit of diced leftover chicken would taste great, too, and up the protein content considerably.
Fresh herbs would also amplify these flavors. Try some chopped chives or parsley. Barring fresh, dried herbs such as chives or parsley would work, in addition to Italian seasoning, marjoram, or oregano.
MORE EGGS AND BROCCOLI, PLEASE!
- Egg, Potato and Broccoli Breakfast Meal Prep
- Broccoli Rice Red Pepper Egg Muffins
- 23 Delicious Egg Meal Prep Recipes

Ingredients
- 8 large eggs
- ½ cup milk
- Kosher salt to taste
- Freshly cracked black pepper to taste
- 1 tablespoon olive oil
- 1 cup shredded sharp cheddar cheese
- ⅓ cup finely diced onion
- 2 cups broccoli florets finely chopped
- 4 whole-grain wraps 8 inches diameter
Instructions
- In a large bowl, whisk together the eggs and milk. Season to taste with salt and pepper, then fold in the cheese; set aside.
- Heat olive oil in a large nonstick skillet over medium heat. Add the onion and broccoli and saute for 5 minutes, or until broccoli is crisp-tender; season to taste with salt and pepper.
- Pour the eggs over the vegetables and stir gently until eggs are just set. Set pan aside to cool before assembling the wraps.
- Spoon a quarter of the eggs onto each wrap, spreading to cover, leaving a 1-inch border. Fold in the sides, then tightly roll up wrap from the bottom.
- Cut wraps in half, if desired, and store in meal prep containers up to 4 days. To serve, reheat to steaming.
Video
Notes
Nutrition
Meal Prep Menu 2023: Week 38
16 High Protein Beef Recipes
High protein beef recipes save the day when you want burgers, steak, and are on a keto diet. Or maybe you just want ALL the protein!
Beef is a delicious source of meat protein, and healthy. Beef is high in iron, zinc, protein, phosphorus, B3, B6, and B12, and it has been shown to be good for muscle growth, improving blood health, and boosting immunity. To help you with your cooking and meal-prepping needs, we have put together a list of 16 high-protein beef recipes.
Low-Carb Beef & Broccoli Stir Fry
This juicy beef stir-fry is an easy 15-minute meal in a savory sauce with tender broccoli. Low-carb, and better for you than takeout!
(Carbs: 11g - Protein: 27g - Fat: 20g)

Five Spice Beef & Broccoli
This lean and aromatic stir fry is full of warm spices such as ginger, cloves, and star anise. Serve this high protein beef recipe over sautéed cauliflower rice. It's satisfying without being high in carbs.
(Carbs: 32g - Protein: 33g - Fat: 23g)

Beef & Vegetable Fried Rice
The versatility of ground beef has made it one of America's all-time favorite go-to cuts. From burgers to lasagna, tacos to meatloaf, pasta sauce to wraps, ground beef offers quick, easy, and delicious options for any meal and any occasion, like this fried rice!
(Carbs: 46g - Protein: 32g - Fat: 11g)

Slow Cooker Asian Beef Stew
This Asian twist on beef stew incorporates ginger, garlic, coconut aminos, and shiitake mushrooms for an umami dish that is full of tender, protein-rich sirloin. Best of all, it's a set-it-and-forget-it meal made in the slow cooker that is easily customizable with any veggies you have on hand!
(Carbs: 56g - Protein: 38g - Fat: 20g)

Instant Pot Beef Barbacoa
Rich with subtle spicy and deep flavors, this Instant Pot beef barbacoa meal prep recipe makes for the perfect simple, delicious, and easy high-protein beef recipe. It works for both a weekday meal prep and a quick dinner!
(Carbs: 23g - Protein: 41g - Fat: 34g)

Mongolian Beef Meatballs
If you're following an AIP diet and missing takeout, this Mongolian beef meatball recipe will curb a craving with AIP-friendly cassava breading and a sweet and savory sauce made with ginger and coconut aminos!
(Carbs: 16g - Protein: 25g - Fat: 25g)

Jamaican Beef Stew
This Jamaican-inspired beef stew is a spicy take on the classic hearty stew you're used to. This version offers a hint of heat!
(Carbs: 68g - Protein: 46g - Fat: 13g)

Instant Pot Beef BBQ Ribs
Bursting with classic BBQ flavors, you're sure to love the straight off-the-grill taste of these saucy bbq beef back ribs. This high protein beef recipe is ready in no time at all with minimal effort.
(Carbs: 56g - Protein: 48g - Fat: 29g)

Korean Beef Bowls
This flavorful and easy Korean Beef Bowl recipe is a fast meal prep recipe ready in 25 minutes and delivers 30g+ protein per serving.
(Carbs: 33g - Protein: 32g - Fat: 14g)

Pesto Beef Kabob
Beef kabobs dressed with an easy pesto sauce. This keto-friendly main dish can be made on the grill or grill pan.
(Carbs: 7g - Protein: 37g - Fat: 40g)

Taco Seasoned Ground Beef & Sweet Potato Hash
This one-pan sweet potato and ground beef hash is full of protein, fiber, and vitamins to start the day off right. Seasoned with taco seasonings and served with salsa, you don't have to wait until dinner to get your taco fix!
(Carbs: 23g - Protein: 38g - Fat: 23g)

Beef Zucchini Enchiladas
Low-carb enchiladas made with sliced zucchini and shredded crockpot beef. A warm wrap stuffed with meat and topped with melted cheese and any variation of delicious chili sauces.
(Carbs: 16g - Protein: 28g - Fat: 30g)

One-Pan Paleo Beef Stroganoff
One-Pan Paleo Beef Stroganoff is an easy dinner recipe. Tender chunks of grass-fed beef, hearty portobello mushrooms, and a creamy sauce are served over spaghetti squash to make this traditional dish paleo and gluten-free.
(Carbs: 25g - Protein: 36g - Fat: 16g)

Low-Carb Crockpot Beef Ragu
Slow-cooked beef in an aromatic blend of tomatoes, spices, and red wine! A simple high protein beef recipe that tastes like a 5-star meal. Serve over zucchini or sweet potato noodles!
(Carbs: 27g - Protein: 31g - Fat: 14g)

One-Skillet Spaghetti Squash & Meatballs
This quick and easy one-skillet spaghetti squash and meatballs recipe requires only a few simple ingredients. It's the ultimate comfort food! Gluten-free, grain free and low carb.
(Carbs: 13g - Protein: 38g - Fat: 15g)

20-Minute Meatballs
These yummy 20-Minute Meatballs are fast, easy, and go with almost any dish! Made with only a few ingredients they are whole30, paleo, and gluten-free.
(Carbs: 1g - Protein: 12g - Fat: 3g)

Our Favorite Tostones Recipe
Tostones are green plantains twice-fried in avocado oil. They're crispy, crunchy, starchy, and sweet!
Have you ever wondered what to do with green plantains? Make these tostones, and you'll never have to wonder again. They're a great snack, first off. Tostones are twice-fried, but don't be scared! We are using avocado oil, which is a healthier oil, and they cook so fast and are so tasty you'll be happy you made them. This food is popular in Latin American and Caribbean cuisines but is often closely associated with Puerto Rico and Cuba. You're as likely to find them on the dinner table in these countries are you are to purchase them from street vendors.
Tostones Ingredients

- 3 green plantains, medium-sized
- ⅓ cup avocado oil
How to Make Tostones

You'll need 2 to 3 medium-sized green plantains for this dish; most grocery stores will have them and Latin American grocers and markets should, too. Cut the ends off each plantain, and then carefully cut a slit down their length to pierce the exterior without cutting into the fruit itself. Remove the peel carefully, and then cut the tostones into rounds. Keep in mind that they'll turn brown/oxidize quickly, so you'll want to work fast to get them into the pan.
Heat the oil in a heavy-bottomed skillet or pot. Fry the rounds briefly, and then remove them from the heat. Then, you smash them a bit to flatten, return to the skillet, and fry them again. What you end up with is a fried plantain that looks like a flower and tastes crunchy, savory, and a little sweet.

How to Store and Serve Tostones
Well, if we're being honest, like all fried foods, tostones are best eaten as soon as they're made. For that reason, we're not super excited about recommending you meal prep them but you can if you want to. Or, If you have any leftovers, you can certainly store them in the fridge in an airtight container.
Here's where having an air fryer comes in handy. Reheating in the air fryer for a few minutes will crisp them back up. But the oven will do, as will a hot skillet with a little bit of oil.
Serve these as a snack, dusted with salt. Or serve with a spread of rice and beans. Some people like to eat tostones alongside guacamole, salsa, chips, or rice with cilantro and lime. All good. You could also serve it with grilled foods or veggies and it would be a nice accompaniment.

Substitutions and Alterations
There are two ingredients in this recipe, so the only thing you can really swap is the oil choice. If you have vegetable oil or something else with a high smoke point, you can use that. But tostones aren't tostones without green plantains. And whatever you do, please don't use bananas instead. They're just not the right texture or consistency.
RELATED DISHES AND TASTES!
- Plantain Taco Bowl Meal Prep
- Sheet Pan Caribbean Chicken Thighs
- Mexican Whole Grain Rice and Quinoa Casserole Meal Prep

Ingredients
- 3 green plaintains medium sized
- ⅓ cup avocado oil
Instructions
- Cut the ends off each plantain, then carefully cut a slit lengthwise down the peel without cutting into the flesh. Use your hands to separate the peel from the fruit. Cut each plantain crosswise into 1-inch rounds.
- Add enough oil to just skim coat the bottom of a heavy skillet and set the pan over medium to medium-low heat. Once the oil is hot, add the plantains in a single layer and cook for 2 to 3 minutes on each side, or until lightly golden.
- Remove plantains from pan and transfer to a work surface or cutting board. Use a plantain press or the bottom of a drinking glass to press the plantain into rounds about ½-inch thick.
- Return plantains to skillet, adding oil if necessary, and cook on each side for 2 to 3 minutes more or until golden brown and crispy. Remove from the pan and transfer to a plate lined with a paper towel. While still hot, sprinkle with sea salt.
Video
Nutrition
Meal Prep Menu 2023: Week 37
Keto Vanilla Mug Cake
Keto vanilla mug cake is low-carb, low-sugar, and ready in less than two minutes in the microwave. Dessert for one is served!
We've been posting a few of these delicious keto mug cakes here at MPOF, because even if you're following a keto diet, it doesn't mean you have to give up something sweet now and then. And sometimes a single-serve cake is just what you need.
This keto vanilla mug cake is the most basic but perhaps the most versatile because of it. Sometimes you just want vanilla, and that's ok. We know chocolate gets all the cravings most of the time, but vanilla is stealthy and not to be underrated. Just think of all the things you can pair with this little cake . . .
Keto Vanilla Mug Cake Ingredients

- ¼ cup blanched almond flour
- 1 tablespoon erythritol sweetener
- 1 egg, at room temperature
- 1 tablespoon melted butter
- ½ vanilla extract
- ½ teaspoon baking powder
- Pinch of salt
How to Make Keto Vanilla Mug Cake
So it's easy! Combine the almond flour, erythritol sweetener, egg, melted butter, vanilla extract, baking powder, and salt in a small bowl. Mix it together until it's moist and forms a batter. Transfer to a mug that you've sprayed with nonstick spray and microwave for 90 seconds. That's it. Mystery solved. Less than two minutes to cake bliss.

How to Store and Serve Keto Vanilla Mug Cake
So yes, this is a single-serve item. It's simple to make and you might eat it all in one clip. Or you might not. And in that case, you can always cover the top with some plastic wrap or aluminum foil. The cake will keep for a couple of days at room temperature, no problem. You can serve this keto mug cake just as it is, or scatter a handful of blueberries over the top. If you like a bit of extra sweetness, sprinkle some keto-friendly confectioners sugar over the top. Your call!
Substitutions and Alterations
As you might know, keto baking is a particular kind of thing. It doesn't take too easily to substitutions when it comes to its flour and its fats; those are what need to give it structure because you're dealing with gluten-free baking, basically. We don't really recommend switching the flour or using an egg substitute without the caveat that the texture of this keto mug cake will likely suffer.
But feel free to switch out the vanilla extract for other kinds (almond, lemon, etc.), to change the flavor profile a bit. Vanilla is a good base to experiment with.
Add some spices, such as cinnamon, ginger, nutmeg, and so forth. We also like adding lemon zest to the batter; you only need a little bit. Lime or orange zest would be delicious, too. In those cases, if you're going citrus, you can add a squeeze of fresh juice, too. It won't hurt!
You can also fold in some chocolate chips if you can't decide between a chocolate or vanilla mug cake, or drizzle a keto chocolate sauce on top. Chopped up pistachios, walnuts, or almonds add some crunchy contrast when sprinkled over the top of this cake. Just some ideas!
MORE CAKE AND DESSERTS! AND MORE GLUTEN-FREE LOVE!
- Keto Vanilla Chia Pudding
- Gluten-Free Cinnamon Roll Coffee Cake Meal Prep
- Keto Cashew Cheesecake Bites

Ingredients
- ¼ cup blanched almond flour
- 1 tablespoon erythritol sweetener
- 1 large egg
- 1 tablespoon melted butter
- ½ teaspoon vanilla extract
- ½ teaspoon baking powder
- 1 pinch salt
Instructions
- Combine almond flour, sweetener, egg, melted butter, vanilla, baking powder, and salt in a small bowl. Mix until moist.
- Pour into a lightly greased 1 ½ cup microwave safe mug. Mug cake will double in size while cooking. Microwave for 90 seconds. Enjoy warm.
Nutrition
5 Reasons Exercise Will Change Your Life
Exercise isn't just about looking good, it's all about feeling good as well. While the aesthetic benefits are a definite bonus when it comes to incorporating regular exercise to your life, there are so many other ways it can really change your life for the better. Here are the top 5 reasons why exercise will change your life!
1. Improves your physical health
One of the best and most important reasons why exercise will change your life is because it'll extend it! There are an array of health benefits such as reducing the risk of heart disease and diabetes, managing insulin, improving circulation and oxygen flow throughout the body and the list goes on.
Even going for a walk every day increases the amount of physical activity in your life and can change your body for the better. The more you exercise, the more time you have to enjoy the benefits that come with it.
2. Improves your mental health
It isn't just the physical benefits that matter, but also your mental health. Fortunately, exercise has that covered as well. Have you ever walked in the gym in a bad mood but left feeling much happier? Exercise releases endorphins in the body which helps you let go of any negative feelings you may have and replaces them with good ones. Not only that, you can let out any anger or stress during your workout. There are different types of fitness that you can do to, depending on your mood and what you're looking for. Boxing classes can get that frustration out while yoga can help you find your inner peace and zen.
Studies have also shown that it can lessen the symptoms of depression and anxiety. In these cases, focusing on the frequency of exercise, as opposed to the duration or intensity is a good start. While there are other factors that play a part in reducing the effects of depression and anxiety, exercise is a big contributing element as well.
3. Improves your functional fitness
Exercise will help make everyday tasks so much easier. With better balance, strength, fitness and coordination, you'll find that day-to-day responsibilities will be a piece of cake. Need to carry all those groceries from your car to your kitchen? No problem! Elevator broken and you need to climb those 5 flights of stairs instead? You've got it covered. You'll even be able to keep up with your kid's endless bundles of energy so much longer as well.
Not only that, learning the proper technique for certain movements such as the squat or deadlift can help you execute tasks that mimic these exercises with a decreased risk of injury.
4. Improves your sleep
Who doesn't want a better nights sleep? Sleeping is such an important part of life and yet it is one of the aspects where people suffer from the most. But not if you include regular exercise.
"We have solid evidence that exercise does, in fact, help you fall asleep more quickly and improves sleep quality," says Charlene Gamaldo, M.D. , medical director of Johns Hopkins Center for Sleep at Howard County General Hospital. You just have to be careful about when you exercise. Some people find that exercising too close to your bedtime can have a detrimental effect on your sleep quality instead. So experiment and see which works best for you. Anywhere from the morning to late afternoon is ideal.
5. Improves your social life
Sure, exercise comes with great physical and mental benefits, but it also comes with great social ones too! It can be really fun. By joining a class or club, you'll most likely run into the same people often and soon enough (if you regularly attend), you have a new group of friends.
Exercise is an incredibly rewarding activity that can change your life for the better. By improving your physical health, mental well being, social life and also, of course, your aesthetics, there are all too many reasons why you should include physical activity in your daily life.
__
Article courtesy of:
Emily Trinh
"A powerlifter by day and a writer by night, Emily Trinh has a passion for all things health, fitness, and writing-which makes her profession as a health and fitness writer quite fitting."

8 Best Chicken Salad Recipes
Chicken salad is one of the best dishes for meal prepping. It is quick and easy to prepare, can be eaten almost any time of day or year, easily stored, and it can be as lavish or healthy as the chef would have it. There are many benefits with chicken salad. The chicken salad originated in Rhode Island, in 1863, by a man named Liam Gray. The original recipe consisted of leftover chicken, grapes, mayonnaise, and tarragon. Today, the recipe has spread worldwide, and there are countless recipes for delicious chicken salad. After some testing, we have put together our favorite 8 chicken salad meal prep recipes that we believe most people will enjoy.
A couple tips for your chicken salad meal prep;
How to Store Chicken Salad?
The best way to store chicken salad is in a air tight meal prep container in the fridge. Because oxygen breakdown your food, you using a vacuum sealer would be ideal, but it's not necessary.
How long will Chicken Salad last in the fridge?
For best quality, chicken (as well as egg, ham, tuna and macaroni) salads should be kept only three to five days in the refrigerator (stored at 40 degrees or lower).
Chicken Salad Recipe Ideas:
Chicken Quinoa Salad
Protein 64 grams - Carbohydrates 32 grams - Fat 5 grams

BLT Chicken Salad
Protein 24 grams - Carbohydrates 8 grams - Fat 37 grams

Classic Chicken Salad
Protein 15 grams - Carbohydrates 1 gram - Fat 16 grams

Protein 32 grams - Carbohydrates 31 grams - Fat 39 grams

Ultimate Chicken Salad
Protein 36 grams - Carbohydrates 10 grams - Fat 38 grams

Full Harvest Power Chicken Salad
Protein 29 grams - Carbohydrates 45 grams - Fat 25 grams

New York Times' Best Chicken Salad
Protein 96 grams - Carbohydrates 5 grams - Fat 77 grams

Apples, Grapes, and Walnuts Chicken Salad
Protein 17 grams - Carbohydrates 11 grams - Fat 23 grams

Turkey Sausage and Egg Breakfast Quesadillas
Turkey sausage and egg breakfast quesadillas will make your mornings easier, tastier, and full of protein!
This awesome meal prep for breakfast combines turkey sausage, eggs, and a ton of seasonings and veggies, along with some cheese, of course. It makes great and healthy breakfast meal prep, or maybe even a lunch or dinner if you don't think breakfast foods belong just at breakfast. (We like breakfast all day!).
Turkey Sausage and Egg Breakfast Quesadillas Ingredients

- 1 Tbsp olive oil divided
- 8 ounces turkey sausage
- ½ cup onion finely chopped
- ½ cup red bell pepper finely chopped
- 1 tsp chili powder
- ½ tsp garlic powder
- Kosher salt, to taste
- Black pepper, to taste
- 6 large eggs, beaten
- ¼ cup cilantro, finely chopped
- 1 cup Mexican-style shredded cheese
- 4 8-inch flour tortillas
- Salsa, optional, for serving
- Sliced avocado, optional, for serving
- Berries, optional, for serving
How to Make Turkey Sausage and Egg Breakfast Quesadillas
Start off by cooking the ground turkey sausage in a skillet with some olive oil. Once it's cooked all the way through, remove it from the pan and set it aside. Then, cook the onion and peppers along with the chili powder and garlic powder (plus salt and pepper to taste, naturally), until they've softened. Then, start cooking the eggs in the pan with the rest of the veggies over medium-low heat until they start to set. Add in the cooked sausage crumbles and stir to combine until everything is cooked through. Then, you can fill each tortilla on one side, add the cheese, and fold it over. Cook each one on flat skillet or grill pan for several minutes a side until the cheese has melted and the tortilla looks lightly golden. Once they're cooked, slice them into thirds (a pizza cutter works awesome here!) and store them for meal preps throughout the week.

How to Store and Serve Turkey Sausage and Egg Breakfast Quesadilla
Once these have been prepped they'll keep great all cut into triangles in an airtight container. Keep them refrigerated for up to 4 days. Add some sliced avocado and some fresh berries for a delicious and healthy meal prep, if desired, or just prep the quesadillas as they are; they're plenty hearty enough. Alternately, you can serve this turkey sausage and egg quesadilla with rice (brown, white, or cauliflower rice) or quinoa if you want a really filling breakfast, or you're deciding to serve it for lunch or dinner, instead.
When it's time to eat, reheat them in a hot skillet until the cheese re-melts and the inside is steaming. Quesadillas need a good reheat! (I mean, you could eat it cold, but it's better hot, right?)

Doesn't that just look so good???

Substitutions and Alterations
Feel free to make these with vegan ingredients such as soy crumbles and vegan cheese if you want! Or use regular pork sausage if desired.
These quesadillas work best with flour tortillas but some places sell tortillas that are a combination of flour and corn. Or if you need to go keto, try our Keto Tortillas!
More Breakfast Foods For Meal Prepping!

Ingredients
- 1 tablespoon olive oil divided
- 8 ounces turkey sausage
- ½ cup onion finely chopped
- ½ cup red bell pepper finely chopped
- 1 teaspoon chili powder
- ½ teaspoon garlic powder
- Kosher salt to taste
- Black pepper to taste
- 6 large eggs beaten
- ¼ cup cilantro finely chopped
- 1 cup Mexican style shredded cheese
- 4 8-inch flour tortillas
- Salsa optional, for serving
- Sliced avocado optional, for serving
- Berries optional, for serving
Instructions
- Heat ½ Tbsp. oil in a large nonstick skillet over medium heat. Add turkey sausage to the pan and brown until cooked through, crumbling with a wooden spoon; remove from pan and set aside.
- Wipe out the pan and add the remaining ½ Tbsp. oil. Add onion and bell pepper and sauté for 5 minutes. Season with chili powder and garlic powder, then add salt and pepper to taste.
- Pour beaten eggs into the skillet with the veggies, and continue to stir until eggs are just set. Season to taste with additional salt and pepper. Fold cooked sausage and cilantro into the eggs.
- Top half a tortilla with a quarter of the scrambled eggs, then sprinkle with ¼ cup of the cheese; fold the other half of the tortilla over to cover.
- Wipe out the pan, then toast the quesadillas for a couple minutes on each side, or until lightly golden brown.
- Cut into thirds and store in meal prep containers for up to 4 days. To serve, reheat to steaming.
Video
Nutrition
Meal Prep Menu 2023: Week 36
Spinach and Feta Breakfast Pizzas
Spinach and feta breakfast pizzas come together fast for a great weekday breakfast meal prep that's just perfect for vegetarians!
Pizza for breakfast? Yes, please!
We love a good egg meal prep around here, it's no secret. Mix up your morning breakfast routine with these spinach and feta breakfast pizzas. Prep them all ahead of time and you'll have a protein and veggie-packed breakfast for the week. We all get tired of the same old carbohydrate of choice with, say, cream cheese, butter, or even a nut butter. And pizza doesn't necessarily just have to mean cheese and toppings and tomatoes. Here, we've created a breakfast meal prep that involves spinach, feta cheese, and eggs. So delicious!
Spinach and Feta Breakfast Pizza Ingredients

- 4 whole grain English muffins, halved and lightly toasted
- 1 Tbsp. olive oil
- ½ cup finely diced red bell pepper
- 2 cups baby spinach, packed, coarsely chopped
- ½ tsp. garlic powder
- ¼ tsp. crushed red pepper flakes, optional
- Kosher salt and black pepper
- 5 large eggs, beaten
- ¼ cup crumbled feta cheese
- ½ cup shredded mozzarella cheese
How to Make Spinach and Feta Breakfast Pizzas

Start off by getting those English muffins all toasted under the broiler. Then, you'll cook some peppers in olive oil in a skillet, adding in the spinach until it wilts. Whisk the eggs together just a bit to beat them, and then add to the pan with the seasonings. This cooks pretty quickly once everything's prepped. The last add? The mozzarella and feta cheeses. The mozzarella gives it some creaminess and that fun cheese pull when you bit into it. And the feta? Well, it's so tangy and salty and delicious. Altogether, though, these breakfast pizzas have a bit of a Greek inspiration going on.
How to Store and Serve Spinach and Feta Breakfast Pizzas

Once these are made, you can meal prep them with some fresh berries like we've done here (so good), pop them into airtight containers and stick them in the fridge. You're good to go for a few days. When it's time to eat, nothing's stopping you from eating these pizzas cold if you want to. However, a few minutes in the oven, the air fryer, a cast iron pan, or the good ole toaster oven to crisp up the bottoms and re-melt the tops, will bring these breakfast pizzas back to life.
You can also make a batch of these for dinner and serve them with salad. They'd be great with soup, too. Think of all the veggies you can get into your diet in one meal with this awesome meal prep, right? We think these smart breakfast items will also withstand the freezer if you wrap them tightly in foil. Then, just pop them in the oven, frozen, at 350 for about 15 minutes. You'll never scramble for breakfast inspiration again if you've got these in the freezer!
Substitutions and Alterations

Feel free to use a different kind of bell pepper with these, or start with onions and peppers if you want some extra flavor (and more veggies).
Goat cheese and mozzarella would taste good together, too, if you don't have feta or don't like it. Use gluten-free English muffins to make this a gluten-free breakfast pizza if need be.
Try it with baby kale or arugula, wilted in the pan if you're out of spinach.
There are so many ways to adapt this. You can add even more protein with some cooked and sliced breakfast sausage layered on top of these pizzas, before you add the cheese or even crumbled and scrambled in with the eggs. So many ways to vary these; consider this a template!
MORE BREAKFAST INSPIRATION!

Ingredients
- 4 whole grain Engilsh muffins halved and lightly toasted
- 1 tablespoon olive oil
- ½ cup red bell pepper finely diced
- 2 cups baby spinach packed, coarsely chopped
- ½ teaspoon garlic powder
- ¼ tsp crushed red pepper flakes
- Kosher salt to taste
- Freshly cracked black pepper to taste
- 5 large eggs lightly beaten
- ¼ cup crumbled feta cheese
- ½ cup shredded mozzarella cheese
Instructions
- Preheat broiler. Arrange English muffins cut side-up on a sheet pan.
- Heat olive oil in a large nonstick skillet over medium heat. Add bell pepper and sauté for 2 to 3 minutes, then add spinach and continue to sauté until it just wilts, 1 to 2 minutes more. Season vegetables with garlic powder and red pepper flakes, then add salt and pepper to taste.
- Reduce heat to medium-low and add the eggs to the pan. Cook the eggs, stirring often, until almost set. Then, stir in the feta and half of the mozzarella cheese. Continue to cook until eggs are just set, then season to taste with salt and pepper; remove pan from heat.
- Top each English muffin half with the scrambled eggs, then sprinkle tops with remaining mozzarella cheese.
Video
Nutrition
Tuna Snack Box
This literally takes me 10 minutes to prepare and costs less than $15 for four total meal prep snacks. Zero cooking required.


Ingredients
- 4 ea tuna fish packets about 10oz
- 1 ea cucumber
- 1 cup Almonds
- 8 ea cheese sticks
Instructions
- Combine all in a box and enjoy!
Video
Nutrition

The 6 Best Energy Drinks
The Best Energy Drinks give you what you need without the dreaded crash-and-burn feeling. Here are our faves when you need a boost!
Whether you're going to the gym, need an energy boost mid-afternoon, or craving a pick-me-up in a sporting event, energy drinks are there for you. There are many energy drinks on the market today, and that number is expected to rise even more by 2030. Of course, this means more flavors, benefits, and mixing opportunities! These are six of our favorite energy drinks on the market today.
Reign
Reign Total Body Fuel is an innovative performance energy drink to help athletes perform at their peak. Blended with BCAAs, 300 mg of Natural Caffeine, CoQ10, and electrolytes, Reign Total Body Fuel also offers zero sugar, & zero artificial flavors & colors. Reign currently comes in 3 product lines: Storm, Core, and Inferno; and a total of 14 flavors.
Monster
Monster Energy is a carbonated energy drink with caffeine. It also includes ginseng and B vitamins. It is smooth, refreshing, and made to gulp. We like that they have a sugar free line of products, too. Coffee lovers might enjoy the Monster Java energy, and a Monster juice energy, recovery, or hydration options might be what the doctor ordered after a workout. Monster energy drinks come in 24 varieties, including classic, sugar-free, low-carb and so forth.
Related: Top 3 Supplements for Muscle Recovery
Red Bull
Many people are no stranger to this product, as Red Bull Energy Drink is an Austrian-based company that launched in 1987. Their lightly carbonated energy drinks contain B vitamins, taurine, and some caffeine. Red Bull is known for its slogan "Gives You Wiiings," and the brand is known for events and sponsorships in sports such as diving, breakdancing, mountain biking, racing, drifting, skateboarding, and more. They offer 11 varieties: classic, classic sugar-free, zero, red edition, yellow edition, and so forth.
Celsius
Celsius Fitness Drinks come in sparkling and non-carbonated varieties and are specially formulated for fueling active lifestyles. The brand's product is clinically studied to boost your metabolism and burn body fat when exercising. Celsius currently has 4 main product lines: classic, Celsius Heat, Celsius BCAA, and Celsius-Stevia. Many of their products are either sugar-free or low-calorie. Their recipes tend to have green tea extract to boost metabolism, guarana seed extract for energy, ginger root for digestion and to increase body heat. It also contains chromium to curb appetite, vitamin C for immune support, and B vitamins for additional energy and metabolic boost.
Related: Getting Started With Collagen: What You Need to Know
Rockstar
Rockstar Energy Drink contains B vitamins and guarana, taurine, and caffeine to help keep you going and stay focused. The company offers a comparatively large variety, with 30 flavors across 8 product sublines: Original, Pure Zero, Punched, Recovery, XDurance, Unplugged, Boom, and Throwback.
Bang
Bang Energy gives you a bang for your buck with 4 main product varieties: classic Bang, Vooz Hydration, Redline, and Meltdown Energy. Of their mainline classic Bang, these drinks are zero-calorie, sugar-free, gluten-free, vegan-friendly, keto-friendly, and have no artificial colors. Bang Energy has a whopping 38 flavors on the market today.
Related: The Best and Worst Keto Drinks
If we were to decide which is our favorite and least favorite, it will be a close race. However, if pressed enough, Red Bull would come out on top and Reign would be our least favorite. Red Bull is straightforward and utilizes an optimal recipe for improving energy, is culturally relevant, and has a decent distinct flavor for an energy drink. Reign seems to be lacking and less available while their presentation is over the top for what it is.
Meal Prep Menu 2023: Week 35
Low Carb Pork Fried Rice Meal Prep
Who loves a good Chinese buffet? We sure do! But sadly, the food at a traditional westernized Chinese buffet can wreak havoc on almost any diet plan.
One heavy meal can yield 1200 calories, 70g of unhealthy fats, 2,300mg of hypertension-inducing sodium, and to put the last nail in the coffin, 300mg of cholesterol. But what if you could skip out on all the unhealthy parts, but still get all the flavor of a meal straight from an all-you-can-eat Chinese buffet?
Well, we're excited to tell you that now you can, with today's meal prep recipe--A low-carb pork fried rice!

But of course, now you may be wondering how it would be possible to to have a low-carb pork fried rice! Well, that's actually quite simple-Cauliflower rice!
Like many low-carb, paleo, Whole30 and keto-compliant recipes with a rice base, this pork fried rice meal prep recipe makes use of the flavor and texture similarities rice has to cauliflower.
It may not look like much, but this vegetable actually boasts a truly impressive list of health benefits, all on its own! For example, a single cup contains almost 80% of recommended daily allowance of vitamin C, 20% of your RDA for vitamin K, 14% of your RDA of folate, and 3g (about 10% of your RDA) of fiber to keep you fuller for longer!

We really love this low-carb pork fried rice meal prep recipe because it gives you options if you follow the keto diet.
While pork is a great high-fat meat, chicken or beef can also be used for even higher fat content! The inclusion of toasted sesame oil also adds fat, while giving this Oriental-influenced dish a nutty, rich flavor profile.
We highly recommend using coconut aminos for flavor as well, for a healthier soy sauce alternative. In fact, beyond having far less sodium than regular soy sauce, coconut aminos actually have a number of impressive health benefits! Not unlike eating other coconut-based products, coconut aminos are fantastic for increasing your HDL (or, "good" cholesterol) levels!

Low Carb Pork Fried Rice Meal Prep Ingredients:
- 2 tablespoons sesame oil
- 2 eggs
- 1 lb pork, sliced thinly
- 2 cups snap peas, ends snapped
- 1 cup carrots, diced
- 1 medium head cauliflower, riced
- ⅓ cup coconut aminos (or more, to taste
- Sea salt, to taste
- Sriracha chili sauce, to taste
- ¼ cup cashews, toasted, optional
- ¼ cup green onions, sliced, optional
One of the healthiest ingredients in this pork fried rice meal prep recipe is the snap peas! Snap peas have half the carbs of regular peas, and are totally rich in dietary fiber, weighing in at 3g per 1 cup serving. That's quite a lot, considering your RDA for fiber is 9-15g (depending on age and body mass)!
Snap peas are also high in vitamin C, folate, iron, and potassium-All of which nutrients are vital to your body function!

This low-carb pork fried rice meal prep recipe makes 4 servings and serves up very well in a standard 1 compartment meal prep container! If you're new to meal prep and need info about your container options, check out our Ultimate Guide to Meal Prep Containers!
Not only will you find information about which types of containers will best suit your needs, but we have included real Amazon customer reviews to help you narrow down your choices.
For more pork-based recipes, check out our delicious Pork Burger Meal Prep (with fried egg!) or this Thai Sweet Chili Pork Tenderloin!


Helpful Guides
- Counting Calories: A Comprehensive Guide to Managing Your Diet Effectively
- Complete Guide: How To Meal Prep
- Your Guide to Portion Control. No Tools Required
- Top 25 Pork Meal Prep Recipes On The Planet
- The Biggest Low-Carb Diet Mistakes You're Probably Making

Ingredients
- 2 tbs sesame oil
- 1 pound pork tenderloin or pork cut of choice
- 2 large eggs
- 2 cups snap peas
- 1 cup Carrots diced
- 1 medium head cauliflower riced
- ⅓ cup Coconut Aminos
- salt & pepper to taste
- sriracha chili sauce to taste
- ¼ cup cashews
- ¼ cup green onion sliced
Instructions
- Rice cauliflower by chopping the cauliflower into small chunks, and adding to a food processor bowl. Be sure not to overfill the food processor bowl. Only fill about ½ way full in order to get evenly chopped cauliflower. Set aside.
- Add 1 tablespoon of sesame oil in a large skillet over high heat. Scramble eggs, and remove from pan when still slightly undercooked.
- Add the other tablespoon of sesame oil to the pan, and add pork, snap peas, and carrots. Stir fry until pork is fully cooked, and season with sea salt and coconut aminos. Remove pork and vegetables from pan and set aside.
- Add riced cauliflower, and stir fry on high heat for 3-5 minutes, until cauliflower is heated through. Be careful not to overcook, or the rice can become watery.
- Once the cauliflower is cooked, add back in the eggs, pork, and vegetables. Stir together, and season with more sea salt, coconut aminos, and chili sauce, if desired.
- Garnish with green onions and cashews.
Notes
Nutrition
Low Carb Sun Dried Tomato Egg Cups
Breakfast is the most important meal of the day. We've all heard that, right? But do you know why it's true? Among better cognitive performance and an increased likelihood of meeting nutrition requirements for the day, research has found that eating breakfast is crucial in keeping your metabolism working optimally.
Though people who skip breakfast might eat fewer calories over time, studies show that they still typically have a higher BMI than those who take the time each morning to have a meal. Enter our GF breakfast recommendation Low Carb Sun Dried Tomato Egg Cups!

Okay, surely we have your attention about why breakfast matters. But if you're anything like us, the question of how breakfast actually happens is probably the real issue here, right?
We can barely be trusted to match our socks or not put our shirts on inside out in the morning, and now we have to cook?! Absolutely not. We needed some solid breakfast meal prep ideas, so we came up with these delicious Low Carb Egg Cups. Your mornings are about to level up.

Gluten-Fee Breakfast Egg Cups
Not only does the cauliflower base give these Low Carb Egg Cups their namesake, but it also adds some pretty eggscellent (too far?) nutritional benefits. 1 cup of cauliflower boasts 77% of your daily Vitamin C needs, 20% of your recommended Vitamin K, and 10% of your daily fiber- all before you've even left your house for the day!
And that's just the cauliflower. Tomatoes are a fantastic source of lycopene and other antioxidants that support macular and cardiovascular health. And because we've used sundried tomatoes in this recipe, you're getting a concentrated and extra-tasty serving of those benefits. You're welcome.
We're all about making sure our meal prep ideas have protein in mind, and these Low Carb Egg Cups are no eggsception ? With 13 grams per Egg Cup, this breakfast is a perfect way to get a little or a lot of protein for the same amount of prep!

Low Carb Sun-Dried Tomato Egg Cups Ingredients:
- 3 cups riced cauliflower
- 3 large eggs
- ½ cup sun-dried tomatoes
- ¾ cup shredded cheese

Related: The Biggest Low-Carb Diet Mistakes You're Probably Making

Helpful Guides
- The Ultimate Guide To Making Egg Cups
- Counting Calories: A Comprehensive Guide to Managing Your Diet Effectively
- Complete Guide: How To Meal Prep
- Your Guide to Portion Control. No Tools Required

References: https://www.rush.edu/health-wellness/discover-health/why-you-should-eat-breakfast
https://www.healthline.com/nutrition/benefits-of-cauliflower#section1
https://healthyeating.sfgate.com/health-benefits-eating-sun-dried-tomatoes-2314.html

Ingredients
- 3 cups riced cauliflower
- 3 large eggs
- ½ cup sun dried tomatoes chopped
- ¾ cup shredded cheese
- salt & pepper to taste
Instructions
- Preheat oven to 350 degrees
- Spray 12 muffin cups with nonstick spray (or coat with oil)
- Mix together all ingredients
- Evenly divide between 12 muffin cups
- Bake for 20-25 minutes or until set
Notes
Nutrition
Air Fryer Baked Apples
Air fryer apples are so delicious. It's a quick and easy way to prepare and serve apples without adding a lot of sugar! Paleo and gluten free!
Consider these air fryer-baked apples something of a super shortcut to the most concentrated experience of all that is wonderful about an apple, without adding a ton of sugar. It's kind of ideal.
If you've ever dehydrated apples before in a food dehydrator or a low oven, you know how delicious they are. But if you've also ever baked apples as a dessert, you know, too, how amazing those are. Especially when they're served with ice cream, some chopped nuts, a drizzle of some kind of sauce or another. Ok, we're getting ahead of ourselves here, but suffice to say, you'll love this dessert. Or maybe it's a snack. It can happily serve as either. Once you use your air fryer to make these baked apples, which are a healthy indulgence, you'll do it again. Think of air fryer apples like a deconstructed apple pie, minus the crust and oh, did we mention, the sugar?
Air Fryer Baked Apples Ingredients

- 1 ½ Tbsp. maple syrup
- 1 Tbsp. melted unsalted butter or coconut oil
- ½ tsp. vanilla extract
- ½ tsp. ground cinnamon
- ¼ tsp. ground ginger
- Large pinch fine sea salt
- 2 medium apples, sliced ½-inch thick (about 3 cups total)
- Nonstick cooking spray
- Greek yogurt and chopped toasted walnuts, optional, for serving
How to Make Air Fryer Apples
Slice your favorite apples (about will work) about a half-inch thick and set aside. You can leave them unpeeled if you like; it adds flavor and nutrition. Toss the apples in some maple syrup, along with the melted butter (or coconut oil), some vanilla extract, and some spices. We like cinnamon and ginger. Pop it all in the air fryer and let it do its magic!

How to Store and Serve Air Fryer Apples
Once these air fryer apples are made, they're best eaten almost immediately, nice and warm. We like them alongside some plain Greek yogurt (or regular yogurt) topped with chopped toasted walnuts (or pecans!). But you do you! If eating this immediately isn't possible, just set them aside in an airtight container. They'll keep for a day or so and it's possible to warm them up briefly again in the air fryer, but as with most air-fried items, savory or sweet, they really are best right out of the fryer. You could go more decadent with this, and serve with vanilla ice cream. We don't judge.

Substitutions and Alterations
This recipe would work with pears, too, or a combination of pears and apples. Depending on how ripe the pears are, they might bake faster, so just keep an eye on the timing if you're experimenting with pears.
You can use any kind of apple you want for these air fryer apples, as long as it's firm and good for baking. Granny Smith would be more tart and less sweet, Pink Lady would be tart-sweet, Fuji apples are always crisp and delicious, and Gala are available all year round. Making these baked apples while apples are in season, or even after you go apple picking, would be even more fun, because you could mix and match different types. Try experimenting with different types of apples and see which ones you like the best.
Use allspice, nutmeg, cardamom, and cloves; all of those spices are great. We recommend any of them! You can even shortcut the whole thing and use apple pie spice. That contains most of the key fall apple baking spices you might want.
We wouldn't recommend switching the maple syrup for honey, without a caveat: honey is sticky! Maple syrup is not. You could, however, use agave nectar instead of maple syrup.
MORE AIR FRYER AND APPLE MAGIC!

Equipment
- 1 Air Fryer
Ingredients
- 1 ½ tablespoon maple syrup
- 1 tablespoon unsalted butter melted, or coconut oil
- ½ teaspoon vanilla extract
- ½ teaspoon ground cinnamon
- ¼ teaspoon ground ginger
- Large pinch sea salt
- 2 medium apples sliced ½-inch thick (about 3 cups total)
- Nonstick cooking spray
- Greek yogurt optional, for serving
- Walnuts toasted and chopped, optional, for serving
Instructions
- In a large bowl, mix together the maple syrup, melted butter, vanilla, spices, and salt.
- Add the apples to the maple syrup mixture and toss well to combine.
- Preheat air fryer to 375°F. Spray the tray of your air fryer with nonstick cooking spray. Add the apples in a single layer (cook in batches if necessary). Cook for 12 to 14 minutes, tossing at least once during cook time, or until tender and golden brown around the edges.
- Serve warm topped with Greek yogurt and walnuts.
Notes
Nutrition
Loaded Lean Beef Burger Bowls - 4 Ways!
These delicious burger bowls have a recipe to fit any craving. Teriyaki is full of tropical Asian flavors with green onion and grilled pineapple. Greek offers chewy farro and herby Mediterranean flavors.
The burrito burger bowl has smoky Mexican flavor, and the cheeseburger bowl is full of classic burger toppings like cheddar cheese and pickles. Each bowl is high in protein from the lean ground beef and contain healthy fats like avocado and Greek yogurt for a balanced meal that satisfies every time!
Thank you to The Kansas Beef Council for sponsoring this Loaded Lean Beef Burger Bowls post, and thank YOU for supporting the brands that help make Meal Prep On Fleek possible. All opinions are our own.

We know what you're probably thinking right now, "But where are the buns? Burgers aren't complete without buns!" Yes, we will never argue the fact that a burger is always delicious when served on a bun, always! But if you're part of our premium group, you know that one of our goals for 2021 was to include more plants in our diet. No, not house plants, plants as in veggies!
Eating more plants in the summertime is usually pretty easy for us because, hello, big salads! But sometimes, we aren't in the mood for a salad and are looking for something more substantial that includes a lean source of protein, carbs, veggies, and heart-healthy fats to carry us through the day. That's where these lean beef burger bowls come into play!
Each bowl contains a serving of grains (carbs), at least two different veggies, sometimes fruit, and a 4 ounce serving of lean beef protein. We went with a lean beef burger in these recipes because burgers just hit different in the summertime!
A 3 oz cooked portion of lean beef (approx. 4 ounces raw) contains 10 essential nutrients and just 170 calories! If you're wondering what type of beef is considered lean, check this out!
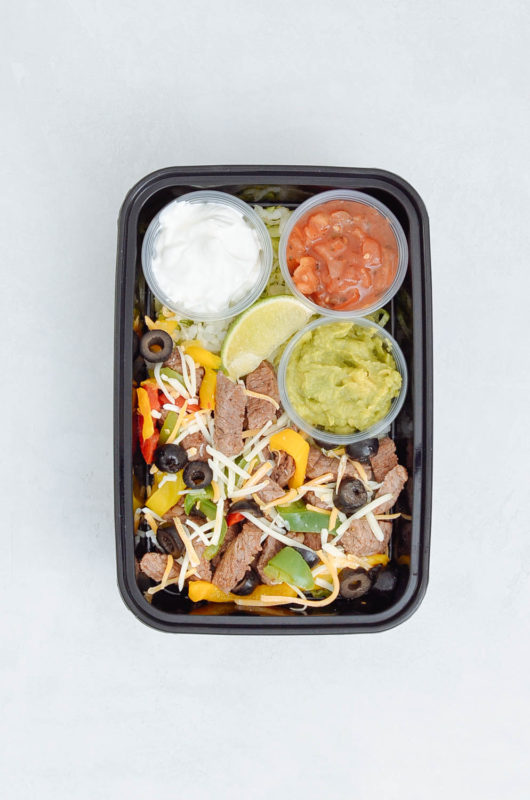
A cut of fresh meat is considered "lean" when it contains less than 10 grams of total fat, 4.5 grams or less of saturated fat, and less than 95 mg of cholesterol per 100 grams (3½ oz) uncooked portion. This amount is equivalent to a 3 oz (85 grams) cooked portion known as the RACC (Reference Amount Customarily Consumed).
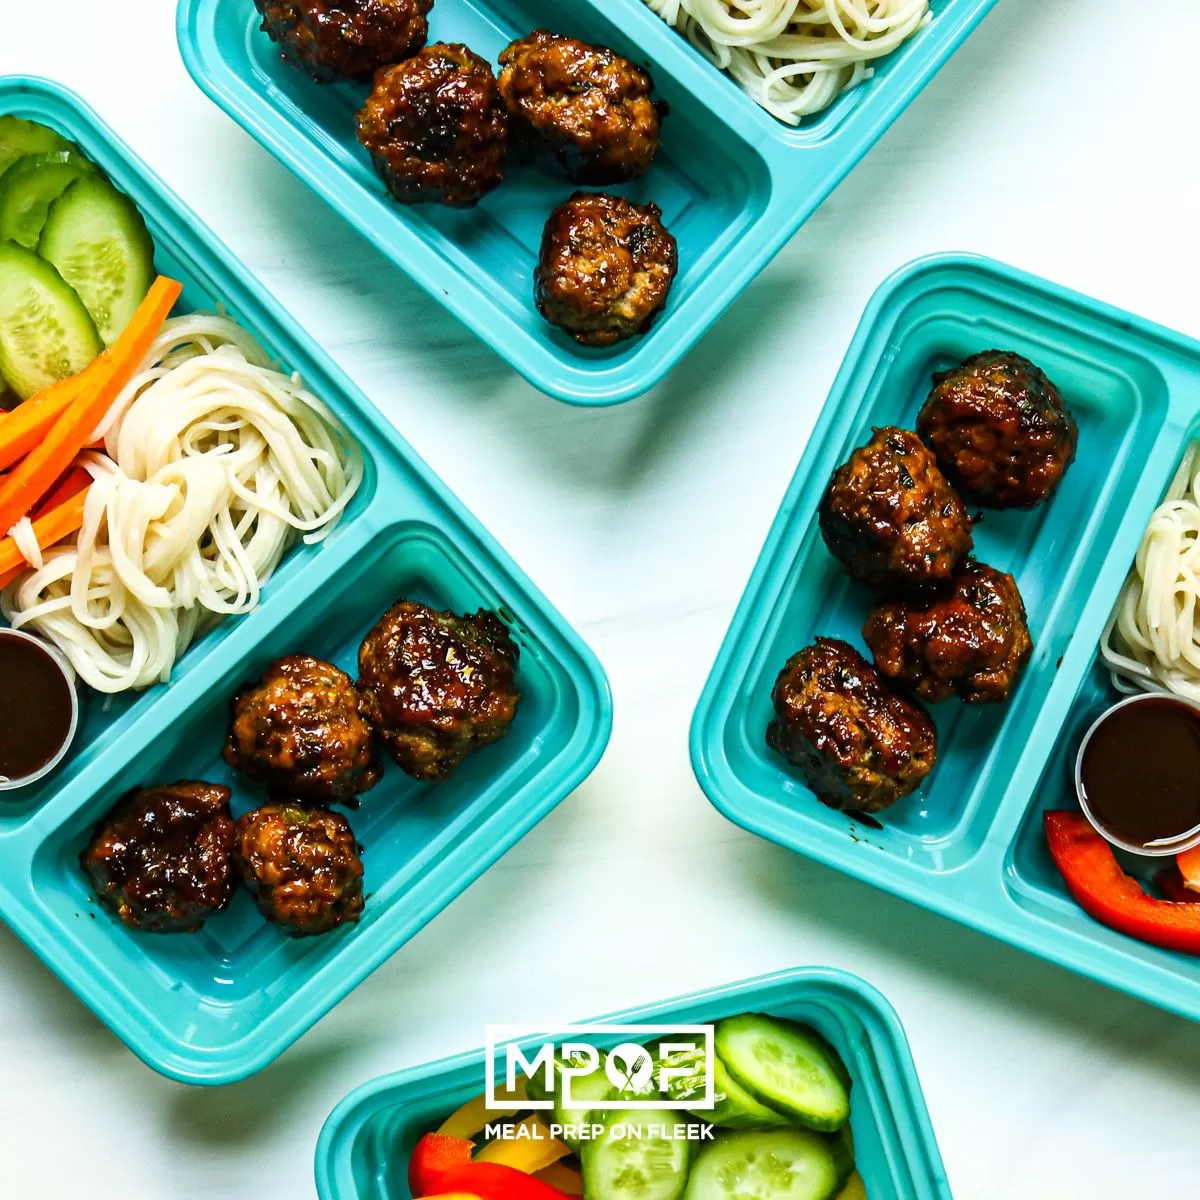
Per 100 grams:
- Less than 10 grams of total fat
- 4.5 grams or less of saturated fat
- Less than 95 mg of cholesterol
In these burger recipes, we used 93% lean ground beef. Buying Ground Beef that's 93% lean (or leaner), provides great flavor and convenience in a lean package.
Other lean beef protein options include:
TOP SIRLOIN STEAK
This versatile steak can be used in a multitude of ways. Whether cubed for kabobs, sliced into strips for stir-fry, or grilled straight up as a steak, you can count on Top Sirloin for good value and great flavor.
STRIP STEAK (TOP LOIN STEAK)
With nicknames like New York Strip or Kansas City Steak, you've probably enjoyed a Strip Steak at home or at a restaurant! Delicious beefy taste and lots of mealtime versatility make this cut a popular choice!
TENDERLOIN STEAK
There's a good reason it's called the Tenderloin. This steak ranks as the #1 most tender! It has a delicate beef flavor that can't be beaten!
So, when you go bold and make recipes like these burger bowls that contain lean beef and several plants, you are getting the health benefits from both! You're getting the 10 essential nutrients, including protein, zinc, iron, and B vitamins that support a heart-healthy lifestyle from the beef, plus fiber, vitamins, minerals, antioxidants, and lots of textures from the fruits and veggies! It's a combination that wins every time!
So, whether you're a carnivore who is trying to include more plants in their diet or someone who is looking for alternative ways to add more lean protein to their weekly menu, these lean beef burger bowls, with FOUR options, are the best place to start!

Here's to enjoying the best flavors of summer burgers all year long in a balanced and nutritious way! Let's dive into the recipes! Each recipe below serves four. Feel free to make half of two recipes one week or rotate through the recipes by week. Heck, you can also turn these lean beef burger bowls into a "build your own" bowl station at your next summer BBQ and give your guests endless options for creating something they like! Plus, you'd be teaching them about building a better-for-you lean beef + plant-based meal. We will take that as a win any day!
The Greek Burger Bowl

INGREDIENTS:
For Burgers
- 1 lb. 93% lean ground beef
- ¼ cup finely chopped white onion
- 2 tablespoon finely chopped fresh mint
- 1 teaspoon sea salt
- 1 teaspoon dried oregano
- ½ tsp dried dill
- ½ tsp garlic powder
- ½ tsp black pepper
For Serving
- 1 cup grape tomatoes, halved
- 1 cup cucumber, peeled and chopped
- ½ cup chopped parsley
- 2 cups uncooked farro, cooked according to package directions
- 1 pita, toasted and sliced into 8 wedges
- ½ cup Greek yogurt
- 2 tablespoon lemon juice
- ½ tsp sea salt
- ⅛ teaspoon cracked pepper

The Burrito Burger Bowl

INGREDIENTS:
For Burgers
- 1 lb. 93% lean ground beef
- 1 tablespoon cumin
- 2 teaspoon chili powder
- 1 teaspoon dried oregano
- 1 teaspoon sea salt
For Serving
- 1 ½ cups uncooked instant brown rice, cooked according to package directions
- 1 cup pico de gallo
- ½ cup prepared guacamole
- 1 cup drained black beans
- ½ cup salsa

The Teriyaki Burger Bowl

INGREDIENTS:
For Burgers
- 1 lb. 93% lean ground beef
- ¼ cup teriyaki sauce
- ¼ cup minced green onion
For Serving
- 1 ½ cups uncooked instant white or jasmine rice, cooked according to package directions
- 1 tablespoon olive oil
- 8 pineapple slices
- 1 cup coarsely chopped red onion
- 2 cups chopped leafy lettuce
- ¼ cup chopped cashews
- ½ cup teriyaki sauce

The Deconstructed Cheeseburger Bowl

INGREDIENTS:
For Burgers
- 1 lb. ground beef
- ¼ cup Worcestershire sauce
- 1 teaspoon paprika
- ½ teaspoon mustard powder
- ½ teaspoon onion powder
- ½ teaspoon black pepper
For Serving
- 1 ½ cups uncooked quinoa, cooked according to package directions
- 2 cups shredded lettuce
- 1 cup chopped tomato
- ½ cup shredded cheddar cheese
- ¼ cup sliced pickles
- ½ a medium avocado, sliced
- ⅓ cup Dijon mustard
- 2 tablespoon honey

Try these Burger Bowls:
- Green and Hot Bison Burger Bowl
- Yummy Bacon Burger Bowls
- Sheet Pan Salmon Burgers
- Meal Prep Burger Bowl With Shake Shack Sauce

Ingredients
Greek Burger Bowl
For Burgers
- 1 lb. ground beef 93% lean
- ¼ cup white onion finely chopped
- 2 tablespoon fresh mint finely chopped
- 1 teaspoon sea salt
- 1 teaspoon dried oregano
- ½ teaspoon dried dill
- ½ teaspoon garlic powder
- ½ teaspoon black pepper
For Serving
- 1 cup grape tomatoes halved
- 1 cup cucumber peeled and chopped
- ½ cup parsley chopped
- 2 cups farro cooked according to package directions
- 1 pita toasted and sliced into 8 wedges
- ½ cup Greek yogurt
- 2 tablespoon lemon juice
- ½ teaspoon sea salt
- ⅛ teaspoon cracked pepper
Burrito Burger Bowl
For Burgers
- 1 lb. ground beef 93% lean
- 1 tablespoon cumin
- 2 teaspoon chili powder
- 1 teaspoon dried oregano
- 1 teaspoon sea salt
For Serving
- 1 ½ cups uncooked instant brown rice cooked according to package directions
- 1 cup pico de gallo
- ½ cup prepared guacamole
- 1 cup drained black beans
- ½ cup salsa
Teriyaki Burger Bowl
For Burgers
- 1 lb. 93% lean ground beef
- ¼ cup teriyaki sauce
- ¼ cup minced green onion
For Serving
- 1 ½ cups uncooked instant white or jasmine rice cooked according to package directions
- 1 tablespoon olive oil
- 8 pineapple slices
- 1 cup coarsely chopped red onion
- 2 cups chopped leafy lettuce
- ¼ cup chopped cashews
- ½ cup teriyaki sauce
Deconstructed Cheeseburger Bowl
For Burgers
- 1 lb. 93% lean ground beef
- ¼ cup Worcestershire sauce
- 1 teaspoon paprika
- ½ teaspoon mustard powder
- ½ teaspoon onion powder
- ½ teaspoon black pepper
For Serving
- 1 ½ cups uncooked quinoa cooked according to package directions
- 2 cups shredded lettuce
- 1 cup chopped tomato
- ½ cup shredded cheddar cheese
- ¼ cup sliced pickles
- ½ medium avocado sliced
- ⅓ cup Dijon mustard
- 2 tablespoon honey
Instructions
Greek Burger Bowl
- Combine ingredients for burgers in a medium mixing bowl and mix well. Divide into 4 equal burger patties.
- Heat grill or grill pan over medium-high heat and grease with cooking spray. Cook burgers for 7-8 minutes, turning halfway through cooking. Cook until an internal temperature of 160 degrees.
- Stir together yogurt, lemon juice, salt and pepper. Divide sauce between small sauce cups.
- Divide cooked farro between 4 meal prep containers. Top each with 1 burger patty, cucumber, tomato, parsley and 2 pita wedges.
Burrito Burger Bowl
- Combine ingredients for burgers in a medium mixing bowl and mix well. Divide into 4 equal burger patties.
- Heat grill or grill pan over medium-high heat and grease with cooking spray. Cook burgers for 7-8 minutes, turning halfway through cooking. Cook until an internal temperature of 160 degrees.
- Divide cooked brown rice between 4 meal prep containers. Top each with a burger patty, pico de gallo, guacamole and black beans. Divide salsa between 4 small sauce cups.
Teriyaki Burger Bowl
- Combine ingredients for burgers in a medium mixing bowl and mix well. Divide into 4 equal burger patties.
- Heat grill or grill pan over medium-high heat and grease with cooking spray. Cook burgers for 7-8 minutes, turning halfway through cooking. Cook until an internal temperature of 160 degrees.
- Remove burgers from grill. Drizzle pineapple and red onion with olive oil and place on grill. Grill for 3-4 minutes on each side.
- Divide cooked rice between 4 meal prep containers. Top each with a burger patty. Add pineapple slices, red onion, lettuce and cashews. Divide teriyaki sauce between small sauce cups.
Deconstructed Cheeseburger Bowl
- Combine ingredients for burgers in a medium mixing bowl and mix well. Divide into 4 equal burger patties.
- Heat grill or grill pan over medium-high heat and grease with cooking spray. Cook burgers for 7-8 minutes, turning halfway through cooking. Cook until an internal temperature of 160 degrees.
- Divide quinoa between 4 meal prep containers. Top each with a burger patty. Add lettuce, tomato, shredded cheese, sliced pickles, and sliced avocado.
- Stir together honey and mustard in a small bowl and divide between 4 small sauce cups.
Notes

5 Best Sparkling Beverages of 2023
With summer right around the corner, many people are looking for refreshing drinks that don't add a lot of sugar or calories. There's no shortage of fun drinks these days. You may have noticed the beverage category has kind of exploded in growth in recent years. Many of them are naturally flavored, and don't have sodium or calories. Some even come with added health benefits such as probiotics. Others add a smidge of fruit juice for flavor without added sugar. Soda waters, or seltzer, or sparkling water (all same!) are versatile. You can drink them by themselves, mixed in cocktails, or blended in with other teas and fruits. They're a fun and creative way to cool off in the summer. Here are five of our favorite sparkling beverages, from sodas to waters and in between.
Olipop
So Olipop isn't soda water per se, but a full-fledged soda! Olipop originated in Oakland, California, as a low-calorie soda water with prebiotics, plant fiber, and botanical extracts that support digestive health. Olipop's vibe is retro, colorful, and healthy; you'd never "taste" that it was healthy, nor would you miss the sugar! The sodas are non-GMO, vegan, gluten-free, paleo, and keto-friendly. Currently, Olipop comes in 14 very fun flavors that include classics such as root beer, vintage cola, cream soda, grape, and orange, among many other fun seasonals. The brand also offers some seasonal faves, too.
Poppi
Poppi originated in Dallas, Texas, and is a unique sparkling beverage that combines fresh fruit juices with apple cider vinegar (ACV). You might think it's astringent, but it's not. These soda waters lead with fruit (and other) flavors instead of the acidity of the vinegar. This brand was further popularized after making a deal on the tv show Shark Tank. Poppi currently comes in 10 exciting flavors: grape, strawberry lemon, orange, cherry limeade, ginger lime, raspberry rose, watermelon, classic cola, doc pop, and root beer.
Related: The Best and Worst Keto Drinks
Topo Chico
This sparkling water is highly coveted and not always easy to find. That has changed somewhat since its acquisition by Coca-Cola several years ago. Topo Chico originated in 1895 in Mexico as sparkling mineral water. The brand offers two main product lines, i.e. classic sparkling mineral water, and sabores. The latter combines the classic sparkling water with real fruit juices and herbs. Of the classic sparkling water products, Topo Chico offers 4 flavors: plain, lime twist, grapefruit twist, and tangerine twist. From their sabores line, Topo Chico offers 3 flavors: tangerine ginger, blueberry hibiscus, and lime mint.
Zevia
Zevia originated in Los Angeles, California, with a vision to help people reduce sugar consumption by sweetening their drinks with stevia. The brand offers more than just soda water, but for this piece let's stick to those. Their zero-calorie soda waters come in 18 varieties. These are all over the map, from cream, ginger ale orange cream, to cherry cola, orange, and lemon-lime, among many others.
Related: Simple Ways to Get More and Better Sleep
La Croix
La Croix, pronounced "la croy" as in "Enjoy La Croix," originated in LaCrosse, Wisconsin. These sparkling waters are wildly popular, thanks to their creative flavors, and the fact that they have no calories, sodium, or artificial ingredients. These sparkling waters come in an array of several dozen flavors that include all manner of fruits. Some of their fun and sought-after flavors also include those directly inspired by beverages such as coffee, mojito, and limoncello, for example.
Read Next: The 5 Best Things to Eat or Drink After a Workout
If we were to say which sparkling waters are our favorites and which are our least favorites, we'd say La Croix still reigns supreme while Zevia is our least favorite. La Croix does not use any sweeteners, and they offer a wide range of fantastic thirst-quenching flavors. Whereas Zevia, on the other hand, uses stevia. The theory behind stevia is amazing: to provide sweetness without the risks of artificial sweeteners or simplified sugars, but there is still a lingering taste after every sip. Maybe one day it will be improved, we are not giving up hope on stevia or Zevia.
Meal Prep Menu 2023: Week 34
Meal Prep Menu 2023: Week 34! Bring on the planning and break out your pots and pans, we've got what you need to make this week's healthy meal preps a breeze!
Get your weekly meal prep recipes finished in no time flat with 2023: Week 34's delicious and easy meal prep menu. Lemon Poppyseed Oatmeal Bars make for a fiber-filled and very tasty breakfast bar (or snack bar!) on the go. Have you ever worked with watercress? It's got some pep to it, and paired with feta cheese and stuffed in flank steak, it's so good. Snack time means old-school vibes, done new again, with a Zesty Chex Mix, and our other dinner prep is a Whole30 Buffalo Chicken Casserole.
Every recipe requires fresh, whole ingredients-just the way we like it-and can be customized to fit your dietary needs.
Our weekly meal prep menus are the perfect solution for busy individuals looking to eat healthy, delicious meals without the hassle of cooking every day. Every week, we offer a selection of nourishing dishes made with fresh, whole ingredients for healthy meal preps. Each menu targets the 1800-2000 calorie range.
NOTE: Meal Prep Menu 2023: week 34 is designed to give you ideas. We aren't about to tell you how many calories you should consume every day. (In fact, we don't really like the word "should.") Please calculate your macros HERE and then adjust the menu items' portion sizes as needed.
This week's recipes:
- Lemon Poppyseed Oatmeal Bars
- Buffalo Chicken Casserole
- Watercress & Feta Stuffed Flank Steak
- Zesty Chex Mix
Don't forget to leave a comment on each recipe to let us know how you liked them! We love seeing your photos in the Meal Prep Facebook group too!
How to customize:
- Lemon Poppyseed Oatmeal Bars
- Use a sugar of your choice instead of the monk fruit sweetener.
- Buffalo Chicken Casserole
- Make this recipe vegan by using plant-based chicken, dairy-free butter, and JustEgg.
- Watercress & Feta Stuffed Flank Steak
- Swap the flank steak for tofu and the feta for a dairy-free version to make this vegan.
- Use chicken or turkey instead of flank steak.
- If you don't like watercress, spinach or baby kale would also work.
- Zesty Chex Mix
- Use dairy-free butter and non-dairy powdered milk to make this vegan.
- Out of Chex Mix? Use any combination of cereal and nuts instead.
If you have any questions or need ideas for alternate swaps, head over to our Facebook Group to ask or email me at [email protected]!
How to alter the macros:
- Lemon Poppyseed Oatmeal Bars
- To reduce the carbs and fat, cut bars into a smaller size. Unfortunately, the recipe can't be altered.
- Buffalo Chicken Casserole
- Increase the carbs by adding fruit to the side.
- Increase the protein by adding a few whole eggs.
- Watercress & Feta Stuffed Flank Steak
- Reduce the fat by using chicken or turkey instead of the flank steak.
- Zesty Chex Mix
- Reduce the fat by using fewer nuts.
- Increase the protein by adding a diced beef stick.
*Please note that any changes to ingredients will alter the macros on each recipe.
One Pot Southwestern Meal Prep
Looking for a delicious and efficient way to meal prep for the week? This Southwestern Meal Prep is a perfect solution! Combining juicy steak, flavorful Hatch chile salsa, and a hearty mix of rice, corn, and beans, this one-pot wonder is not only tasty but also incredibly easy to make. With the added creaminess of fresh avocado, this meal prep is sure to become a favorite. Let's dive into how you can whip up this Southwestern-inspired dish in no time!
Ingredients:
- 1 tablespoon olive oil
- 1 lb steak, sliced
- 1 cup Hatch Chile salsa
- 2 cups cooked brown rice
- 1 ½ cups frozen corn (or fresh if in season)
- 15 oz steamed kidney beans
- 1 avocado, diced

How to Store:
- Store the meal prep containers in the refrigerator for up to 4 days. Make sure the lids are tightly sealed to keep everything fresh. If you plan to store the meals for longer, you can freeze them for up to a month. Just leave out the avocado when freezing and add it fresh when you're ready to eat.
How to Reheat:
- To reheat, simply microwave each container for 1-2 minutes, or until the meal is warmed through. If reheating from frozen, allow the meal to thaw overnight in the refrigerator before microwaving. For the best results, add the avocado after reheating to maintain its creamy texture.
This Southwestern Meal Prep with steak, rice, corn, Hatch chiles, and beans is a fantastic way to enjoy a hearty, flavorful meal without spending hours in the kitchen. With everything cooked in one pot, cleanup is a breeze, and you get a balanced meal packed with protein, fiber, and healthy fats. Perfect for busy weeknights or a satisfying lunch, this meal prep will keep you coming back for more.
Ready to spice up your meal prep game? Try this Southwestern Meal Prep recipe and share your creations with us! Use the hashtag #MealPrepOnFleek on social media to show off your delicious dishes and inspire others to enjoy easy, flavorful meals. Happy cooking!

Ingredients
- 1 lbs steak sliced
- 1 cup Hatch Chile salsa
- 2 cups Brown Rice cooked
- 1.5 cup Frozen corn
- 15 oz Steamed Kidney Beans
- 1 ea Avocado diced
- 1 tbs olive oil
Instructions
- Heat olive oil in skillet over medium heat
- When oil is hot add in sliced steak strips
- Saute steak until cooked half way through (about 3 minutes per side)
- Add in hatch chili salsa, brown rice, corn and kidney beans
- Mix
- Cover and cook for 5 minutes
- Mix again
- Cover and cook an additional 5 minutes or until bubbling
- Evenly divide between meal prep containers
- Finish off with diced avocado, if desired
Video
Nutrition
Sheet Pan Salmon with Capers and Broccolini Pasta
Sheet Pan Salmon with Capers and Broccolini Pasta is loaded with protein and great flavors. This is easy meal prep is one you'll want again and again!
We know and love sheet pan salmon meal preps around here. That's a fact. But have you had broccolini or capers? Let's stop for a moment because once you learn about these ingredients you'll find fun ways to use them-with or without salmon!
Capers are actually caper berries, and they're technically an unripened flower bud from a prickly plant that grows in the Mediterranean and parts of Asia called capparis spinosa. You typically find them in jars and they add a slightly tart and salty taste, similar to pickles. They pack a punch, flavor-wise; you only need a little bit to make an impact on a dish and, like salt or other pickled items, it's very easy to go overboard!
And broccolini? Well, it's kind of like baby broccoli. That's the shortest answer. The stalks are not as thick and fibrous as broccoli so you can eat the whole thing.
Sheet Pan Salmon with Capers and Broccolini Pasta Ingredients

For the Salmon, Broccolini and Pasta
- 4 fillets salmon about 1 to ½ pounds
- 1 bunch broccolini
- 2 tbsp olive oil
- Kosher salt to taste
- Black pepper to taste
- 1 lemon juice and zest
- 8 ounces pasta any kind
For the Caper Cream Sauce
- 3 cloves garlic minced
- 2 tbsp capers
- 2 tbsp coconut aminos
- 1 cup low-sodium chicken broth
- 1 ½ cups heavy cream
How to Make Sheet Pan Salmon with Capers and Broccolini Pasta
Oh, we love a good sheet pan meal around here!
To start this dish off, grab your sheet pan and preheat the oven to 425 F. Arrange the salmon filets and broccolini on the sheet pan and brush with olive oil. Sprinkle the tops with salt and pepper. Pop it in the oven and while it cooks, start the pasta.
Cook the pappardelle (or pasta of choice) in salted boiling water until al dente. While all that's happening, you can start the sauce, which is basically garlic cloves, heavy cream, capers, chicken broth, coconut aminos (for that inexplicable umami taste) and, of course, heavy cream. All of that makes a really flavorful sauce that reduces over medium-low heat. Then, all you need to do is portion out the pasta, topped with the cream sauce, salmon, and broccolini, into four containers, and you're good to go.
How to Store and Serve Sheet Pan Salmon

Well, four days in the fridge will work for this salmon meal prep. This is pretty much a complete meal but if you feel so inclined a salad would taste great alongside this dish. We also like some crusty bread to sop up bits of that creamy sauce. But you can serve it just like this, no questions asked!
Store this in the fridge until you're ready to eat. You can heat it up in the oven, covered, or in the microwave. It's your call. We wouldn't recommend freezing the pasta and sauce, but you could freeze the salmon and broccolini with no problem at all. Pasta with cream sauce doesn't necessarily reheat well from frozen.
Substitutions and Alterations
If you can't find broccolini use regular broccoli instead. About a pound of broccoli should do it, given the amount of other ingredients. You could also use cauliflower or a combination of both.
We wouldn't eliminate the lemon or the capers, but if you're out of capers or can't find them, you could add some very finely chopped green olives to the sauce instead.
Feel free to use garlic or onion powder if you're out of garlic. Swap out the pappardelle or other pasta for something like rice. Brown, white, or cauliflower rice would work, too, and it would take about as much time as pasta to cook, maybe a little longer. It wouldn't add too much to the workload.
MORE SHEET PAN AND SALMON DINNERS TO LOVE!
- Simple Low Carb Salmon Meal Prep
- Sheet Pan Salmon and Veggies Meal Prep
- Sheet Pan Salmon Fajitas Meal Prep

Ingredients
- 4 fillets salmon about 1 to ½ pounds
- 1 bunch broccolini
- 2 tablespoon olive oil
- Kosher salt to taste
- Black pepper to taste
- 1 lemon juice and zest
- 8 ounces pasta any kind
For the Caper Cream Sauce
- 3 cloves garlic minced
- 2 tablespoon capers
- 2 tablespoon coconut aminos
- 1 cup low-sodium chicken broth
- 1 ½ cups heavy cream
Instructions
- Heat oven to 425 F.
- Arrange salmon filets and broccolini on a sheet pan. Brush the salmon with olive oil and toss with broccolini to coat.
- Zest the lemon right over the salmon and broccolini. Season with salt and pepper. Drizzle the lemon juice over the top and bake for 20 minutes.
- While salmon is baking, cook the pasta according to package directions. Drain and set aside.
- Combine all sauce ingredients in a saucepan over medium-low heat. Stir occasionally and reduce the liquid by half.
- Divide the cooked pasta among 4 meal prep containers and cover with the sauce. Top with salmon filets and broccolini. Store in the refrigerator for up to 4 days.
Nutrition
- « Previous Page
- 1
- …
- 8
- 9
- 10
- 11
- 12
- …
- 30
- Next Page »