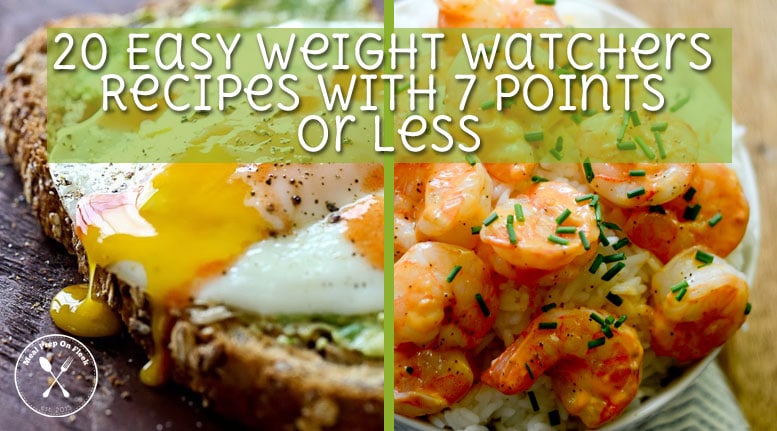
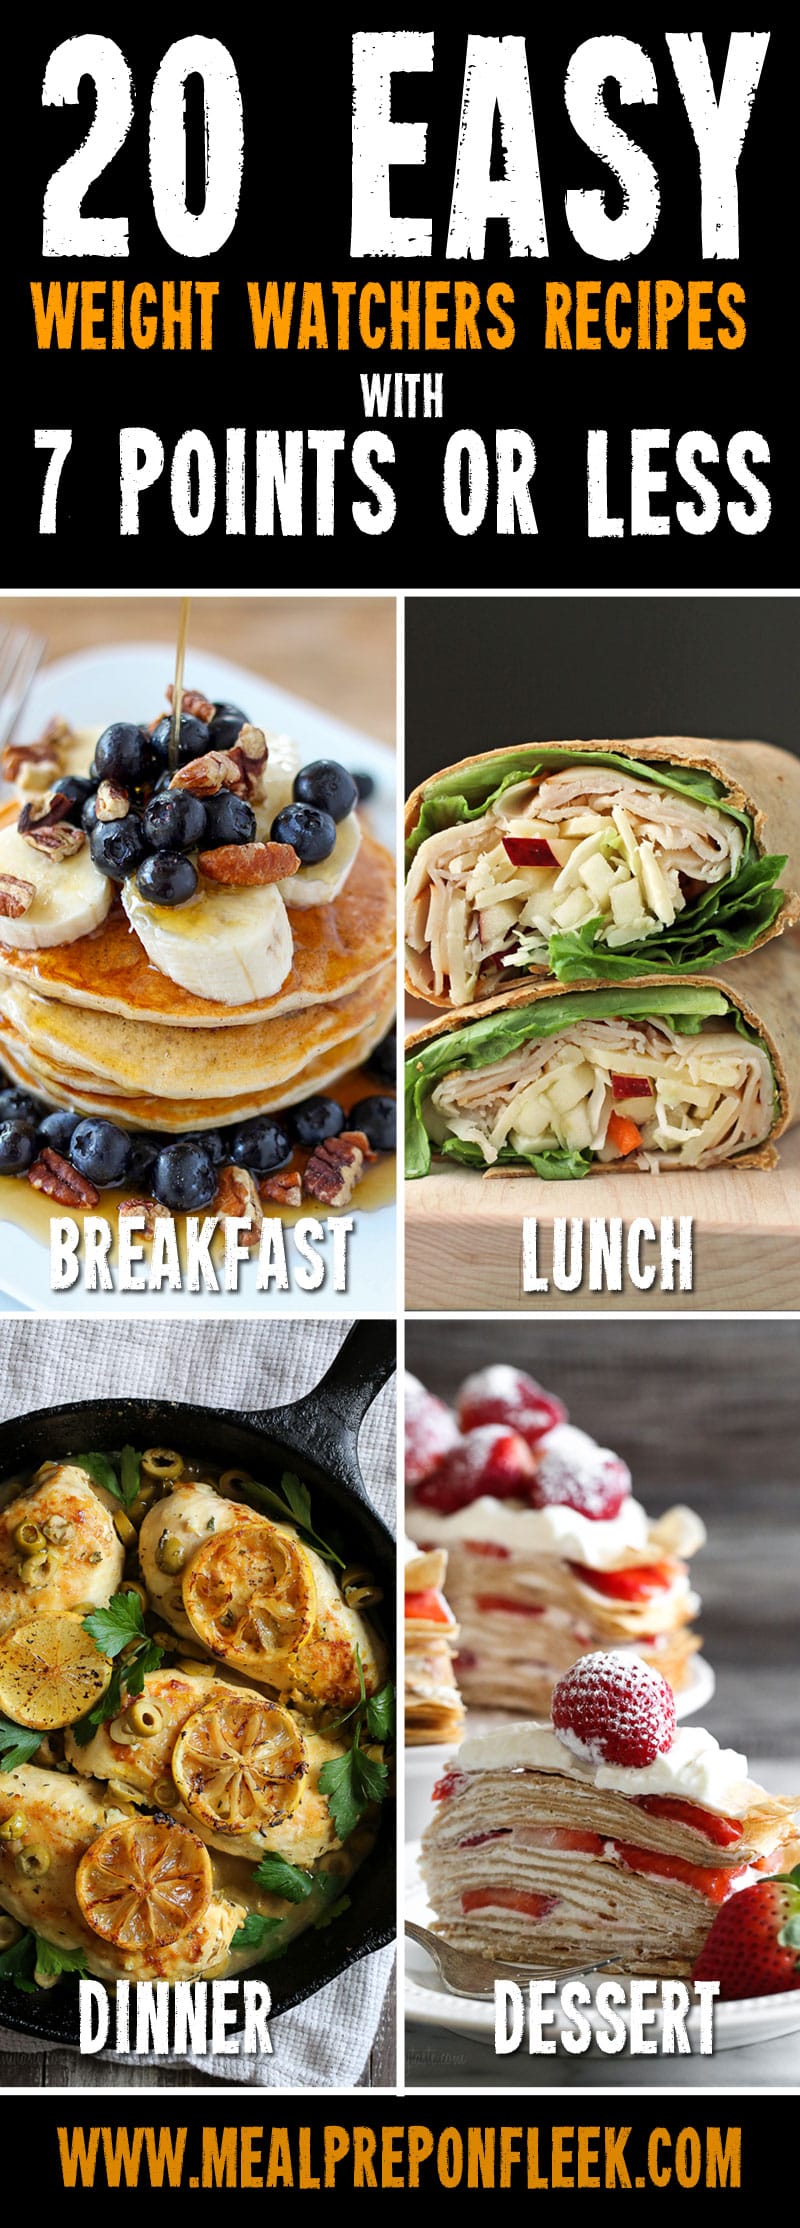
Losing weight doesn't mean you have to live a life full of bland chicken and broccoli every day. You can enjoy all of the foods you love like avocado and egg toast, pancakes, shrimp spring rolls, and mouth-watering chocolate cake with these 20 Easy Weight Watchers Recipes With 7 Points Or Less.
From filling breakfast recipes to easy to prep lunches and family-friendly weeknight meals, we've got all the inspiration you need to make eating (and losing weight) healthy and delicious! And don't worry, we didn't forget about dessert!
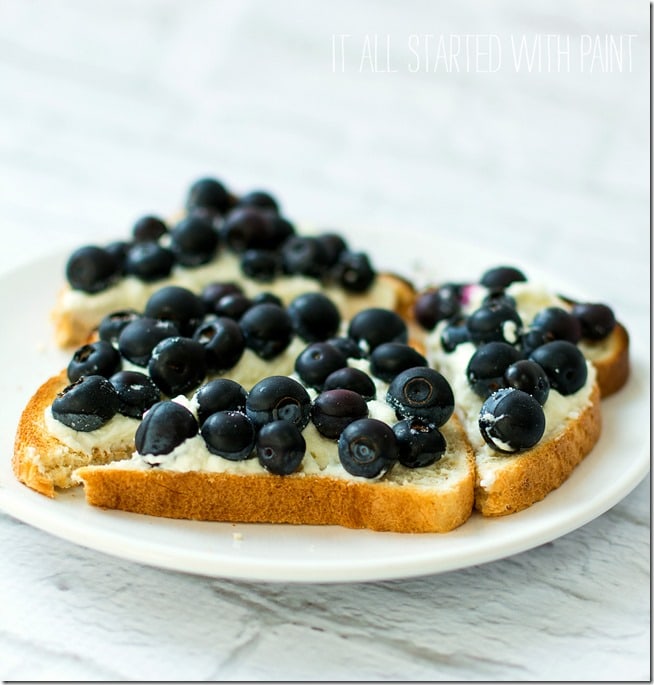
Blueberry Cheese Danish (6 points)
Avocado Toast With Sunny Side Up Egg (6 points)

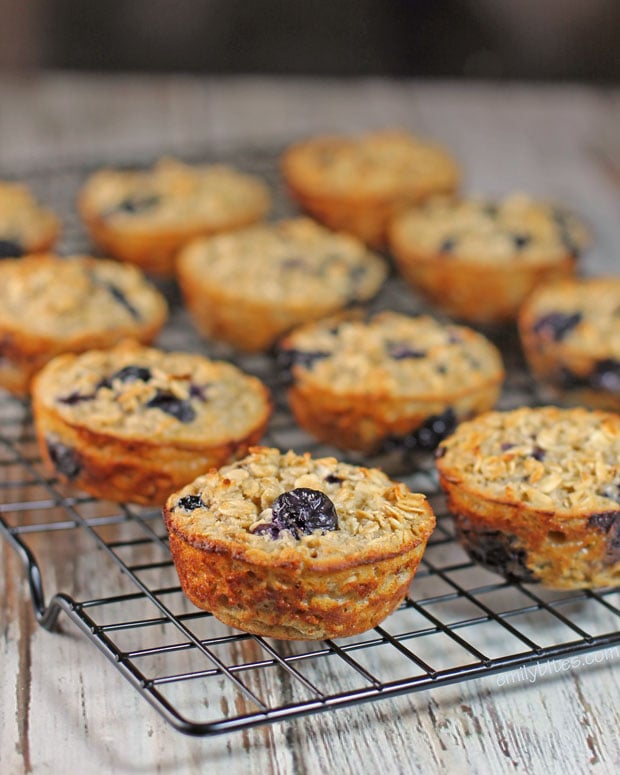
Blueberry Baked Oatmeal Singles (3 points)
Skinny One Point Pancakes (1 point)

Breakfast Burrito Bowl (5 points)


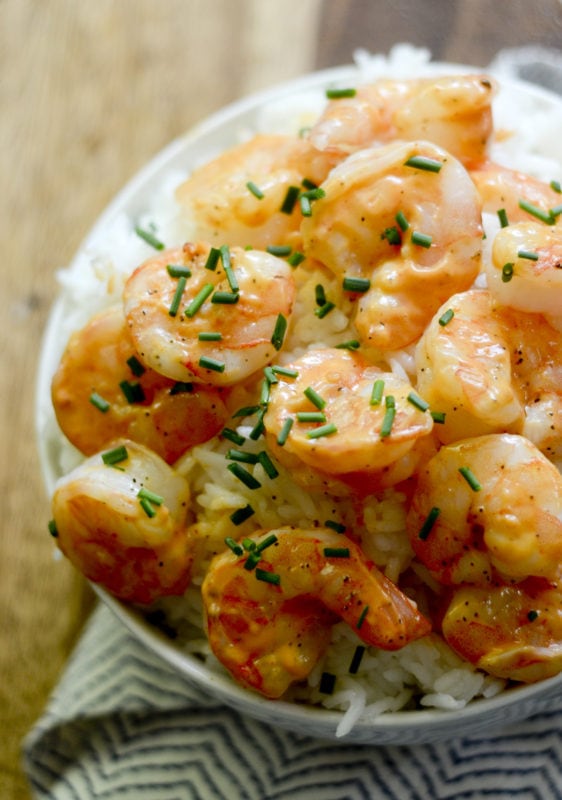
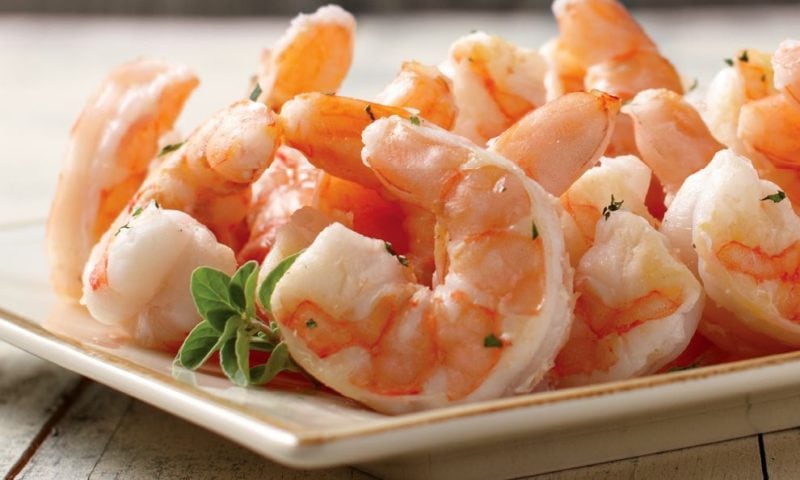
Skinny Bang Bang Shrimp (4 points)
Shrimp Summer Rolls (4 points)

Thai Chicken Skewers With Peanut Sauce (5 points)

Apple Cheddar Turkey Wrap (7 points)

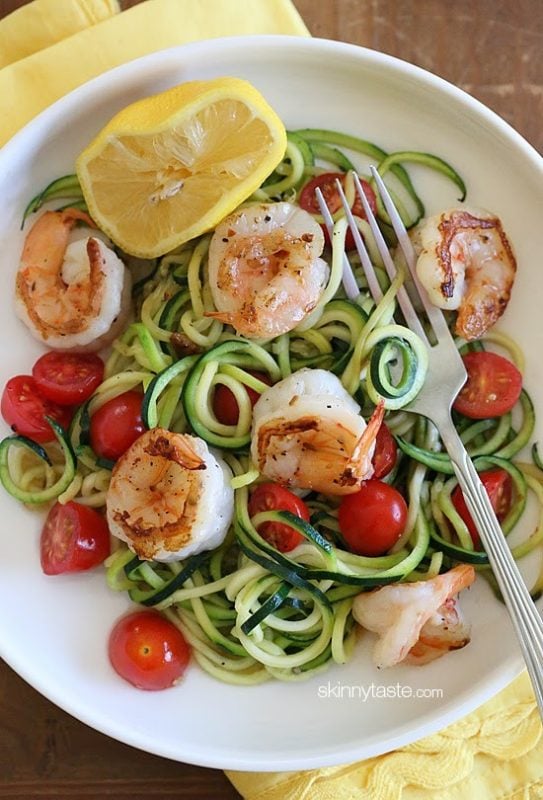
Zucchini Noodles With Lemon Garlic Shrimp (6 points)
Veggie Loaded Mac & Cheese (6 points)

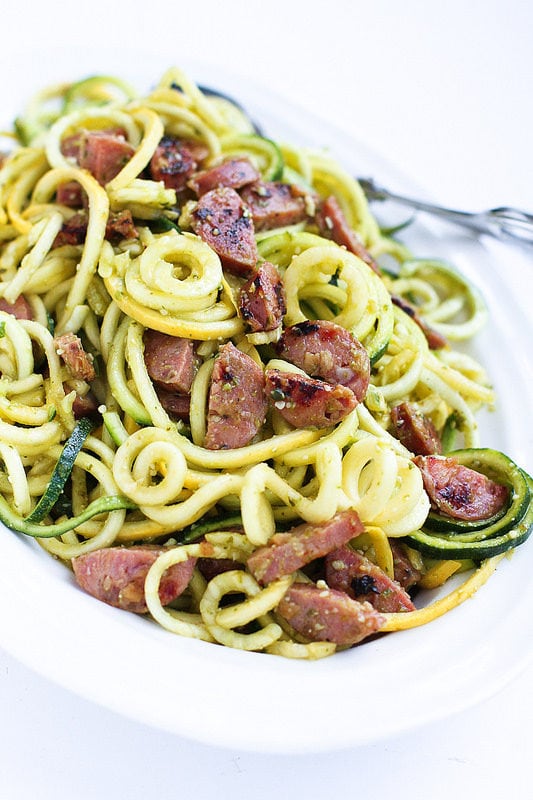
Pesto Zucchini Noodles & Sausage (5 points)
Chicken Taco Casserole (6 points)

Teriyaki Chicken & Rice Casserole (7 points)

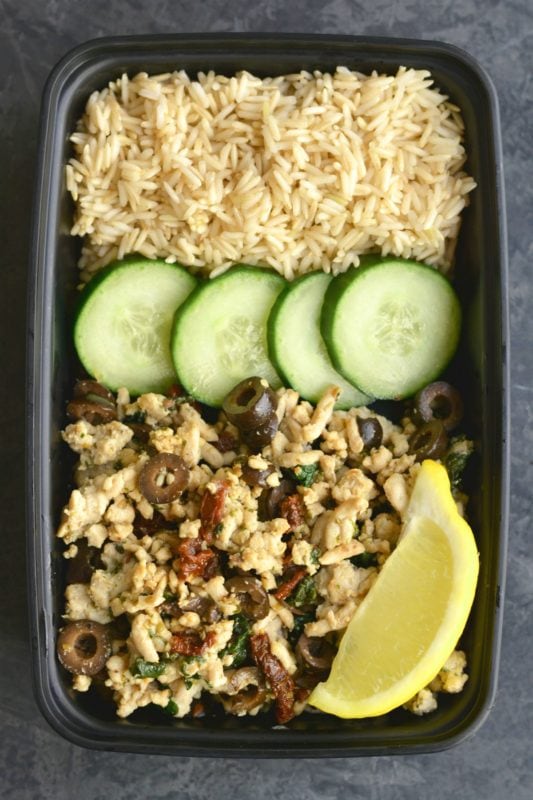
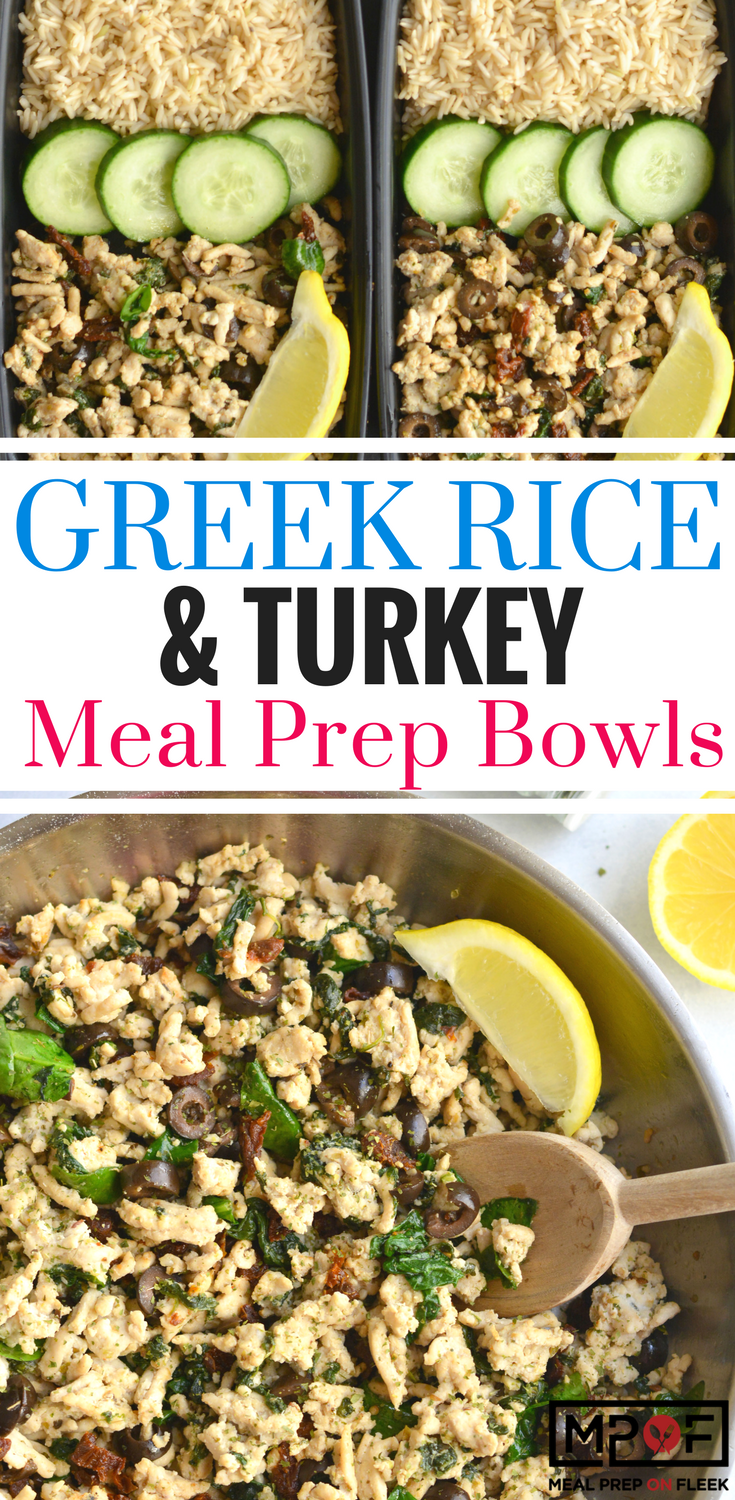
Skillet Lemon Chicken With Olives & Herbs (7 points)

Skinny Cake Batter Blondie (7 points)

Strawberries and Cream Crepe Cake (7 points)

Single Serve Chocolate Chip Gingerbread Mug Cake (5 points)

Lowfat Chocolate Mug Cake (3 points)

Mixed Berry Tartlets (5 points)

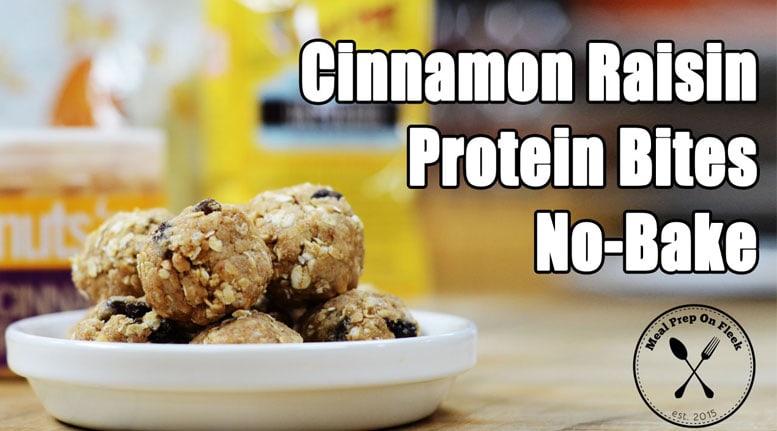
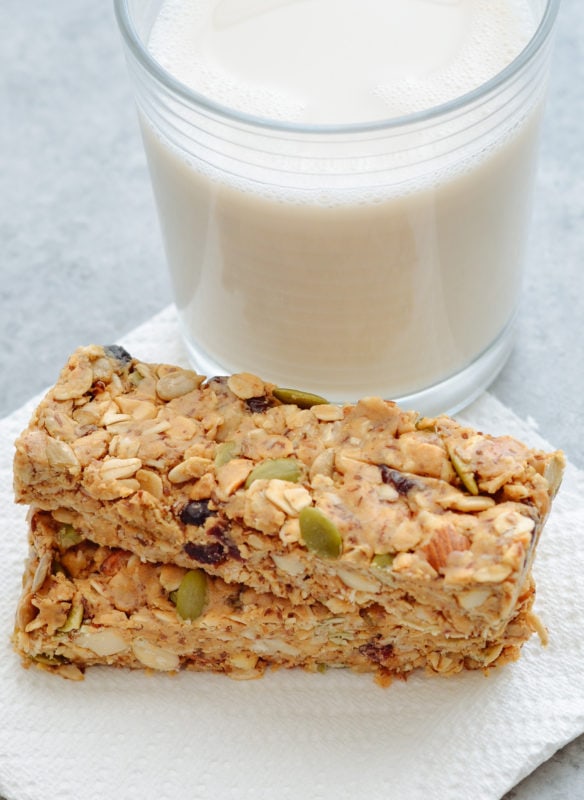
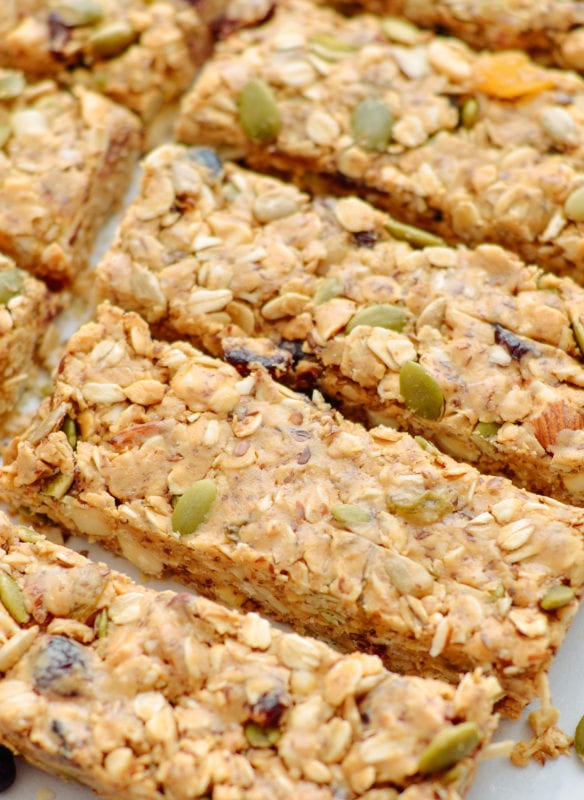
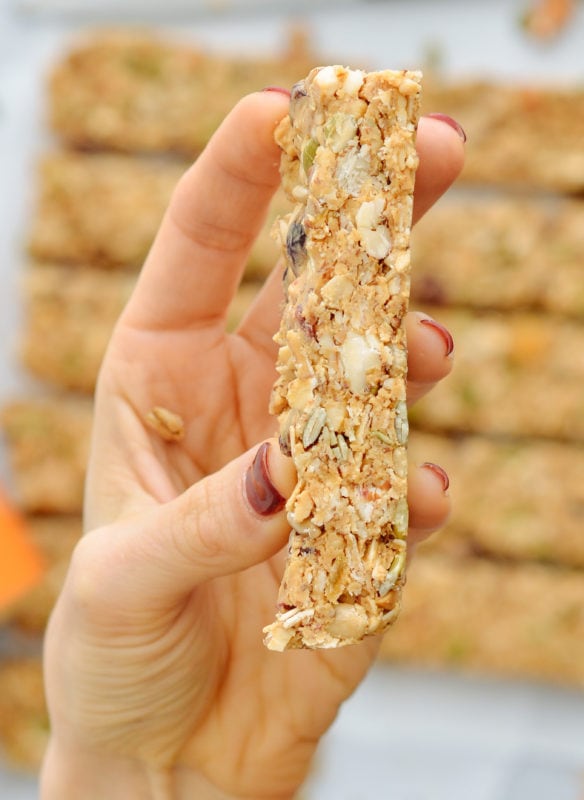
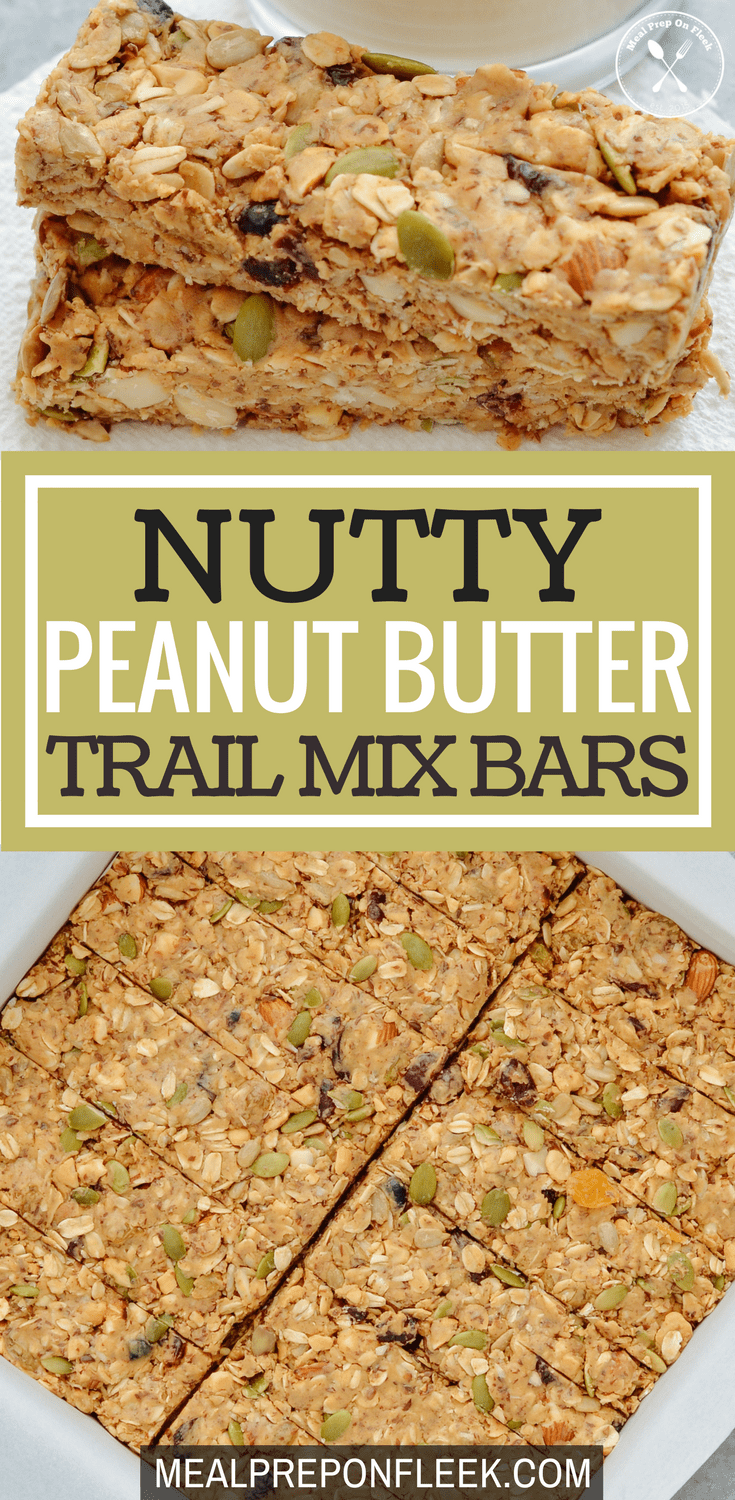
Nutty Peanut Butter Trail Mix Bars are a combination of high-protein peanut butter, dried fruit, nuts, and seeds. They are an easy, no-bake, gluten-free snack that is packed full of superfoods.
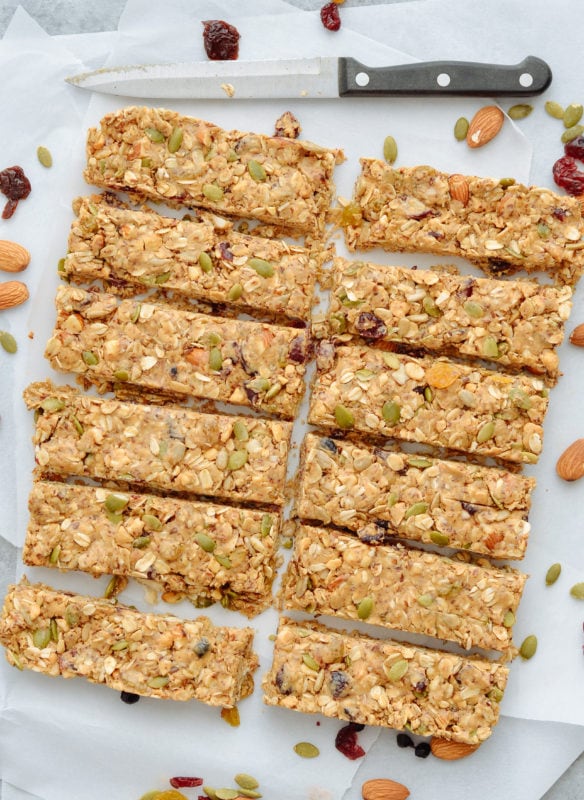
Nutty Peanut Butter Trail Mix Bars. When salty meets sweet. 😉 We love granola bars. When we were growing up more often than not we always had a Quaker chewy granola bar in our bag. But, today there are so many granola bars on the market. Many made with unhealthy or processed ingredients. Oh, and did we mention that many of them are expensive too? Like $3.50-$4 for a single bar, sometimes? Who are these people kidding! If we are going to spend $4 it is going to be for a full meal, not just a snack. Plus, with the store bought bars you can't customize them to include all of your favorite superfoods. Sigh.
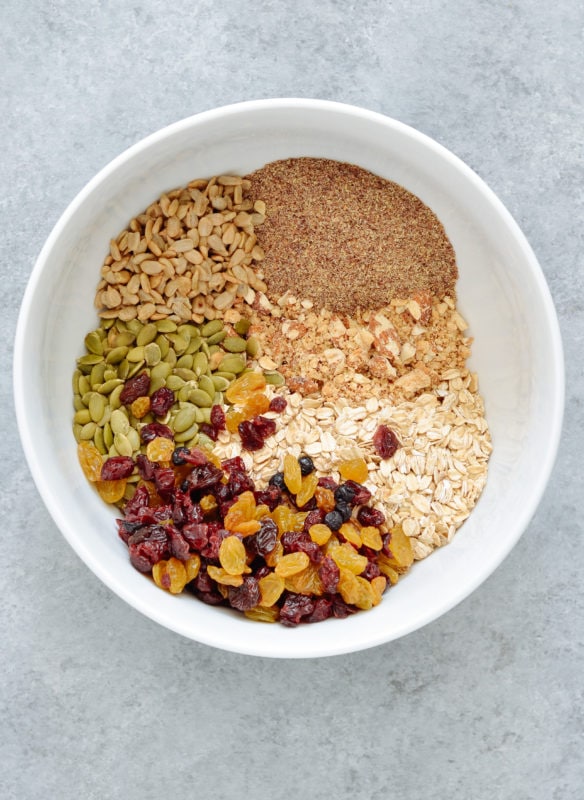
Let's solve all of those problems and take the (no-bake) granola bar making to our own kitchen, shall we? Just take a look at the ingredients:
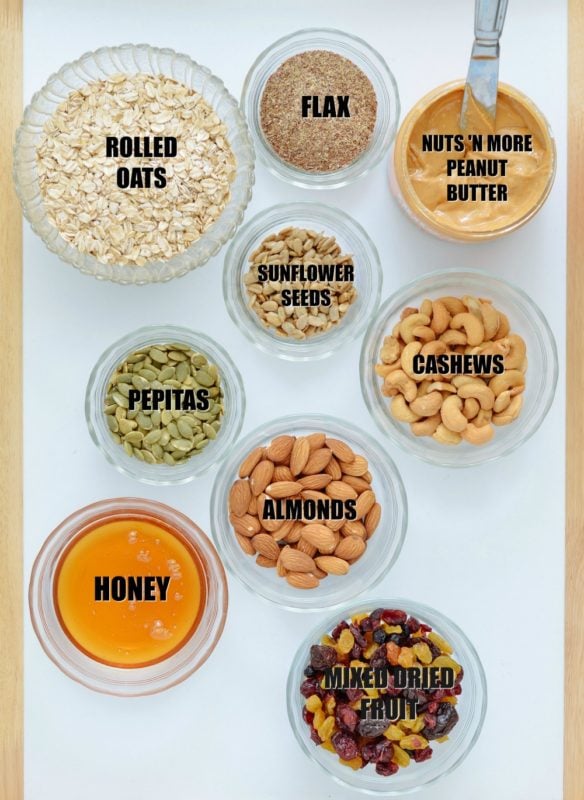
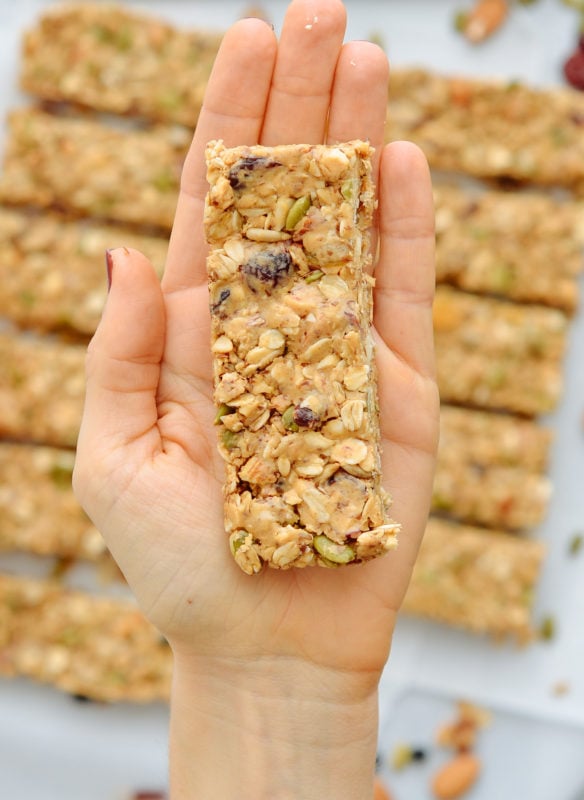
Does it get any healthier? You can swap the peanut butter for any nut or seed butter, you can swap the nuts and seeds for any combination of either/or you like, you could replace the honey with maple syrup or agave and use any dried fruit your heart desires. PLUS, you could opt to add in something sweet like chocolate chips to really take it up a notch. Or maybe even a chocolate drizzle on top? Yeah, that sounds perfect actually. We did say that dark chocolate is healthy, didn't we?
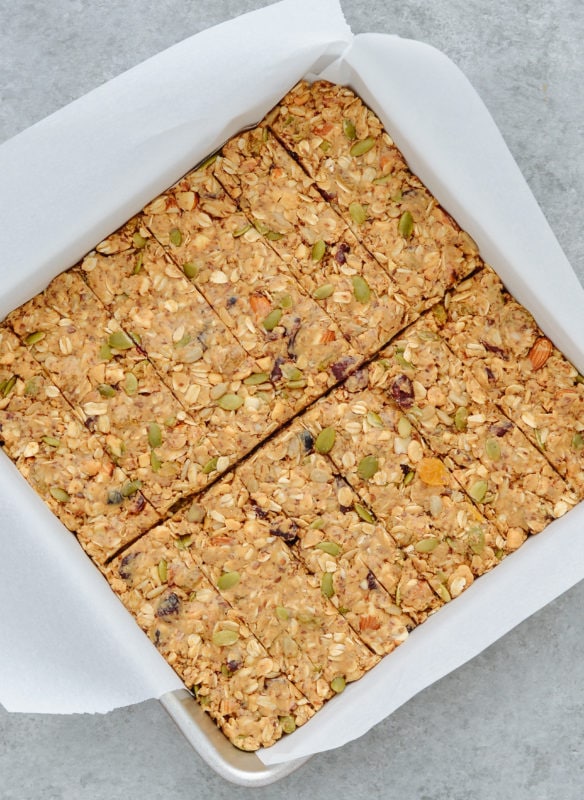
If made with an all natural nut or seed butter instead of the high-protein version these bars would be dairy free, vegetarian, gluten-free and vegan (if you swap the honey for agave). Total win!
And if you like this recipe, you're going to love these peanut butter chocolate bars!!
It can be helpful to think about calorie burn in increments because sometimes we only have a certain amount of time to get some good exercise in and build strength. Here's how to burn 300 calories!
Are you looking for simple, at-home workouts you can do to amp up the output and burn 300 calories, to be precise- and ALSO crush your weight loss goals?
Well, lucky for you, that's precisely what we are here for.
Meal prepping and exercise go hand in hand in creating a sustainable weight loss program. Exercising has countless benefits including cardiovascular health, muscle endurance, long-term health, mental health, and so much more, but one of the biggest reasons people exercise is to lose weight.
Exercise helps us lose weight in two primary ways. First, it burns calories while we are moving and performing our workout. Burning 300 calories, for example, helps you stay in a caloric deficit which allows you to lose weight, and, when done right, primarily fat.
Second, specific exercises help us build muscle. By building muscle and losing fat, we essentially trade wasted weight for weight that is active. That's because fat doesn't really burn calories on its own; however, muscle actively burns more calories throughout the day as it functions.
So, how do we do this and more specifically, burn 300 calories? Great question. The workouts below will help you not only burn calories but also build muscle. And lean muscle mass can help you with the afterburn!
Note: Total calories burned based on a 30-year-old, 200-pound man.

Tabata:
Tabata is a fancy word for 8 rounds of 20 seconds of work and 10 seconds of rest. Tabatas are great for getting your heart rate high and then allowing you to recover and do it all over again. Feel free to modify the pushups and work from your knees if you need to.
EMOM (24 Min.)
Every Minute on the Minute (EMOM) training is perfect for keeping you on track during your workout. If you are anything like me and get distracted during your workouts, this may be a helpful approach.
The goal is to work for about forty-five seconds out of every minute. So at the start of the time (0:00), you would do 20-30 step-ups, then at the 1-minute mark, you would do 20-30 slow Russian twists, etc. For the step-ups, you can use your front porch steps, a sturdy wooden box, or anything that allows you to step up between fifteen to twenty inches. You will do each exercise six times.

30-Minute Strength Training Circuit:
If you have access to a moderate-weight dumbbell or kettlebell, this workout is sure to build strength. Unlike the previous workouts, it's not timed per se. Aim to spend about thirty minutes on this activity, however, so choose your weight accordingly.
Here's how to read this. You'll do each set of exercises in sequence, ten times, and repeat the sequence three times. So, after your first set of squats, do your first set of shoulder presses on each arm, alternating back and forth. With the squat and lunge, be sure to hold the weight with both hands right underneath your chin. On the dumbbell row, you want to hinge at your hips, rest the hand that is not lifting the weight on a couch or bench, keep a flat back, and pull the weight up underneath your armpit.
Completing these three exercises should help you burn 300 calories in about an hour or so, but it'll also build a lot of functional strength and mobility.
Adding these exercise sessions that target strength can help you with your overall weight loss efforts. The process can sometimes be difficult, mysterious, and frustrating, but it is worth it! Stick to the basics of meal prepping, tracking calories, exercising, and sleep. Also, after your hard work, be sure to consume some protein to help your muscles recover and grow stronger. Most importantly? Don't forget to hydrate, as that helps with recovery.
As always we are here for you on this journey, and can't wait to see you reach your health and fitness goals-burning 300 calories at a time, perhaps! How's it going for you? Let us know in the comments!
Remember, working out is just a way to burn energy. If you're not pairing a solid exercise routine with a balanced diet, you're fighting an uphill battle. I would suggest pairing a weekly meal plan with your exercise routine to maximize your results and maintain a healthy lifestyle.
Kaminski, Jacqueline. "Metabolic Equivalents: What Are They & How To Calculate Them." NASM, https://blog.nasm.org/metabolic-equivalents-for-weight-loss.
Shaikh, Dr. Jasmine. "How Do You Calculate Calories Burned During Exercise?" MedicineNet, MedicineNet, 20 Oct. 2021, https://mealpreponfleek.com/counting-calories-101/
There are thousands of weight loss formulas circulating the internet right now and most are touted as the real deal. When starting a weight loss program, it's important to keep in mind that your success (or lack thereof) may very well be determined by things like your genetics, age, gender, and sheer willpower. The information outlined in this article is meant to help you achieve a number of things including:
We've assembled a list of ten simple things that you can do today to speed up weight loss without investing too much of your time or energy.
Each one of your meals should include a protein source, healthy fats, and low-carb vegetables to give you a
fuller nutrient experience. If you set your meals this way you will lower your carb intake to the recommended range of 25-50 grams per day. Your protein sources include:
The importance of protein in your diet cannot be overstated. Multiple studies (1,2,3) have shown a correlation between a protein-rich diet and high metabolism. Also, protein helps to reduce obsessive thoughts about food by over 50%, and it makes you feel fuller during the day so that you automatically eat fewer calories. Here's a list of low-carb vegetables to include in your diet:
Feel free to load your plate with these low-carb vegetables - you can eat large amounts without exceeding the recommended amount of carbs per day.
A diet that includes meats and vegetables contains high amounts of minerals, fiber, and vitamins - which means there's no physiological need to eat grains.
Your fat sources include:
If you don't eat a healthy breakfast every day, your body automatically goes into starvation mode, so your metabolism slows to a crawl as a way to conserve energy.
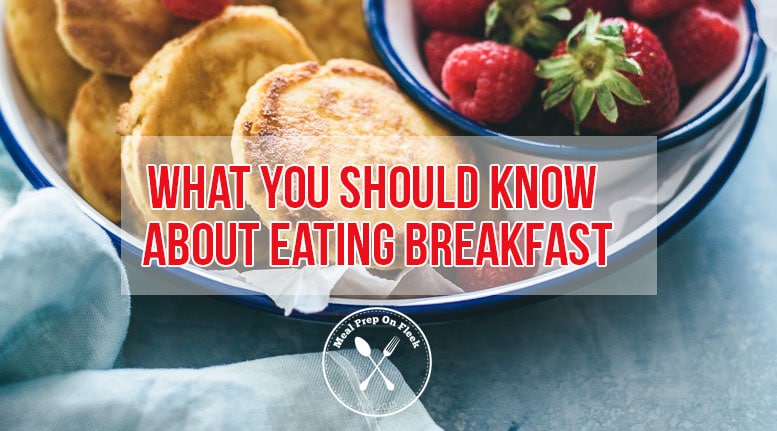
A nutrient-dense breakfast strengthens your metabolism. A study was first published in the Journal of Epidemiology that showed that people who skipped breakfast were 4.5 times more likely to suffer obesity as those who took time to eat in the morning. So what should you have for breakfast?
Foods that are slow to digest are the best. You may try combining lean proteins with fats and complex carbohydrates, such as found in this particular power breakfast: one omelet (1 egg, 2 eggs whites), a half cup of onions and mixed peppers, half cup of cooked steel-cut oats combined with frozen berries and a teaspoonful of omega-3 fish oil.
To lose weight successfully, you need to burn more calories than you consume; which means you have to control your portions. Portion control doesn't necessarily mean you're doomed to a growling stomach. It's a way to make sure you eat fewer calories. Here's how to eat smaller meals:
You don't always have to exercise to lose a few pounds, but it is highly recommended. For the best results, go to the gym at least 3-4 times a week and include warm-ups, stretches and weight lifting. When you lift weights you burn more calories and your metabolism will stay relatively high (4). Other studies show that you can build muscle and lose a significant amount of body fat (5).
It's important to mix things up in order to attain your fitness goals - and this is particularly true when working out. To burn more calories in a short amount of time, you may have to step up your intensity. Bursts of speed can cause a powerful fat-burning response in your muscles - so find a way to incorporate short sprints into your workout.
Combining your workouts with fish-oil supplements can also increase your ability to burn fat according to a study published in American Journal of Clinical Nutrition. In the study, volunteers supplemented on six grams of fish oil every day and exercised three times a week. They lost an average of 3.4 pounds after 12 weeks while those who didn't use any fish supplement saw little shrinkage.
Effective dieting is an art. Consider the level of creative output we use when trying to lose weight, and the sheer purpose we put behind every effort. Creativity allows your mind to explore different possibilities and to come up with solutions for any problem. In this case, it helps take your mind off negative thinking, weight gain, fat, and food. As a matter of fact, a keen, positive focus makes all the difference in the world for anybody trying to lose weight.
Exercising creativity also boosts your self-esteem and gives you a sense of pride when you see something that you created with your own hands. So what do you like? You can try coloring books, scrapbooking, collage, sewing, photography, etc. Anything that gives you great enthusiasm can work for your benefit as you take up the challenge to tone your body - and it's also a good way to meet like-minded people.
We have the misfortune of living in a world where sleep is associated with being sluggish. But this isn't the case. We know from modern science that sleep is a key contributor to a healthy metabolism, so the more you give in to quality sleep, the more equipped your body will be to burn fat. Your body also regulates hormones that influence appetite and energy production so when you don't get enough rest you inevitably produce low leptin and high amounts of ghrelin, a hormone that triggers food cravings.
If that's not reason enough to get 8 hours of shut-eye, researchers have shown that lack of sleep is connected to stress - and both are causes of early deaths through strokes and a compromised immune system.
This is one of the most important things you can do to lose weight. Sugars and starches stimulate the secretion of insulin - a major fat-storage hormone in the body. When insulin levels drop, the body has an easier time burning fat that is stored in fat reserves. There's another reason to reduce the amount of insulin in your blood; it allows the kidneys to lose excess amounts of sodium and water, effectively reducing bloating and water weight (5,6).
It is possible to lose over 10 pounds in the first week of eating this way as your body sheds both fat and
excess water (7). Reduce the carbs, lower your insulin levels and you will find that you eat fewer calories and feel fuller for longer (8).
Drinking more water can help you lose a few extra pounds especially when combined with exercise and a balanced diet. By drinking water you can avoid eating large amounts of food and you're less likely to consume sugary beverages (which by the way account for over 20% of American's energy intake).
Cold water can speed up your metabolism (albeit slightly) due to the energy your body uses to warm the water.
Water is a good accessory for weight loss. Drinking enough water every day contributes to a healthy body in general. That said, we don't mean that you should go around guzzling water all day to prevent dehydration (though it's not common, it is possible to drink too much water, especially if you're forcing yourself to drink even when you're not thirsty).
Most fitness experts recommend limiting the number of carbs you eat at night because as you fall asleep, your metabolism slows down and the carbs you eat have a higher chance of being stored in your body as fat. When you eat early in the day, your body will transform this food into energy; however several metabolic processes are altered during sleep including insulin sensitivity which slows down at night, changing your carb-storing process towards fat.
Your body responds to stress in a harmful (and predictable) manner. When you have a stressful day, your brain
sends a message to the cells to release potent hormones like adrenaline - which retrieves stored energy to power the fight-or-flight reaction. As this is happening, your brain is also telling the cells to produce cortisol so you can replenish this lost energy. This is what causes those hunger pangs and causes you to eat nonstop.
To relieve this hunger, many of us reach for sugar-filled snacks and fatty foods as a comfort because they help
release pleasure chemicals that ease the tension. Soon this becomes an unhealthy cycle of tension and feeding, and it causes weight gain. We have a few tips for managing stress in our hectic day-to-day routines:
As with all well-meaning weight loss guides, take what works for you and leave the rest. Remember no weight loss strategy works if you find it unpleasant. So if you find that you need to tweak this strategy to accommodate a few of your own choices, go ahead, as long as you're not jeopardizing your own health.

__
Lydia is a NASM Certified Personal Trainer at fitnessgoals, with a passion for writing and a love for chocolate. She enjoys long walks with a breeze and finding ways to make dessert healthy.
Hormones are essential chemicals in your overall health. Lately, I have been seeing more and more signs of hormone imbalances in my clients. Some of the signs/complaints include the following:
The list could go on and on. The degree to which each of these signs impacts my clients is different. Perhaps some of these issues resonate with you. But, the one thing they all have in common? These issues stem from a lack of proper nutrition.
We all need a good balance of protein, carbs, and healthy fats. More often than not, we cut back on fat first because it has the most calories and we think eating less fat will help us lose weight more quickly, which can be true in some instances. However, by cutting out a significant amount of fat we do more harm to our bodies than good. It's tempting, and we certainly have had periods of time in our culture in which we believed that fat was the enemy; all those low-fat diet fads are a testament to such thinking.
READ MORE: 10 Reasons Why You Are Having Food Cravings
But here's the thing. Fat is the most important macronutrient for balancing hormones because they are produced from fatty acids and cholesterol. So, when we cut back our fat we are basically depriving our bodies of the elements it needs to keep our hormones in balance. Yikes! That's not something anyone wants.
By structuring your meals around a solid foundation of all three macronutrients-carbohydrates, protein, and fats-your body will really begin to flourish because your hormones will be balanced.
Start by adding one or two, and then slowly increase from there.
Try to stick with organic, grass-fed, or wild-caught for the following:

These will be the most important. Try to aim for a variety of healthy fat sources each day. You can always keep some nuts handy as a snack, in your car or in a backpack. Try cooking with coconut oil or ghee if it's unfamiliar to you. (Or make these coconut fat bombs!)

Other things such as spices and seasonings can go a long way too! Try adding:
Including a variety of these foods gives your body the nutrients it needs to really flourish. You will be amazed at how quickly our bodies can heal from a lack of nutrients, thanks to a few small daily changes.
If any of this strikes a chord with you, it's always a good idea to consult your physician.
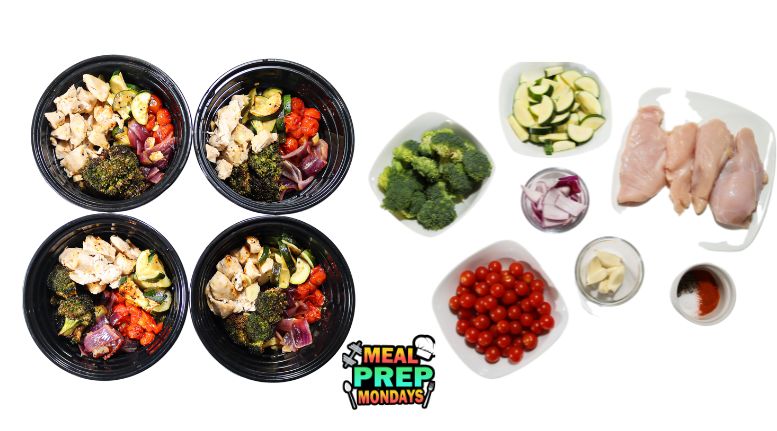
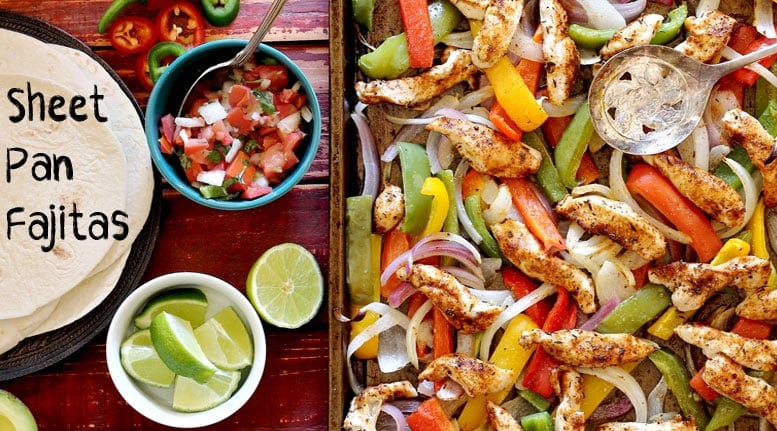
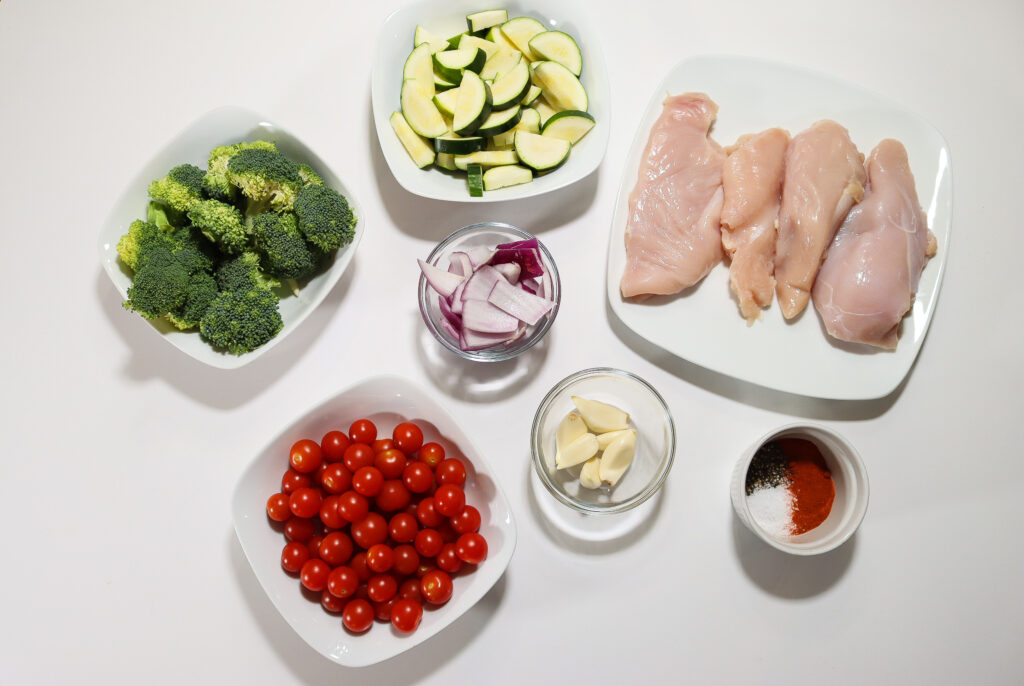
This is another winner of sheet pan chicken and veggies dinner! Yes! Endlessly customizable, healthy, and loaded with protein. We're here for it!
We'll never stop going on about our love of sheet pan dinners. They just make so much sense. You take a protein and some veggies, toss it in a little oil with salt, pepper, and other seasonings, and dinner is ready in a half an hour. You've got one pan to clean afterward, along with a knife and a cutting board. It's a game changer, a time saver, and all sorts of other great things! (Make sure you check out our top sheet pan dinners for 2023.)
This recipe is friendly toward gluten free, paleo, and keto diets, depending on the veggies you pick. Consider this a template for cooking dinner and mix it up to find your favorite combinations of veggies and protein. (Salmon and pork are great here, too!)
You combine all the ingredients on a sheet pan and season accordingly with garlic and a tasty combination of salt, pepper, and paprika. Chicken just LOVES paprika.
This is a classic meal prep that will keep in the fridge for up to 4 or 5 days. Reheat in the oven, tented with foil, until hot. (You can also use the microwave but that is sometimes a dicier proposition with chicken because it can get rubbery that way.
If you'd like to freeze the chicken and veggies, that's also possible. We like to use zip-close plastic bags for this job and then defrost the food in the fridge overnight before reheating.
For this sheet pan recipe with chicken and veggies, you can make a lot of swaps.
It's never a bad idea to break up a sheet pan dinner onto two different pans if you load it up and things look crowded. This chicken and veggiges sheet pan dinner is pretty loaded! You want everything to cook evenly and the veggies to get a little color and if they're all close together, they'll steam and get a little mushy, rather than roast. It's still easy clean up with two pans and minimal prep equipment.
READ MORE: We think you'll love these Sheet Pan Chicken Fajitas. Let us know!


Pro Tip: Habit forming is the key to effective, lifelong, health and wellness success. Check out this Habit Forming workbook, which guides you through a process and strategy to help you make the most of your day/week/month. Best of all? It's FREE!
What are your favorite veggies to pair with chicken for a sheet pan weeknight dinner? Let us know in the comments!
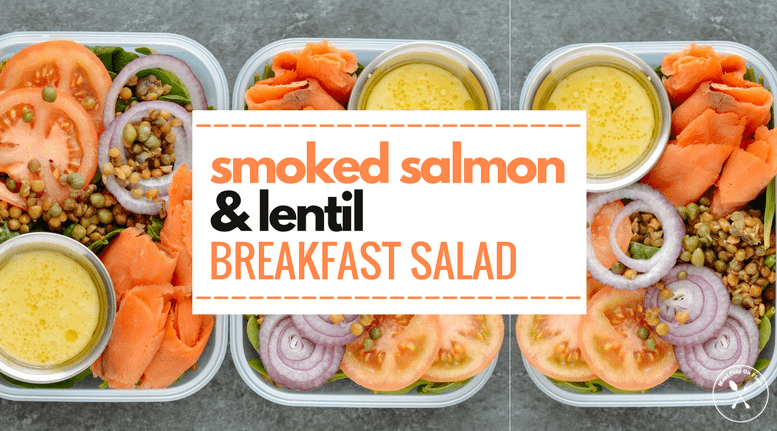
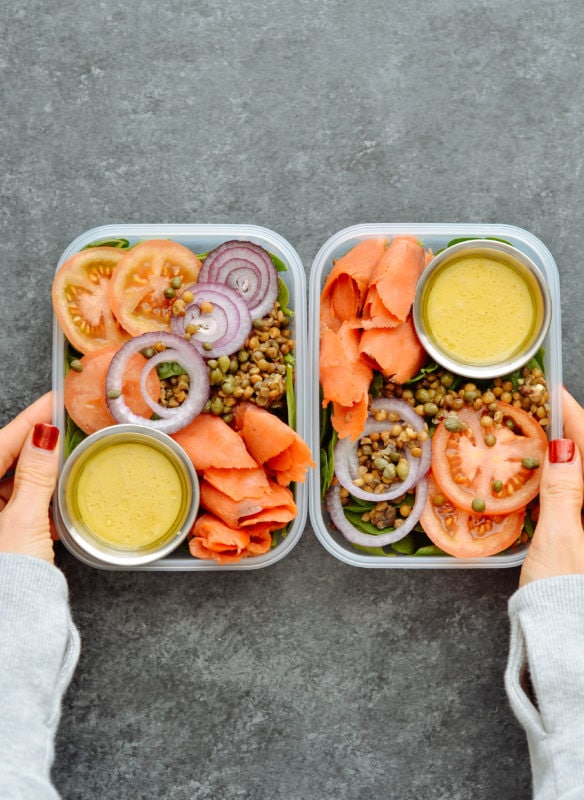
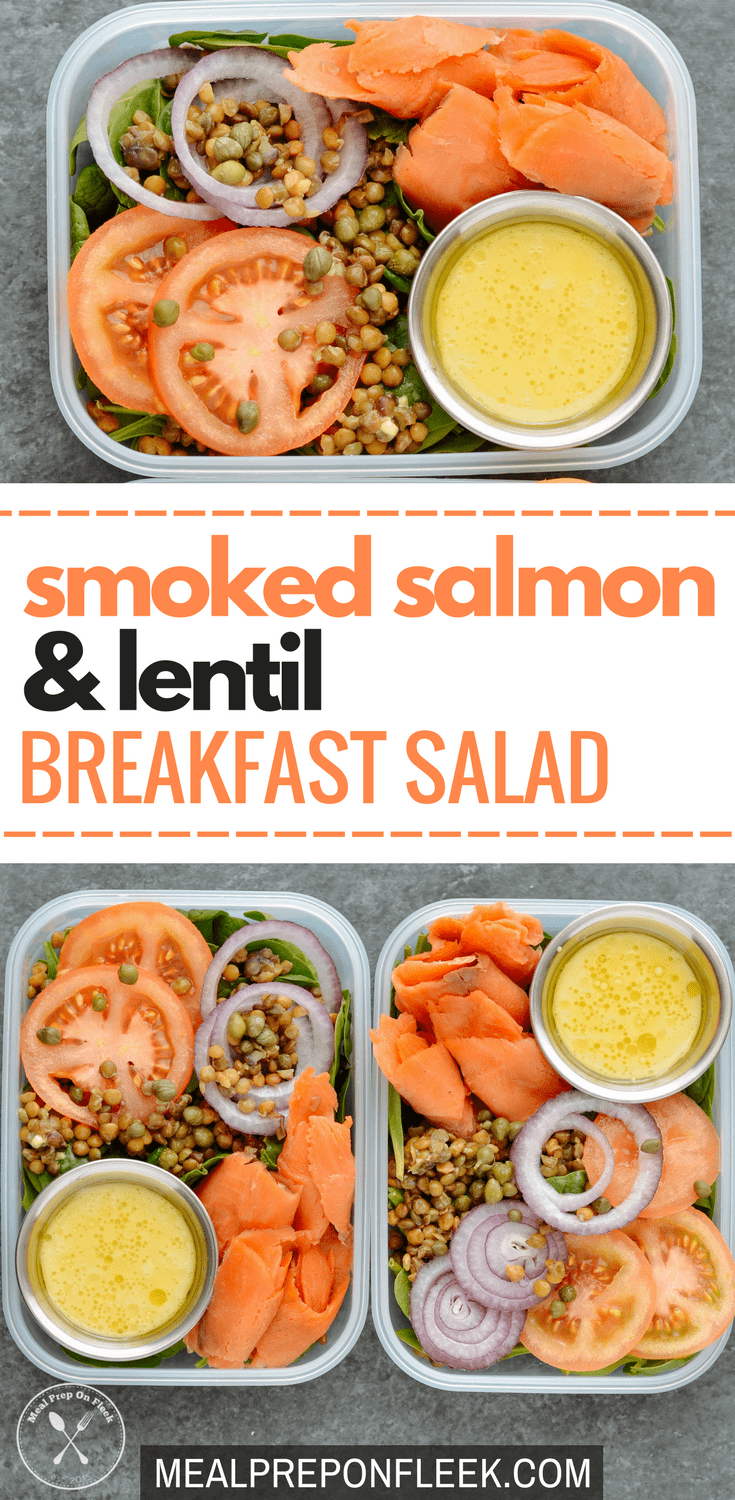
Smoked salmon & lentil breakfast salad is a no-cook meal prep packed with high-protein, high-fiber lentils, smoked salmon, and fresh vegetables. Easy, fast assembly, and gluten-free!
This smoked salmon & lentil breakfast salad puts together ingredients you might not have considered to string together, for a dish that may at first not seem very breakfast-y. We know. You are probably thinking, who eats lentils for breakfast? Lentils are for soup, right? We don't, normally, but we were craving some smoked salmon one morning and had extra lentils in the fridge. So, we tossed all of this on a plate and were blown away by the flavors! They were too good not to recreate. So, we meal-prepped it to test it out and now we are craving this Smoked Salmon & Lentil Breakfast Salad for lunch and dinner, too!
The best part, other than the ease? It's a breakfast recipe that can be made in 5 minutes, and that is no small thing because we all know mornings can be hectic sometimes. Plus! This lentil breakfast salad packs in 28g of protein, 11g of fiber (almost half of your daily intake), and tons of healthy omega-3 fats! It's the ideal ratio of carbs, protein, and fats to keep you fueled all morning long.

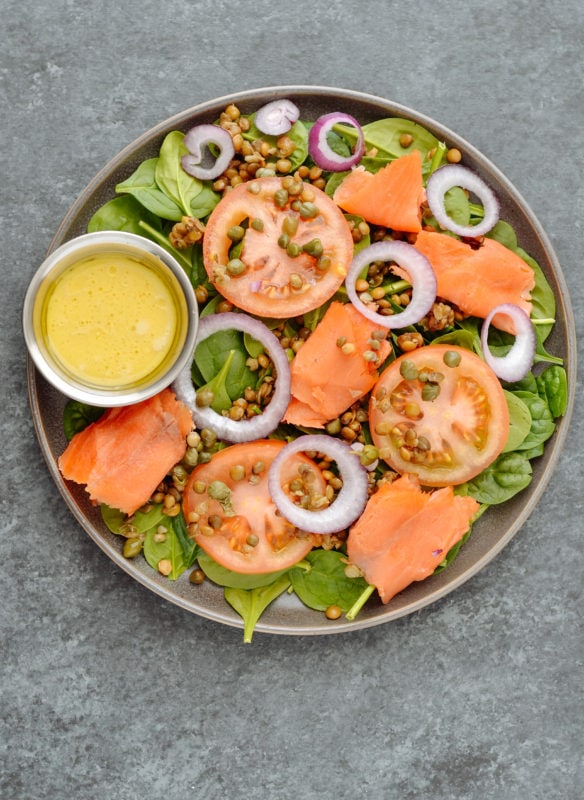
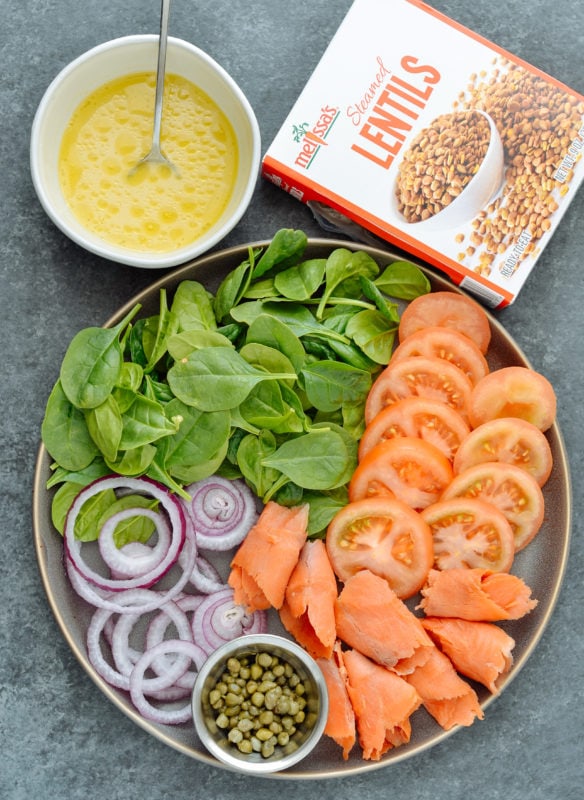
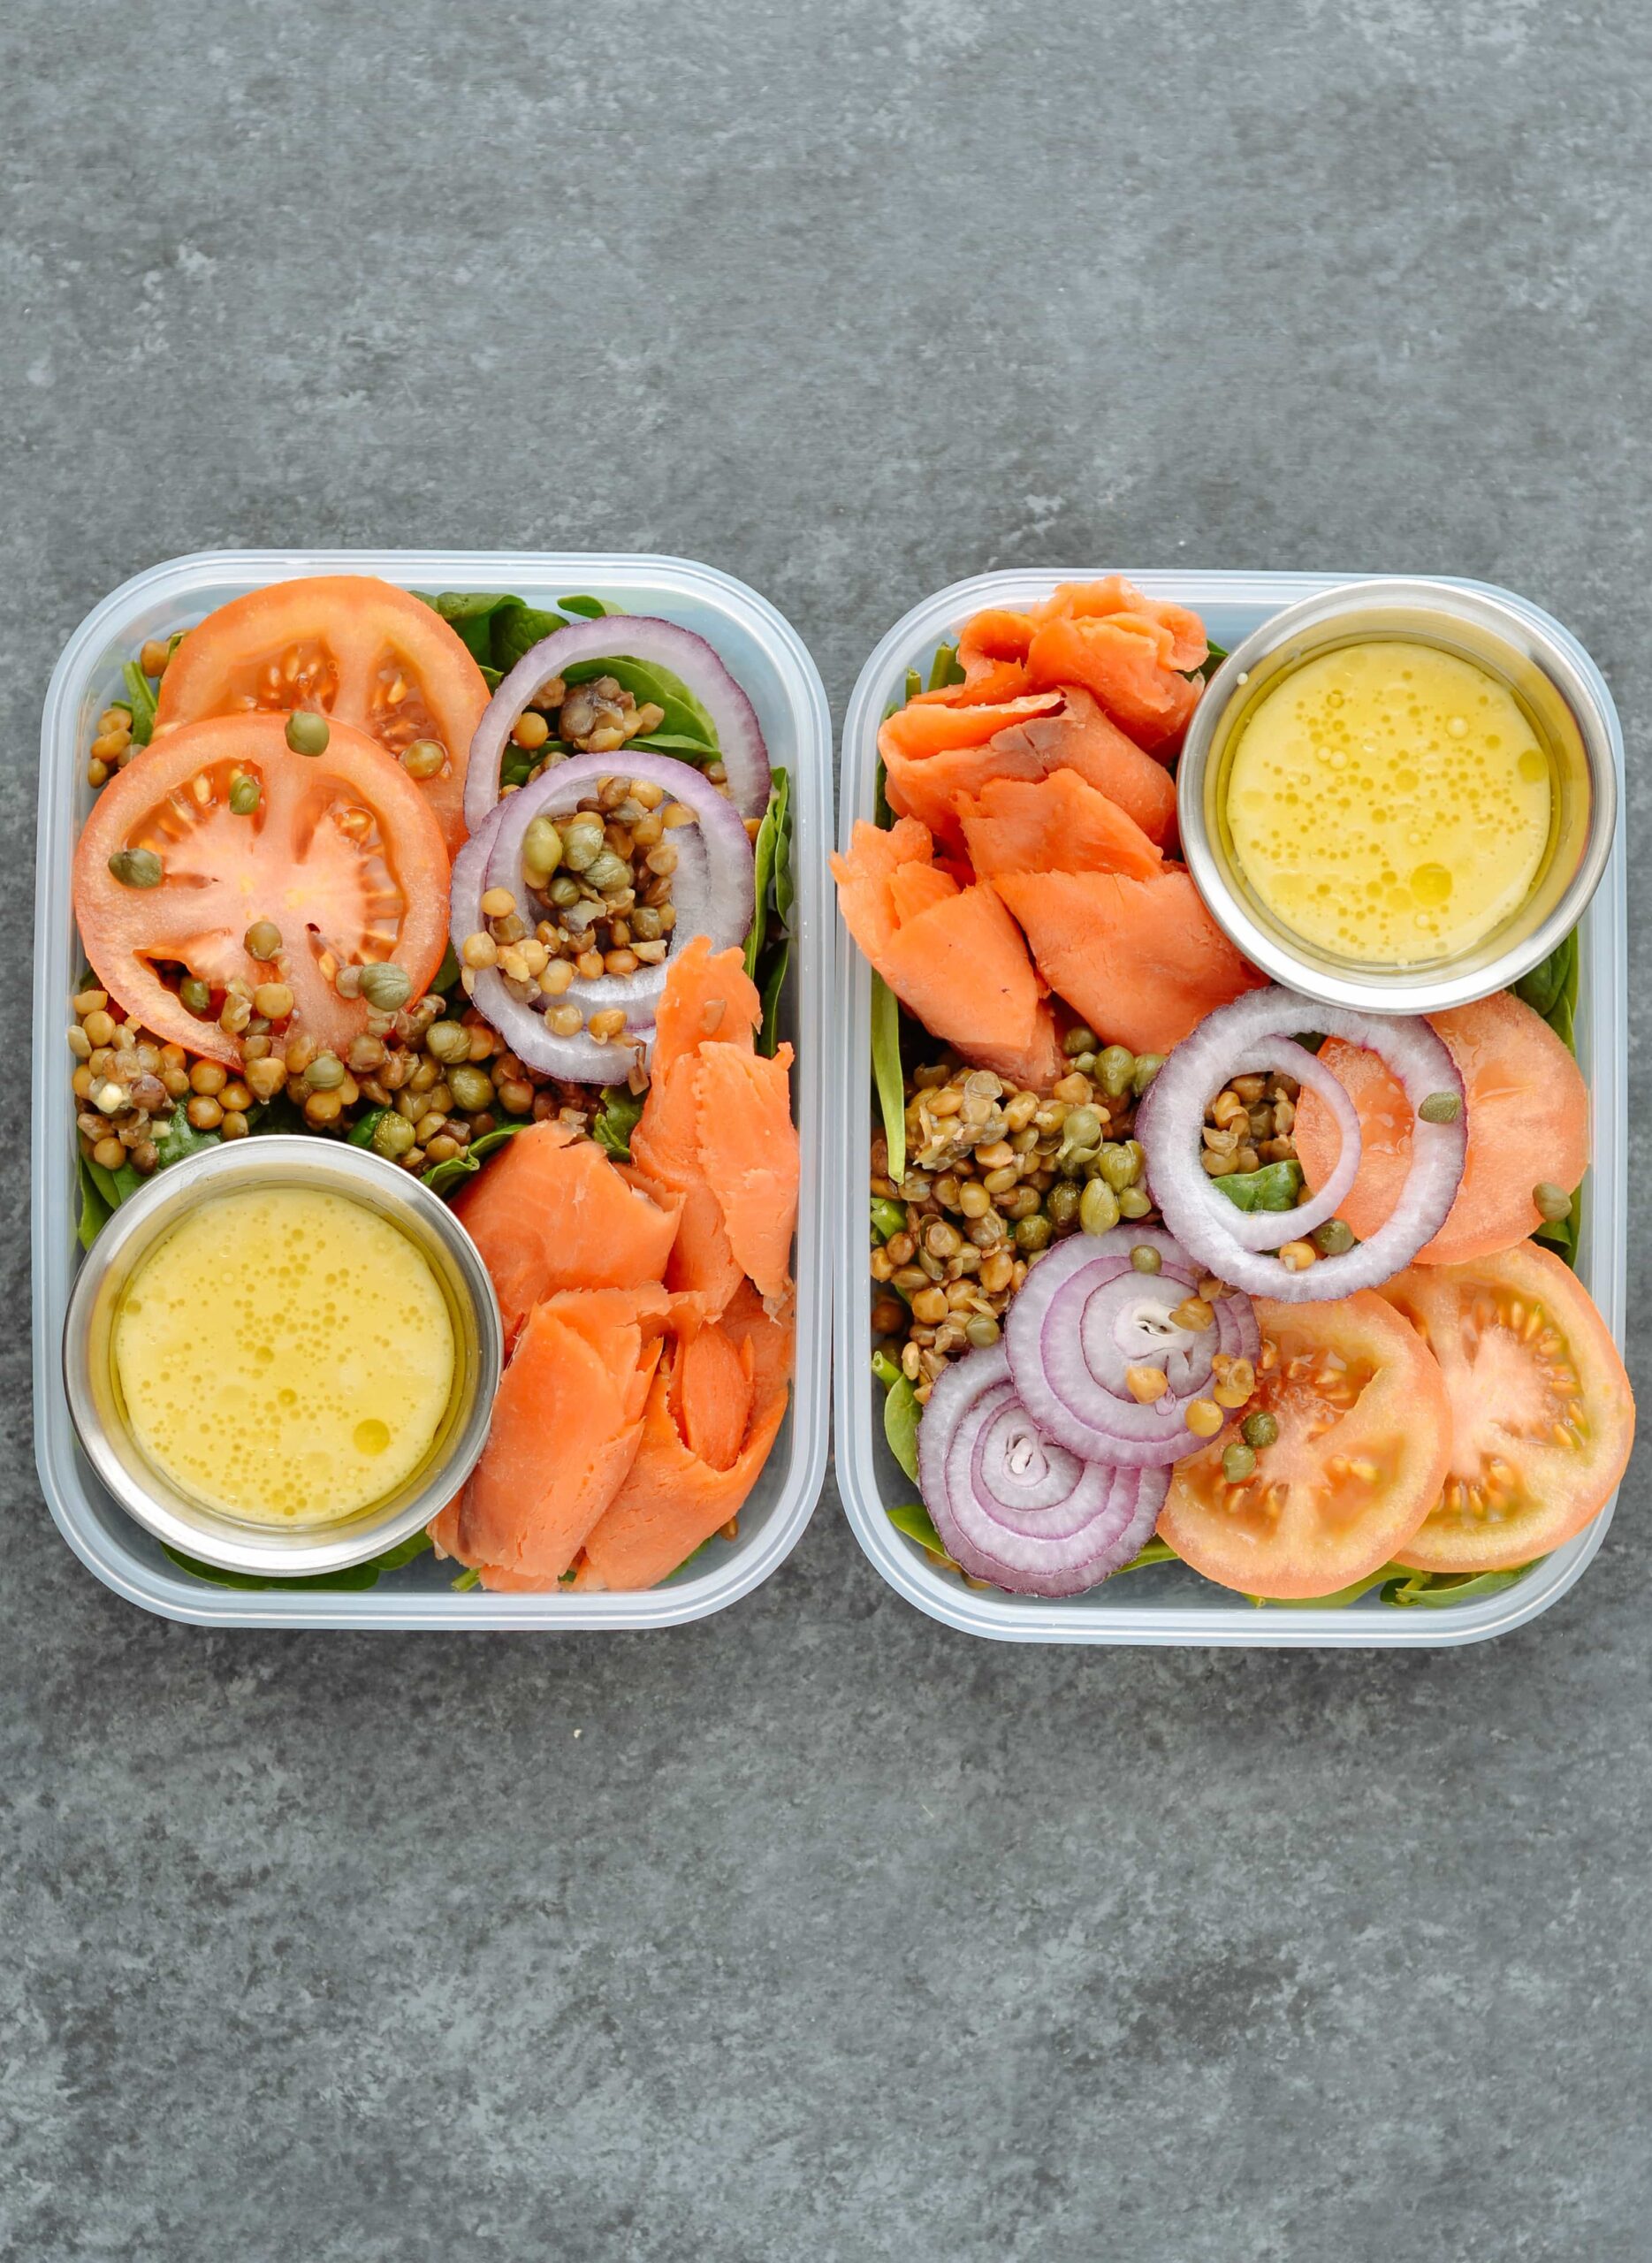
Ok, so you can totally shortcut this salmon and lentil salad and buy pre-cooked lentils, like the ones we've pictured here. But you can also cook them as part of your weekly meal prep activities in the kitchen and they'll be ready. Smoked salmon needs no help. We love the Dijon-based salad dressing, which gives us a good acidic hit to balance out the rest of the flavors with white balsamic vinegar, lemon juice, and Dijon mustard. Slice up some red onion and tomatoes and serve on top of the greens.
You better believe this also works for both of those meals, as well! Lunch. Check. Dinner. Check. You can even make it into 4 portions and make it a side dish for a party or turn it into a 'build your own' smoked salmon plate at a weekend brunch (and then just save the leftovers for meal prep). This is just another one of those easy meal prep recipes to always keep in your back pocket for when you need something quick. And if you're into it, a nice big slice of crusty bread pairs so well with this.
Brown or green lentils work great here. The most ideal lentils for a salad like this are the French ones, which stay firmer when they're cooked; they're also smaller. Steer clear of red lentils, because they break open quickly and don't really hold their shape during cooking.
Baby kale or arugula would also taste great with the dressing and the other ingredients.
If you don't have white balsamic vinegar or can't find it, feel free to substitute apple cider vinegar or white wine vinegar instead. The dressing would also taste great with a tablespoon of honey added to it.
If you aren't using this awesome product of steamed lentils from Melissa's Produce, cook the lentils ahead of time. You'll need about a cup, dried. Anything you don't use in this recipe you can freeze in zip-close bags you can label, for later. Or keep the lentils in the fridge for making soup later in the week.
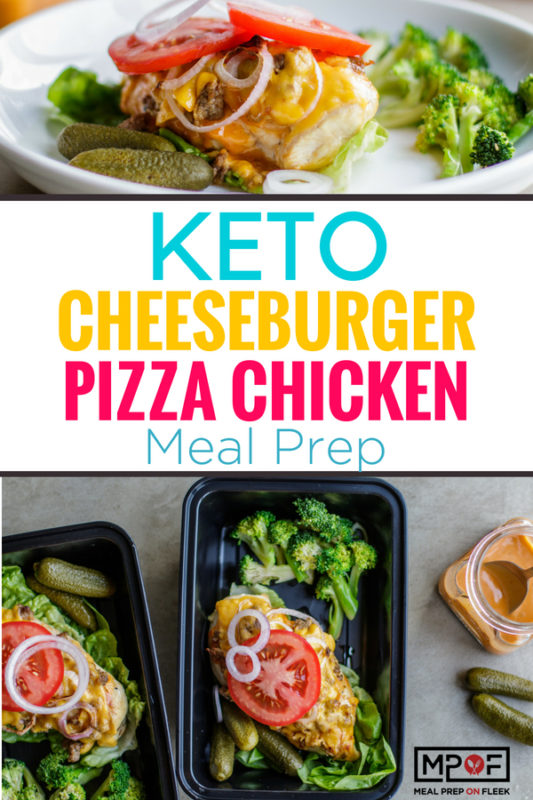
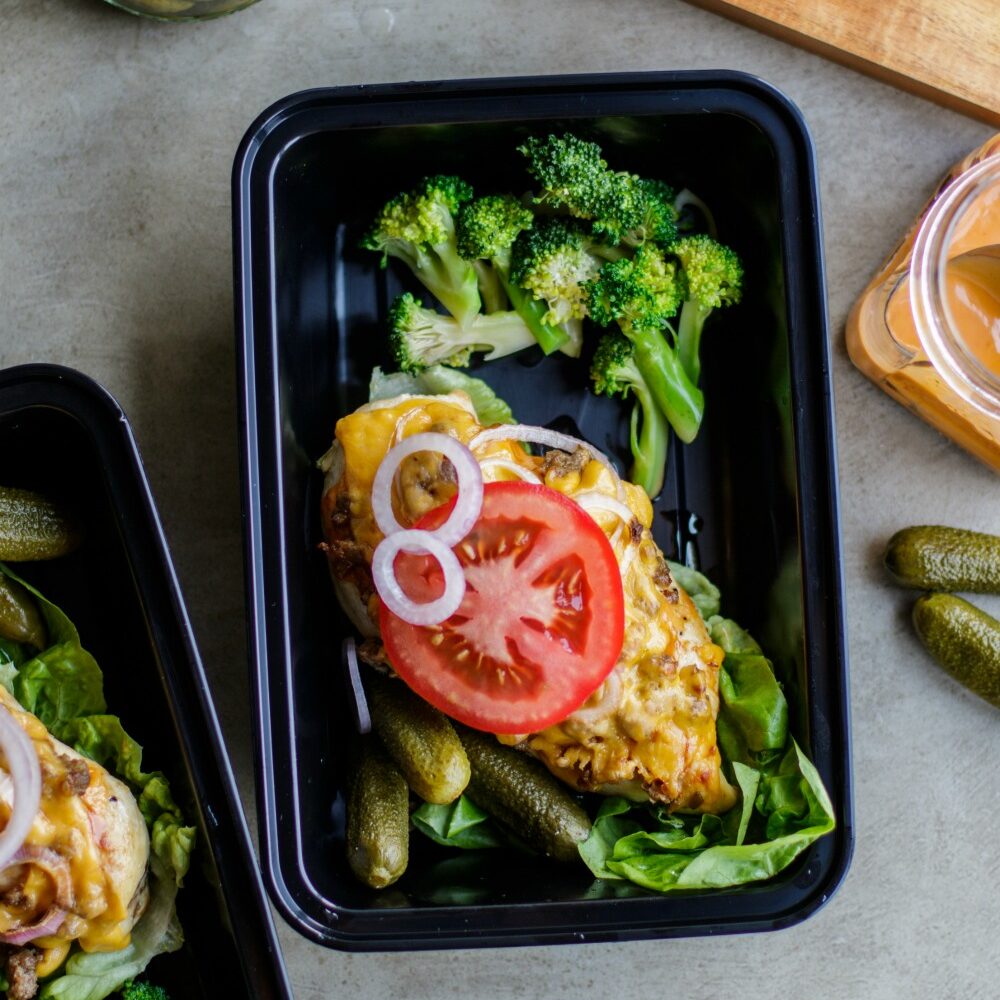
Cheeseburger Pizza Chicken Meal Prep sounds like a lot of tasty buzzwords! This keto recipe is a mashup of pizza and cheeseburgers. Say no more!
This incredible comfort food meal prep idea is what you get when you combine two favorites, pizza, and cheeseburgers. Whodathunkit? It's gluten-free, low-carb, and ketogenic, and it can be yours tonight (and the night after that, and after that . . . you get the idea.) Instead of bread as the base, it's chicken!
This healthy meal prep is so hearty and filling you won't miss the bread at all. Serve it over top a large lettuce leaf if you want to simulate bread, or pick it up with one hand. But you might find it's a lot easier to eat this with a knife and fork. You do you!
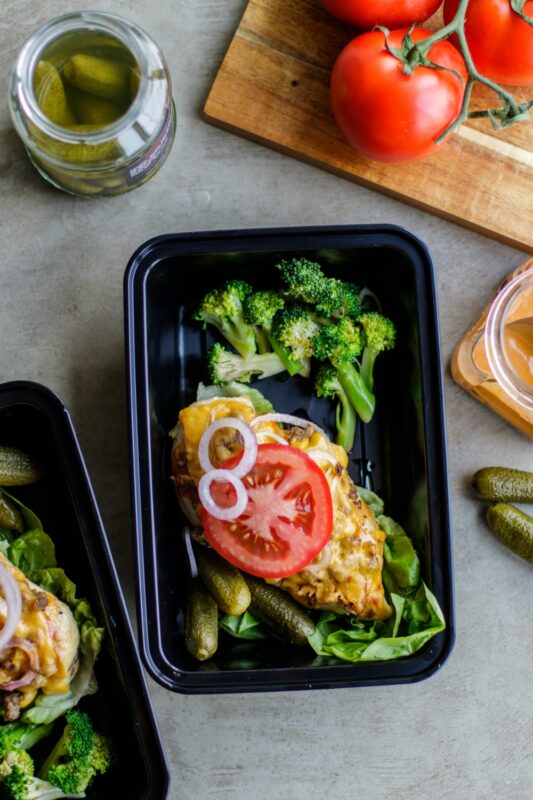
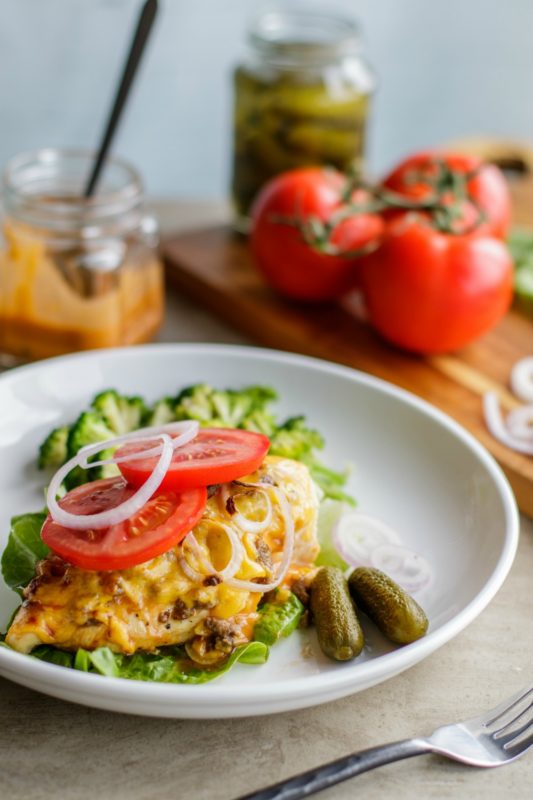
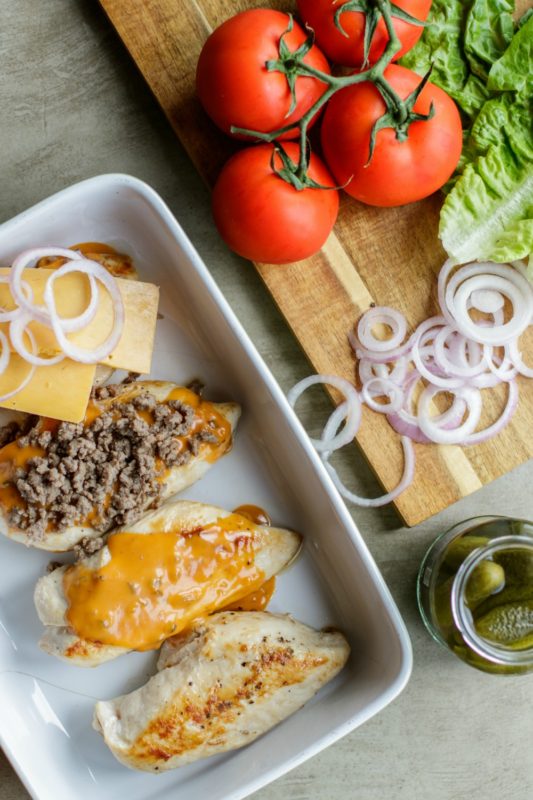
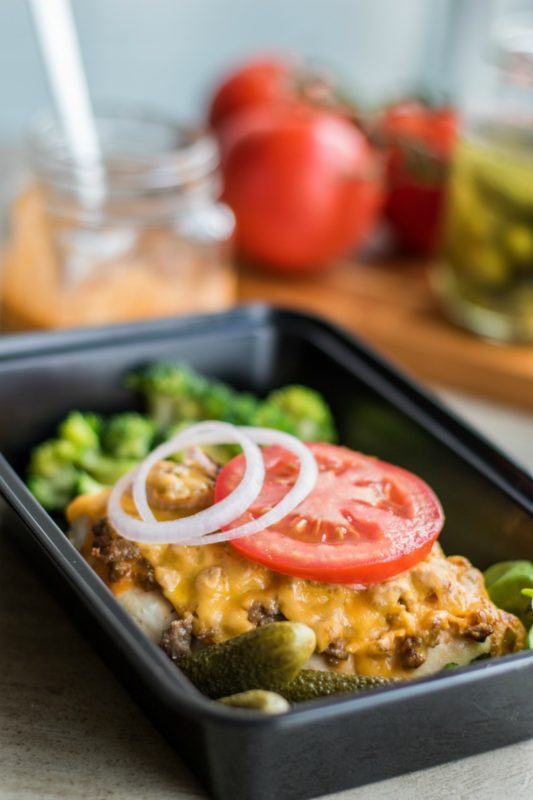
It goes like this. The chicken breast is the bread. The cheese goes on top (that's the "pizza"), and the ground beef goes on top of that. Then you add more cheese, and the toppings, which include red onion, along with some salt and pepper to taste. Serve with a side of steamed broccoli and pickles, if you like. And that is your cheeseburger pizza chicken mash-up keto meal prep, friends. Oh, and let's not forget the special sauce!
Perhaps you've seen such an ingenious idea before with our Pizza Chicken Meal Prep Recipe?
So, we love anything called "special sauce," right? Sir Kensington is a condiment brand we're fans of because the ingredients are pronounceable and they tend to work well with keto and paleo diets. This one is plant-based, too-it's basically a seasoned mayo with paprika, mustard, and some other seasonings. We don't want to ruin the surprise, because then it wouldn't be special, would it?
We like to prep this meal as directed and keep it in the fridge, as usual, in a sealed meal prep container. When it's time to reheat, put it in the oven briefly under high heat so the cheese re-melts a bit. Or, if you're so inclined, add more cheese and let it melt under the broiler.
We have specified serving this with a side of steamed or roasted broccoli (you can add the broccoli to the baking sheet if you like), but a green salad is great, too.
For those who aren't worried about carbs but who don't eat gluten, serve this with some homemade steak fries or roasted potatoes.
Oh, this is a fun one to mess around with. Think about how you like cheeseburgers, and take it from there!
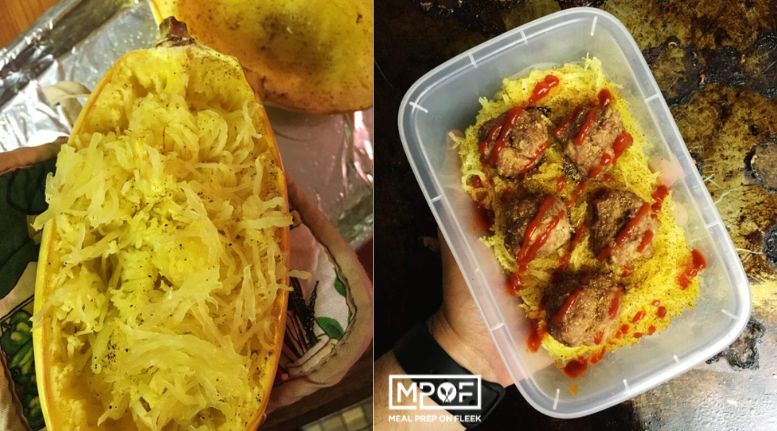
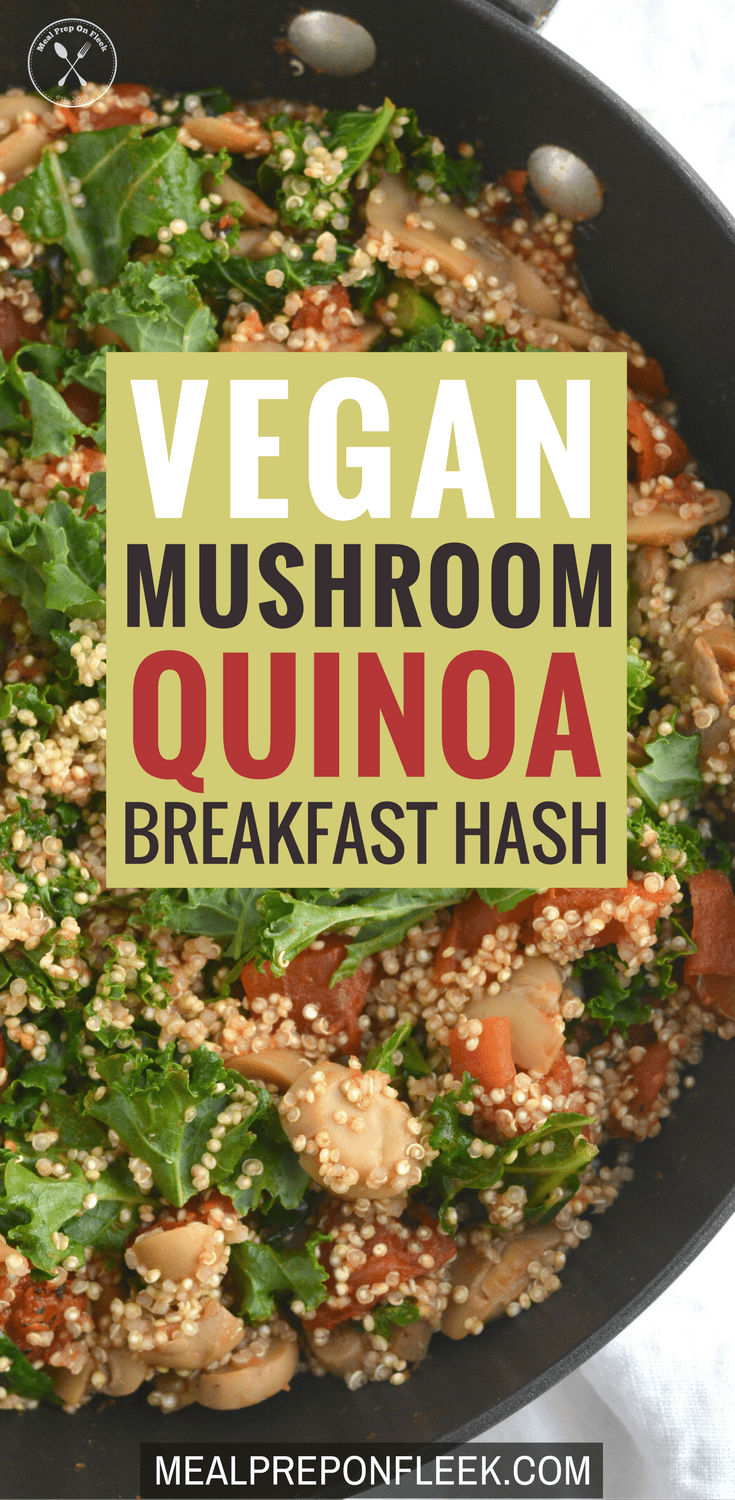
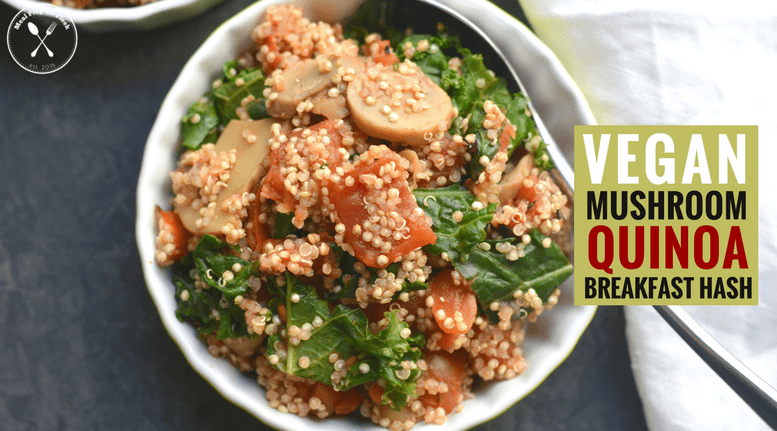
This Vegan Mushroom Quinoa Breakfast Hash replaces traditional eggs with quinoa, a complete protein. Quick to make and gluten free.
Just because you're following a plant-based diet (or maybe dabbling with one) doesn't mean that you can't have a filling and healthy breakfast meal prep. This one involves cooked quinoa, some tomatoes, mushrooms, and kale. You could even eat this for dinner if you wanted to. Or lunch! It's also pretty adaptable based on what you have on hand in the fridge, pantry, or freezer.
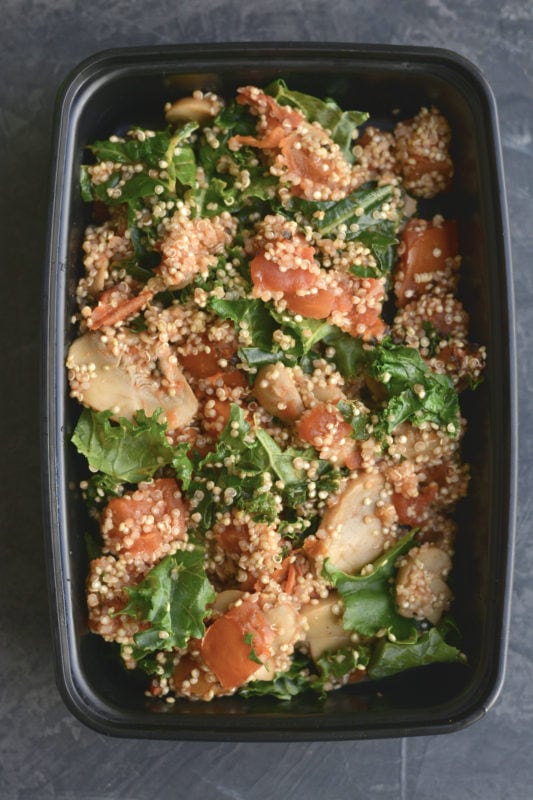
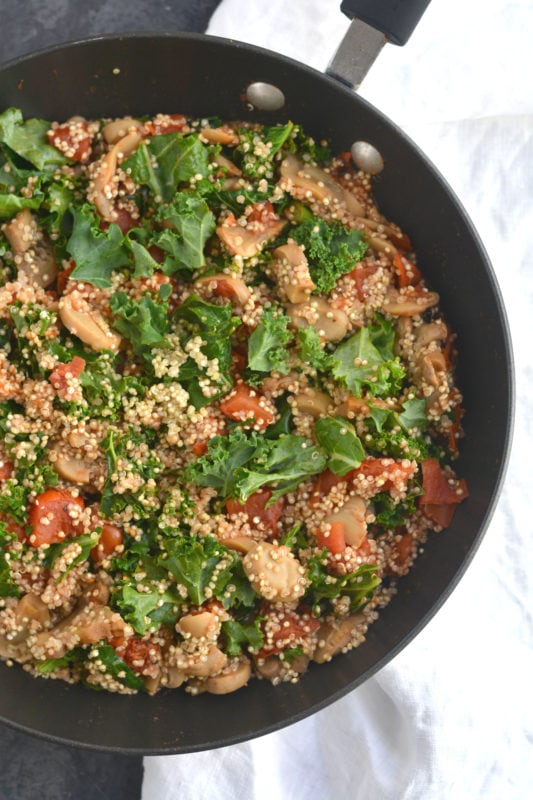
Start off by cooking the quinoa; that's the base for this recipe. Then, you'll saute some garlic and mushrooms in a skillet, along with some white wine vinegar until the garlic becomes fragrant. Add in the tomatoes, sage, salt, and pepper, and let it simmer for a couple of minutes. Finally, add in the kale and the quinoa and stir it all together. This cooks very quickly.
We like to serve this vegan mushroom hash as is for breakfast, or maybe with some crusty bread on the side that you've drizzled with a little olive oil. You can also eat this for lunch or dinner, alongside some roasted potatoes, if desired. It's also good with a soup like our vegan minestrone soup, or even with rice added in. You can use brown or white rice, or even our cauliflower rice.
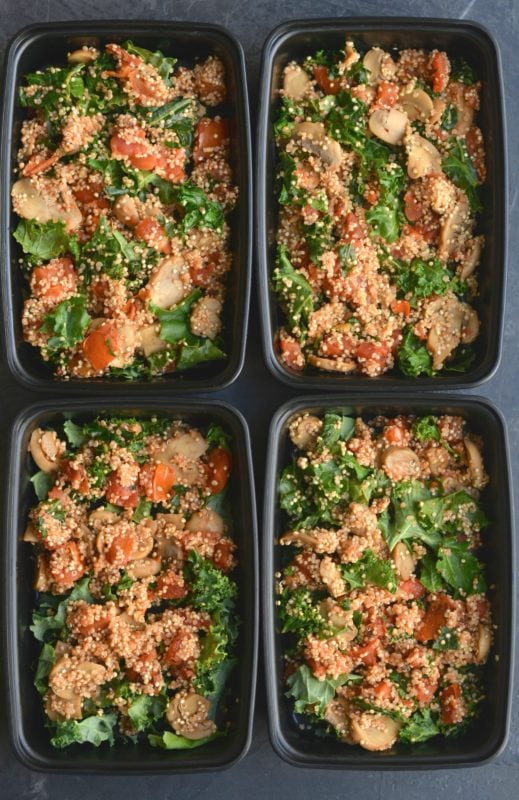
If you're going to make this as a meal prep recipe, once it's cooked portion it into individual air-tight containers and store it in the fridge until you're ready to eat it. It's good for 4 to 5 days. You can eat this at room temperature or reheat it in a skillet over medium heat until it's hot all the way through. You can also freeze this (yes, quinoa freezes well) and defrost it right in a hot skillet. It will be ready quickly.
Feel free to use fresh mushrooms if you like. They'll cook down considerably; just keep that in mind if you're using fresh ones. Just chop them to bite-size so that everything in the hash is close to the same size. Similarly, you can use fresh tomatoes if it's summertime when you're making this and your garden is overflowing with tomatoes.
Cooked cubed sweet potatoes would be delicious in this vegan breakfast hash, or roasted Yukon gold or new potatoes.
Kale is awesome, we love it, but spinach works here, too, or even Swiss chard. You can use almost any kind of greens here (even beet greens). The mushrooms are pretty earthy and they'd pair well with chard in particular. Arugula is good, too, if you'd like a peppery kick to this dish.
Use any of your favorite seasonings, whether it's paprika, rosemary, oregano, or thyme. All of them would complement this dish.
Click here for more Vegan Meal Prep Recipes


This might not be a phrase you ever thought you'd encounter--how to meal prep exactly like Snoop Dogg--but the man knows a few things about prepping. Must be all that time hanging out with Martha.
If you've ever caught an episode of Martha & Snoop's Potluck Dinner Party, then you already know that Snoop Dogg is pretty comfortable in a kitchen. And because of that, we're going to tell you how to meal prep exactly like Snoop Dogg.
Now trying to live his best life, Snoop says: "I never knew how good working out was for you. Gotta take care of your body, man you just gots to." Part of that caretaking involves eating good food, and planning for it. He also explained how motivation and inspiration, together with protein shakes and meal preps for weight gain, have made him "try to be better." You can try to be better, too, if you could master How To Meal Prep Exactly Like Snoop Dogg.
Shoot... we could all take a lesson or two from Snoop!
It just goes to show you: Inspiration can come when you least expect it and from the most surprising sources.

Snoop starts his day with egg, sausage, lettuce, tomatoes, and English muffins. Try it!
That's a pretty solid breakfast, but if you want to switch it up... here are some of our Breakfast Meal Prep Recipes that can also get you going!
We are pretty stoked to see that Snoop's lunch prep follows along with our recommended Protein + Carb + Veg combo for the perfect meal prep. He prepped chicken, brown rice, and seasoned carrots for lunch.
Here's some advice. When someone else preps for you, it's wise to not ask questions. Just eat it and be thankful! K? Gratitude: another way to prep exactly like Snoop Dogg. (And isn't this a lesson we should have learned as kids? Lol!)
Not into meal-prepping lunch exactly like Snoop Dogg? Check out some of our original lunch meal prep recipes!
You got that asparagus, salmon, greens, and biscuits for dinner?
READ MORE: 'Cause we all need more salmon, try 35 Simple Salmon Meal Prep Recipes
Without further ado, we bring you the ultimate meal prep exactly like Snoop Dog with this recipe. Are you ready?
Prep time: 5 minutes
Total time: 2-2 ½ hours
Servings: 6
Ingredients:
Believe it or not, fresh fruit is a great way to stay hydrated-and get those vitamins in! That's why it tastes so good when it's hot out.
And when you've been going hard all week and you want to relax for breakfast, we feel your pain. Here is how to Meal Prep Exactly Like Snoop Dogg for breakfast:
Bet you weren't expecting that twist?
What's Snoop Dogg taught you here today? Share in the comments below!
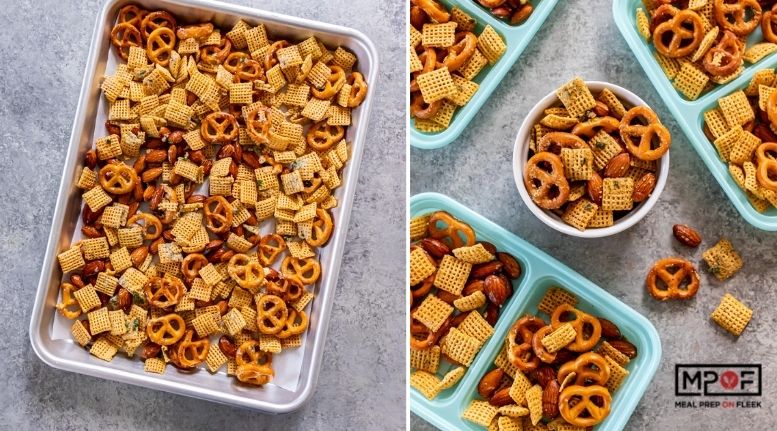
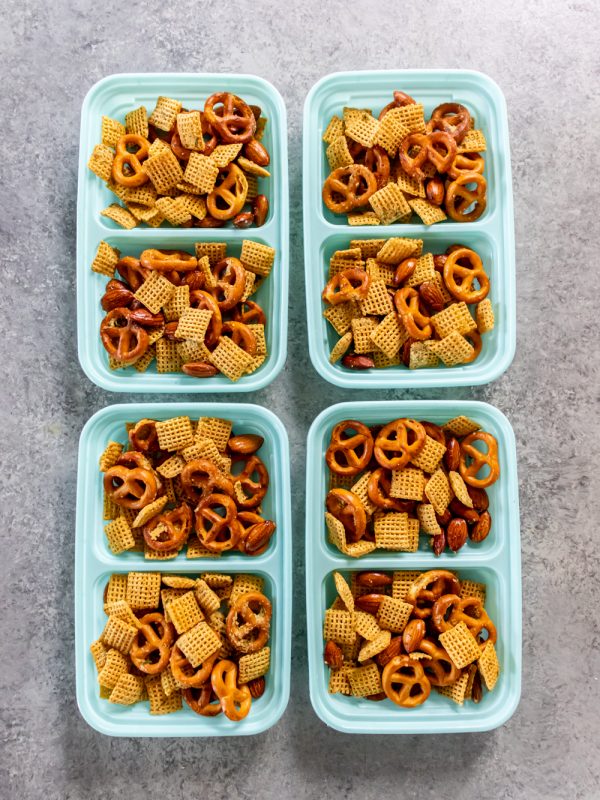
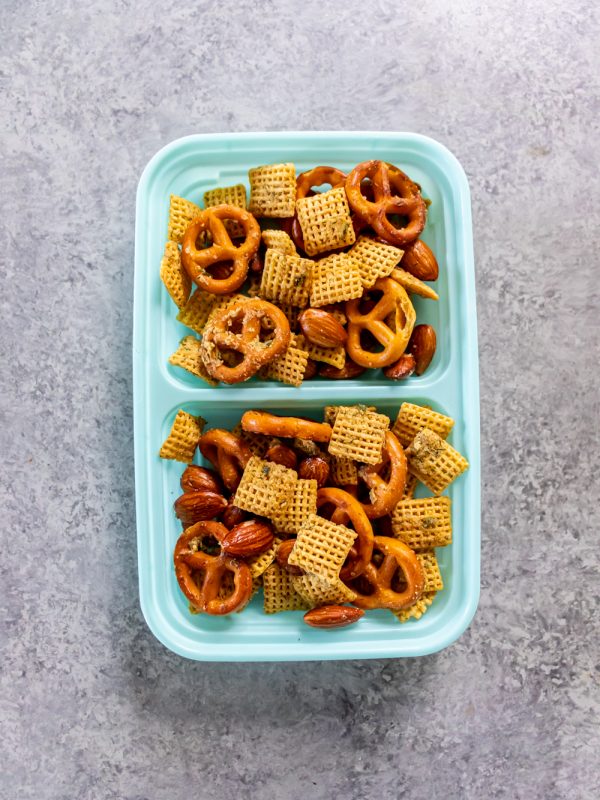
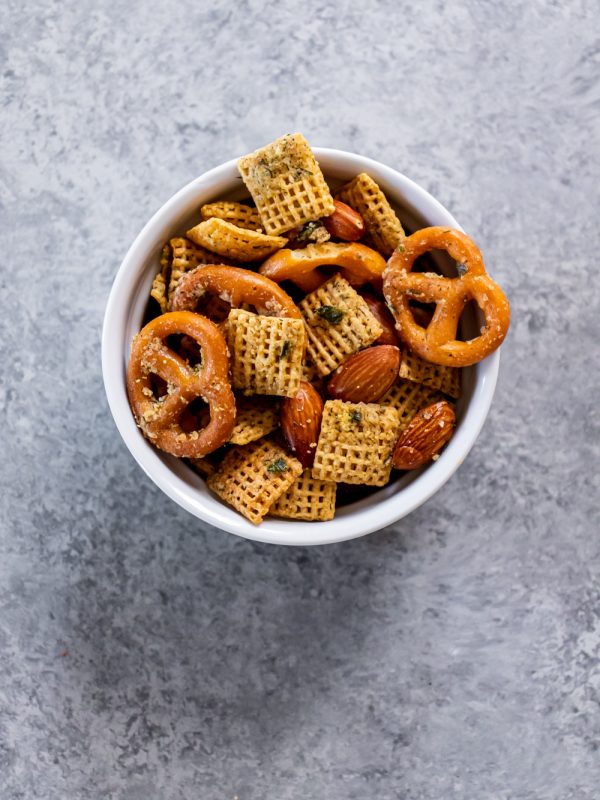
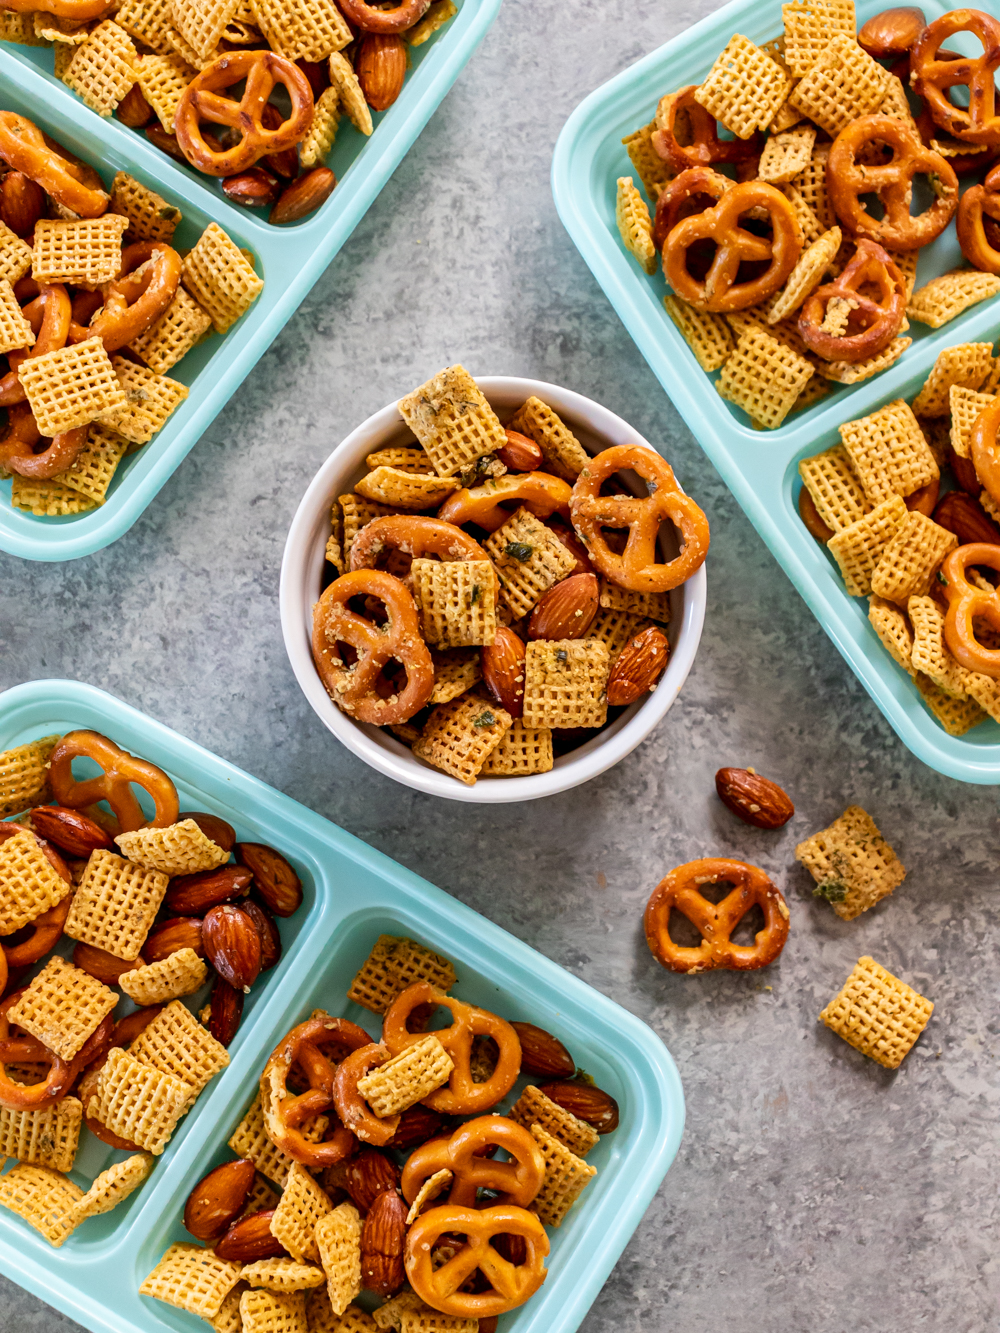
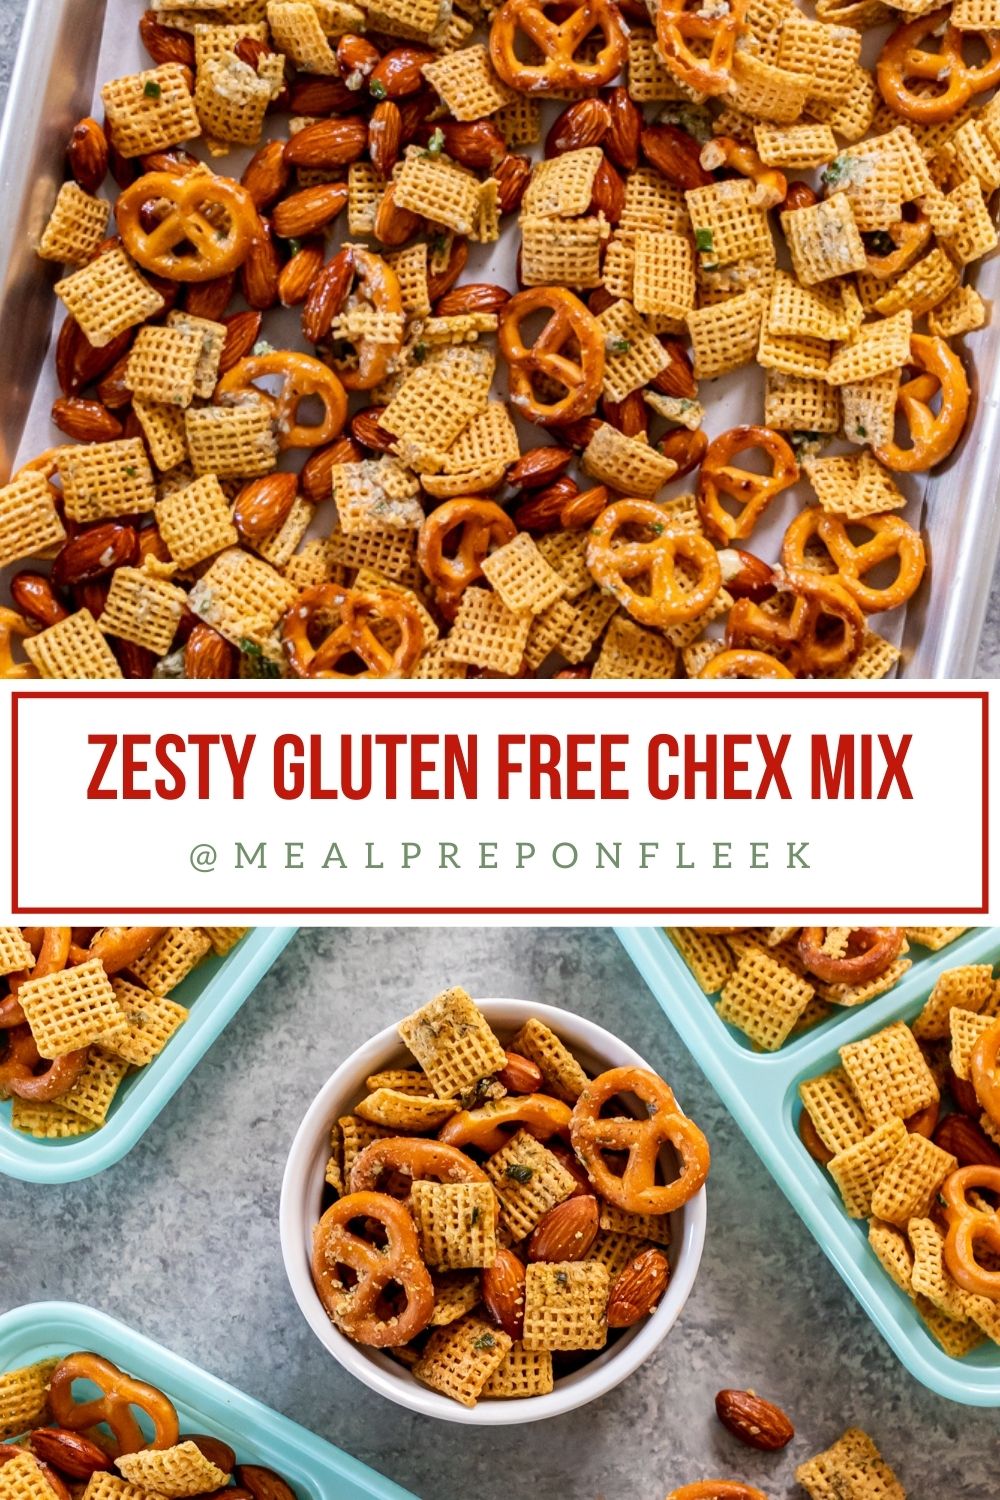
This zesty gluten-free Chex Mix gets its ranch flavor from dried buttermilk and herbs such as garlic, dill, and chives. Heart-healthy almonds add a dose of good-for-you fats that satiate.
Do you remember Chex Mix? Did you have this as a snack growing up? It was such a popular snack, with pretzels and peanuts and sometimes even things like cashews and chocolate chips, depending on who's putting it together. Are you surprised they even still make Chex cereal? Are we asking too many questions? Ha!
Whatever your answer to these questions, this isn't your mom's Chex Mix. No way. Or not even your grandma's! This is a zesty, gluten-free Chex Mix for a new age!
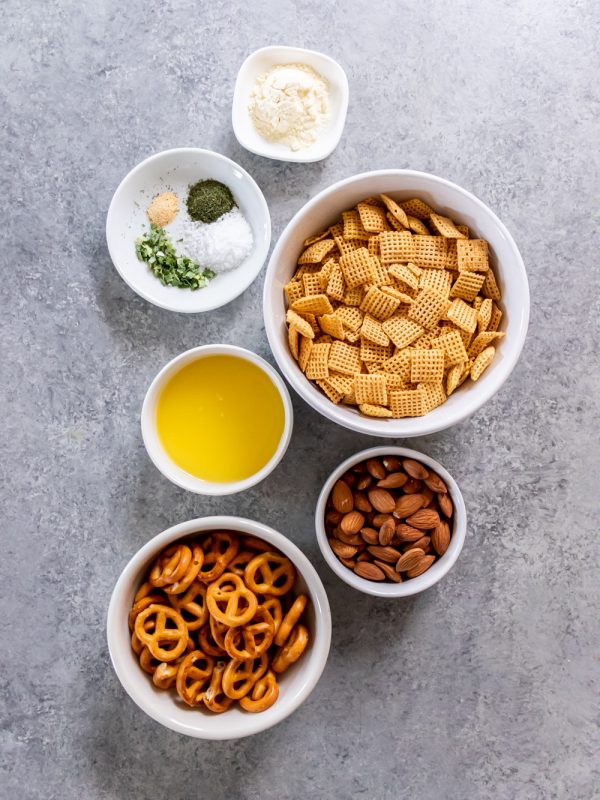
Chex Mix is easy to assemble, that's for sure. But this one takes on a ranch flavor. And it feels a little bit retro and also kinda grown up, too at the same time. All you need is gluten-free Chex and a big bowl to start. Keep in mind that all Chex cereals are gluten-free (rice and corn, we're looking at you), with the exception of the wheat version.
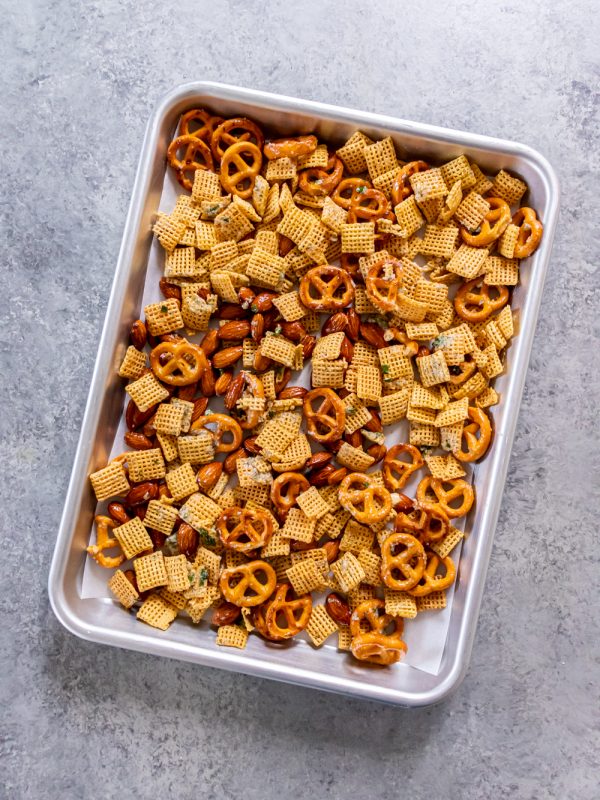
Toss it with some melted butter, dried buttermilk, gluten-free pretzels, and dried herbs such as dill and chives. A smidge of salt and garlic powder go a long way toward a really tasty snack. 'Cause sometimes you want fruit and veggies, and other times you want a savory, salty crunch-fest for a snack.

Anything that's tiny, salty, and gluten-free would work in this mix. But we're definitely partial to it as written.
You can easily double or triple this recipe. Just make sure you've got enough rimmed baking sheets to accommodate the increase.
Of course, this is a great snack, but you might consider also giving some out as gifts around the holidays, or doubling the recipe when you're having a party. People will wonder how you got it to taste like ranch dressing, but without a bit of dressing in sight!
If you have never used powdered buttermilk before, you can usually find it in the baking aisle. Barring that, it's available online. (But then again, what isn't?)
This tasty snack will keep in meal prep containers for 4 or 5 days. You'll want to store it at room temperature. It might be tempting to just put it all in one airtight container instead of prepping it, but unless you've got incredible willpower, prep it and forget it!
READ MORE: Because snacks are life, try Candied Nut Mix for the Holidays (or anytime, really!)
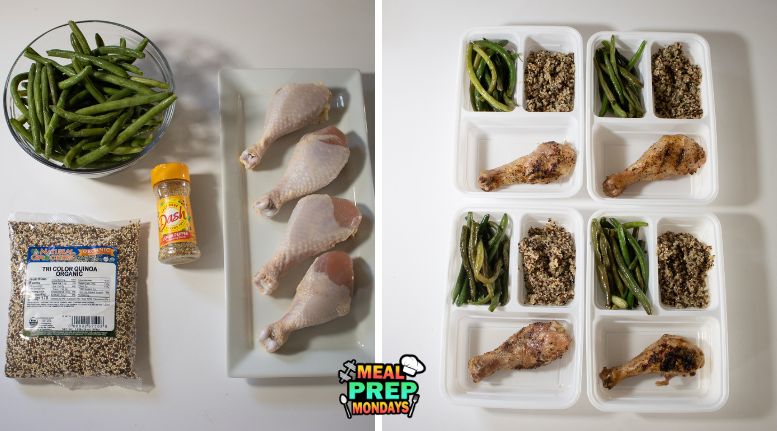
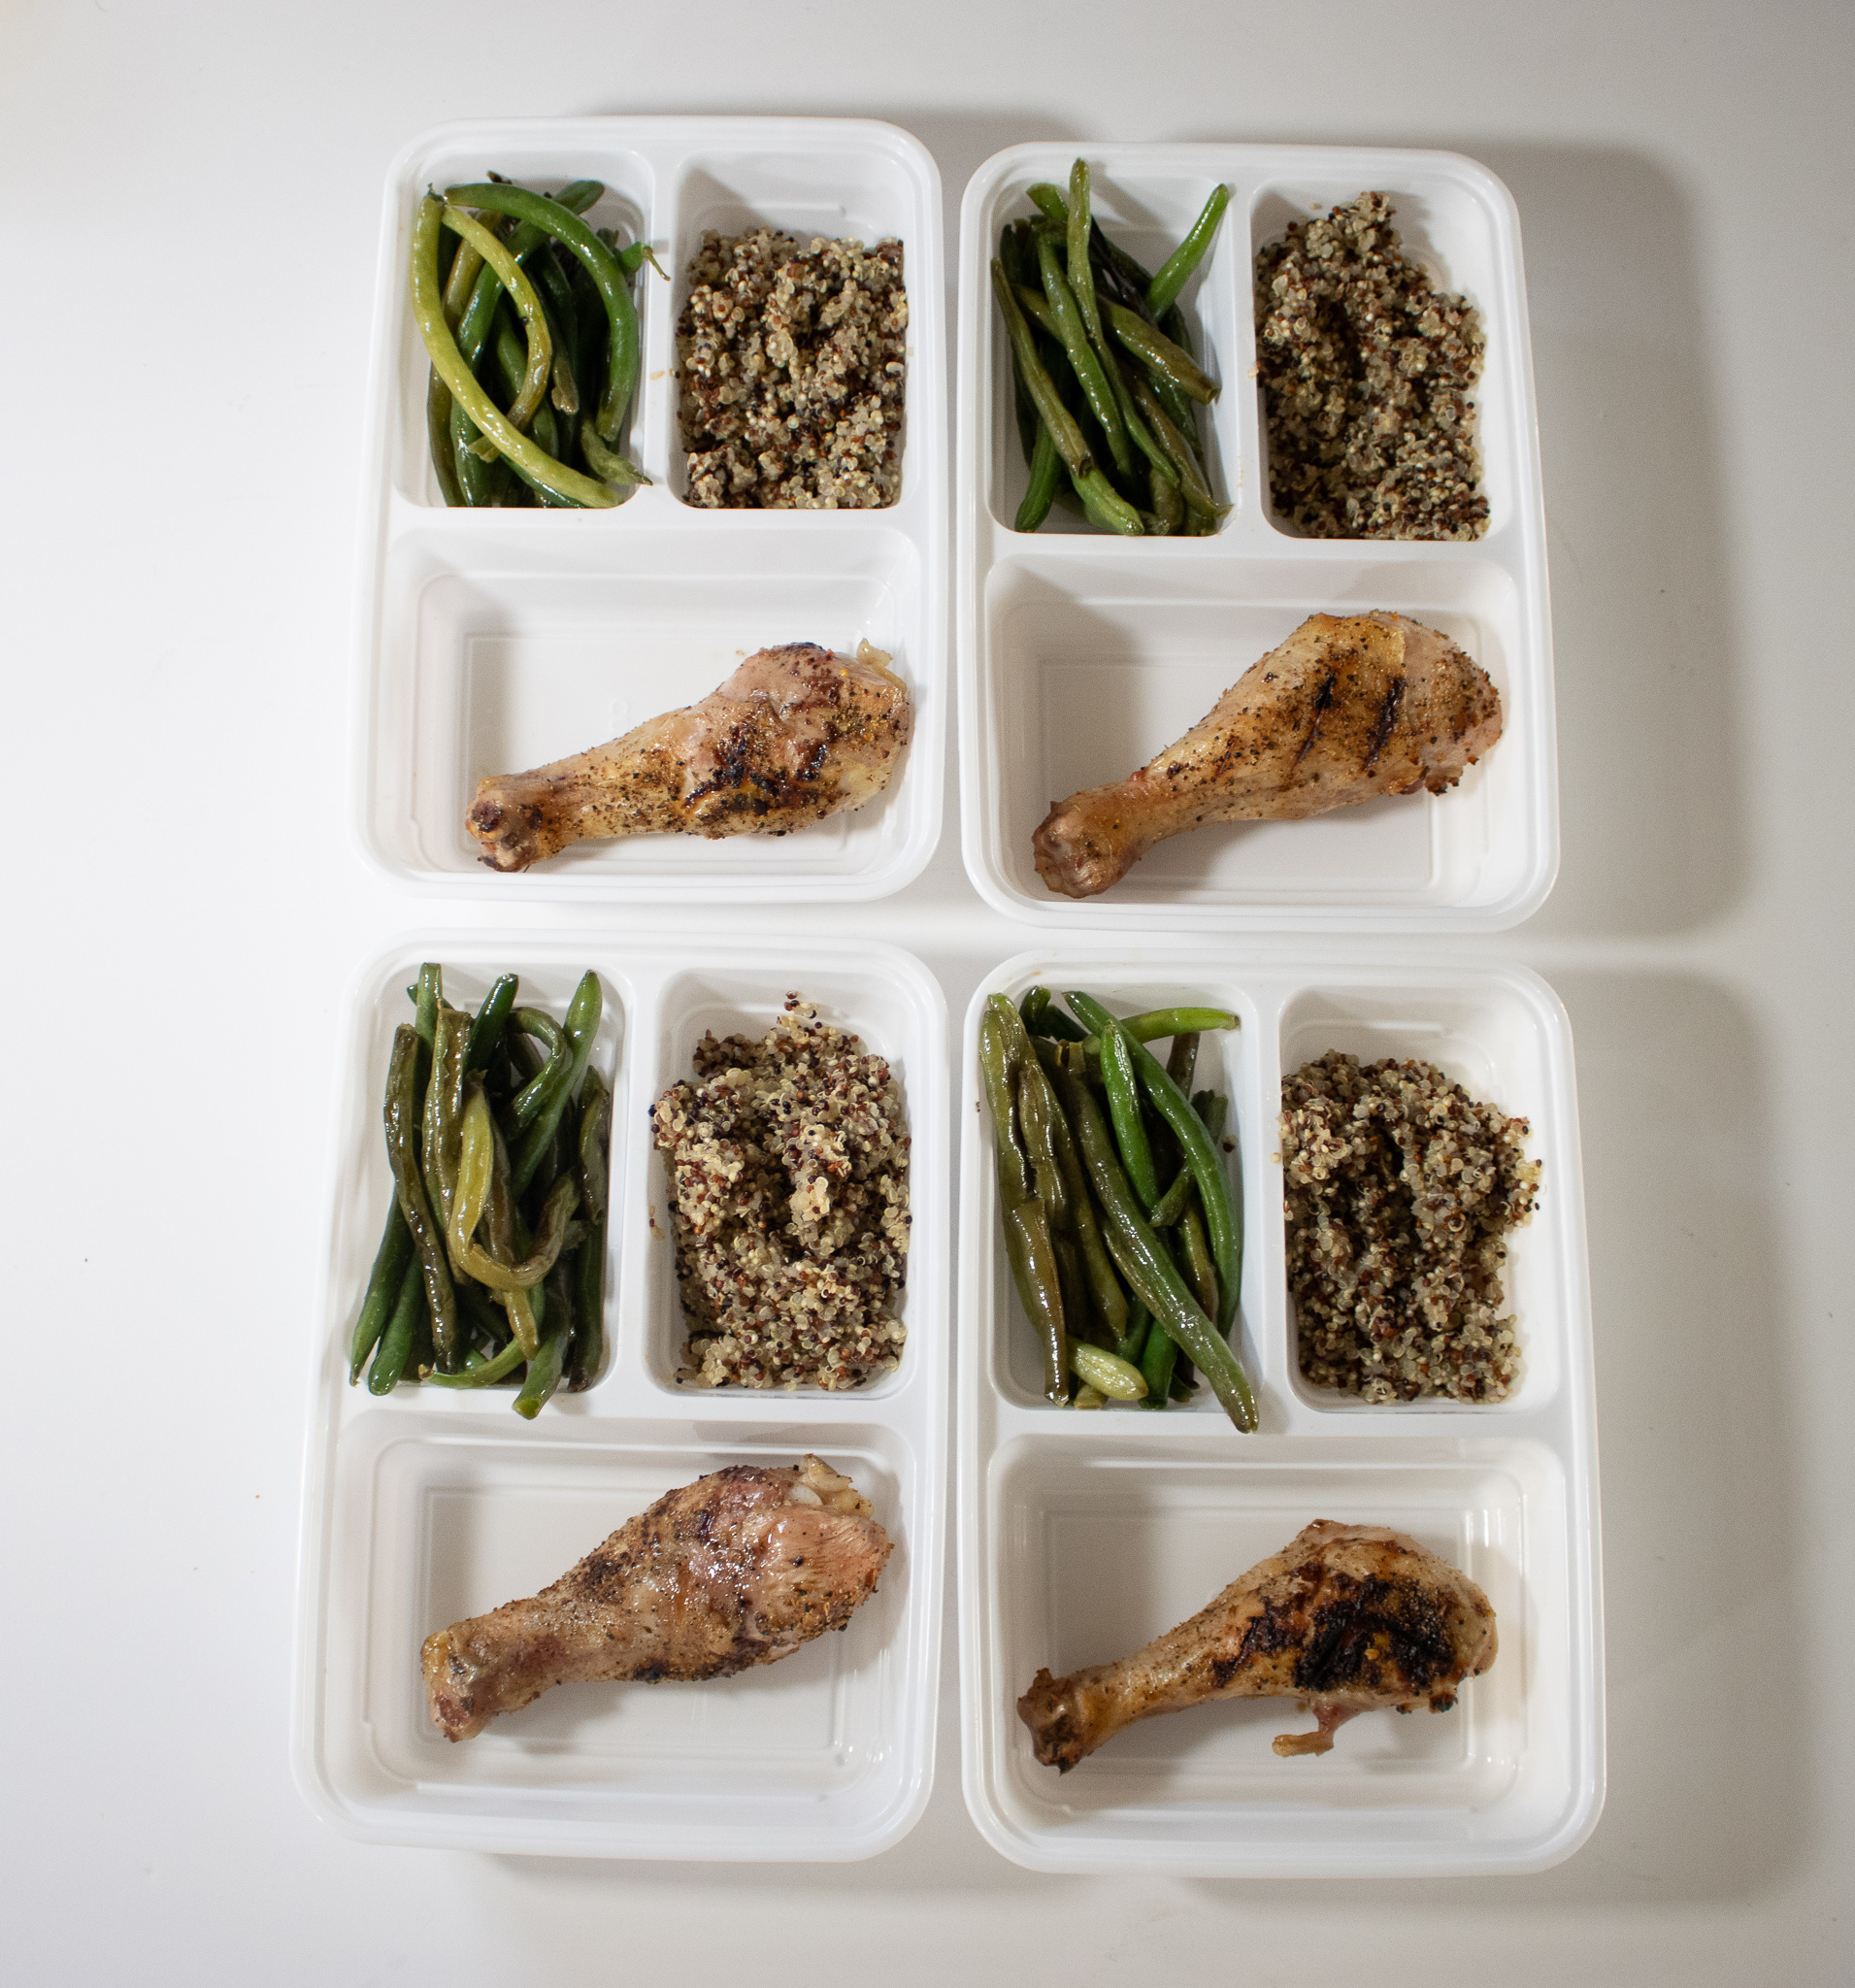
Lemon-Pepper Chicken Drumsticks are an inexpensive slam dunk of a dinner for adults and kids alike. Serve with green beans and quinoa for a high-protein meal.
So, we have to admit that chicken breasts and, to a lesser extent, chicken thighs get a lot of attention. But drumsticks are fun to eat, kids tend to like them, and they're inexpensive. Way inexpensive. There's plenty to go around for this meal! And honestly, sometimes simple meals are the best meals. This lemon pepper chicken drumstick recipe is a quick and easy meal prep for lunch or dinner, because it relies on two things: freezer and pantry staples.
This recipe comes together easily using a lot of things you may have on hand-assuming chicken drumsticks is one of them. Regardless, if your freezer is well stocked, we especially like this dish with green beans.
We've written this for the grill if you're game to fire it up, but you can also cook this on a very hot grill pan right inside your house. Your call!
Is this surprising to you, that we're saying to GRILL? If you think you can't meal prep on the grill, think again!
While the chicken cooks, you can cook the green beans (which you've defrosted) in a skillet with some olive oil. We kind of like them to get a little bit of a char on them if you turn the skillet it up to medium-high; it's up to you. You can cook them right from frozen. The quinoa cooks in about 10 to 15 minutes, so you can start that after the chicken hits the grill.
But the best part? The lemon chicken seasoning! We're using an old-school seasoning that used to go by the name Mrs. Dash (now it's just . . . Dash???) but it imparts the same great lemon-pepper flavor. These blends are often without salt, so just read the label carefully and add a little salt if you'd like. And that's how you get lemon chicken drumsticks. Easy!
The grill is your friend here! These will easily keep for meal prepping for 4 to 5 days. You can also freeze meat that's been grilled. Just defrost it overnight in the fridge and then transfer to moderate oven to heat it up and crisp it through. Or, take it right from the freezer and reheat it in a low oven, wrapped in aluminum foil. It's a good idea to then take it out of the foil once it's heated through, turn up the temperature to about 400, to crisp it up all the way around!
Feel free to use chicken wings and thighs, or a combination of different chicken parts; it'll still be lemon chicken. Consider this recipe a template for the protein itself. You can even use chicken breasts; you'll just need to make sure the chicken doesn't overcook because dark meat like thighs and drumsticks is more moist.
Broccoli is always great with chicken for some mysterious reason, so if you've got a bag of frozen florets kicking around in your freezer, by all means pull it out.
You can cook the veggies right from frozen if you like; the heat of the skillet will cook off any extra moisture if you cook them at medium-high
If you want to grill the green beans, put them all in a grilling basket and do it that way. This piece of equipment can be very handy if you grill frequently and don't want to lose your veggies in between the grill grates!
If you love lemon, serve these lemon chicken drumsticks with a couple of lemon wedges alongside, to boost the flavor.
READ MORE: More drumsticks, please! How about these Caribbean Drumsticks?


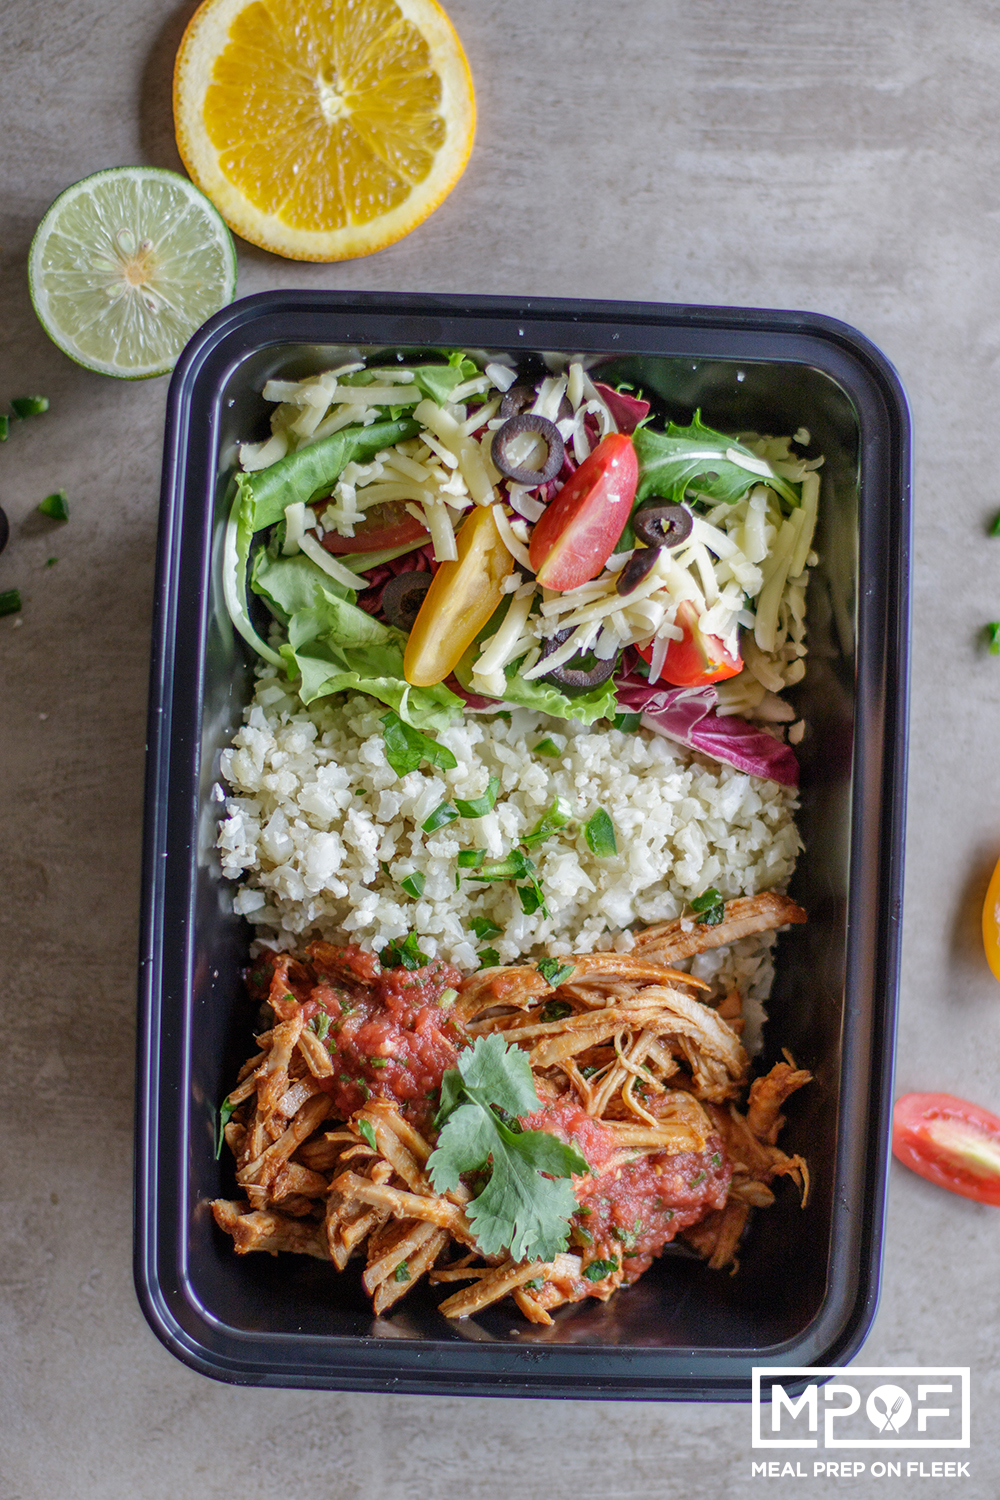
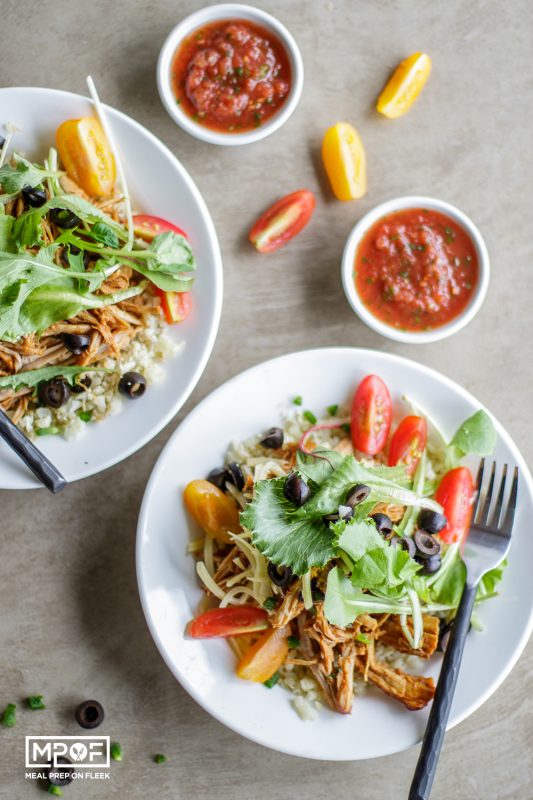
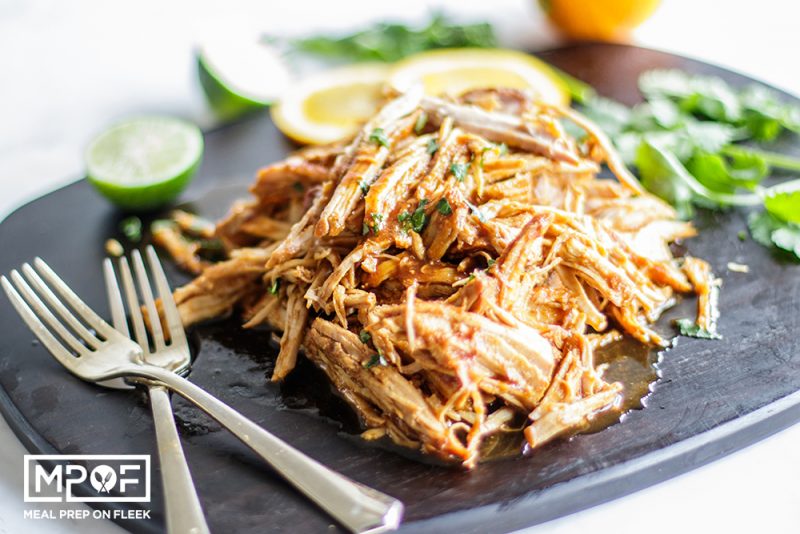
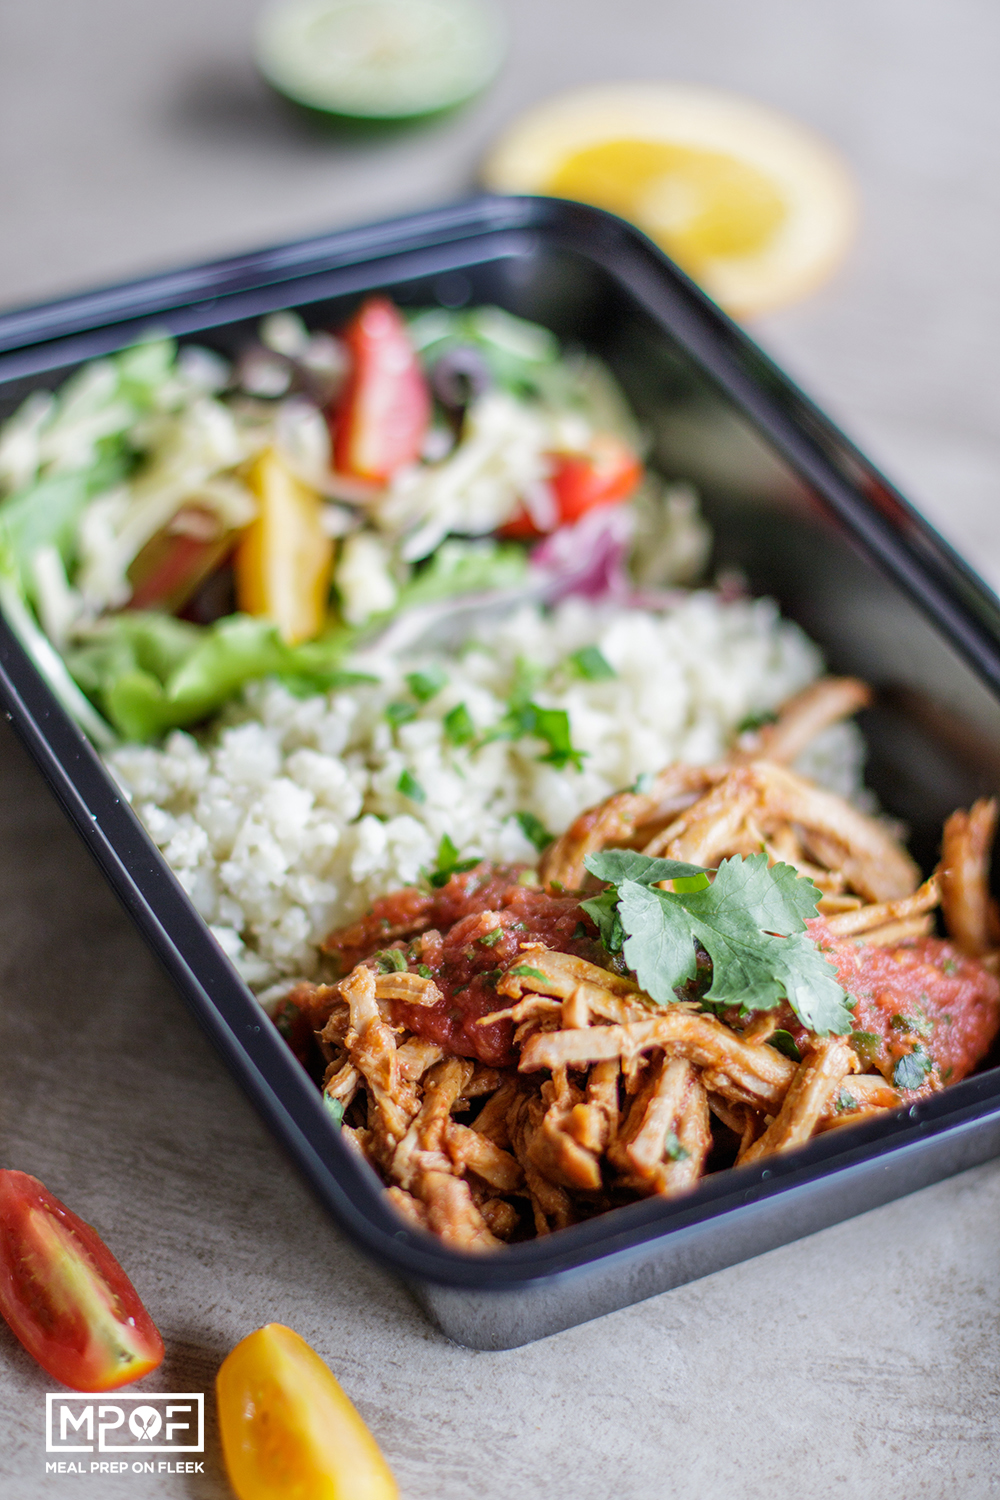
Slow Cooker Keto Pork Carnitas Bowls are incredibly juicy and full of flavor thanks to a zesty citrus marinade and the use of a slow cooker. Layer the shredded pork over cauliflower rice, and add on your favorite burrito toppings!
The slow cooker is the ultimate set-it-and-forget it meal prep helper. But whether your call it a slow cooker or a Crock-Pot (that's the brand name!), it's worth having this appliance. And it does such amazing work with all different kinds of cuts of meat, turning them incredibly flavorful and moist over the course of several hours. Plus, let's not forget the incredible smell, too, wafting around your kitchen as this cooks away.
This pork dish is no exception, and it's ideal for a keto diet. There's nothing in here that's off-limits for those on this plan.
For the carnitas
And the Cauliflower "Rice" . . .
Who can forget the toppings. . .
It's just a matter of assembly, really. Sear the pork in a hot pan and then transfer it along with all the carnitas ingredients right into the slow cooker. While it does its thing (it'll take hours!), you can go about your business. Then, about a half hour before you're ready to serve these (or meal prep them and stash them away), make up the cauliflower rice, which comes together thanks to a food processor and your skillet, along with some seasonings.
READ MORE: Can't Get Enough Carnitas? Chicken Carnitas Nachos Are Amazing!
When you're ready to assemble these bowls, add on as many delicious toppings as you want, such as baby greens, cherry tomatoes, cheddar cheese, peppers, olives, and salsa. Oh, and avocado too, if you want. Because we at MPOF just loooove recipes with avocado.
These will keep just great for 4 to 5 days in their meal prep containers. You can also freeze the meat all by itself, as long it's in a sealed container that's ideal for the freezer. Defrost in the fridge overnight and reheat, or simply pop the frozen meat in a saucepan over low heat. Alternatively, you can reheat the meat in the oven. Just be sure to cover it a bit with foil so it doesn't dry out. You can even freeze the cauliflower rice, too, if you want. This frozen meal should keep for at least 3 months.
The key to making fluffy and not watery cauliflower rice is to cook it over very high heat, and to only cook it for a few minutes, so the moisture doesn't begin to come out of it.
You can use pork shoulder if you like, even though this recipe calls for a roast. A typical pork shoulder will yield more than 2 pounds of meat, so just keep an eye out as you're putting it together. You might need to up the rest of the ingredients that go with the pork. No biggie, though!
If you're not following a keto diet, you can use regular rice (white or brown) and serve the carnitas right over the rice. Or, pile all the ingredients into a tortilla and roll it up like a burrito!
READ MORE: Try our Asian Style Slow Cooker Pot Roast Meal Prep-it's crazy flavorful!


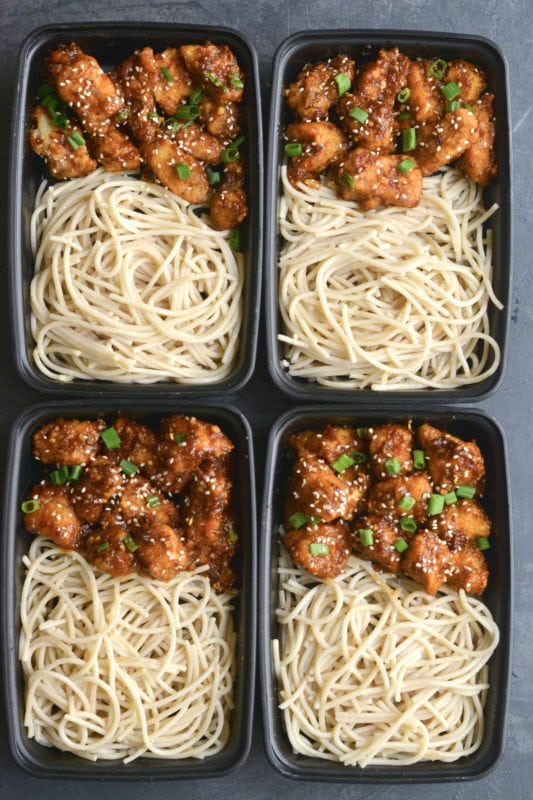
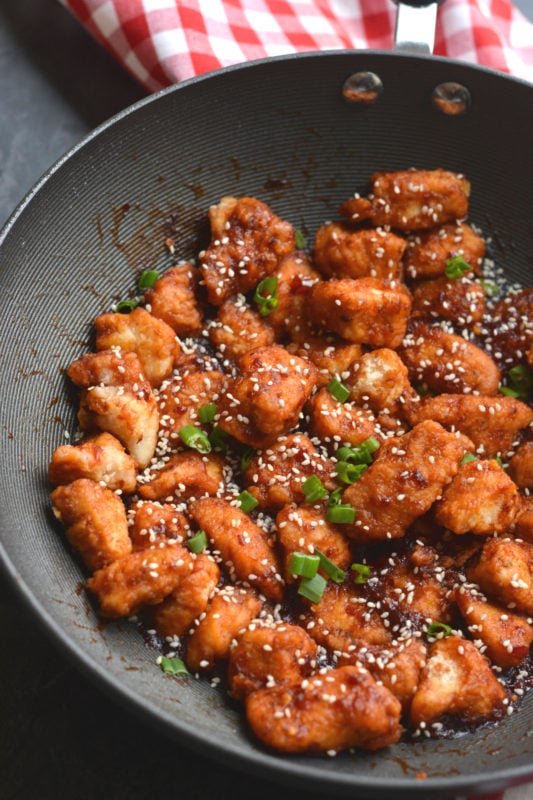
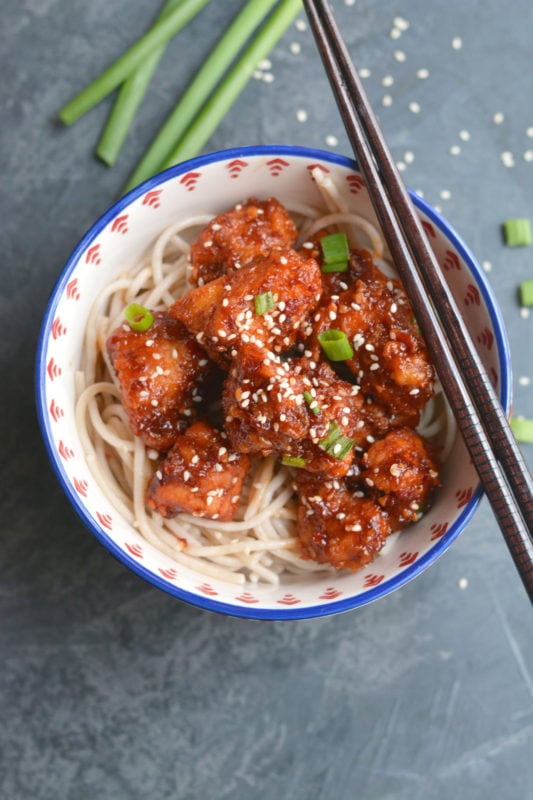
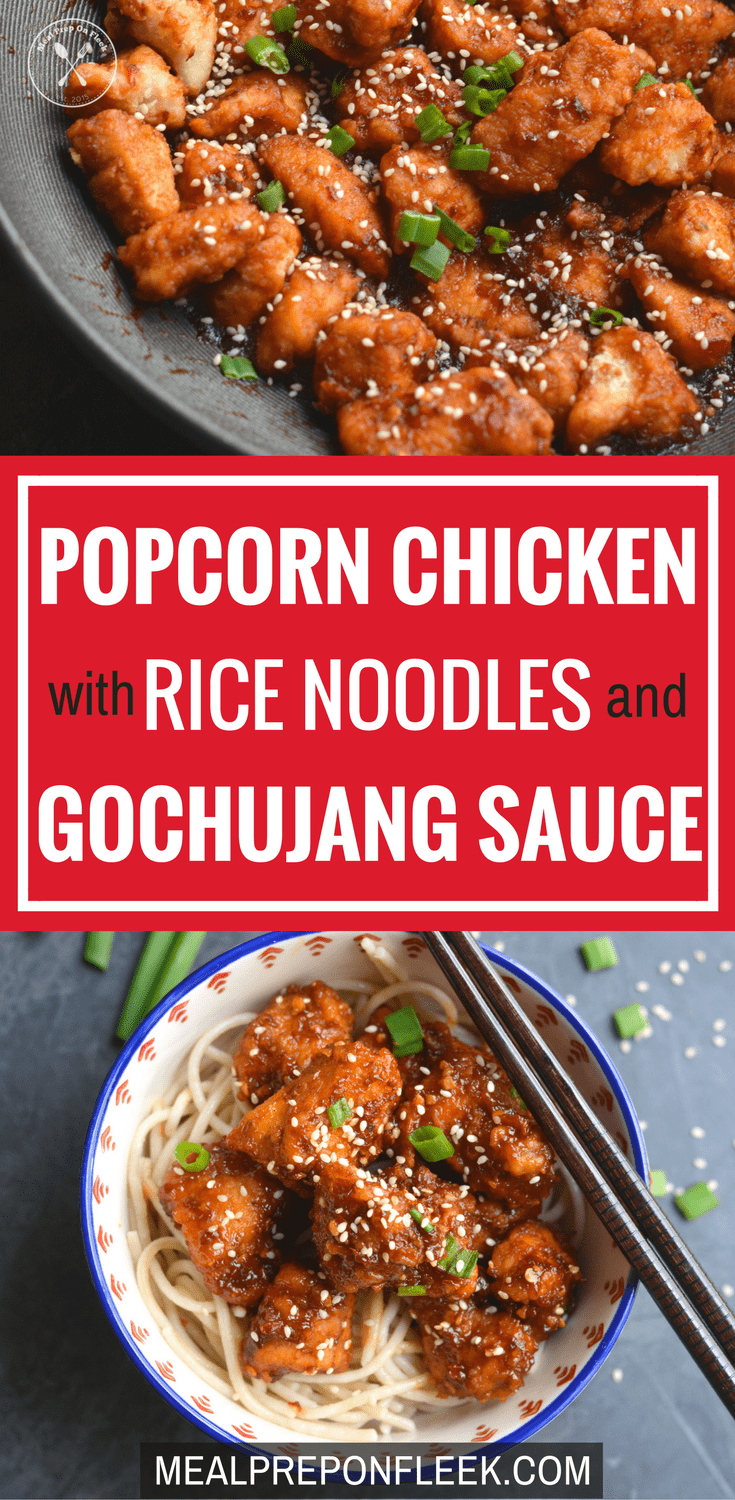
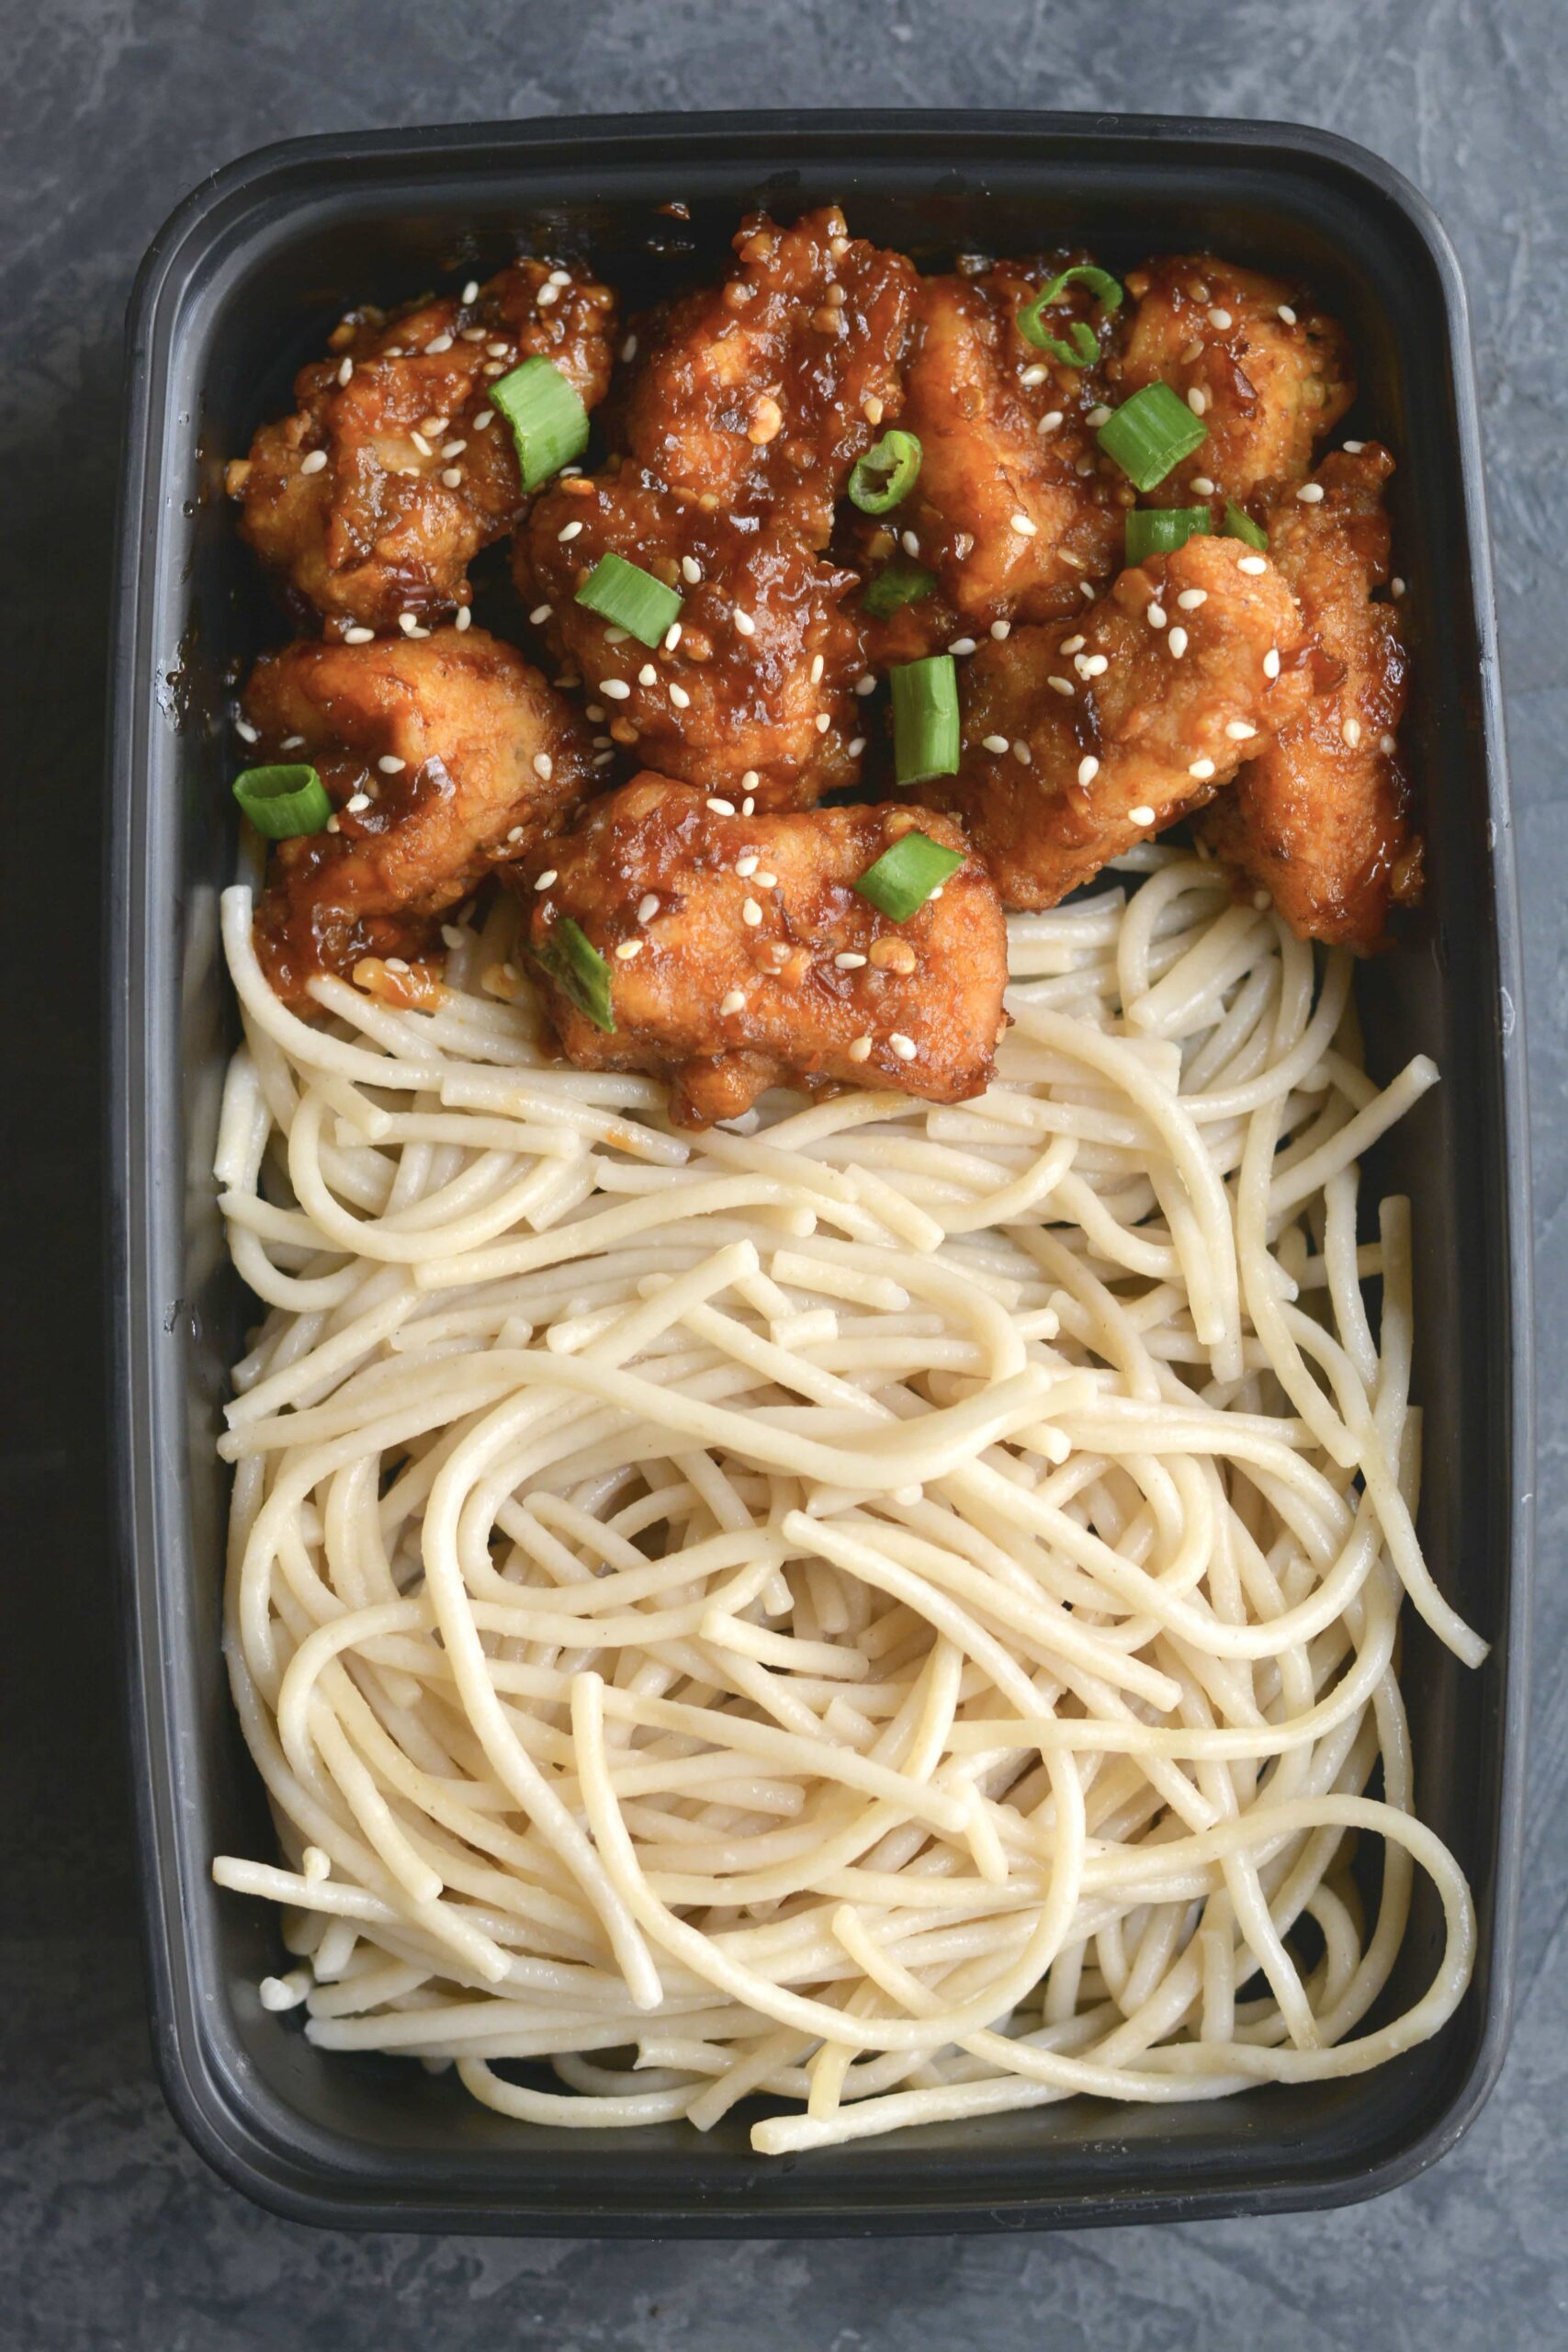
Popcorn chicken is lightly fried Korean chicken served with a spicy sauce over brown rice noodles. Healthier than takeout and just as delicious!
Popcorn chicken isn't popcorn at all. A bit of a misnomer, yes! It's bite-sized pieces of chicken lightly fried to crispy perfection. If you're looking for something different for dinner, make this easy meal prep recipe tonight. The chicken gets tossed in a popular Korean cooking condiment called gochujang, which is a savory, sweet and spicy fermented red chili paste. (Most grocery stores have this, in case you haven't seen it before!) Make this dish made gluten-free (swap out the soy sauce for tamari) if needed.
For the chicken:
For the Sauce:
The chicken gets cooked in sesame oil with a bunch of awesome spices including paprika, garlic, and ginger. Then you toss it in tapioca flower (making this dish gluten-free!) and quickly pan fry it. Remove to a paper towel to drain.
Meanwhile, your noodle will cook in another pot. You can make the sauce ahead of time if you like, as it just consists of ketchup, coconut sugar, soy sauce (or tamari if gluten-free), and gochujang. Play with the amounts if desired to get your ideal balance of flavors.
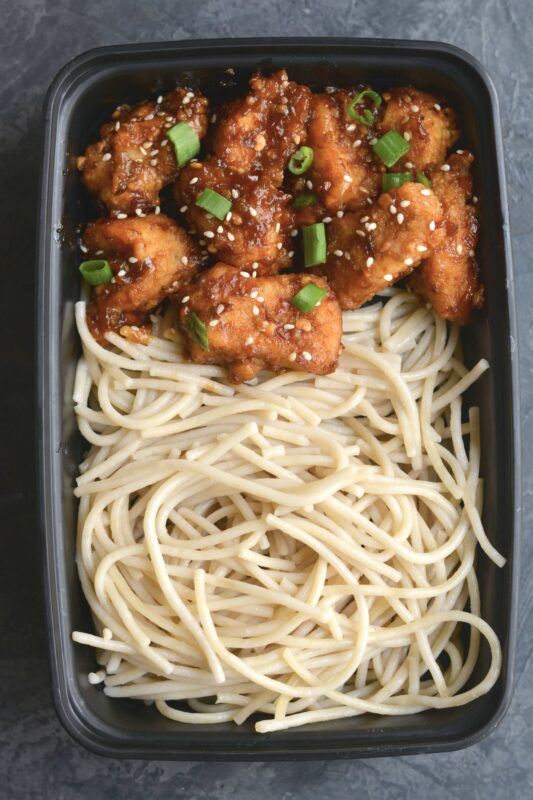
We've got you all set for this chicken dish as an easy meal prep recipe. Portion the chicken into one side of the container and the noodles in the other. Done and done! This keeps in the fridge for 4 or 5 days provided the containers are sealed properly. Reheat in the microwave or right in a hot pan to which you've added a smidge of oil (just so the noodles don't stick or dry out!).
We also love to double the chicken for a recipe like this and freeze it. You can freeze the chicken before or after cooking. Just transfer to a zip-close plastic bag and label it with the contents and date, so you know what's what when it's time to excavate that bag from the freezer! Defrost in the fridge (overnight if you can, it's very helpful!) before cooking it, and defrost before reheating.
This meal prep recipe is a complete dinner in and of itself. However, you can add a few things if desired.
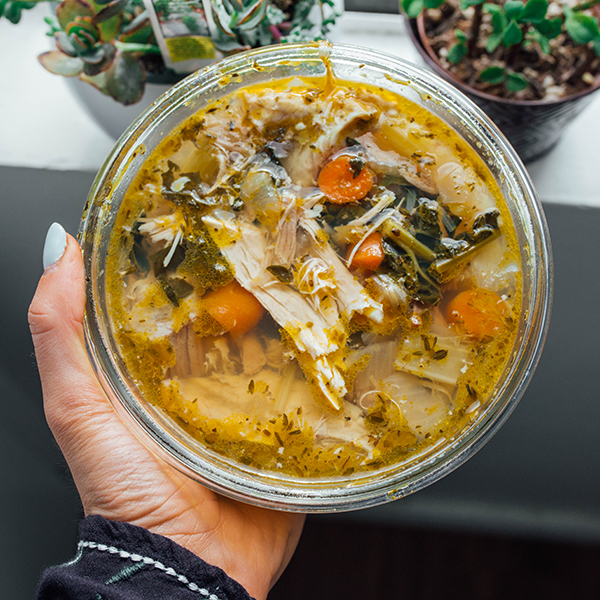
Paleo Chicken Soup with Kale combines the benefits of a comforting soup with the nutrition of kale, all in your Instant Pot!
It's wintry cold and you want something warm and cozy to eat ASAP. You also want to stick to your nutrition goals. What do you do? Pull out your Instant Pot and make paleo chicken soup with kale! This is a recipe for exactly what you need: a delicious comfort food soup that is loaded with flavor and nutrients. Kale makes this paleo chicken soup even better, adding a touch of bitterness, along with lots of nutrition. With any luck, you may find yourself reaching for seconds. We think this soup is auditioning for the role of "new favorite comfort food for the colder months." Give it a try!
We love it just as it is, because it's so delicious, but if you want more veggies, a green salad is never a bad idea alongside some soup.
The beauty of a pressure cooker such as the Instant Pot is that everything cooks right in the same pot and it happens more quickly than it would take otherwise if you were just simmering a soup on the stove.
You start with the saute function and add the avocado oil and veggies, along with seasonings. Add the whole chicken, set the Instant Pot, and walk away! Once it's ready, release the pressure and remove the chicken to a cutting board. Then, remove as much meat from the bones as possible. It's as easy as that!
Soup is one of those things, like stew, that tastes better the second or third day. Keep leftovers stored in an airtight container in the fridge for up to 5 days.
Freeze any leftover soup. As we like to say around here, future you will be so happy you did that. Freeze in individual servings if that makes the most sense for you, or in 2 or 4-cup increments, which can also be helpful depending on the size of your household. It should keep for up to 6 months. Defrost overnight and reheat on the stove, or use the microwave to speed things along.
Often referred to as a "superfood," kale offers high levels of many vitamins and minerals, which are essential for normal body function. The nutrients in a serving of kale will support your immune system, brain, eyes, skin, muscles, heart, and many other pathways within your body. Kale has anti-inflammatory and antioxidant properties, making it helpful for preventing and fighting many diseases including heart disease and cancer. Kale contains iron, too, which is doubly important for vegetarians and vegans.
As with most vegetables, kale is low in calories and high in fiber, which helps you stay full and helps digestion, and contributes to healthy cholesterol levels. Did you know adults need at least 25 grams of fiber per day? Many of us fall short. Eating something like this paleo chicken soup with kale makes it easier to get your good green veggies into your diet-and the fiber they bring, too. (Sources Dr. Axe; National Institute of Health, Arthritis Foundation, Healthline)
Feel free to use chicken parts, whether that means chicken breasts, thighs, drumsticks and/or some combination of any of those pieces.
If you're not a fan of kale, spinach works great here, and so does Swiss chard. In a pinch, beet greens would do, too. Anything dark green and leafy is a nutritional win!
You can take the leftover chicken carcass and use that to make stock if you like. Kitchen efficiency at its best. Then, transfer it once it's cool to containers you can label with the date and contents. Freeze if you like, or leave it in the fridge to make more soup-paleo chicken or something else.
READ MORE: Set it and forget it with this Slow Cooker Lentil Soup!
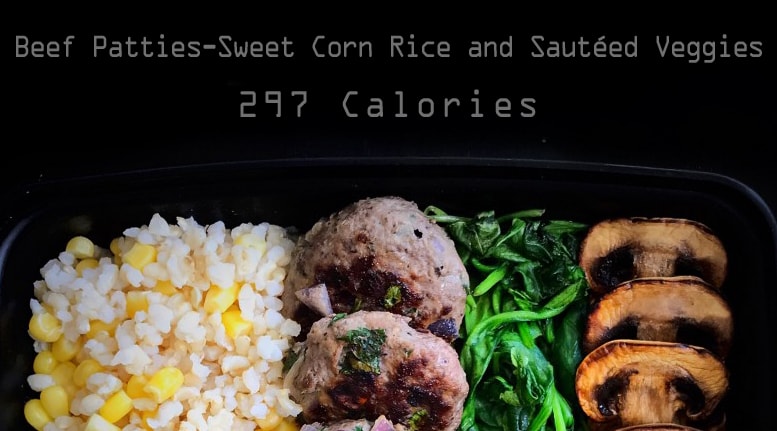
Tomato and Chickpea Rice with Beef Patties and Steamed Broccoli is a delicious way to use ground beef and it's loaded with protein!
This hearty Tomato and Chickpea Rice with Beef Patties and Steamed Broccoli meal prep is bursting with flavor! Packed with protein from both lean ground beef and chickpeas, this is one meal prep recipe that will keep you feeling satisfied and fueled all afternoon long! No 3pm slumps around here, thanks to the good balance of fats, protein, and carbs. It's also easy as far as a make-ahead meal prep is concerned. You can break this down into as many steps as you like since they're pretty distinct.

For patties:
For the rice and the rest:
You first make the patties by combining the ground beef, onion, and seasonings in a large bowl. Scoop them into evenly-sized small patties and set aside. Cook the patties over medium heat in a skillet and then take them off the heat. Finally, cook the rice in a deep skill or a saucepan until the water has been absorbed, and add in the tomatoes and chickpeas. Meanwhile, as the rice cooks, you can steam the broccoli and it's all ready around the same time.
If you want to break this down further into its own steps, making the broccoli ahead of time is an easy step. Prepping the beef patties is smart, too; just keep them in an airtight container after you cook them. Sometimes you have to get really granular with meal preps, and that's ok. Whatever it takes to get a good meal on the table.
This is a great meal prep because everything fits neatly into prep containers and can store for up to 4 or 5 days in the fridge. Simply reheat it all wrapped in foil in the oven for 10 to 15 minutes. You could even eat the beef patties cold if desired. It's pretty complete in terms of a meal as is, but if desired, add a salad or some crusty bread if those items fit with your dietary plans. You can also freeze every part of this dish in an airtight container for up to 3 months. Defrost overnight or in the microwave, or right in a hot skillet with a bit of butter or olive oil.
You can make this dish with other ground meat such as turkey, chicken, or pork. They might not be as moist as beef, thanks to the lower fat content, but the dish will still taste great.
Similarly, feel free to use white beans of any kind, which will complement this dish well.
You can also vary the types of dried seasonings, too. Oregano is great with beef, and so is rosemary. Paprika would pair well along with the cumin and chili powder, and maybe even a little dried coriander, too.
Swap out the white rice for brown rice if desired, or cauliflower rice.
Make any other veggie instead of broccoli, such as green beans, Brussels sprouts (roasting them would be great), or even sauteed bell peppers.
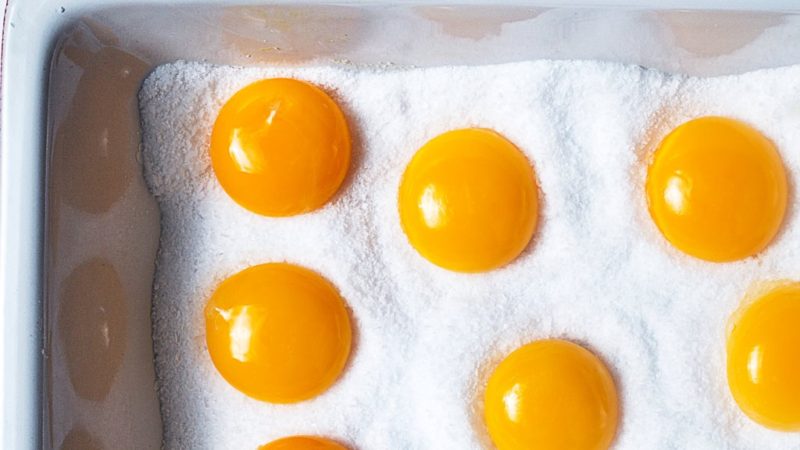
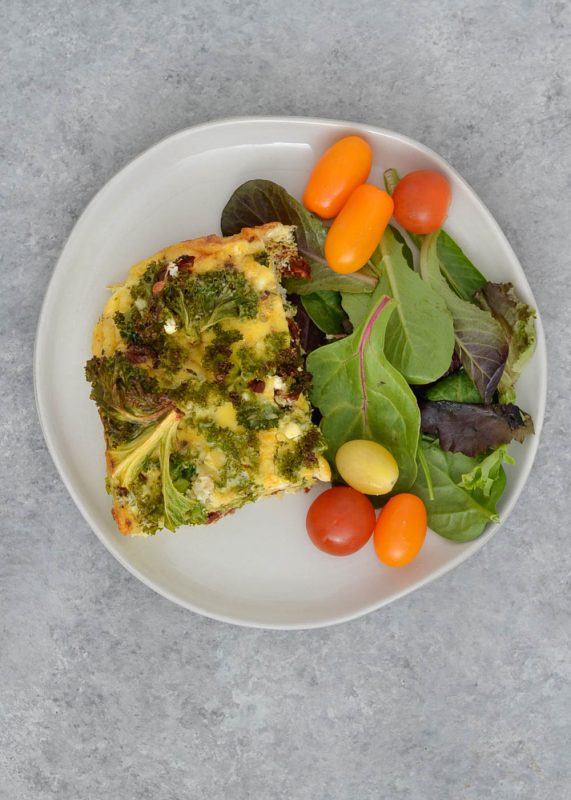
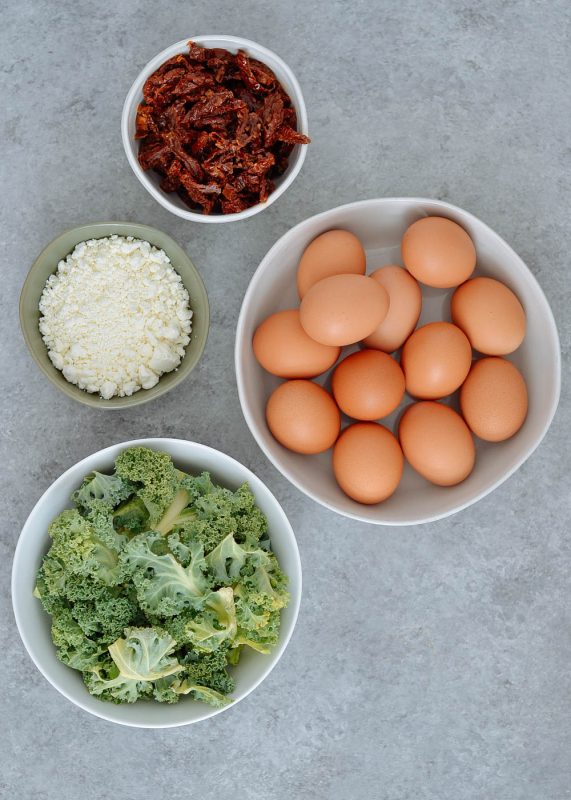
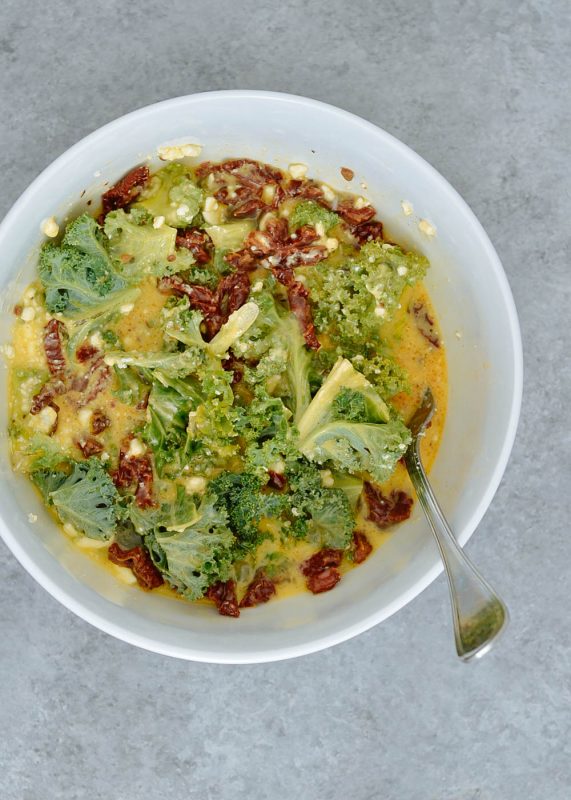
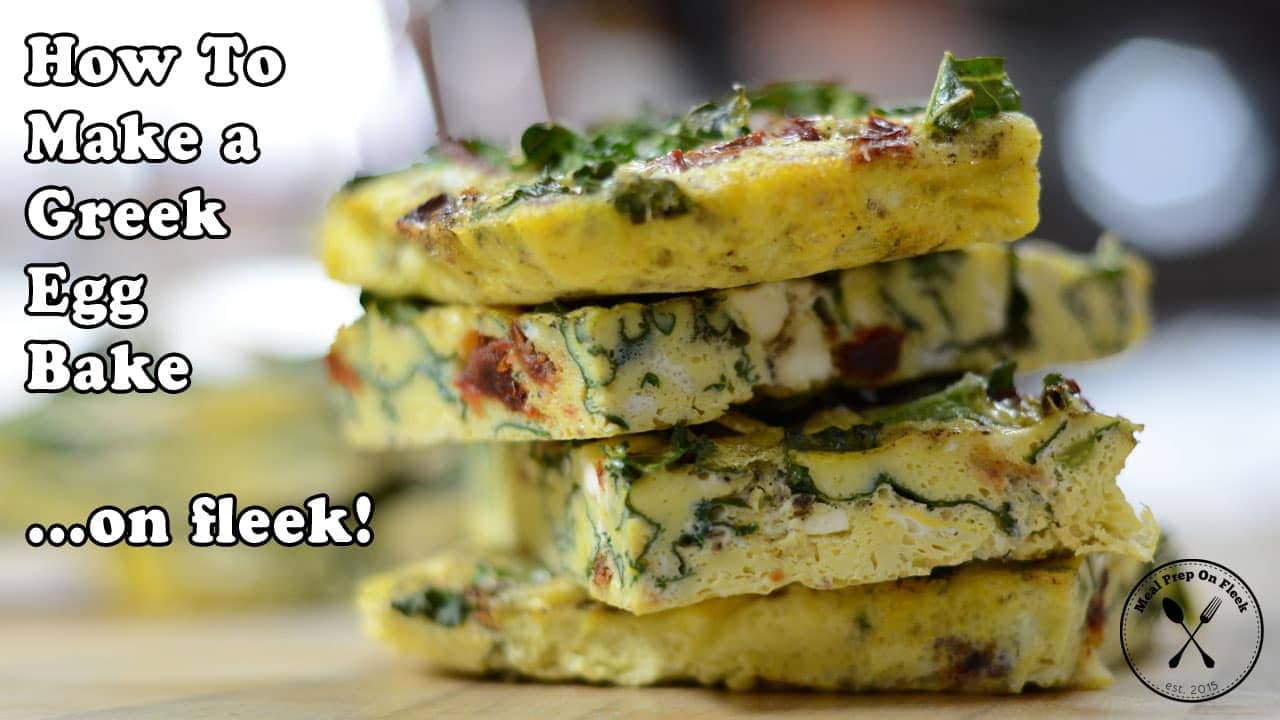
This Greek egg bake is so easy and a great way to get a lot of veggies and protein into one meal prep recipe. So good with fresh tomatoes, too.
It's not an omelet, and it's also not quite a frittata, but this Greek egg bake is an easy egg dish that delivers a lot of protein and veggies, too. We like this bake because it's a cool way to use up a lot of what's left in your fridge when it comes to vegetables; who doesn't love a good fridge clean-out recipe? Ultimately, a bake like this with eggs is a template that you can use to customize the dish to your liking.
And ultimately, we love any kind of breakfast meal prep that takes the guesswork and chaos out of the morning. But for real? We can eat this for lunch or dinner. Because eggs are always a winner for any meal. This recipe is gluten free and keto, and low-carb, too. Take out the cheese and it's both paleo and Whole30-friendly.
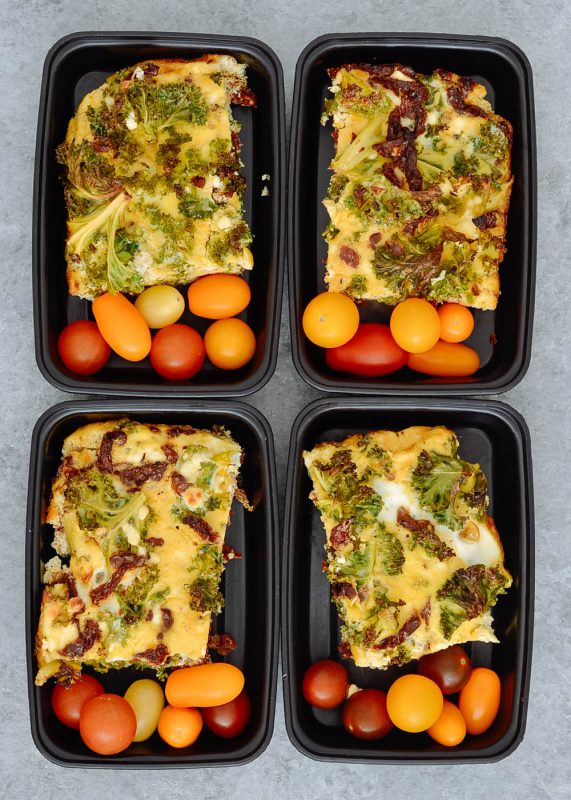
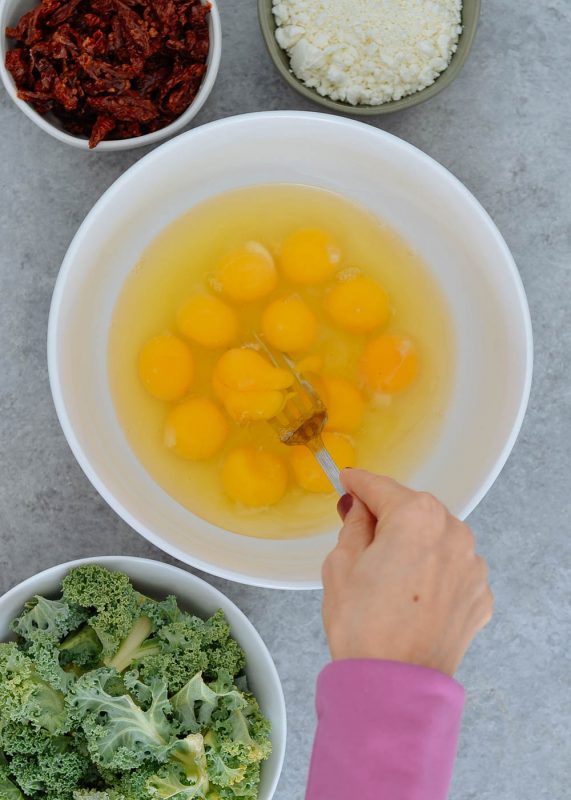
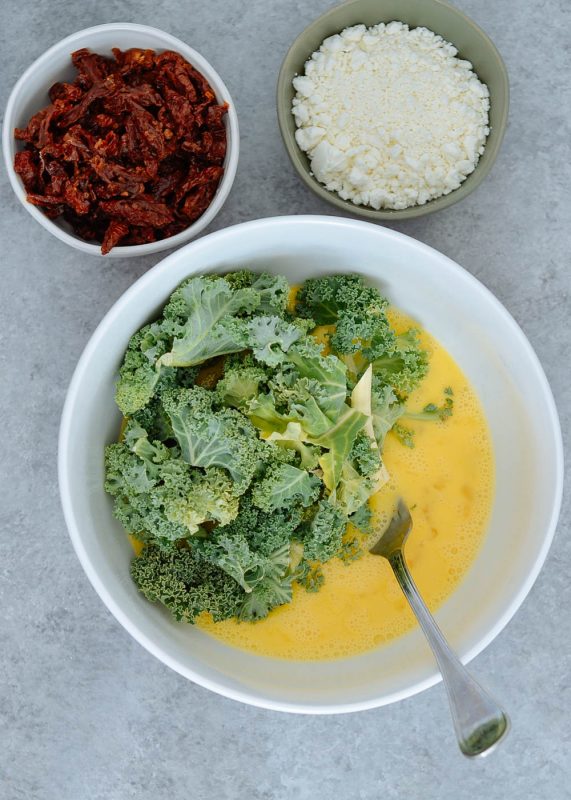
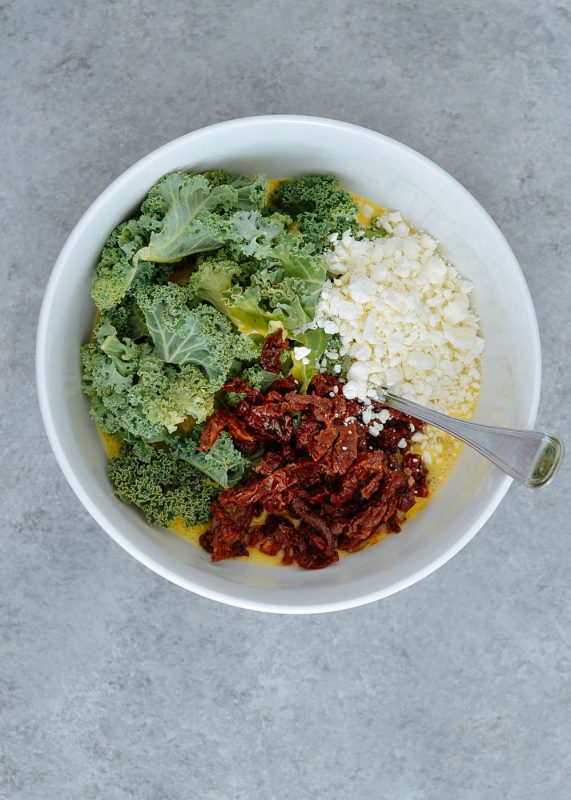
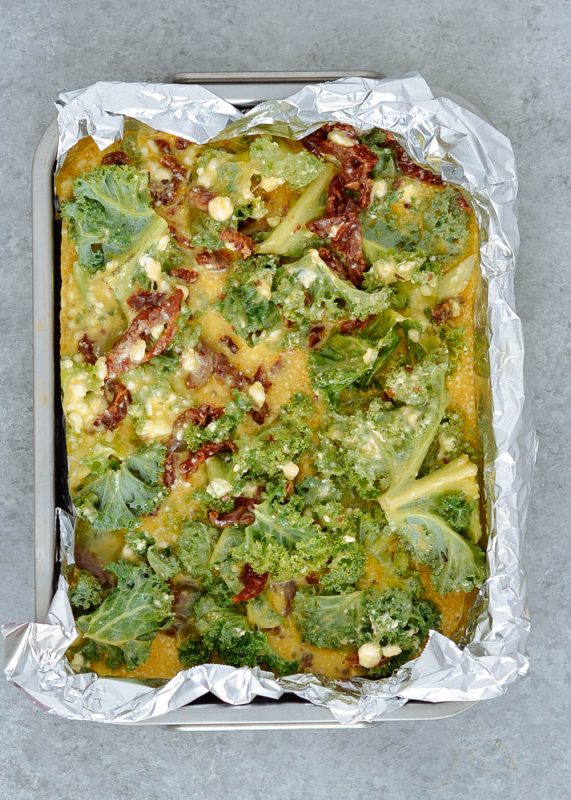
This Greek egg bake is fast! We love it. Whisk together the eggs in a large bowl and add the salt and pepper to taste, along with the dried oregano. Add in the chopped kale, tomatoes, and feta and transfer to a foil-lined baking dish. (The foil makes it easier for you to remove the egg bake when it's ready; it makes a little "sling" for the food so you can lift it out afterward and then slice it without it sticking to the pan.)
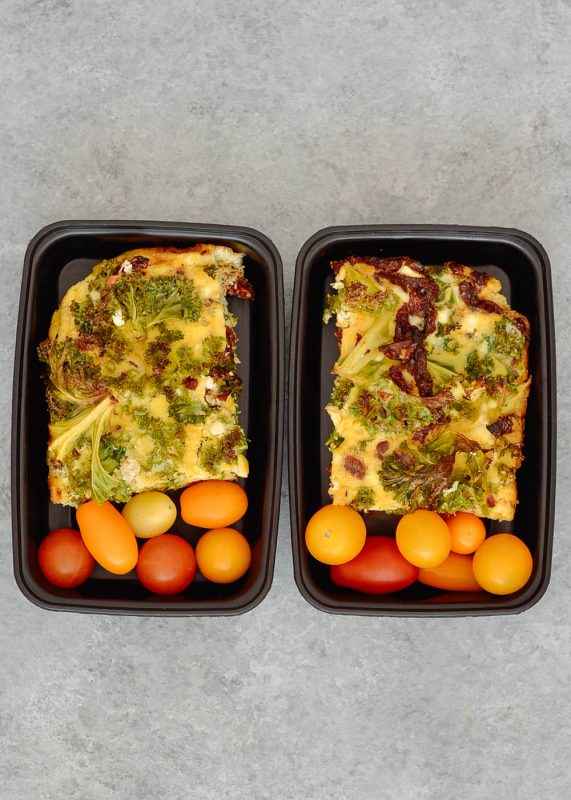
Once this is prepped it will keep in the fridge for up to 4 or 5 days. Just make sure it's in a sealed airtight container. Reheat in the oven (we like wrapping egg bakes in foil) or in the microwave, gently-sometimes eggs get rubbery in the microwave.
We like this with a small side salad with fresh veggies. If you're a tomato lover, slice up some fresh multicolored grape tomatoes. You could also serve this with hash browns or roasted potatoes of some kind. If you're feeling particularly adventurous, quinoa or even cauliflower rice would work, too. If you're the sort who meal preps roasted or grilled veggies, just to have on hand, those can serve as a side if need be.
Don't like kale? Spinach is a great substitute, and so is Swiss chard (just make sure you remove the stems from the chard first). You could even use arugula, although that would give the dish a bit of a peppery bite.
Feta is a classic Greek cheese, but you could use goat cheese instead and it would impart a similarly tangy flavor.
Chop up ¼ cup of kalamata (or other) olives to amp up the Greek flavors in this egg bake.
Use fresh oregano if you've got it, by all means. Use about 1 ½ teaspoons of fresh herb to the ½ teaspoon dried specified here.
Skip the sundried tomatoes altogether and opt for sliced fresh grape tomatoes, or roughly chopped heirlooms (if it's summertime).

Macros for 1 out of 6 servings:
Protein: 15g, Fat: 11g, Carbs: 5g, Calories: 175
Nutrition Tip: SUN-DRIED TOMATOES
Contain 20 percent more lycopene per serving than their fresh counterparts. These intensely flavored, sun-kissed beauties are a concentrated source of nutrients. They provide vitamins C and K, iron, and lycopene, an antioxidant associated with a lower risk of certain cancers.
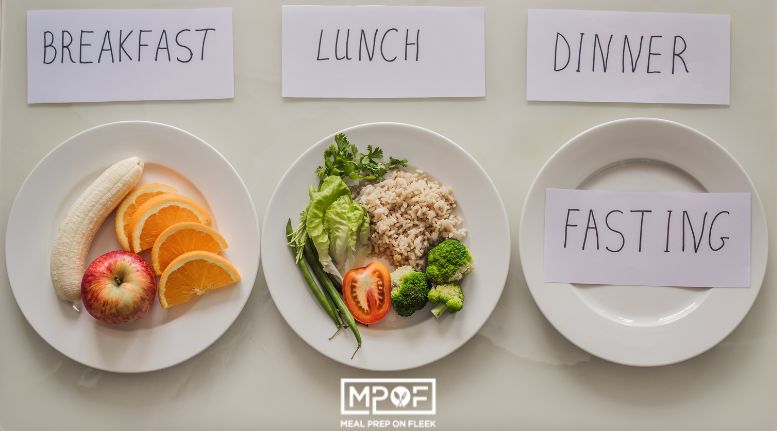
Meal prepping can really help with your intermittent fasting goals. Here's how!
As it's most commonly practiced, Intermittent fasting is a method of only eating within certain windows of time. However, there are a few types of intermittent fasting including alternate-day fasting, periodic fasting, and daily time-restricted fasting. People normally pick the option they can commit to, with the primary goal of fat loss in mind.
Intermittent fasting is a diet plan that considers windows of time for eating, whether that be taking every other day off from eating, eating 5 days per week while taking two days spread out through the week to fast, occasionally fasting, or only eating within certain hours every day. We will even be as bold as to say that not everyone can or should use intermittent fasting. Some people can easily make it a day without eating, but most people prefer having an established daily window of time dedicated to eating.
The most popular hour ratios for intermittent fasting are as follows:
16:8 method, which is 16 hours of not eating and an 8-hour window that allows for limited eating.
20:4 method, which is 20 hours of not eating, and a 4-hour window for eating.
People typically either use intermittent fasting to lose fat, control their blood sugar levels, feel rejuvenated, or as a spiritual or religious act. It is quite normal for those within a religious group to fast, and then donate the money they would have spent on those meals to a charity that feeds those in need.
According to personal trainer (and meal prepper!) Airon Mallars, "I intermittent fast every day. I'd say the best time for fasting is before bed, it's easiest, too. Have your last meal at 8pm and don't eat until late morning or around 12 noon." He likes this idea especially for beginners, just because you're sleeping while you're doing it. "You don't have to worry about getting hungry while you're asleep!" he says.
He says a reduction in excess fat typically indicates a correlated reduction in the risk of cancer, diabetes, joint pain, heart disease, heart attack, stroke, immobility, better sleep, and more. Maintaining a healthy weight can also make us feel better, and provide inspiration to others as a positive externality. Intermittent fasting is an easy way to accomplish this weight loss, while meal prepping makes intermittent fasting even easier!
Knowing your personal energy levels, blood sugar, and capability of accomplishing your goals is important for your success with intermittent fasting. Some people cannot do an every-other-day fast, or a 20:4 fast, but they might be able to do a 16:8, or another variation. If someone is active, working out a lot, using a lot of cognitive thinking in their daily life, etc., they especially may need to find a balance that works best.
Once you have the hours figured out, you'll want to balance your diet with the proper amount of macros and nutrients your body needs. Meal prepping while intermittent fasting makes the latter process easier: you give yourself the peace of mind that you are getting the right foods when it's time to break the fast.
When you understand how much energy you need per day to reach your goal, your meal prep planning and the Meal Prep on Fleek meal prep macros calculator will become invaluable.
Prepping your meals ahead of time allows you to eat easily without stopping to prep, when you are ready to break your fast. Cooking when you are hungry can be frustrating and torturous at times. Meal prepping while intermittent fasting can also help save additional money you'd normally be spending on those skipped meals, and it can save more time throughout the week. Using meal prep to your advantage can help deter spontaneous destructive eating choices or habits. It can also create a greater sense of personal responsibility while pursuing your goals.

You've Got This!
Once you are ready to start your body transformation through intermittent fasting with meal prepping, be sure to check our recipes that are dedicated to your goal plans. Dieting does not have to cause suffering! It can be a legitimate step in the right direction of a healthier lifestyle that has you looking and feeling great, and living longer!
Understanding hunger, physical versus emotional, can be tricky. There are a few ways to develop this skill.
For most of us, it is not easy to know the difference between physical and emotional hunger. Understanding our hunger can be hard. It can sometimes overwhelm us, but it's actually not very difficult, with a little bit of practice and some mindfulness put toward the effort.
When you get home after a long day of work, and you see the cupcakes that you made on Sunday sitting on the counter calling your name, is it physical hunger or emotional hunger? Or maybe a little bit of both? Most of us don't know, because our tendency is to head straight to the cupcakes and dive right in. One, two, or three cupcakes later, and we are either feeling satisfied or upset with ourselves for eating them. Or maybe some mix of both?
But what would happen if you paused for a moment before eating the cupcakes and said to yourself, "Am I actually hungry right now? Or would those cupcakes just make me happy?" Is it hunger, or a craving? (Well, that's probably another topic for another post, right?) Would you be able to detect if you were physically hungry or were eating to satisfy an emotion? And if so, how?
Here's how to begin understanding hunger.

This is real hunger. The kind of hunger that makes you want to chew your arm off. Have you heard the term "hangry" before? Well, this is it. You don't care what you eat, you just need to eat. When you are physically hungry even boiled chicken and broccoli would taste good.
Some signs of physical hunger include:

This is the kind of hunger when you crave something specific like homemade cupcakes. It is usually a craving for the foods that you don't allow yourself to have because they are on your "bad foods" list.
Some signs of emotional hunger include:
At the end of the day, it is not about the food. If you just found yourself saying, "This is me" to more than one bullet in the emotional hunger category then it may be time to start diving into your feelings and finding a healthy way to express them in a nurturing way. You can start by keeping an emotional eating journal to see if you have any patterns. Then begin by improving your relationship with food with these 5 tips. Finally, find support. It is the best thing you can do for yourself.
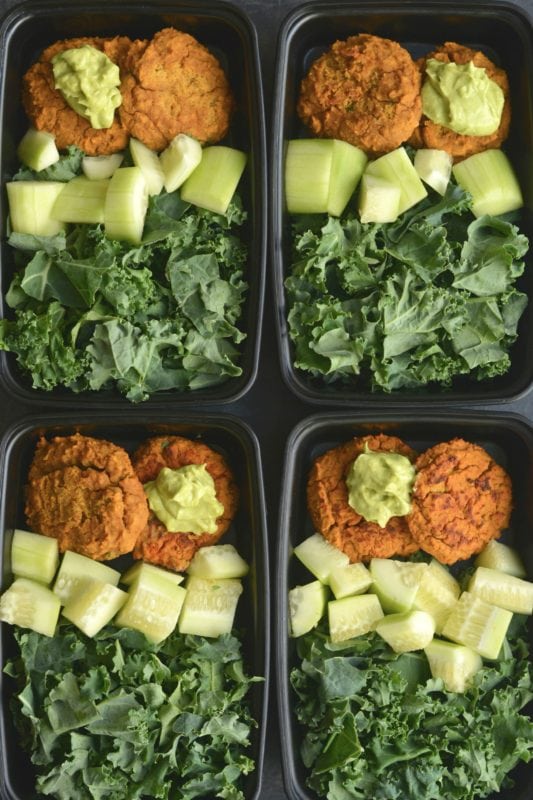
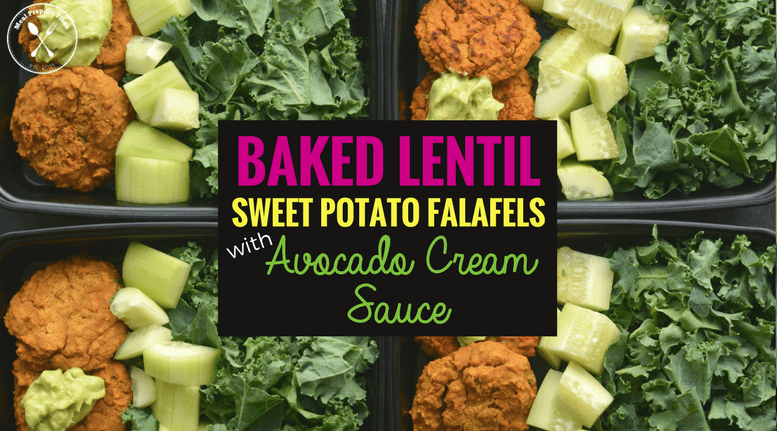
Baked lentil sweet potato falafel (with avocado cream sauce!) is a healthy twist on a fried favorite. Pair with a big salad for a light lunch or dinner.
Look at all the green in this recipe. So good, right? Falafel is so good, what with all the chickpeas and spices and fried goodness. But we gave traditional falafel a makeover, for a baked recipe that’s high in beta-carotene and iron.
For the Falafel
For the Avocado Sauce
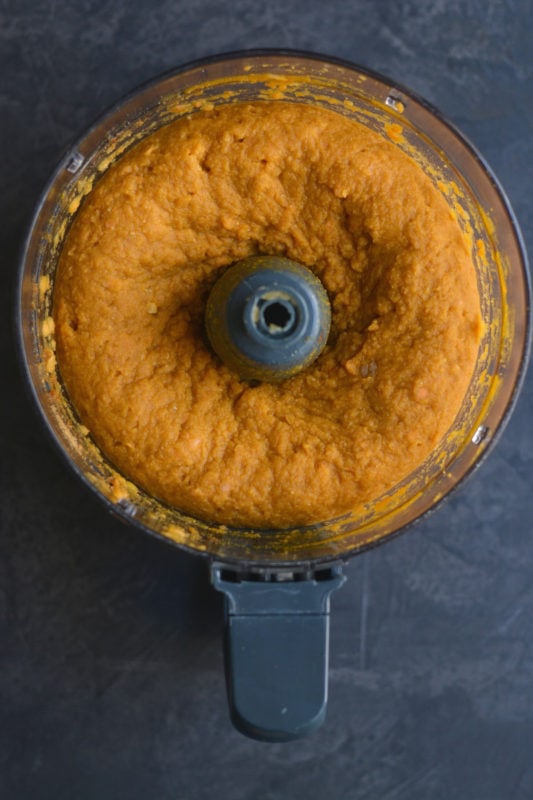
This recipe comes together fairly quickly. It requires you to cook the lentils, which can take a little bit of time. You can certainly make the lentils ahead of time and store them in the fridge if you want to break this meal prep into even smaller steps. Otherwise, make the lentils, and then drain them. Then, combine them with the sweet potato puree, along with some garlic, cayenne, paprika, coconut flour, salt, and pepper in a food processor or a high-speed blender.
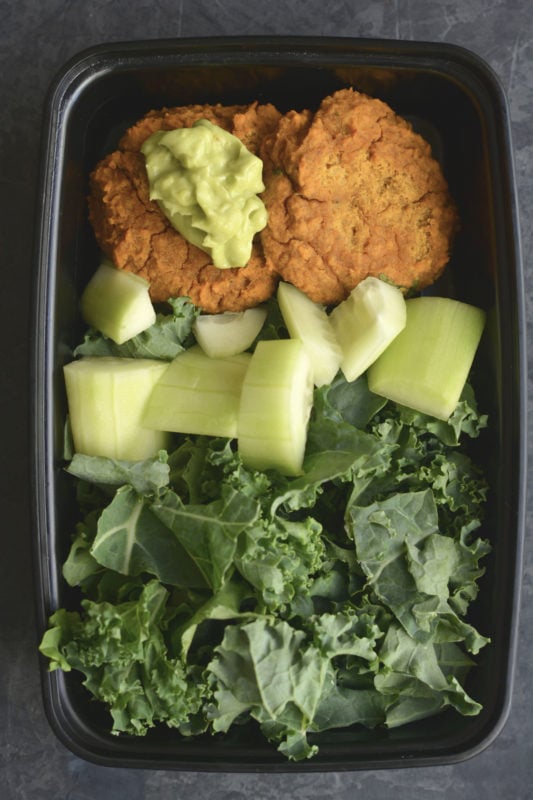
Form them into patties and then transfer them to a baking sheet lined with parchment. While that's happening, make the cream sauce with the avocado and some unsweetened coconut milk. It's so delicious, you'll figure out ways to put it on all kinds of things other than as a bit of a garnish for this baked lentil sweet potato falafel.
We've suggested a good salad alongside this baked falafel meal prep. We like it with kale or spinach, and some cut-up pieces of cucumbers, peppers, and grape tomatoes, for example.
Once it's been prepped and stored in containers in the fridge, it will keep for 4 days or so. You can eat all of this cold or even at room temperature, if desired, if you're taking the meal preps on the go with you. But if you'd rather, you can heat each falafel patty up in a hot skillet, or wrap them in foil and pop them in a 350 F oven for about ten minutes.
Sometimes sweet potato puree can be hard to find. Feel free to substitute pumpkin puree (not canned pumpkin pie puree).
You can make this with regular brown lentils, or use red lentils; the latter cook more quickly. The French kind, Puy lentils, will take much longer and may not puree as well as the other types; they tend to hold their shape longer and are best used for salads and room-temperature dishes.
You can use the canned coconut milk (just shake the can well, it's thick!) or the type that comes in the refrigerator section that's meant to be used more as a plant-based milk substitute. Either will work; the consistency will be a little different (i.e., thicker) with the canned milk. But it's up to you!
Double the recipe if desired and use the cream sauce on the salad you might eat alongside this healthy meal prep.


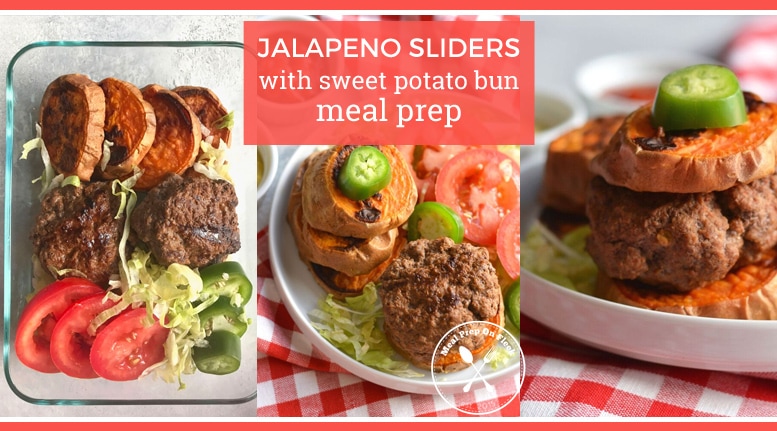
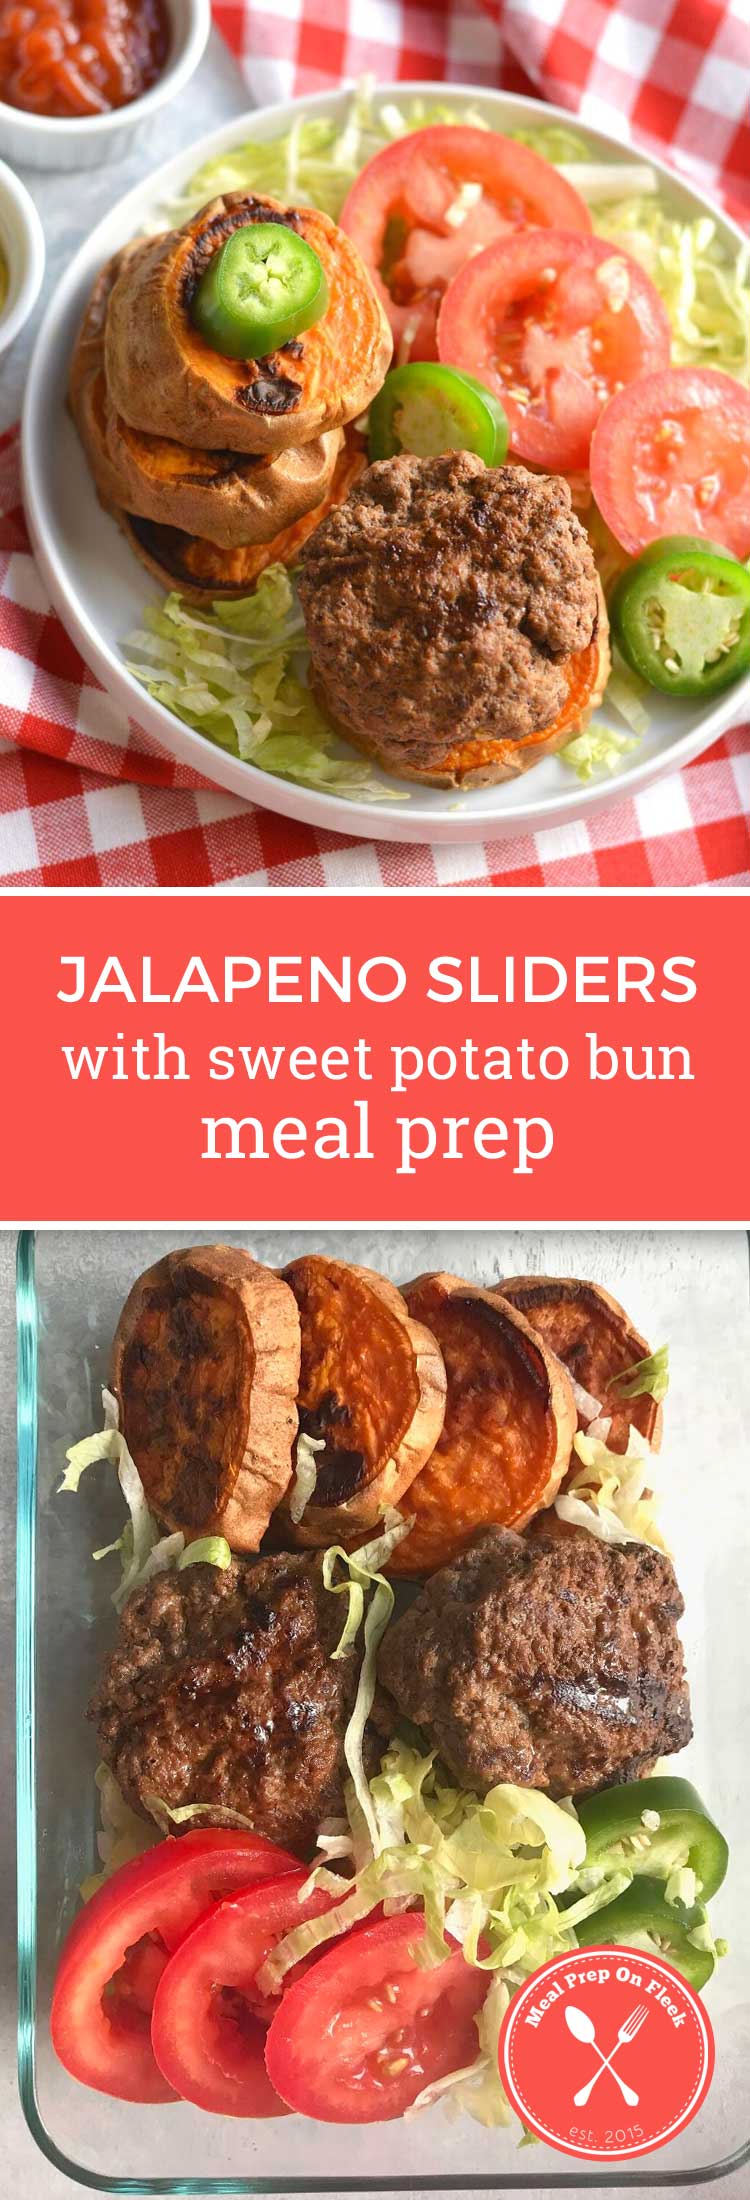
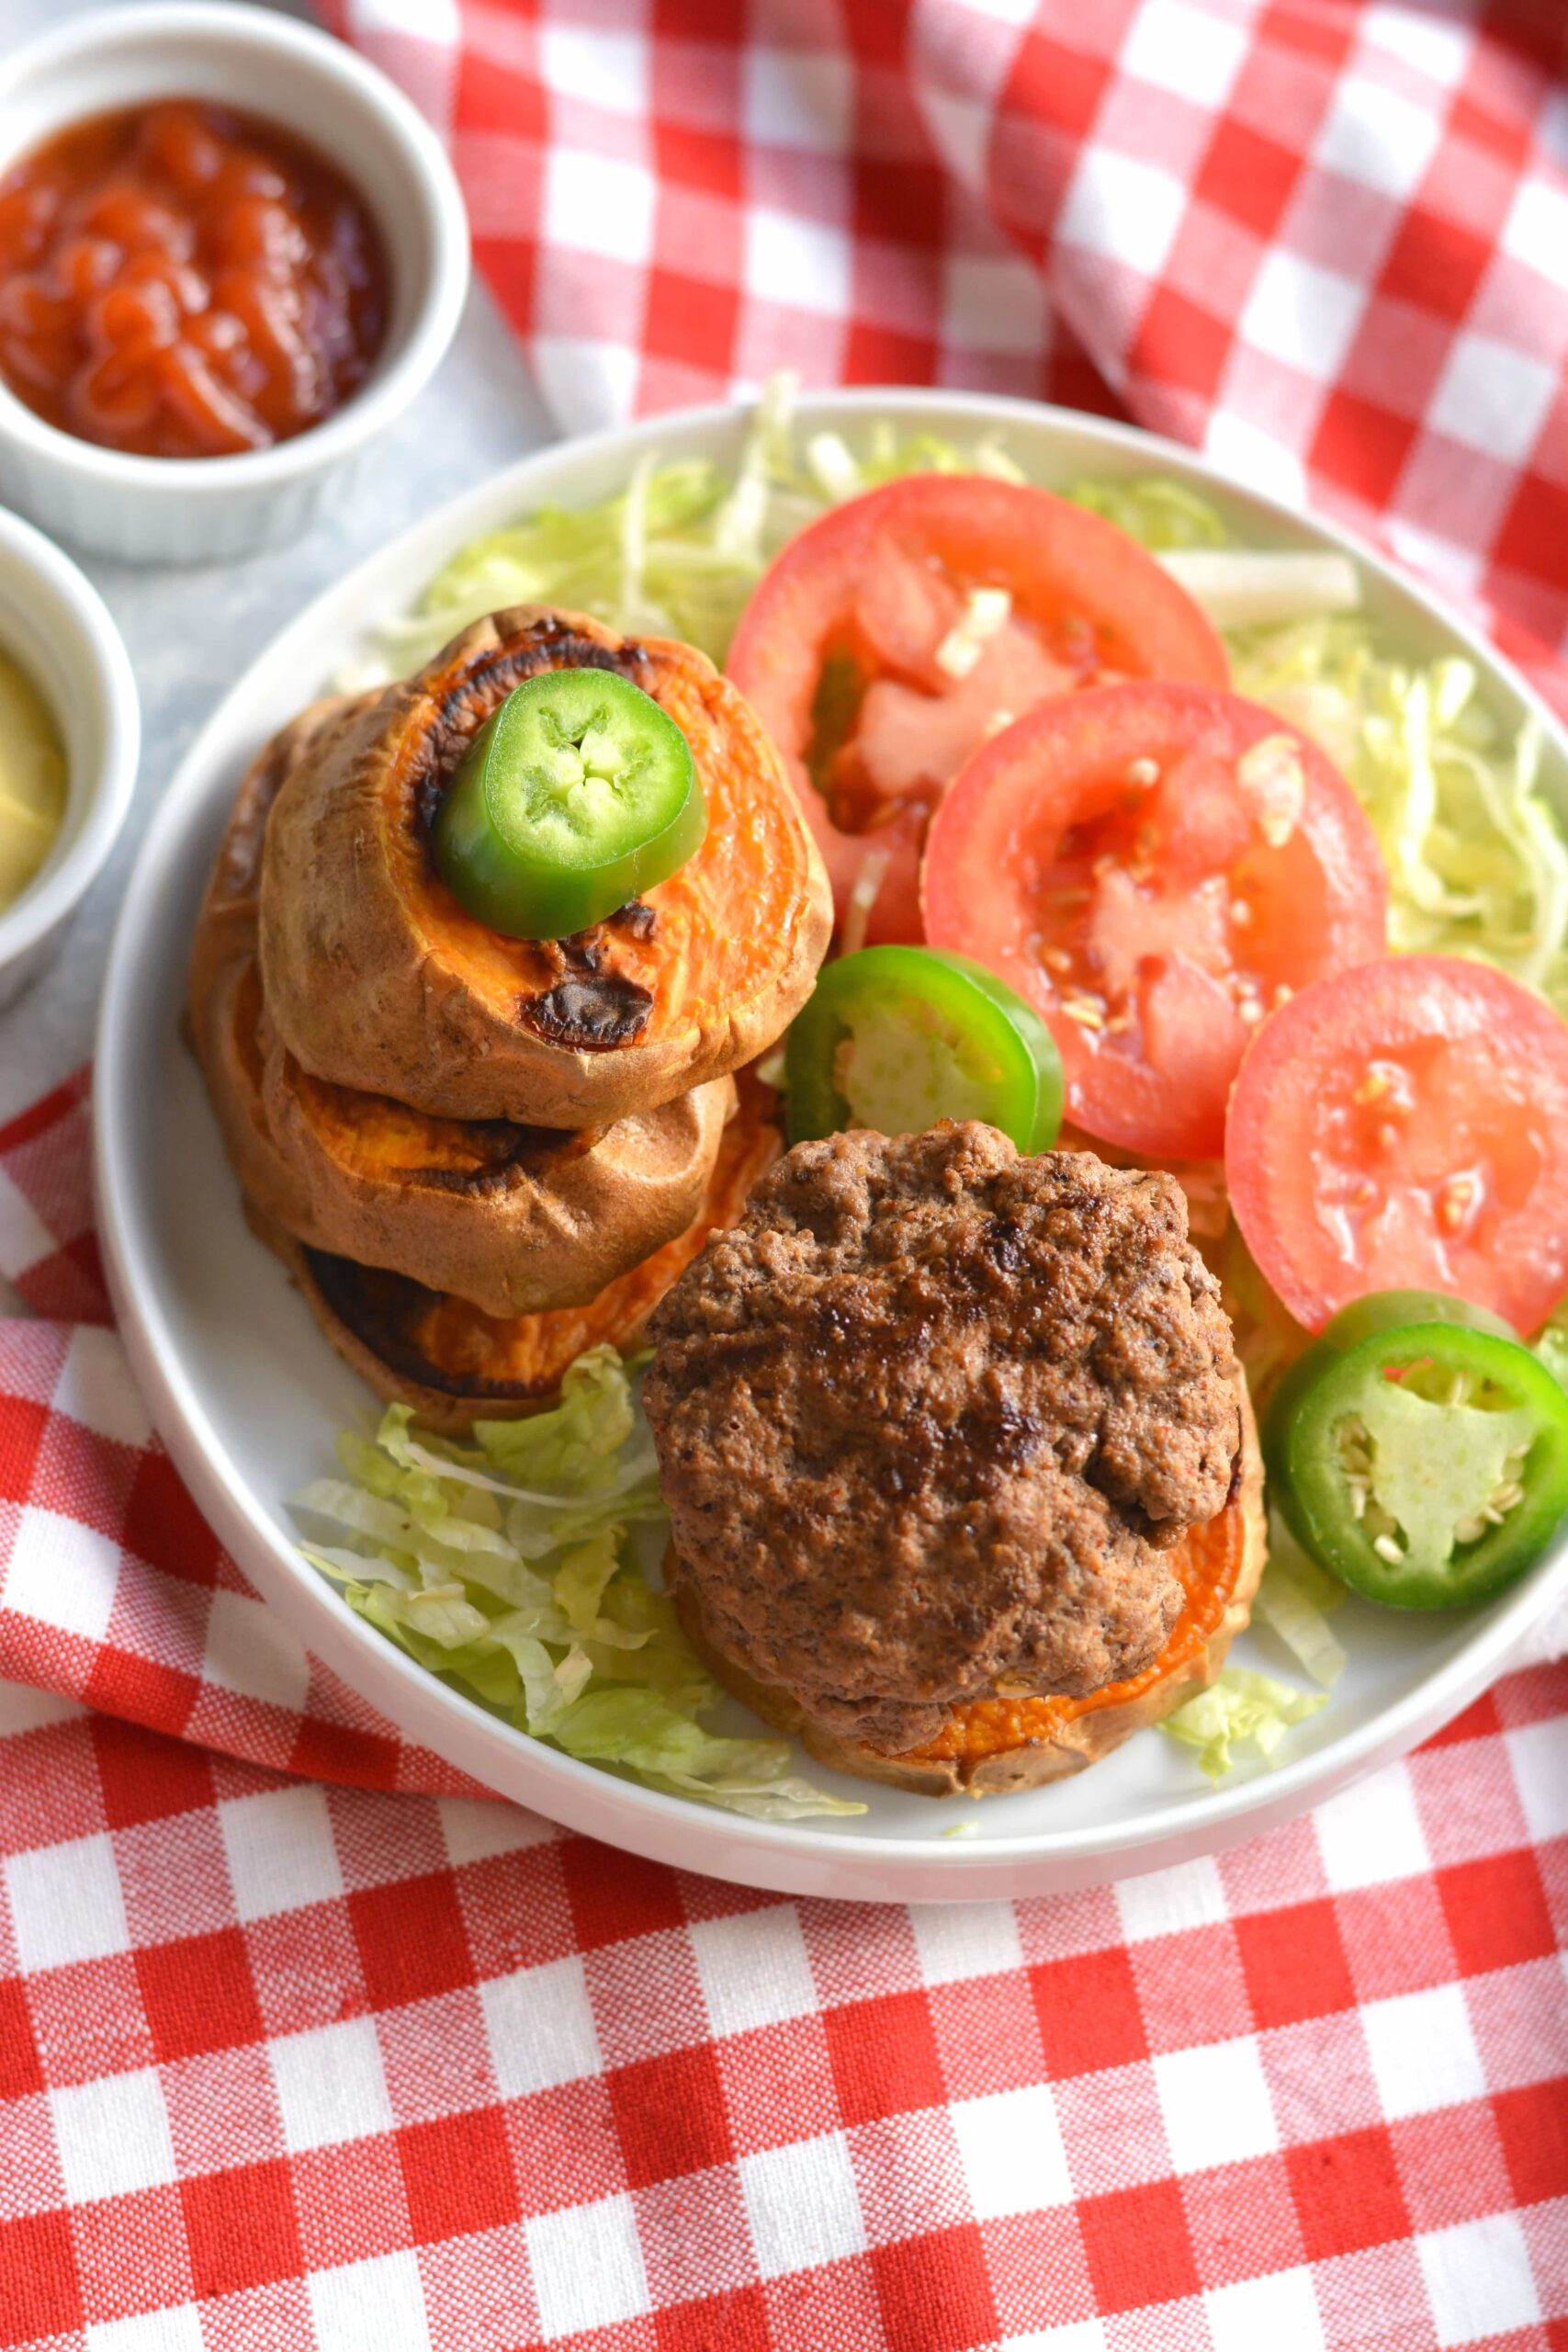
These Jalapeno sliders have a spicy kick! Made with diced jalapenos and placed on a sweet potato “bun” for Paleo-friendly meal on the go!

Hello, hello!
Watch as we 'slide' right on into your day with this Jalapeno Sliders With Sweet Potato Buns Meal Prep recipe. Just imagine kicking up your feet at lunchtime and relaxing with a container full of spicy burgers! It's like being at your best friend's summer BBQ, while working!
Ok, we are back from our daydream. But seriously, make these—regardless of the time of year.
This recipe is Whole30 compliant, gluten-free, dairy-free, and beyond easy. Plus, the spice is enough to give you an energy kick to finish out your afternoon!
This flavorful recipe for sliders comes together with just some lean ground beef, a small jalapeno pepper, and some seasonings. That's it. Grill it outside or on your grill pan. And instead of using a bun, make this paleo by cutting a sweet potato into slices that are thick enough to serve as a bun. The slices roast in the oven while the sliders cook.
We love these with the standard accompaniments such as lettuce, tomato, and maybe even a pickle. It's a pretty well-rounded meal as is, but a green salad is always a good addition to healthy meal prep. These burgers are pretty filling, though! You might not need anything else. A good paleo mayo like one from Primal Kitchen would be delicious if you like mayo on your burgers; the creaminess of mayo tastes great against the spice of these sliders.
Once these are prepped, they can stay in the fridge for 4 to 5 days. You might want to reheat the slices of sweet potato just slightly to take the edge off the cold from the fridge. A skillet over medium heat would do the trick.
You can also make the elements of this meal, namely, the burger and the "buns," ahead of time and freeze them. Defrost in the fridge or wrap the items in foil and reheat in the oven. A microwave might make the beef "cook" unevenly when it defrosts unless you've got a good sense of how your microwave works. They can be unpredictable. Frozen, however, the sliders will keep well for 3 months along with the sweet potato slices. They will likely need some re-crisping up in a hot pan once they're defrosted.
Make sure your sweet potato is large enough in diameter to accommodate a slider. It should be a few inches or so; it will shrink a little in the oven, but not much.
Use your hands! It's never a bad idea to use your very clean hands to mix together seasonings and ground meat when you are forming burgers. It better distributes the seasonings within the meat, and it also helps to avoid overmixing, which can very easily happen when you're using a spoon or spatula. The end result? A more tender, juicy burger that doesn't taste tough.
Prep Ahead! Mix these burgers up the night before and keep them covered in the fridge until you're ready to cook them. Just bring them to room temperature beforehand so they cook more evenly once they hit the grill or your grill pan.
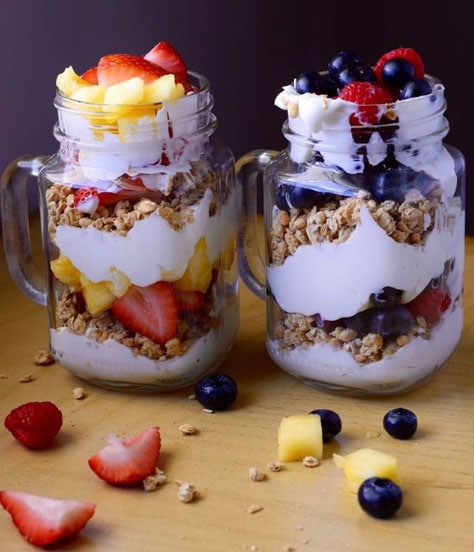
Parfait combos are endless and so much fun to come up with. It's all about layers of flavor!
Our family loves yogurt, granola, and fruit, at any time, and they love it even more when it all comes together in one delicious spoonful. And guess what? It only takes an extra few minutes to prepare it that way. It looks pretty and it's ready to eat when you're ready to enjoy it. You can customize this to your heart's content, too, and make it vegan and/or gluten-free if need be! It's an easy meal prep or a healthy snack.
Here are 3 of our favorite go-to weekend parfait combos for on-the-go breakfasts.
In the United States, parfait refers to either the traditional French-style dessert or to a popular variant, the American parfait, made by layering parfait cream, ice cream, and/or fruit, usually in a tall clear glass. (It can also be in a shorter glass, depending on how big your parfait wants to be). The clear glass displays the layers of the dessert, much like an English trifle bowl does for the layers of a trifle dessert. The topping is created with whipped cream, fresh or canned fruit, and/or liqueurs.
A yogurt parfait with granola is easy: You just layer yogurt with granola, nuts, and/or fresh fruits such as peaches, strawberries, or blueberries. This version is sometimes called a yogurt parfait or fruit parfait and is often served for breakfast. But you can eat it any time of day; it also happens to make for a great afternoon snack, thanks to the protein.
Now I realize this looks nothing like a traditional French parfait. These parfait combos are sweet, bursting with flavor, creamy, vanilla-y, and crunchy, thanks to the granola. They're lightly sweetened. You can feel good about including this option in your weekend meal prep!
Parfaits make for some sweet grab-and-go meal prep, whether you eat this for breakfast, as a snack, as a light dessert, or even lunch. The ingredients in these combos are listed from bottom to top, and you just repeat the layers until the jar or glass is full.
View this post on Instagram
This one's vegan and comes to us from Crazy Vegan Kitchen!
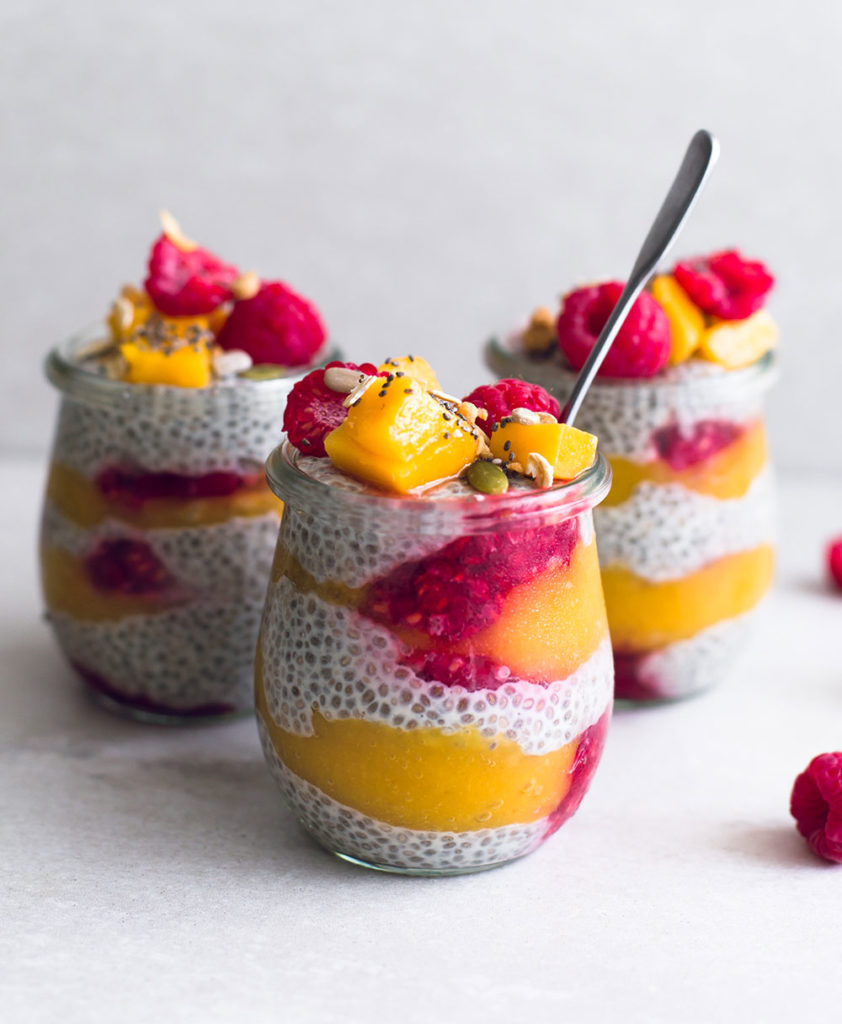
Ingredients for Mango, Raspberry, and Chia Seed Yogurt
1 ½ cups soy milk (or other plant-based milk)
2 tablespoons, plus ½ teaspoon maple syrup, divided
Pinch of sea salt
1 teaspoon pure vanilla extract
6 tablespoons chia seeds
1 mango, chopped
½ cup fresh raspberries
Oh, parfaits are so easy to customize. We love fresh berries but frozen ones work great, too, especially if you are prepping ahead of time. They'll slowly defrost in the fridge.
We like to stick with plain, whole-milk Greek yogurt because it has more protein and less sugar, and it's a good idea to have some dietary fat with your dairy. Not everything has to be so low-fat all the time.
Almost any kind of fruit works well here, but ones that are juicy get extra points, we think. Pears and apples will taste good, but we love berries and tropical fruits such as mango, pineapple, papaya, and so forth. And oh, dare we mention peaches, nectarines, apricots, and plums? Their sweetness works so nicely against tart and creamy yogurt.
If you're out of granola, you can use any kind of crunchy, sturdy cereal with a yogurt parfait, or even just a layer of chopped nuts.
It's really easy for something like this to become very sweet and sugary, especially if you are looking at a granola that has a lot of sugar in it. If this is something you pay attention to, just be sure to read the label. The same advice goes for yogurt; it's why we stick with plain yogurt as much as possible because your average fruit-flavored yogurt has upwards of 15 grams of sugar; granted, about 5 of them are natural milk sugars, but much of it is added.
Greek Yogurt Cookie Dough Fruit Dip:
Easy Gluten-Free Fall Breakfast Granola
Peanut Butter Chocolate Chip Granola Recipe--also gluten free!
Food is part of the equation, without a doubt, but what about movement. Check out this guide to mobility--it can help you reach your health and wellness goals!
You are doing everything right, from meal prep to exercise and everything in between. But you just can't move the way you want to. Maybe it's a tight back, stiff knees, or locked-up hips.
Maybe you've even heard a little bit about mobility training, but you aren't sure what to do or even what it is. It has become somewhat of a buzzword in the health and fitness space, but what exactly does it mean? Are we talking about taking a weekly yoga class? Do chiropractor visits count? I'm sure you're hoping I don't tell you to touch your toes like you are in PE class again, right?
And furthermore, you might even be thinking, I'm fine. Nothing hurts right now. Why should I care about this right now? Why do we even need a guide to mobility?

While all these things have their place and can be a part of a mobility program, simply put, mobility goes far deeper.
It is worth noting that there are entire books written on mobility, so this is a condensed overview of what mobility is, why it matters, and how we can begin to improve it.
Mobility is the ability to move your body pain-free through full ranges of motion.
Mobility goes hand in hand with strength. We not only want to be able to reach the end ranges of our motion but want to be able to control our bodies in these positions. Having muscle control when, for example, you're in the bottom of a squat, means that you truly own that position.
Just as with exercise, nutrition, and our health in general, this is all very individual. Mobility needs are dependent on the person, where they are at in their journey, and what they want to achieve. For some people, it means simply moving in basic exercise. For others, it may be active stretching or banded joint mobilizations. It may also include muscle strengthening using weights, bands, or even your own body weight. Mobility measures can be designed to tailor specific imbalances in the body, strengthen one area, and alleviate pain. It's complex! It can even help prevent injury.
This is why we need a guide to mobility.

Simply put, mobility is movement.
As we age, our mobility and muscle mass begin to decrease. We begin to lose the ranges of motion we once had access to as kids and even young adults. Think back to the last time you saw kids playing at a playground. Do they struggle to move? No, quite the opposite. Kids often are seen sitting in the bottom of a squat quite comfortably. However, at some point, whether we blame sitting all day or just getting older, we no longer have access to these positions in a pain-free way. This is where mobility training comes in.
As mentioned above, mobility has two major components.
The ability to move. No matter how hard we try, many of us cannot get into basic positions, whether it's the aforementioned bottom of a squat or stretching our arms up straight over our heads. You may be thinking, "You're right, but does it really matter if my squat doesn't break parallel or my arms can't fully extend?"
It absolutely does. As we age, we lose mobility. So, as you grow older your problem can go from not being able to sit at the bottom of a squat to not being able to do a quarter squat. Maybe you're asking, what is even a quarter squat? Think about simple everyday tasks like using the restroom or getting off the couch. If your mobility is impaired, doing those simple tasks is considerably more difficult.
The ability to move without pain. This is the goal. We want you to move fully and without pain. Pain is different than discomfort and it is important that you determine which one you are feeling day-to-day when performing a mobility routine. Mobility training can be difficult at times, but it should feel similar to exercise discomfort or even mild pain-definitely not sharp pain.
I know you are sold at this point on this whole guide to mobility and amping it up!
For the vast majority of people, rather than spending ten minutes touching your toes or doing a chest stretch, mobility should begin with full ranges of movement in your exercise training. Whether it is an air squat, pushup, or pull-up, be sure to control the entire movement and move through the full range, without pain.
So much of what we do with our bodies is connected, whether it's our diet, mental health, exercise, or stress. Some of your mobility issues could be partially due to inflammation in the body.
READ MORE: Fight inflammation and improve mobility with the top ten inflammation-fighting foods.
Mobility training can be daunting to start and we certainly don't want to leave you high and dry. Here are some specific mobility routines for some of the most common problem areas:
Try these out and let us know what you think. We are here for you in your health, fitness, (and now mobility) journey!
Eriksson, Keenan. "How to Master Your Mobility in 15 Minutes a Day." Medium, Better Humans, 12 Oct. 2021, https://betterhumans.pub/how-to-write-yourself-a-15-minute-mobility-pres cription-c6c0067b926f.
Vegan minestrone soup is loaded with beans and lots of veggies for a high-protein and healthy lunch or dinner.
Minestrone on its own is healthy, but if you make it vegan it can be even healthier. It's hearty and one of those soups that taste good all year round, but like most warming foods, is best in the winter. Vegan minestrone is also endlessly adaptable, a soup to make with a few key ingredients but a recipe that is good with other veggies as you see fit.
This soup is easy to make (watch the video below); it's a simple assembly job with some simmering. But once you've made it, you can serve it right away of course, with a great salad and maybe a nice hunk of crusty bread.
You can certainly keep this in the fridge for 4 to 5 days and it will freeze well because there is no dairy. Soup like this will be good in the freezer for up to 6 months. It's helpful to freeze it in serving sizes so you can just defrost what you need quickly and reheat and eat; two-cup increments tend to work well.
Minestrone is awesome because it can be so easily adapted. This recipe calls for pre-cooked/steamed kidney beans and chickpeas, but you can use canned if need be, or cook your own beans from dried. (Hint: cook a big batch and freeze some for future recipes!)
Feel free to use fresh parsley instead of cilantro if desired; we know how divisive cilantro can be.
You can also add some freshly chopped spinach, kale, or Swiss chard into this soup, but be sure to stir it in toward the end and not the beginning because it will wilt too much and lose its flavor. Fresh greens cook quickly!
Use any kind of onion if you like; red works well here and adds some sweetness.
Make this gluten-free by using a plant-based pasta such as rice, corn, quinoa, lentil, or chickpea. The latter three types will also bump up the protein considerably.
If it doesn't need to be vegan, sausage would be really tasty here. You can cook it in a hot skillet while the soup simmers and then set it aside briefly. Slice it thinly and add it to the soup so the flavors can meld. Leftover shredded chicken also works great here.

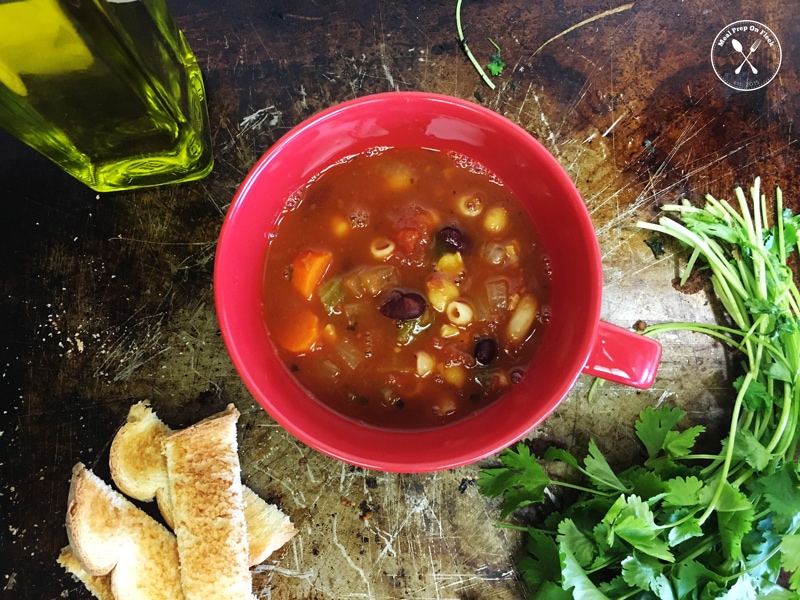
Minestrone is my fave soup, especially for a gloomy day. It's a classic recipe that leaves you feeling full and warm. It comes together easily with some onions, carrots, and celery in a large pot, with oil. And then everything gets added, bit by bit, afterward. Watch how to make it here:
Recipe adapted from Feel Good Foodie
One-Pan Paleo Sticky Sesame Chicken Thighs makes a quick and easy weeknight meal! Serve over cauliflower rice for a full ‘take-out’ style meal any night of the week.
We love a good sesame chicken recipe, and it's a go-to for a lot of people for takeout. But if you are following a paleo diet you know that takeout means can be a minefield of unknown and likely forbidden ingredients that will get you off track. With this sticky chicken thigh recipe, you can make your own paleo sesame chicken recipe at home and control the ingredients.
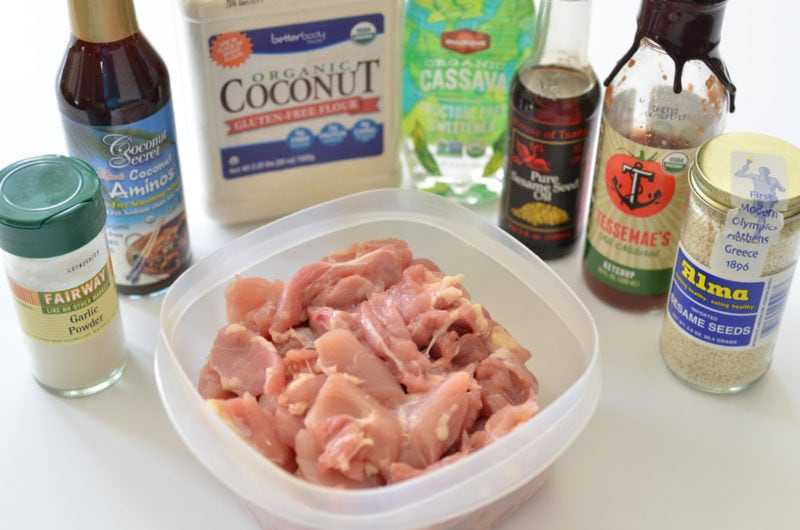
This easy, quick and flavorful meal comes together with only a few simple ingredients that you can find at any local grocery store. If you aren't following a paleo diet, then feel free to use any brand of these products that you would like!
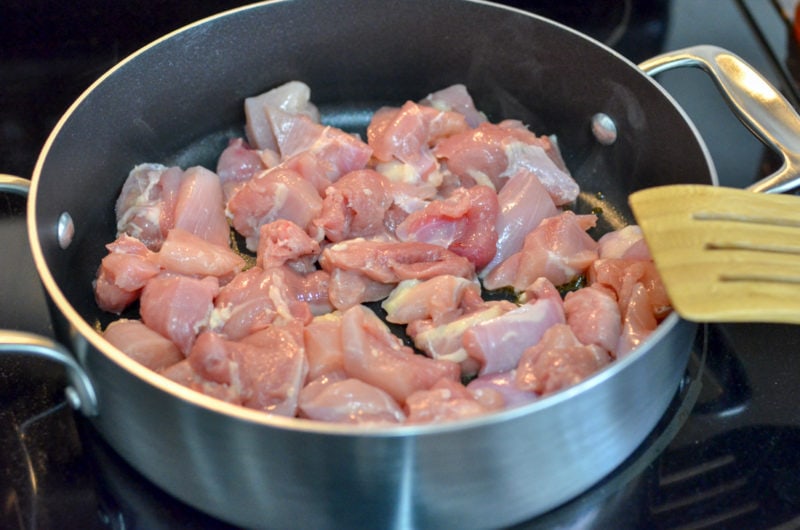
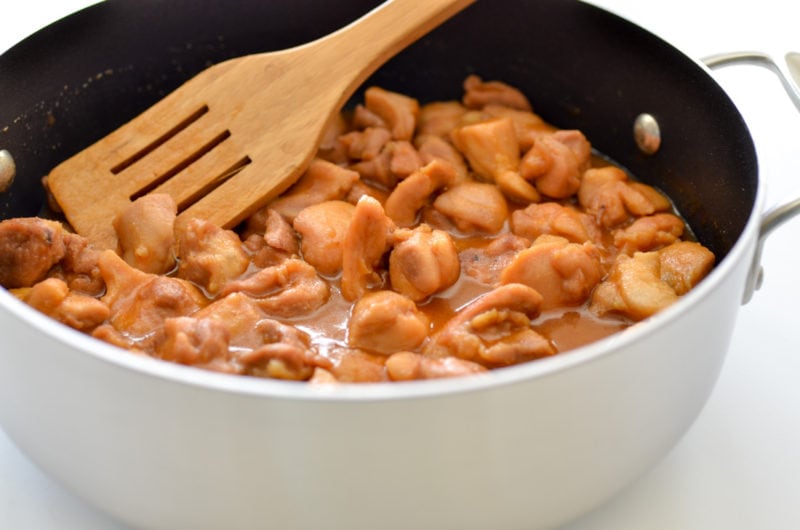
Add your chicken and oil to the pan and cook for 6 to 8 minutes.
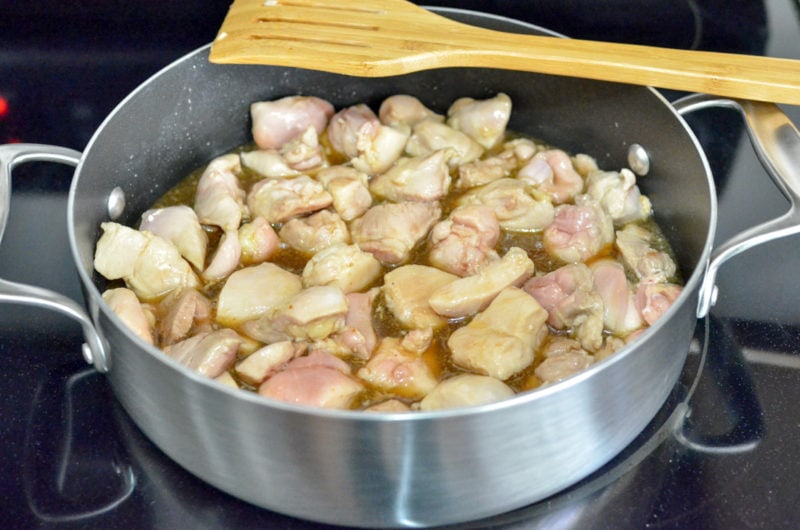
Next, mix together the coconut aminos, sweetener, and ketchup. Add the sauce to the chicken.

Cook the chicken for an additional 2 to 3 minutes and then stir in the coconut flour to thicken.
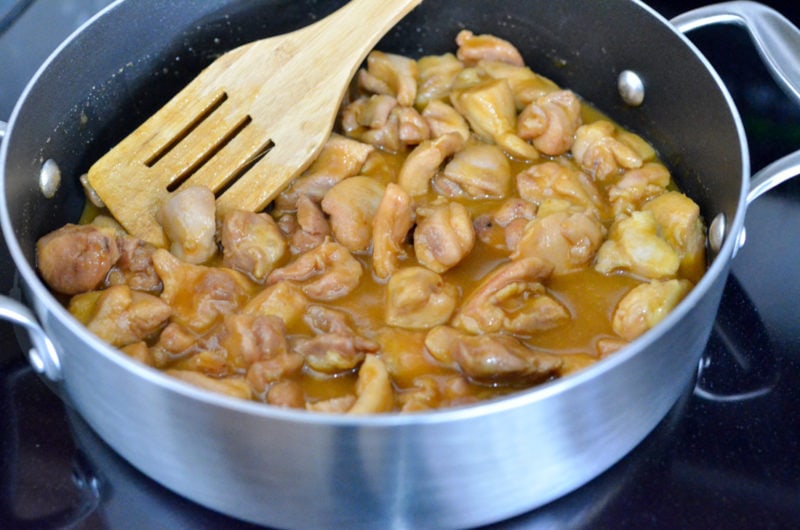
Mix and let the chicken sit, covered, for 2 to 3 minutes while the sauce thickens.
Mix well and serve over cauliflower rice.
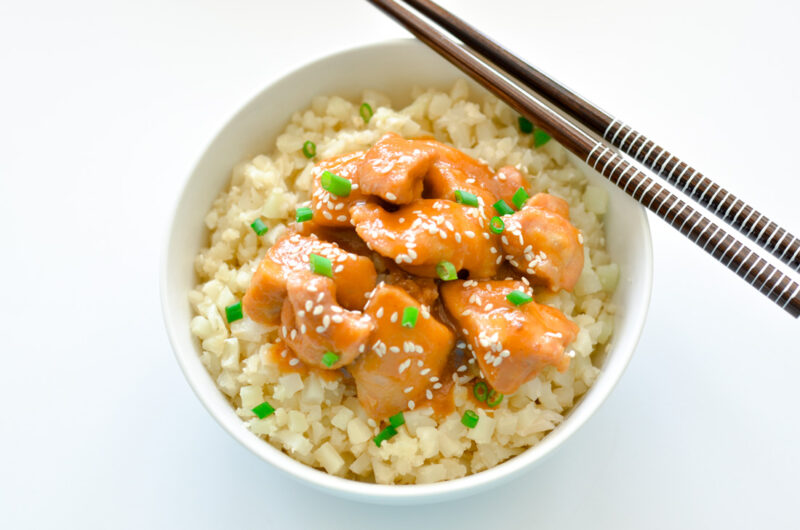
We love this right over cauliflower rice but you can serve it with plain white rice, jasmine rice, or try one of these other rice alternatives. Serve it right out of the pan for dinner (recipe yields 4 generous servings, or 6), or divide it into your containers for a take-out style lunch all week.
You can freeze the chicken very easily and even the rice, too, if you like. Transfer to a zip-close bag and press out all the air, or store in the freezer. Defrost in the microwave, in the refrigerator overnight and reheat in a hot skillet.
You might consider serving these sticky sesame chicken thighs with a side of steamed broccoli. Drizzle it with a little bit of sesame oil and sprinkle with sesame seeds before serving. Steamed green beans would also complement this dish well, or perhaps sauteed bell peppers.
This sauce is adaptable very easily to other proteins. Try this paleo sticky sauce with tofu or shrimp, or some lean pork or steak. Tofu and shrimp will cook much faster than chicken, though, so keep that in mind.
You can make this sticky sesame chicken recipe without the paleo-leaning ingredients if you need to. Swap the coconut aminos for soy sauce, for example, or regular flour for the coconut flour. Agave would work in place of honey or cassava.

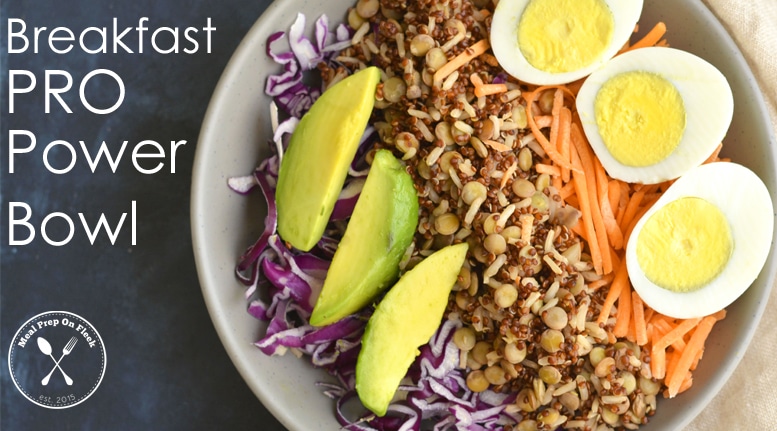
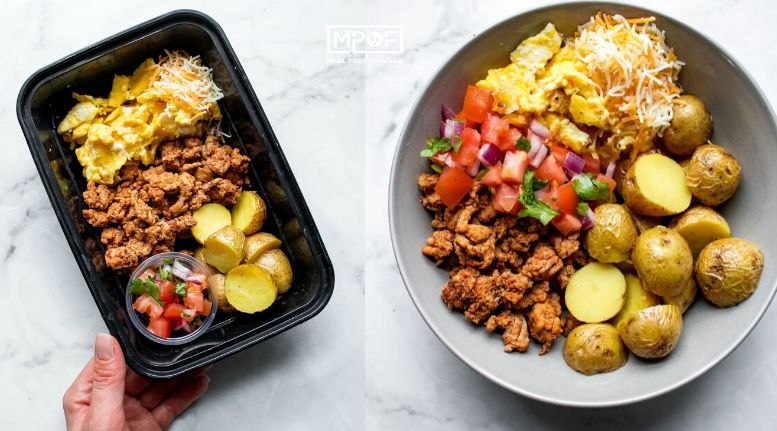
Loaded with protein and produce (see what we did there?), this breakfast PRO power bowl will fill you up!
Make breakfast count with a Breakfast PRO Power Bowl loaded with produce and protein! What does this mean? It means this breakfast meal prep is guaranteed to jumpstart your day. With eggs, quinoa, avocado, and veggies, it's a healthy meal prep recipe.
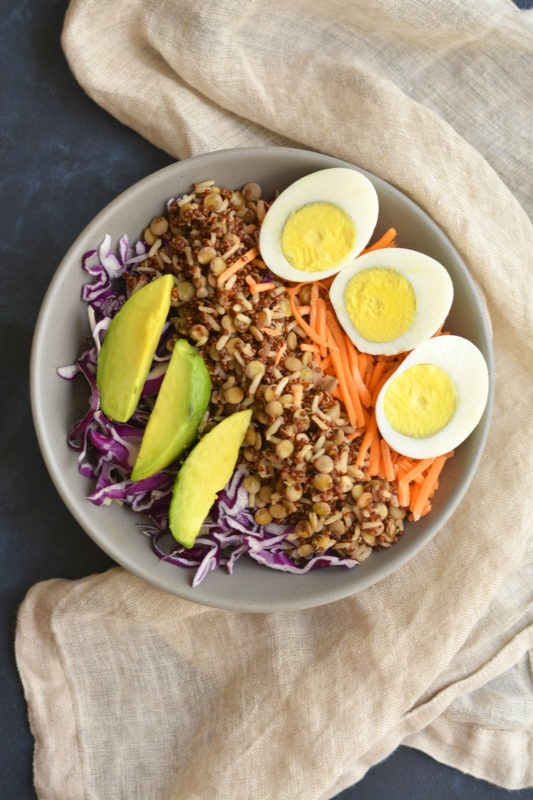
Breakfast, hands down, is our favorite meal of the day. Especially when it starts with a Greek egg bake, waffles or this breakfast pro power bowl.
This breakfast pro power bowl recipe is power packed for you with healthy fats, protein, and complex carbohydrates that will equip your body and mind with what it needs to face the day. It contains everything you need, macro wise, to stoke your digestion and keep you satiated until lunch. (Or dinner, if you're eating this for lunch!)
This is a simple assembly job at its best. If you've already prepped hard-boiled eggs, you're part of the way there. Batch cooking lentils and quinoa helps, too; whatever you have left over from making this dish you can freeze. Or maybe you've got some frozen lentils or quinoa you can pull out like a magician to help speed up this healthy meal prep.
This meal prep recipe can quickly be made ahead of time. It's good either warm or cold, depending on your preference, for breakfast or lunch. Heat up the lentils and quinoa if desired; otherwise, this meal prep is perfectly delicious at room temperature or chilled.

It'll keep in airtight containers in the fridge for 4 or 5 days. You can freeze some elements of this dish, if needed, with the exception of the egg and avocado. They won't really freeze well.
Add in 3 ounces of cooked chicken breast (we love a good rotisserie for this reason) and you have a second meal option, also ready in minutes.
Use any kind of lentils you like, but the French green ones will hold their shape the best in cooked salad situations like this.
Serve this over a bed of greens if cabbage and carrots aren't your things. Cauliflower rice would work, too, as another veggie to load up on in the morning.
Drizzle some high-quality extra-virgin olive oil (or even avocado oil) over this breakfast pro power bowl before serving. It perks up all the flavors and adds a little bit of fat, which will help your body absorb all those nutrients.
Top with a handful of chopped almonds or walnuts, or a couple of tablespoons of hemp seeds or pumpkin seeds for extra nutrients.
For this easy meal prep recipe, make the hard-boiled eggs ahead of time, along with the quinoa and the lentils. Hard-boiled eggs can sit right in your fridge, unpeeled, in a bowl, until you're ready to use them. Keep the quinoa and lentils in airtight containers in the fridge.
READ MORE: We love a good bowl! 3 Easy Power Salad Bowl Meal Prep Recipes!
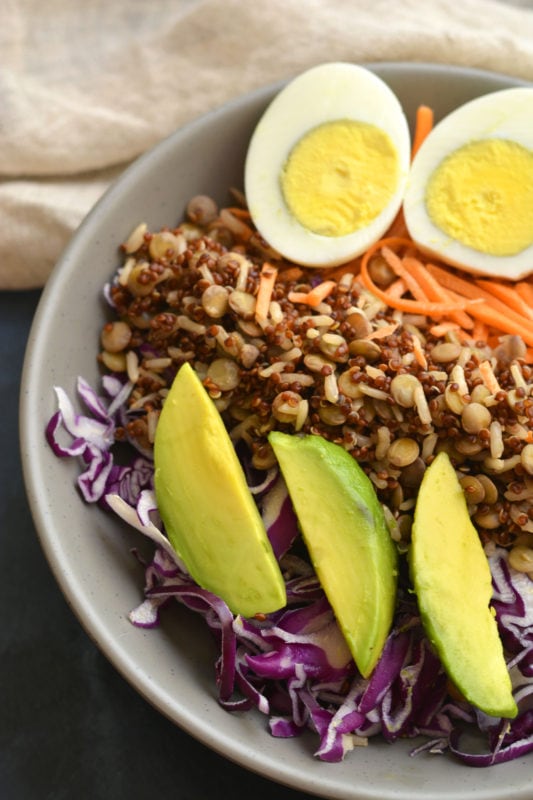
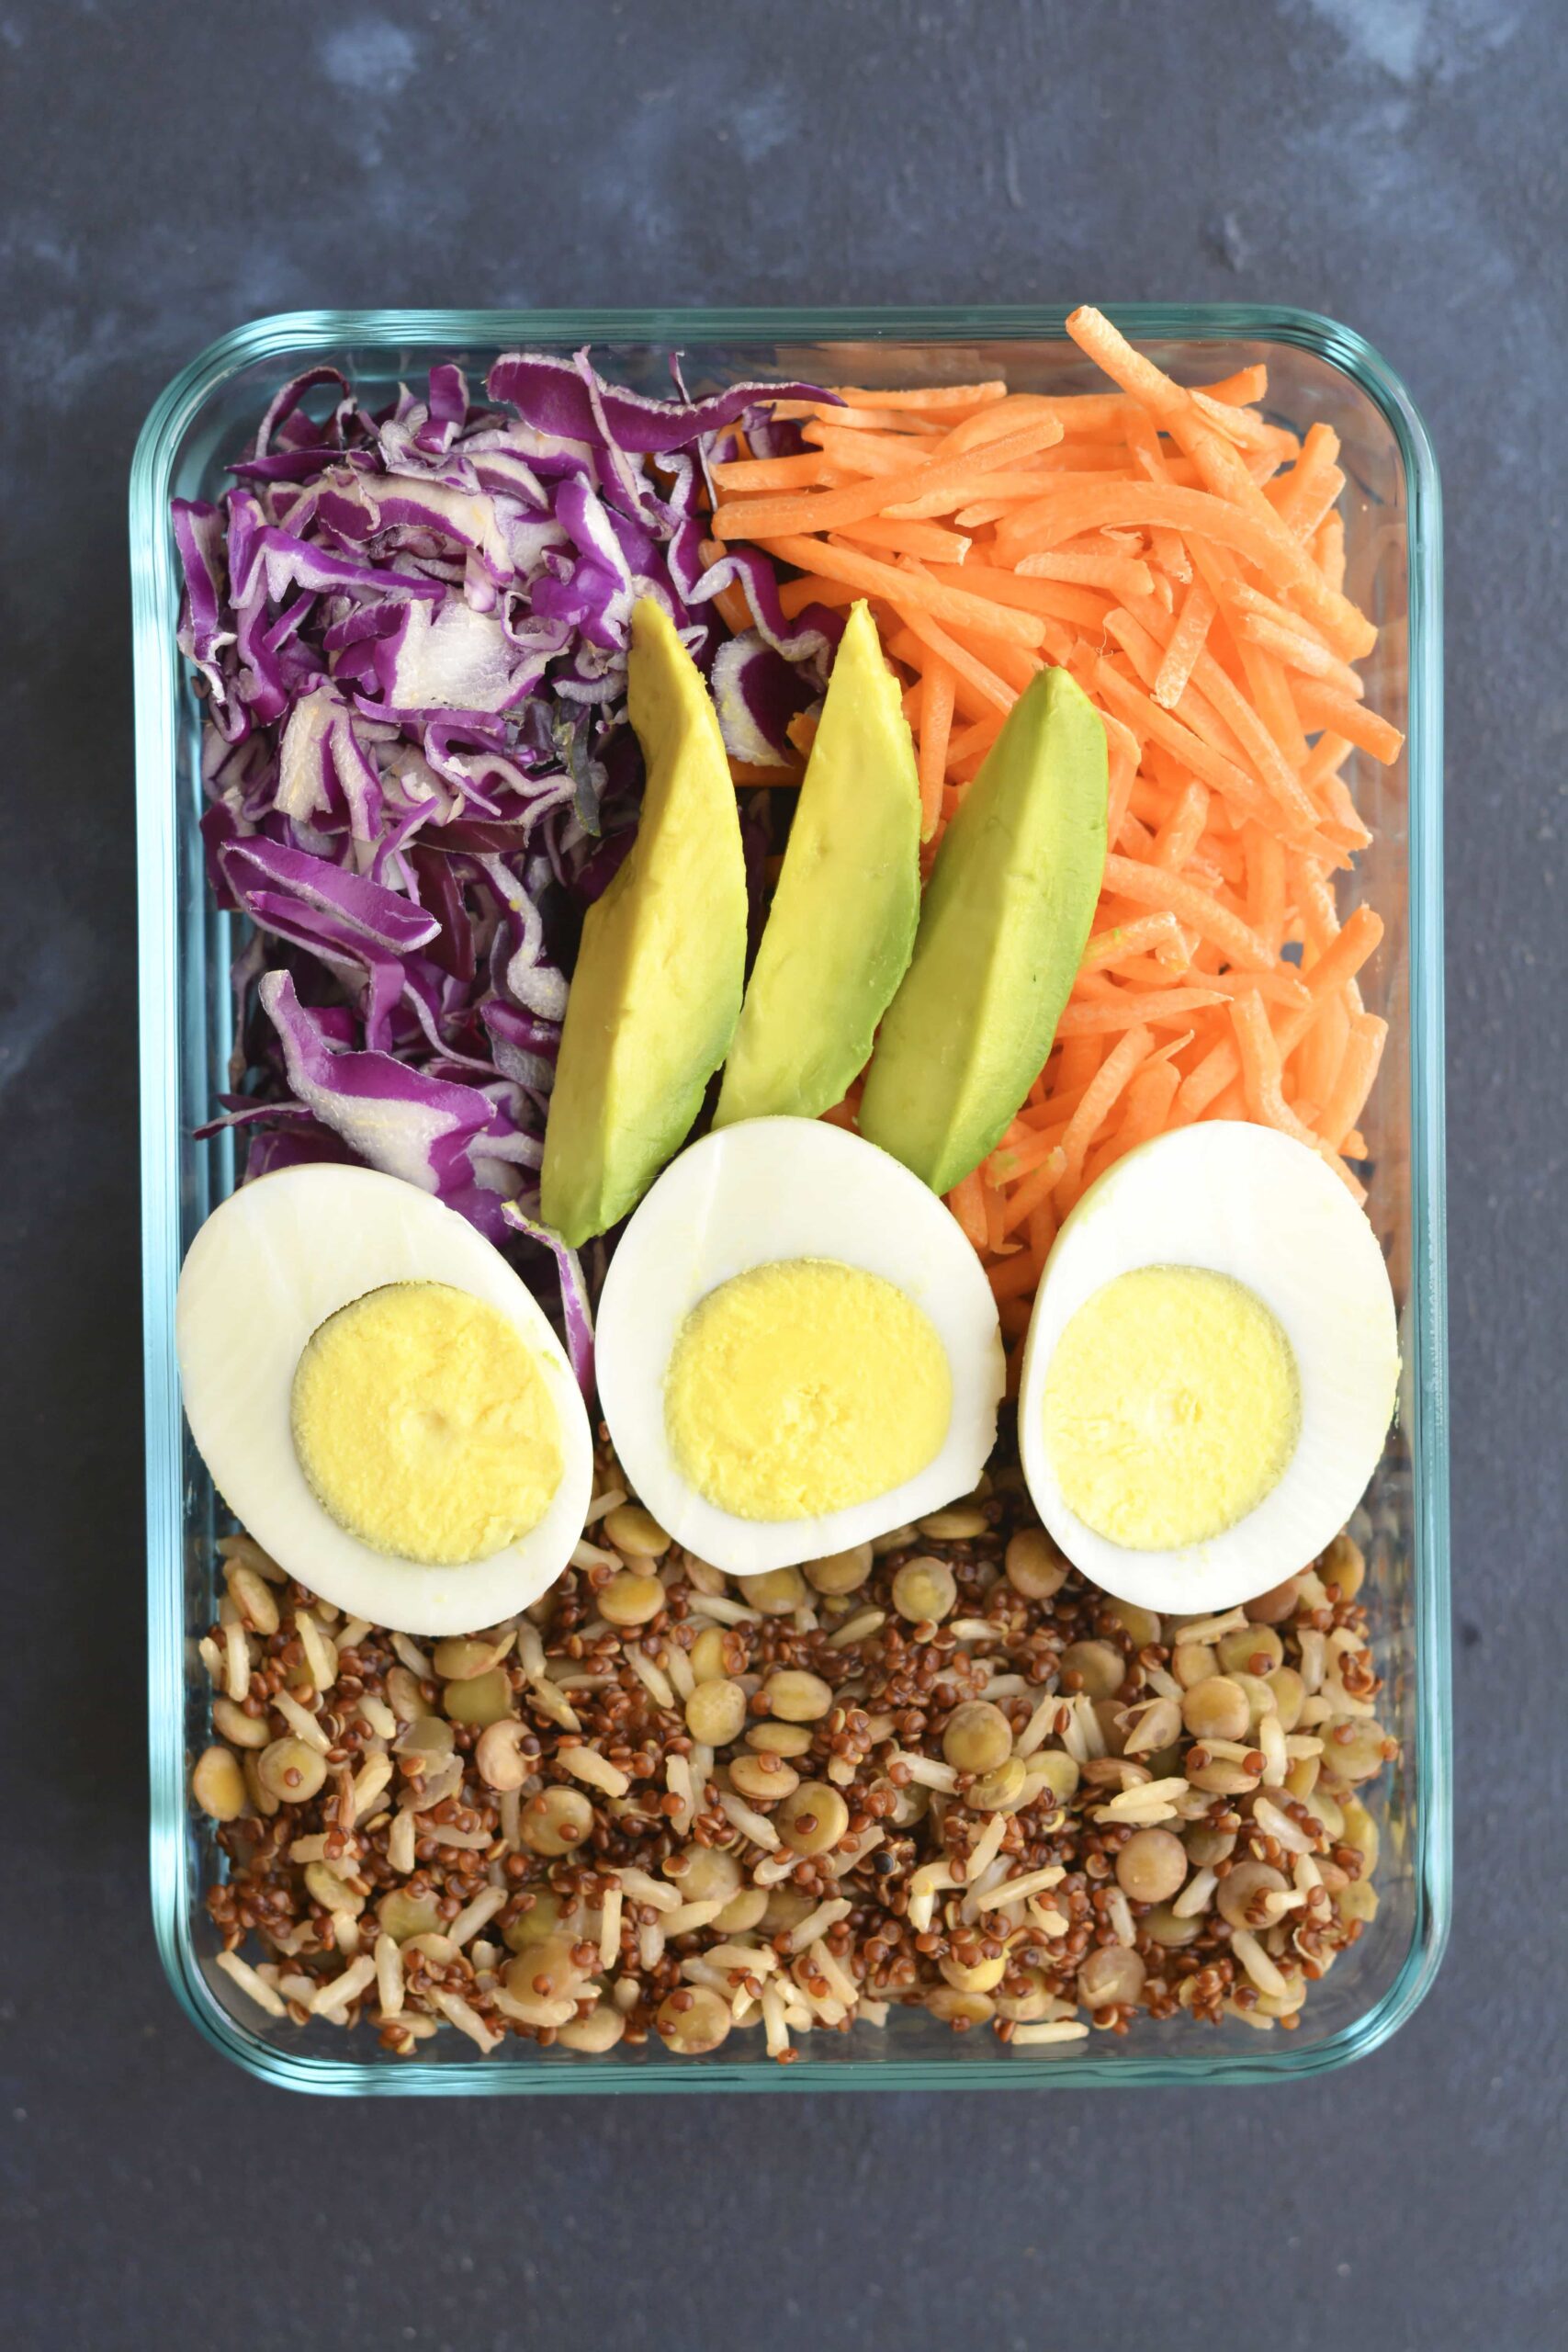
Beef Patties-Sweet Corn, Rice, and Sauteed Veggies: Do you need more than that for a balanced meal prep loaded with veggies and protein?
The key to successful meal prep is to have a plan, keep it simple and make it taste good! This Beef Patties-Sweet Corn, Rice, and Sauteed Veggies meal prep does just that!
With just a handful of wholesome ingredients, you can be enjoying one of the summer's favorite foods - burgers with a balance of healthy carbs and the freshest veggies! We love these for so many reasons, but mostly they're delicious and versatile, and the recipe yields about 16 patties.
For the patties:
The rice:
And the veggies:
Simply combine the ground beef with the onions, garlic, parsley, and all the seasonings. Then you portion them out with a measuring spoon. They're cooked quickly in a nonstick pan (no oil needed), for about five minutes per side. Very easy. The rest of the prep involves cooked brown rice, corn, mushrooms, tomatoes, and spinach.
This meal prep keeps well for the usual duration in an airtight container for four to five days in the fridge. You can also freeze the patties ahead of time and even the veggies and rice, too, if desired. (Yes, you can freeze rice). Defrost in the refrigerator overnight and serve slightly warm or at room temperature.

Lean ground beef is what this recipe calls for (about 93 percent), but feel free to combine beef, veal, and pork, or some combination thereof if you want some savory diversity. If you opt for something like turkey or chicken, just know that the fat content won't be quite as high and they might not be quite as moist. They'll still be good, though!
A bit of garlic or onion powder will amp up the flavor.
Use white rice instead of brown, or skip it altogether and boil up some quinoa if desired. These beef patties with corn and rice will be delicious even if you're not using rice, but some other grain or grain-like ingredient (quinoa isn't actually a grain but a pseudograin!).
You can use a spatula or a spoon to combine the ingredients for the beef patties, but we suggest using something else: your hands. Using your hands for patties (or meatballs!) means you're less likely to overmix the ingredients, and it's more likely the ingredients get combined evenly. Overmixing can result in tough patties.
This recipe is a great way to use up leftover rice because it calls for cooked rice.
Canned or frozen corn can be used. If using canned corn, drain and rinse it first, though.
If you've never grated garlic, use the smallest holes in your box grater, or try a microplane grater instead to get the garlic nice and grated.
READ MORE: Tomato and Chickpea Rice with Beef Patties and Steamed Broccoli is calling your name!
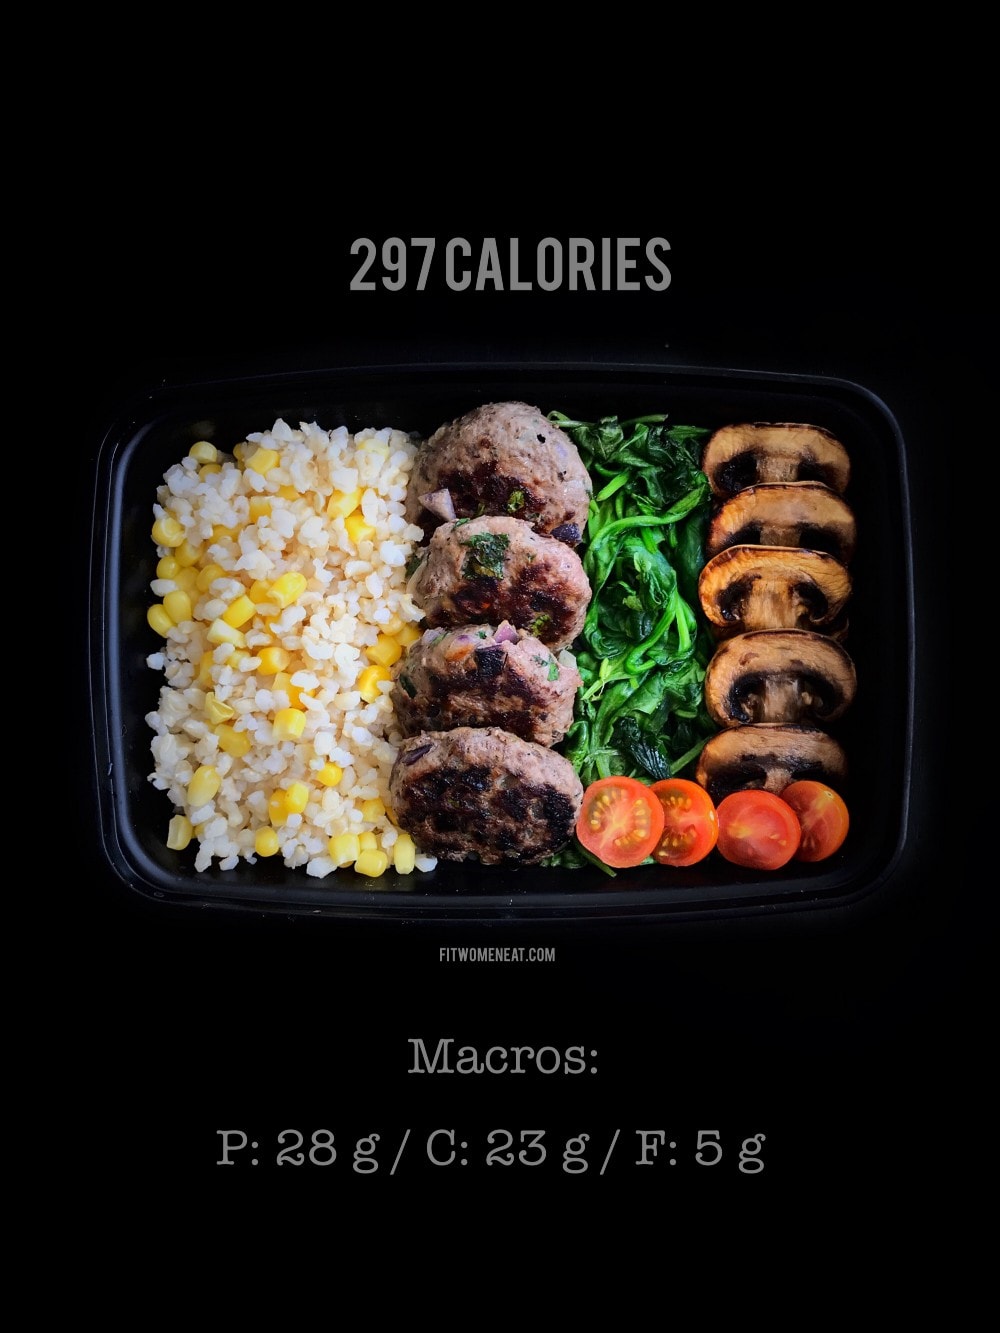
Spaghetti squash and turkey meatball meal prep will give you all the cozy feels of the classic dish it's inspired by, spaghetti and meatballs, but with lower carbs and fat.
Cutting out starchy pasta is a great way to save calories, but you need to replace those noodles with something that's like noodles, but also tasty! Spaghetti Squash is one of the simplest healthy swaps you could make for traditional pasta if you are looking to reduce carbs and/or eat more veggies in general. (Spaghetti squash contains about 10 grams of carbs per cup, a fraction of pasta's typical carb count.) This squash can be used in sweet and savory dishes, but the most common use for meal prepping? Well, it just so happens to be with meatballs, or even with some meat sauce.
First, let's talk about the squash itself. You'll start off by roasting it at high heat in the oven until you can easily shred the squash into "spaghetti" with a fork. While the squash is roasting, bring together the ingredients for the meatballs in a medium bowl. If you can't find the specific seasoning we recommend here, which contains a combination of sage, rosemary, thyme, salt, paprika, marjoram, and garlic powder, we suggest using something similar. The same amount of Italian seasoning would work, or get creative and do a dash of all of those individual herbs, if desired. Keep in mind the seasoning we recommend already has salt and pepper in it, so you may not need a whole lot for the meatballs.
We love this for an easy meal prep because it's deliciously rewarding and balanced, and it stores well. Keep them in airtight meal prep containers for up to 4 days. Reheat in the microwave or on the stovetop over medium-low heat. You can freeze the meatballs if you want, but the spaghetti squash won't do so well in the freezer when you go to reheat it.
Spaghetti and meatballs deserve a good green salad, maybe with Caesar dressing. Or at the very least, a side of broccoli rabe, sauteed kale with garlic, or something else that's very green! We also like a good dash of freshly grated Parmesan cheese over the finished dish, too.
Serve this spaghetti squash and meatballs with your favorite marinara sauce or other jarred pasta sauce. Or make it from scratch, if desired.
Feel free to use ground beef, chicken, or pork, or a combination of those meats, for this meal prep.
Doubling this recipe means you can freeze the meatballs and have them at a moment's notice for dinner. Future you will definitely thank you!
Use your clean hands to combine the meatball mixture. It will ensure that it's both evenly mixed and not overmixed; the latter can result in meatballs that are tough and not tender.

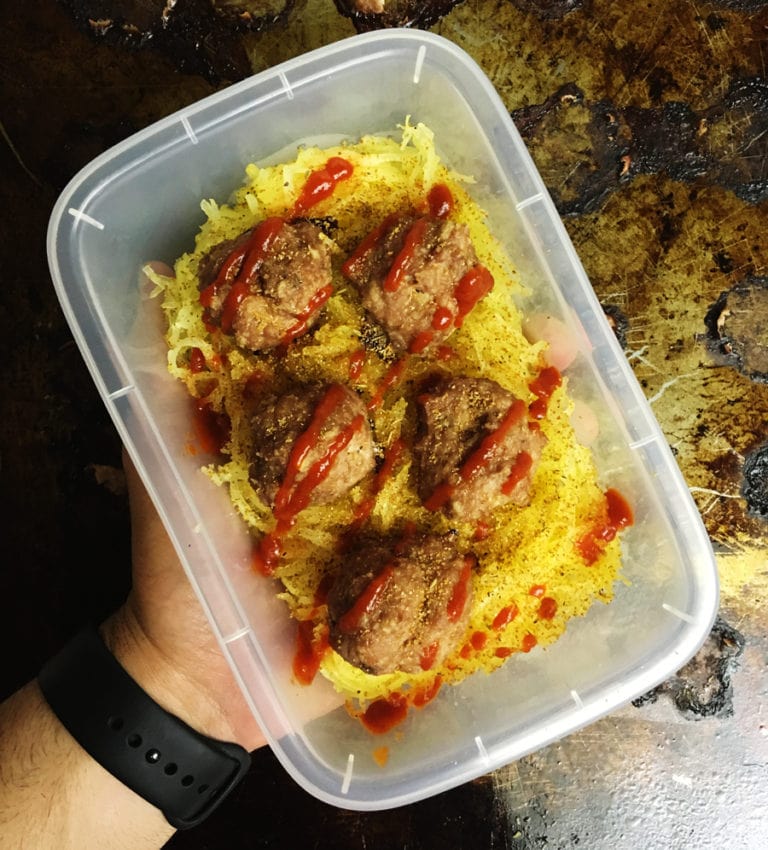
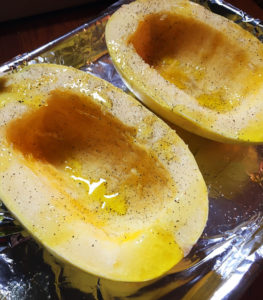


Garlic grilled chicken with rosemary and lemon. No matter how you describe it, all of those things are delicious and classic accompaniments to chicken.

Hiiiiya! It's Stephanie here from @cookbycolor sharing a recipe for this simply delicious Rosemary, Lemon and Garlic Grilled Chicken. No matter what time of year it is, there's nothing like a roasted chicken with rosemary, lemon, and garlic. So delicious.
Please don't mind that this chicken missing a wing. I literally couldn't help myself, so I had to test it to make sure it was safe, ya dig? The verdict? Well, I enjoyed it before I remembered I needed a picture. Take away? It's irresistible.
This chicken will easily serve our small family 6 meals + the goods for a delicious broth. You have a perfect protein-building block to work with, so stick with me here.
This recipe comes together fast because what you're doing is removing the backbone of the chicken, or spatchcocking it. With the backbone removed, you can lay the chicken flat right on the grill and it cooks more quickly and evenly. If this sounds like something you're afraid to do or don't know how to do, you can ask your butcher to do it, try your hand at it yourself (take a spin through YouTube), or find a grocery store that sells them already prepped that way. (Thanks, Wegmans!) All this needs is a quick rub down with lemon juice, rosemary, and garlic, and some salt and pepper. And boom, you're good to go.
Just about anything tastes great with chicken. It's true, right? Roasted potatoes (sweet or white or even Yukon golds), green beans, steamed broccoli, or a giant salad. It's something you can make all year round and vary the side dishes accordingly; in the summer, serve alongside grilled vegetables. Chicken will keep in the fridge for up to 4 or 5 days. You can portion this out into airtight meal-prep containers if desired, or just leave the whole thing in the fridge, as is, and cut off what you need, as you need it. Talk about low-fuss meal prep!
This recipe uses lemon, but feel free to use lime if you want instead, or even orange. Chicken and citrus get along well together, in general.
Vary the herbs, too. Thyme, cilantro, sage, parsley, marjoram, chives-these are all great herbs that work with chicken.
If you don't have garlic, or want to vary things, try chopped shallots or red onion instead.
For dinner tonight, we can have chopped chicken breast with roasted potatoes and a simple salad. Maybe tomorrow we will mix it with mayo, celery, apples, and curry powder to make a to-die-for chicken salad that can be wrapped, sandwiched or set atop a #BAS.
The point? You have prepped protein for the week, or at least a few days. With minimal effort, it can feed us as is, or can be repurposed in endless ways. Soup, salad, stews-the sky is the limit.
I am always featuring easy ways to reinvent leftovers in creative, delicious ways @cookbycolor and would love for you to join the #cookbycolor community. Check it out!
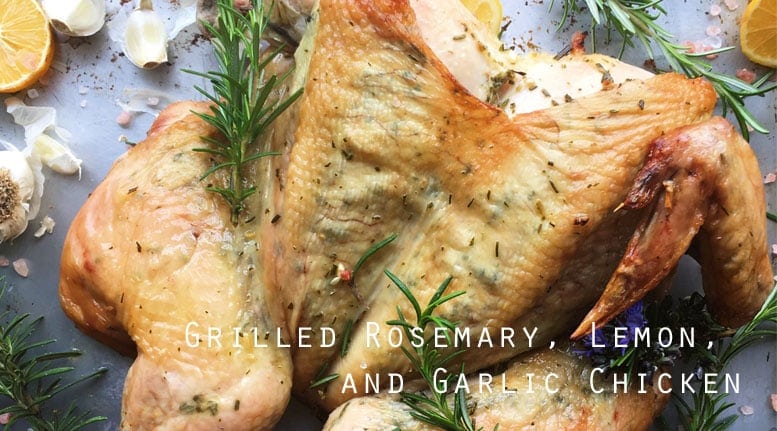
This Moroccan Turmeric Chicken Stew has an anti-inflammatory boost! It's pungent, fragrant, and slightly sweet. Serve over cauliflower rice, white or brown rice for a warm lunch or dinner.
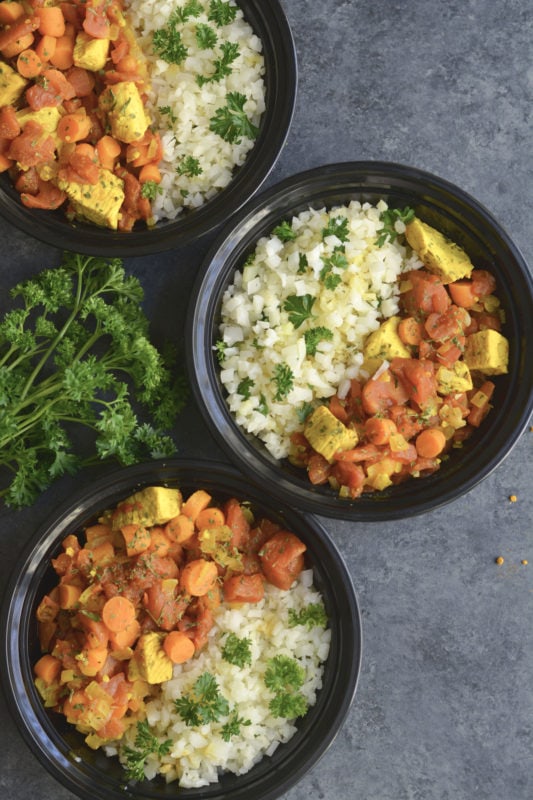
Who doesn't love a chicken stew for a cold night? Or any night, really?
This one takes a little bit of time, as any good stew does, but it's worth it. With chicken, turmeric, ginger, coriander, and cinnamon, it's warming, spicy, a little sweet, and so good. It's a flavor profile commonly associated with Moroccan food. Like any stew, it gets better the longer it sits, so you'll have fun tasting this on day 1 versus day 4.
Carrots, onions, and garlic come together in a large pot, and then you add the chicken and some salt and pepper. Then, cook that a little bit and add the tomatoes and stock, plus all of the spices. Bring it up to a boil and then simmer, simmer, simmer. And then, you're good to go.

We like this over cauliflower rice, or regular rice if you don't need to restrict carbs. Either brown or white rice would taste good here. Jasmine rice in particular would complement these flavors.
You can also eat this stew as is, or serve it with crusty bread if that's part of your diet plan. Sometimes it's worth the glutens! A green salad goes a long way, but you've got a lot of veggies in this stew already.
Stew gets better with age and can sit for several days in the fridge. Suffice it to say, it'll taste more interesting on days three and four, so certainly enjoy this meal prep.
Freeze any leftovers in an airtight container for up to three months. Defrost in the microwave, in the fridge overnight, or over medium-low heat on the stovetop.
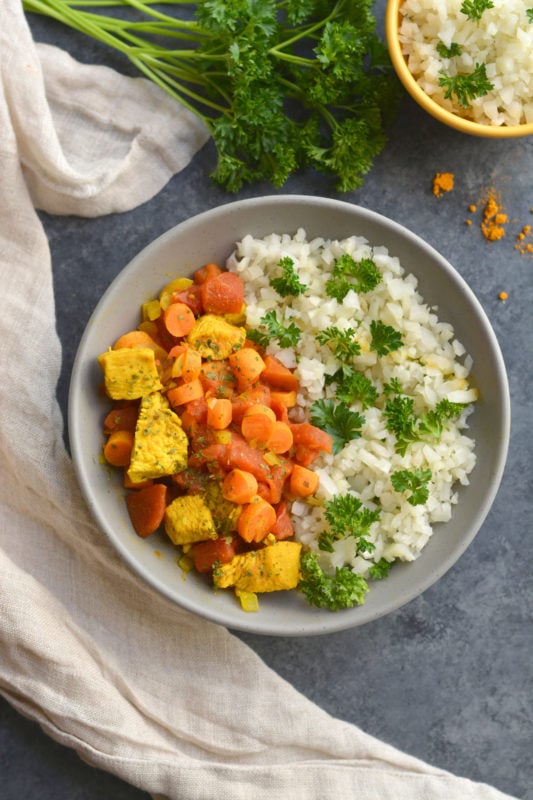
When using canned goods, such as tomatoes, beans, and pre-made stock, it's nice to buy low-sodium versions (or no salt) of these products. It may be most helpful if you (or those you cook for) need to restrict salt intake. But in more practical cooking terms, buying processed foods with low or no sodium means you can customize the salt level to your liking. It makes it less likely that your food will end up too salty.
READ MORE: Digging Moroccan Chicken? Try Instant Pot Moroccan Chicken Meal Prep

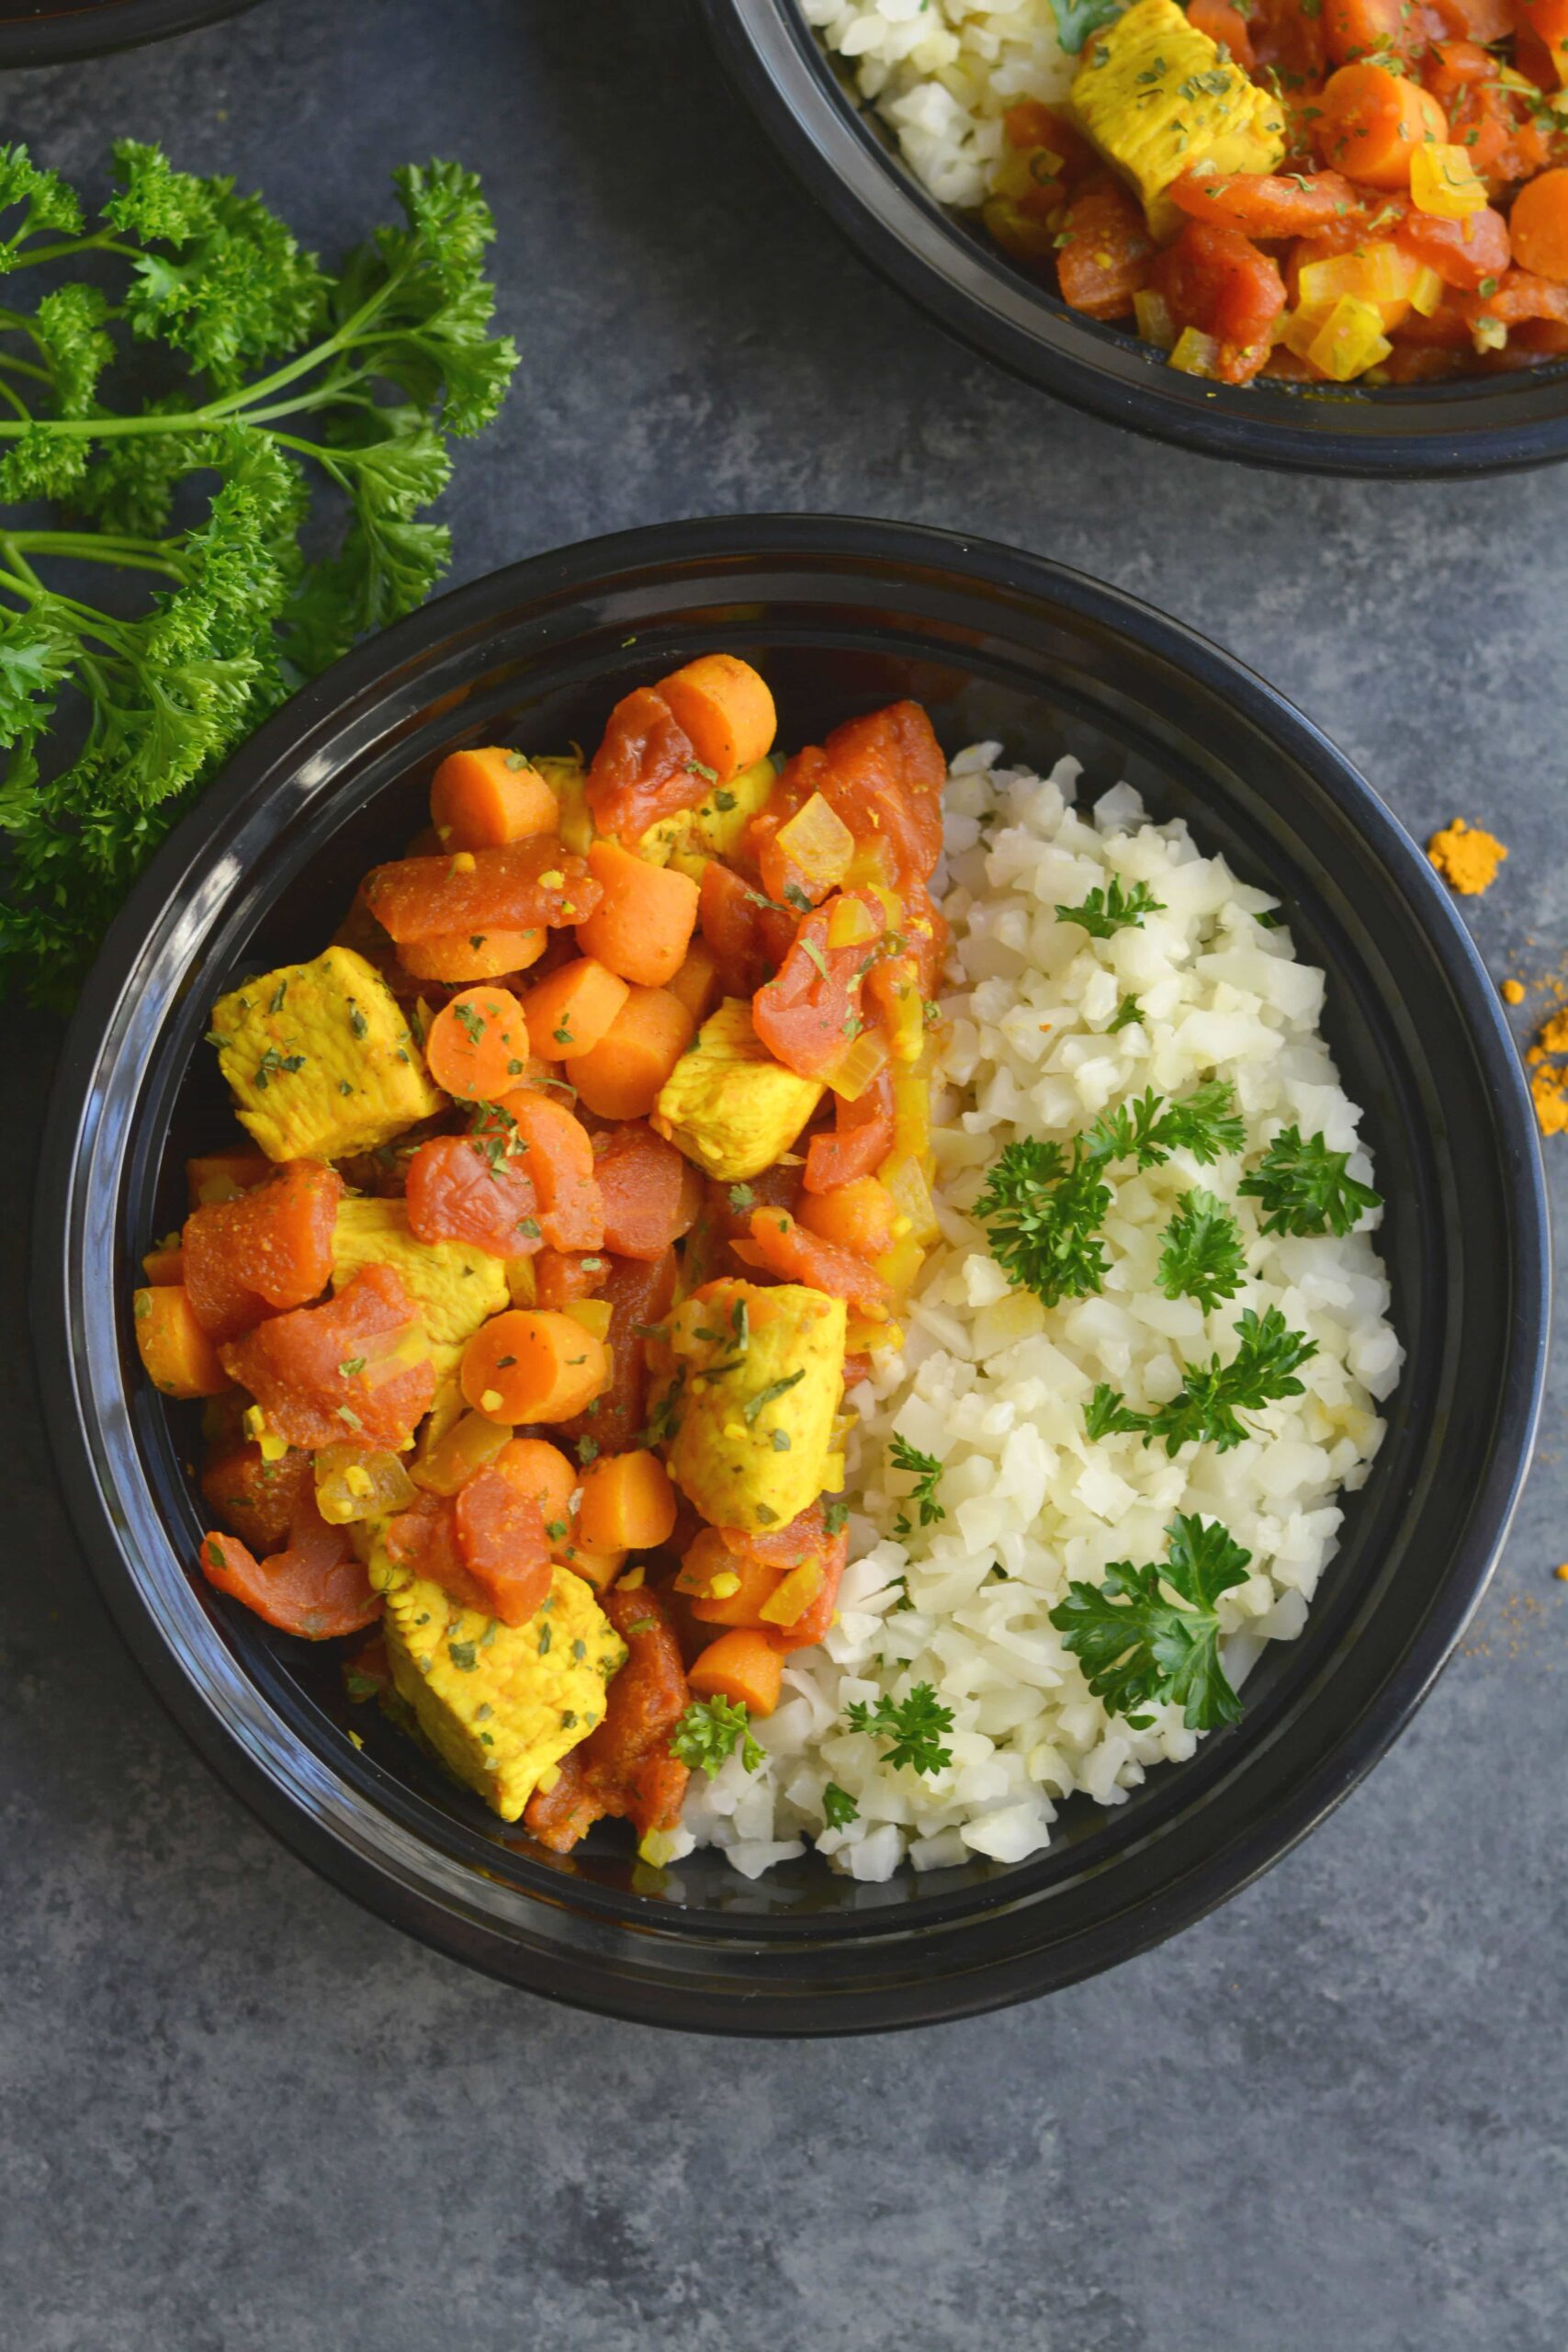
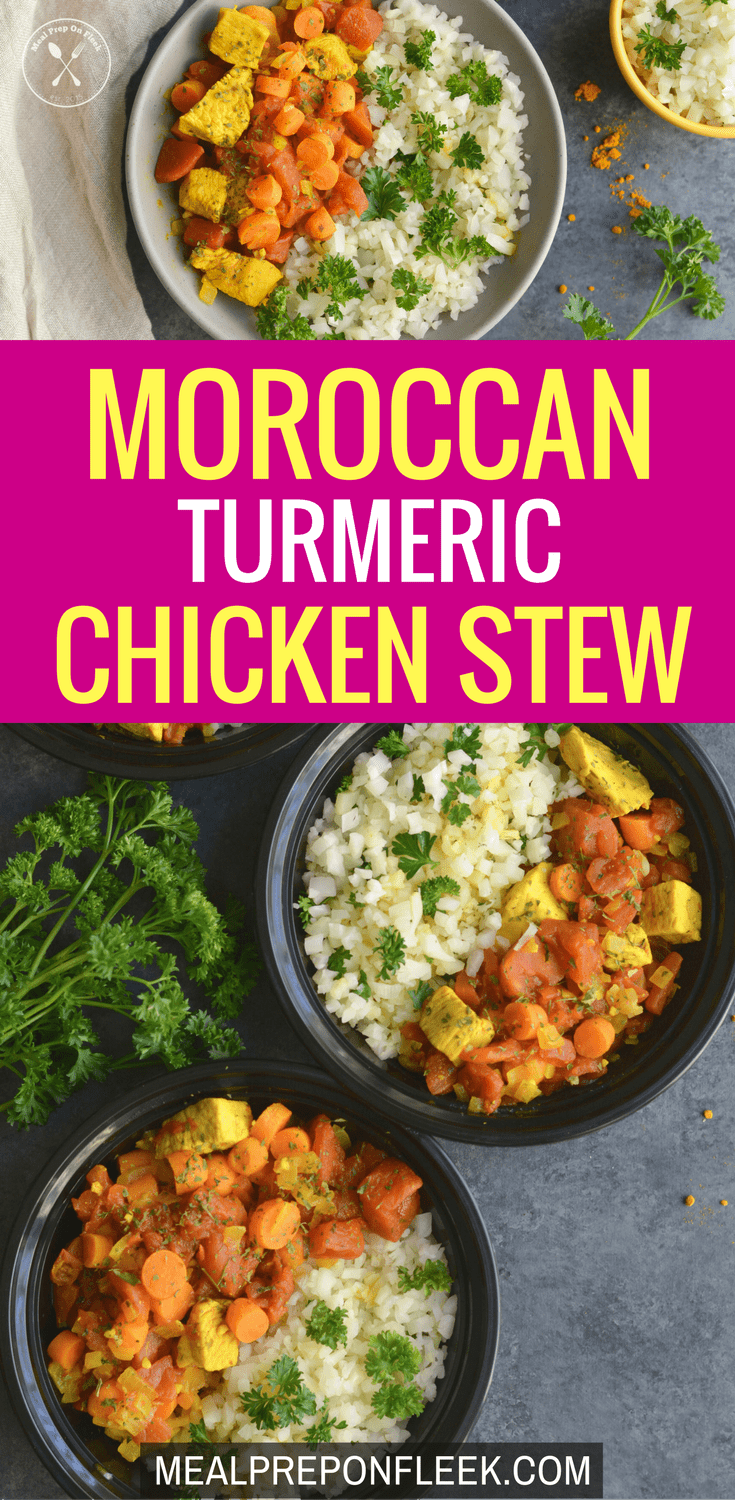
Simplify prep and clean up with these sheet pan chicken fajitas, which are ready in a flash! They're great for all kinds of diets!
Let the oven do all of the work for these chicken fajitas. All you need is one pan and about 20 minutes to have a healthy and wholesome meal prep ready for the entire week! No takeout is needed; this dish is way better. Plus, it makes your Sunday meal prep easy-peasy. Cook once, eat four times-so much wisdom in this! And we are all about finding sheet pan recipes that work great during the week. (Try these Sheet Pan Salmon Fajitas next!)
This recipe is great for those following a low-carb diet. You can serve as is or with keto tortillas. It's also paleo-friendly, gluten-free, dairy-free, and Whole30 compliant! Our only recommendation? Say, "Yes, I'll take the guacamole, please." Because we all know that avocados are life, no matter what kind of dietary plan you're following.
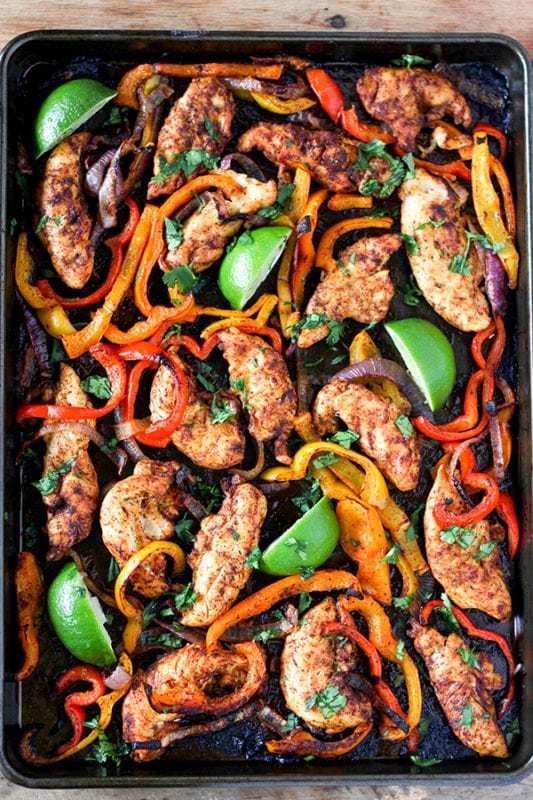
Who wouldn't want to eat fajitas for lunch all week? Or dinner! Here's what you need:
This couldn't be easier. Slice everything up and toss it with taco seasoning and olive oil. Then, load it onto the sheet pan, which you've also greased with a little bit of oil, and bake for less than a half an hour. It's really that quick. Clean-up is a snap because you're basically only washing a knife, a cutting board and, once the meal is prepped or served, the sheet pan. Seriously.
Granted, we like this for a weeknight meal for all the aforementioned reasons. But there's no reason why you can't double or triple this (get more sheet pans, you'll need 'em!) recipe and serve it for a party. Put out all the fixins on the side so people can load up with the toppings they want, like sour cream, pico de gallo, cheddar and/or Monterey jack cheeses, chopped cilantro and, of course, guacamole. (Any kind of salsa would work, though, if you don't have pico. Skip the tortillas or opt for gluten-free or low-carb ones as needed. Or serve with regular rice or cauliflower rice.
Once they're prepped, this recipe will keep for up to 4 days in a sealed and airtight container in the fridge. Just reheat gently in the microwave or on the stovetop with a little bit of olive oil in the pan. You can also freeze these in an airtight zip-close plastic bag. Defrost overnight in the refrigerator and then reheat as directed. This kind of meal prep takes well to the freezer.
READ MORE: 35 Sheet Pan Meal Prep Recipes That Will Change Your Life!
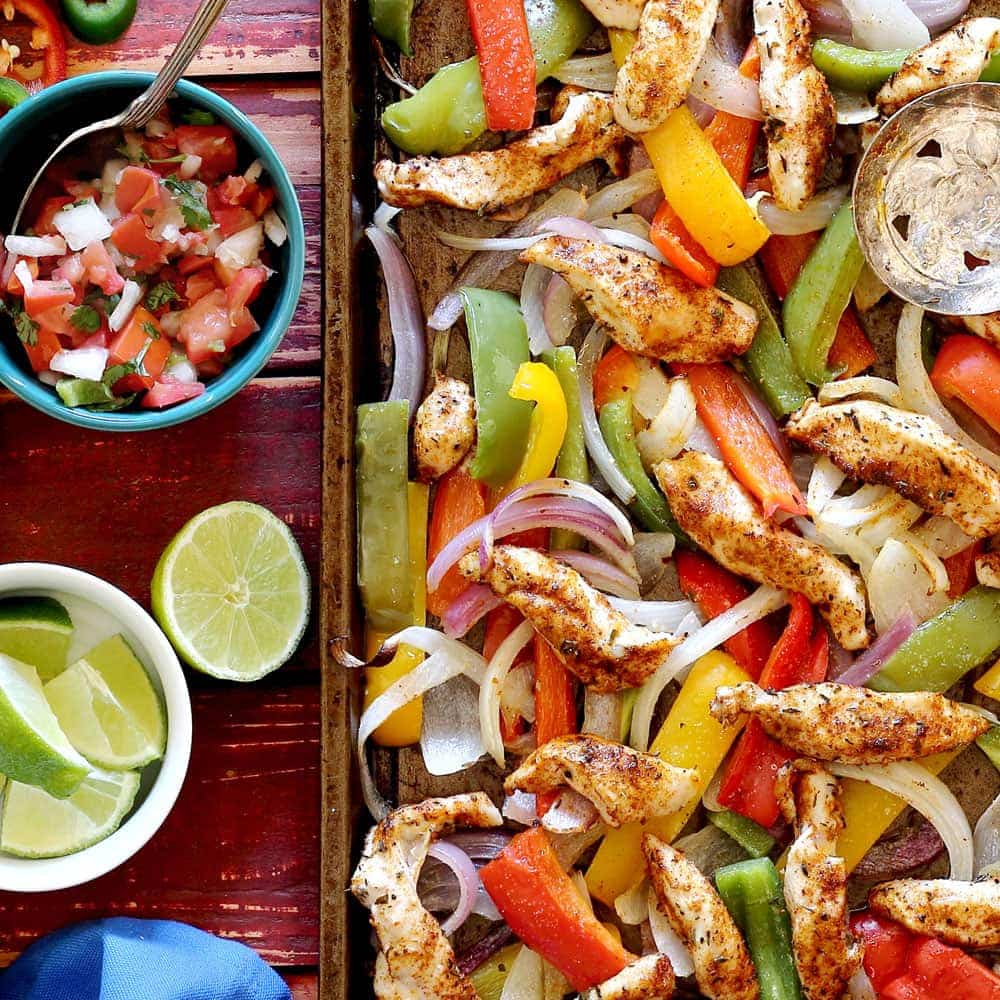
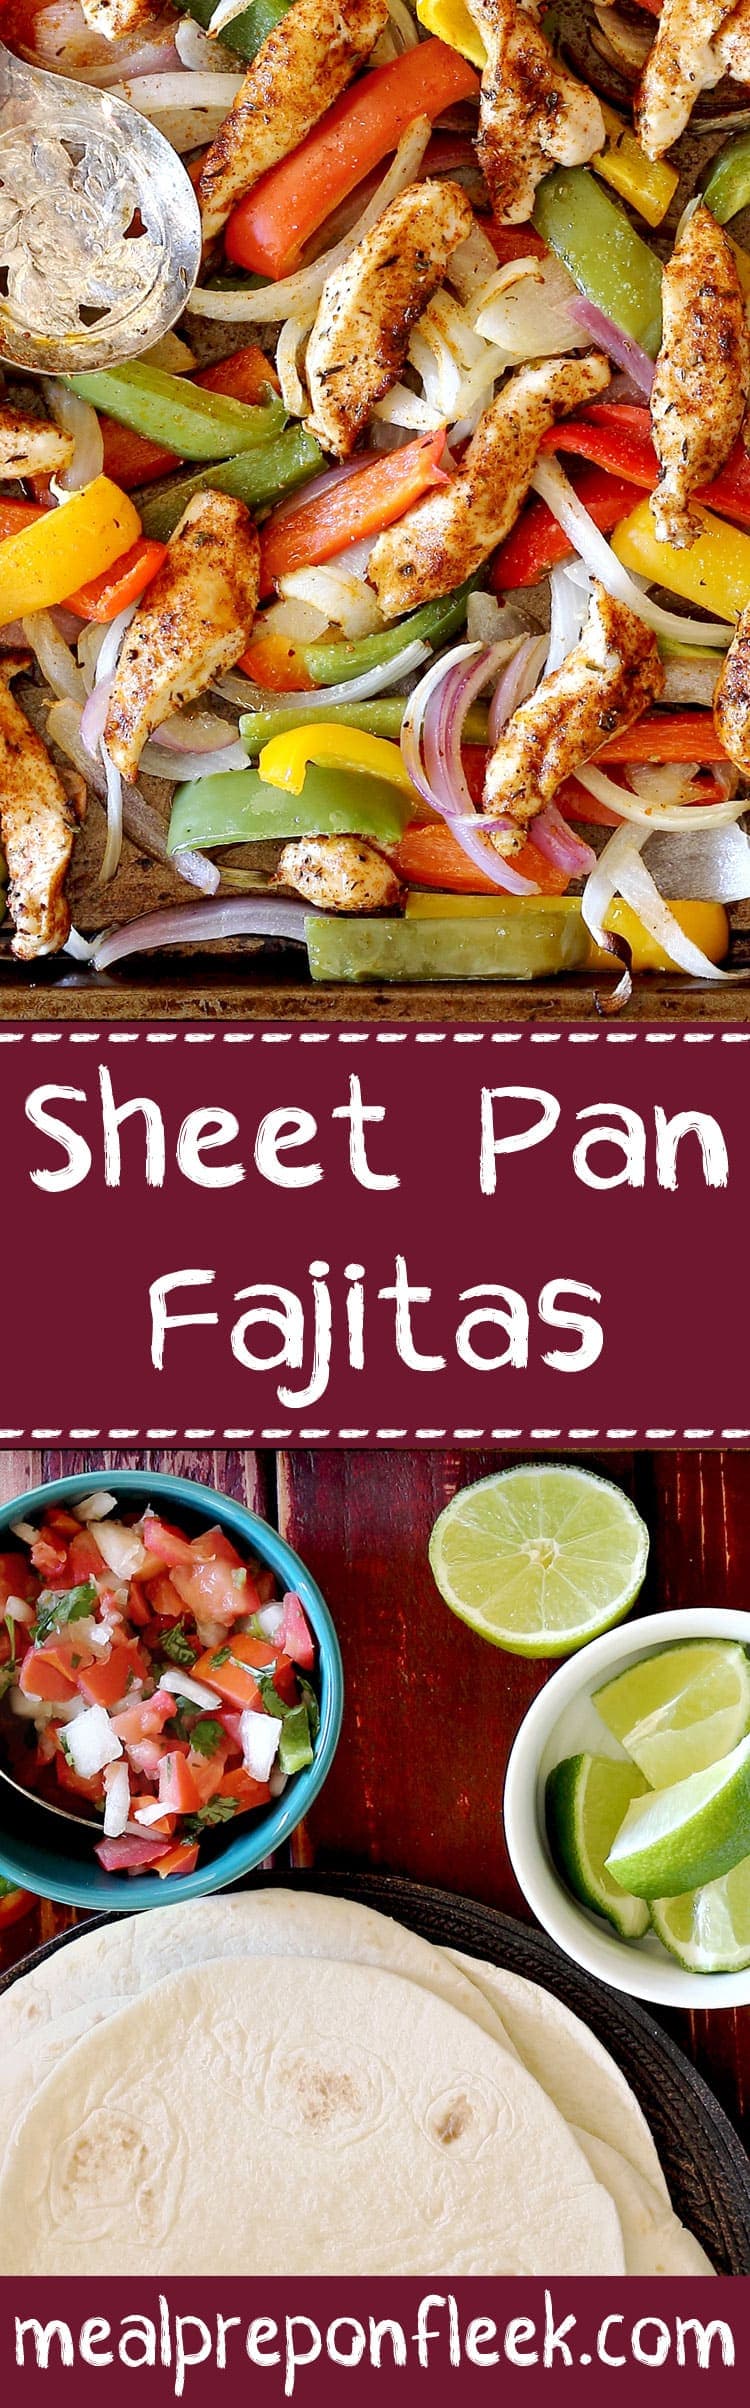
Slow Cooker Beef Ragu Pasta Meal Prep is an effortless and hearty meal to be enjoyed for lunch or dinner. Gluten-Free.
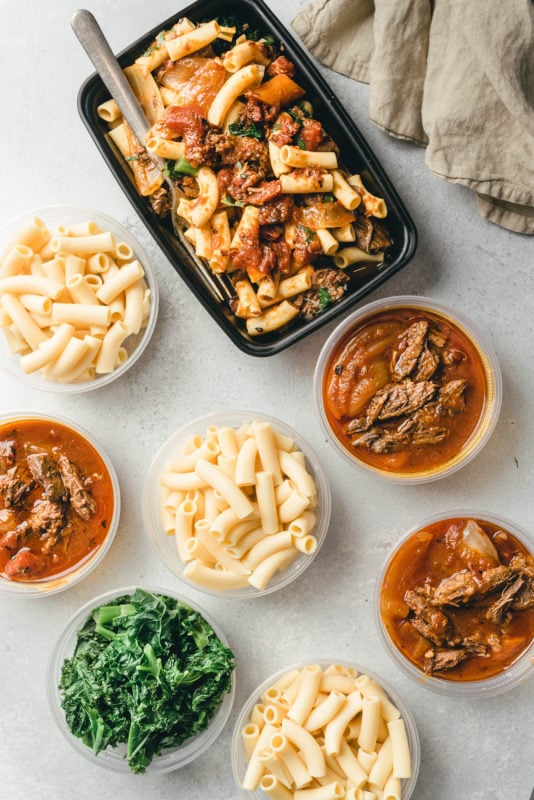
Can you tell we have been on a kick with recipes that are easy and made in the Crock-Pot? Basically, these kinds of recipes are ideal for people less enthusiastic about cooking. Or if you just don't want to spend a lot of time on the weekend chopping, prepping, and all the rest. Here's the deal. This beef ragu does its thing in your kitchen on a Sunday afternoon while you go about your business. This ragu makes your house smell awesome, and then dinner is ready for that night. Or for meal prepping.
This Slow Cooker Beef Ragu Pasta Meal Prep recipe is super easy, but still has all of the rich, hearty flavors of a classic ragu. It is served over a high-protein, gluten-free pasta for a complete meal for lunch or dinner. This comforting dish will appeal to the whole family. It feels filling and nostalgic, which is a winning combo for us.
Everything goes in your slow cooker. This beef ragu earns the award for the fastest description we've ever written for a dish.
But seriously, there's one exception, and that's the pasta. Resist the temptation to do your pasta in the slow cooker. It just won't work. That's why you make the pasta separately. This kind of appliance just doesn't exactly excel at starches like pasta and rice, with a few exceptions.
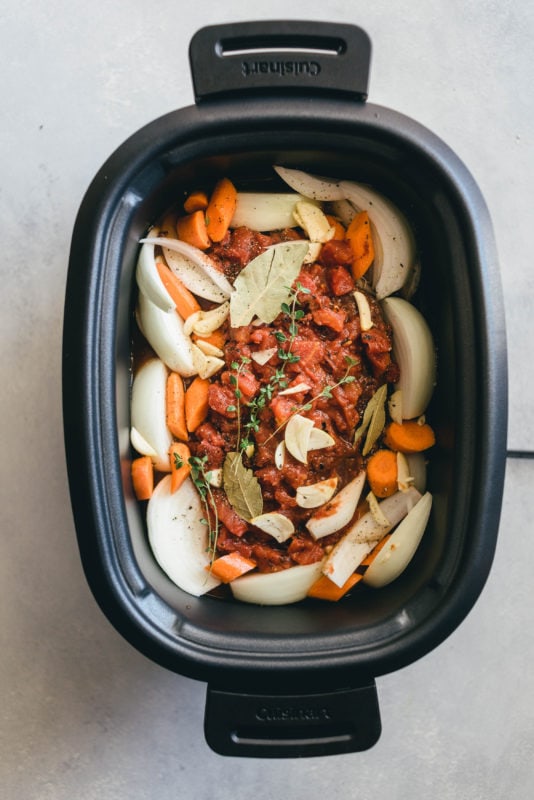
Meal prep as directed. This beef ragu is so hearty, it will keep for about five days or so. Reheat in the microwave or on the stovetop. (Hint: Dishes with pasta do better reheated on the stovetop in a little bit of extra sauce or water. The microwave can make pasta gummy).
Freeze any beef ragu pasta leftovers in freezer-safe containers or zip-close bags.
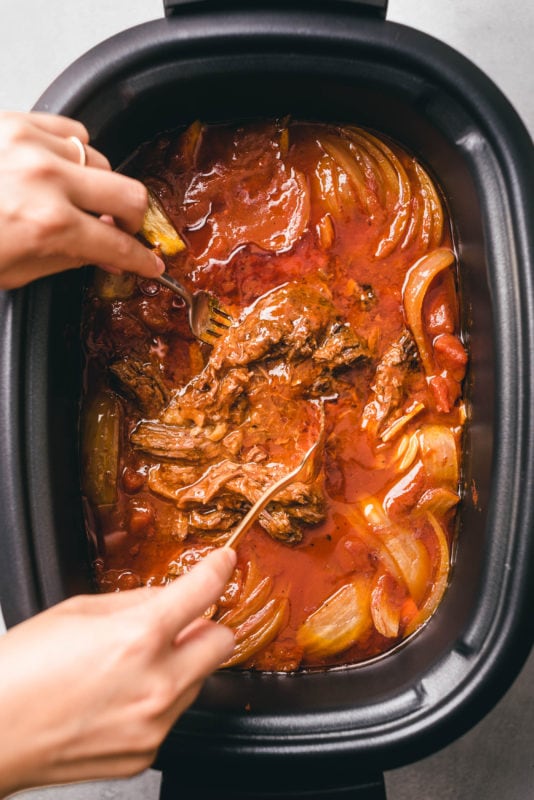
We like serving this not only with pasta, but with some fresh kale or spinach mixed into the dish at the last minute. The heat from the dish will soften the greens, so don't think of it as quite like adding a salad to your pasta.
READ MORE: Need a reason to use your slow cooker? How about 31 Slow Cooker Meal Prep Recipes?


Make all the meals!! Slow cooker meal prep recipes save time and taste SO GOOD! No dry meat here

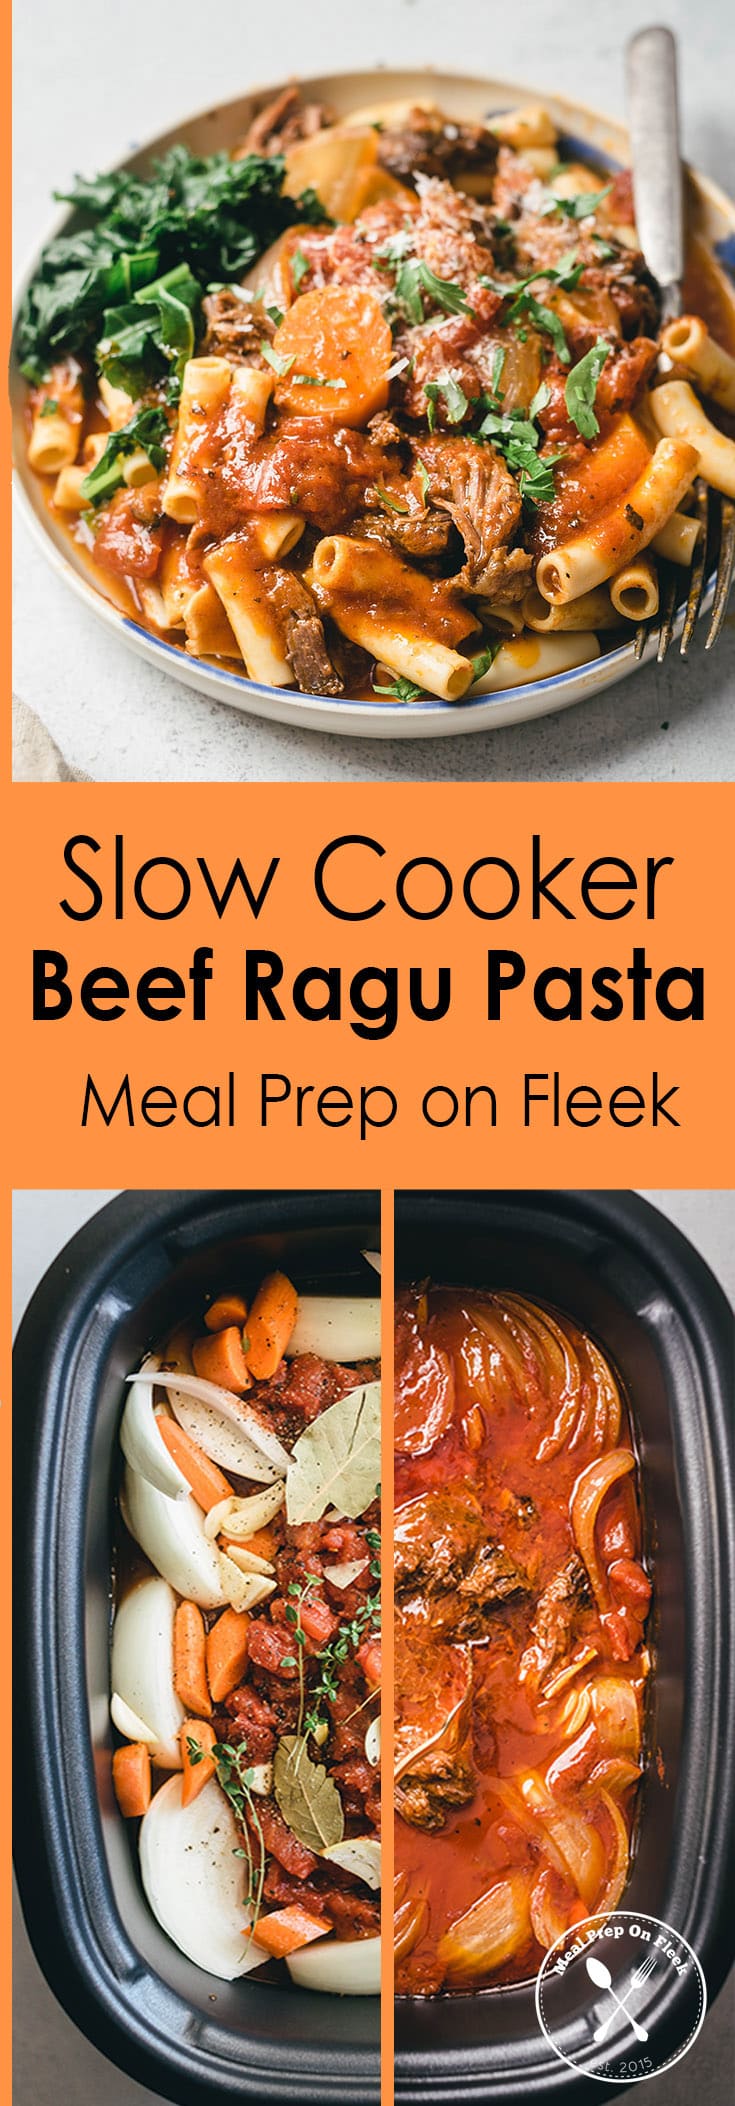
If the word "Instant" is involved you better believe we will be including it in our weekly meal preps. Who wouldn't want recipes that make your Sunday meal prep adventures easier? We're raising BOTH our hands here, because we sure do! The less time spent in the kitchen and the more time spent with our families, the better.
Basically, the Instant Pot is a pressure cooker, and therefore can accelerate the cooking time of your meals. You can make a WHOLE lot of different types of meals in this handy appliance. You'll see.
So, what can this magical kitchen tool do? It saves you time and money (and time is worth money!), and it can help you batch prep meals and eat healthier. Sign us up!
We think you get the point. Saving time + saving money + eating healthier = the keys to ongoing meal prep success! To help you get started we have compiled a list of more than a dozen Meal Prep Instant Pot Recipes that will rock your tastebuds.
Pair any of the proteins with your favorite whole grain or rice alternative for a well-rounded and balanced meal. Or, you can even alternate with different proteins or vegan options in each of these recipes to add variety and cater to you and your family's preferences.
So, what are you waiting for (besides the appliance to finish)? It's time to get meal prepping.
Oh, and we included a few snacks and desserts because life is always better when a little sweetness is involved. Right?
Start here. Promise this'll convert you to what the Instant Pot can do for your chicken dinners!
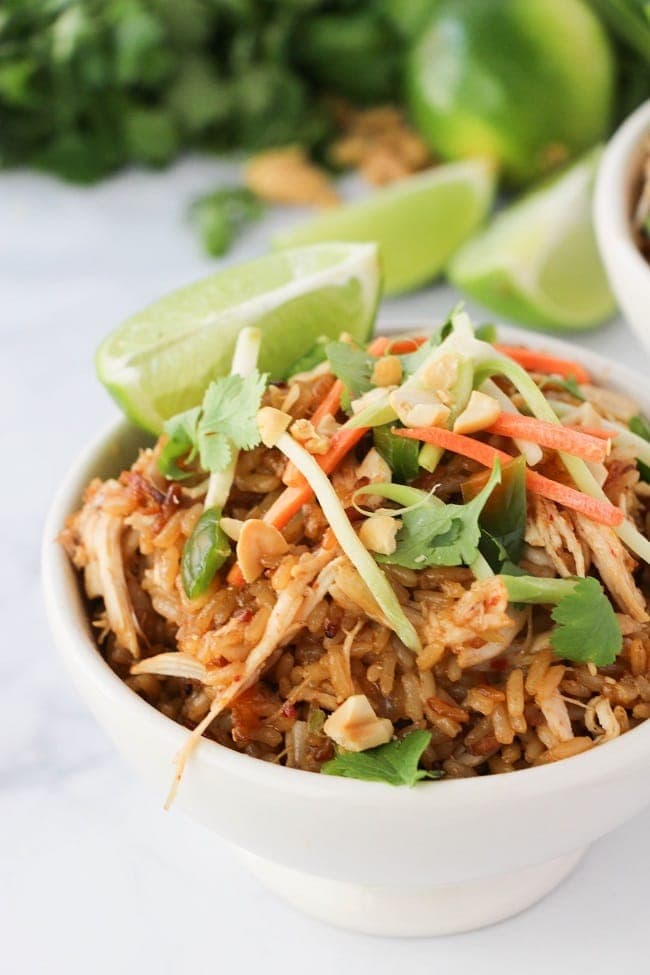
No need for takeout when you can prep this meal in your Instant Pot!
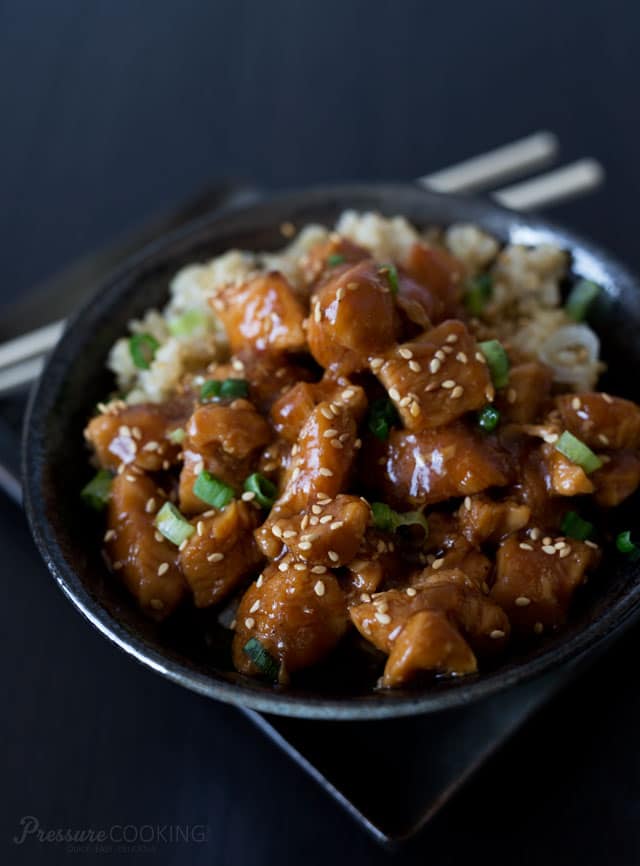
The base of tacos, burritos, or just a delicious meal on its own over rice. Yep, that's what you're looking at right here!
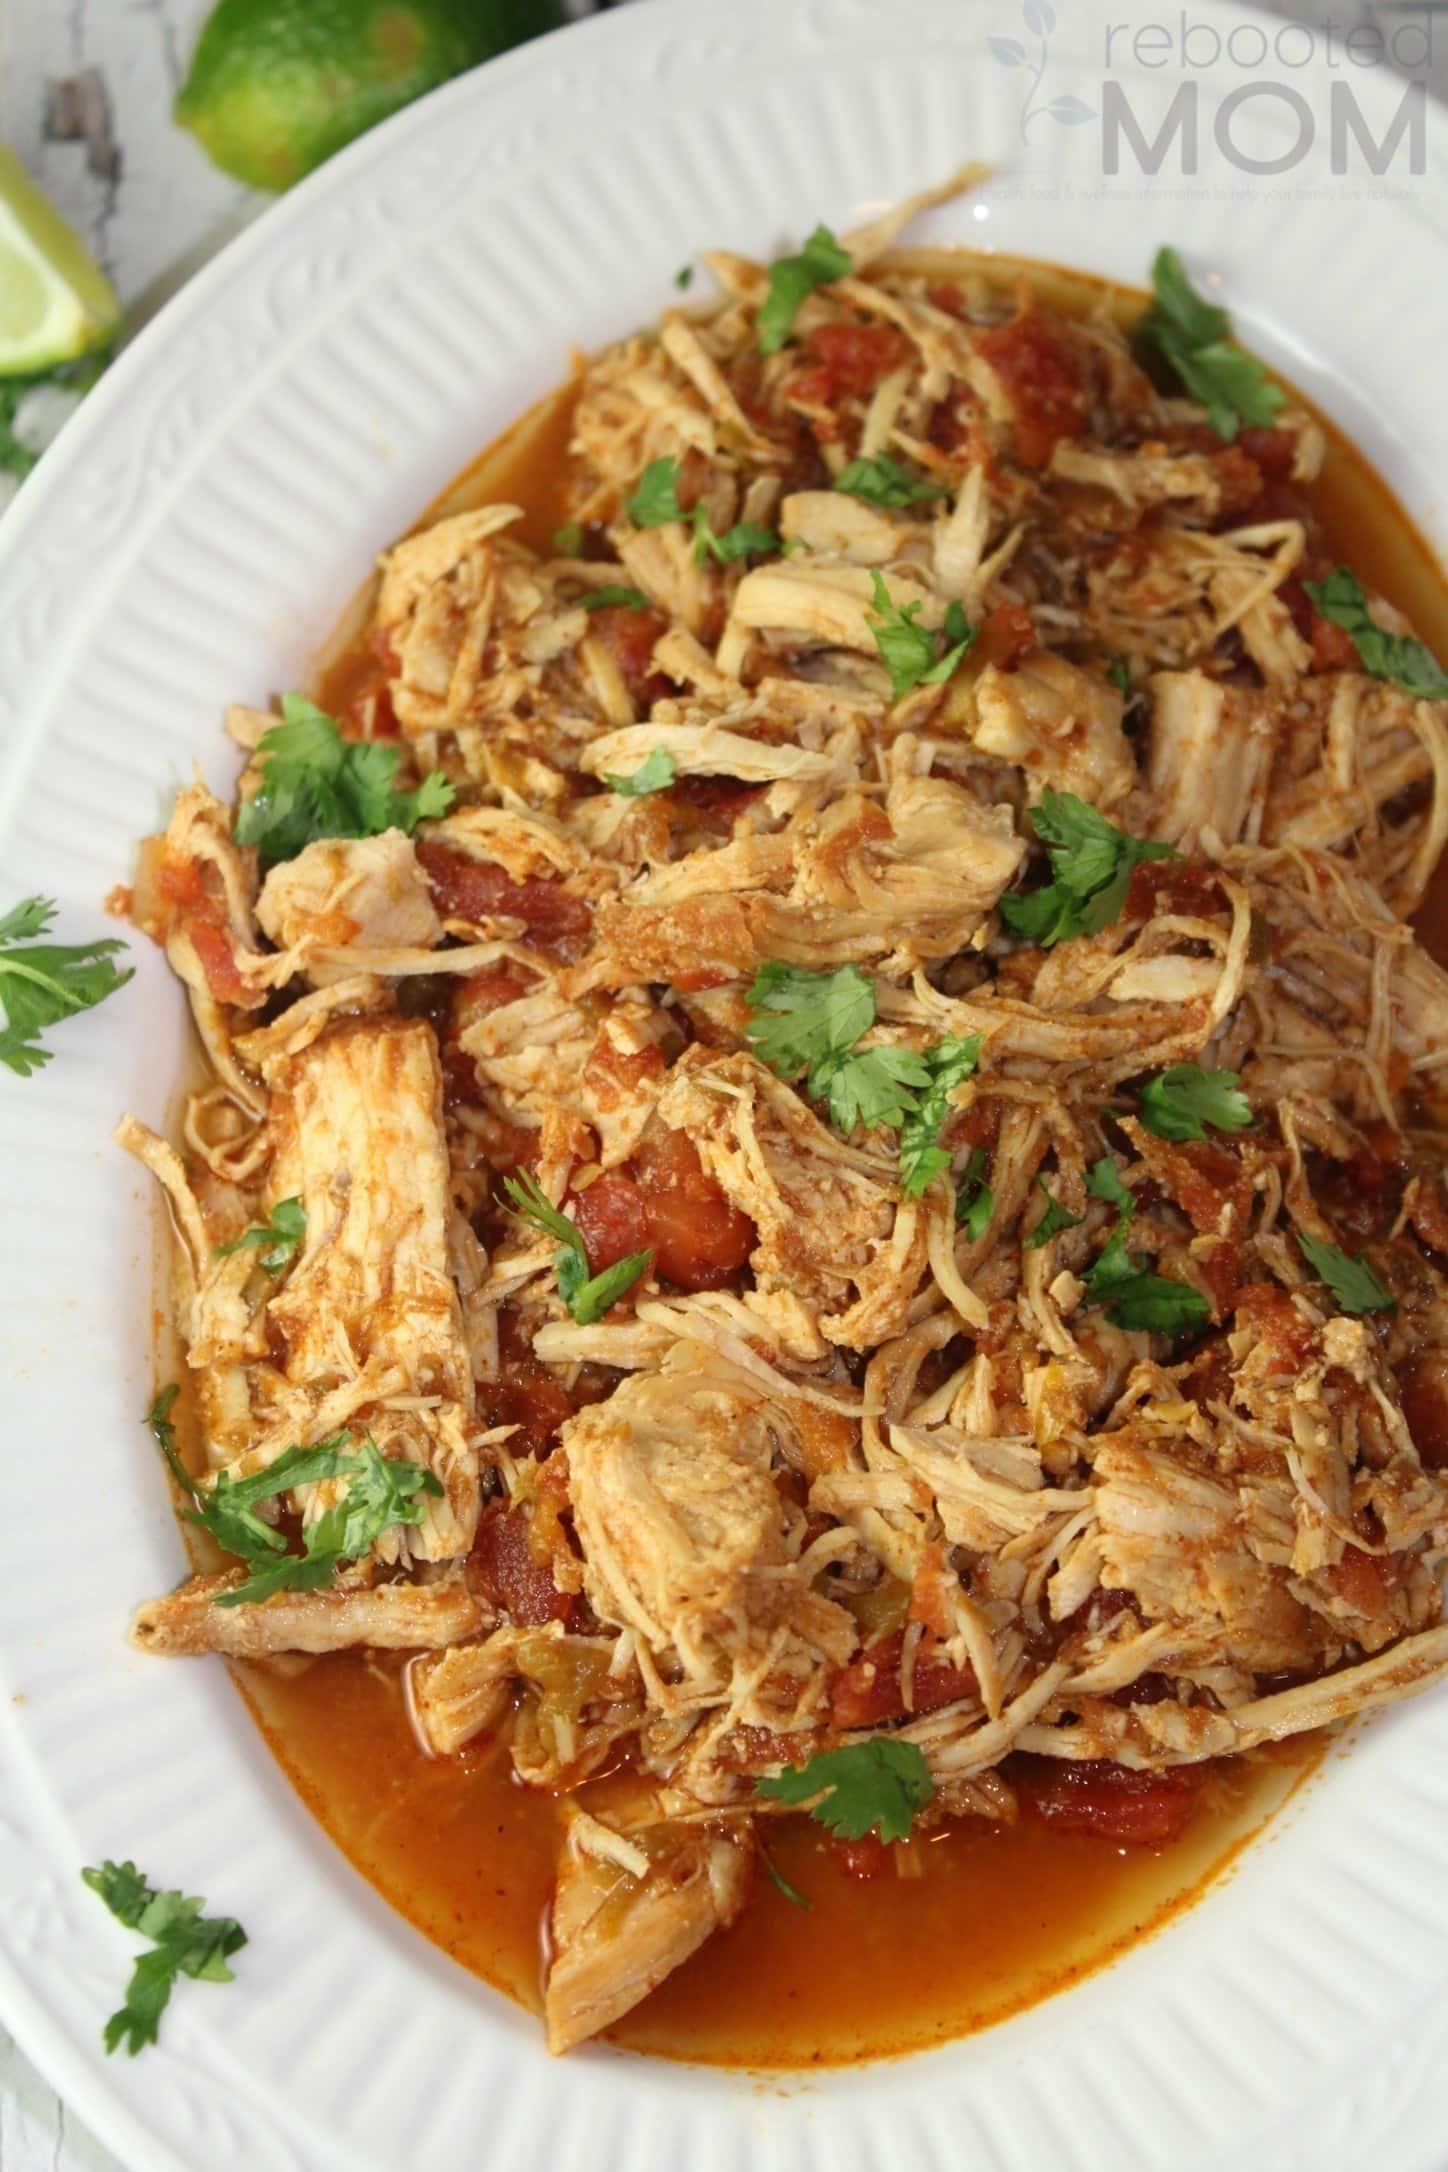
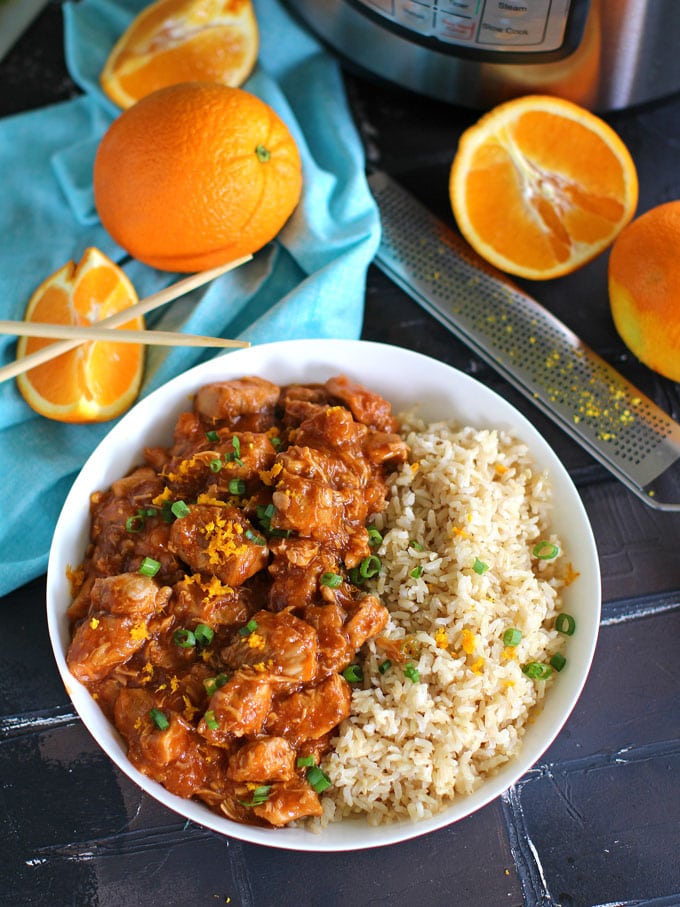 Instant Pot All In One Chicken & Rice
Chicken and rice is such a classic. And this one? Flavorful and fast!
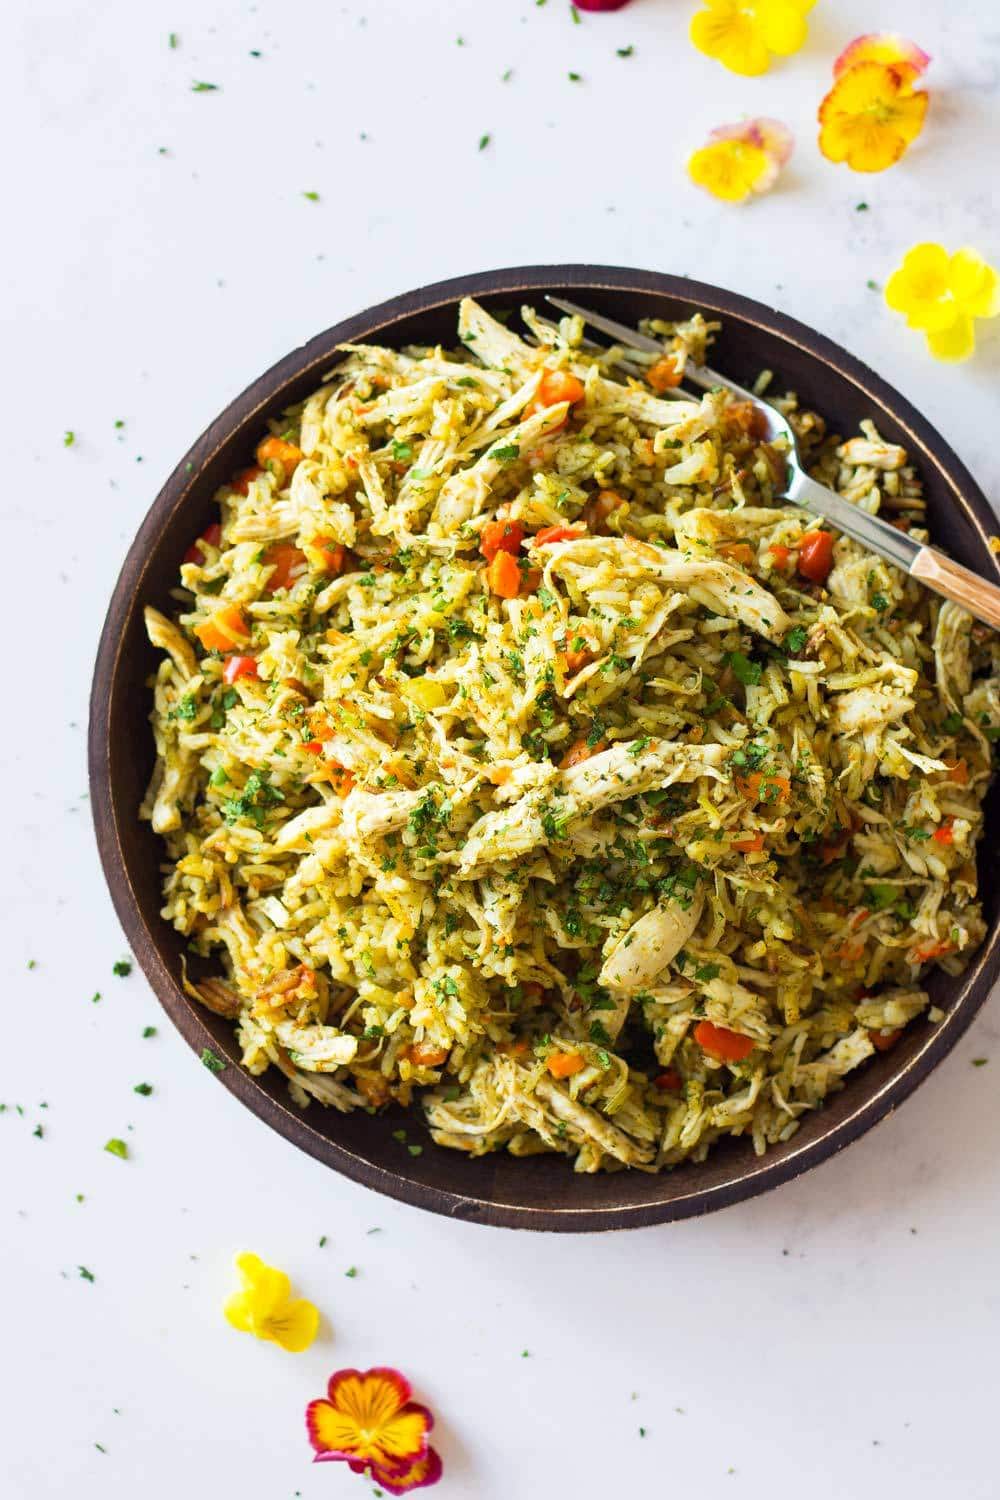
Eat this amazingly tender chuck roast as is, or topped on a sub roll for an indulgent sandwich. (Yeah, we still eat sandwiches sometimes!)
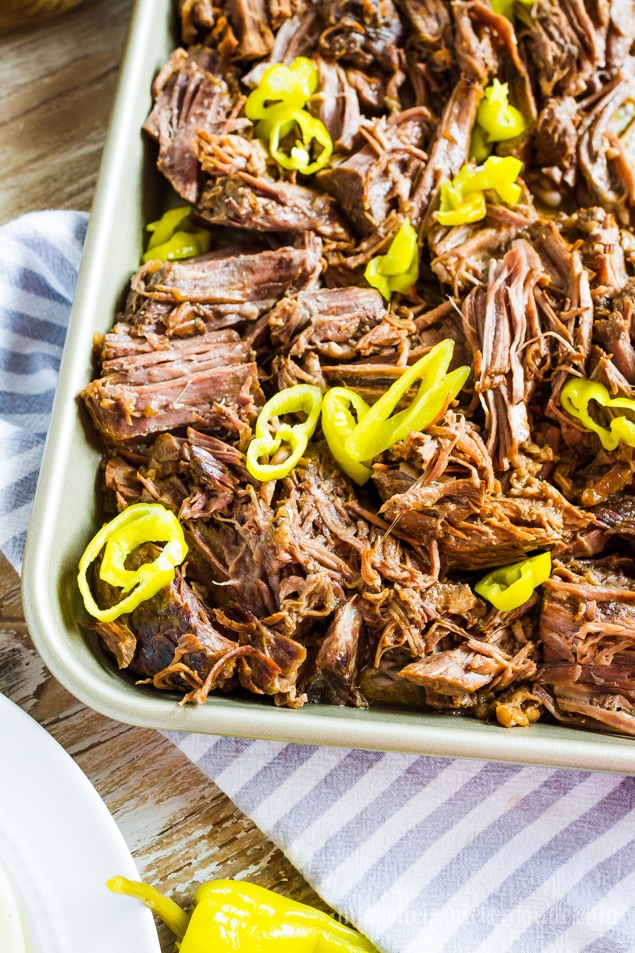

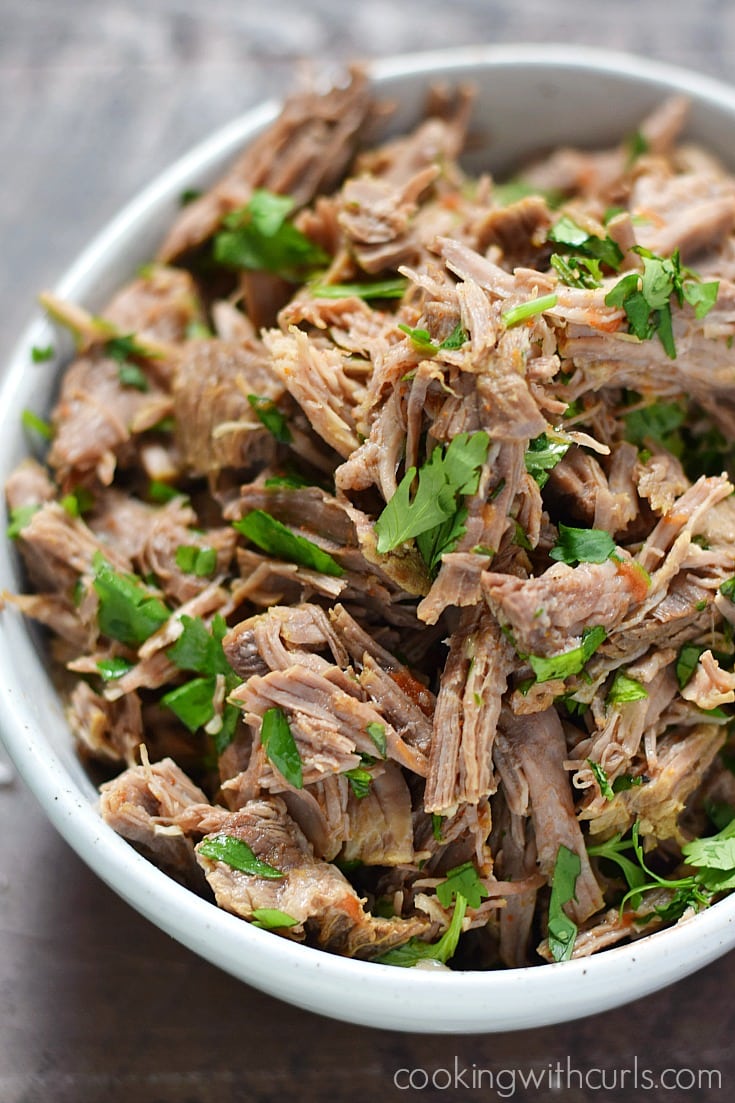
Comfort food delivered right in your pressure cooker? Yes, please!
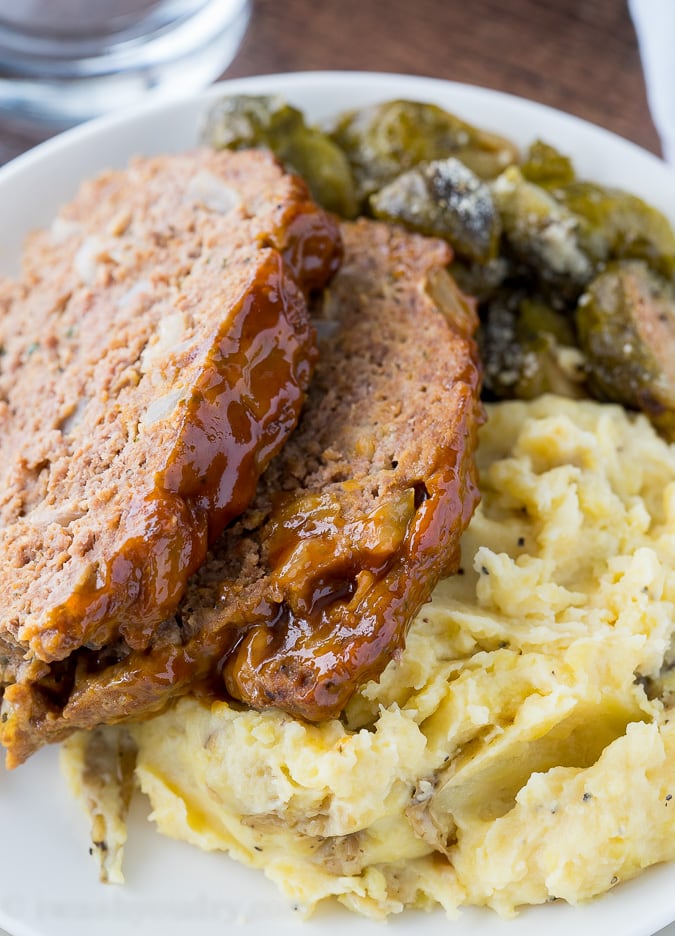 Instant Pot Un-Stuffed Cabbage Bowls
Think of this as a deconstructed stuffed cabbage dish. So delicious!
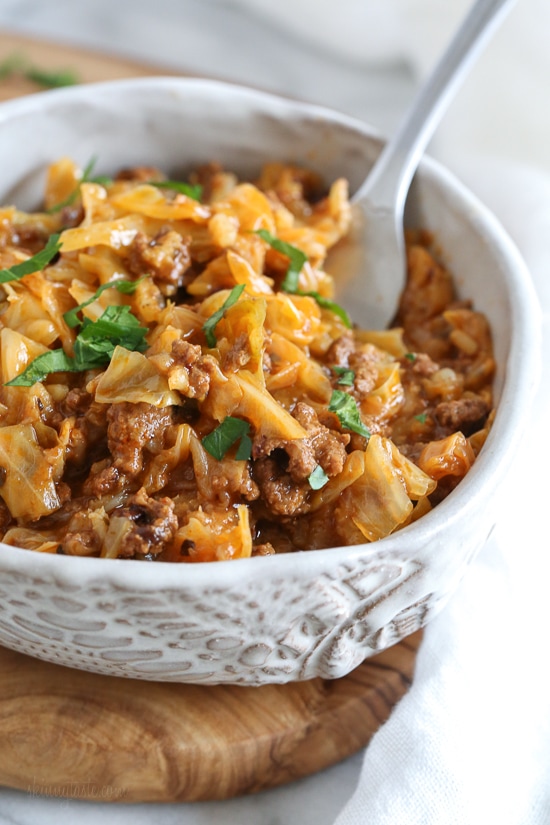 Pork
Pork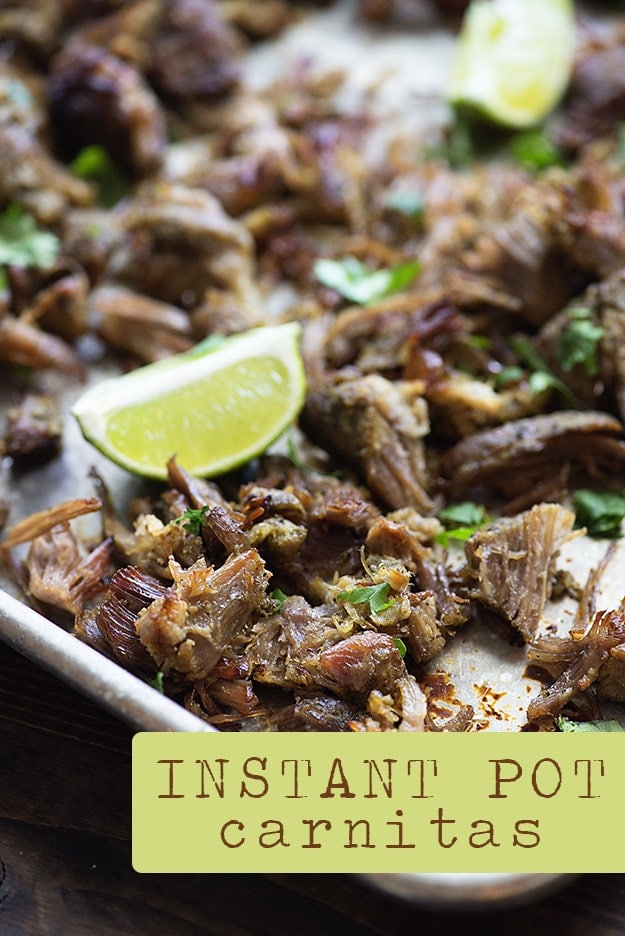 Instant Pot Hawaiian Kahlua Pork
Add Liquid Smoke, soy sauce, and sugar to pork for an amazing pork dish.
 Instant Pot Sweet Balsamic Glazed Pork Loin
Oh, this one is a keeper! Once you figure out how to do a balsamic glaze, it's game over.
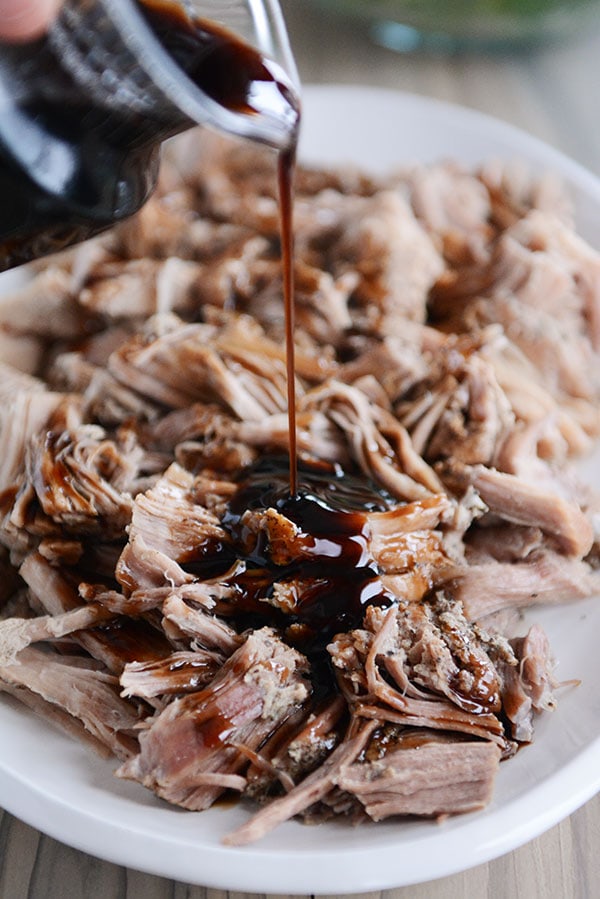
Ah, the beauty and simplicity of a good ole white bean and sausage soup.
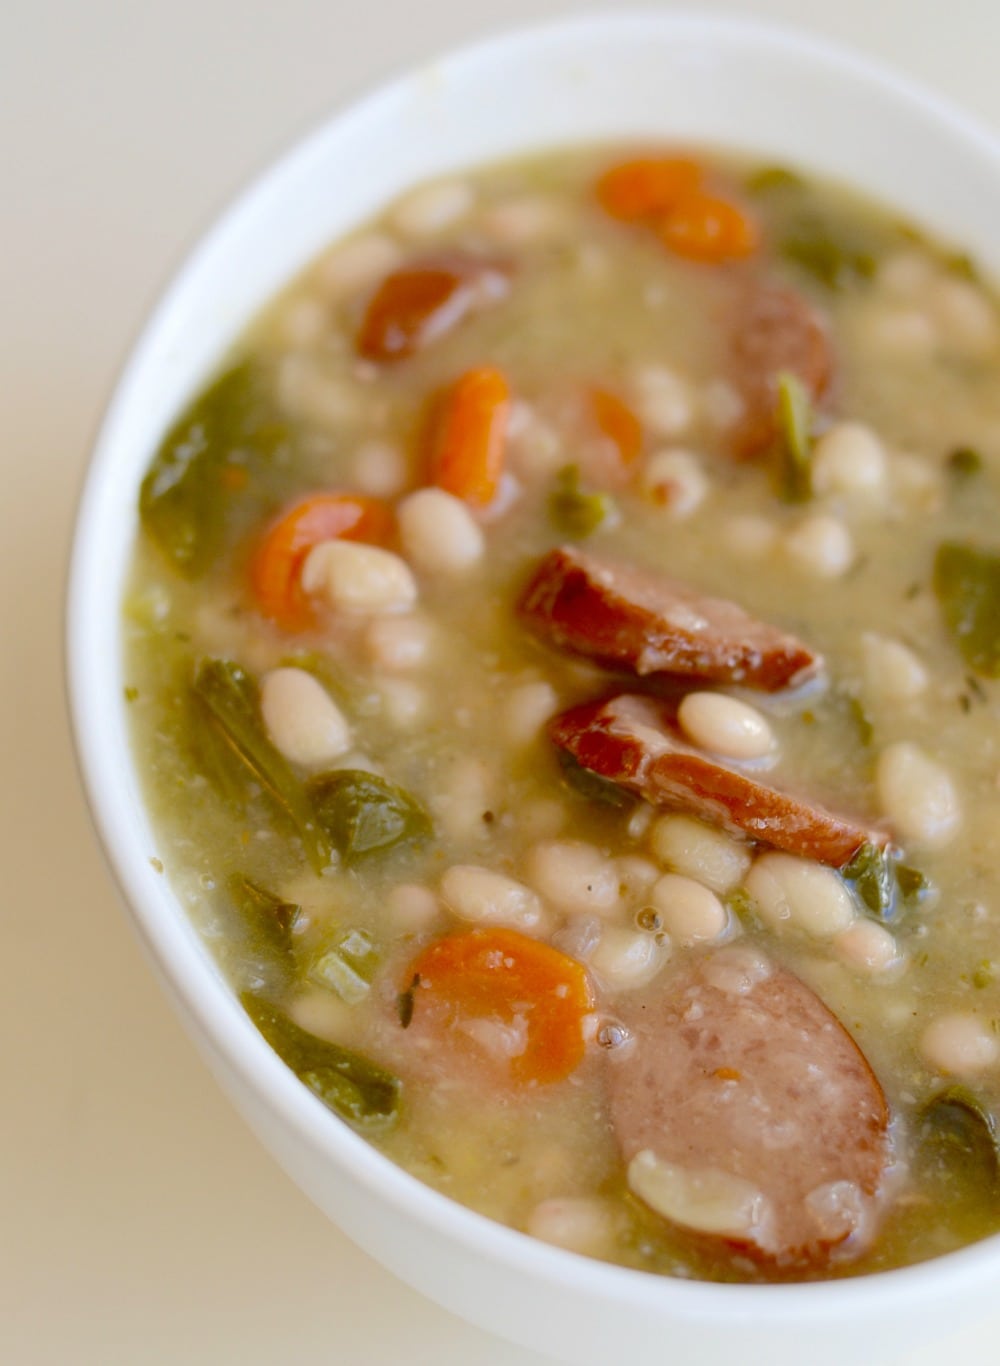 Instant Pot Vegetarian Lentil Tortilla Soup
For when you don't want to mess with tacos, we bring you this dish.
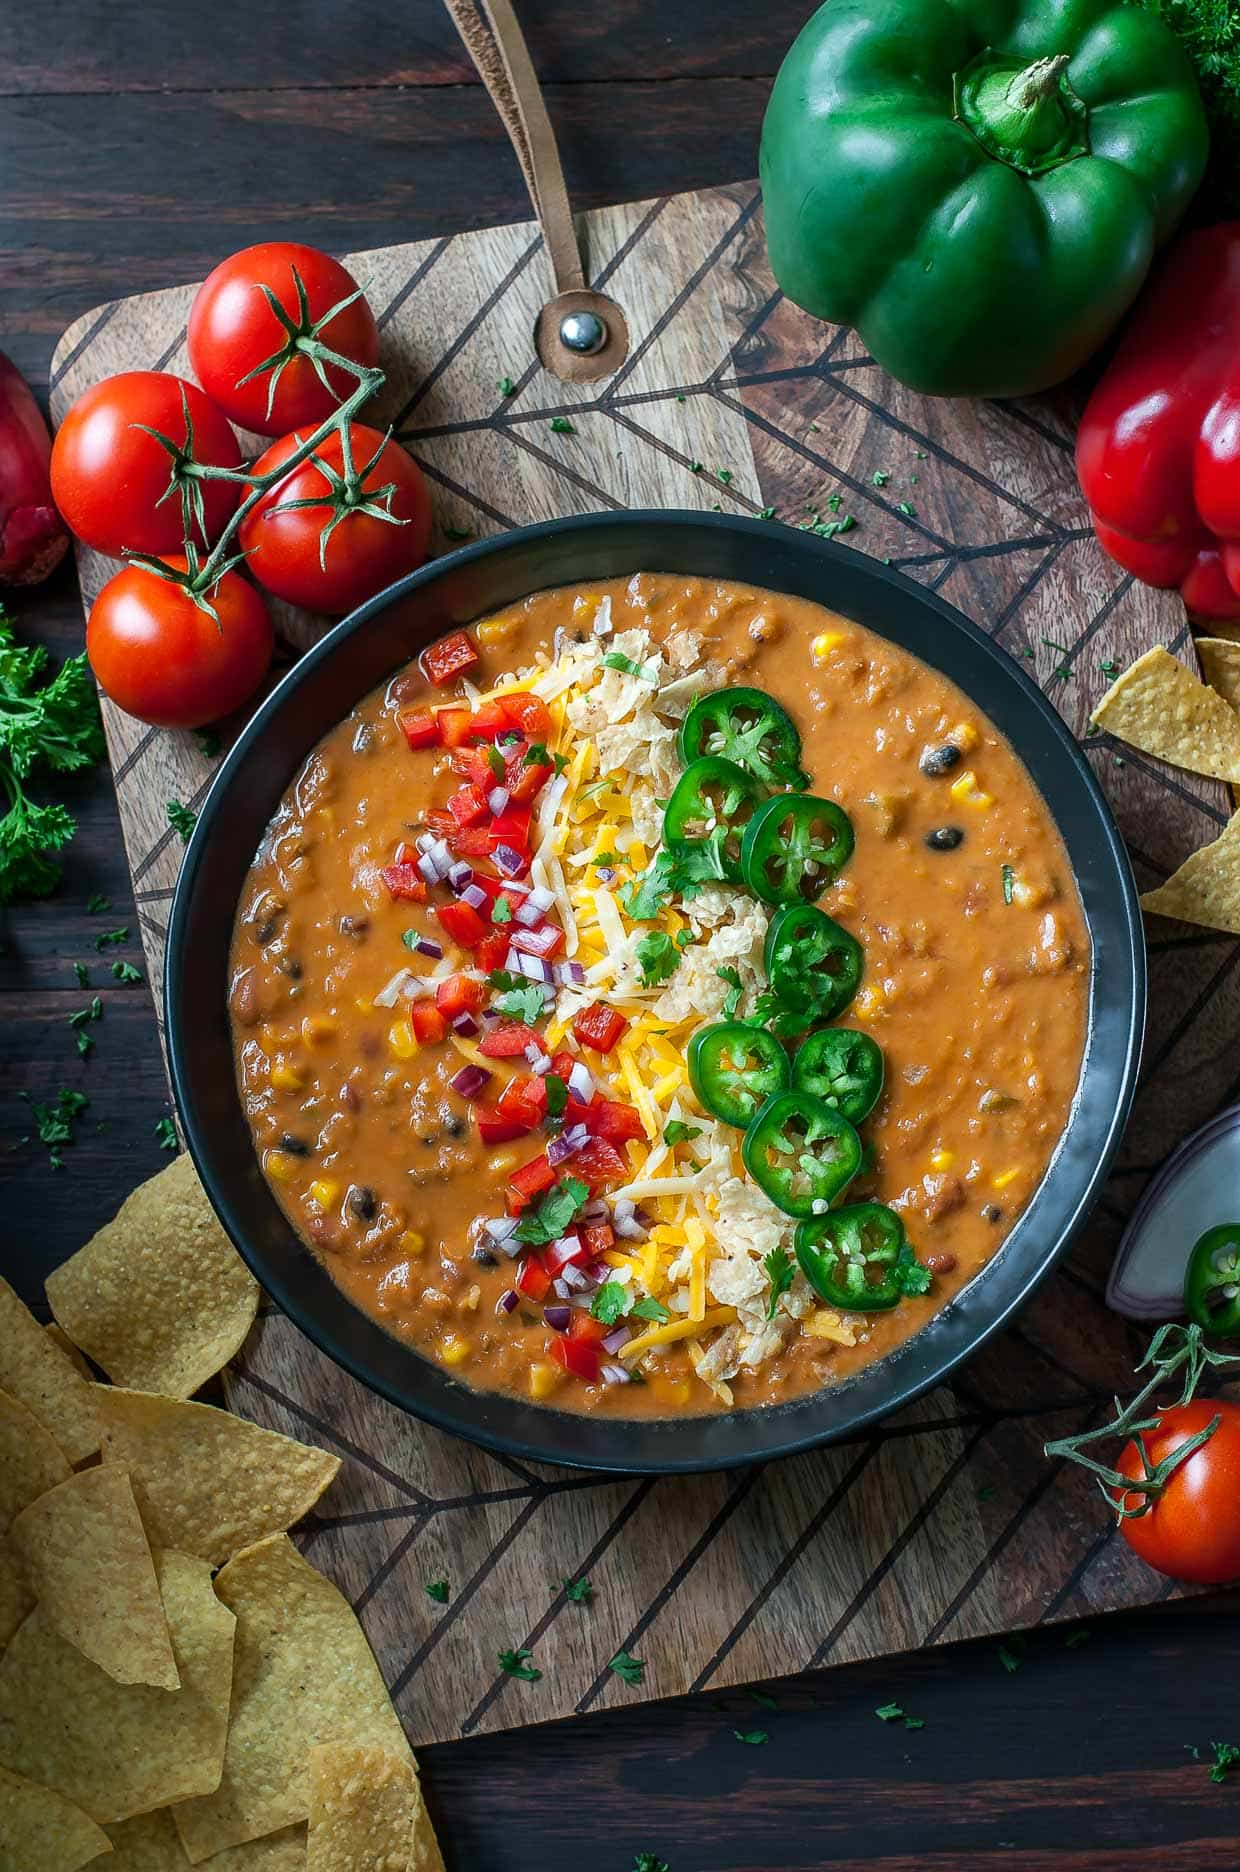
Yes, you can make this vegan dessert in the Instant Pot. Then, you can eat it!
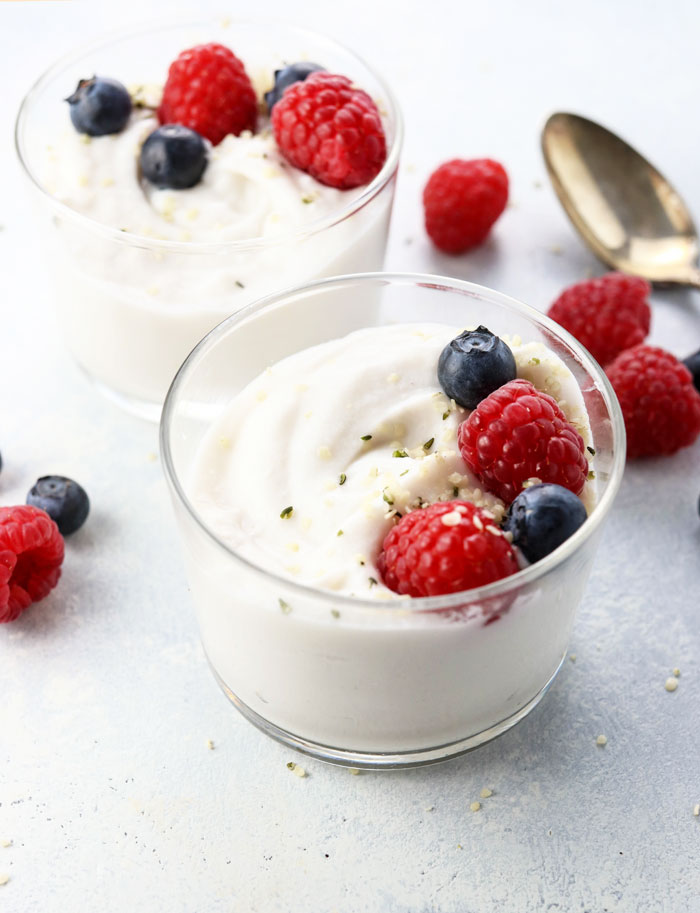
You know you wanna try this. Look at how inventive this snack is!

Quick, easy, and delicious! Mint garnish is optional, naturally!
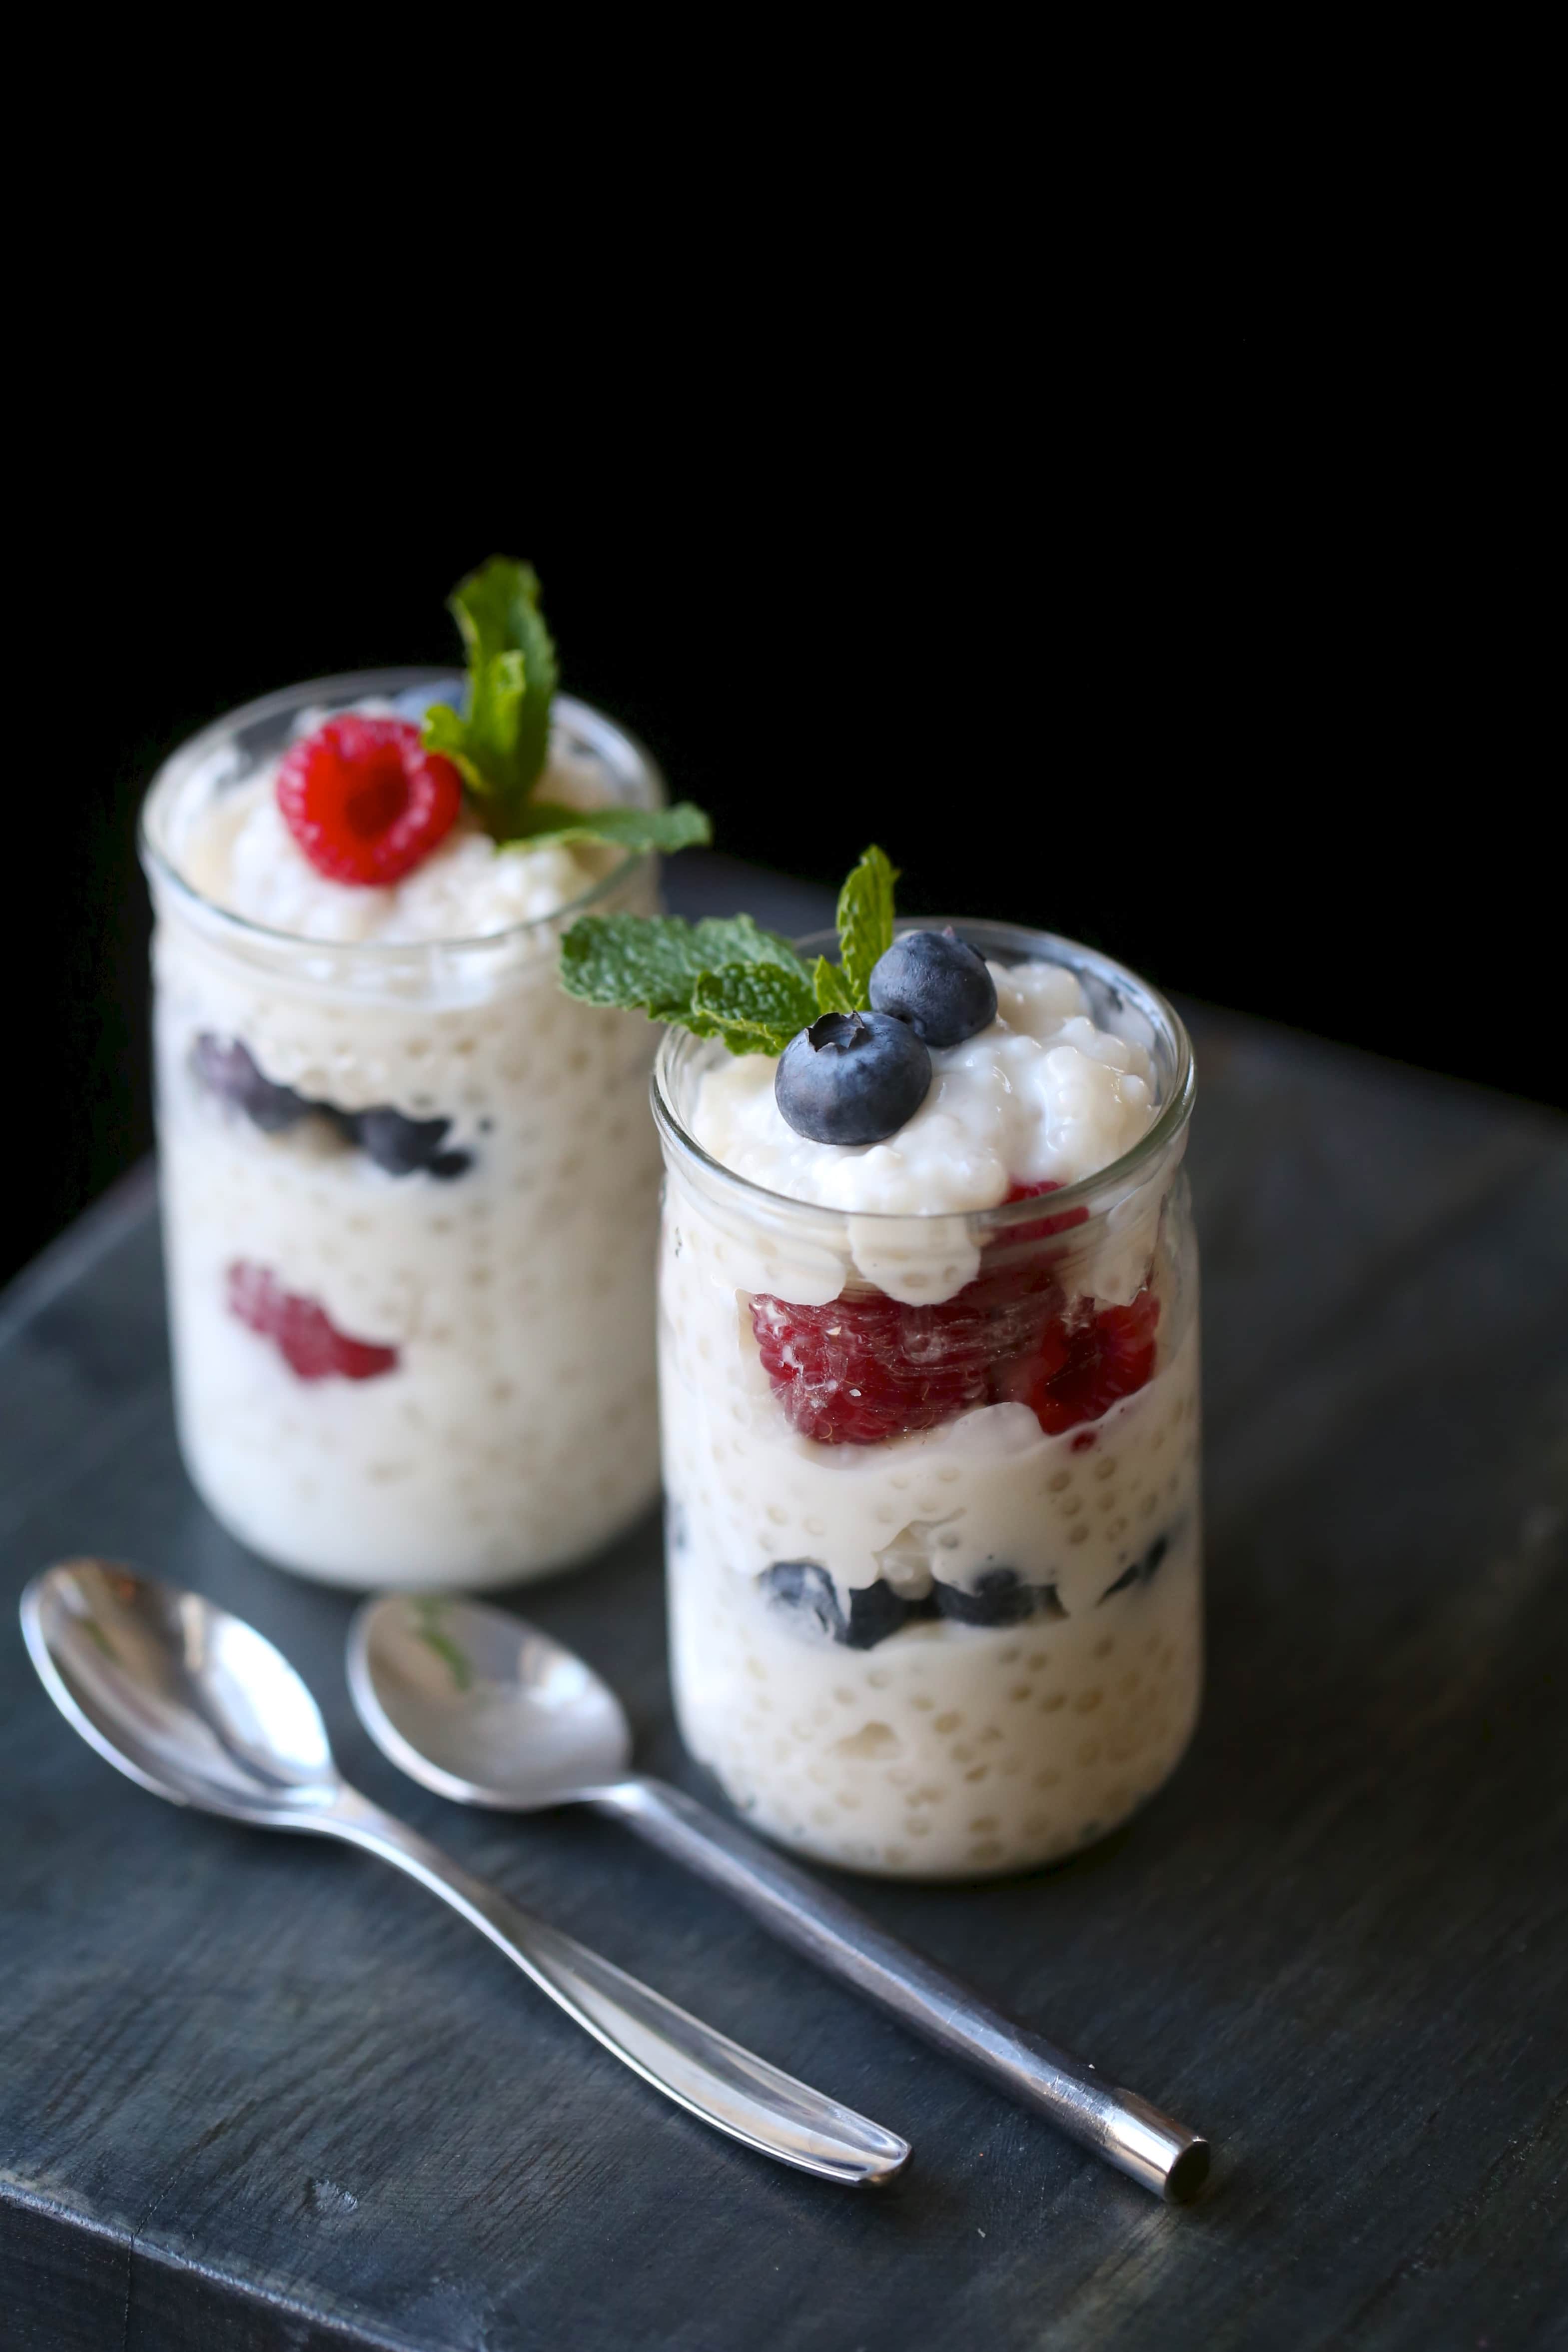
You'll never look at cheesecake again the same way once you pull it out of the Instant Pot.
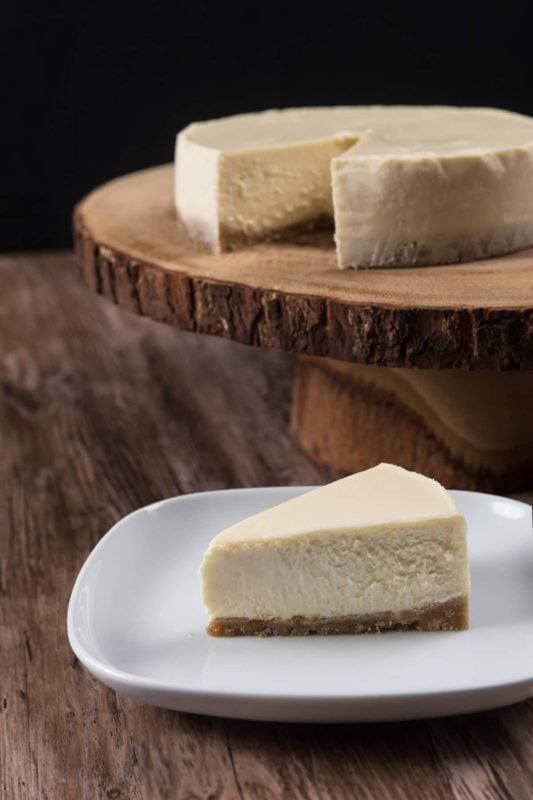
TWO BONUS RECIPES!
Instant Pot "Better than Sex" Lava Cake
Banana French Toast Instant Pot Recipe
Pin these Instant Pot Recipes for later:
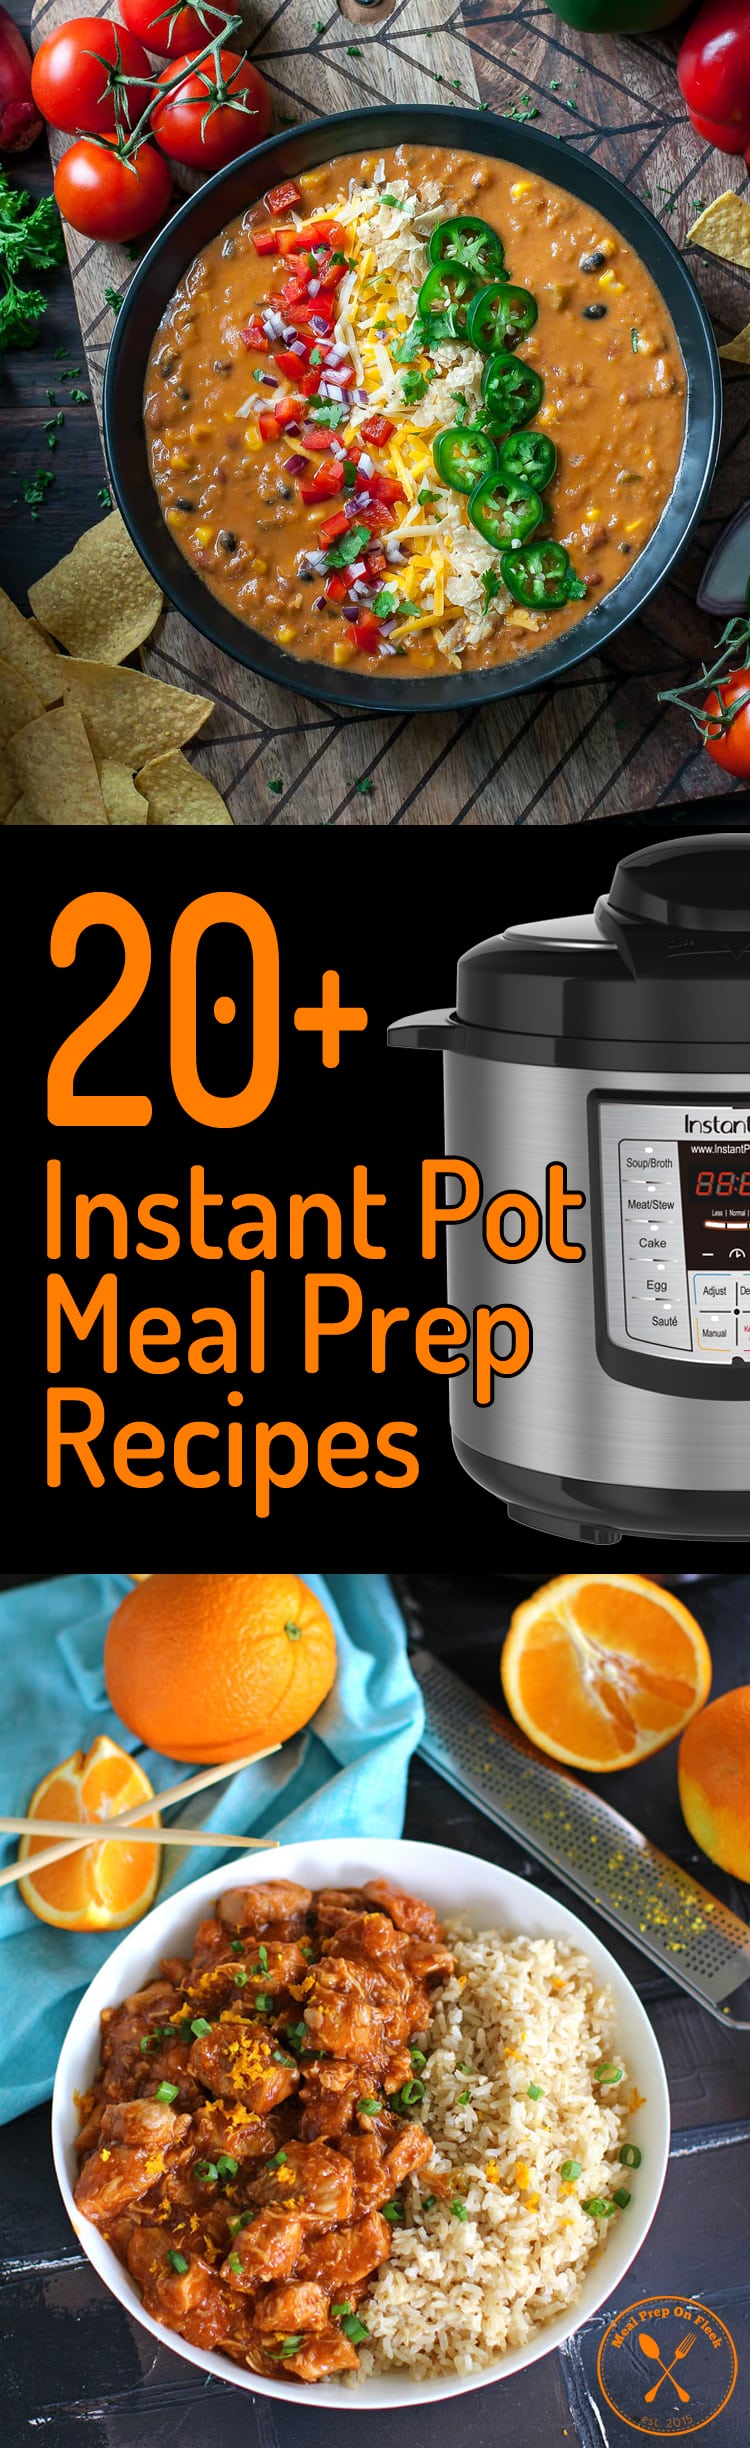
Facebook: https://www.facebook.com/Mealpreponfleek/
Instagram: https://www.instagram.com/mealpreponfleek/
Twitter: https://twitter.com/mealpreponfleek
Pinterest: https://www.pinterest.com/mealpreponfleek/
Energy bites are such a good snack to have on hand, and these cinnamon raisin ones taste like a cookie or your favorite cereal, but pack more protein!
Delicious and easy recipes that require no baking are some of our favorites. They also make terrific recipes for healthy meal prepping because they're just so fast. With a bit of protein powder, some cinnamon raisin almond butter, and other on-hand pantry ingredients, these energy bites are easy to make. They require just a little bit of chilling, and then they're ready. It's hard to argue with something that tastes like a cinnamon raisin cookie, but is actually way healthier. Serve them after school for a snack, after a workout to replenish some nutrients, or after dinner as a dessert. Or eat them just because!
Create a simple, delicious, and protein-packed #mealprep snack with this recipe featuring almond butter!
These come together easily. Combine the almond butter, milk, and honey together in a bowl. In a separate bowl combine rolled oats, oat flour, protein powder, and raisins. Add the wet to the dry ingredients and then roll the batter into balls about the size of walnuts. Transfer the balls to a baking sheet lined with parchment and refrigerate for about 20 to 30 minutes. Store them in airtight containers in the fridge.
Keep these in airtight containers in the fridge; they'll keep longer that way and stay firm. They should be good for a week. You can also freeze any kind of energy bites, these included, in an airtight container. They're fun to prep for snacks alongside a handful of almonds or some berries, for example, or maybe even a little bit of plain yogurt, Greek or otherwise.
If you can find a cinnamon raisin almond butter like the one we've specified here, then that's what you use. But you can make your own almond butter with those flavors by adding about ½ teaspoon of cinnamon to the almond butter when you combine it with the honey and milk.
Feel free to use a neutral-flavored protein powder (whey or plant is great) if you can't find the one we've specified here. Vanilla is probably the best bet because it won't compete with the other flavors in the energy bites.
Any kind of milk works here, whether dairy or non-dairy.
Dried cranberries, cherries, or blueberries would also be a fun twist.
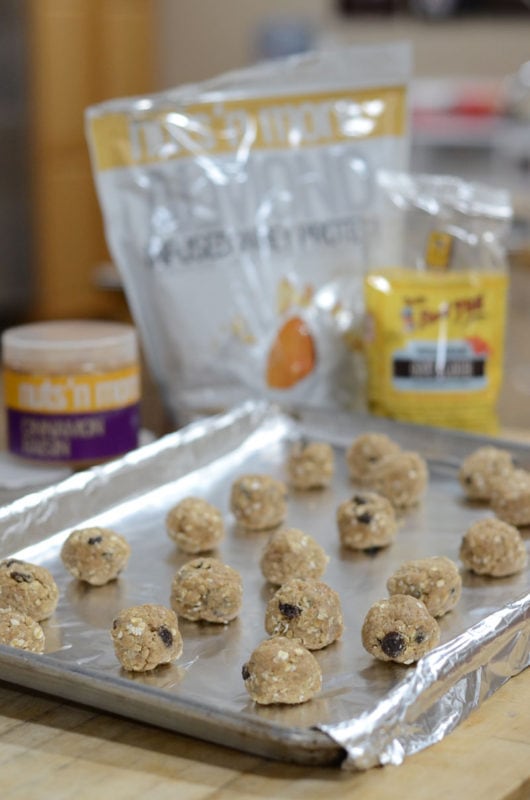
ALMOND BUTTER TIP:
Almond butter offers cardiovascular benefits because of its fiber and fat content. Almond butter is made up primarily of unsaturated fatty acids that improve your blood cholesterol levels to help combat cardiovascular disease, and also provide energy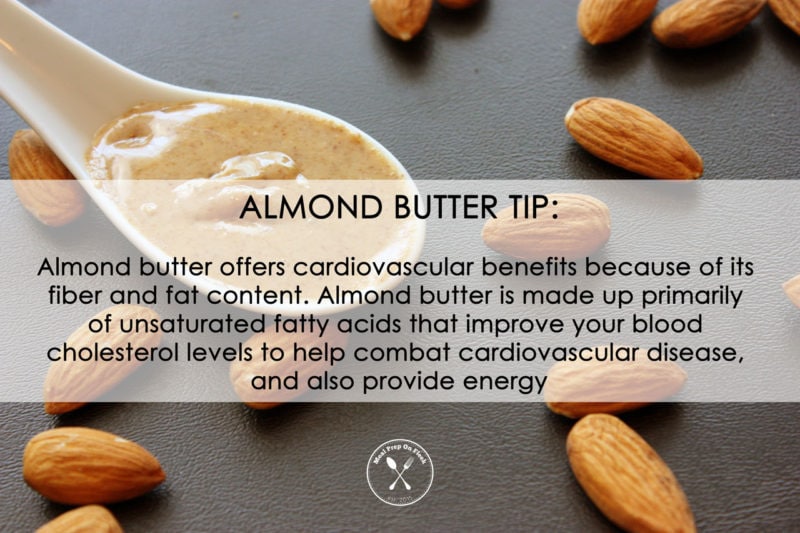
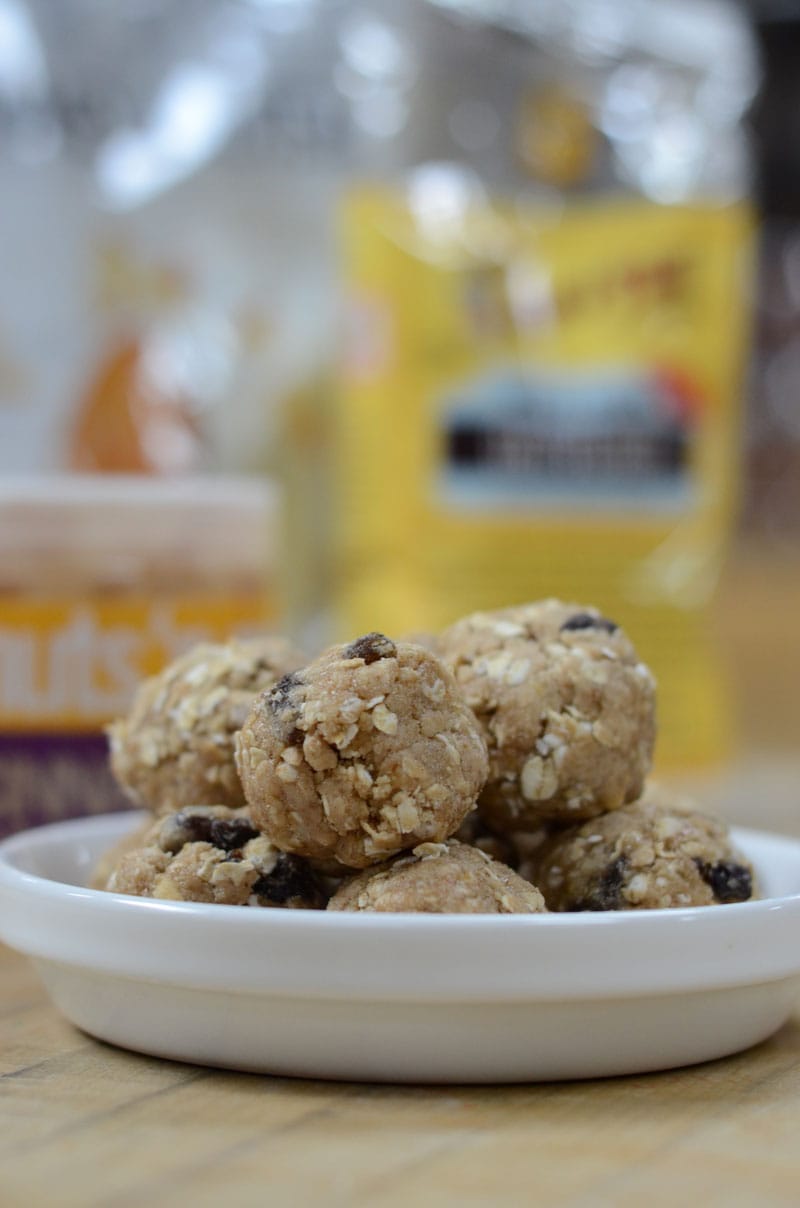
Lenny Kravitz once said, "My dream is to become a farmer. Just a Bohemian guy pulling up his own sweet potatoes for dinner." We'll be honest… That really sounds like the best life, Lenny! But who says sweet potatoes are only a dinner staple? They're so deliciously versatile, we could happily eat them for any meal, and that's why we have a sweet potato meal prep idea for you today that makes for an excellent breakfast option-A sheet pan sweet potato breakfast hash! Plus, it's so raw in ingredients, our paleo readers will love it especially!

Oh yeah, and did we mention that this is a Whole30-compliant meal prep idea as well? That means this meal can help you eliminate the things that potentially trigger unfavorable reactions in your body! In other words, it contains absolutely no dairy, grains, alcohol, legumes, or added sugars. Just make sure you read the labels (if any) of the products you buy, before you buy them, to ensure they don't contain any of the aforementioned ingredients.
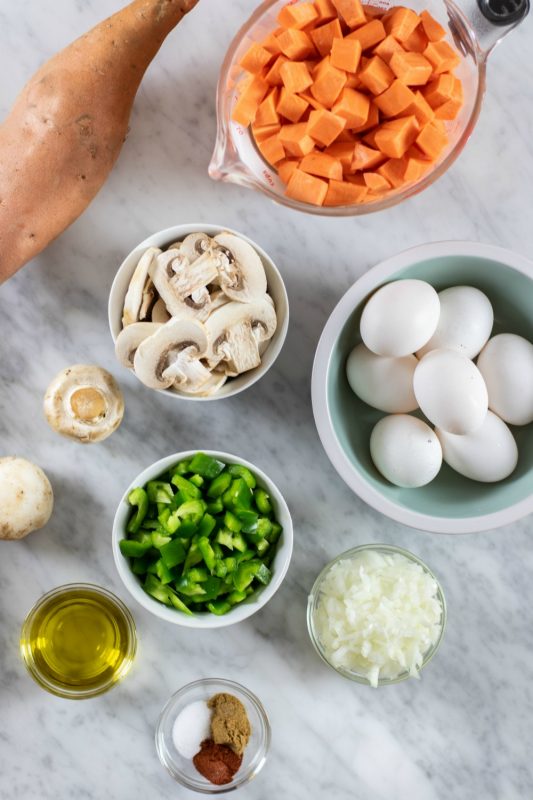
We recommend eating this dish within 4 days of cooking it.
Partially, yes-Cooked fresh veggies themselves can be expected to last 2-3 months in the freezer, but absolutely do not freeze the eggs or else you risk illness after thawing them! Just make sure to cook your eggs fresh if you plan to freeze this meal prep idea.
A southwest inspired hash made with sweet potatoes. This Whole30 breakfast is customizable, so use what vegetables you have on hand and dice them to mix into the sweet potatoes. A breakfast you'll look forward to waking up for!

Begin making this meal prep idea by preheating your oven to 425° F, then add sweet potatoes, bell pepper, mushrooms, onions or other substituted veggies to a sheet pan. Drizzle with olive oil, and sprinkle with sea salt, cumin, and chili powder. Toss pan ingredients to evenly coat in oil, then bake for 25 minutes. Once baking is done, remove the pan from the oven and use a spatula to divide the sweet potato hash into 4 piles. Make indentations in the center of each pile, and add 1-2 eggs to the tops of each pile. Return the sheet pan to the oven for 8-12 minutes, depending on how well done you'd like the eggs, then serve with fruit and avocado if desired.
If you plan to eat this dish without the optional sides, we recommend using these single compartment containers. However, if you want the sides, we recommend using three-compartment containers.
Breakfast might be our favorite meal of the day, so we have plenty of breakfast meal prep ideas to check out! If you want more Whole30 breakfast recipes, check out this Whole30 Bacon Strawberry Breakfast Salad, or these Whole30 Breakfast Snack Boxes for your next round of prepped meals!
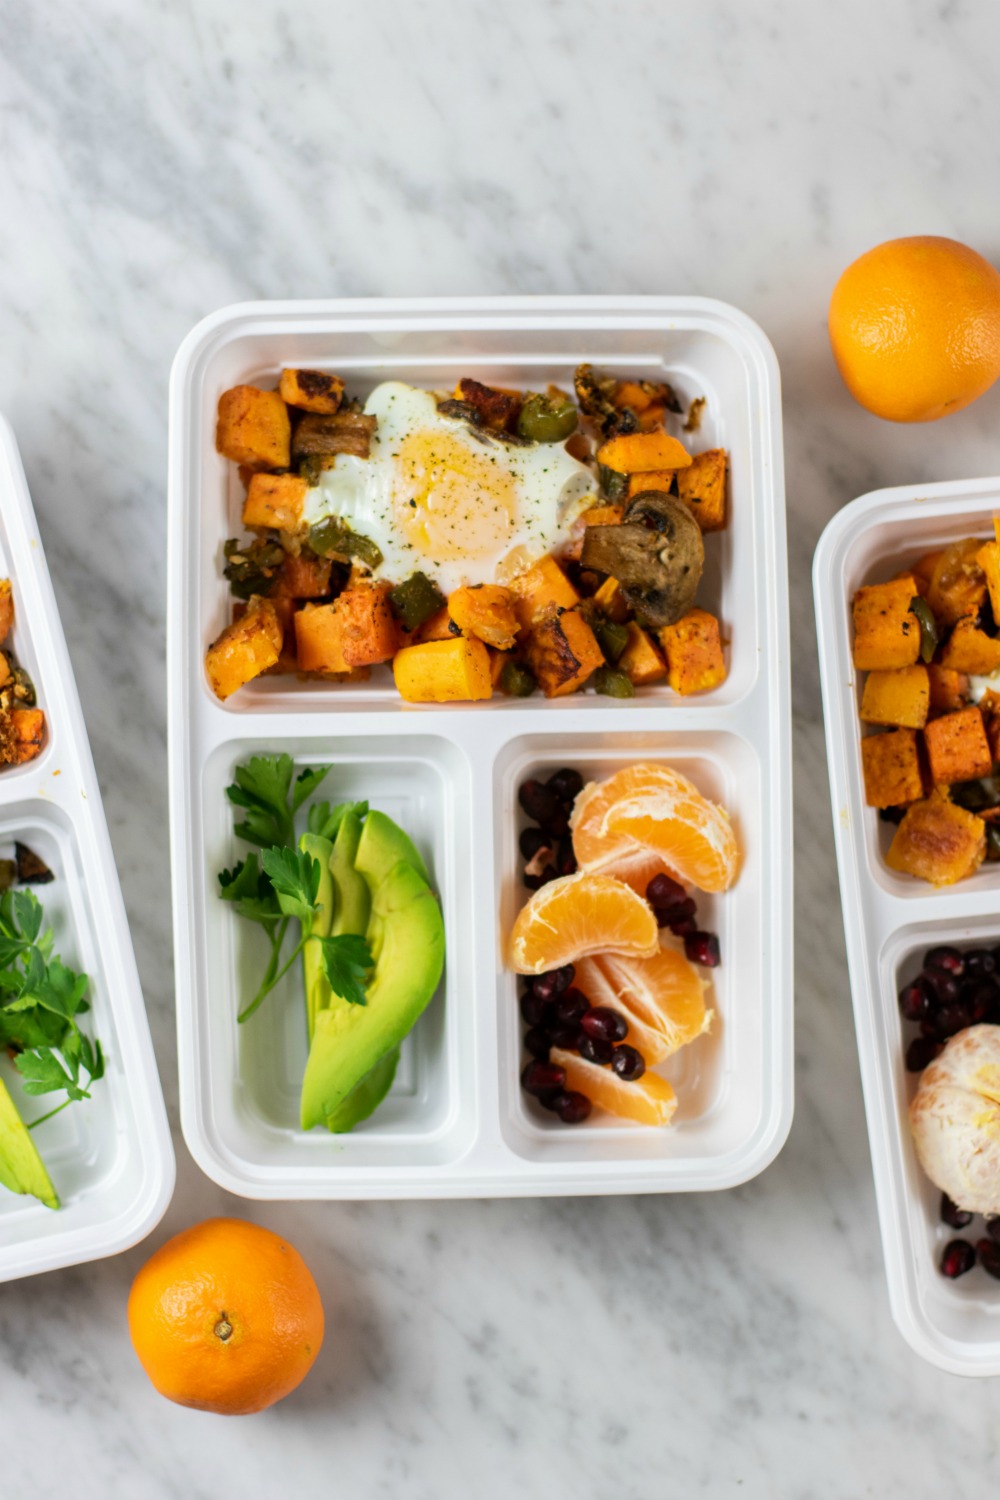
Chicken Quinoa Salad is a high-protein flavorful meal prep idea with fresh fruit and avocado. Prep it for a delicious filling lunch or dinner.
Chicken Quinoa Salad combines fresh fruit and quinoa with high-protein chicken breast for a sweet and savory meal prep idea! Serve with some avocado or a drizzle of avocado oil for a complete macro-friendly meal! It's so good, and gluten-free, too. We like this salad for a quick lunch, as you can it eat it cold right from the fridge if you like, but you can have it for dinner. Versatility is key!
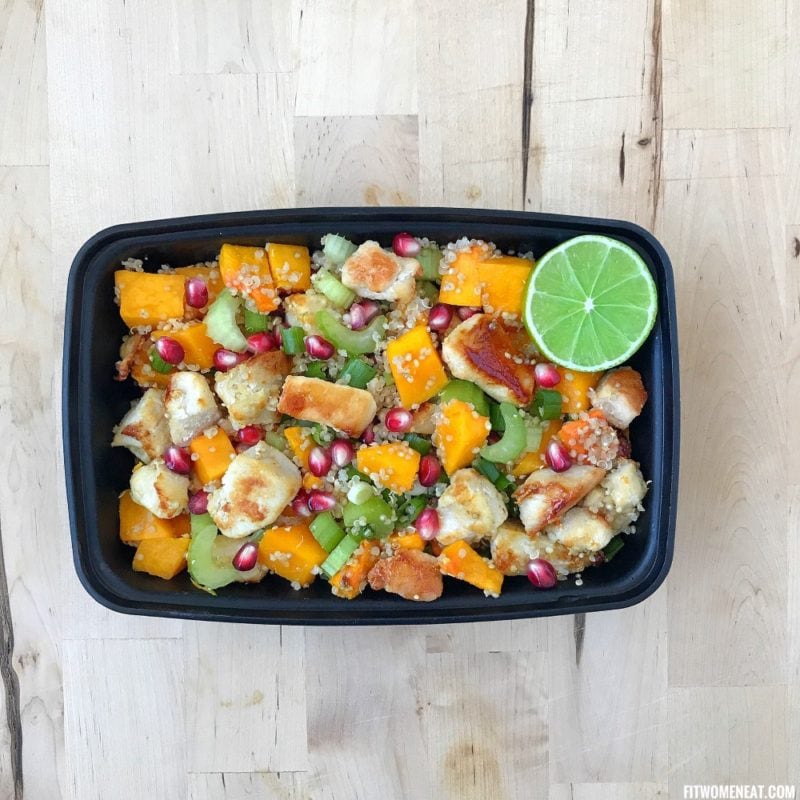
For meal prep, this comes together pretty fast. You start the chicken in a skillet with some olive oil while the quinoa cooks in some water on the stovetop. Butternut squash cooks in the oven, and then gets combined with the rest of the ingredients.
The trickiest part of this whole thing? The pomegranate. Buying a whole pomegranate is more economical, but it takes some time to wrangle to get the arils, or seeds, out. You cut it in half and then submerge the halves in a bowl of cold water and dig the seeds out using your fingers. It takes time and your fingers will definitely get cold, but the water loosens the arils from the membranes inside the pomegranate. It just takes some practice. If you can't be bothered with all of this, pomegranate arils are sold on their own, usually in clear plastic cups with a lid, in the produce department. Toss them right into the quinoa salad and call it a day!
We love a good salad meal prep, so know that this chicken salad keeps just like all our other recipes, for up to 4 or 5 days. If you want to, you can freeze the salad in airtight containers for up to 3 months. Defrost it in the refrigerator and eat it at room temperature or a bit warm. It's up to you!
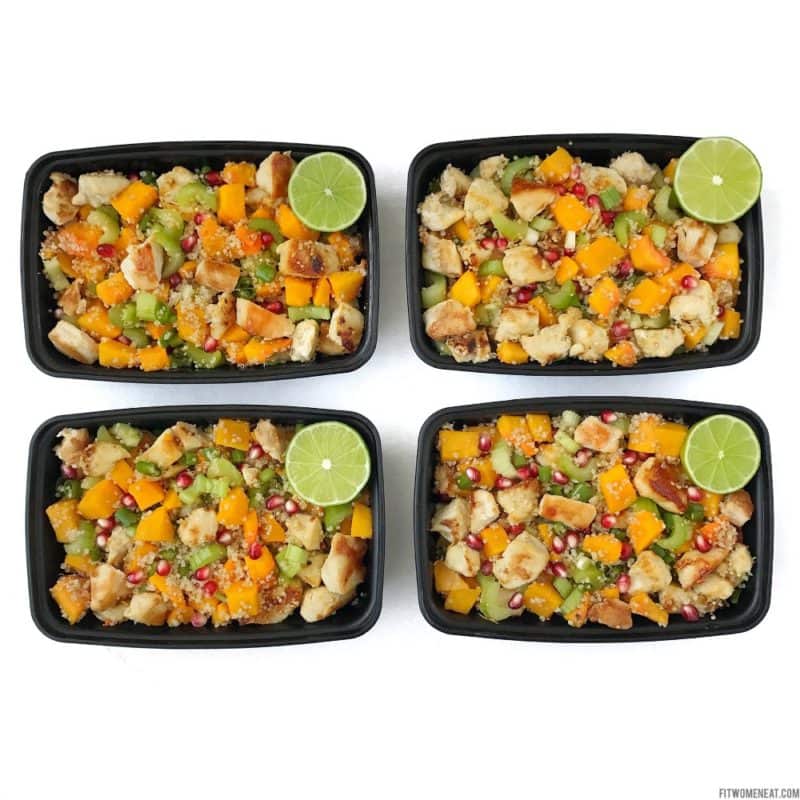
READ MORE: For more protein, quinoa, and fruit combos, try Fruity Quinoa and Grilled Salmon
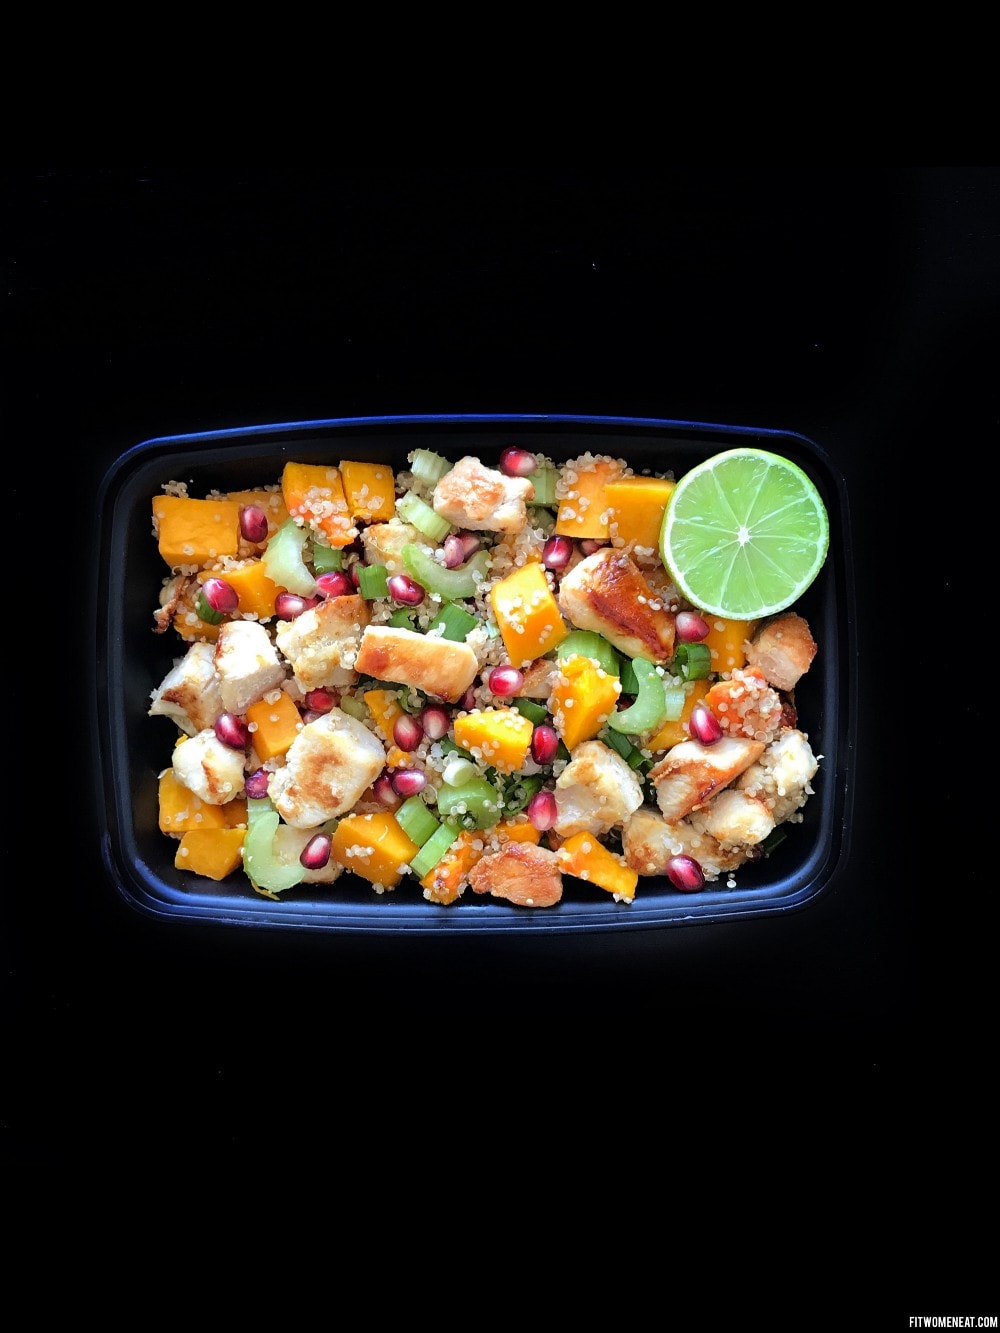
No need to wait for lunch-or Tuesdays!-to enjoy taco flavor! These breakfast taco bowls are chock full of protein and hearty air-fried potatoes to start the day off strong.
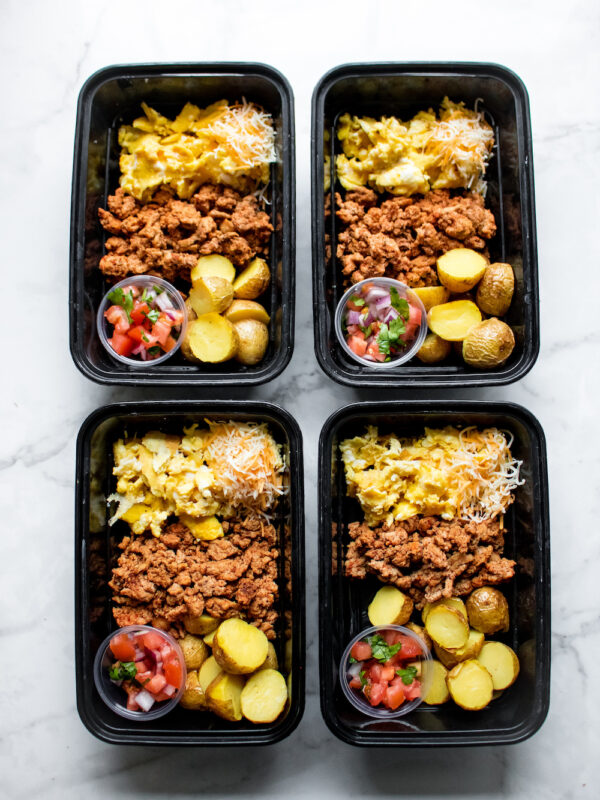
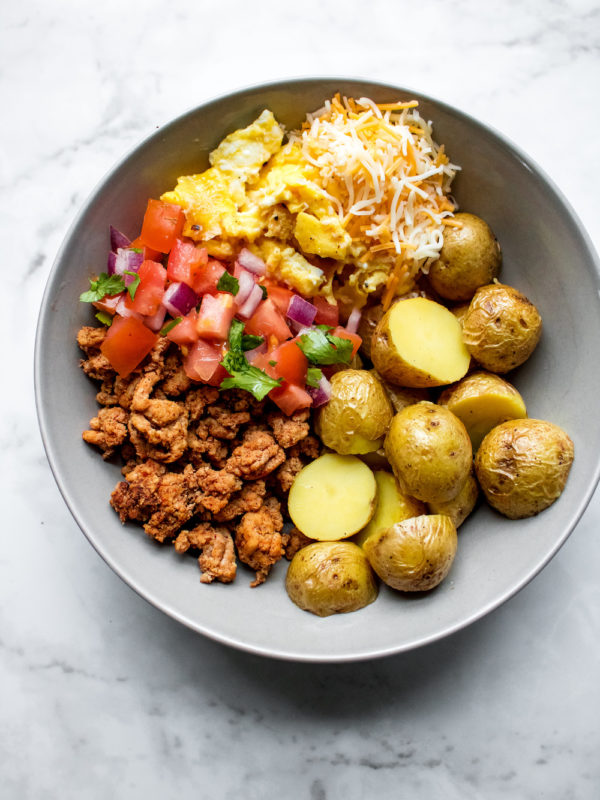
Every day is Taco Tuesday when you make these breakfast taco bowls! Eat one every day of the week with this protein-loaded dish that will keep you full for hours. We would also gladly dig into this for lunch or a sort of breakfast-for-dinner.
Scramble up some eggs. Cook up some ground turkey with cumin, sea salt, and chili powder. Combine them in a bowl with some baby potatoes that you've air fried. Top with some good shredded Mexican cheese-you know, one of those specialized blends you can buy in bags. That's the "bowl" portion of the breakfast taco bowl.
The other delicious component of these breakfast bowls is the pico de gallo. It's basically a fresh salsa with tomatoes, red onion, cilantro, lime juice, and salt. Very simple, very quick, and very delicious.
For the bowls . . .
And the pico de gallo . . .
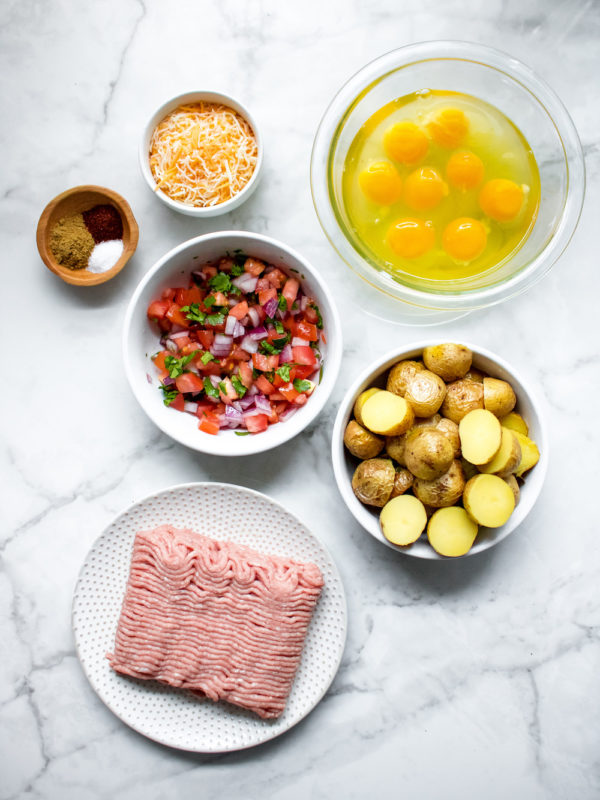
Ok, we serve these in a bowl, right? But for real, they're ideal for a bowl meal in the morning. Put everything right in these breakfast bowls and top it with the pico. Think of it as the most savory cereal you've ever had.
Another thing you can do? Serve it over baby spinach and make it a quasi-salad situation. Just ups the veggie quotient for the day to something close to 2 and a half servings, depending on how heavy you go with the pico.
If you're feeling like you can't eat something taco-oriented without tortilla chips, by all means, serve a handful on the side. Might come in handy to use to scoop up any leftover bits in the bowl.
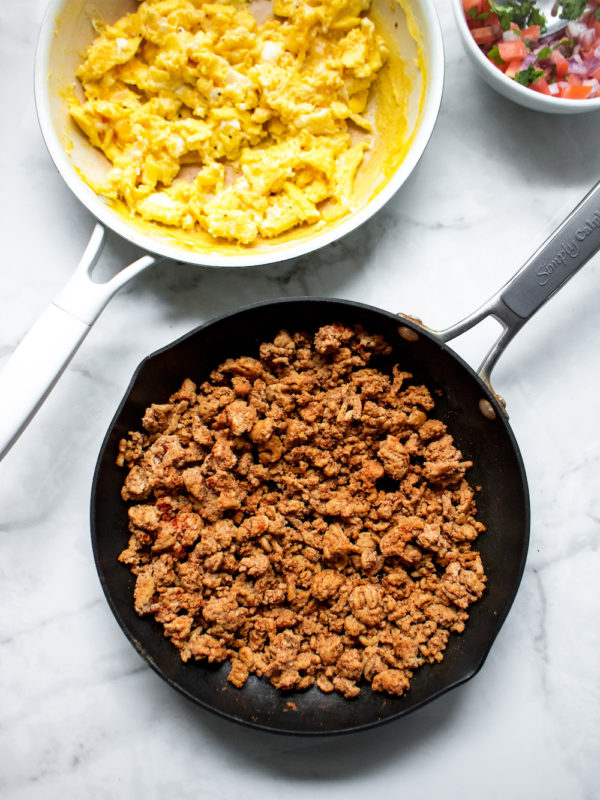
Breakfast taco bowls will keep for up to 5 days in the fridge. We like to reheat everything in a casserole dish, covered, in the oven. This protects the eggs, which can get dried out once they're reheated. Alternatively, if you have a preferred setting on your microwave for this breakfast bowl, go ahead and reheat it carefully to avoid rubbery overcooked eggs.
Turkey is great, so is chicken, and so is beef in terms of ground meat to use here. Bump up the seasonings if you wanna, we won't tell. Use a little ground coriander, too.
Go straight for all cheddar cheese if you want, or Monterey jack, in these taco bowls. And by all means, you bought that cilantro bunch for the pico, so feel free to garnish the whole breakfast bowl with it if you love it. (But we know how divisive cilantro can be.)
If you don't have an air fryer, use your oven and roast the potatoes at 400 degrees F for about 25-30 minutes. In that case, we'd recommend starting the potatoes first before doing anything else to prep this breakfast bowl. Then, once they're in the oven, cook the ground turkey mixture and the eggs. The potatoes will take the longest for this breakfast taco bowl.
READ MORE! All the taco things! Taco Skillet Meal Prep! Or Taco Meatballs! Or Burrito Bowls for Every Diet Type!
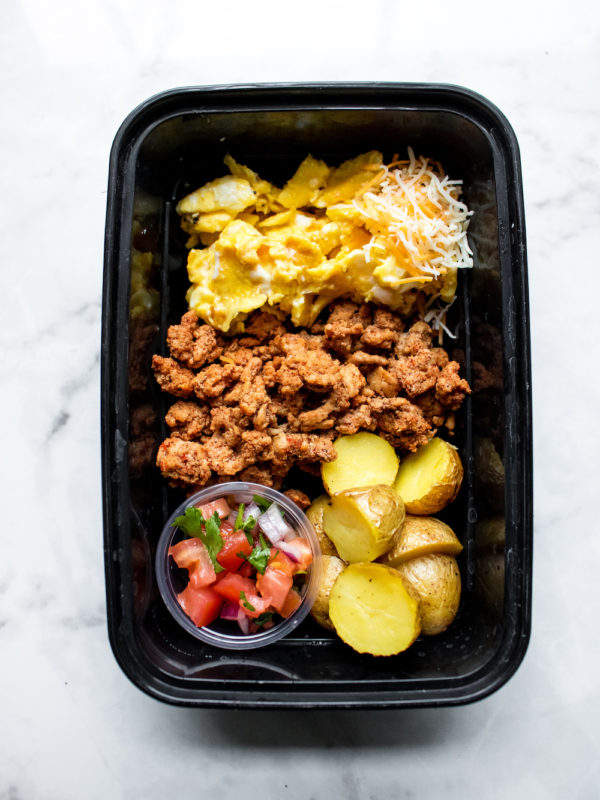
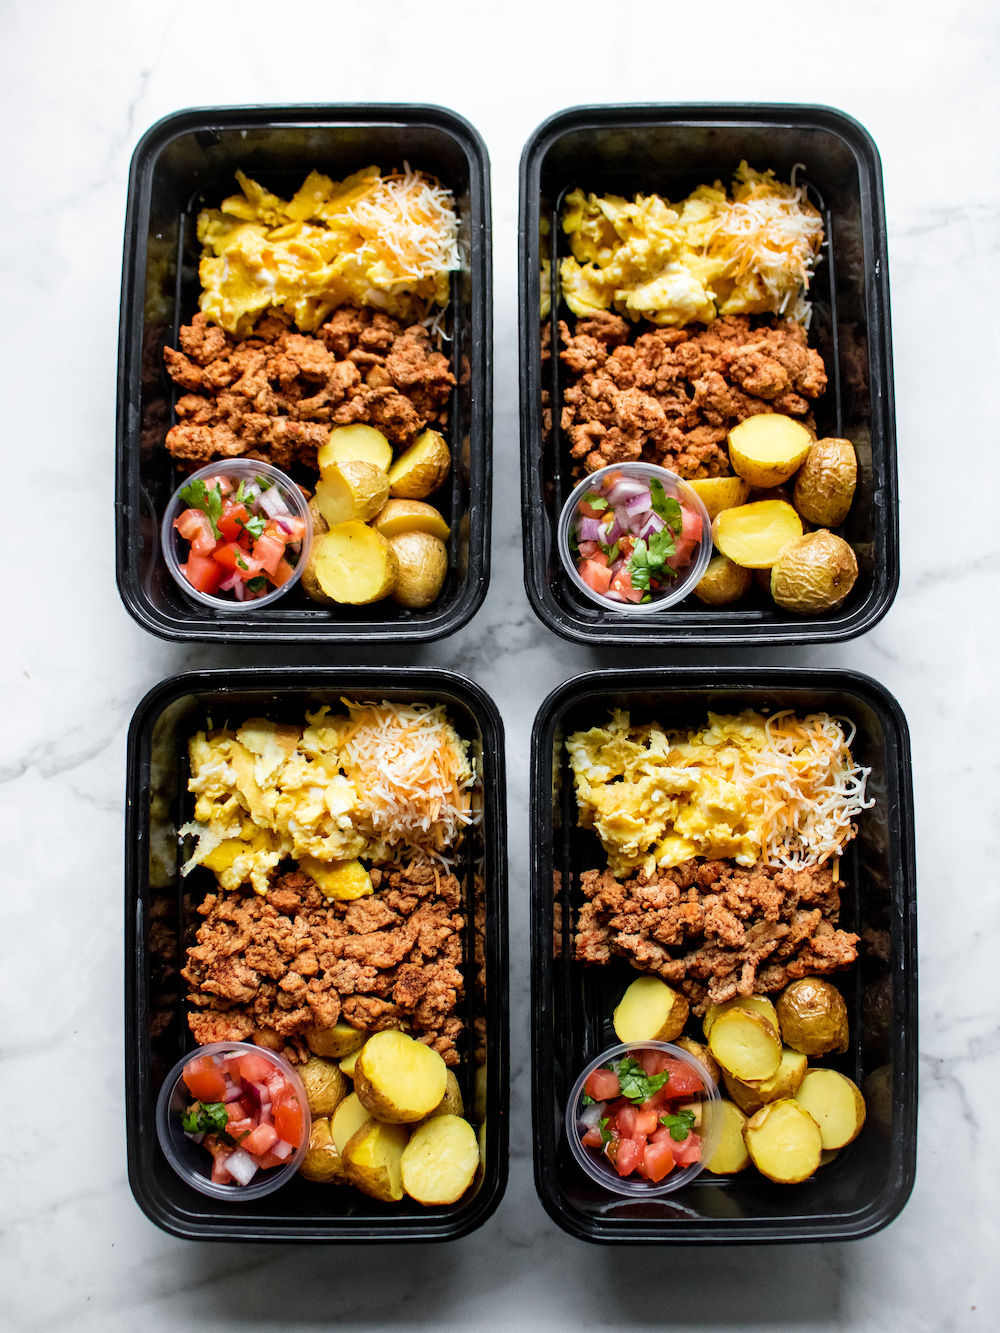
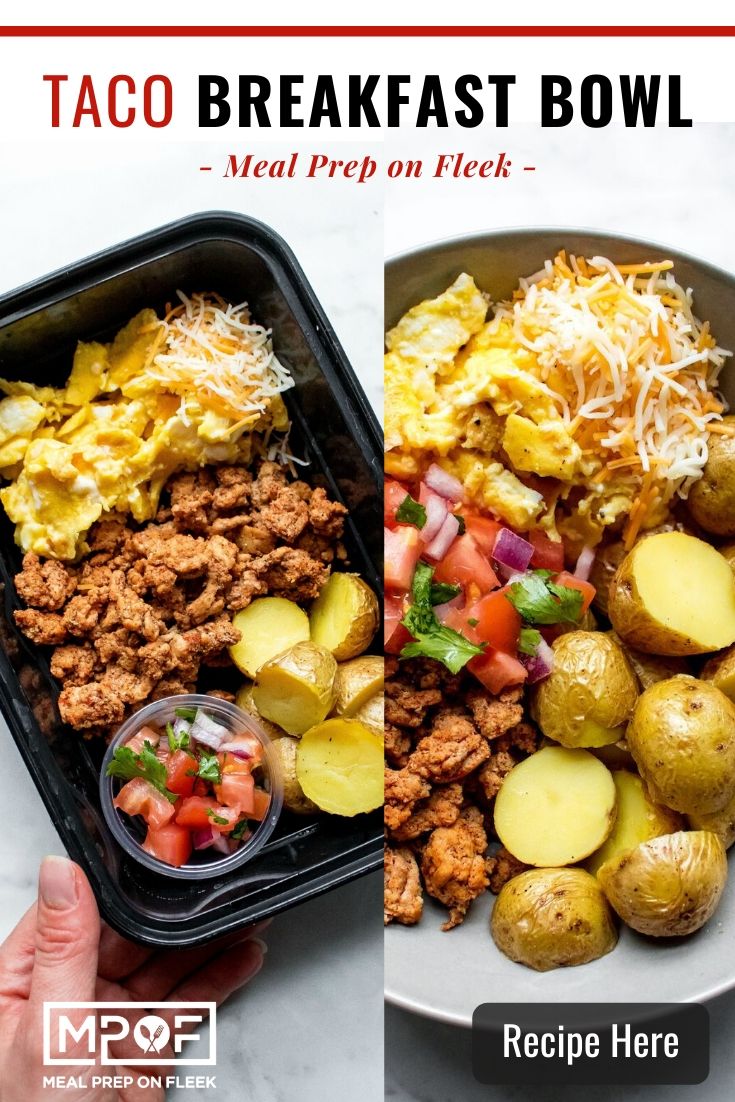
Skillet shrimp with tomato and avocado is an awesome one-pan dish that comes together fast and is bright, spicy, and flavorful. Put this one on repeat!
Did someone say one skillet? Yup! One Skillet Shrimp with Tomato and Avocado. It's all the foods we love together in one healthy, paleo-friendly, gluten-free, low-carb recipe! It kind of checks off a lot of boxes, doesn't it? As if you need another reason to love this recipe, it also works great as a quick weeknight dinner if you are short on time!
Are you ready for this? Because this dish is ready so fast, you're going to love it. Heat the ghee or butter in a large skillet, and toss in the shrimp, parsley, and salt and pepper. Then, shrimp cooks quickly, so be prepared to add everything else just as quickly. Finally, garnish the dish with cubed avocado and some lime juice.
By now you are fully aware of our love for all things avocado, because it's loaded with good fats and fiber, among other things. But did you know we also love shrimp? It is a low-calorie, low-fat source of protein. Four ounces of raw shrimp have only 120 calories, 27g of protein, and 1g of fat. Now those are some killer macros for making meal prep dishes that fit your nutritional goals! Not to mention, shrimp is easy to find and have on hand in your freezer. You can defrost it in a flash either in the fridge or in a colander under running water. (Not that we'd advocate leaving dinner for the last minute, but we all live in the same world . . . )
Feel free to add some thinly sliced bell peppers to this dish, which would play up the pepper factor a bit.
Sugar snap peas complement the other ingredients in this skillet shrimp dish with avocado. Plus, they also cook fast.
Use chicken if you don't have shrimp, but know it won't cook nearly as quickly.
Tofu could work, too, if you wanted to make this dish vegetarian or vegan. Just be sure to press as much water as possible out of the tofu before cooking it, and cutting it into ½-inch cubes.
This is meal prep land, so this skillet shrimp dish will keep for a few days for sure, in those sealed containers. But we don't recommend freezing this. Avocado is not the best frozen and defrosted (unless you're tossing it in a smoothie), and shrimp does not take well to freezing after it's been cooked. Think of it this way: Shrimp has been frozen (that's how you buy it), defrosted, and cooked. Doing that all over again ruins the texture. Best to eat it all up! We don't imagine you will have much trouble doing that.
READ MORE: Low Carb Meal Prep: Shrimp, Veggies, and Cauliflower Rice
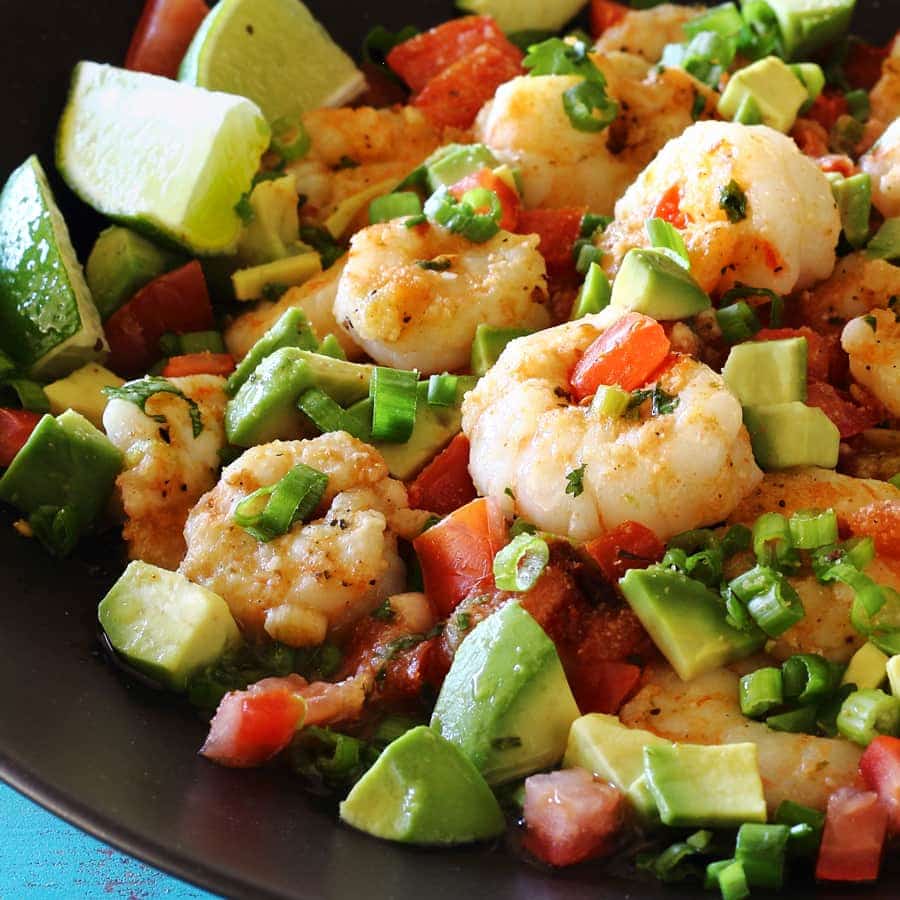
Bacon cauliflower soup is so delicious, you'll think you're having a loaded potato soup. But this one's low-carb and creamy!
We've gotta call this like we see it. This Bacon Cauliflower Soup really should be called, "We Can't Believe It's Not a Loaded Bacon Potato Soup." That's because this low-carb soup tastes so much like it! We love our potatoes, but sometimes we need something a little lighter, yet still hearty, filling, flavorful, and comforting. This soup checks off all those boxes in one simple low-carb dish. It's gluten-free, and paleo-friendly.


This recipe is low in both fat and calories, but not nutrients or flavor. We also kept the recipe gluten-free and paleo for those following more restricted diets. You could very easily make this recipe vegan by leaving out the bacon or substituting it with vegan bacon.
For those who just can't live without carbs and aren't following a paleo or gluten-free diet, this pairs nicely with a big piece of crusty bread. Otherwise, look for some gluten-free crackers or paleo-friendly ones.
This couldn't be easier. You'll start with onion and olive oil in a stock pot over medium-high heat. Add those cauliflower florets, garlic powder, salt and pepper. Cook for several minutes until the cauliflower takes on the flavor of everything in the pot. Then, add the broth and bring to a boil. While that's happening, cook the bacon in a skillet. Let the soup simmer until the cauliflower is tender. Add the nutritional yeast and cook for a few more minutes. Finally, puree everything in a food processor or high-speed blender. You might need to do that in batches to avoid major spills. When serving, garnish with the chopped bacon and let your tastebuds be fooled into thinking you're eating a carb-dense potato soup!
If you aren't serving this immediately, it will store well in the fridge for several days, up to 4 or 5 days. (There's no dairy in this soup, so that helps prolong the soup's life.) Reheat the soup over medium-low heat (or in the microwave). You can also freeze this soup if desired. We like to freeze soups in 2-cup increments for individual servings, but you do what works best for you and your family.
Serve this soup for a light lunch or dinner, or pair it with salad, a grilled chicken breast or steak, for a well-rounded dinner.
There's so much you can do with this soup.
Feel free to add some chopped chives or parsley to the top of this soup upon serving, or add a little of the dried versions of these herbs to the pot when you're cooking the cauliflower.
If you aren't following a paleo diet, you can substitute shredded cheddar or Monterey jack cheese for the nutritional yeast.
Any kind of bacon works here, whether it's pork or turkey bacon. Pancetta would work, too, and it's already in the right shape and small enough to work as a garnish. Vegan bacon works, too, if that's where your preferences lie.

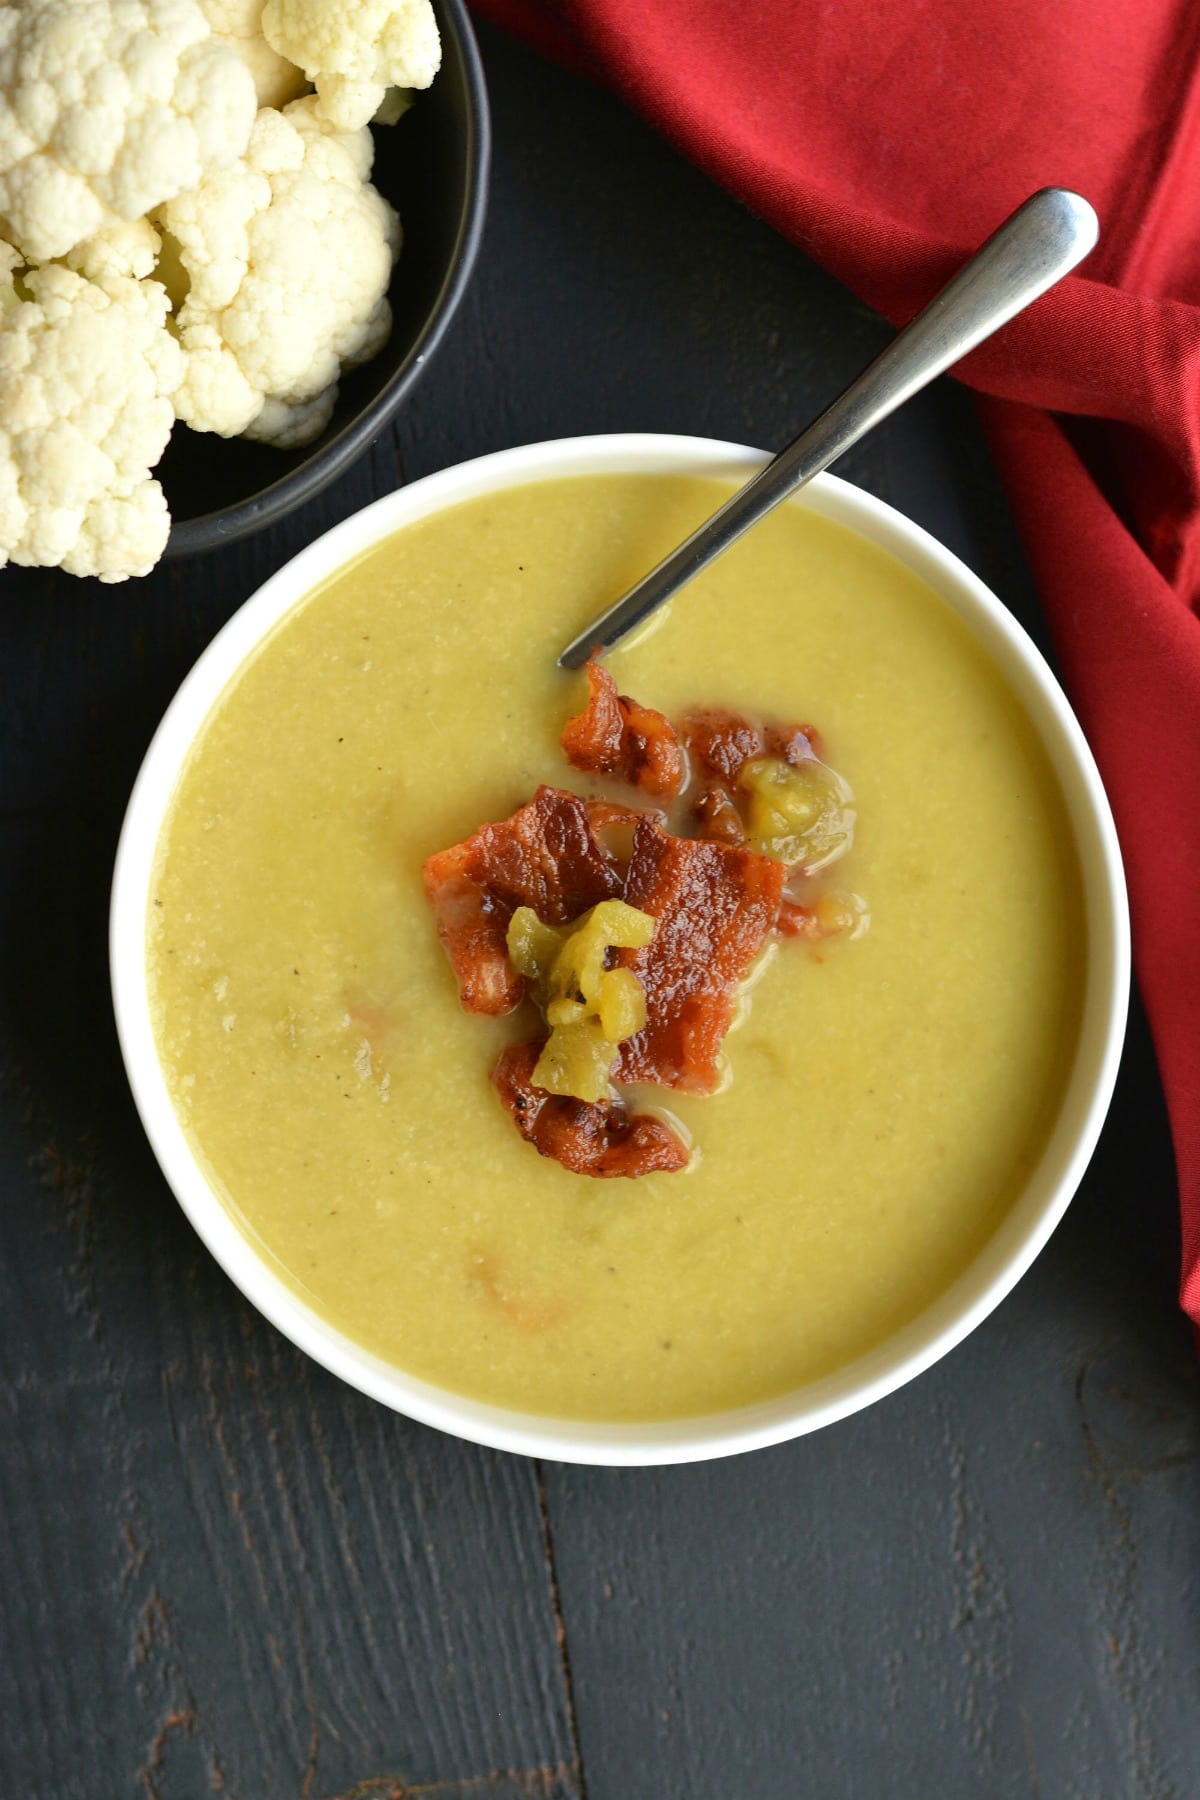
Greek Rice & Turkey Meal Prep Bowls will bring Mediterranean flavors to your dinner in 30 minutes, with olives, oregano, and cucumbers! Gluten-free, too!
We are always on the lookout for better and more flavorful dishes, and use what's in our pantry to our best advantage. This Greek rice meal prep does just that. If you've got some olives, some dried oregano and rice, and turkey (or even chicken), you're on your way to a bright and flavorful dish that calls to mind ingredients used a lot in Greek cooking: oregano, lemon, olives, cucumbers, and tomatoes.
It feels like summer, but you can eat this all year long!
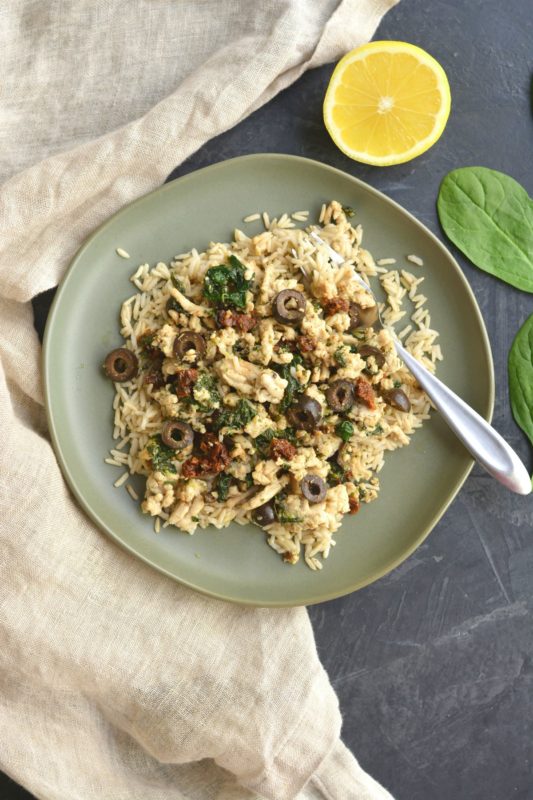
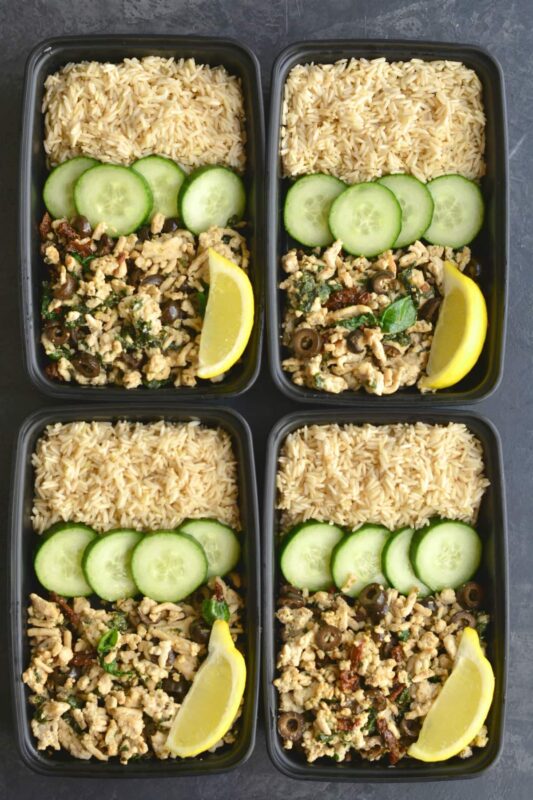
With the exception of the rice, which is cooked separately, this is really a one-skillet dish, which makes things move faster, especially clean-up. Ground turkey cooks with some olive oil, salt, pepper, garlic, and oregano for a really flavorful and savory base. The rice gives it a nice starchy base, and the cukes and lemons add some crunch and acidity-a blast of brightness.
This is so good, it hardly needs much else. Feel free to add a great green salad with it, too. It's definitely best served hot, though.

Ground chicken would also be really delicious here and maybe even pork. In a pinch, beef would work, but we like turkey and chicken the best. Those proteins keep this a little more light and bright; beef tends to feel a little more savory.
If you don't have sun-dried tomatoes feel free to use halved cherry tomatoes instead for these rice and turkey bowls.
White rice works here, too, as would quinoa or any kind of cauliflower rice. (You could make our cilantro and lime cauli rice into a lemon and parsley version, if you want!)
If you don't have black olives, kalamata would be delicious here. They are a classic Greek olive and more purple in color. You can even mix up the olive types if you like, which can be fun because most supermarkets have an olive bar with their salad bar.
Use veggie stock (or water, in a pinch) if you don't have chicken stock.
There's no harm in upping the amount of fresh herbs in this dish. Doing so will really take the flavor to the next level. You can easily increase the parsley and oregano to a tablespoon each if desired. You can add it all at once or reserve some of those herbs for freshening it up when you serve these Greek rice and turkey bowls!
READ MORE: These flavors rock! Sheet Pan Greek Chicken and Vegetables!