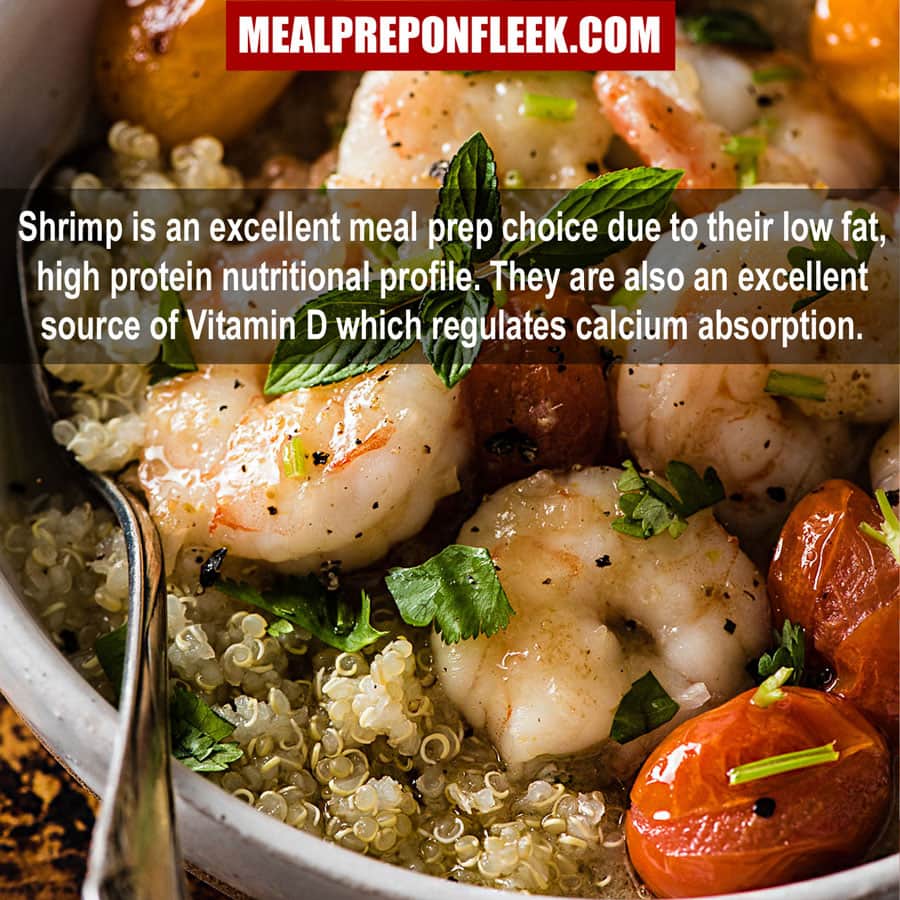
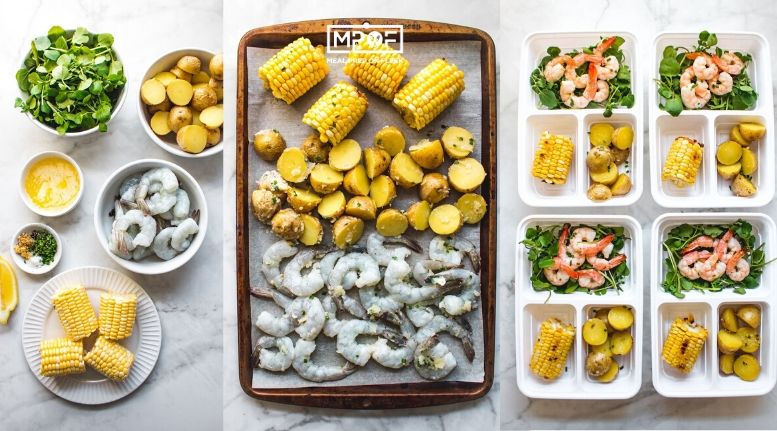
Shrimp is an excellent meal prep choice because it is low in fat with a high protein nutritional profile. Shrimp is an excellent source of Vitamin D, which regulates calcium absorption.
Shrimp nutrition
Here's an overview of the nutrients in a 3-ounce (85-gram) serving of shrimp:
Calories: 84.2
Protein: 20.4 g
Iron: 0.433 mg
Phosphorus: 201 mg
Potassium: 220 mg
Zinc: 1.39 mg
Magnesium: 33.2 mg
Sodium: 94.4 mg
Shrimp is also one of the best food sources of iodine, an important mineral that many people are deficient in. Iodine is required for proper thyroid function and brain health.
Shrimp is also a good source of omega-3 fatty acids.
Shrimp is a great Meal Prep choice!
_
Here is an Easy Shrimp Meal Prep Recipe
Thank you to GoodCook for sponsoring this Firecracker Tofu recipe post, and thank YOU for supporting the brands that help make Meal Prep On Fleek possible. All opinions are our own.

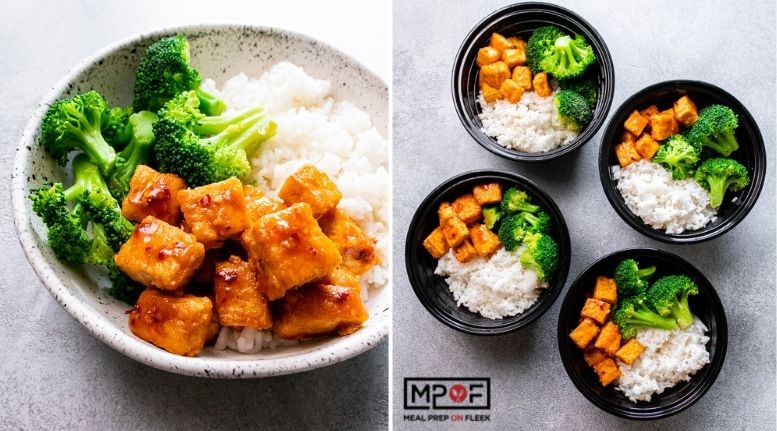
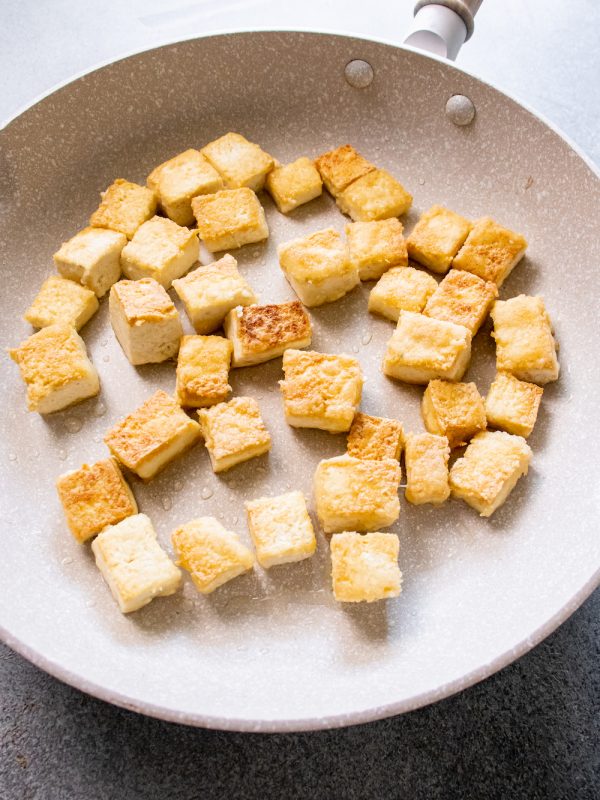
For a sweet and spicy recipe that rivals take-out flavor, look no further than this vegan firecracker tofu. Tofu is first patted dry and tossed in gluten-free flour to absorb extra moisture, then pan-fried until golden brown and crisp before tossing in firecracker sauce. Serve alongside jasmine rice and steamed broccoli for a complete meal.

It's not often that I find a recipe addicting, but the combination of sweet and spicy in this Firecracker Tofu is, well, addicting. 😉 It's so addicting that I may or may not have used the sauce on more than just tofu in the last two weeks. Believe me when I say that you're going to want to use it on anything and everything you make!
I've been eating a lot more plant-based and pescatarian meals the last 8 months or so, which means I've been including more tofu because it's affordable, versatile, and a great source of both protein and calcium. In addition, I like how tofu picks up the flavor of sauces and dressing much better than a meat or seafood protein. It just soaks right in and gives the tofu that extra burst of flavor!
If you've been hanging around here for a while, you know that my love for all things sweet and savory runs real deep, which is why this sauce has me addicted! The combination of spicy from the hot sauce and the sweet from the brown sugar is unreal! Depending on your preference, you can also customize the sauce to make it more or less spicy or sweet.
The tofu is then pan-fried to give it the crispy coating that you crave from a takeout meal. But you won't find any takeout meals around here! Instead, you will find takeout remixes like this Firecracker Tofu that are set to make your meal prep easy, affordable, and delicious.
The key to doing a takeout remix is making sure it's close to the real thing. This is why I went with traditional sides like steamed white rice and broccoli. Not only are these the side options you would find at a takeout restaurant, but can we talk about how the colors all just come together so beautifully?
When it comes to putting the meal prep together, the last part of making sure this meal is like a real takeout dish is by using the GoodCook® Meal Prep Bowls. Not only do they allow you to prepare and serve just like a takeout dish, but they are designed in 4 cup portions, which makes them just right for balanced meal prep.
Plus, they have a dome-shaped lid, so you can toss everything together and make sure the flavor of the firecracker sauce is coating everything! My all-time favorite part is the built-in "dressing cup" on top of the lid. I always make extra firecracker sauce and store it here to make sure the rice and broccoli are extra saucy! If you're not into extra firecracker sauce with this recipe, you can use the dressing holder for a cool, creamy dressing or even hold extra seasonings like salt or pepper. For my hot sauce addicts out there, use it for extra hot sauce.
So, grab your set of 10 meal prep bowls (you can't forget to prep for your partner), your ingredients, and make takeout in your house cheaper, healthier, and way more delicious with my easy Firecracker Tofu recipe!
P.S - for my meal preppers who aren't into tofu, feel free to swap it for chicken, shrimp, or tempeh!
For Serving


Thank you to GoodCook® for sponsoring this Vegan Oatmeal Bowl with Sauteed Cinnamon Apples recipe, and thank YOU for supporting the brands that help make Meal Prep On Fleek possible. All opinions are our own.
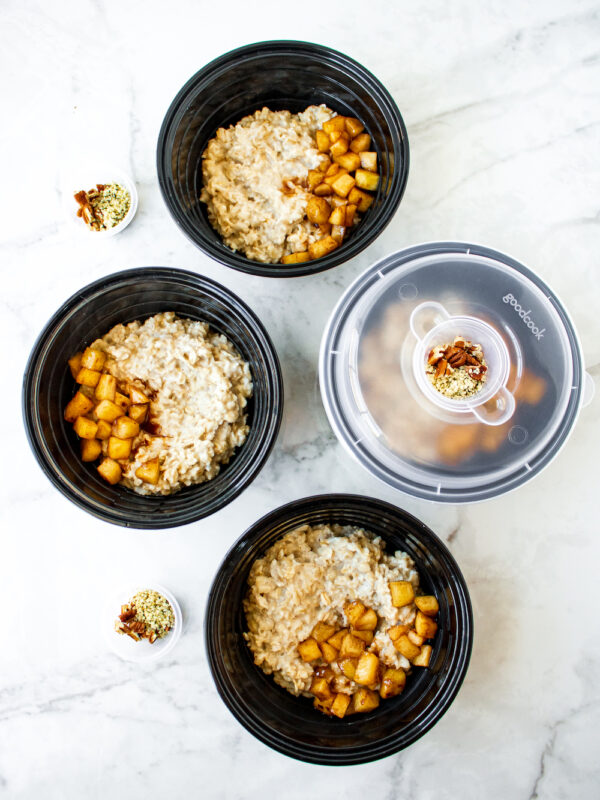
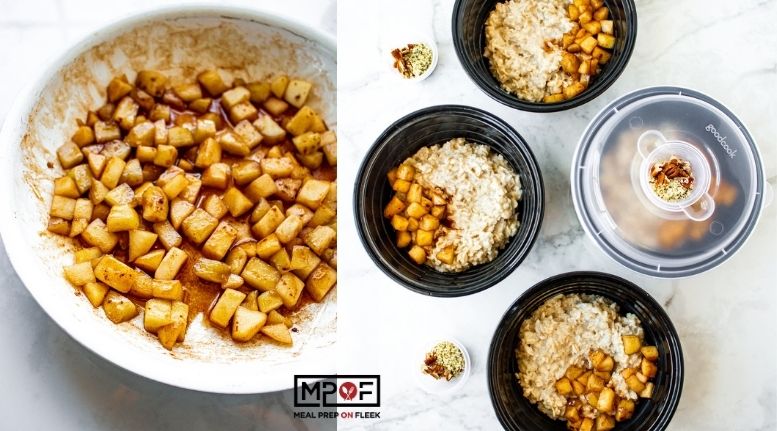
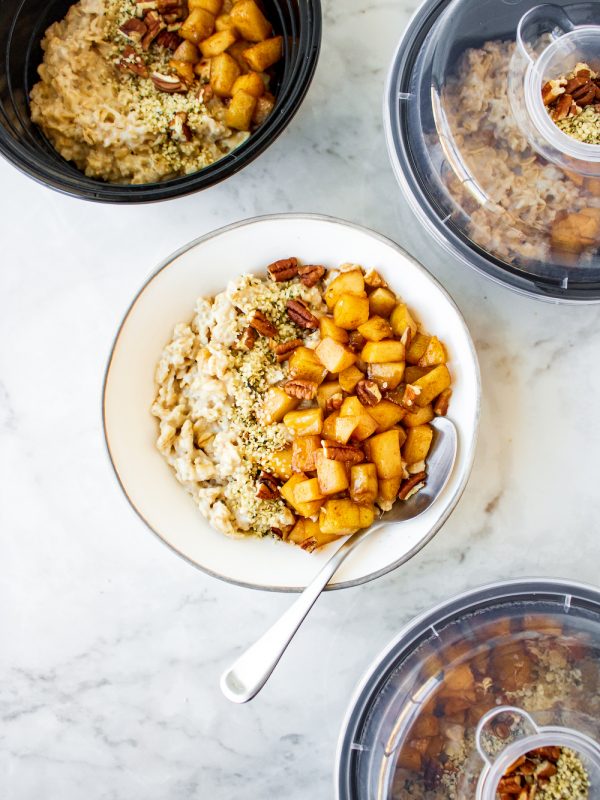
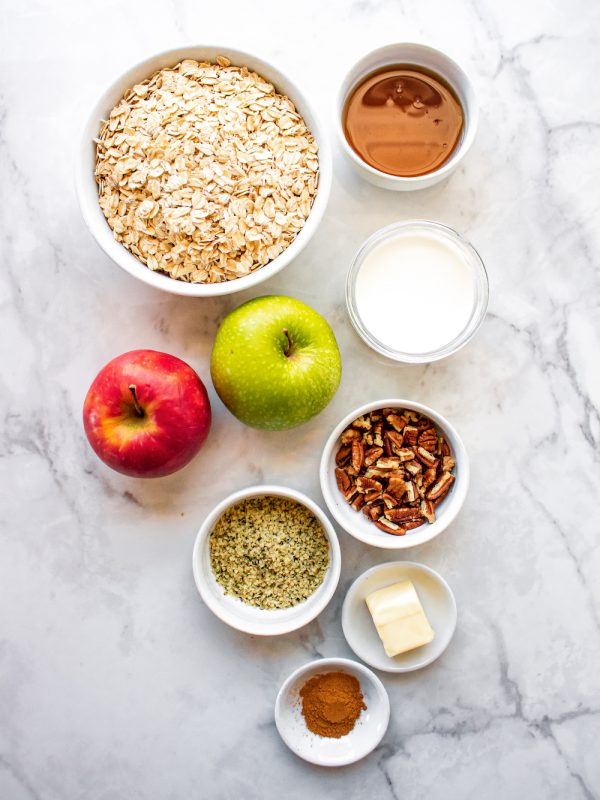
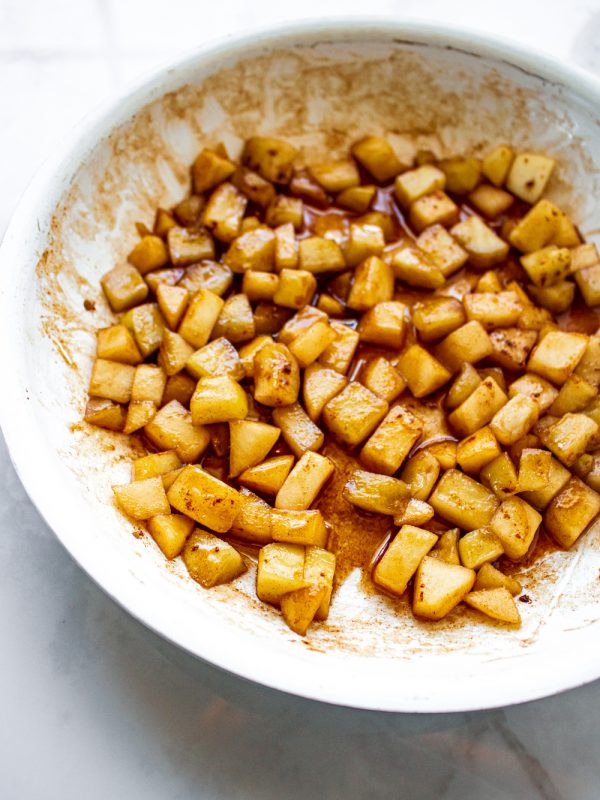
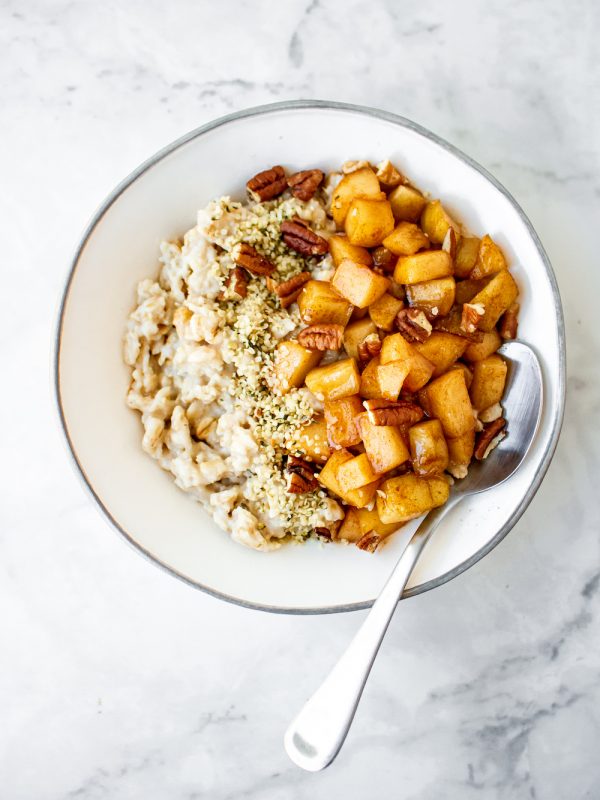
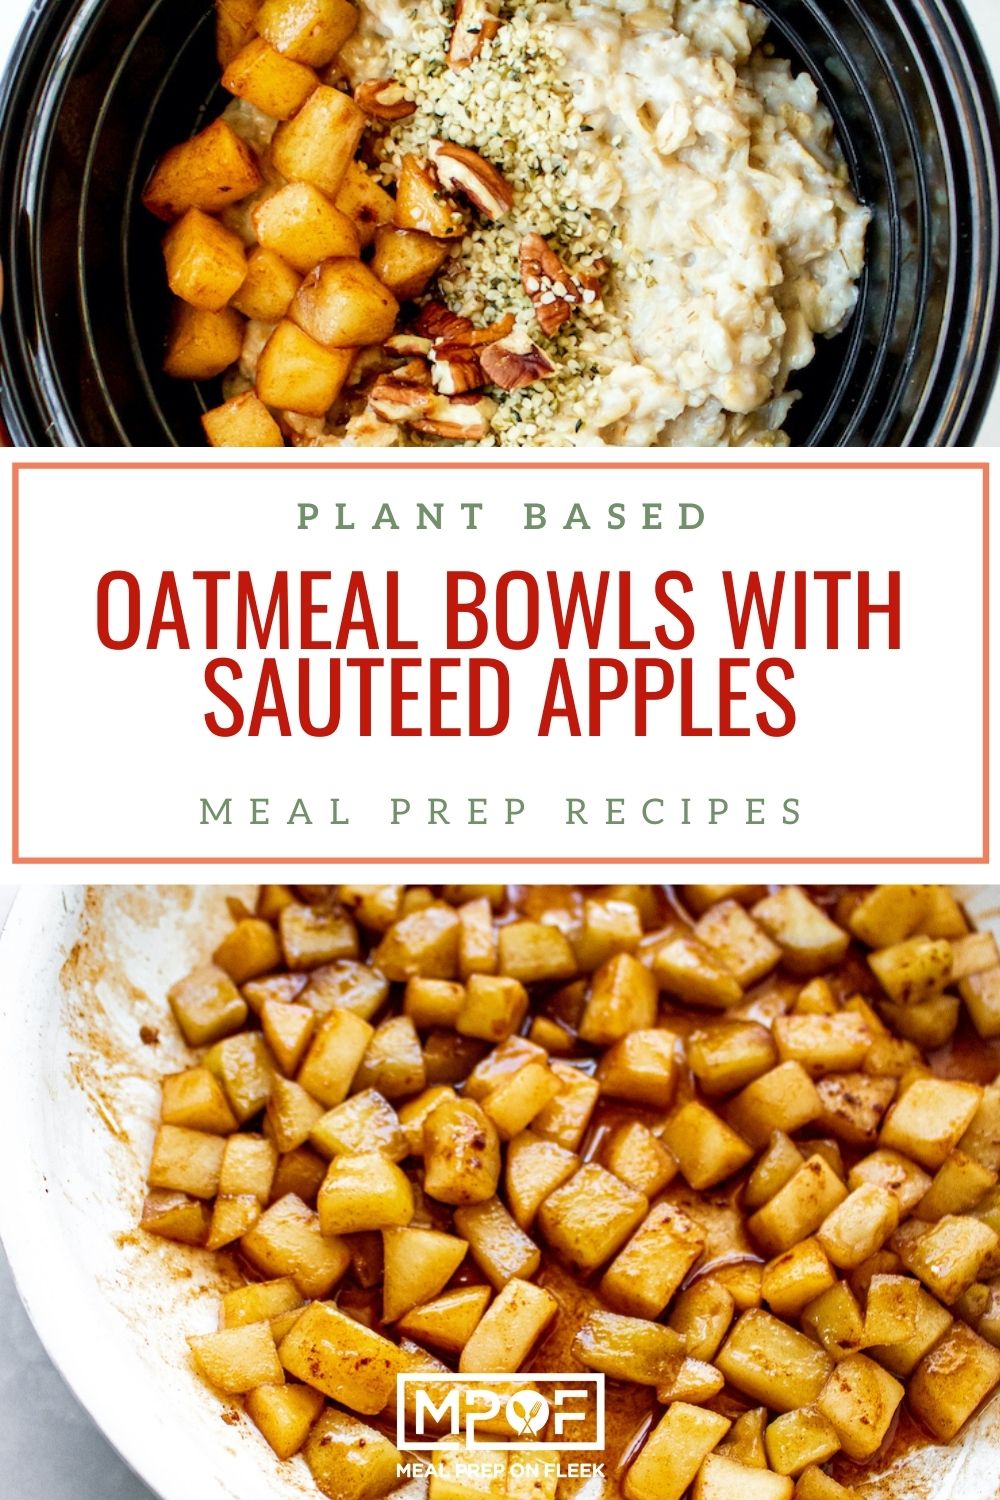
This stick-to-your-ribs breakfast turns ordinary oats into an autumn feast! Cooked oats are topped with buttery sauteed apples, hemp hearts, and pecans for a satisfying breakfast that's vegan-friendly!
These vegan oatmeal bowls have been our go-to breakfast for the last month! They are a sweet, stick-to-your-ribs kind of breakfast that keeps you full and warms you up on a chilly morning. They have just the right amount of sweetness that makes you crave them on repeat! Have you ever come across a meal prep recipe that you craved day after day, week after week?? That is us with these Vegan Oatmeal Bowls and we bet it will be you too!
When the times comes that you think you just can't look at another oatmeal bowl topped with cinnamon apples, you can switch up the toppings and change the entire flavor profile of your oatmeal bowl! The versatility of this recipe is just another reason why we love it so much!
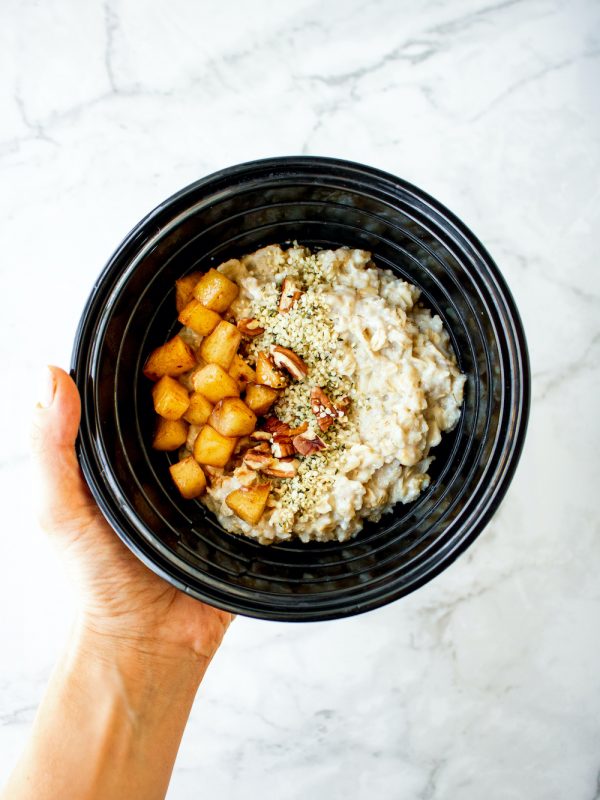
We have found the key to making the topping combos endless is using the new GoodCook meal prep bowls. The container, which also works for salads and grain bowls, is the perfect size to hold a satisfying portion of oatmeal. But the real key for ingredients that get soggy quick is the 2-ounce condiment cup on top! For salads, it holds dressings, for grain bowls, it holds nuts and dried fruit, for this tasty vegan oatmeal bowl recipe it holds nuts, seeds, dried fruit, shredded coconut, chocolate chips, nut butter, granola, etc. All of those extra yummy toppings that are perfect on oatmeal, but also should be eaten within reason (we see you and your "a little extra sprinkle of chocolate chips") are best stored in the condiment cup that snaps in on top of the bowl's lid.
Not only will this prevent these tasty toppings from getting soggy, but it will also help you keep your portions in line with your macro goals. Sometimes, we use it to hold a couple of tablespoons of Greek yogurt or cottage cheese. After we reheat the oatmeal we like to mix those in to give them some extra creaminess before eating.
We have found these containers to be the most versatile container yet! Soups, grain bowls, salads, oatmeal bowls, lasagna, etc. They work for all sorts of meal prep recipes and allow you to keep toppings/garnishes/herbs fresh until you are ready to enjoy your meal, thank you little condiment cup!
For Topping
For Serving
4 Good Cook Meal Prep Containers with 2 ounce condiment cup

Thank you to Now Real Food® for sponsoring this Coconut Oat Breakfast Cookies recipe post, and thank YOU for supporting the brands that help make Meal Prep On Fleek possible. All opinions are our own.

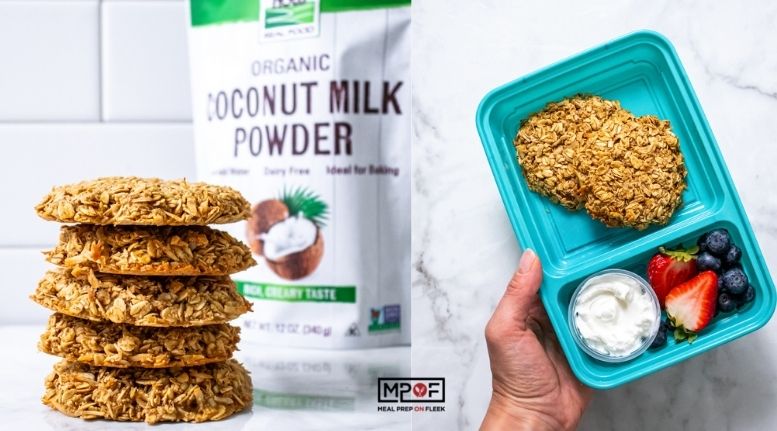
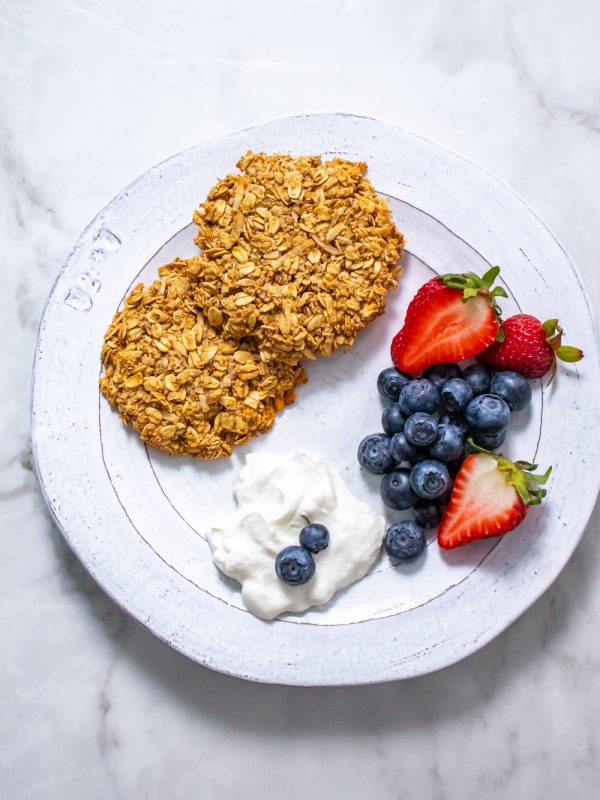
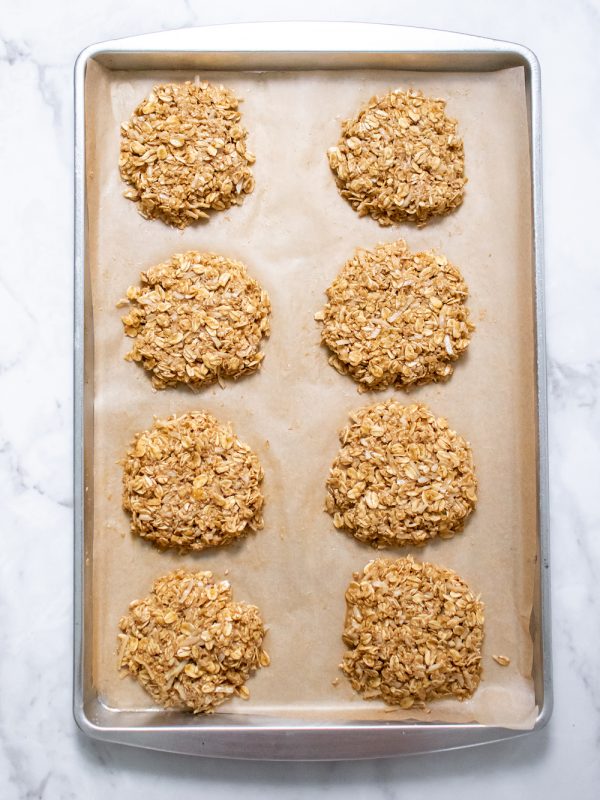
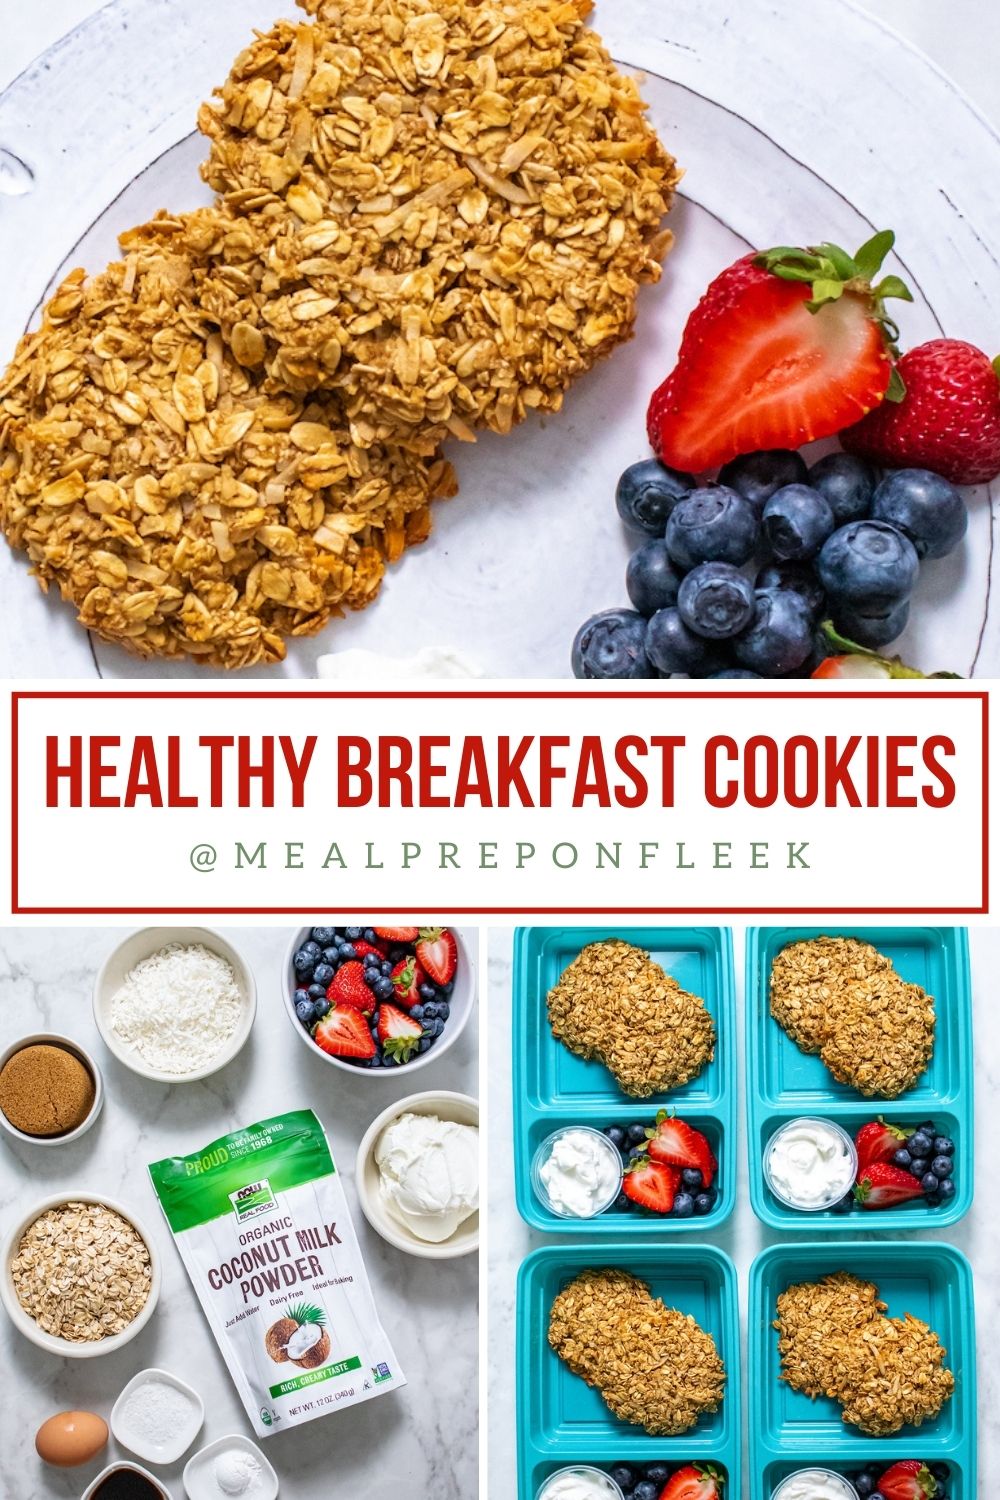
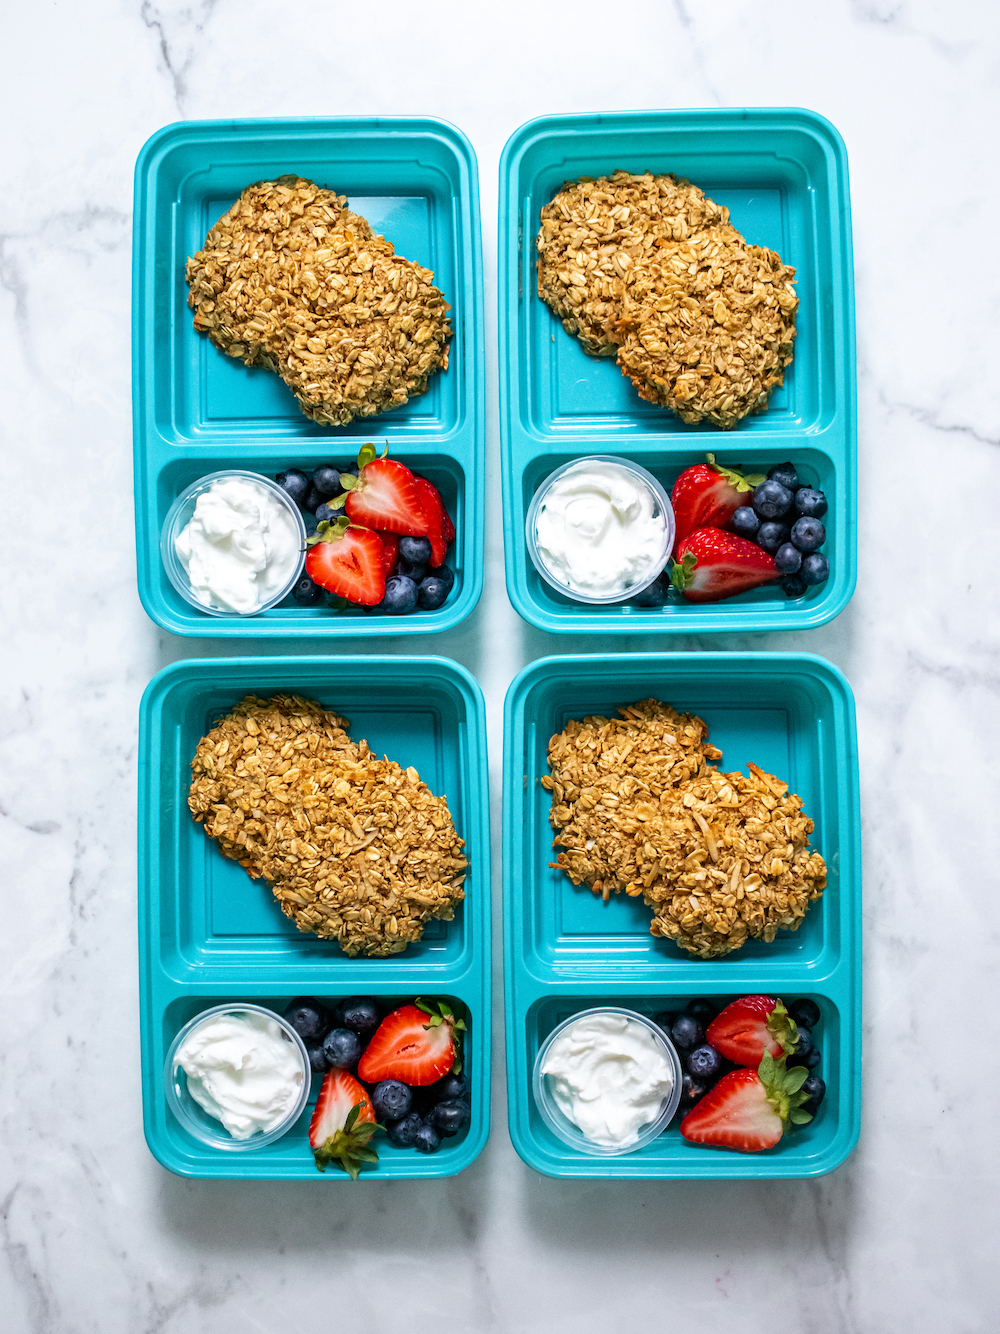
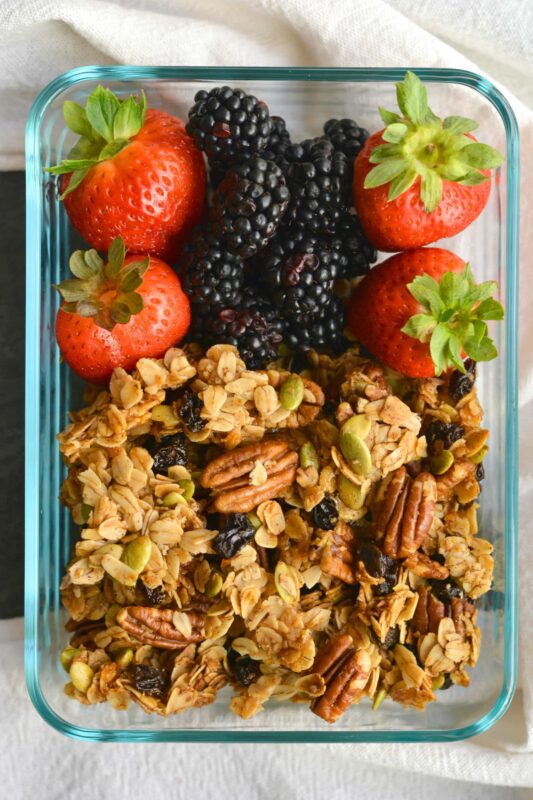
Say yes to cookies for breakfast with these fiber-rich oat cookies complete with tropical coconut flavor from coconut flakes and coconut milk powder! This recipe becomes a complete meal by pairing cookies with antioxidant-rich berries and protein-packed Greek yogurt.
Back to school is in full swing, and that means our mornings are more rushed than ever. The best way to sweeten them up and make them nutritious? These Coconut Oat Breakfast Cookies. Yes, I said cookies for breakfast!
These cookies are sweetened with a bit of brown sugar, but not nearly as much as you'd find in regular cookies. Hence why we can feel good about enjoying them at breakfast! They also have heart-healthy oats, organic coconut milk powder (my new fave baking ingredient), and unsweetened shredded coconut that add fiber and natural sweetness. When paired with high-protein Greek yogurt and fresh berries, you have a complete, sweet meal that you can feel good about starting your day with.
I know you're wondering about this magical new baking ingredient that I've recently discovered, Coconut Milk Organic Powder. If you've been around here for a while, then you know Now Real Food® is my go-to brand for all things baking, and recently, pasta! Their monk fruit and erythritol are always in my baking cabinet. I even keep the erythritol on hand savory dishes like this! But now I can confidently recommend adding their new Coconut Milk Organic Powder to your baking collection, or even drinking collection!
The Organic Coconut Milk Powder comes directly from fresh, organic coconuts and is spray dried and then mixed with organic plant-based ingredients so it easily dissolves in hot water or coffee. It’s perfect for baking since it has a much longer shelf life than liquid coconut milk and does not require refrigeration. It can be used in sauces, smoothies, desserts, and wherever you want to avoid dairy milk but still enjoy its rich, creamy taste. And we all know how dreamy and creamy coconut milk is! Someone, please pour me a glass!
Given that food waste is kinda a big deal around here, having an ingredient like coconut milk organic powder on hand instead of the refrigerated kind that goes pretty quickly is a key product attribute for us! Plus, I know I'll never run out of ingredients when the urge to make a batch of cookies hits!
Now that you have the 4-1-1 on the coconut milk powder let's get back to variations on these cookies! As mentioned, I used shredded coconut, but don't think that's the only ingredient you can use here. Dried cranberries, or any dried fruit, nuts, seeds, chocolate chips (if you're feeling a need for something a little extra sweet), would all be delicious in these cookies!
The brown sugar can be subbed for coconut sugar or date sugar (my fave!), and the egg can be swapped with a vegan replacement to make these cookies fully vegan-friendly.
I chose to serve these with Greek yogurt for protein and berries for extra fiber and color, but cottage cheese, a dairy-free yogurt, or even a few hard boiled eggs, plus your favorite fruit, would make this a complete meal.
If you're just looking for a new morning or afternoon snack, skip the sides and enjoy the cookies with a cup of coffee or tea. And for the days or weeks when you're in the mood to share, double or triple the cookie recipe and bring them to your next birthday party or football gathering. Having healthy snacks on hand at parties like these makes it easier to stay on track with your macros for those who count.
For Serving


If you have any questions or need ideas for alternate swaps, head over to our Facebook Group to ask or email me at [email protected]!
*Please note that any changes to ingredients will alter the macros on each recipe.
If you have any questions or need ideas for alternate swaps, head over to our Facebook Group to ask or email me at [email protected]!
*Please note that any changes to ingredients will alter the macros on each recipe.
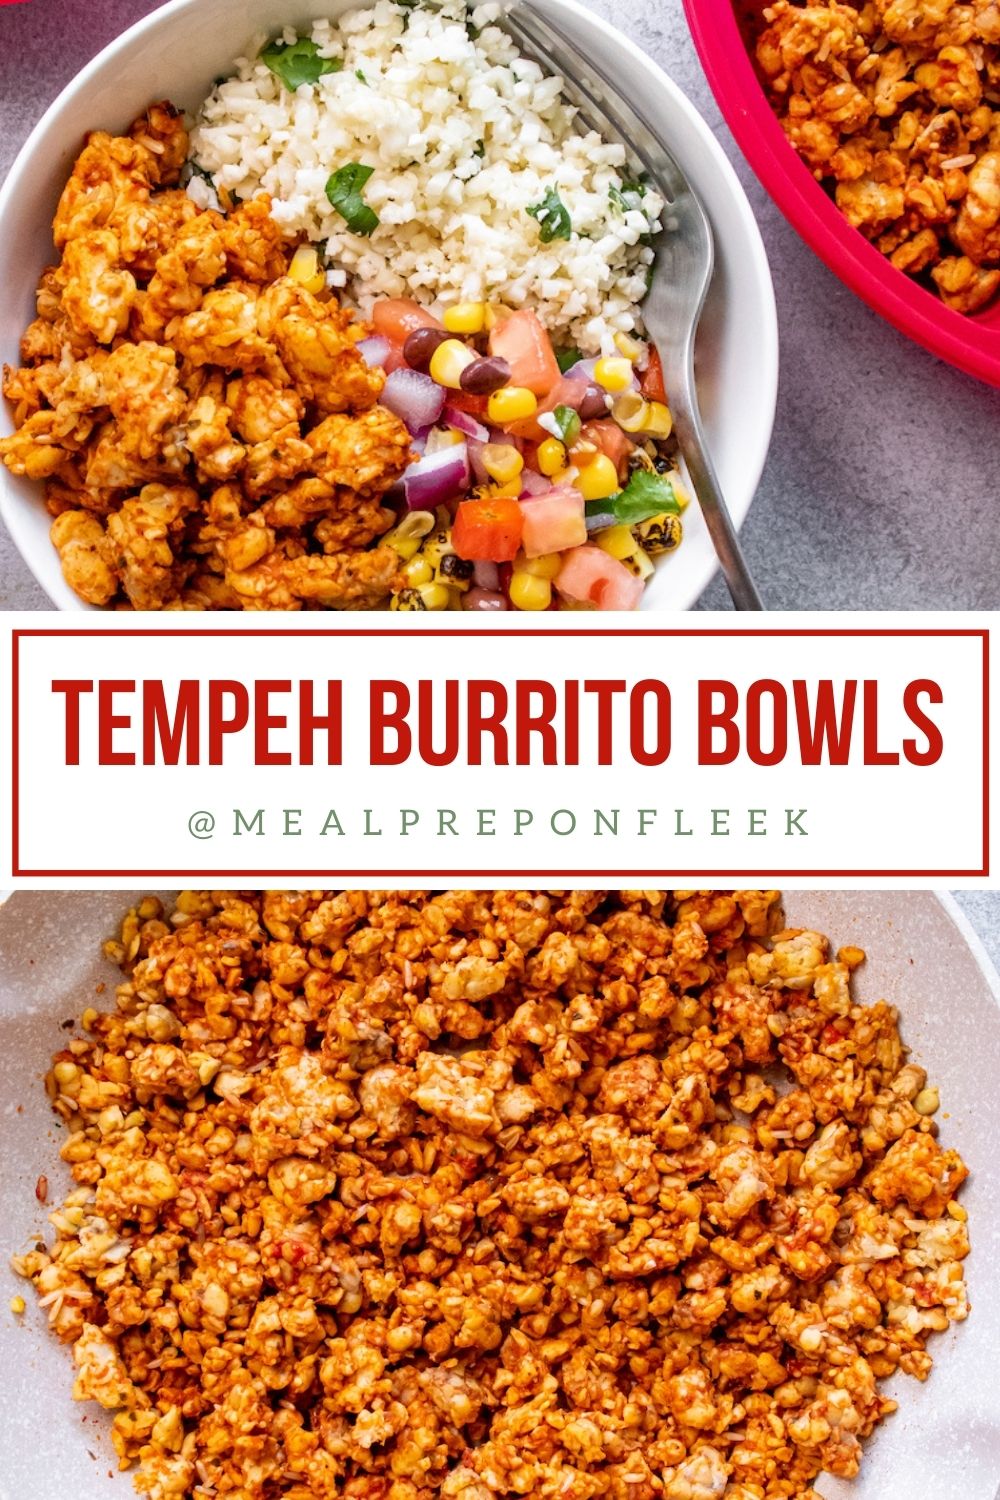
Thank you to GoodCook® for sponsoring this Tempeh Burrito Bowls Recipes post, and thank YOU for supporting the brands that help make Meal Prep On Fleek possible. All opinions are our own.
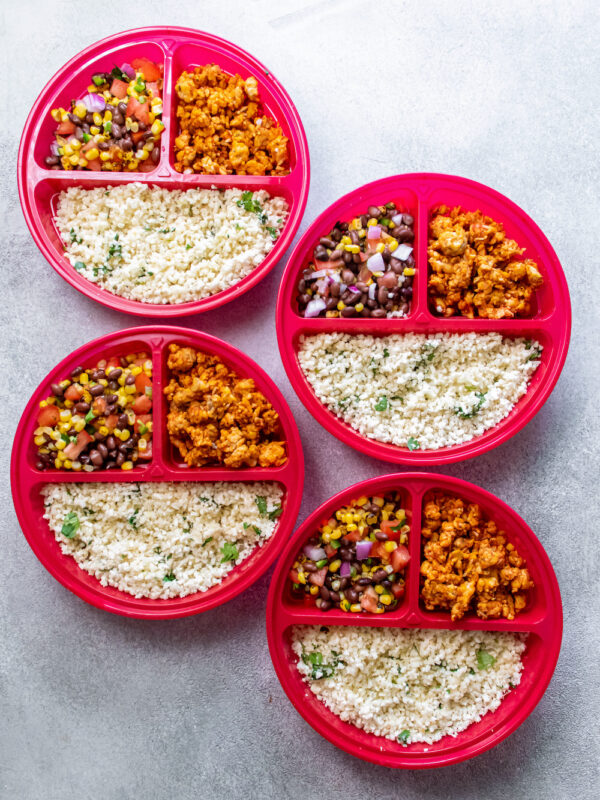
Skip takeout and make this easy vegan burrito bowl complete with tangy cilantro-lime rice. Crumbled tempeh takes on the texture of ground meat and gets seasoned up with Mexican spices for a protein-rich meal.
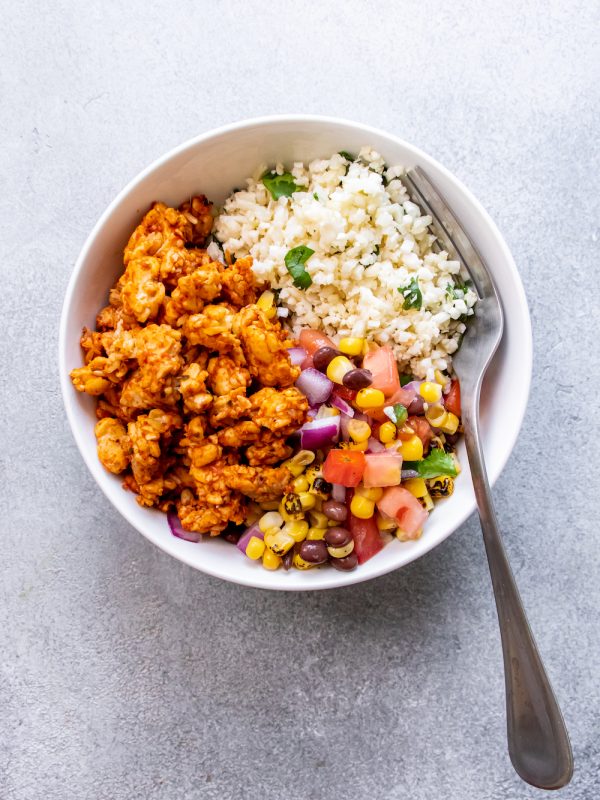
What's your "why?" Why do you meal prep? What about meal prep makes your life better? For us, it's saving money, keeping our portions in check, and feeding our bodies delicious, nutrient-dense foods. These Tempeh Burrito Bowls are a shining example of all of those things!
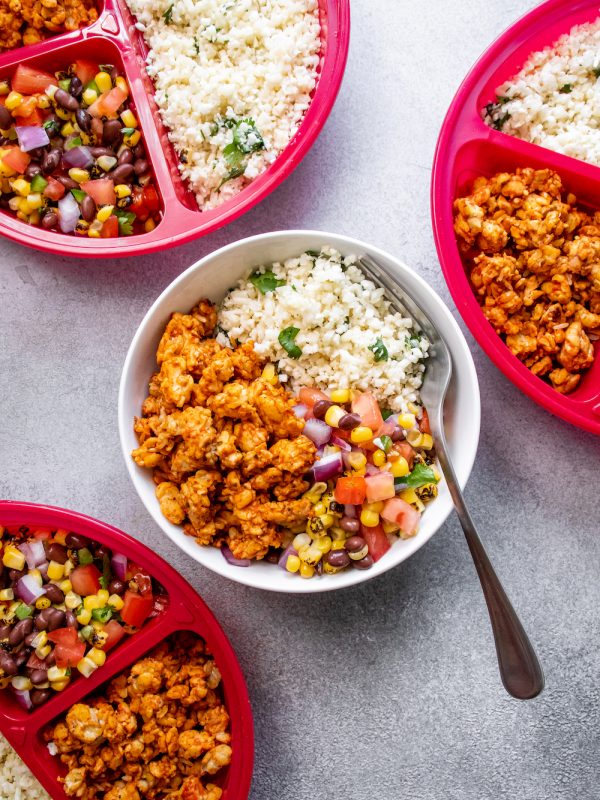
Yes, don't get us wrong, we love us some takeout, but our wallets, not so much! That's why we look to homemade takeout remix recipes like these burrito bowls! For less than one takeout meal, we can have four days worth of meals that will nourish our minds and bodies! Plus, when we divide the ingredients into our portion-controlled meal prep containers, we know that we are getting the right balance of protein, carbs, and healthy fats (plus veggies!) in our meals!
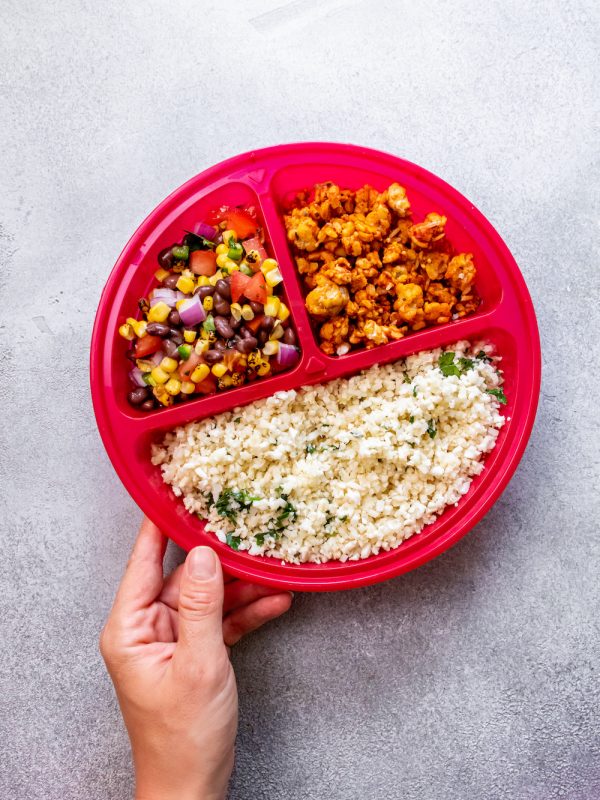
The red, three-compartment meal prep containers are one of our go-to containers because they are labeled with the specific foods groups:
This takes meal prepping a step further by removing all the guesswork out of creating a balanced meal. On top of that, who doesn't need a little pick-me-up during the middle or end of the day? There is just something about that red color that makes our eyes open a little wider, or is it the food inside? Probably both. 😉
Ok, back to the food! So, we went with a vegan spin on these burrito bowls! We are trying to eat more plant-based meals and less meat, and these tempeh burrito bowls are such an easy way to do that! The only swap you need to make from a regular burrito bowl is using tempeh in place of ground chicken or beef. But, if you just love your chicken or beef, use it! There is no right or wrong way to make a meal prep that works for you!
We made every ingredient from scratch here, but you can use a store-bought salsa in place of the corn and black bean salsa below to save some time! Another time-saving hack, although not as cost-effective, would be to buy pre-riced cauliflower. If you do this, please make sure it isn't frozen. It should come from the fresh produce section at your grocery store. The frozen version will leave you with extra soggy cauli-rice that won't taste good by day four.
We kept the burrito bowls pretty simple, but feel free to finish yours off with sliced avocado, sour cream, shredded cheese (use vegan, if needed), queso fresco, etc.! We are here to provide an easy and delicious recipe but always encourage you to do what works for you!
If you're bored with all our food talk and just wanna know where you can grab those awesome containers, head here! You will get 10 in your pack, which is enough for two people or two meals per day for one!
For Taco Tempeh
For Fire Roasted Corn and Black Bean Salsa
For Serving


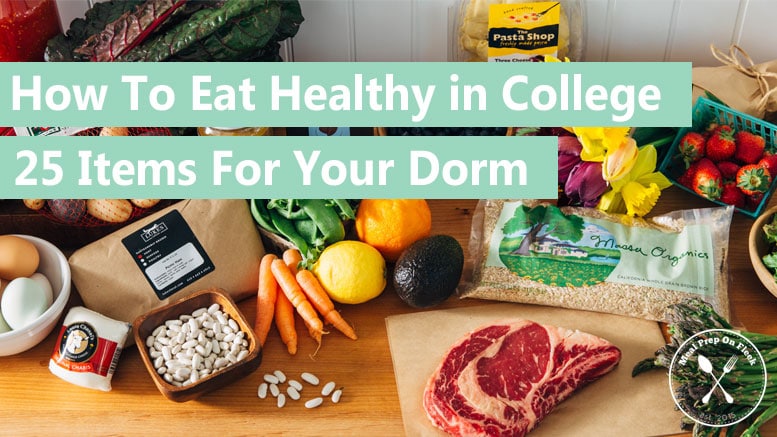
For the first time in your life, you're on your own, making decisions about what you should and shouldn't eat. You're surrounded by salty snacks and sweets, you're almost always in a rush, and controlling what you consume without a kitchen at your disposal can be majorly challenging. But college is also the place where you can start establishing good eating patterns that will last a lifetime (and where you can break the bad ones, too!).

Whether it’s grabbing something quick between classes or snacking while staying up late to study, here are some staples and snacks for healthy dorm chefs.


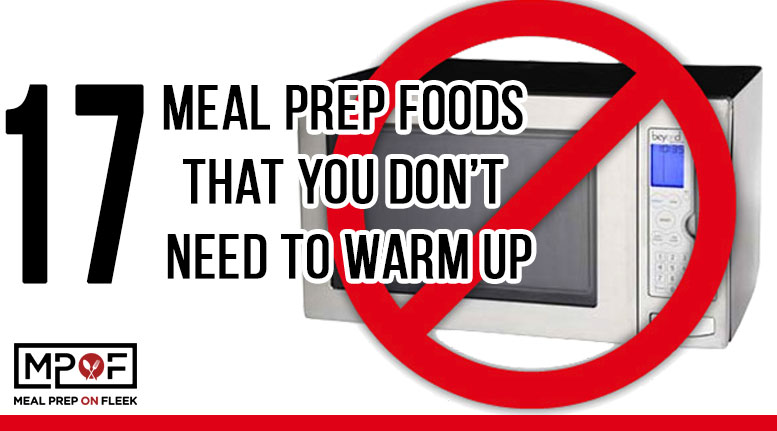
Let's be real... sometimes a hot meal is just out of the question. Road trips, late night work shifts, nasty office microwaves, or whatever else comes up in life, you're eating a cold meal.
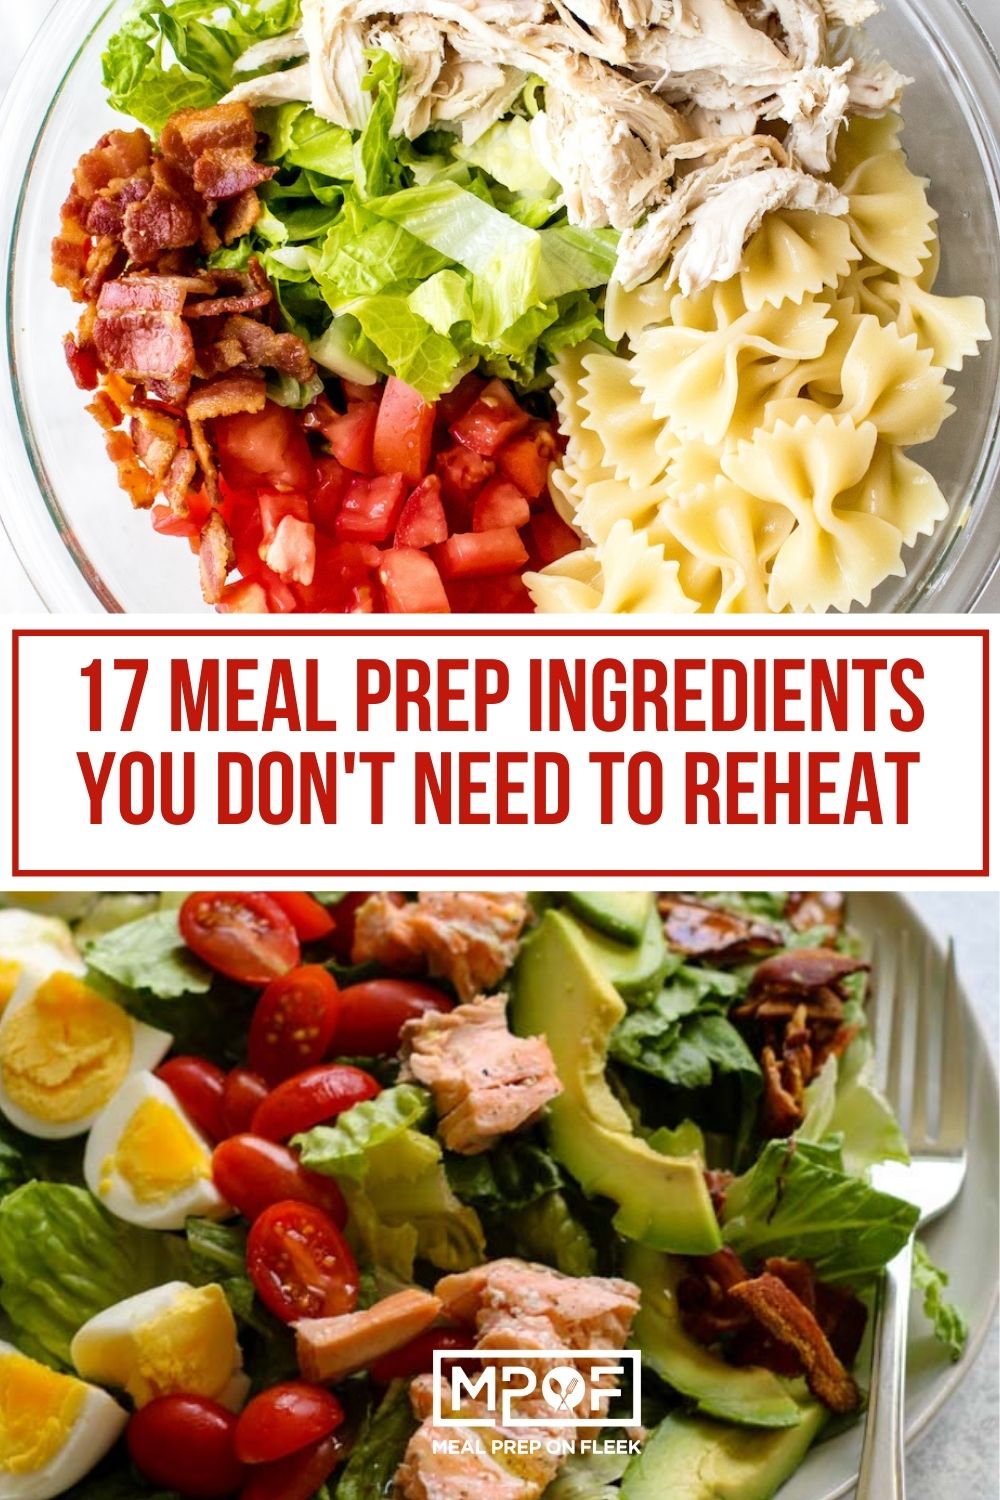
If your office microwave is not an option, you eat on the road or totally spaced on paying your electrical bill; there are still plenty of healthy and delicious meals that you can enjoy during the week! No re-heating required! Here are 17 of the most popular meal prep ingredients that you don't need to reheat, and why they are better than curly fries and cheeseburgers.
Including healthy fats into your meals is key to help keep your energy levels up, your mood happy and your digestion on point!
Meal-Prep Tip: Eggs are an inexpensive option when trying to put breakfast together. They offer both protein and fat for a double bang for your buck! Once eggs have been cooked, they do not need to be reheated! From egg salads to quiche you can use them in a variety of ways! Make sure to prep extra hard-boiled eggs for a quick afternoon snack!
Recipe Idea: Use them in this Low Carb Sundried Tomato Egg Cup Recipe for a quick on-the-go breakfast idea!
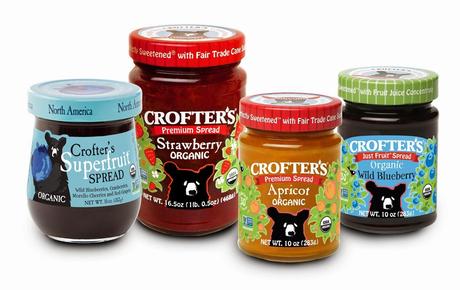
Meal-Prep Tip: Almond butter is a nutritional powerhouse with a wide range of nutrients it provides. Like eggs, almond butter is also an excellent source of heart-healthy fats and protein. For less than $7.00 you can grab a jar of almond butter and create recipes ranging from almond butter & jelly sandwiches to Superfoods Almond Butter Bars! It is one of the lowest maintenance prep foods around and meant to eat cold!
Recipe Idea: Use your favorite almond butter in these Protein Packed Almond Butter Cups for a sweet and healthy afternoon pick-me-up!
Including carbohydrates in your diet is key to keeping you energized as they are one of the main sources of energy for our bodies. Carbohydrates can be made into a variety of recipes and are great because they can be prepped in large batches!
Meal Prep Tip: Oatmeal is incredibly cost-effective and nutritionally dense with the healthy carbohydrates and fiber it provides. From overnight oats in a jar to whole grain savory oat bread, oats can be used in a multitude of meals that do not need to be reheated!
Recipe Idea: Use oatmeal in these Healthy Oatmeal Muffins and sweeten it up with your favorite fruit topping

Meal Prep Tip: Quinoa is one of the most protein-rich carbohydrate sources! Like oats, quinoa can also be batch prepped for lots of easy meals! From sweet cinnamon maple breakfast bowls to cucumber quinoa salads, quinoa runs the spectrum in the ways you can use it - no re-heating required! Use extra quinoa to round out a weeknight meal after your workout!
Recipe Idea: Use quinoa is this creative Baked Quinoa and Spinach Breakfast Bite Recipe!
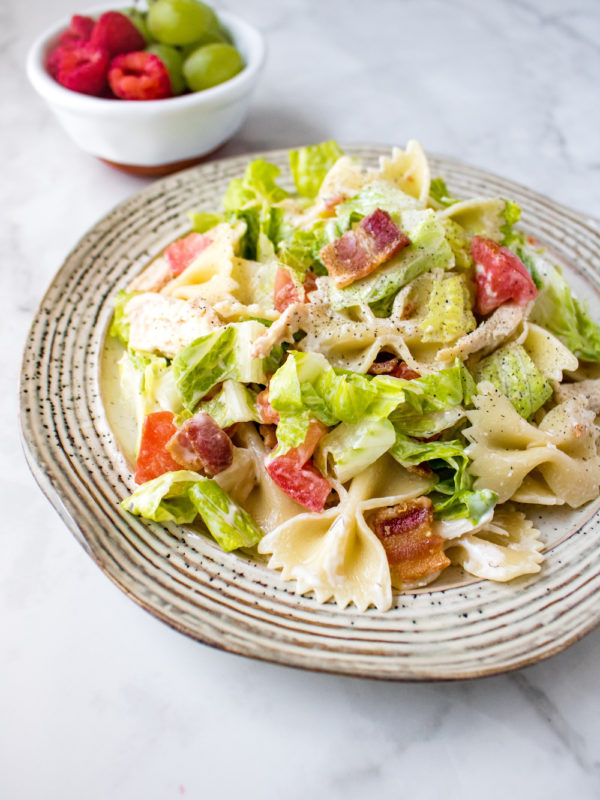
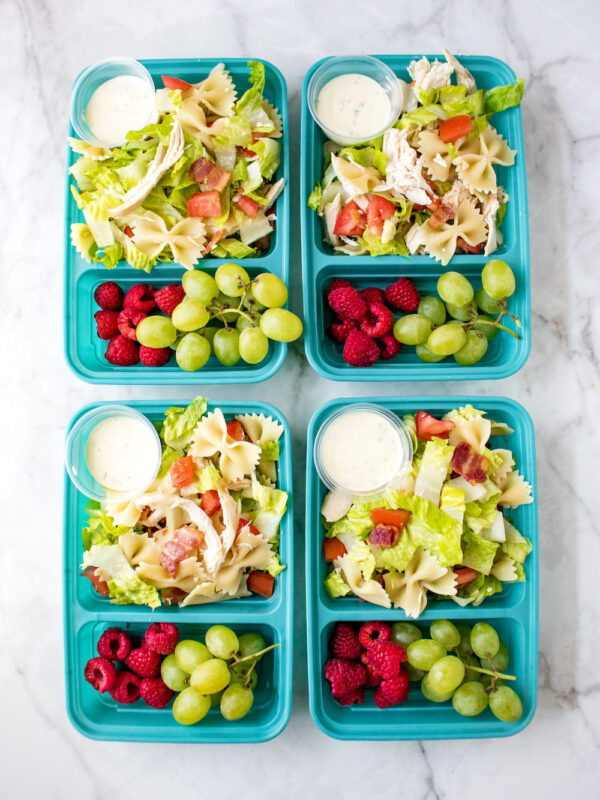
Meal-Prep Tip: Who doesn't love a big hearty bowl of pasta? Pasta is one of those ingredients that are cheap, quick to cook and easy to batch prep. From pesto, pasta & grilled chicken salads to taco pasta salad the flavor profiles for lunches that do not need to be reheated are endless with this carbohydrate!
Food Fact: Dr. Denise Robertson, a senior nutrition scientist from the University of Surrey in England believes if you cook and cool pasta down, the body will begin to treat it more like a fiber than a starch. It does this by creating a smaller sugar rise and feeding the good gut bacteria. Eating cold pasta will also lead to less absorption of calories. (MedicalDaily)
Recipe Idea: Try out whole grain pasta in this Chicken BLT Pasta Salad!
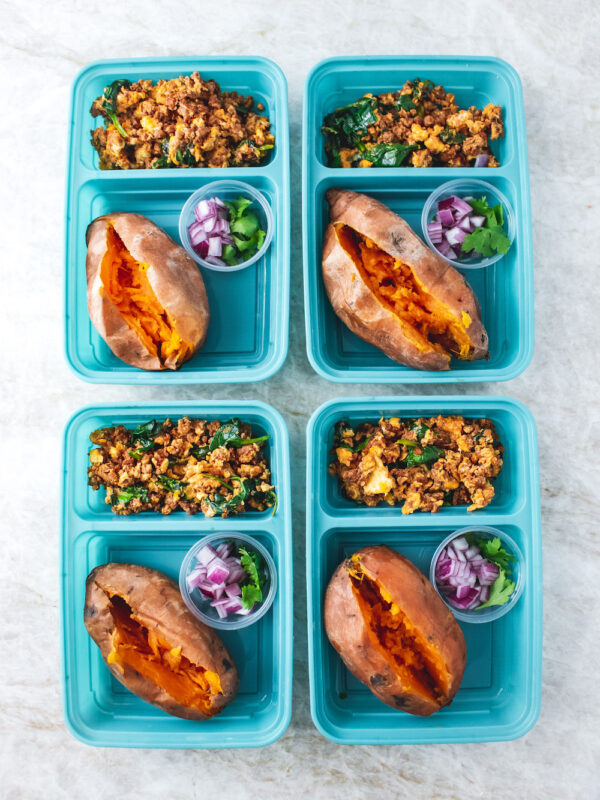
Meal-Prep Tip: Not only are sweet potatoes healthy, but like our other carbohydrate sources they are cheap, easy to prep and give your meals a hint of sweetness! Enjoy sweet potatoes stuffed with all of your favorites like eggs and cooked chicken for breakfast, lunch, dinner or even snack!
Recipe Idea: Use them in this super nutrient dense Southwester Stuffed Sweet Potato!
Meal-Prep Tip: Lentils are low in cost but very high in nutritional bang for your buck providing both fibrous carbohydrates and protein! Cook up a huge batch of lentils and create a filling hummus to use on eggs, in salads or over chicken! They are one of the best options for lunches that don't need to be reheated!
Recipe Idea: Give lentils a try in this Avocado & Lentil Salad recipe!

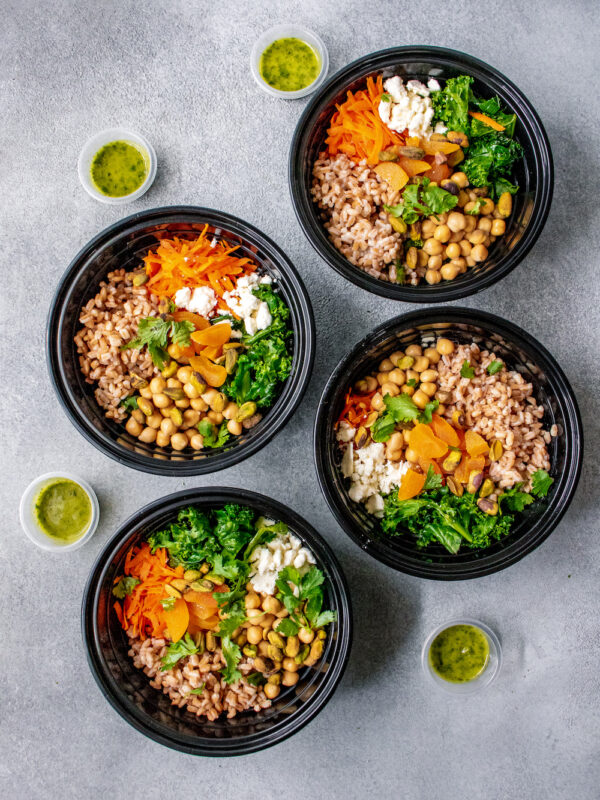
Meal-Prep Tip: Chickpeas, also known as Garbanzo beans add both texture and carbohydrates to your meals. You can enjoy chickpeas in salads, roasted with sweet or savory spices for a snack or even in brownies! They are a cheap yet healthy food that never needs to be cooked. You can eat them as soon as you open the package!
Recipe Idea: Give them a try in this plant-based Moroccan Farro Grain Bowl!
We all work hard in the gym, so ensuring that we get enough protein is key to our muscle growth, tissue repair and the growth of our skin and nails. Include a variety of different protein sources in your meals each week to keep your taste buds happy!
Meal-Prep Tip: Tofu is an excellent source of vegetarian and vegan-friendly protein containing all eight of the essential amino acids. It can be enjoyed heat free from the moment it is opened! From a healthy chocolate pudding to crispy maple and soy tofu sandwiches, tofu is an excellent meal prep choice!
Recipe Idea: Enjoy this cold Banh Mi Sticky Tofu Noodle Bowl for a colorful and nutrient-packed lunch!

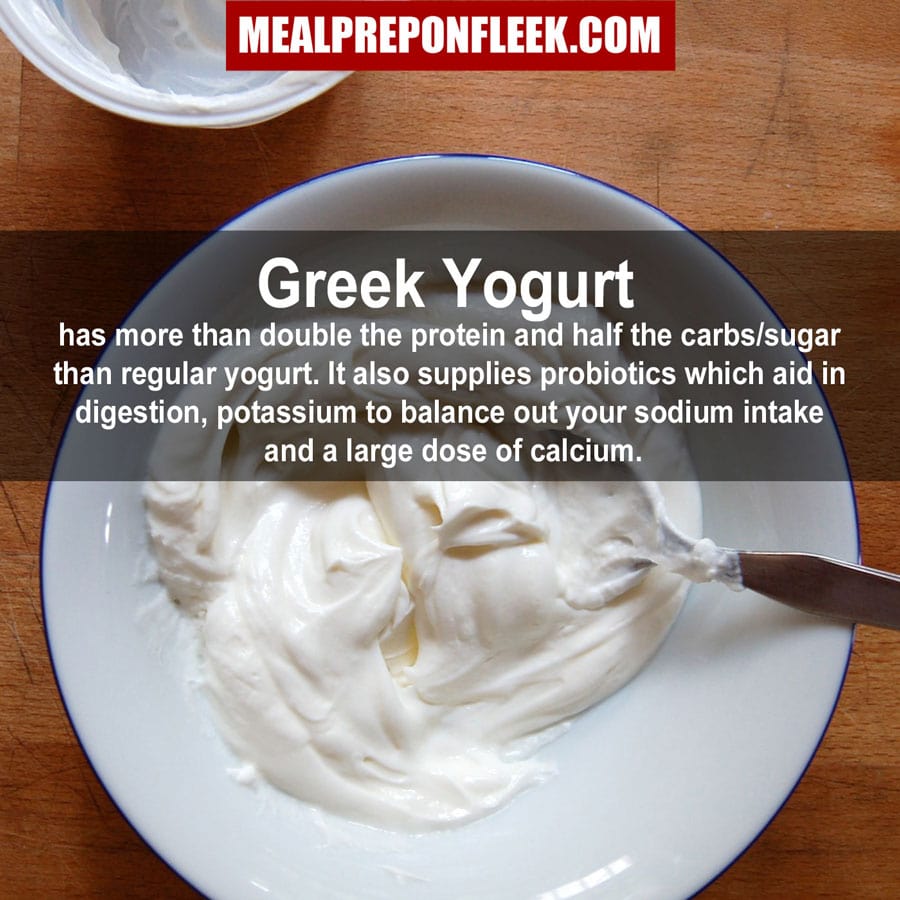
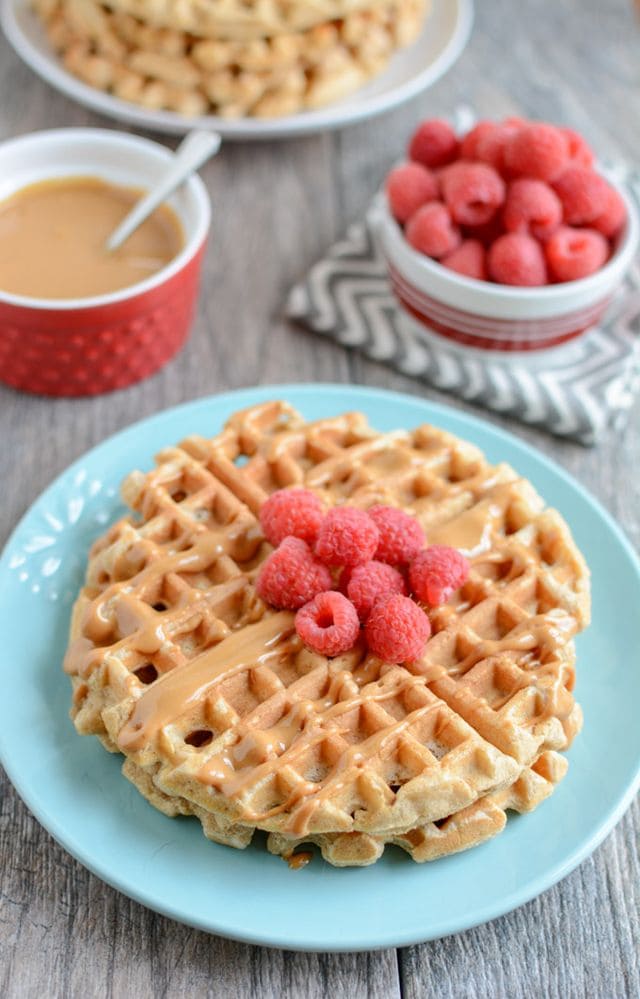
Meal-Prep Tip: Greek yogurt is an excellent meal prep option when looking for items that require no cooking and are high in protein. From yogurt parfaits to Greek yogurt marinades for chicken, this cost-effective food is a must for meal prep!
Recipe Idea: Pack these Whole Wheat Yogurt Waffles for a hearty on the go breakfast! You can always finish them off with a drizzle of peanut butter for an extra nutritional punch!
Meal Prep Tip: Tuna is one of those ingredients that can be brought everywhere! You can toss a pouch in your purse or gym bag for an on-the-go protein source or meal prep it in advance in a spicy tuna wrap or a Thai tuna power bowl.
Recipe Idea: Make these Tuna Stuffed Avocado boats in less than 10 minutes and pack into your meal prep container for a low carb, high protein lunch!

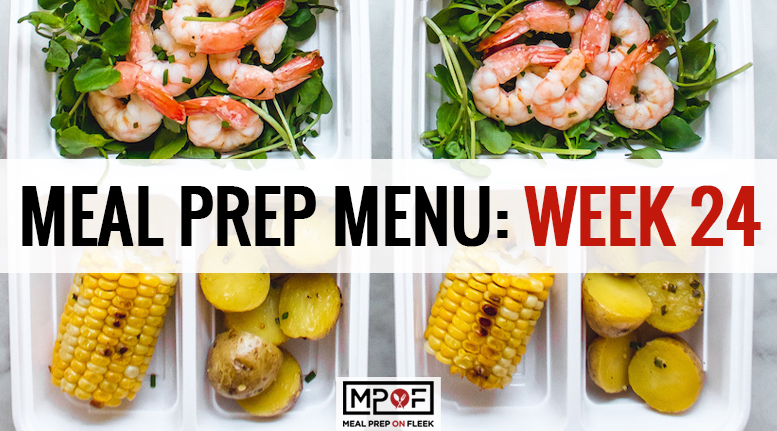
Meal-Prep Tip: Wild caught shrimp are an excellent source of protein that do not need to be reheated! Like tuna, they can be enjoy in a salad, wrap or even spring rolls for a quick, cool lunch!
Recipe Idea: Add shrimp to your lunches this week with a Shrimp Cobb Salad!

Meal Prep Tip: Salmon is an excellent source of protein: A bit higher in cost than some of our other protein choices, but incredibly healthy! From salmon frittatas to salmon caesar salads this protein-packed fish can be enjoyed in a dozen non-reheatable ways! Prep 4-5 pieces for a week full of omega-3's!
Try out regular or smoked salmon in this sweet & savory Salmon Cobb Salad!

Meal-Prep Tip: Chicken is a great low cost, lean protein option for meal prep that doesn't need to be re-heated once cooked! Make a sheet pan full of chicken on meal prep Sunday to create everything from Greek chicken meal prep bowls to buffalo chicken breakfast casserole! All, no re-heating required!
Recipe Idea: Add flavor to your chicken lunches with this 5 minute Chicken BLT Pasta Salad recipe!
Meal Prep Tip: Another favorite, low cost, easy to prep protein option is lean ground beef. From a quick ground beef, potato and egg hash to 20-minute meatballs, ground beef can be made into so many flavorful and large batch meal prep recipes!
Add a lean ground beef burger to your breakfast for a rainbow of color and nutrients!
Meal Prep: Chicken sausage is one of those ingredients that just comes with loads of flavor! With just a few veggies you can create one pan sausage meal prep recipes or stir-fries that make for quick, healthy and easy lunches all week long! No re-heating required.
Recipe Idea: Enjoy all the flavor of sausage in this Sausage and Egg Breakfast Bake while running out the door!
Meal Prep Idea: Because there is always room for bacon! Bacon is a cheap and easy meal prep option when looking to add loads of flavor to a dish! From cold BLT salads to bacon ranch pasta salad a little of this salty protein can go a long way in satisfying your taste buds!
Add just a bit of bacon saltiness to your sweet meal prep muffin recipe with this Apple Bacon Protein Muffin Recipe!

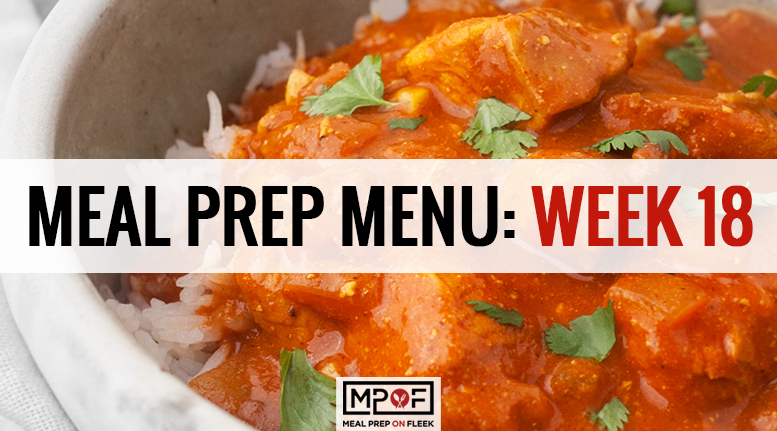
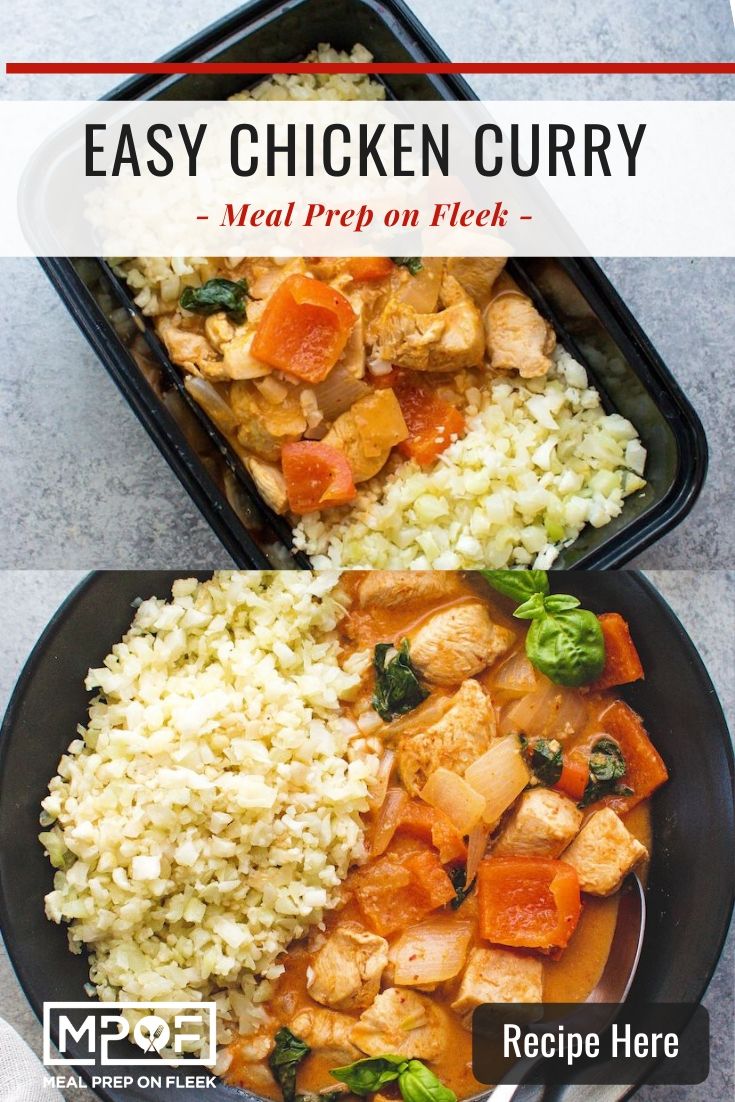
Curry has an interesting history and didn't originate in Thailand as the name Thai Red Curry suggests. There are different variations of curry, like Indian and Japanese. What makes each curry different are the seasonings that give each curry their distinct flavors. Thai red curry always has onions, shallots, chilies, garlic with a more watery consistency from pastes and coconut milk. Whereas Indian curry, for example, is thicker and includes turmeric, coriander, and cumin. Which one is better? That depends on your taste preference, but they're both delicious and warm dishes that you can enjoy all-year-round. Today, we're giving you our recipe for an easy dinner idea that is tangy, satisfying, and creamy. Get ready to enjoy Thai red curry chicken for dinner and possibly lunch!

Enjoy all the spicy flavor of restaurant style curry without leaving the house! This red chicken curry is full of creamy texture, high in protein and rich in antioxidants. Best of all it's served over cauliflower rice for a Paleo-friendly recipe.
Four days. Once the dish cools, store it in an airtight glass or plastic container in your refrigerator. The ideal fridge temperature is below 38 degrees.
Yes, you can freeze our easy dinner idea for enjoyment and convenience for another day! After the curry cools, divide it into portions and put it into labeled freezer bags. Thai red curry chicken will last for 3 months in the freezer.


When we say an easy dinner idea, we mean it! Thai red curry chicken is ready in less than 40 minutes. We pair this curry dish with cauliflower rice for the traditional curry feel that is gluten-free. If you don't have cauliflower rice on hand, use our simple Cilantro Lime Cauliflower Rice meal prep recipe.
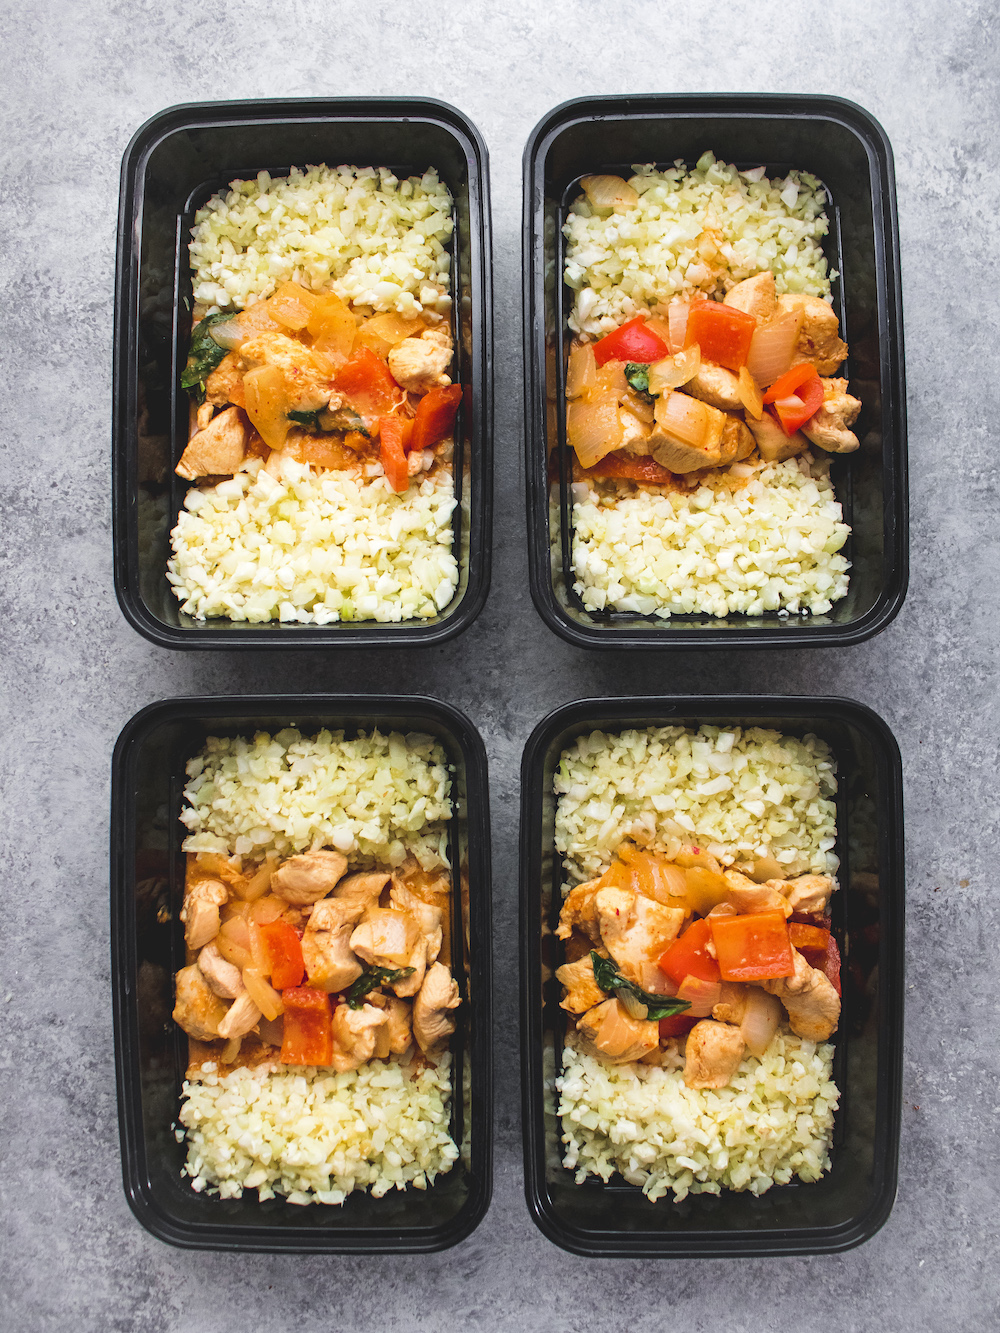
Start making Thai red curry chicken by heating 1 tablespoon of coconut oil in a Dutch oven or other heavy pot. Add your cauliflower rice and sauté for 5 minutes. Place rice into four meal prep containers, a separate bowl, or use another pot to cook the curry. Use the rest of the coconut oil for the curry, starting with the chicken. Brown the chicken for 8 minutes over medium heat. Add garlic, ginger, red peppers, and onion to the chicken. Cook the chicken and vegetables for 5 minutes, then stir in curry paste to coat. Add in coconut sugar, sea salt, and chicken stock. Let the aromatic mixture come to a boil, then reduce the heat to medium for 10 minutes of simmering. When simmering is complete, stir in lime juice, coconut cream, and basil leaves.
You're done! Let the curry cool for a bit before packing away.

Divide cauliflower rice into four MPOF meal prep containers and top with curry.
Chickpea Curry With Jasmine Rice Meal Prep
Vegan Chickpea Curry & Basmati Rice Meal Prep

Garlic, onions, and ginger make Thai red curry so flavorful and distinguished. Feel free to add as much of these aromatic flavors as your heart desires!
Use full-fat coconut milk for a creamier curry.
This recipe is perfect for freezing because there aren't any vegetables. If you want to add vegetables, try broccoli, cauliflower, sweet potatoes, mushrooms, or butternut. If you make the curry with veggies and want to freeze the dish, leave the vegetables undercooked.
You can buy Thai red curry paste or make your own.
Oats are among the healthiest grains on earth.
They’re a gluten-free whole grain and a great source of important vitamins, minerals, fiber and antioxidants.
Studies show that oats and oatmeal have many health benefits.
These include weight loss, lower blood sugar levels and a reduced risk of heart disease.
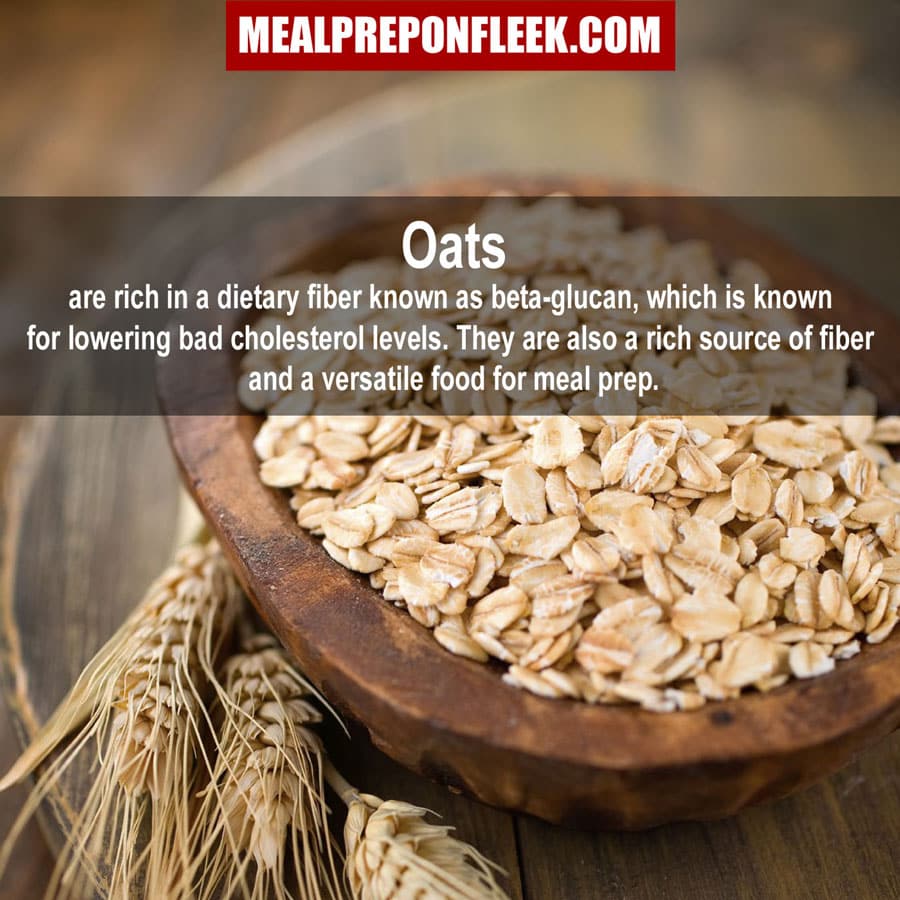
You see... Oats don't just have to be used in oatmeal!
Check out this *Blender Banana Oatmeal Muffin Recipe* from Well Plated!
_
YIELD: 12 muffins COOK TIME: 15 minutes TOTAL TIME: 40 minutes
_
Ingredients:
2 cups oats (quick cooking or old fashioned)
2 large very ripe bananas
2 large eggs
1 cup plain Greek yogurt
2-3 tablespoons honey*
1 ½ teaspoons baking powder (I prefer aluminum free)
½ teaspoon baking soda
½ teaspoon pure vanilla extract
⅛ teaspoon kosher salt
Up to ½ cup mix-ins: chocolate chips (mini or regular), chopped dark chocolate, nuts, dried cranberries, or blueberries (fresh or frozen)
Directions:
1.Preheat the oven to 400 degrees. Lightly grease a 12-cup standard muffin tin or line with paper liners. If using liners, lightly greasing them as well. Set aside.
2. Place all ingredients but the mix-ins in a blender or the bowl of a food processor fitted with the steel blade: oats, bananas, eggs, Greek yogurt, honey, baking powder, baking soda, vanilla extract, and salt.
3.Blend or process on high, stopping to scrape down and stir the ingredients once or twice as needed, until the batter is smooth and the oats have broken down almost completely, about 3 minutes.
4. By hand, stir in the mix-ins. If the batter is warm from the appliance’s motor, the chocolate chips may melt and swirl as they are stirred. If this bothers you, let the batter cool for 10 minutes before adding them.
5. Divide the batter between the prepared muffin cups, filling each no more than ¾ of the way to the top. Sprinkle with additional chocolate chips or nuts as desired.
6.Bake for 15 minutes, until the tops of the muffins set and a toothpick inserted in the center comes out clean.
7. Place the pan on a wire rack and let the muffins cool in the pan for 10 minutes. Remove from the pan and enjoy!
If you have any questions or need ideas for alternate swaps, head over to our Facebook Group to ask or email me at [email protected]!
*Please note that any changes to ingredients will alter the macros on each recipe.
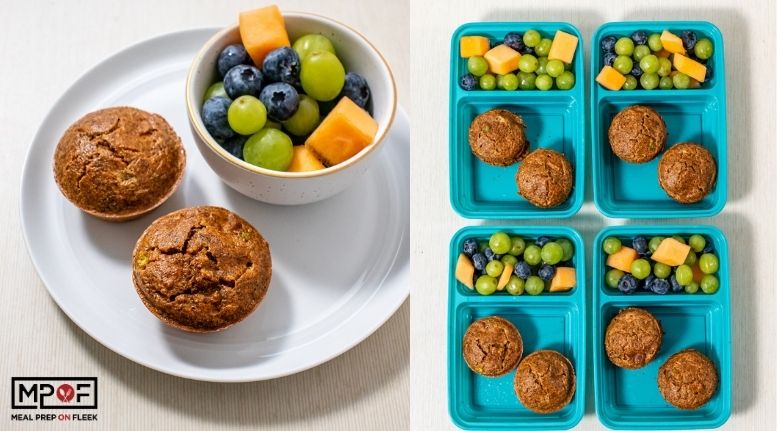
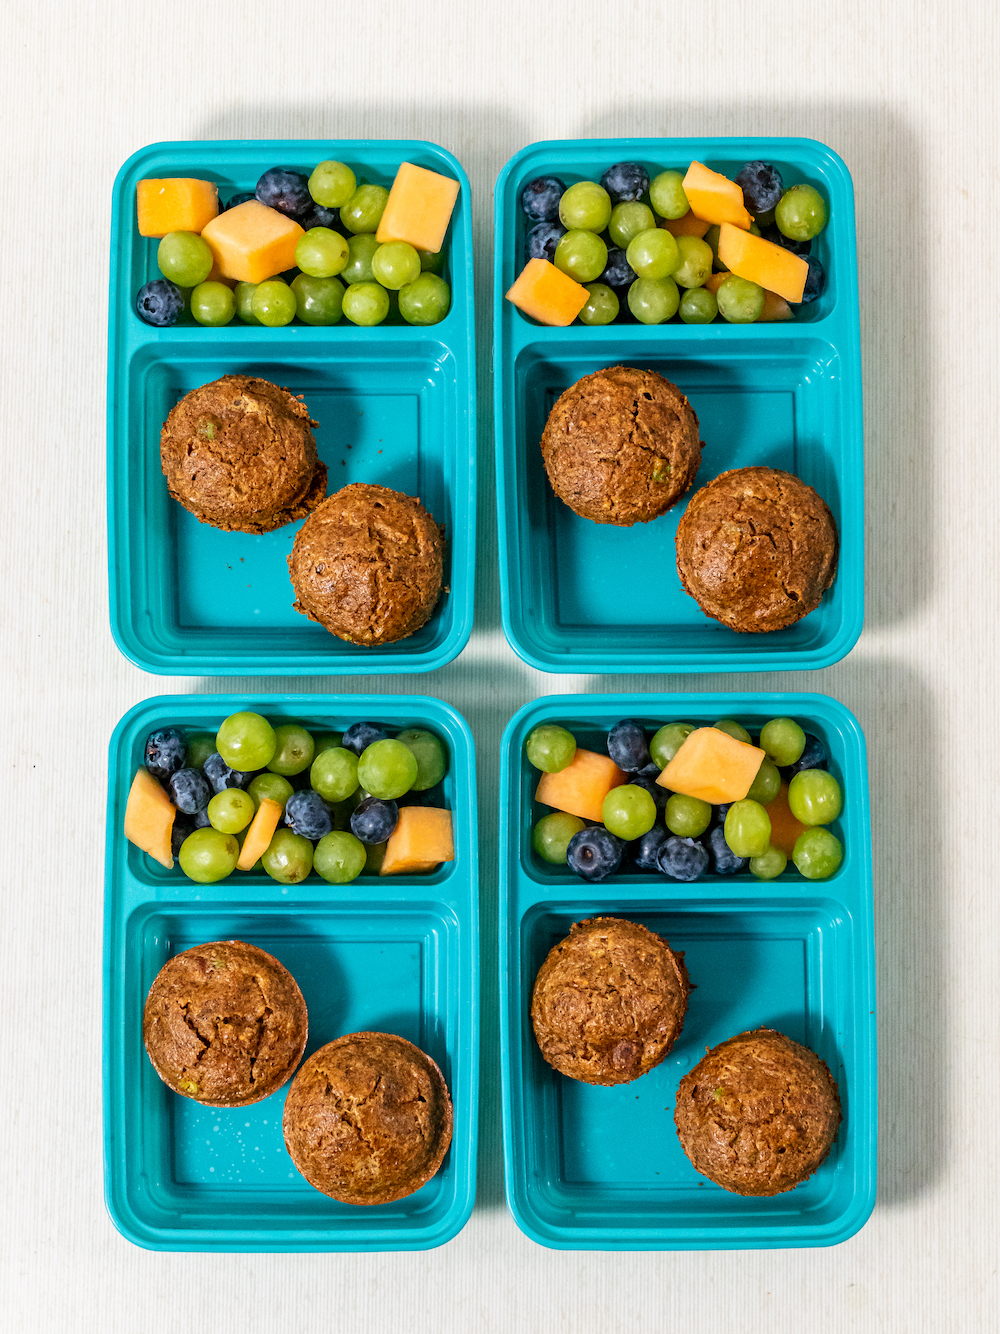
If you are a breakfast person and you’re looking for the most hearty morning recipe, these savory breakfast muffins are what you’re looking for! We love it when you enjoy gluten-free and no grain muffins that are super easy to make. You can relish our savory muffins for either breakfast, brunch, or as a snack. These grab-and-go muffins will keep you full, with breakfast sausage and eggs in every bite and the texture of a muffin. We use spice, almond flour, and flax breading in this gluten-free recipe for easy preparation.
By the way, did you know that almond flour is incredibly nutritious because it’s packed with magnesium and Vitamin E, two essential health elements for the body? Ok, enough of the science talk. Let’s eat!
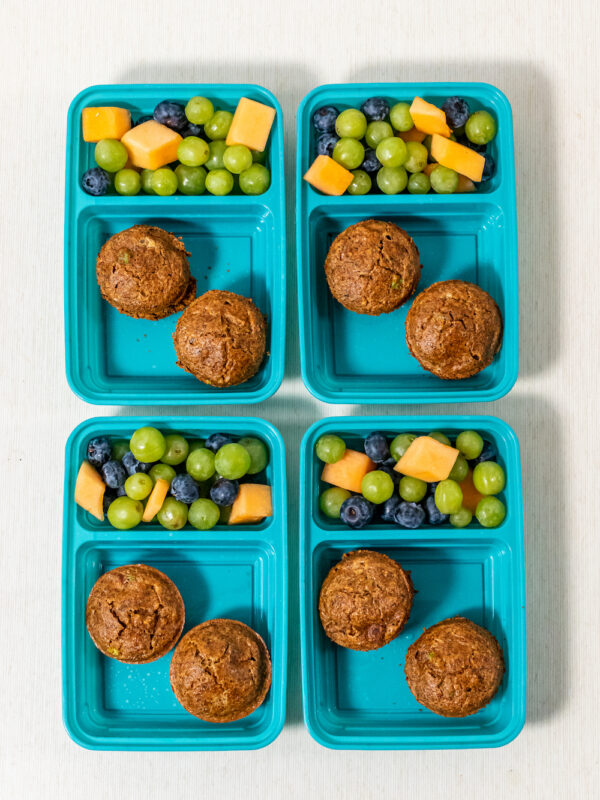
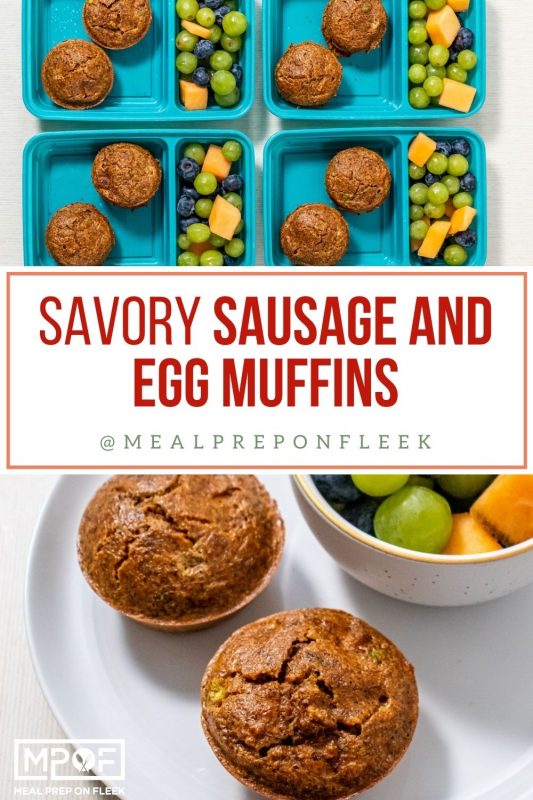
These grab and go muffins will keep you full with breakfast sausage and eggs in every bite and the texture of a muffin! This gluten-free recipe uses almond flour and flax breading with built-in spice for easy preparation!
Savory breakfast muffins can last up to one week in the refrigerator and one day at room temperature. Use properly sealed airtight containers or plastic storage bags to keep them fresh.
If you’re looking for sturdy and affordable meal prep containers, learn more about our Good Cook® Meal Prep containers.
Yes! These savory breakfast muffins freeze perfectly. After baking, ensure the muffins cool completely. Place them on a large cookie sheet and pop them in the freezer for about one hour. When they are completely frozen, transfer them into a resealable airtight bag. Don’t forget to label the bags before storing your meal prep breakfast, brunch, or snack in the future. The muffins will last in the freezer and maintain their freshness for 1-2 months.

For Serving
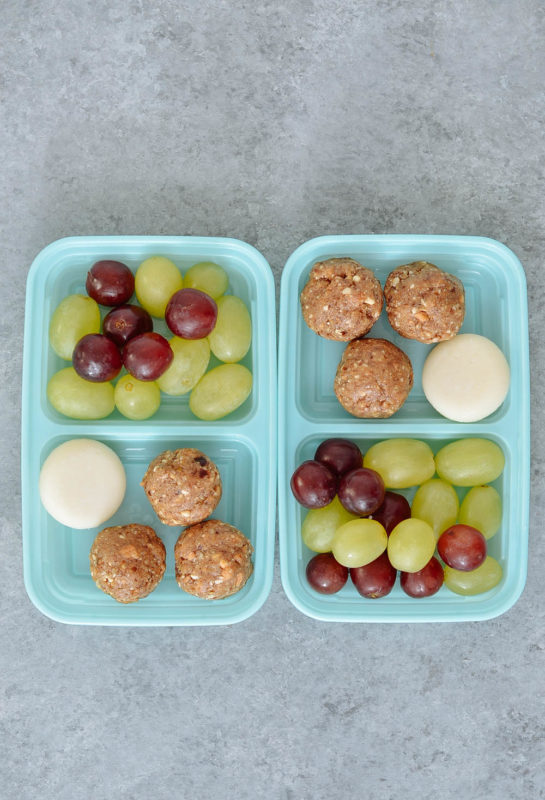
Apart from being a quick fix that you’ll enjoy in under 20 minutes, this meal prep breakfast recipe will leave you with a delectable wow flavor in the mouth! Are you ready to take back breakfast?
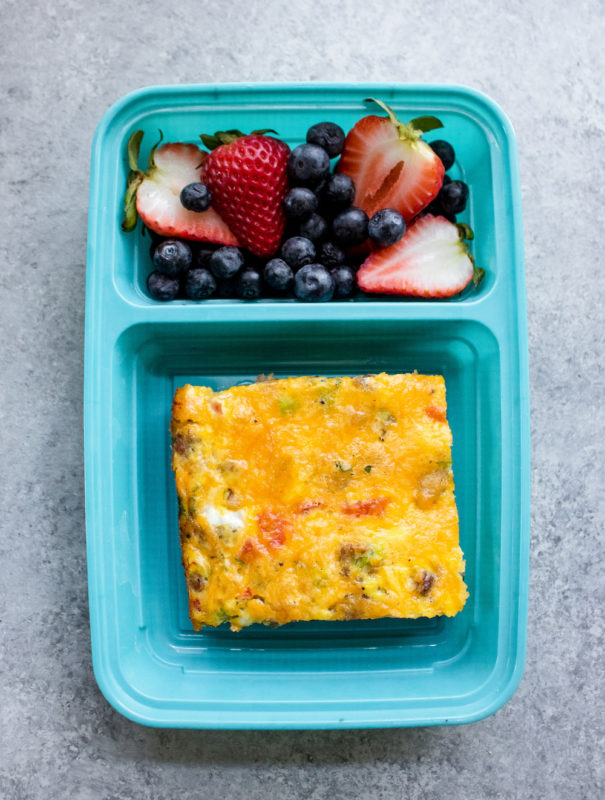
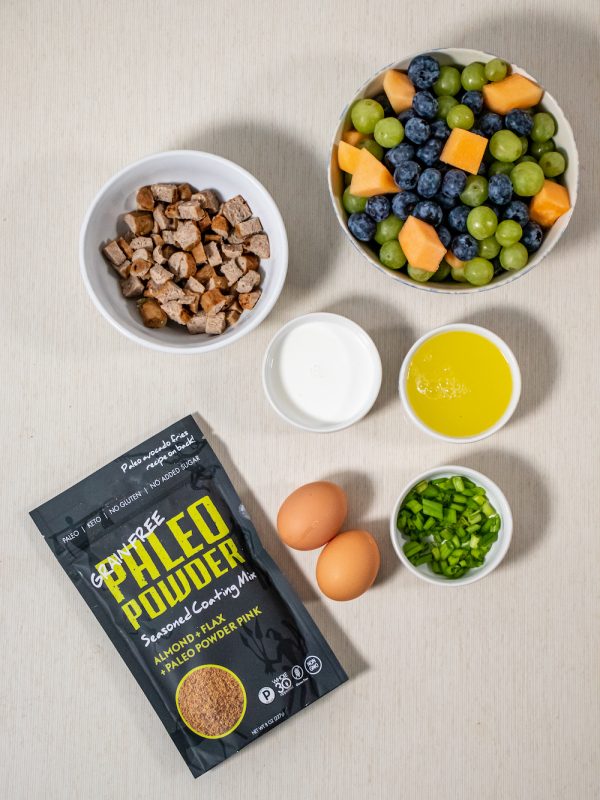
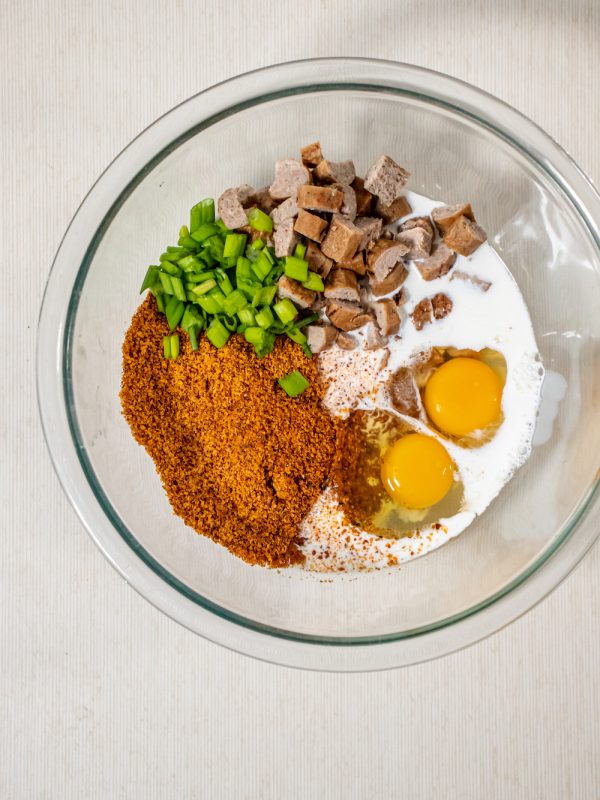
Gather all ingredients, then preheat the oven to 350 degrees Fahrenheit. Then grab a muffin tin and spray it with cooking spray. Now it’s time to prep! Put the eggs, almond powder, flax breading, sausages, egg whites, unsweetened milk, and green onions in a medium mixing bowl. Whisk all the ingredients so they can combine evenly for a savory and creamy batter. Then scoop some muffin batter into the greased tin and bake for 30 minutes in the preheated oven. When they’re done baking, allow the muffins to cool at room temperature for 10 minutes. Portion your muffin and fruits in the compartment teal containers, and Voila! You’re good to enjoy a ready meal each week.

Use our Good Cook® dual-compartment meal prep containers when portioning your savory breakfast muffins meal. Put two muffins in each of the four large compartments, then divide the fruit between the smaller compartments.

Low Carb Cinnamon Apple Muffins for brunch or snacks
Peanut Butter Chocolate Muffins for breakfast that puts smile on your face.
Paleo Maple Pecan Banana Bread Muffins are quick and simple gluten-free recipes you can enjoy at any time of the day.
Broccoli Rice Red Pepper Egg Muffins are the best way to enjoy a muffin and veggie combination at the same time.
Healthy Oatmeal Muffins are definitely worth trying.
Cinnamon Roll Muffin Meal Prep for cinnamon roll lovers!
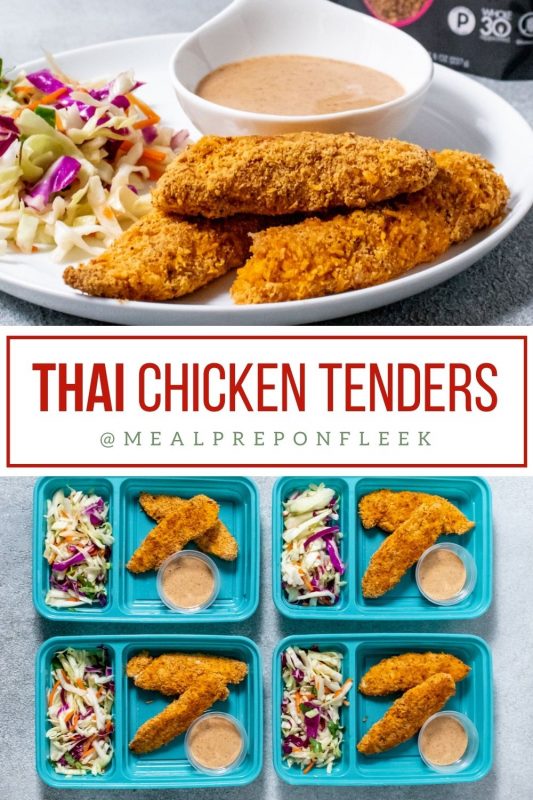
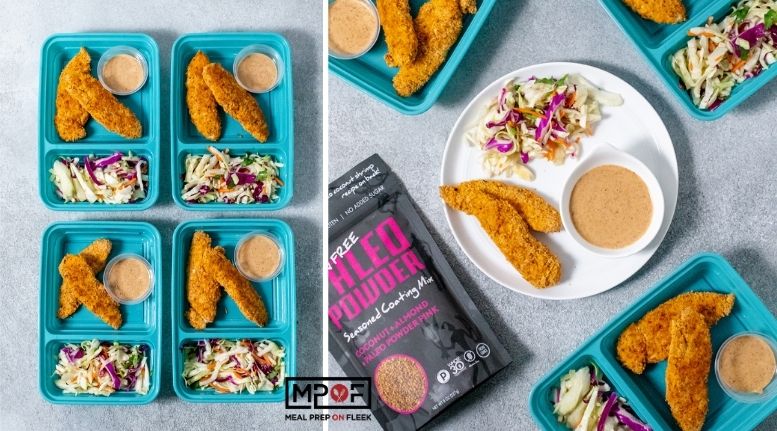
Have you heard of Thai chicken fingers? Chicken tenders is a common fast-food or takeout meal you see at the office. They’re crispy, succulent strips of meat that go with French fries or a salad, or you can eat them alone with dipping sauces. If you’re a fan of chicken tenders, give them a twist with our Thai Chicken Tenders Paleo meal prep recipe. You can never go wrong with this Thai chicken recipe because the outcome is nothing short of a great dish. The Paleo powder crunch takes the flavors to an entirely new level. We like offering a Paleo meal prep recipe that people of all ages enjoy. The spices and almond dipping makes the entire dish phenomenal.
Skip the drive-thru and make these oven-baked chicken tenders with an Asian twist! Coated in a spicy seasoned mix of almond and coconut flours and served with a cool, crunchy slaw and creamy dipping sauce. It offers a perfect blend of health indulgent!
Fun fact: Almond butter has monounsaturated fats, which is good for the heart. It lowers the bad cholesterol and increases the good cholesterol. Coconut milk, on the other hand, helps maintain a healthier body. Good for you and delicious!
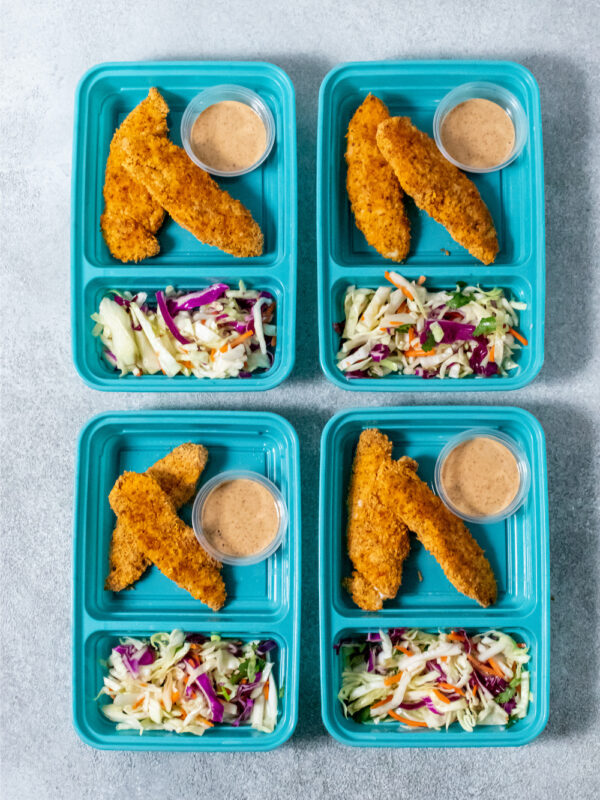
Skip the drive-thru and make these oven-baked chicken tenders with an Asian twist! Coated in a spicy seasoned mix of almond and coconut flours and served with a cool, crunchy slaw and creamy dipping sauce, it’s the perfect mix of healthy and indulgent!
The Thai chicken tenders can last from 3-4 days in the refrigerator. Use a shallow airtight container to ensure they maintain the initial flavors and freshness.
Thai chicken tenders freeze well, and they can have the same good flavor for about 1-2 months in the freezer. Use our meal prep containers when storing away leftovers or meals. You can also use heavy-duty freezer bags, just make sure they’re labeled before storage. Don’t freeze the almond dipping sauce because when thawed, it becomes watery, runny, and bland.You’ll have to make a fresh batch.
After thawing and using meal portions, you can leave extras in the refrigerator for another three days. However, it would be best if you consumed chicken thawed at room temperature immediately.

For Chicken Tenders
For Asian Slaw
For Creamy Almond Dipping Sauce
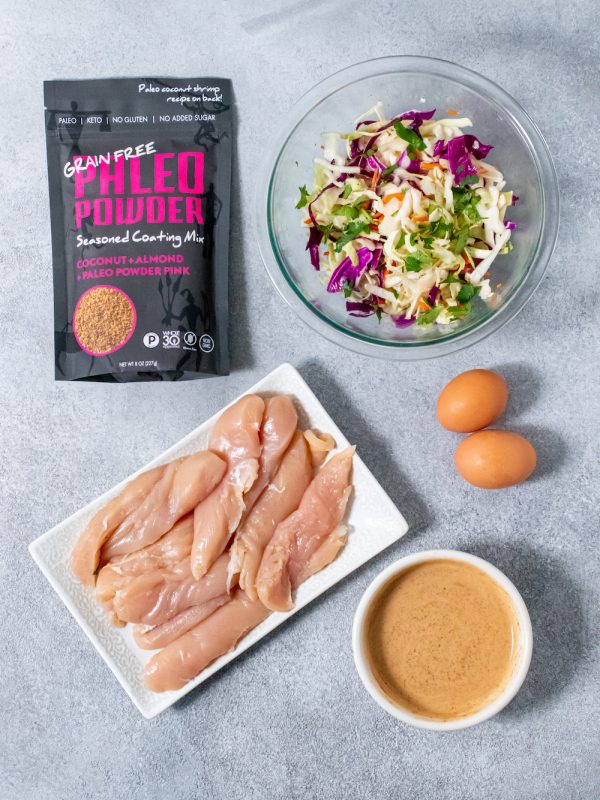
Making our Thai chicken tenders Paleo meal prep recipe is easy, and it looks so pretty afterward. It looks really good, but is done in less than one hour. One thing that’s important in meal prep is accessibility and convenience. We want you to enjoy exotic flavors while employing a healthy approach without stress and confusion. With that said, gather all the ingredients and prepare the oven, then boom, you’re ready to go!
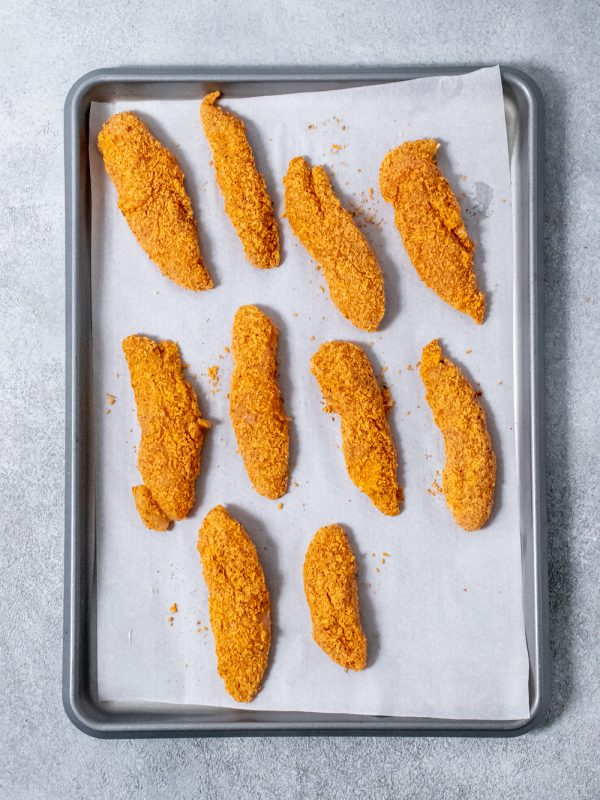
First, preheat the oven to 350 Fahrenheit and line a medium baking sheet with parchment paper. Pat the chicken tenders dry using a paper towel. Then whisk the eggs in a bowl, and add Paleo powder to a second shallow bowl. Dip each chicken tender in the egg wash while shaking off excess wash, then dredge in the Paleo powder to coat the tenders completely. Place them on the baking sheet and bake for 30-35 minutes. As the chicken tenders cook, make the coleslaw and dipping sauce. All that’s left is plate, store, and enjoy!
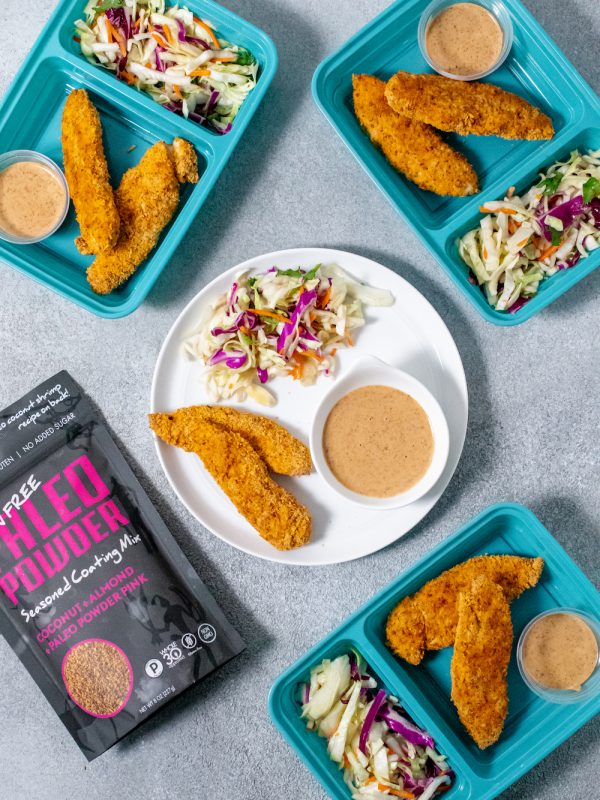
Our Good Cook® meal prep container can adequately store your Thai chicken tenders. Put the chicken tenders in the large compartments of 4 teal meal prep containers. Put the Asian slaw in the small compartments and divide the almond dipping sauce into small cups. Put the sauce cups with the chicken tenders.

One Pan Paleo Sticky Sesame Chicken Thighs
Whole30 Baked Buffalo Chicken Casserole
Buffalo Chicken Stuffed Pepper Meal Prep
And there’s a lot more! Search “chicken paleo” in the search bar at the top of the page.
Other tips for making Thai Chicken Tenders with Creamy Almond Dipping Sauce: