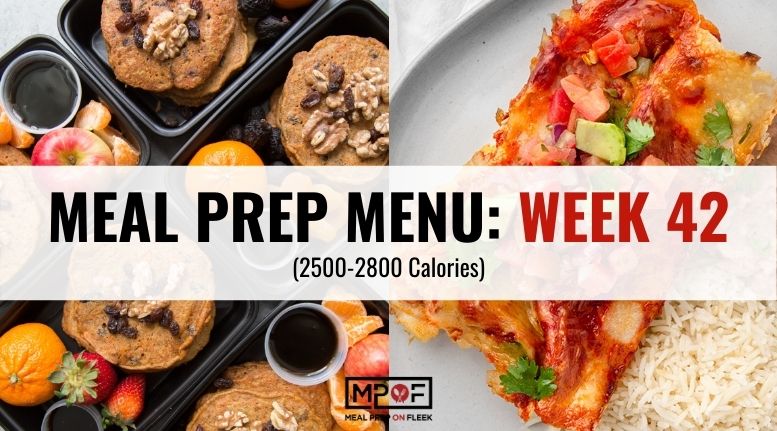
Meal Prep Menu: 2022 Week 9
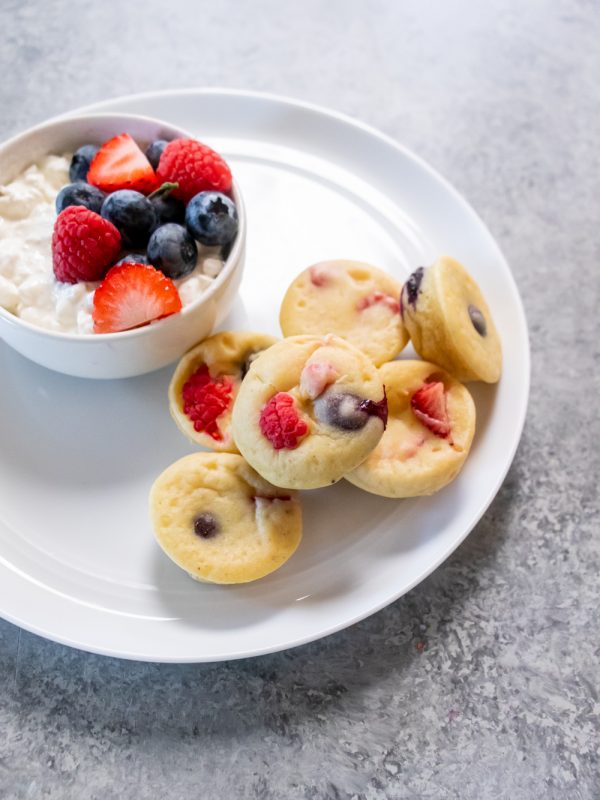
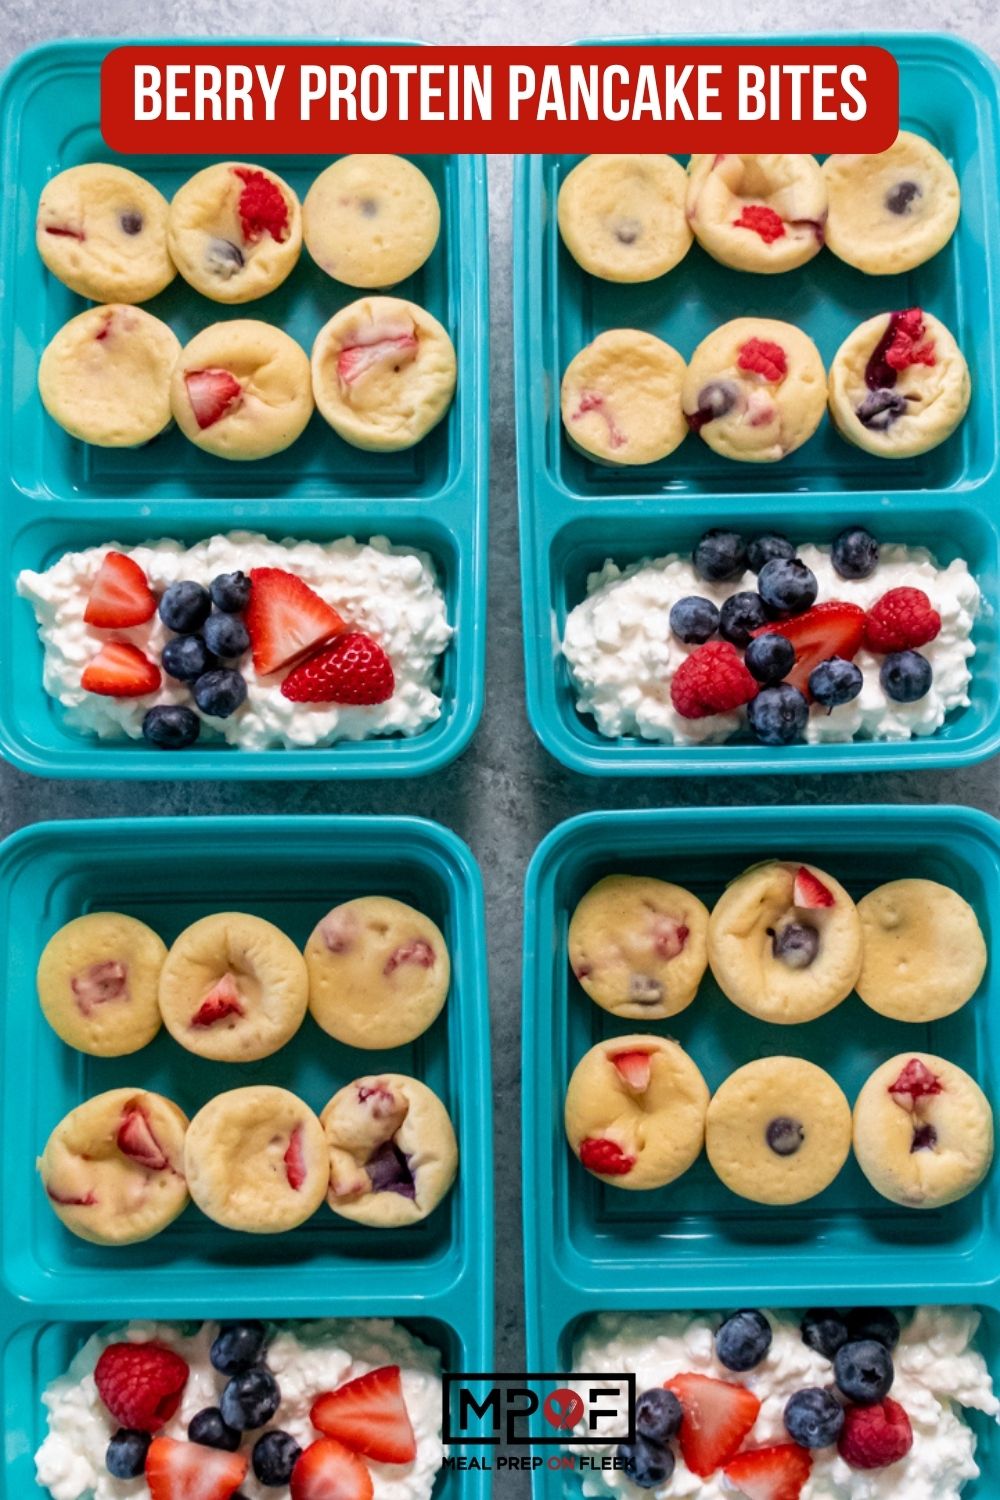
Berry Protein Pancake Bites
Thank you to Now Foods for sponsoring this Berry Protein Pancake Bites recipe post, and thank YOU for supporting the brands that help make Meal Prep On Fleek possible. All opinions are our own.

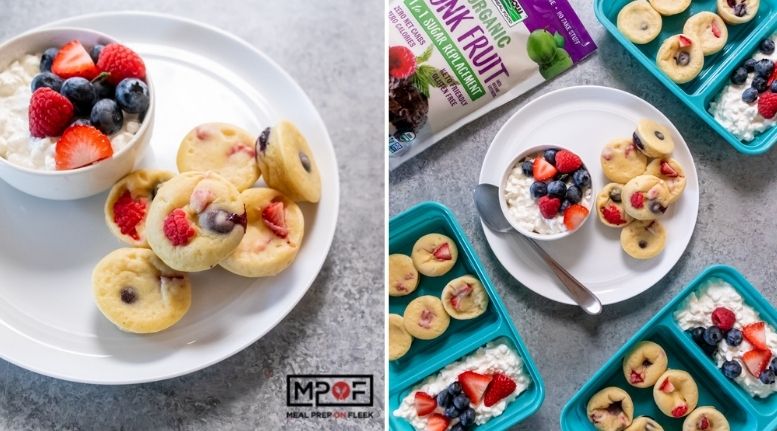
Get a dose of protein with these protein bites made in mini muffin cups for a perfectly portioned breakfast. They are great for on-the-go munching and filled with three berry flavors for a pop of fruity flavor in every bite.

Everything is more fun in mini size, right? That's why these Berry Protein Pancake Bites not only make breakfast fun and delicious but nutritious and extra easy to prepare! Not only did I add a punch of protein to these pancakes, but they have very little sugar, thanks to the monk fruit sweetener.
If you're new to Meal Prep On Fleek, then you haven't seen or read about all the reasons why I love using the NOW Foods Organic Monk Fruit Sweetener. Let me give you a quick rundown! My favorite reason is that it contains no sucralose, aspartame, or other funky additives that give you an icky aftertaste in your mouth. It's also perfect for a keto, diabetic, vegan, gluten-free, etc., etc., etc., diet. 😉 If it's a diet you follow, then you can enjoy this sweetener!
So, now that I've convinced you to use the monk fruit sweetener in any recipe that calls for a dry sugar moving forward, we can proceed with our recipe! 😋
Pancakes are no longer just for weekends! These perfectly poppable little bites make eating on the go easy for both kids and adults alike. Plus, with the added protein, they are sure to sustain you until lunch!

How To Make These
I used gluten-free flour and whey protein powder. However, if desired, you can use regular AP flour, oat flour, etc., and sub the protein powder with additional flour. I haven't tested these with a vegan protein powder, but if you give it a try, let me know how it turns out!
To keep these low in sugar, the monk fruit sweetener is a must!
Make sure not to overmix your batter here! If they are overmixed, the protein pancake bites will get a little chewy/rubbery. Instead, you want to mix them just until everything is incorporated together. Then, gently fold in your berries!
Customizing
One of the things I love to do when meal prepping is to make sure that the recipes are easy to customize. We all have different tastes, ingredients on hand, and budgets, so making recipes customizable makes a recipe a win for all of us. For example, I went with mixed berries, but you could use any berries or add in things like chocolate chips, nuts, bananas, shredded coconut, etc.

For Serving
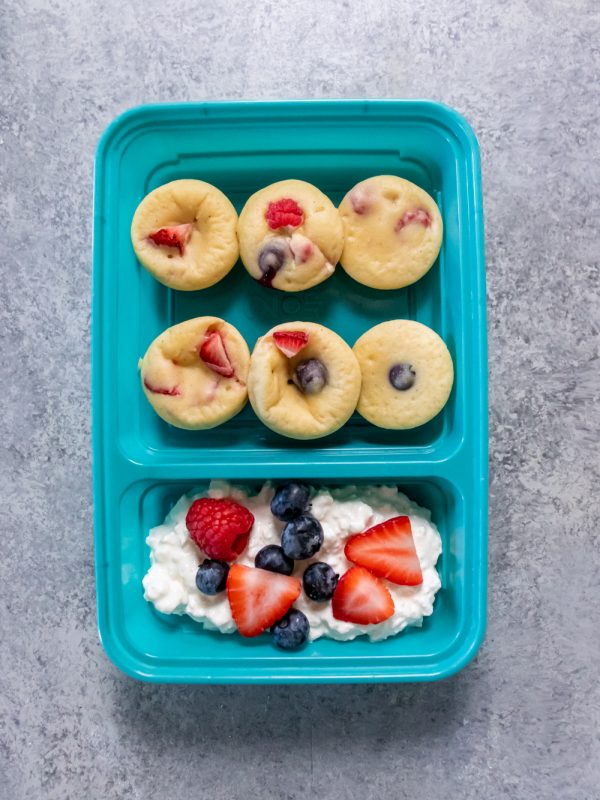
I wanted a bit more protein alongside my Berry Protein Pancake Bites, so I served these with cottage cheese and more fruit. You could leave the cottage cheese plain or sweetener with liquid monk fruit sweetener. Lately, the new caramel liquid monk fruit sweetener has been my go-to for everything!
Instead of the cottage cheese, you could serve these with scrambled eggs and sausages or yogurt and peanut butter or maple syrup for dipping!
Berry Protein Pancake Bites Ingredients:
- 1 cup 1:1 gluten-free flour (or regular AP flour)
- ½ cup vanilla whey protein powder (can sub with additional flour)
- ¼ cup NOW Foods Organic 1:1 Monk Fruit Sweetener
- ½ teaspoon baking powder
- ¼ teaspoon salt
- 1 cup whole milk
- 1 large egg
- ½ cup chopped mixed berries (blueberries, strawberries, raspberries)
For Serving
- 1 cup mixed berries
- 3 cups low-fat cottage cheese


P.S - If you're looking for more ways than just these Berry Protein Pancake Bites to use the monk fruit sweetener, check out these other recipes! We've got you covered with both sweet and savory options!

Ingredients
- 1 cup gluten-free flour
- ½ cup vanilla whey protein powder
- ¼ cup NOW Foods Organic 1:1 Monk Fruit Sweetener
- ½ teaspoon baking powder
- ¼ teaspoon salt
- 1 cup whole milk
- 1 large egg
- ½ cup chopped mixed berries blueberries, strawberries, raspberries
For Serving
- 1 cup mixed berries
- 3 cups low-fat cottage cheese
Instructions
- Preheat the oven to 350ºF and lightly grease 24 mini muffin tin cavities with butter or coconut oil. In a medium mixing bowl, whisk together flour, protein powder, monk fruit sweetener, baking powder and salt. In a separate small bowl, whisk together egg and milk until just combined.
- Stir wet ingredients into dry until blended and smooth. Fold in berries.
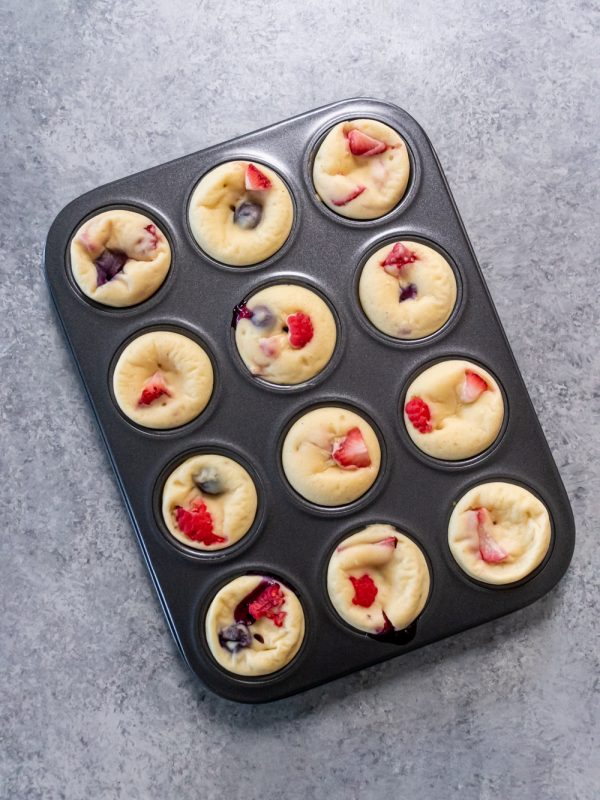
- Fill muffin cavities with batter. Top with additional fresh berries if desired. Bake for 16-18 minutes. Cool pancake bites in tins for 15 minutes.
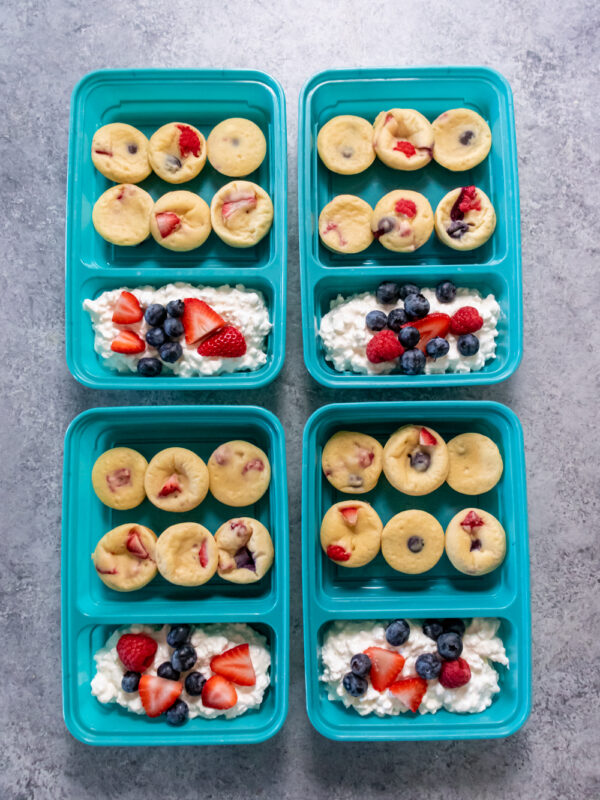
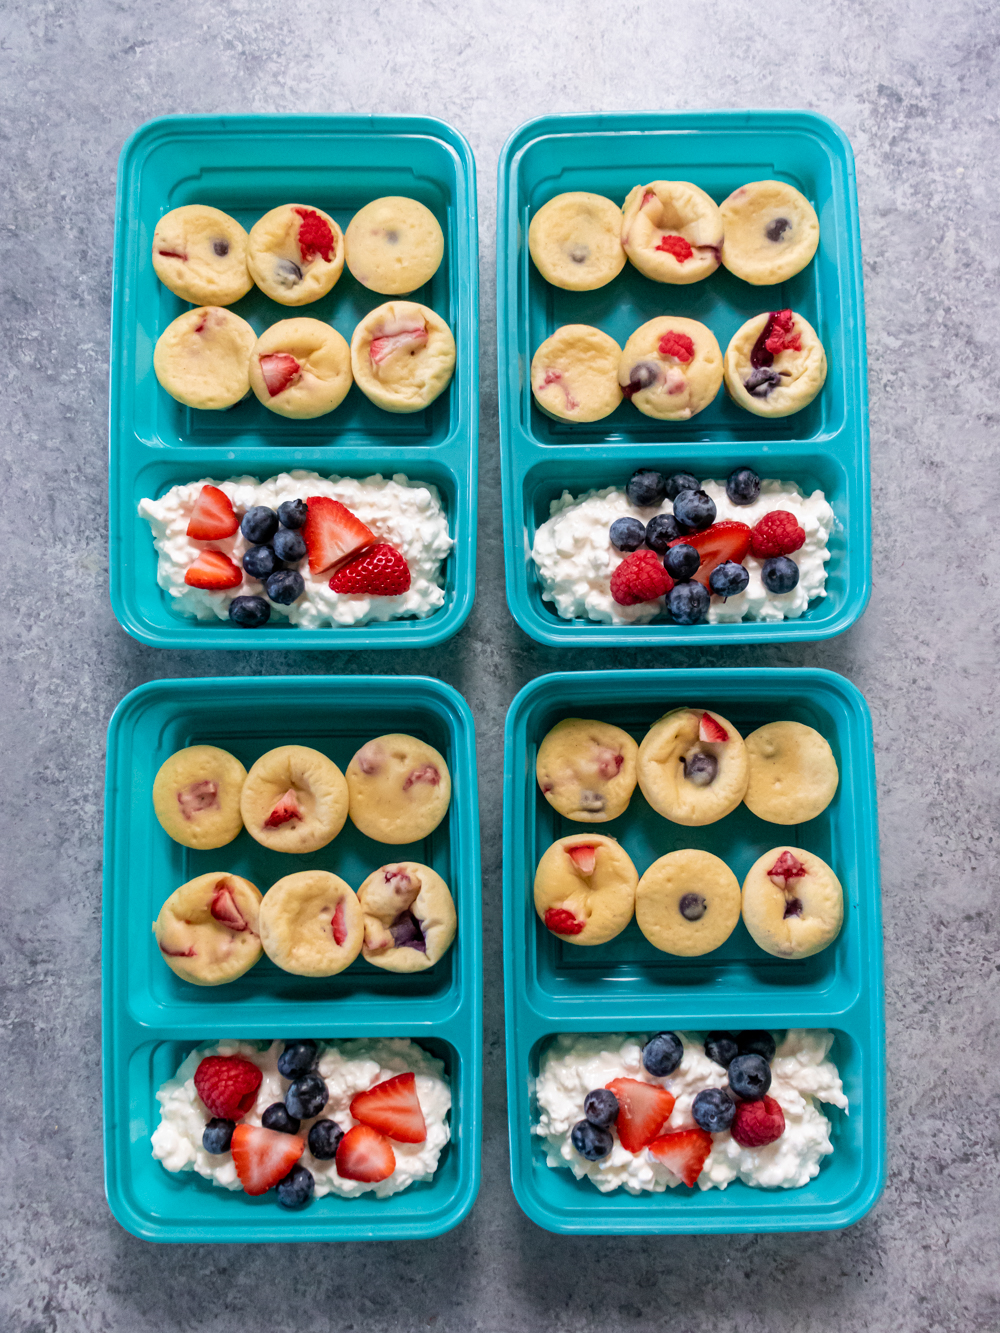
- Gently remove pancake bites and place 6 in large compartments of 4 teal meal prep containers. Add cottage cheese to small compartments and top with berries.
Notes
Nutrition

Meal Prep Menu: 2022 Week 8
The Best Plastic Meal Prep Containers
MPOF's Guide To The Best Plastic Meal Prep Containers
Meal prep can be a great way to save precious time in your daily. It's also a no-brainer for lunches on the fly. We understand that it can be a bit stressful thinking about meal prep for an entire week, especially if you're just getting started, but when you get into the groove, you'll realize how easy it is and how much time it actually saves. No more worrying about what you're gonna feed the kiddos because you have it all prepped for the week. Meal prepping helps you stay on track with your healthy eating goals for you AND your entire family.
One of the most important elements of meal prepping is naturally one of the things that make it possible at all- finding the best meal prep containers! There are endless meal prep containers to choose from, many of them being glass and others being plastic. Not only that, but once you start looking at plastic meal prep containers, do you choose the disposable, semi-reusable, or long lasting? What size meal prep container would be best? If it's too big, your portions could be way out of wack... and even if your portions are right, but you put the food into a meal prep container that is too large for the portions, your mind won't trigger that your body is full and curve your hunger. Yikes!
View this post on Instagram
Benefits of Plastic Meal Prep Containers:
- Durable
- Cheaper than glass
- Ideal for traveling
- Easily disposable
- Will not shatter if broken
- More convenient size options to choose from
Cons of Plastic Meal Prep Containers:
- May contain BPA or other chemicals (most plastic containers are BPA free these days)
- Not as heat resistant as glass
- Shorter longevity versus glass
- May be porous, leading to bacterial growth
- Can warp over time which leads to leakage and decreases the time your food stays fresh
- Not ideal for hard scrubbing or stuck-on foods
Can Plastic Meal Prep Containers be reused?
Yes and No... If you are using the cheap plastic meal prep containers, they will warp and crack after one use if you wash them in the dishwasher. The Meal Prep on Fleek meal prep containers are durable and meant to be reused. They are plastic, but they are crafted for quality and durability so you will definitely be able to reuse them. This may lead you to ask, are meal prep containers safe?
Again, rest assured that our meal prep containers ARE SAFE! You will want to make sure that if you're purchasing other containers, that they are BPA free so that there is no chance of chemicals absorbing into your food when you put them in the microwave.
Now...
Because there are so many options, we've compiled you this list of our favorite plastic meal prep containers, plus real Amazon reviews, to help make your meal prepping journey more intuitive, without the potential hazards of glassware.
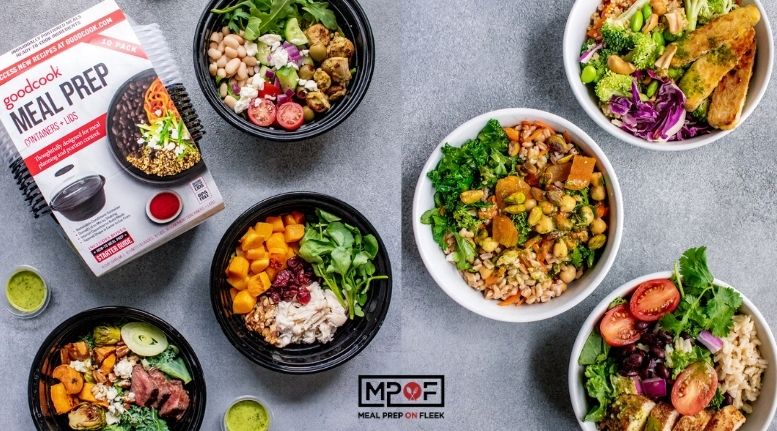
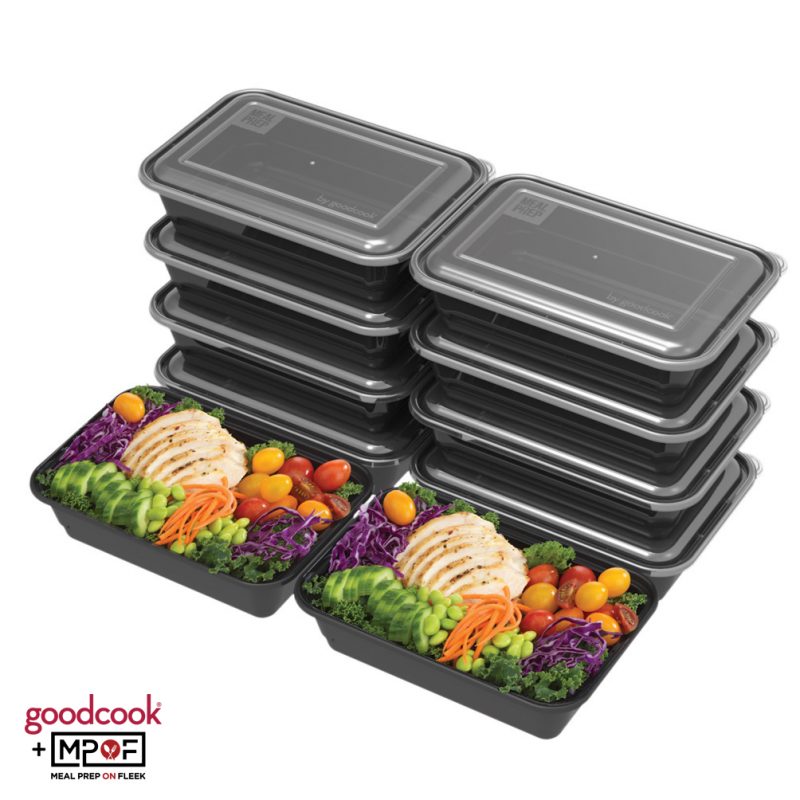
So, here is the deal... this is a little self-serving, but we are stoked to be able to say that we have helped produce the best meal prep containers on the market for meal prepping. We worked for over a year with GoodCook to produce a durable plastic meal prep container that is not going to leak and takes meal prep portions (and macros) into consideration.
Features of the new MPOFxGoodCook Meal prep containers include:
. Lightweight & easy to transport
. Ideal for an on the go lifestyle
. Great for make-ahead meals, batch cooking/freezing, individually portioned meals, and ready-to-cook ingredients
. Perfect set for the week with 10 units (10 lids and 10 bases)
. Bonus starter guide included with each set that contains recipes and tips for the item
. Allow you to plan healthy, time-saving meals
. Traditional meal prep shapes and sizes plus unique shapes and sizes not found in the market
. Bases nest into the lids for easy stacking
. Translucent lids to see the food you are storing
. Easy-find color-coded container and lid
. Multi-compartments to separate flavors and sides
. Containers include helpful volume measurements embossed in the container bottoms
. Patented sidewall design adds additional structure to the side wall for greater product stability over straight lines provide average support**
. Reusable up to 10X
. Top rack dishwasher safe
. Microwave safe
. Freezer safe
. BPA Free
Single Compartment Meal Prep Container - 10 piece

These single compartment meal prep containers are a simple and versatile solution to a huge number of meal prep needs. Not only are they deep enough for a full one-pan meal or stir fry, but they also stack neatly. These meal prep containers are microwavable, freezer and dishwasher safe as well, to add to the benefits. It's great for a bowl of warm hearty soup, especially in the winter time.
Rating:☆☆☆☆☆
"I couldn't review these immediately. Why? Because I had full intent of abusing the heck out of these so that I could really see the quality. (for science, of course, not just because I'm lazy)
It said dishwasher safe. "Okay, that's pretty cool" I thought. Instead of putting them on the top rack like a normal person, I decided that the bottom rack was more than fine. Heated dry. None of that eco-friendly air drying garbage. Maximum temperature for maximum cleaning power amiright?
And did I do just one container to test to make sure they wouldn't melt? Nope! I did 8 of them at once so that if they didn't work, I could ruin half the order. I'm a pretty logical person.
Long story short, they didn't melt or warp! However, if you want to bring something to work like applesauce, you need to make sure that you get a lunchbox that can hold these flat and not turned over. This is because even though the lids prevent leakage outside the container, it won't prevent one compartment from leaking into the other. Again, this can be easily solved by getting a lunchbox that's shaped so that the container can be laid flat.
Overall, I love these. They're great for people like me in college who want desperately to eat healthily but will happily eat a ketchup and ramen sandwich if I don't adequately plan ahead. You should get some."
Dual Compartment Meal Prep Containers - 10 piece set

We love these dual compartment meal prep containers because they have a 2-cup compartment for the main dish and a 1-cup compartment for a side of healthy vegetables! Great for light lunches or leftovers. Mom's we know you would love these. They are also great for veggie sticks with a delicious dip on the side. Yum! A simple way to ensure everyone gets their daily serving of veggies. As with all our meal prep containers, these dual compartment meal prep containers come with with a starter guide that features 3 healthy recipes made for this container. That means you have your next 3 meal prep recipes outlined for you with your purchase. It also includes some useful tips on how to make meal prepping work for you!
Rating: ☆☆☆☆☆
"I have a similar set of these meal prep containers but it has only one large partition. I use these regularly for storing pre-prepared meals in my fridge and freezer, also use these to carry lunches to work as they are such a versatile size, and decided to pick up a set that has a partition so I have the ability to use them for storing meals where there are more than one food item being stored and I don't want them to mix and mingle. This is perfect for things like meats or pasta on one side and either veggies or potatoes on the other. The containers are durable and work really well. The tops stay on and do a good job of preventing any leakage. The size is really good as well so I can put a good size meal in for my kids when preparing meals. I really like how they stack and store very well to minimize storage space in my cupboards. These get used very regularly in my house."
Three Compartment Meal Prep Container - 10 piece set

They say things that come in threes are more satisfying to the mind. Well, these three compartment meal prep containers can be more satisfying to the body! At MPOF, we recommend filling the large 2-cup compartment with protein and the two 1-cup compartments with carbs and veggies! We also love that each container is embossed with helpful volume measurements, so you can be certain that your portion control, is truly under control. The recipes included in this three compartment meal prep container set include Turmeric Scrambled Eggs packed with a protein boost for breakfast. It also includes an Apple BBQ Meatloaf and Pesto Chicken for lunch and dinner, respectively! These are one for the best meal prep containers to pack lunch for 2 people for the kids' playdates or double portion meals for the husband when he has to work late hours.
Rating: ☆☆☆☆
"One of the best things I've ever bought on Amazon! PROS:
They are the perfect size for a meal with two sides left over
The lid snaps on great
They stack inside each other without lids or on top of each other with the lids on (like in the fridge), making it so easy to heat up portions for lunch or dinner left over, and make leftovers look so much more appealing
CONS (tiny things really)
You have to be careful microwaving because if you leave it too long (like way too long) it'll melt, but any plastic would do that, and for the price you can't complain really use the auto reheat button on your microwave so it doesn't get too hot and too much power to cook the plastic and you'll be fine.
There are little grooves in the base of each section that make it a tad bit more difficult to clean.... But like I said, not enough so to not buy them again.
NOT dishwasher safe
The pros definitely out weight the cons by A LOT! My kids will actually eat leftovers now because it looks more appealing and they don't have to get our big bowls of each thing and scoop it onto a plate. A friend of mine has leftover nights on Thursdays and each mod fights over which container they get to eat... Fighting over leftovers!!! MOM WIN!!"
Round Meal Prep Containers - 10 piece

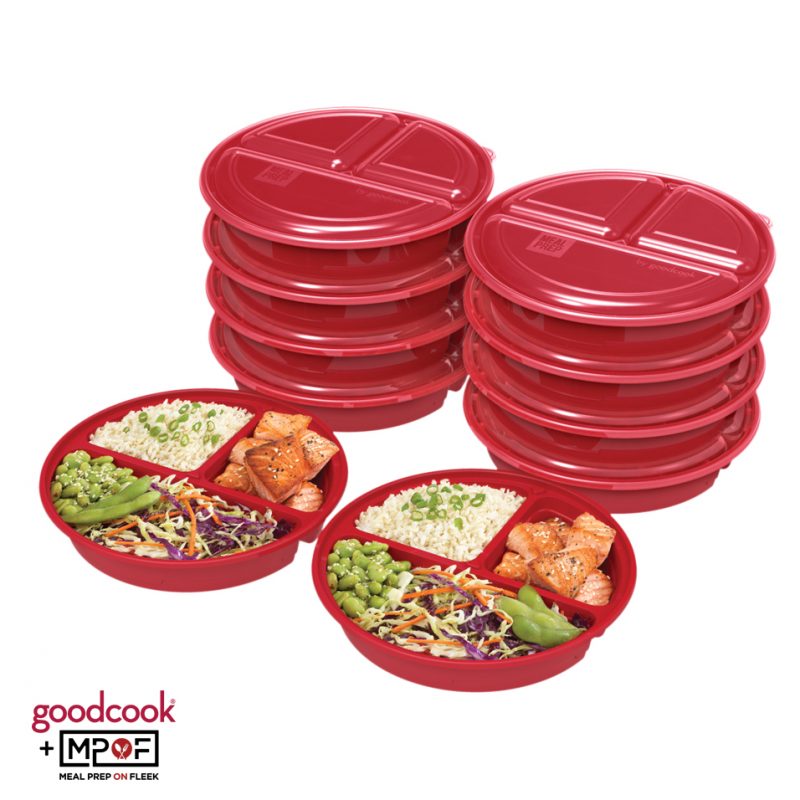
Have you ever heard that a smaller plate does psychological wonders for how full you feel after you eat? Well, we think these round meal prep containers are absolutely excellent for putting that idea to the test. These meal prep containers are great for an intuitive eating lifestyle. Not to mention, they are bright red, and studies have shown that eating from a bright red place can lead to less eating overall. The round dinner plate shape with perfectly measured compartments for healthy meal planning that include 2-cup veggies, 1-cup protein, and 1-cup grains. For maximum user-friendliness, these round meal prep containers even feature orientation tabs to ensure the lid is positioned correctly on the vessel.
Rating: ☆☆☆☆☆
"A meal prep essential for me now! The package arrives super compact, but it contains 30 containers and lids- so you can prep a full month of lunches or dinners so easily. You can fit the perfect sized serving in there and they remind me of what you'd get your restaurant salad in for a to-go order. I can freeze, microwave and throw these in the dishwasher and not have to worry about bpa, either. (Note: the brand sent this to me in exchange for my honest feedback and opinion.)"
Snack Size Meal Prep Container - 10 piece

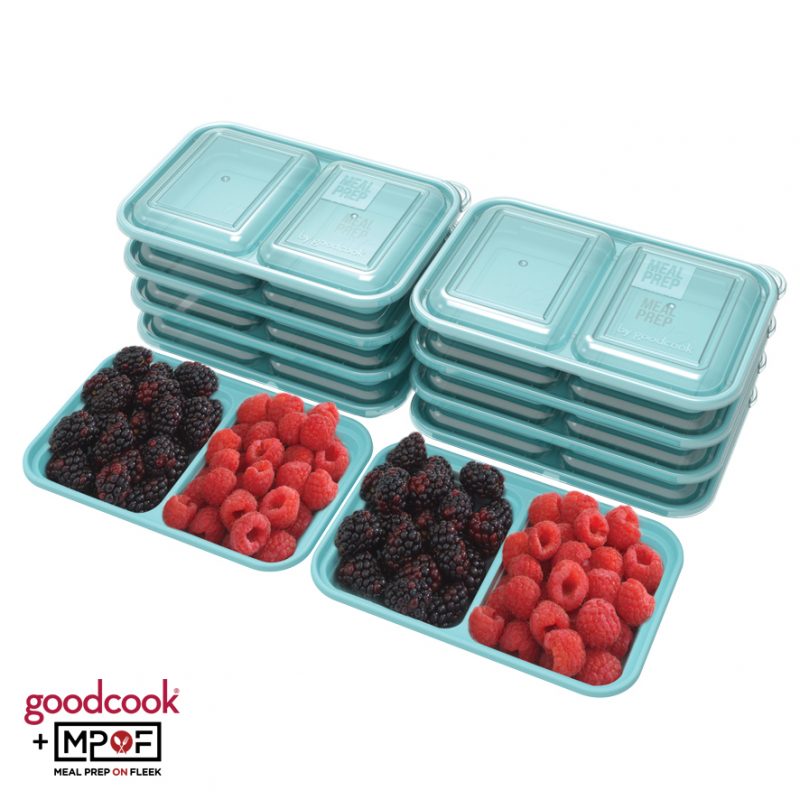
It's hip to be square, and since two is better than one, these snack size meal prep containers with two square compartments will have your Meal Prep On Fleek! These are one of the best meal prep containers because of their low-profile form factor, and with two square compartments for snacking, we recommend filling them with two servings of berries or some crunchy veggie sticks, in case a sugar craving hits you in the middle of your day.
Rating: ☆☆☆☆☆
"I have some of the other, larger meal containers, but i found that i subconsciously overfilled them because their large capacity and my smaller lunch portions made them look pathetically meager. I tended to add a little more, which, over time, became almost a double portion. i decided to look for some smaller capacity containers, and found these - turns out these are perfect - filling them with the measured food makes them look copious, and i no longer have too much food when lunchtime finally arrives.

Meal Prep Menu: 2022 Week 7
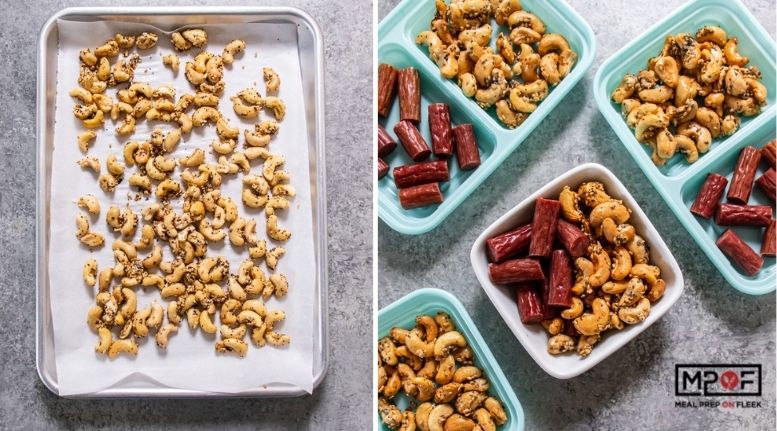
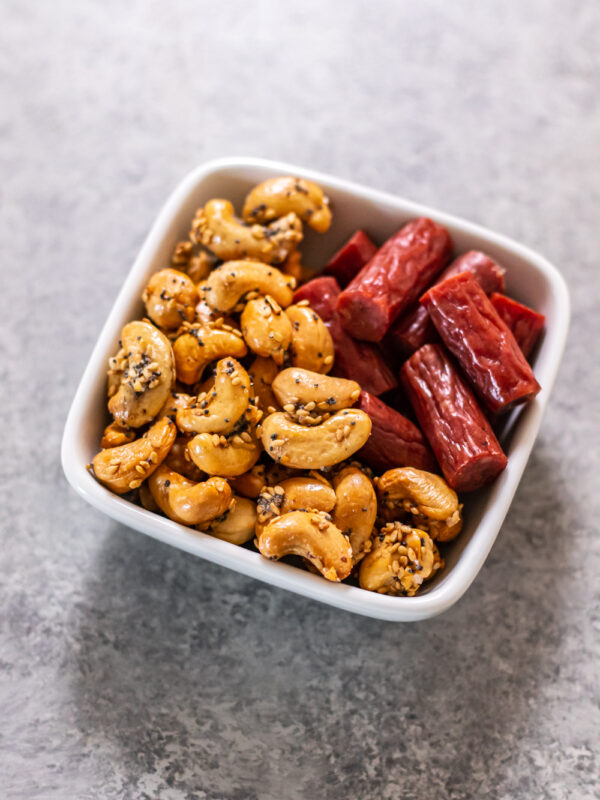
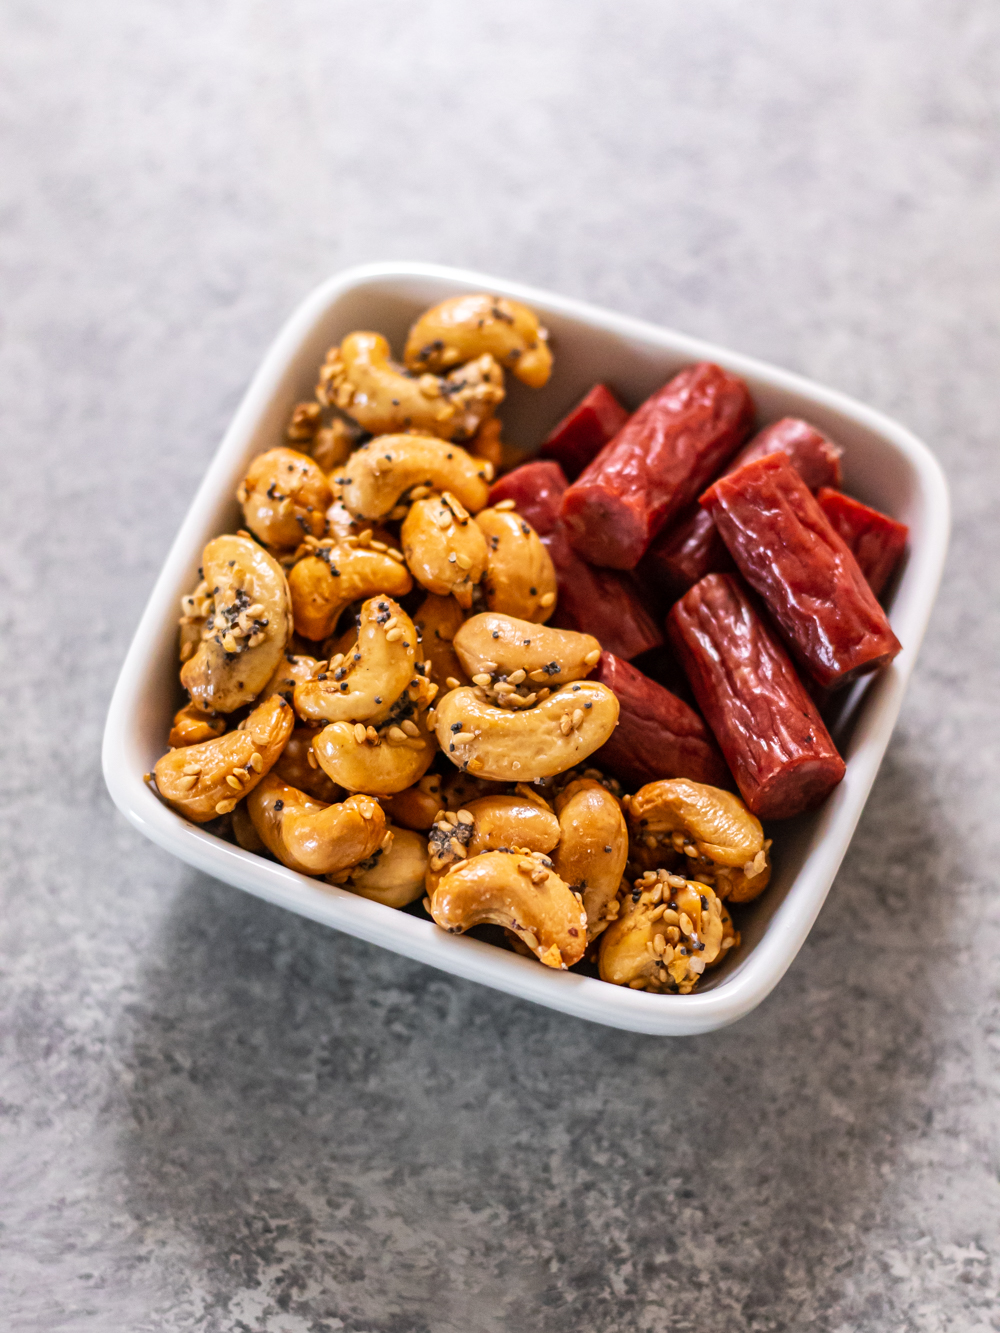
Everything Bagel Cashews
If you love the flavor of everything bagels but don't want the heavy carb load, then these cashews are right up your alley. Dried onion, sesame seeds, and poppy seeds create the nutty, herb flavor of the popular bagel, back on heart-healthy cashews. This is a travel-friendly snack that curbs hunger in a pinch.


Oh, everything bagel seasoning: Is there anything you can't do?
You may have seen the famous bagel seasoning blend at places like Trader Joe's, or maybe Whole Foods. And you may have wondered what to do with it, especially if bagels have long left your dietary rotation in favor of whole grains. Or maybe you're following a keto or paleo diet, or you've gotta be gluten free and bagels feel like ancient history to you. This seasoning blend tastes great on a lot of things, especially when mixed with nuts. (If you just got a random craving for a bagel and something sweet, try these low-carb pumpkin spice bagels!)
Cashews of course taste great in various cooking preparations (like Instant Pot Cashew Chicken, for example), but this seasoning trick ups the ante on a great snack for the lunchbox, on the trail, or anywhere, really. Because you never know when you might need a snack. A good one that's full of protein works well.
How to Make Everything Bagel Cashews
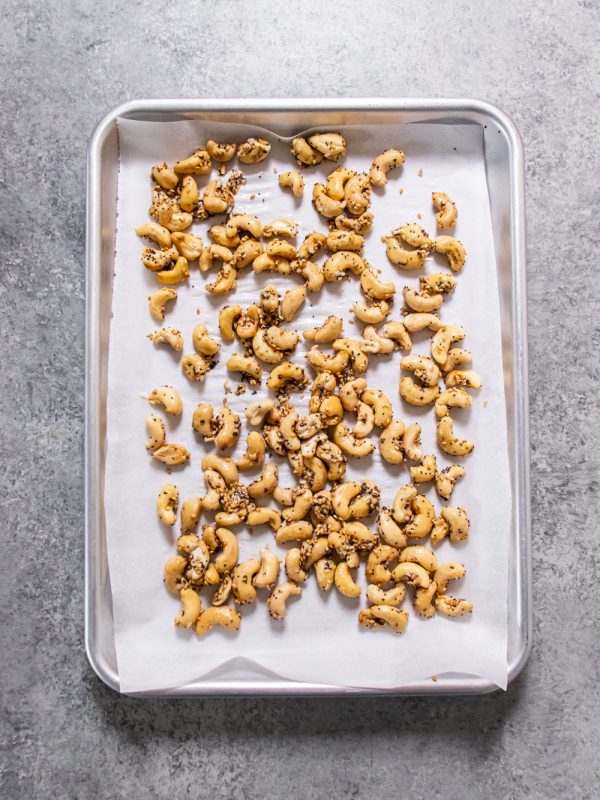
It's simple. You combine the cashews with lightly beaten egg whites, along with a bunch of different seasonings. They bake in a low oven and come out just right. The egg whites help the seasonings stick to the cashews and they add some more protein; this snack packs 10 grams of protein, and that's not even counting what else you might serve it with.
Substitutions and Alternations
Don't have cashews? Try almonds, walnuts, or pecans, or some combination of all of them. It'll be good. The cashews, however, take well to the everything bagel seasoning because the surface is more smooth in comparison to those other nut types. Nevertheless, it will work. And variety is nice, right?
What to Serve With Everything Bagel Cashews
This snack is great on its own, of course, but for a supercharged protein-driven nosh, serve these cashews with 4-ounce paleo jerky sticks that you've sliced into bite-sized pieces. (They make for a super-cute prep job, too.) A good sharp cheddar is nice complement to nuts, too.
Vegetarians or vegans? Fresh fruit is always a great accompaniment to nuts. Strawberries and blueberries in particular feel like good picks.
What Else Can I do With Everything Bagel Seasoning?
If you fall in love with this (what's not to love?), feel free to make more of the seasoning itself. Just leave out the egg whites, naturally, and store in an airtight container. Labeling it with the contents and the date helps, too, as sometimes seasoning blends can clump together and lose their pizzazz over time. Here are some other ideas for using it.
- Sprinkle it on eggs-scrambled, fried, or otherwise
- Add a dash on top of sliced avocado, along with a drizzle of extra virgin olive oil, for some heart-healthy fats.
- Toss it with french fries (air fryer sweet potato fries, perhaps?)
- Add it to a seasoning mix when you cook chicken or salmon
- Top butternut squash soup with a dash of it
- Add half a teaspoon (to start) to an easy vinaigrette
- Sprinkle it on freshly popped popcorn
Everything Bagel Cashews Ingredients:
- 1 cup raw cashews
- 1 tbsp. egg whites, lightly beaten
- 1 tbsp. sesame seeds
- 1 tsp. poppy seeds
- 1 tsp. sea salt
- 1 tsp. dried minced onion
- ⅛ tsp. garlic powder
For Serving
- 4 oz. paleo jerky sticks, sliced into bite-sized pieces (if you are vegetarian swap with fresh fruit)


Ingredients
- 1 cup raw cashews
- 1 tablespoon egg whites lightly beaten
- 1 tablespoon sesame seeds
- 1 teaspoon poppyseeds
- 1 teaspoon sea salt
- 1 teaspoon dried minced onion
- ⅛ teaspoon garlic powder
For Serving
- 4 oz. paleo jerky sticks (sliced into bite sized pieces) can sub with fruit
Instructions
- Preheat oven to 350ºF and line a small baking sheet with parchment paper. Add cashews and egg white to a bowl and stir well. Add seasonings and stir again to coat cashews.
- Spread evenly on baking sheet. Roast for 8 minutes. Stir gently and return to oven for 6-8 minutes, until cashews are golden brown.
- Cool cashews at room temperature for 10 minutes. Divide cashews between 4 (½ cup) compartments of 4 snack containers. Add jerky to remaining compartments.
Nutrition
How To Sleep Better : Tips and Tricks
Sleep, Wonderful, Sleep!
Why is sleep so awesome and how do I get more of it?
Isn't sleep amazing? It is the time of day that anyone over 15 generally looks forward to. It is obvious that we feel better when we do it. We inherently know that it has a restorative quality to it that we all need. There is nothing like falling into bed after a busy day and then waking up refreshed; not tired anymore. When you have had a good night's sleep it is as if your brain works better and you are ready to focus on the tasks at hand.
Studies show that sleep actively helps memory. It is controversial as to whether it really helps to pull that "all-nighter" before the college final. Did it really help to go to that 8:00 AM exam exhausted? I don't think so! It seems that the data shows that you can focus easier and facts will be recalled better if you get a good night's rest.

Likewise, overall health can be affected for better or for worse by sleep.
Bad news first. There are more, but here are some reasons:
- Greater risk for Type 2 Diabetes - Sleeping less than 6 hours a night has repeatedly been shown to put people at greater risk of insulin resistance and developing type 2 diabetes.
- Mental Health - Mental health issues are strongly related to poor sleep, especially if there is a sleep disorder like insomnia or sleep apnea involved. Did you know that 90% of people that struggle with depression also complain of difficulty with their sleep?
- Immune deficiency - It might be no surprise that a person is 3x more susceptible to becoming ill by not sleeping well. There is evidence that during those times the immune system is weakened making one a prime target during cold and flu season.
- Obesity - There are strong links found between short sleep duration and poor success in weight loss. In fact, not getting enough sleep is one of the biggest risk factors for obesity. There seem to be numerous links from lack of motivation for exercise, to hormone interference.
- Increased inflammation - Poor sleep has been linked to increased inflammation in the digestive tract and inflammatory bowel diseases. For those that suffer from chronic digestive diseases (for example, Crohn's disease) sleep loss has been linked to more frequent relapses. Here are 10 foods that fight inflammation
There is good news too:
One of the most important jobs of sleep is to help us sort out and consolidate memories. All throughout our day, our brains take in mega amounts of information. We don't always conscientiously even realize all that we are taking in; there is way too much! Facts we learned and the things we experience in the daytime need to be processed and stored in the correct parts of our brains. Much of this is done at night while we sleep.
We don't even realize it, but our sleep allows the bits and pieces of information that we have collected throughout our waking hours to be transferred from our short-term memories to our more permanent long-term memory banks. This is a process called "consolidation". Consolidation is one of the main reasons why after a good sleep that people are more likely to retain information.
We can not underestimate the incredible restorative effects of sleep. They are so obvious; you can tell that you feel good, focus better, and you aren't tired all the time. Long, restful, uninterrupted sleep allows our bodies to rejuvenate, synthesize hormones, repair tissue, and even grow muscle. No wonder sleep is so awesome!!
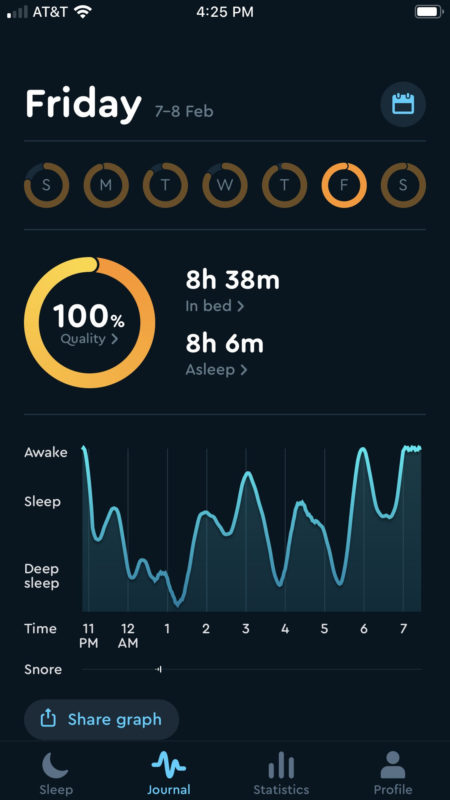
Want to achieve 100% sleep quality, like we did? Keep reading!

What is a perfect night's sleep?
You may be asking yourself this very question. We know that sleep is awesome, but what constitutes that perfect night of sleep? Is it the time of day when your body and brain just shuts down? Well, no, as we have already said, your brain is actually very active and proactive in getting you ready for the next day. It is actually working and overseeing all the functions of your resting body. So you need to give yourself enough hours of sleep in order to give the time your brain needs to do its amazing work.
Imagine your sleep for yourself like the maintenance you do for your car. You know if you skimp on regular oil changes on your car (if you can follow my analogy here), you will be headed for a mechanical breakdown in the near future. So it is with sleep. It surely is not something that you want to cut corners on.
So while the number of hours you spend sleeping are important, so is the quality of those hours. It is possible to get enough sleep timewise, but somehow the time doesn't follow through the stages of the sleep cycle so that you are still waking up tired and not refreshed. If you find you are sleeping a good 8 hours, but are not waking up feeling well, it might be time to consult your physician as to why that might be.
As we go nighty-night, we differ in the number of different stages of sleep and each one is important in its own right. NREM is important for restoring and repairing our bodies and building up energy for the day ahead. REM sleep, which stands for Rapid Eye Movement, is during our dreaming phase where most of the work on our minds and memory categorizing takes place. To ensure that you get more and better sleep, you should avoid getting woken up in the middle of the night by noise or light. That's right, don't bring your cell phone to bed with you!! Alcohol consumption and also nicotine has been known to be sleep stealers as well. To learn more about the science of sleep, see here.
Are there different types of sleep?
There are only 2 different types of sleep, but at least 4 different stages. A cycle of these stages lasts typically 90-120 minutes. Three of those stages are NREM (non-rapid eye movement) with one stage of REM (rapid eye movement) sleep in each cycle.
Most people start a sleep cycle with a short period of stage one (NREM-1) which is generally characterized by slower eye movements at the beginning and the body is beginning to relax. This is obviously the easiest stage in which to rouse a person.
Stage two, (NREM-2) comes next and is usually the longest stage of sleep, compromising approximately 40-60% of a good night's sleep. As we progress further into the night, stage three (NREM-3) resumes. Although it is a longer stage in children and adolescents, it compromises only 5-15% in most adults.
The final stage in the cycle is REM sleep. Our eyes dart back and forth very quickly. We dream the most during this stage while the brain is reviewing the day and consolidating and compartmentalizing all the memories. Interestingly, paralysis of muscles frequently comes with the REM stage and it is believed that it occurs as protection from a person acting out their dreams.
As the night continues, there should be about 4-5 of these cycles with intermittent lengths and stages. As night turns into dawn, there will usually be a lengthening of NREM and a shortening of REM stages. Generally, REM sleep is shorter earlier on in the night lengthening with the longest REM stage being shortly before wakening.
How can you get better sleep?
Structuring a great sleep routine and following a few helpful suggestions should help in getting you that better night's sleep if you have struggled in the past. It might seem almost impossible when you are staring at the ceiling at 2:30 AM in frustration. Maybe you could try a few of these ideas:
- This should be the first thing that you do when thinking about how to get better sleep. Evaluate your sleeping props. Do you have a comfortable mattress? Is your pillow decent? Do you have sheets with a high enough thread count that make you just want crawl right in? If not, these are the first things to remedy before anything else. None of the following suggestions will mean anything if you don't have a comfy bed to sleep in.
- Don't drink alcohol (or caffeine) right before bedtime. While this may seem contradictory (because everyone knows that drinking a beer or glass of wine can help make a person drowsy), drinking alcohol right before bed can actually cause you to have poor quality sleep. It may get you to sleep faster, but the sleep you get will not be as good, had you not imbibed. Alcohol is a depressant and many use it to fall asleep but it can actually block REM sleep which is the most restorative type of sleep. You will not wake up refreshed and focused if you get less REM sleep. Similarly, but opposite, caffeine is a stimulant and will have you staring at the ceiling not able to fall asleep. Both these things, alcohol and caffeine are definite avoiders.
- Exercise Earlier in the day. Exercise also makes a person tired and so it seems logical that if you exercise vigorously before bedtime, that is a great way to fall asleep. Again, this seems counter intuitive, but exercising stimulates your body to secrete the hormone, cortisol, which actually makes you more alert. Best to do this early in the morning or definitely no less than three hours before planning to crawl into bed. Try reading a little in bed to relax instead.
- Take a nice shower or bath before sleep. Here's one that you've certainly heard before!? The warmth of the water gives a slight rise to your body temperature and puts you in a relaxed state. Some studies have shown that if you don't want a full shower, even a relaxing foot soak and hour before bed will have similar effects.
- Give some thought to what is your perfect sleep environment and arrange your bedroom to be this place. Think about the perfect temperature, darkness, and noise level. Think about what wakes you in the middle of the night and try to eliminate that possibility. Do you have a pet that constantly wakes you in the middle of the night? Think about crate training the animal at night. Maybe white noise machines help you? Light blocking curtains? Whatever it is, make sure your boudoir is equipped with all these sleep inducing props.
- Reduce light at night. Get all the light you can in the daytime, but when it is time to put the lights out, make sure you do. Don't use your cellphone in bed. This is tempting for many of us, but it is sleep stealer. The light tricks us into thinking that it is not time to rest. Put your phone in a nightstand drawer or at least screen side down so notifications don't disrupt you.
- Don't eat a heavy meal late at night. This should be a no-brainer, but sometimes we need to be reminded. Eat dinner several (at least 3) hours before turning in. Definitely avoid fried or heavy meals that will require a lot of digestion and cause indigestion! If you are truly hungry and must eat, try a light snack.
- Don't drink a lot of water before going to bed. It is best to have hydration balanced throughout the day. You will appreciate this when your bladder doesn't wake you up way before your alarm.
- Set your internal clock by having a sleep/wake schedule that your body can get used to. Think of what time of day you truly get tired at and what time you need to wake up. Stick with these times as regularly as you can. Your body will get used to these consistent times and thank you!
- Tool: Download the Sleep Cycle App so you can start to monitor your sleep patterns and get a baseline. Make small adjustments in small increments and track if they are helping or not.
- Enlist the help of the ChiliPad! This should really be a PRO TIP! All of those other tips are free, which is great, but THIS right here has been the biggest game change. It's almost like going from dial up internet to high-speed... there is no going back
P.S. I love this thing so much that I reached out to ChiliPad to setup discount codes so you could save big if you want to order one for yourself (or your parents...you'll be their favorite kid). Here you go:
MPM25 - 25% off chiliPAD
MPM15 - 15% off OOLER
How can you get more sleep?
The idea is that you want to be able to get more deep sleep. There may be a few ways to increase the amount that a person gets each night, but really, the most important thing that a person can do is to increase the amount of overall sleep. The more sleep that you get, the more cycles of deep sleep that can fit in for the entire night. So, if you can, and you are tired enough, fit in more sleep to your schedule.
That might mean taking a vacation or a staycation (even better!) where you can tire yourself out early on some fun, fresh air, and exercise and then have all the time you want to rest, relax and sleep! Be sure to eat well, but watch your carbohydrate intake. If there is a spa or sauna available, take advantage of that and tuck yourself in early.
If you aren't so fortunate to be in the running for a vacation just now, there are still a few things that you can do. There are some general healthful sleep habits that may also help promote better sleep overall, like:
- Reducing night time light in your bedroom
- Not eating heavy foods late at night.
- Not using cellphones in bed.
- Reducing stressful conversations or activities before sleep
"Pink noise" is an interesting idea to consider using at night. Pink noise is thought by many to be better than white noise for a more restful sleep. So, what is Pink Noise? It is very similar to white noise, but pink noise has less higher frequencies than white noise. It has a sound more like a steady, heavy wind or rainfall. Some people swear by it and say that it can improve our memories and focus for the next day and possibly even long term. Who knows? It might be worth a try! For more information on pink noise click over here.
So, what about naps?
To nap, or not to nap? That is the question.
This is a common question amongst sleep connoisseurs. Is a nap helpful or harmful to getting in as much sleep as possible and getting a perfect night's sleep all night long.
Hard as it is to believe, there are actually some drawbacks to napping for some people. Napping can be the cause of:
- Excessive grogginess that makes you less alert and able to perform upon waking. This is called "sleep inertia".
- Nighttime sleep problems can occur in some people. If you are finding that you deal with insomnia or lower quality sleep when you nap, that might be an indication that you need to abstain from napping.
If you do decide to give regular napping a whirl, review some of these tips and then really study your sleep habits at night ( you have to be honest though). You might find that for you, naps should be set aside altogether or that you should try to implement a regular schedule of them ASAP.
Think about these potential benefits for healthy adults:
- Increased alertness-Naps can make you feel more awake and alert for the tasks at hand. You might find that you perform better and have fewer mistakes and accidents on the job. A study at NASA on sleepy military pilots and astronauts found that a 40-minute nap improved performance by 34% and alertness 100%.
- Improved mood-This one is not hard to see, is it? Works wonders on the attitudes of both babies and adults alike.
- Reduced fatigue-A nap can be a pleasant luxury, a mini-vacation. It can provide great psychological benefits and be an easy way to get some relaxation and rejuvenation.
Are you convinced to try it yet? You're probably already thinking about ways to incorporate naps into your daily routine. Keep in mind that unless you are sleep deprived and catching up on sleep, naps should only be 20-30 minutes for a good energy boost. If you are really needing a good nap and have the time, 90 minutes is perfect to get in a whole sleep cycle. And remember, getting enough sleep on a regular basis is the best way to be at your best. But when fatigue sets in, a quick nap can do wonders for your mental and physical stamina.
How can you wake up better and other sleep hacks, tips, and tricks
So we've looked at how to sleep better and maximize the benefits of our times of rest. But what about the wake-up time? There are ways of preparing ahead so that you don't have to rely on several cups of coffee to bring us to full-alert in the morning.
The following are some ideas and hacks that you might consider to make your transition to your day smoother:
- No snooze button - Do they make alarms without a snooze button? Not sure, but don't press that button! Hitting snooze is oh, so tempting, but putting your last ½ hour of sleep in fragmented sleep is not very helpful. Instead, try this hack if you want the idea of snoozing extra in the morning. Set two alarms 90 minutes apart. This way you could get another uninterrupted sleep cycle in before you actually have to get up.
- Splash some cold water - Unless you want to take a cold shower, a splash in the face will do to give your body a jolt that there is a change in body temperature and time to get up. If a walk to the bathroom sink sounds like too much at first, you could always keep a mister on your nightstand to mist your face instead.
- Drink some water - Now that you have hydrated your face, hydrate your body by taking in some water to help refresh yourself after a long night without drinking anything.
- Stretch and exercise - If you have a ½ an hour or so getting your muscles stretched and moving would do wonders to rejuvenate them. Remember that they have been paralyzed during certain sleep cycles they need to be reactivated to allow them to release endorphins to the brain which provide energy.
- Protein for breakfast - If you are not intermittent fasting and eating breakfast, make sure it is one to fight sluggishness. We know that food is the fuel that keeps us going, so make it a combo of lean proteins, whole grains, nuts, and lower-sugar fruits. No sugary breakfast foods - keep away from those in order to not go through dealing with blood sugar spikes that in the end cause more fatigue.
- Don't pound down the coffee - Have some, but not a lot. There are good health benefits to coffee, but partaking of cup after cup of the caffeinated drink can be a contributing factor of fatigue later on in the day.
- Let the light in - Or better yet, go outside and enjoy the sunlight. It raises your serotonin levels and just makes most people feel happy to be alive. But, if that is too much for you first thing then at least adjust your curtains to let the sunshine in while you are getting used to the day.
Do you have other hacks that you know of that we have not listed? We would like to hear what works for you. In the meantime, put a few of these through the paces and see if they work for you. Good morning!!

Meal Prep Menu: 2022 Week 6
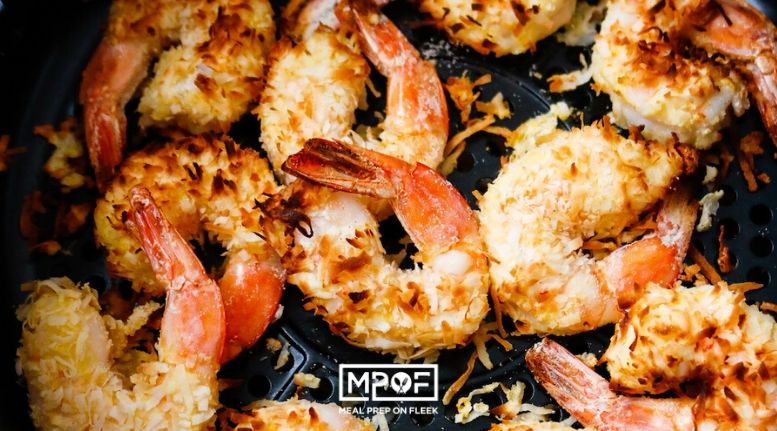
Air Fryer Coconut Shrimp
Are you ready for a tropical getaway? Who isn't! Take your taste buds on a well-deserved tropical vacation with our Air Fryer Coconut Shrimp meal prep recipe. The crunchy shrimp is served with Cilantro Lime Cauliflower Rice and topped with a tangy Sweet & Sour Sauce. This tropically delicious entrée is Keto-friendly and . . .
Meal Prep Menu: 2022 Week 5
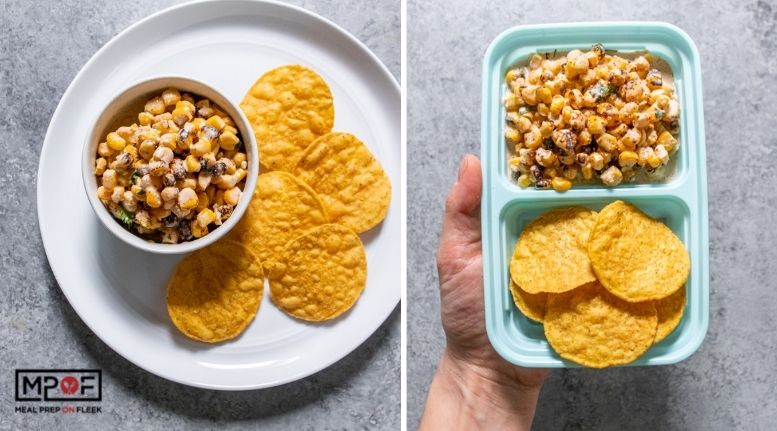
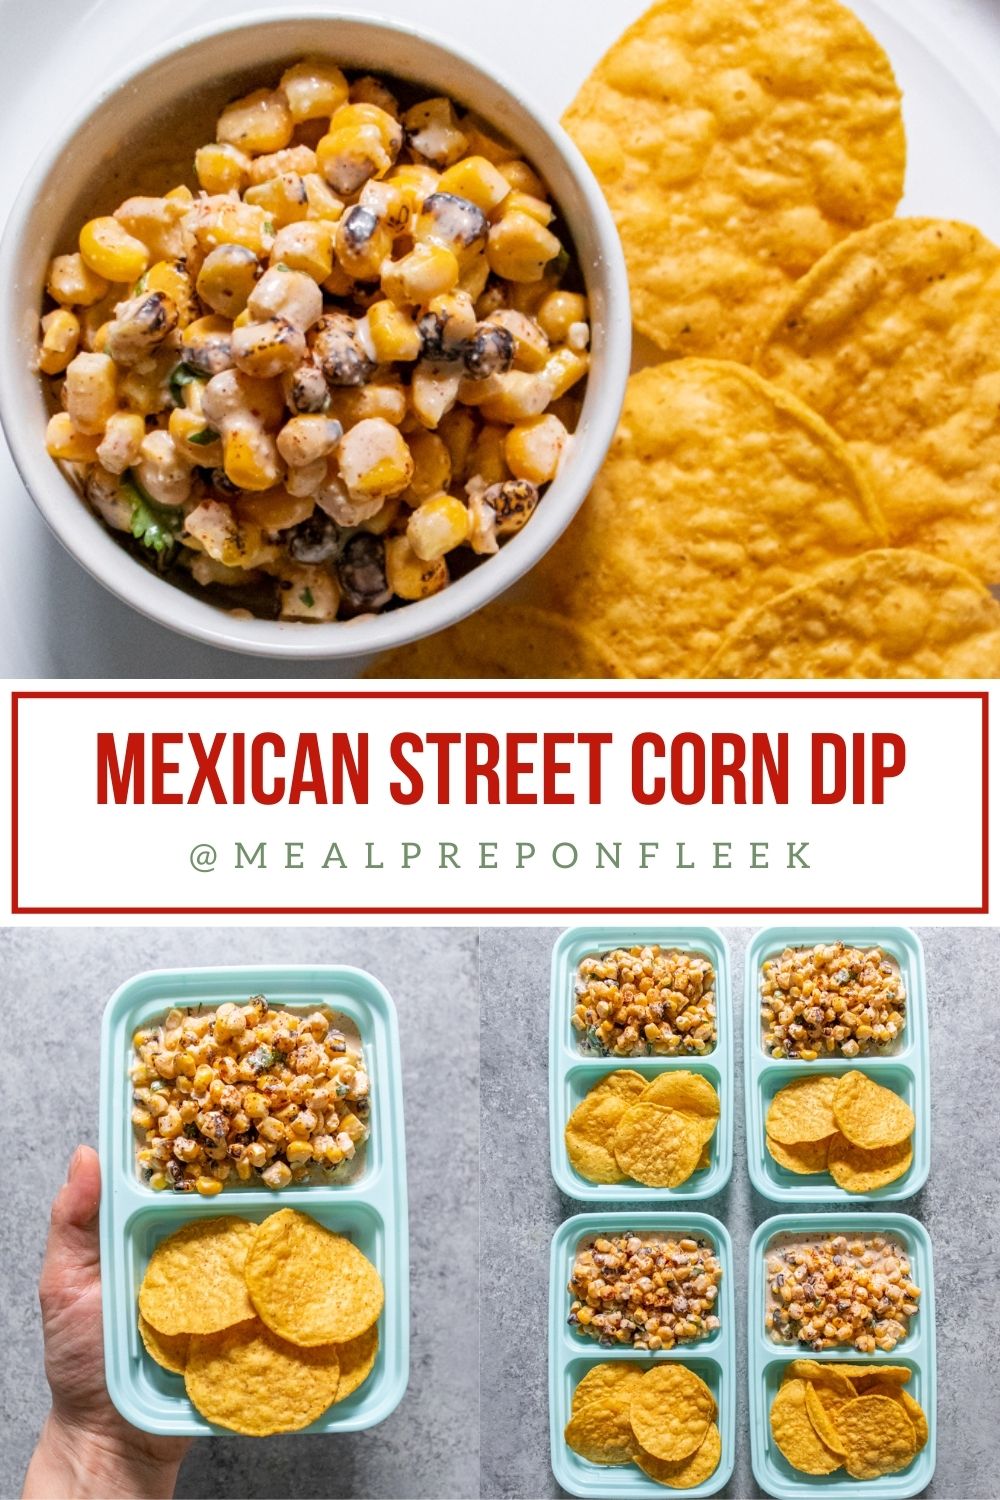
Mexican Street Corn Dip

Roasted corn kernels give this hearty gluten-free Mexican street corn dip a sweet and smoky flavor. Mayonnaise and sour cream add fat to satisfy a snack craving-all ready in ten minutes!
Every day is summertime with a dish like this. Super easy to meal prep, and even easier to devour. This snack takes its inspiration from elotes, a popular Mexican street food that you may have seen at festivals and fairs. Elotes are corn on the cob that's charred on the grill, and then covered in a creamy and spicy sauce and some tangy fresh cheese. Sometimes it's sprinkled with chopped fresh cilantro. It's the kind of food that's taken off like wildfire because it's so delicious.
How to Make Mexican Street Corn Dip
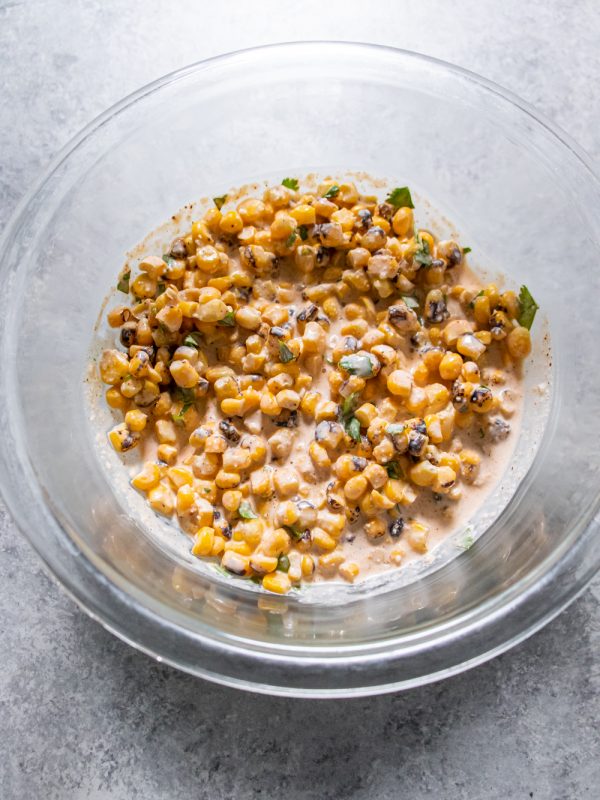
This recipe takes a big shortcut to achieve a corn-centric snack you'll love. Canned fire-roasted corn means you can eat this any time of year. Toss them with mayo, sour cream, cilantro, lime juice, chili and garlic powders, and Parmesan. The meal prep includes corn chips for dipping, and they just up the ante of corn flavor.
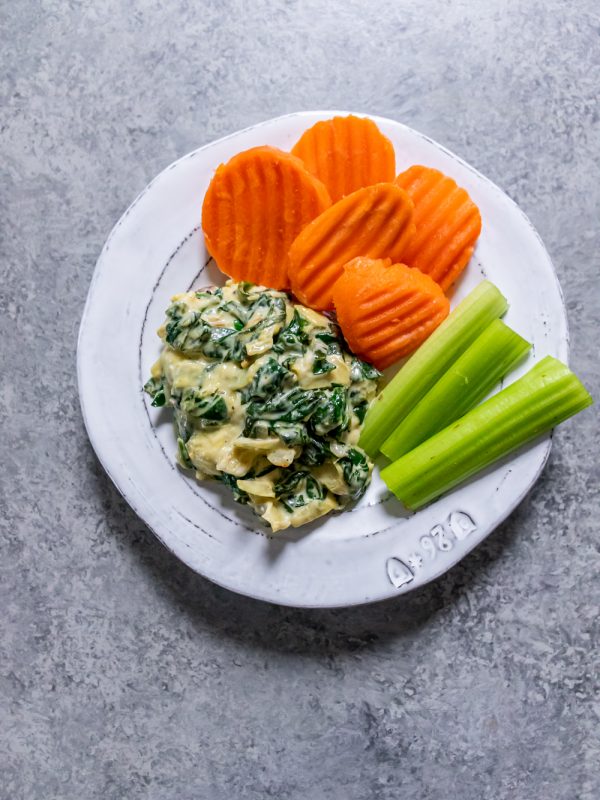
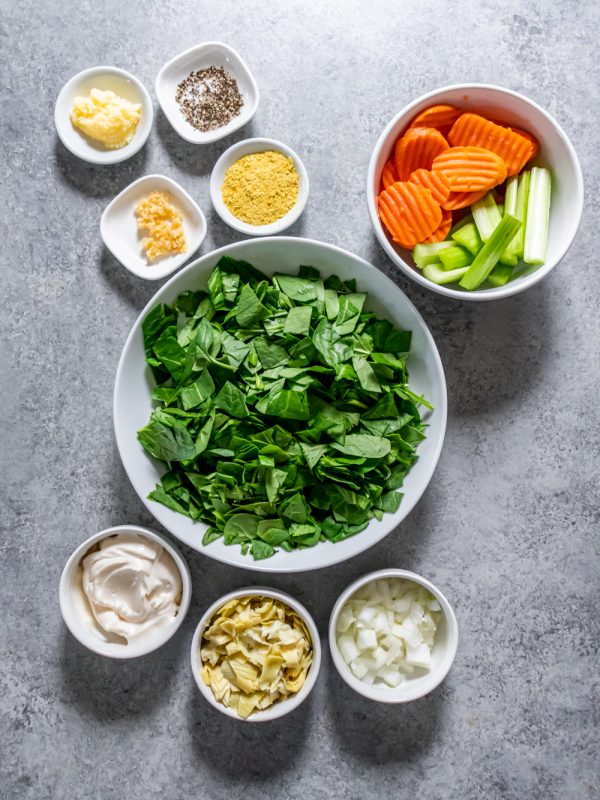
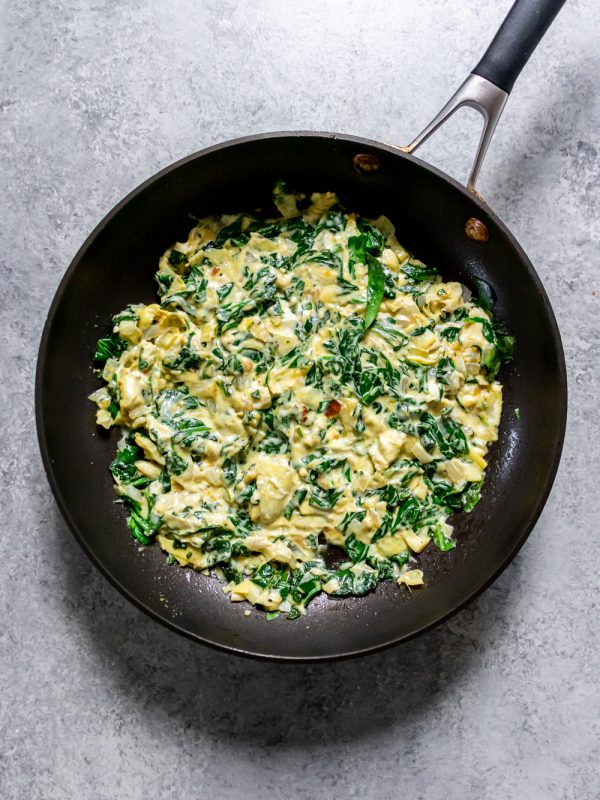
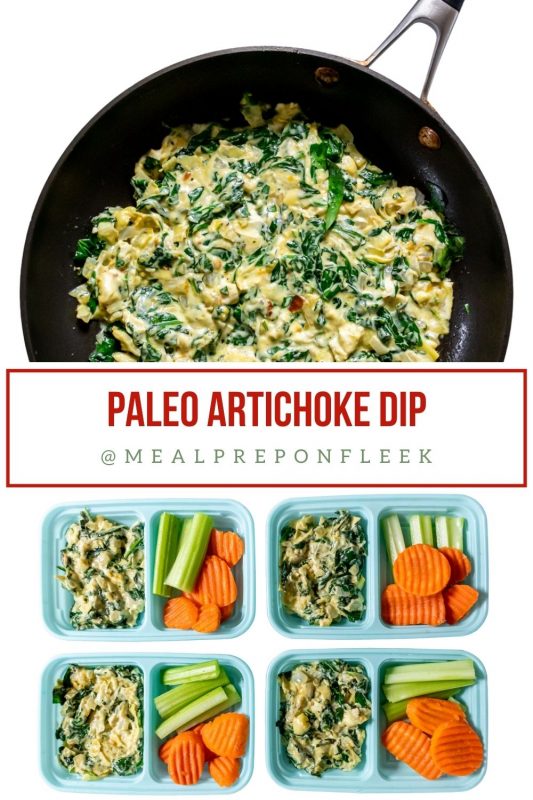
Because dips are great, right? Serve this one at a party alongside our Paleo Spinach Artichoke Dip.
See which one disappears first!

Substitutions and Alterations
If you want to make this Mexican street corn dip a little differently, with in-season corn, go for it. But really, it's great any time of year. For fresh corn, feel free to grill it, still inside the husk, for that smoky flavor. Then, take it out of the husk and put it on the grill for some good char marks. Regardless, it's delicious.
Instead of Parmesan cheese, feel free to use finely grated Cotija cheese, which is a fresh Mexican cheese. Also, sometimes people use crumbled feta cheese instead of Cotija. However, Parmesan cheese tends to be widely available and imparts a similar flavor. So that's why it's in this Mexican street corn dip recipe! But cheese, right? Play around with different kinds if you want.
To make this vegan, swap out plant-based versions of the mayonnaise, sour cream, and cheese. Nutritional yeast works great as a Parmesan cheese swap for vegan diets because it's got a nutty, cheese-like taste.
Use a different kind of tortilla chips if you like, whether that's white or blue corn.
Don't have chili powder? Sweet or smoked paprika will work in a pinch, with a dask of ground cumin.

How to Serve Store Mexican Street Corn Dip
Of course, this prep is the ultimate snack-on-the-go. Just watch at people's reactions. They'll want you to share, but that's entirely up to you. However, you can also lay the tortilla chips out on a sheet pan if you like, and load them up with the dip, like you would with nachos. That's how we serve this at a party.
When prepped, this dip should keep for up to 4 or 5 days in the refrigerator. You can put the chips in the containers ahead of time for the full-on prep mode, or wait and add them right before you're ready to eat. This dip won't really freeze well, but we don't see any problem there. If you have leftovers of this dip, we'll be surprised!

READ MORE: Mexican Whole Grain Rice & Quinoa Casserole Meal Prep
Mexican Street Corn Dip Ingredients:
- 2 cups fire-roasted corn, thawed
- ¼ cup mayonnaise*
- ¼ cup sour cream*
- 1 tablespoon fresh lime juice
- 1 tablespoon chopped cilantro
- 1 teaspoon chill powder, divided
- ¼ teaspoon garlic powder
- 3 tablespoon grated Parmesan cheese*
- 20 tortilla chips
*Make this recipe vegan by swapping the mayo, sour cream, and Parmesan cheese for plant-based alternatives.


Ingredients
- 2 cups fire roasted corn thawed
- ¼ cup mayonnaise
- ¼ cup sour cream
- 1 tablespoon fresh lime juice
- 1 tablespoon chopped cilantro
- 1 teaspoon chill powder divided
- ¼ teaspoon garlic powder
- 3 tablespoon grated Parmesan cheese
- 20 Tortilla chips
Instructions
- Drain the thawed corn in a metal sieve. Combine mayonnaise, sour cream, lime juice, and cilantro, garlic powder, and half of the chili powder in a medium mixing bowl. Stir until smooth. Add corn and Parmesan cheese. Stir to combine.
- Add corn and Parmesan cheese, and stir to combine. Taste, and adjust seasoning if needed.
- Divide corn dip among 4 (½ cup) compartments of 4 snack containers. Sprinkle with the remaining chili powder. Add tortilla chips to thte remaining compartments.
Notes
Nutrition
Meal Prep Menu: 2022 Week 4
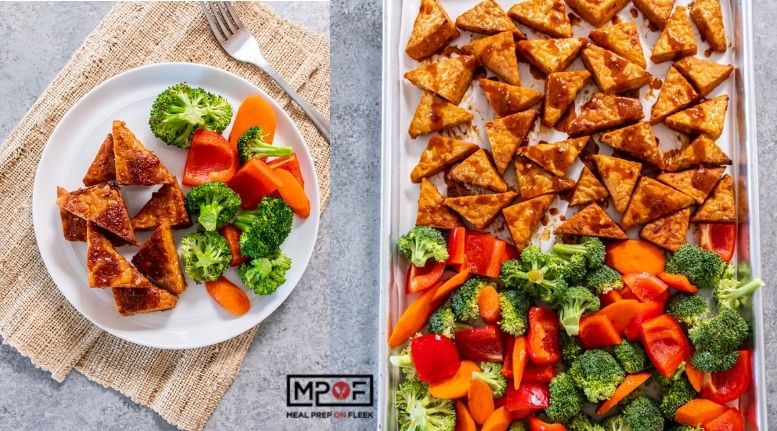
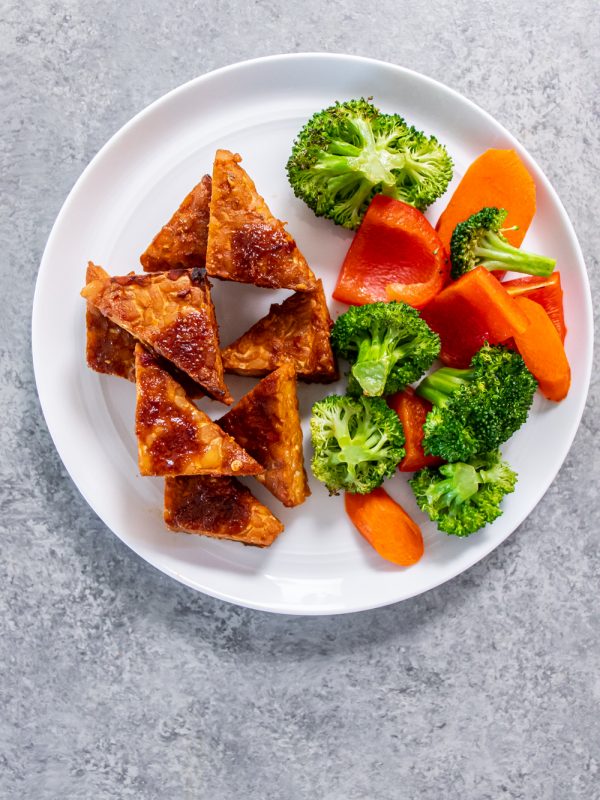
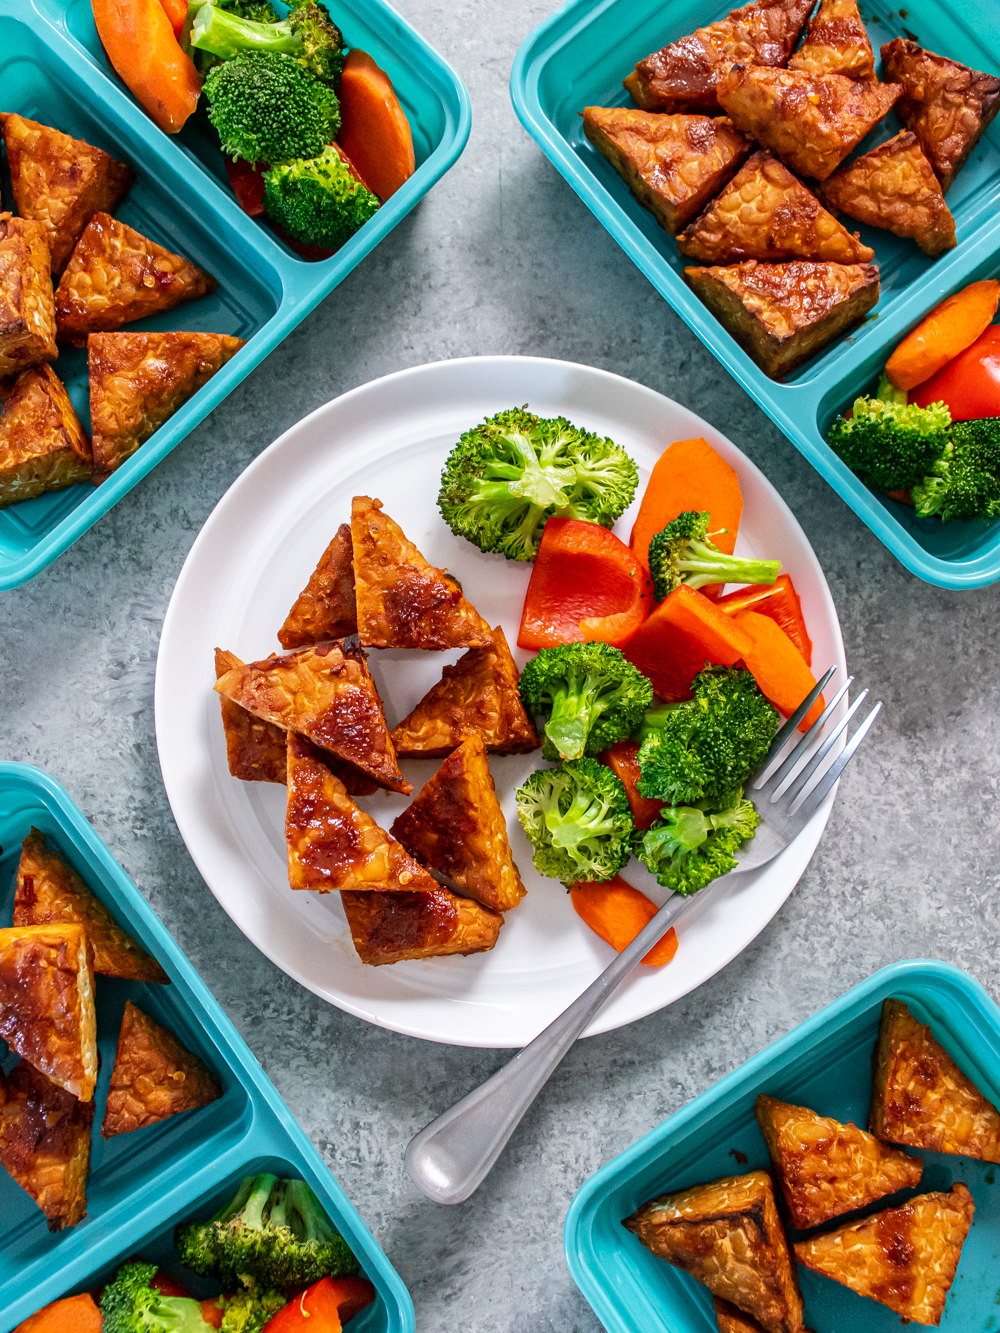
Sheet Pan Spicy Peanut Tempeh and Sesame Vegetables
Thank you to GoodCook for sponsoring this Sheet Pan Spicy Peanut Tempeh and Sesame Vegetables post, and thank YOU for supporting the brands that help make Meal Prep On Fleek possible. All opinions are our own.

This 10-ingredient vegan sheet pan dinner makes five servings full of protein and an irresistible spicy peanut flavor that satisfies hunger!

Cook once, eat all week! It sounds pretty easy. Well, I promise it is really as easy as it sounds! But, the only easy part isn't the phrase. It's also this recipe and the way you control your portions, thanks to my fave meal prep containers!
First, let's start with the recipe! If you've never cooked with tempeh before, this is a great recipe, to begin with. Tempeh, which is found ready to go in the same section as the tofu at your local grocery store, has a meatier and more firm texture than tofu. It's an excellent way to change things up from tofu. However, if you don't like tempeh or aren't ready to take the risk with tempeh yet, use extra firm tofu in this dish.
The sauce is a perfect balance of sweet and spicy. Depending on how spicy you like your meals, you can add more or less chili sauce to this dish. I love this sauce so much that I always double or triple it and save it to use on other protein sources during the week.
The Hard Part....
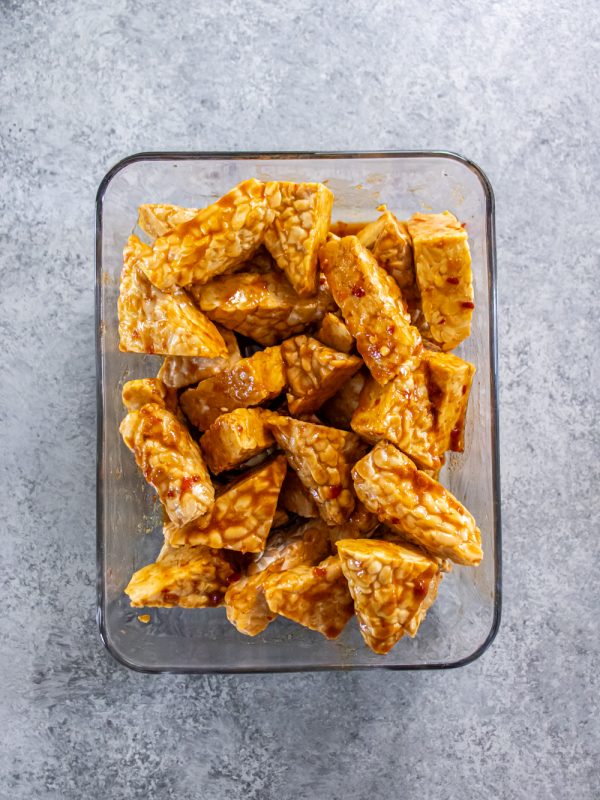
Waiting! Haha, Once you have your tempeh cut and your sauce prepared, the tempeh will need to marinate for 30 minutes or longer. I like to prepare the sauce and tempeh first thing in the morning and let it marinate until I am ready to meal prep in the afternoon. This saves me some time during meal prep.
Once you are done marinating the tempeh, throw it on a sheet pan with your veggies, let it do its thing in the oven, and then voila! You're ready to prep!
Portions Made Easy
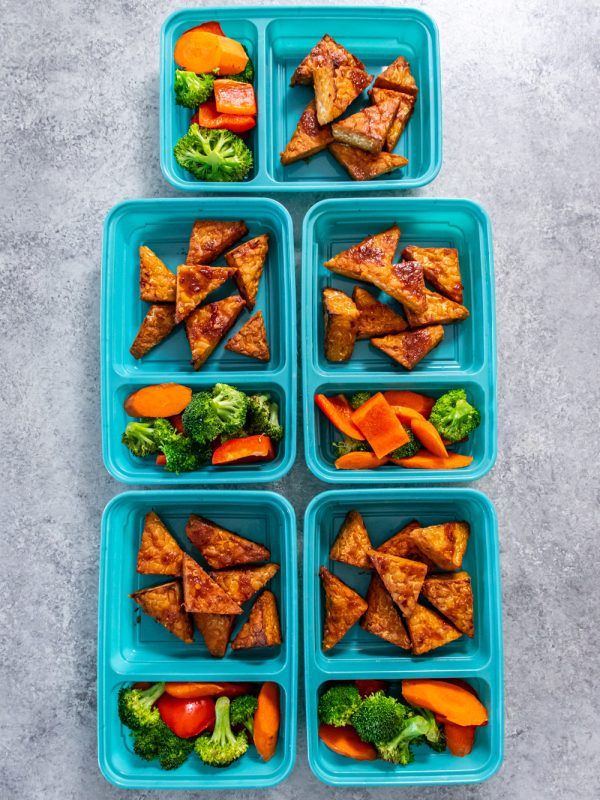
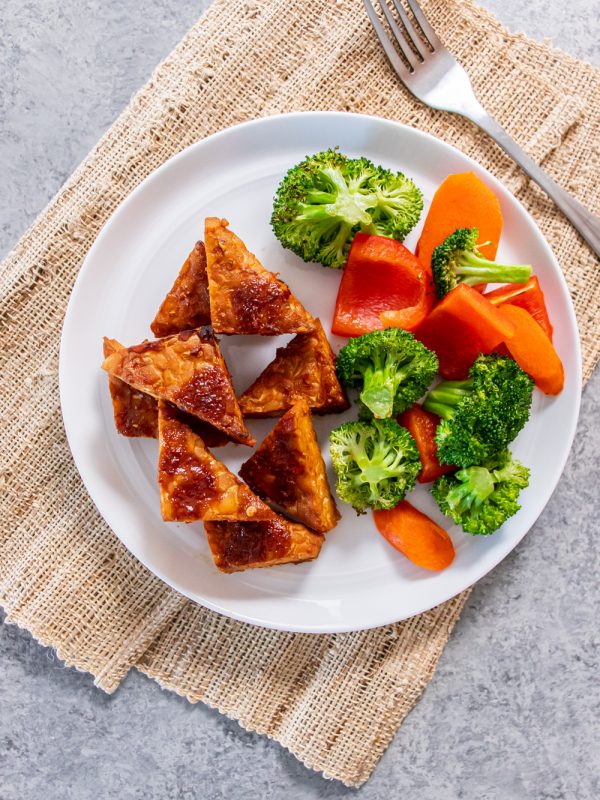
Not only do I like to make sure that the recipes I am meal prepping are easy, but I also like to remove the thinking from portions. That's why I love my GoodCook meal prep containers, especially the teal ones! Not only are they a cool color, but they have two compartments: one for the main part of the meal and the other for the side. That works great here: Tempeh (main dish) + veggies (side dish). The bigger compartment is 2 cups, and the smaller is 1 cup, so I know I am getting good nutrition in each meal without going heavy-handed on my portions.
This set comes with ten containers, so I'll use 5 for a recipe like this and the other 5 for my breakfasts. It works out perfectly! Plus, the containers are BPA-free, microwave safe, and dishwasher safe.
For example, I use these containers to make a breakfast like this or this, and my lunch/dinner might be something like these Hawaiian Chicken Tenders or these Salmon Cakes!
Swaps
If you're not into tempeh (or tofu), this Sheet Pan Spicy Peanut Tempeh and Seasame Vegetables recipe can be made with diced chicken or chicken strips, beef strips, or even chickpeas. I have also listed swaps for the peanut butter if you have an allergy to peanuts or nut butters.
I hope you enjoy this recipe, trying tempeh if it's new to you, and the delightful sweet and spicy sauce!
Sheet Pan Spicy Peanut Tempeh and Sesame Vegetables Ingredients:
- 24 oz. tempeh, sliced into triangles
- ¼ cup coconut aminos
- ¼ cup creamy drippy peanut butter (swap sunflower seed butter for allergies to nuts)
- 2 tablespoon fresh lime juice
- 1 tablespoon garlic-chili sauce
- 8 oz. broccoli florets
- 1 medium red bell pepper, diced
- 2 medium carrots, peeled/thinly sliced carrots
- 3 tablespoon toasted sesame oil
- ½ teaspoon salt
- 5 Teal GoodCook Containers


Ingredients
- 24 oz. tempeh sliced into triangles
- ¼ cup coconut aminos
- ¼ cup creamy drippy peanut butter swap sunflower seed butter for allergies to nuts
- 2 tablespoon fresh lime juice
- 1 tablespoon garlic-chili sauce
- 8 oz. broccoli florets
- 1 medium red bell pepper diced
- 2 medium carrots peeled/thinly sliced carrots
- 3 tablespoon toasted sesame oil
- ½ teaspoon salt
For Serving
Instructions
- Stir together coconut aminos, peanut butter, lime juice and garlic-chili sauce in a bowl. Place tempeh in a large glass dish or bowl and cover with marinade. Gently stir to coat. Cover and marinate for 30 minutes.
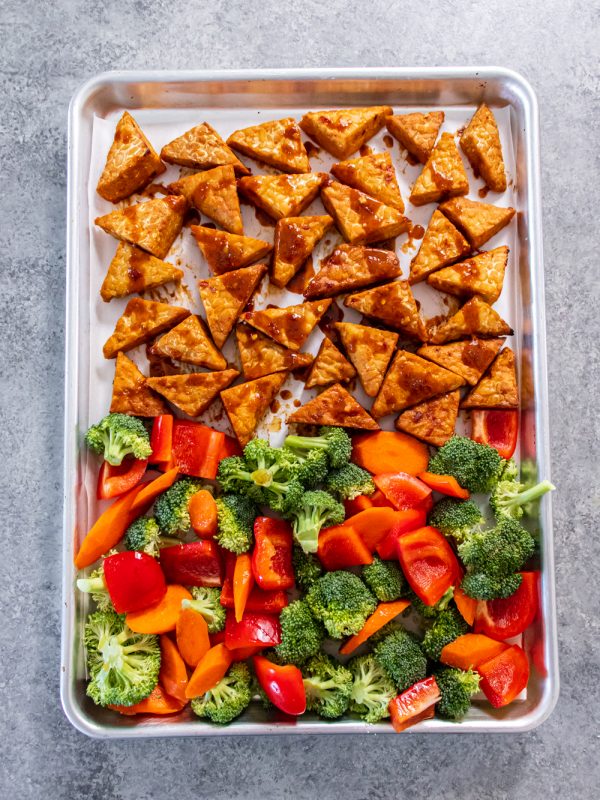
- Heat oven to 375F and line a large baking sheet with parchment paper. Spread tempeh on the top half of the baking sheet and reserve any remaining marinade. Bake tempeh for 15 minutes.
- Remove the baking sheet from the oven and spread vegetables on the lower half. Drizzle with sesame oil and sea salt. Use tongs to gently toss. Pour remaining peanut sauce on tempeh. Return to the oven for 15 minutes longer.
- Divide tempeh between 5 large compartments of 5 blueGood Cook meal prep containers and divide vegetables between small compartments.
Notes
Nutrition
Nutrition Facts: Beets
Beets are an exceptional plant and the root is used in natural medicines for hundreds of years.
Beets are used along with medications in the treatment of liver diseases and fatty liver. They are also used to help lower levels of triglycerides (a type of fat) in the blood, lower blood pressure, and to improve athletic performance.
How does it work?
There is some evidence that a chemical found in beets can help fight fat deposits in the liver. Beets also contain a chemical that might have antioxidant effects. Beet can also increase nitric oxide in the body. This chemical can affect blood vessels.

TOP 10 Health Benefits of Beets:
- are a great source of energy with good sugars, low calories and fat
- beetroot cleanses our body, purifies blood & maintains liver function
- rich in glycine betaine which protects against heart disease
- beets contain sodium, magnesium, calcium, iron & phosphorus
- raw beets are high in folic acid for production of new cells
- beetroot is rich in betaine, boosting mental health & treats depression
- contain antioxidants that fight against many types of cancer
- beets are high in trytophan which treats stress & relaxes the mind
- beetroot is rich in boron which kick-starts production of sex hormones
- the top beet greens are high in vitamin A and C
Beet Nutrition Facts:
Serving Size = 1 cup
Calories = 58
Calories from Fat = 2
Total Fat = 0.23 g
Cholesterol = 0 mg
Sodium = 106 mg
Potassium = 442 mg
Total Carbohydrate = 13 g
Dietary Fiber = 3.8 g
Sugars = 9.19 g
Protein = 2.19 g
Vitamin A = 1% RDI
Vitamin C = 11% RDI
Calcium = 2% RDI
Iron = 6% RDI

Things You May Not Know About Beet Root/Beet greens:
- Often called nature's viagra with their high BORON content
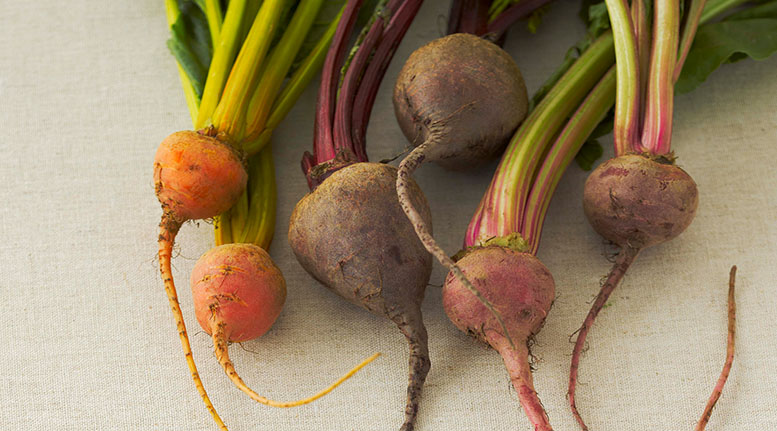
- Beetroot is also known as the table beet, garden beet, red or golden beet
- Red color compound BETANIN cannot be broken down by our bodies so it may cause temporary red urine & stool (not harmful)
- Cooking beets depletes nutrient levels dramatically
- The TOP GREENS of beets are rich in antioxidants, vitamin A & carotenoids!
- Use a proper JUICER when juicing beets (lots of fiber)
- Contain BETACYANIN which are effective in breaking down tumours
- Has been used to treat and cure boils, abscesses and even acne
- Beets contain the HIGHEST source of natural sugar, after the sugar cane
Here are a couple of our favorite recipes with Beets:
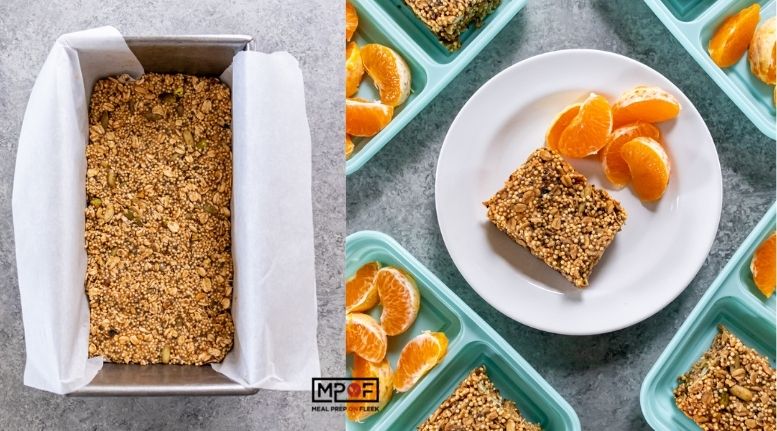
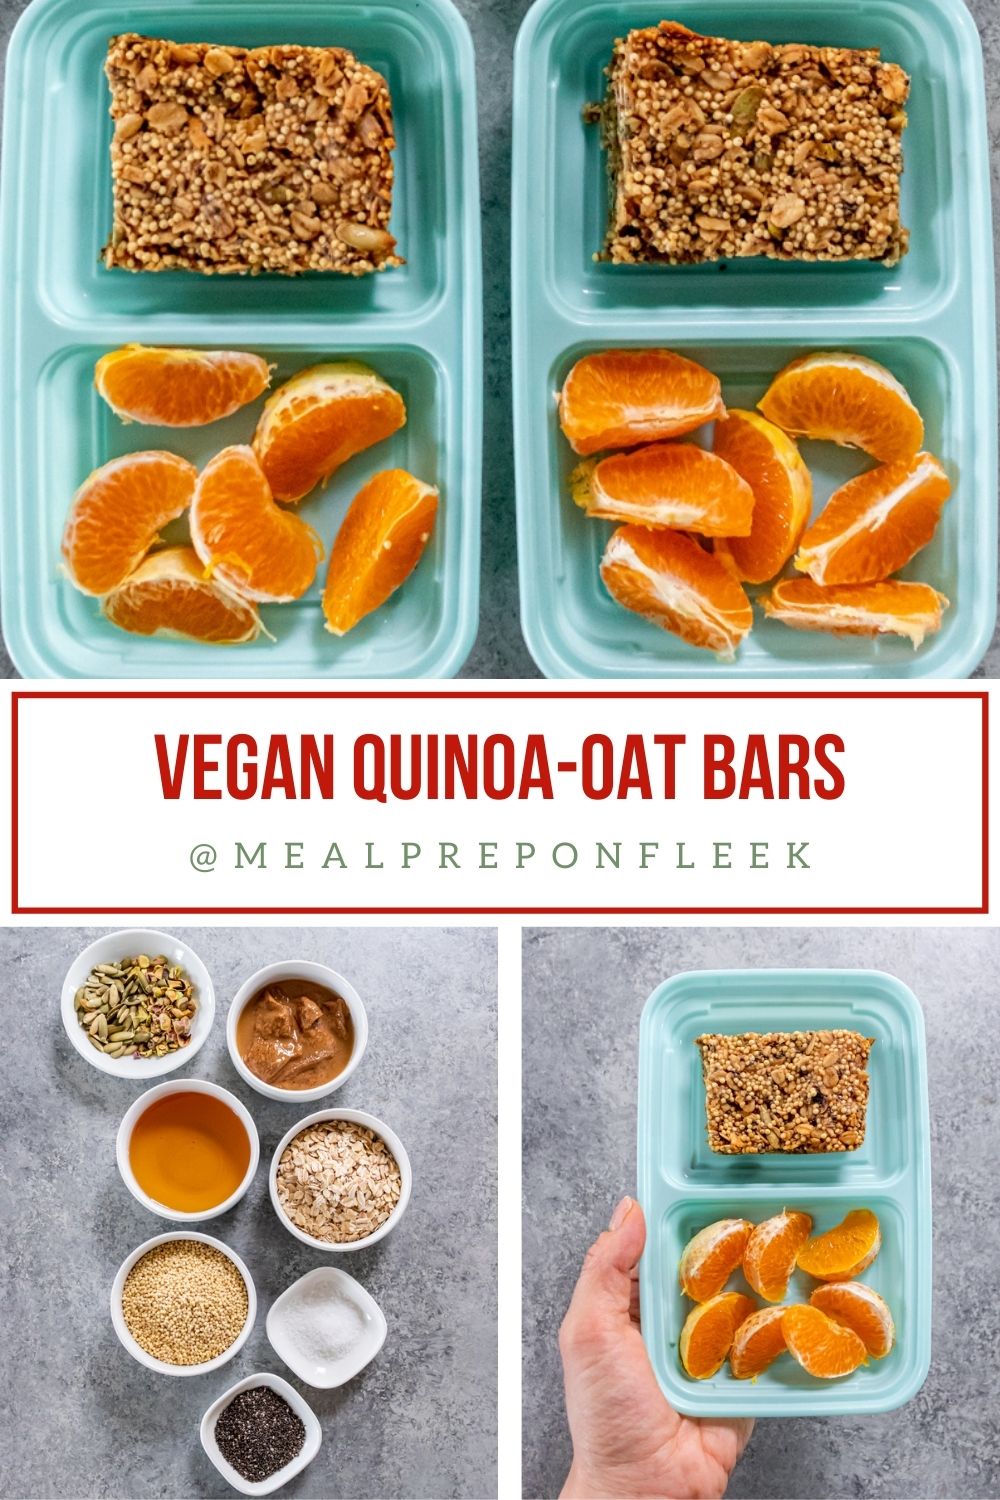
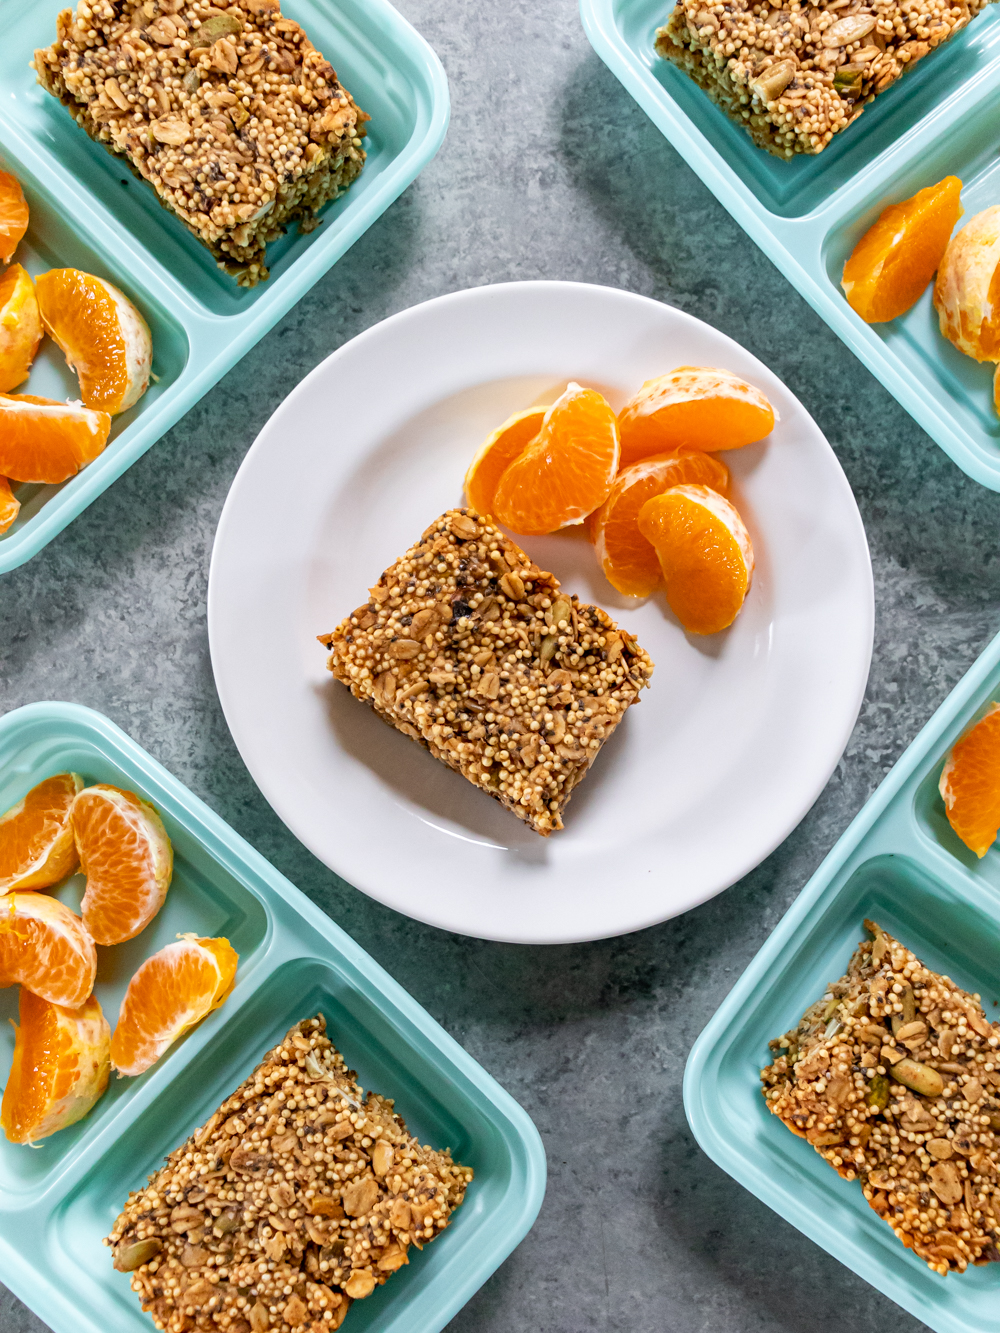
Quinoa-Oat Bars (Vegan, GF)
These sweet and salty crunchy quinoa-oat bars are full of fiber, healthy fats, and protein for a vegan snack that satisfies. Enjoy them any time hunger strikes.
How sweet do these vegan quinoa-oat bars look?
We're always in search of snacks that can check off a couple of different boxes at once. These vegan bars happen to be nutrient-dense (hooray!); specifically, they're good sources of protein and fiber. You might be tempted to say they look a little like bird food, what with all the seeds jammed into these bars, but they taste nothing like it. They're hearty, nutty, and crunchy, and just sweet enough to satisfy a craving that might otherwise send you elsewhere.
How to Make Vegan Quinoa-Oat Bars
It's simple. You stir together the almond butter and agave nectar (the latter makes this a vegan snack), and then add the rest of the ingredients. These include chia and sunflower seeds, pistachios, quinoa, and oats. The ingredients are baked in a parchment-lined loaf pan. Then, you remove them from the oven to cool. Once they're cool, you slice them into six (or four, if you're feeling greedy) chunks and pop them into your prep containers. Voila!
Substitutions and Alterations
- If desired, you can use peanut butter or cashew butter instead of almond butter for these quinoa-oat bars, but we like how almond butter tastes in these vegan quinoa-oat bars.
- For those who aren't following a vegan diet, feel free to swap honey or maple syrup instead for agave syrup.
- Feel free to mix in ⅓ cup of add-ins, whether that's mini chocolate chips, chopped ginger, or dried cranberries. (Bear in mind, however, that the total caloric intake and all the nutritional info will be different once you start tinkering with the recipe.)
- Don't like pistachios? Double up on almonds and use those, or opt for pecans, walnuts, or cashews in this recipe. Just make sure to chop them well, so you don't have big chunks in these vegan quinoa-oat bars.
- Add a dash of cinnamon, ginger, or cardamom when you're combining the ingredients.
Tips
Rolled oats are naturally gluten-free, but sometimes they are produced in a facility where other gluten-containing items are also found. So, if you need to follow a very strict gluten-free diet, source your oats from a certified gluten-free facility. It's usually indicated right on the package. (We happen to like the ones from Bob's Red Mill).
How to Store and Serve These Vegan Quinoa-Oat Bars
These will keep at room temperature for up to 5 days. We kind of like a snack that doesn't need the fridge, because with all this meal prepping going on, the refrigerator gets jammed in a hurry. Right?
Clementine segments make a great companion to these vegan quinoa-oat bars, but feel free to serve them with sliced apples, bananas, or even strawberries or blueberries. The bit of sweetness in the fruit plays nicely with the agave in these bars.
READ MORE: No Bake Chocolate Peanut Butter Bars. 'Nuff said.

Vegan Quinoa-Oat Bars Ingredients:
- ⅓ cup natural unsalted almond butter
- ¼ cup agave nectar
- ⅔ cup old-fashioned oats
- ⅔ cup quinoa
- 2 tablespoon chopped pistachios
- 2 tablespoon raw pepitas
- 1 tablespoon chia seeds
- ¼ teaspoon sea salt
For Serving
- 6 peeled/segmented clementines


Ingredients
- ⅓ cup natural unsalted almond butter can sub with any nut or seed butter
- ¼ cup agave nectar can use any liquid sweetener
- ⅔ cup old-fashioned oats
- ⅔ cup quinoa
- 2 tablespoon chopped pistachios can sub with any nut/seed
- 2 tablespoon raw pepitas can sub with any nut/seed
- 1 tablespoon chia seeds do not substitute
- ¼ teaspoon sea salt
For Serving
- 6 peeled/segmented clementines can serve with any fruit
Instructions
- Preheat the oven to 300ºF and line a loaf pan with parchment paper, leaving the sides long to form a sling.
- In a medium bowl, stir together almond butter and agave nectar until smooth. Add oats, quinoa, pistachios, pepitas, chia seeds, and salt. Stir well to mix.
- Spread mixture evenly in prepared pan and use damp fingertips to press it into pan. Bake for 25-30 minutes. Cool bars completely to room temperature.
- Slice into 4 bars and divide among 4 (½ cup) compartments of snack containers. Add clementine segments to the remaining compartments.
Notes
Nutrition
If you make these, please let us know what you think in the comments below!
Can't get enough snack bar combos? Try out these Sheet Pan No-Bake Paleo Energy Bars!
Meal Prep Menu: 2022 Week 3
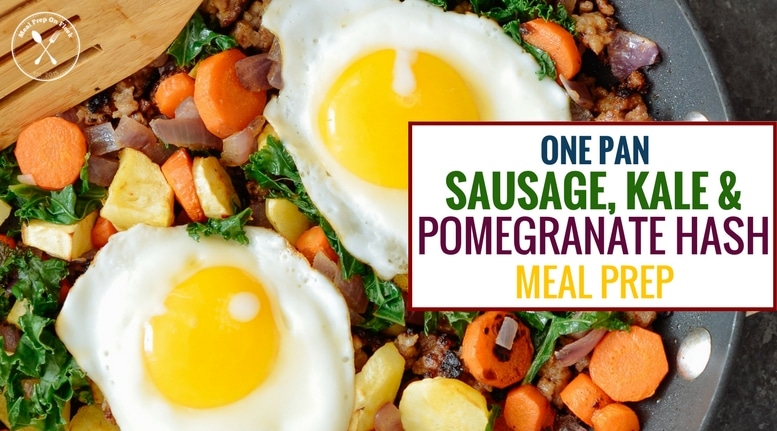
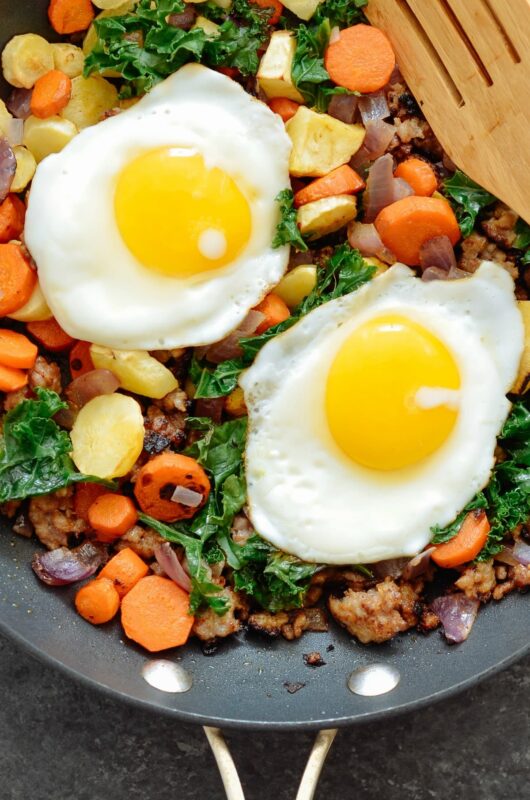
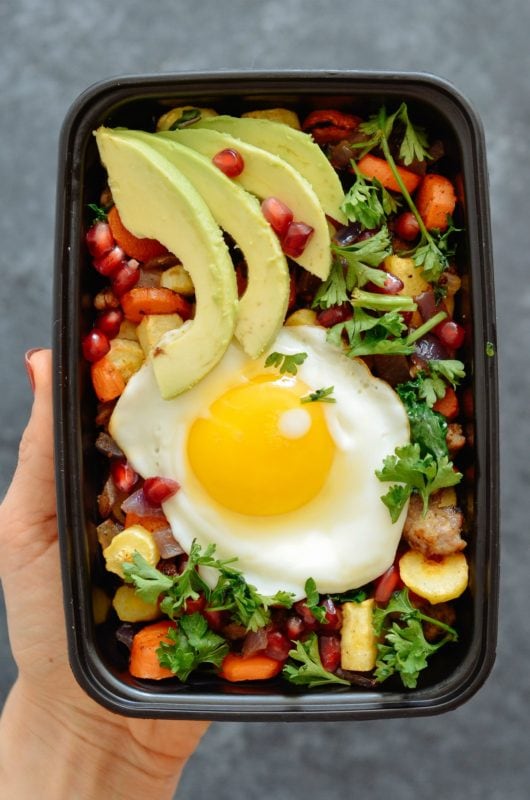
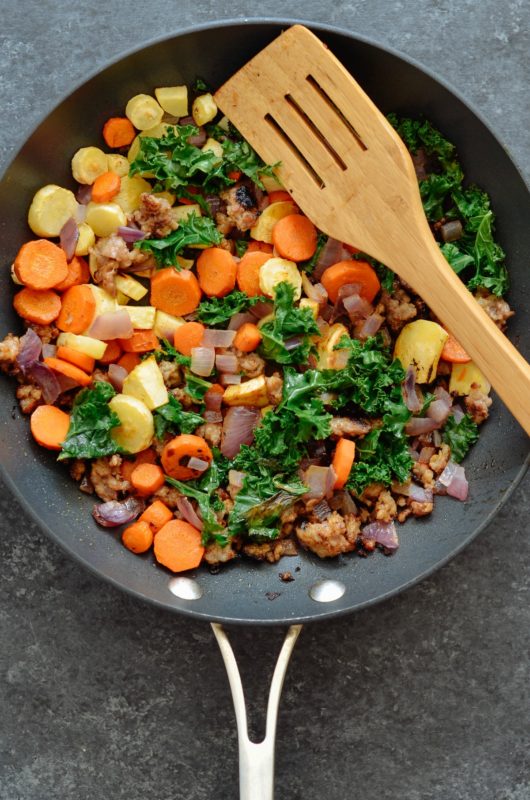
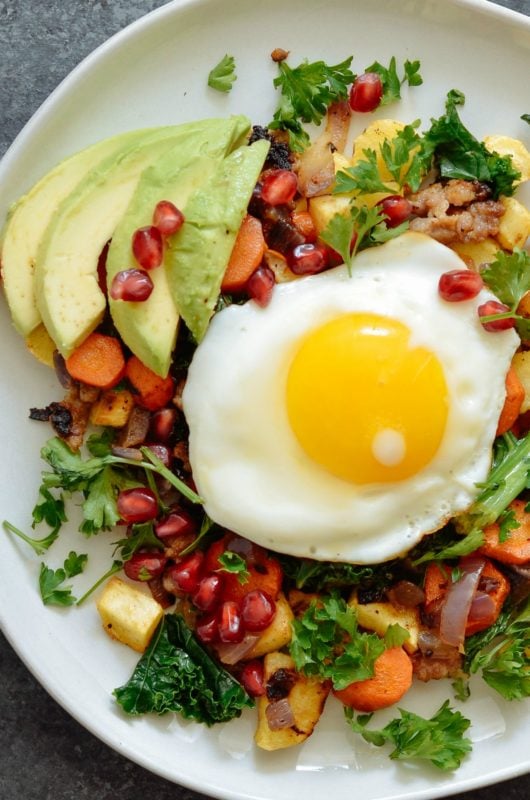
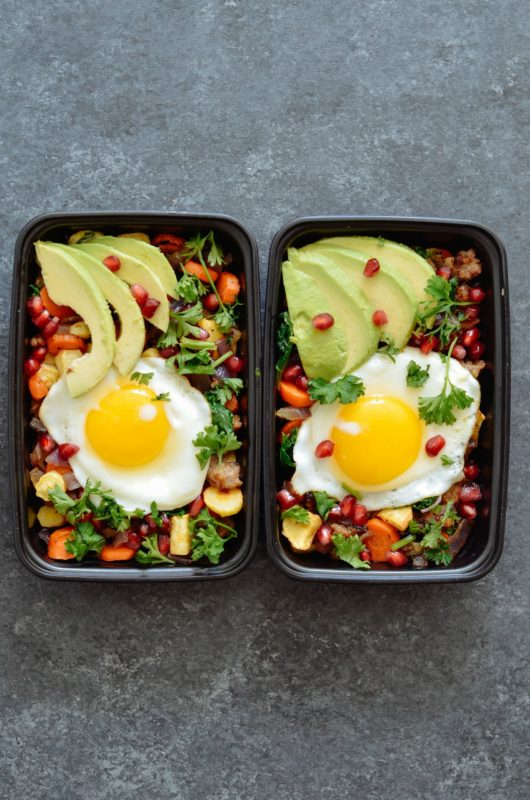
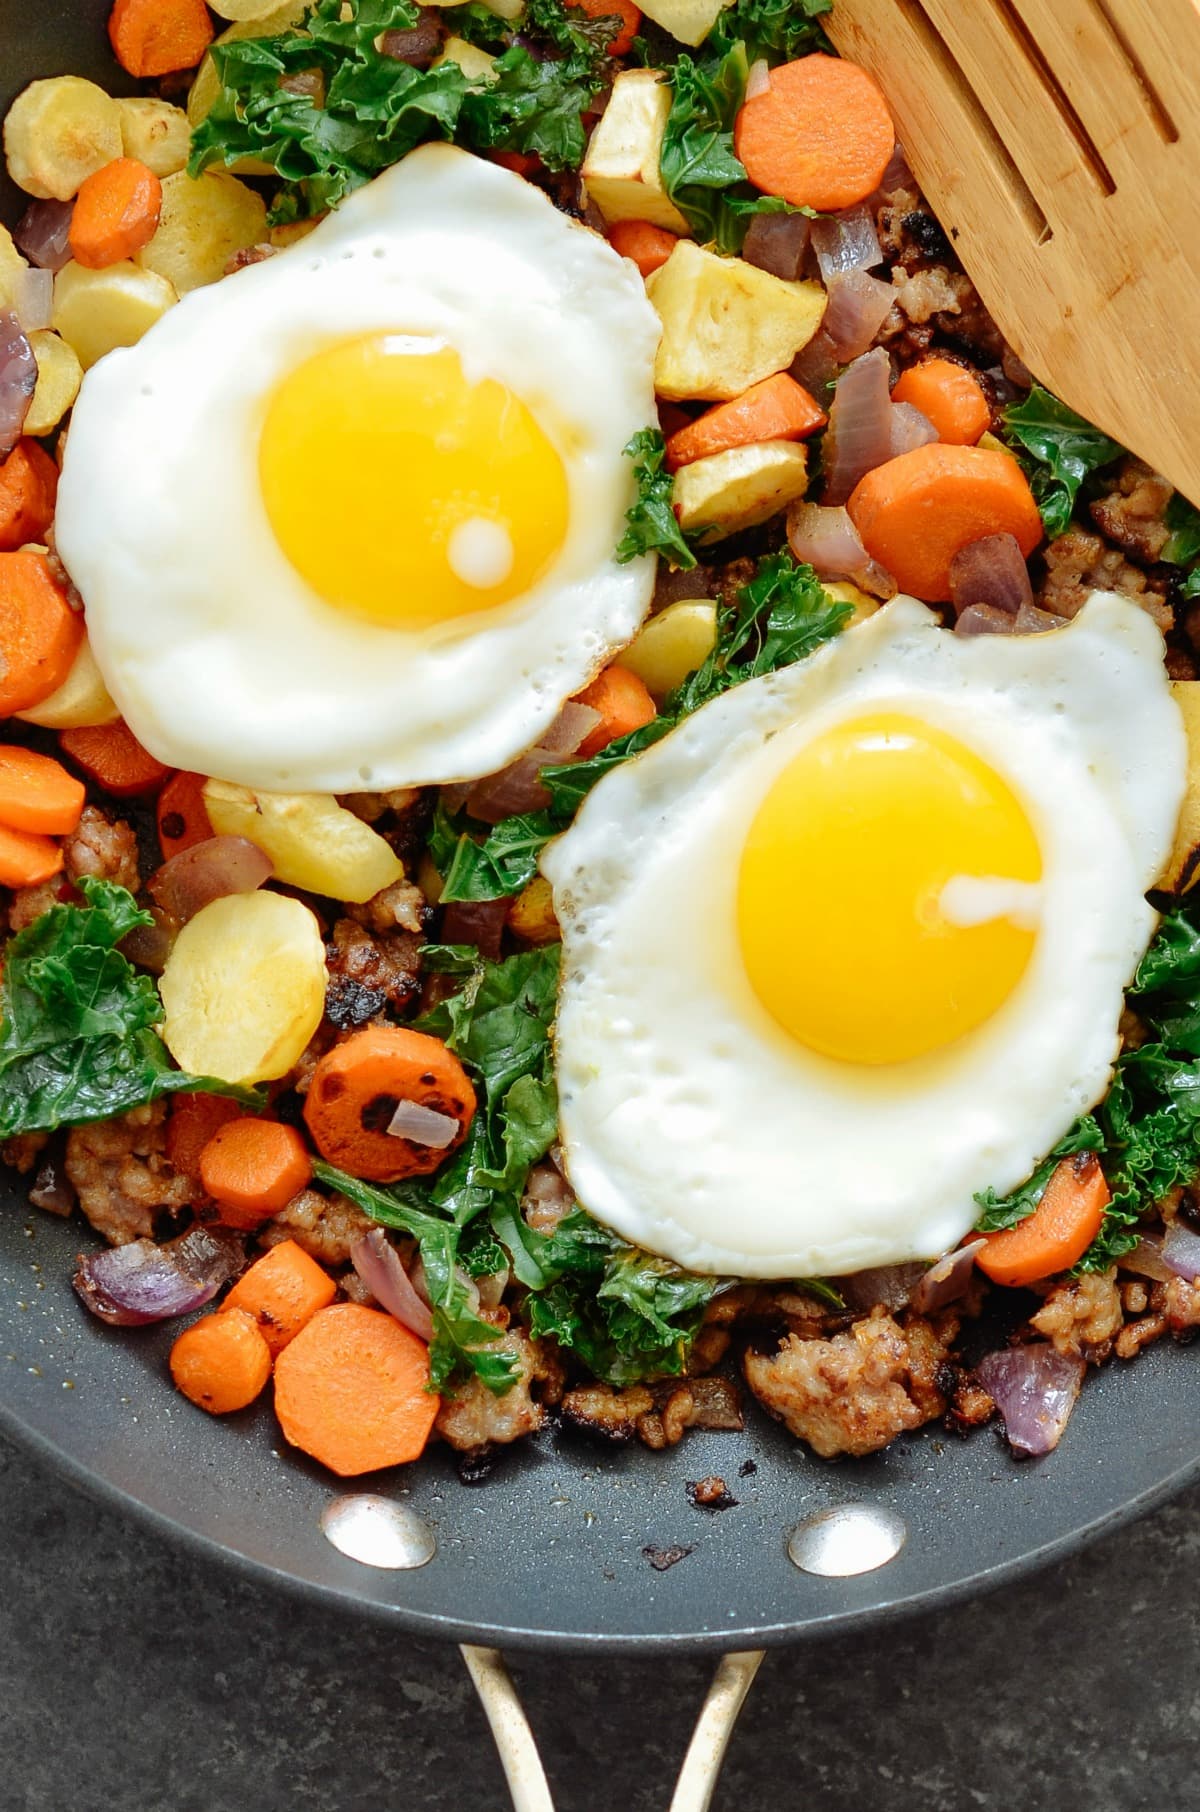
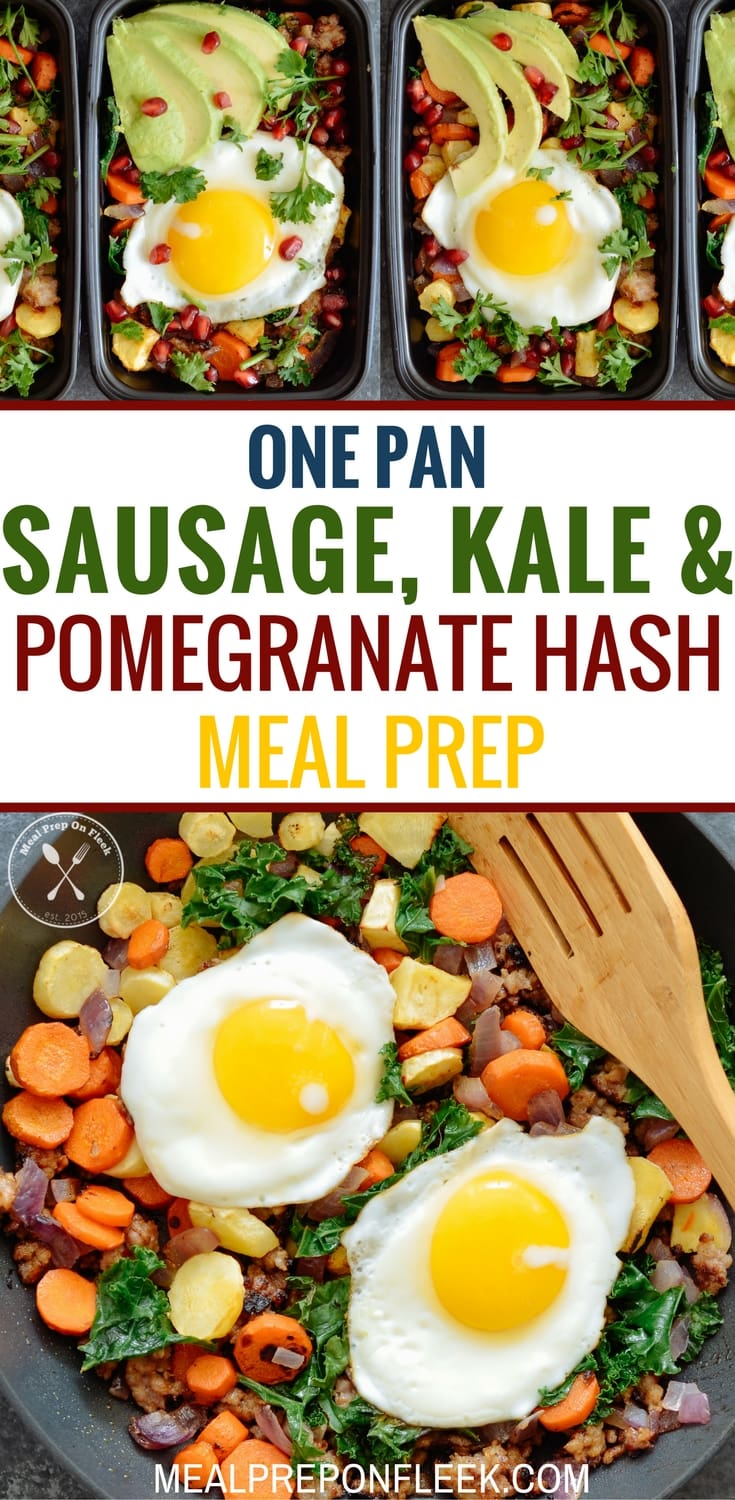
Sausage, Kale & Pomegranate Hash Meal Prep
This one pan, meal prep recipe brings all of our favorite winter flavors together! We just can't get enough. A little bit of sweet. A little bit of savory. A perfectly cooked egg. It is beyond amazing!
Sausage, Kale & Pomegranate Hash Meal Prep is one of those recipes that will have everyone coming back for more! Why? Because it has all of he flavor you could want made in a simple, fast dish! Plus, you can add in or subtract out any vegetables you would like! This is another one of those recipes where it is 100% customizable to your liking!

This recipe for Sausage, Kale & Pomegranate Hash Meal Prep comes together in just minutes and tastes amazing! It's a little bit of sweet and a little bit of savory finished off with a perfectly cooked egg. Whole30. Paleo. Gluten Free.

Make a big batch during meal prep Sunday and then portion out the rest of weekday breakfast. Or, do like us and serve it for lunch or a fast dinner!
If you are looking to lower the fat or sodium you can swap the sausage for ground turkey breast or lean beef. If you are vegetarian you can easily leave out the sausage or use your favorite veggie sausage instead.
How can you go wrong with a recipe that packs in protein, vegetables and fruit made in one pan?
Sausage, Kale & Pomegranate Hash Meal Prep Ingredients:
- ½ pound carrots, sliced
- ½ pound parsnips, sliced
- ½ tbs olive oil
- 1 large purple onion, chopped
- 1 cup kale, chopped
- ¼ cup pomegranate seeds
- 1 tsp ground cumin
- 1 tsp smoked paprika
- salt & pepper, to taste
- 1 large avocado, sliced
- 4 large eggs
- ½ lb lean ground sausage
- fresh parsley, if desired


Ingredients
- ½ pound Carrots sliced
- ½ pound parsnips sliced
- ½ tablespoon olive oil
- 1 large purple onion chopped
- 1 cup kale chopped
- ¼ cup pomegranate seeds
- 1 large Avocado
- 4 large eggs
- ½ pound lean ground sausage we used Simple Truth brand
- 1 teaspoon ground cumin
- 1 teaspoon smoked paprika
- salt & pepper as desired
- fresh parsley if desired
Instructions
- Preheat oven to 425 degrees F. Line a baking sheet with parchment paper and add carrots and parsnips. Drizzle with olive oil and roast for 20 minutes.
- While carrots and parsnips are roasting, heat a non stick skillet over medium heat and brown sausage with your seasonings, salt and pepper.
- Remove sausage and place on a plate.
- Add onion to the pan and saute until translucent. When carrots and parsnips are done add them to the pan with the onions. Add back in your sausage and kale. Saute for 2 minutes.
- Fry eggs, if using.
- Place the hash in your individual containers and top with pomegranate seeds, a fried egg, avocado and fresh parsely.
Video
Notes
Nutrition
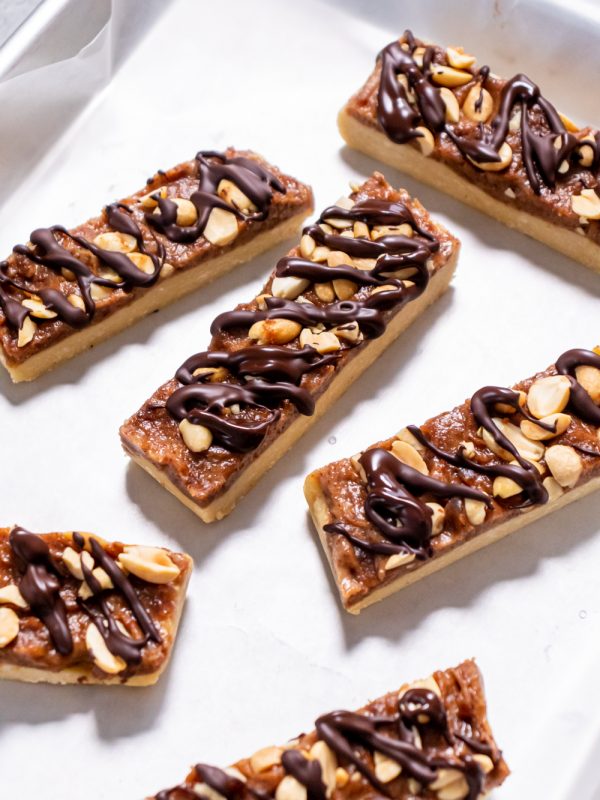
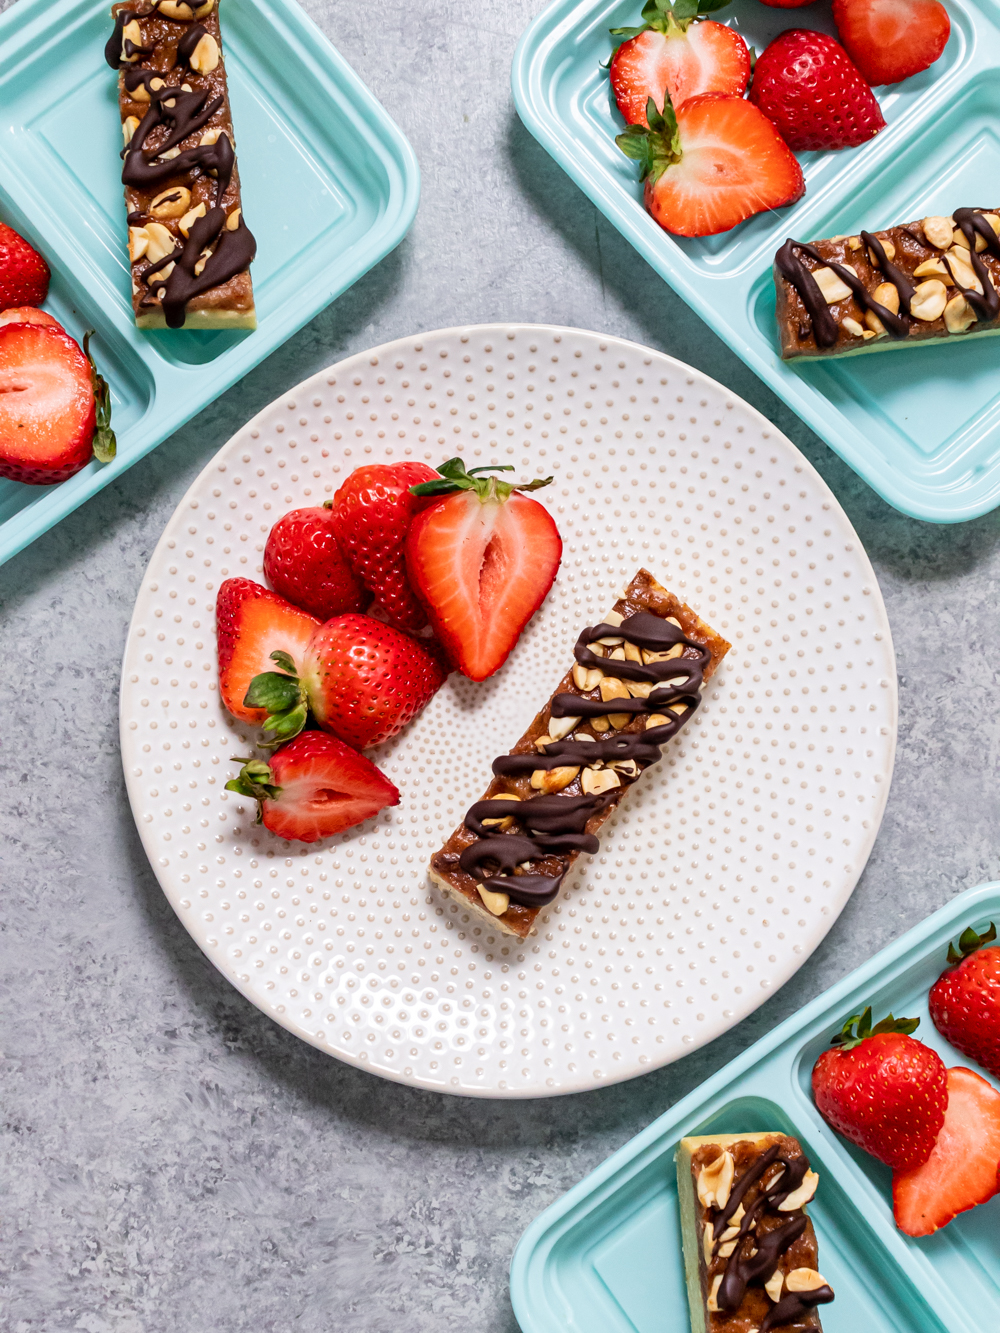
Snickers Protein Bars (Vegan, GF)
Get your sweet fix without all the sugar! These gluten-free, vegan protein bars contain less sugar and more protein than a typical candy bar for a hunger curbing snack with zero guilt.

Vegan Snickers Protein Bars Ingredients:
For Nougat Layer
- 1 cup gluten-free flour (or regular flour)
- ⅓ cup unsweetened vanilla vegan protein powder (garden of life brand)
- 2 tablespoon agave nectar (or sweetener of choice)
- ⅓ cup unsweetened almond milk (or milk of choice)
- 2 tablespoon melted coconut oil
For Filling
- ¼ cup pitted dates, soaked in ¼ cup hot water for 5 minutes
- ⅓ cup natural drippy unsweetened peanut butter, at room temperature (can sub for any drippy nut or seed butter)
- 2 tablespoon roasted salted peanuts, coarsely chopped (can swap for any nut)
For Chocolate Drizzle
- ¼ cup unsweetened vegan dark chocolate chips (or chocolate of choice)
For Serving
- 2 cups sliced strawberries


Ingredients
For Nougat Layer
- 1 cup gluten-free flour or flour of choice
- ⅓ cup unsweetened vanilla vegan protein powder garden of life brand (or any vegan brand)
- 2 tablespoon agave nectar can sub with any liquid sweetener
- ⅓ cup unsweetened almond milk can sub with any kind of milk
- 2 tablespoon melted coconut oil
For Filling
- ¼ cup pitted dates soaked in ¼ cup hot water for 5 minutes
- ⅓ cup natural drippy unsweetened peanut butter, at room temperature can use any drippy nut or seed butter
- 2 tablespoon roasted salted peanuts coarsely chopped (can use any nut)
For Chocolate Drizzle
- ¼ cup unsweetened vegan dark chocolate chips use any kind of chocolate
For Serving
- 2 cups sliced strawberries swap for any fruit
Instructions
- Line a loaf pan with parchment paper overlapping sides. Combine flour, protein powder, coconut oil, agave nectar and almond milk in a small bowl and mix thoroughly to moisten. Spread mixture in the bottom of the prepared pan and press with damp fingertips to form the pan. Freeze for 30 minutes.
- Combine dates with water from soaking and peanut butter in a food processor and blend until smooth. Spread filling over the nougat layer and sprinkle with chopped peanuts. Freeze an additional 30 minutes.
- Melt chocolate chips over a double boiler. Lift bars from loaf pan and slice into 6 equal pieces. Drizzle chocolate over the top of each bar. Place on a wax paper line tray or plate and freeze for 10 minutes to firm.
- Divide sliced strawberries between 6 (½ cup) compartments of snack containers. Add 1 snickers bar to each remaining compartment.
Notes
Nutrition
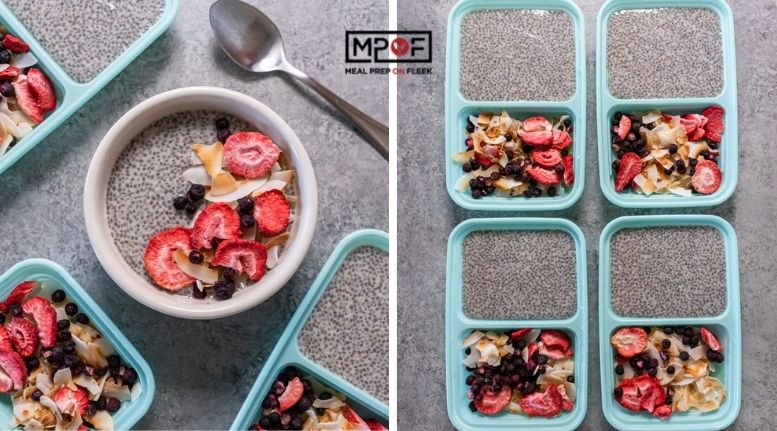
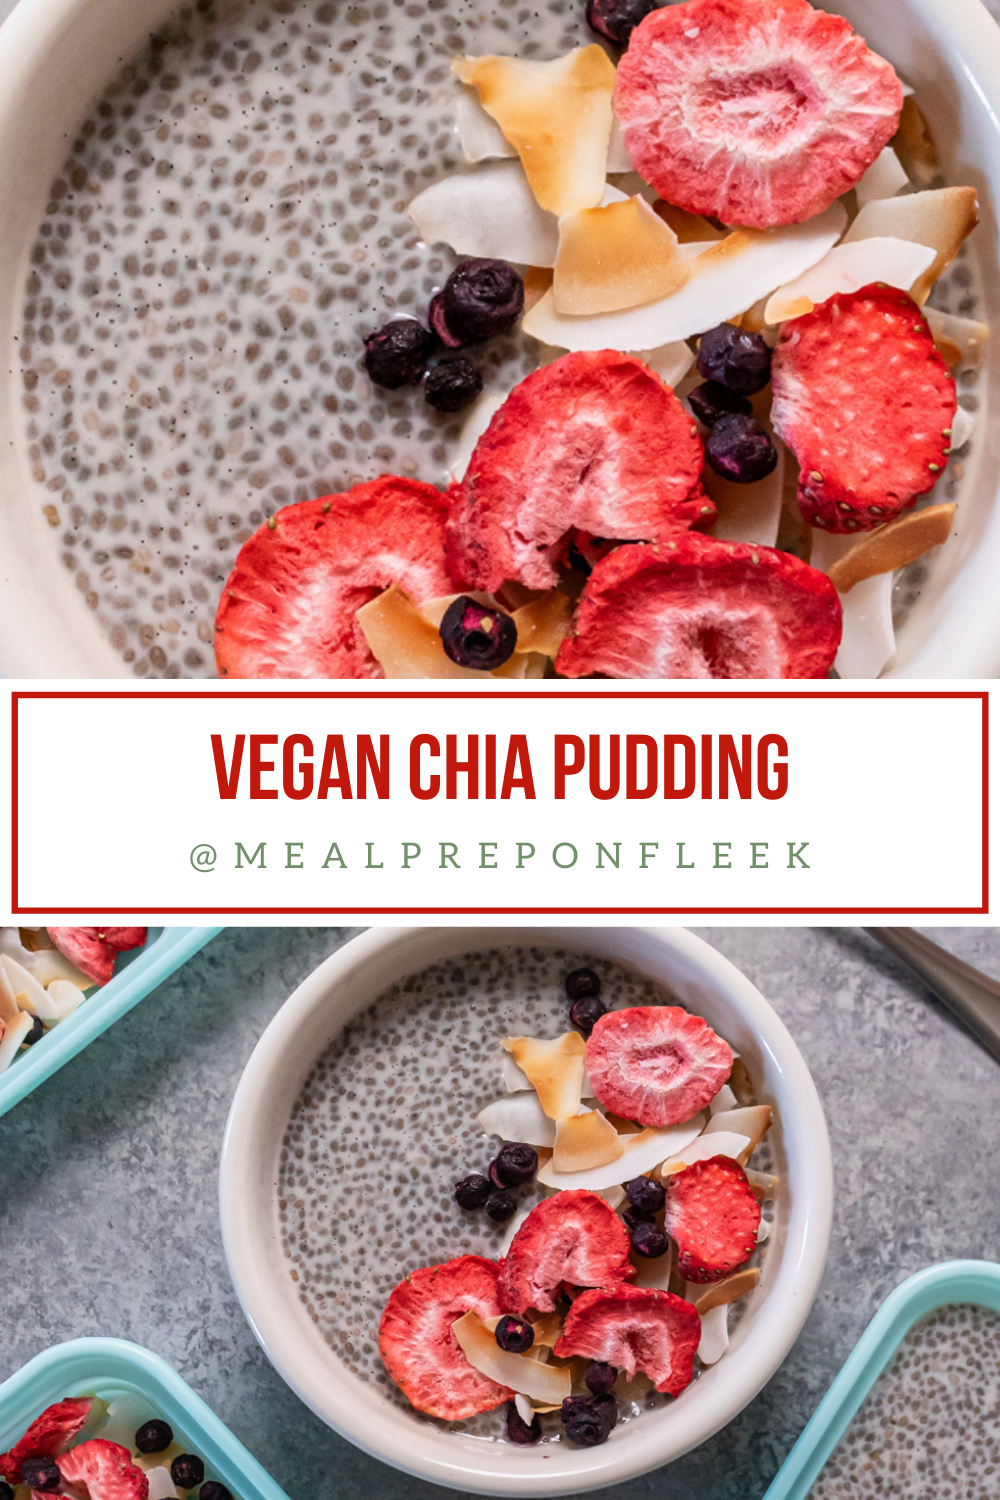
Chia Pudding (Vegan, GF, Paleo)
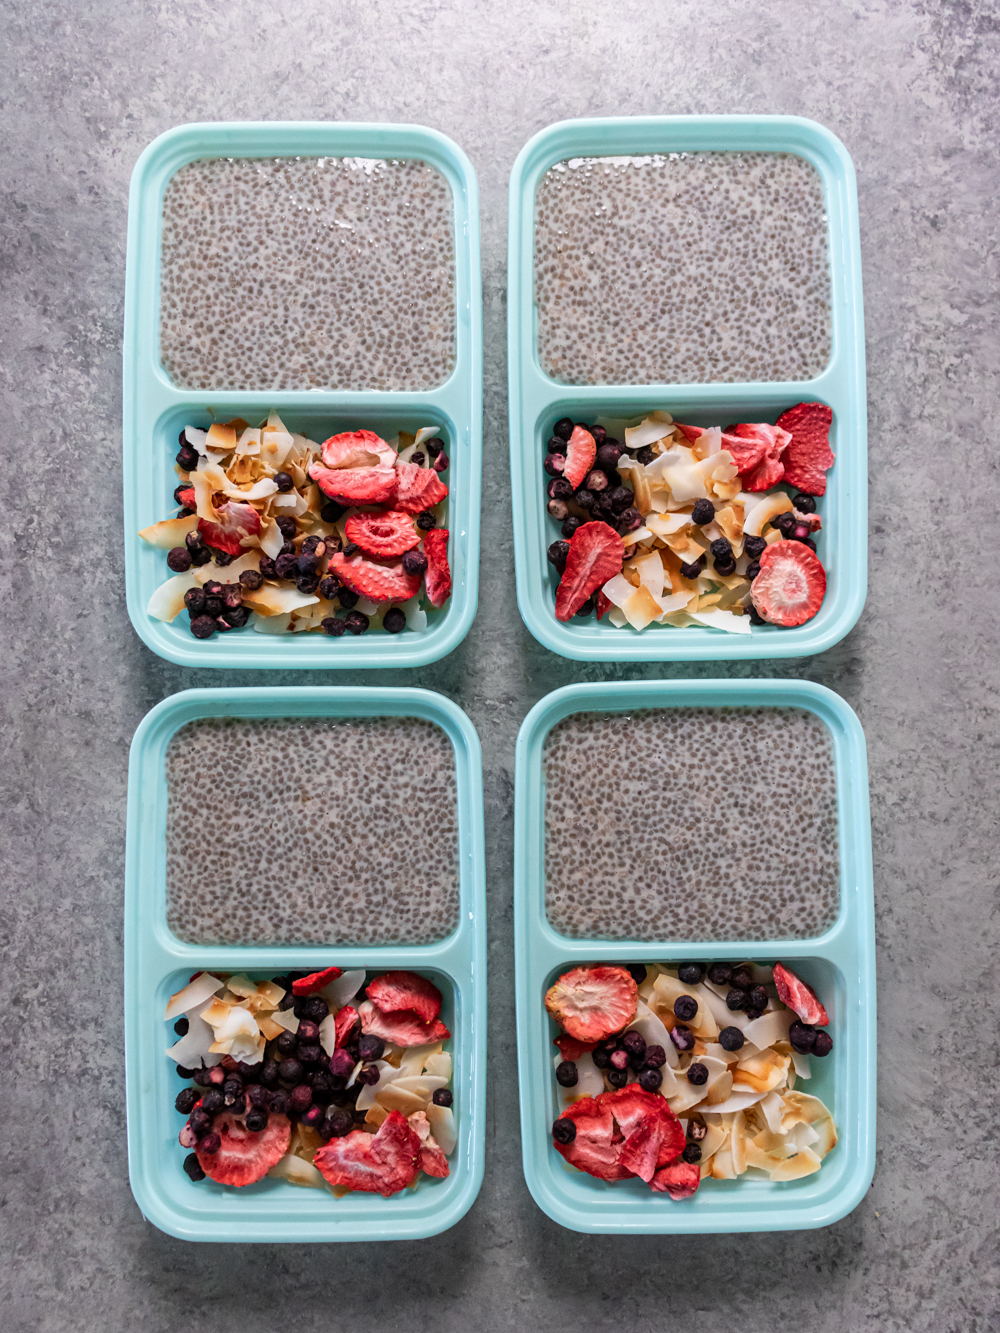
For a light yet filling snack, this vegan chia pudding checks all the boxes. Chia seeds add texture, fat, and fiber. Top with freeze-dried fruit and toasted coconut for a satisfying crunch.

If you've never worked with chia seeds before, they're kind of magical, if we do say so ourselves. Nutrition aside (we'll get to that in a minute), they expand when liquid is added to them and thicken up. It's why they have become a popular ingredient for vegan puddings, because you don't need dairy to achieve the right consistency. See, it's magic, right? (Maybe you're old enough to remember Chia Pets and those middle-of-the night commercials . . . )
Regardless, they're ideal for vegan puddings and they're even better as make-ahead healthy puddings because it does take a little time for the "pudding" to set.
Why Are Chia Seeds Good For You?
Chia seeds are a superfood, which means they're chockablock with all kinds of things that are great for your health, packed into one tiny package. In fact, one serving of chia seeds contains the following:
- 5 grams of protein
- 10 grams of fiber
- 12 grams of carbohydrate
- 9 grams of fat; 8 of those grams are heart-healthy fats
They're a great healthy addition to your diet, regardless of whether or not you're vegan.
How to Serve and Store Vegan Chia Pudding
You'll want to keep this as cold as possible. It does need some time to set up in the fridge-at least 4 hours and up to 8, or overnight. A little longer is okay, too.
How Long Does Chia Seed Pudding Last?
As long as it's covered and refrigerated, it should stay fresh up to 5 days. And there are 5 days in the workweek, typically. How convenient!
Substitutions and Alterations for Vegan Chia Pudding
Depending on your taste buds, you can go a few different ways with ingredients.
- Swap out another plant-based milk (such as coconut, soy, or oat, as all three would taste great).
- If you're vegan but you eat honey, feel free to use that instead of maple syrup or agave (although we like the depth of maple syrup here)
- Stir in fresh (or frozen) blueberries, strawberries, raspberries, or blackberries if desired, instead of the freeze-dried ones.
- Pumpkin or sunflower seeds can also add crunch to vegan chia pudding if you're not into the taste of coconut.
- If you're feeling extra decadent, add some mini-chocolate chips (make sure they're dairy-free first) on top. So good!
- Toasted chopped nuts are great additions too. We like almonds, as in our Berry Almond Chia Pudding Meal Prep recipe!
Why Didn't my Chia Seeds Turn into Pudding?
This can happen sometimes, and partly it's connected to how fresh your chia seeds are (they're best kept in a cool, dark place). But the single most important thing you can do to make sure your pudding sets right and isn't runny? Stir, stir, and stir. Let the mix sit out for a couple of minutes before you refrigerate it, and observe. If the seeds drop to the bottom, stir again! You want them to be suspended in the mix. There's no magic number for how many times you'll need to stir vegan chia pudding. Just stir and observe, and then try again if need be.
READ MORE: Can't get enough chia pudding? Try this Vanilla Chia Pudding!
Vegan Chia Pudding Ingredients:
- 2 cups unsweetened almond milk
- ⅓ cup chia seeds
- 2 tbsp. pure maple syrup or agave nectar
- 1 tsp. vanilla bean paste (or 1 tbsp. unsweetened cacao powder for chocolate flavor)
For Serving
- 1 cup toasted unsweetened toasted coconut flakes
- ½ cup freeze-dried strawberries
- ½ cup freeze-dried blueberries


Ingredients
- 2 cups unsweetened almond milk
- ⅓ cup chia seeds
- 2 tablespoon pure maple syrup or agave nectar
- 1 teaspoon vanilla bean paste or 1 tablespoon unsweetened cacao powder for chocolate flavor
For Serving
- 1 cup toasted unsweetened toasted coconut flakes
- ½ cup freeze dried strawberries
- ½ cup freeze dried blueberries
Instructions
- Whisk together milk, chia seeds, maple syrup and vanilla extract in a medium bowl. Cover and refrigerate at least 4 hours and up to 8 hours (overnight).
- Stir chia pudding thoroughly and well. Divide among 4 (½ cup) compartments in the snack containers. Add toasted coconut and freeze dried fruit to remaining compartments.
Notes
Nutrition
Meal Prep Menu: 2022 Week 2
Sausage and Mashed Potato Meal Prep
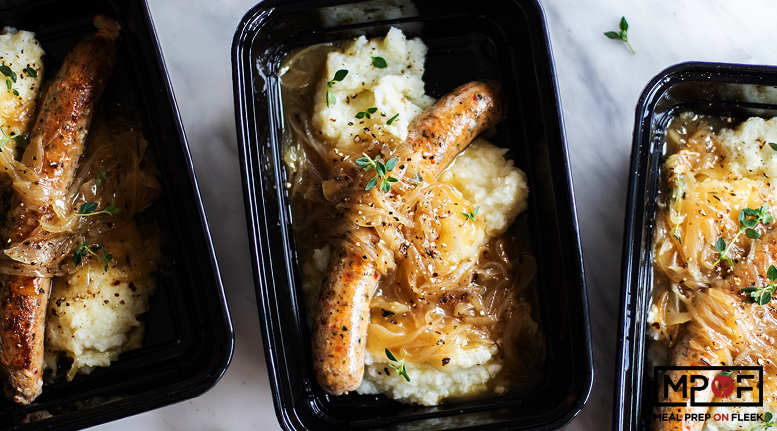
Midway through a potentially long day, when you feel like you need a hearty but quick meal, what are your options? Luckily we have another meal prep ideas recipe which is sure to have you eating a healthy lunch which will have you energized and ready to face the remainder of the day. Here come sausage and mashed potatoes to the rescue with a perfect proportion of the nutrients needed to remain healthy. If you like mashed potatoes, here is a meal prep ideas recipe you can add to your list of the great ones!

How Long Will Sausage And Mashed Potatoes Last For?
At room temperature, consume within 2 hours. However, this delicious meal can be stored in meal prep airtight containers which maintain freshness while in the fridge for 3 to 4 days.
Can Sausage And Mashed Potatoes Be Frozen?
Indeed this appetizing meal can be stored in the freezer for 1 to 2 months.

How Do You Make this Whole30 Meal Prep Recipe?
First off, collect all your ingredients, utensils and measuring equipment. Once these are gathered, let's get started!
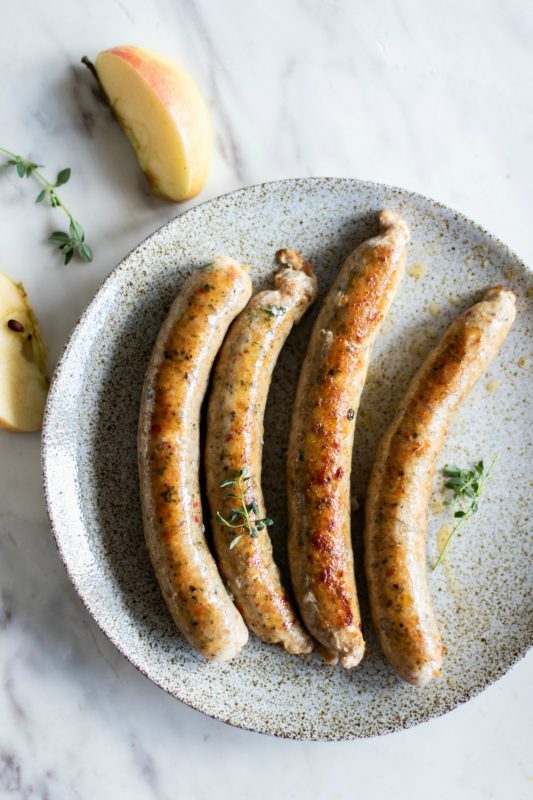
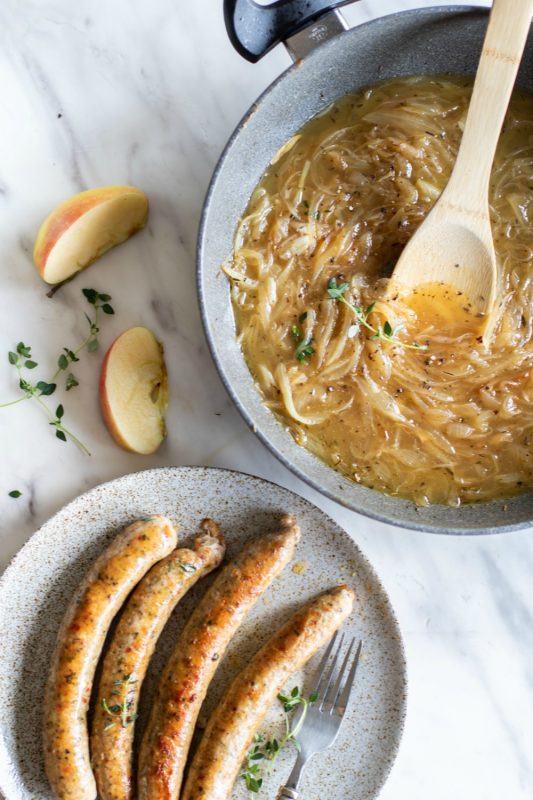
Add olive oil and your sausages into a large skillet and heat until your sausages are cooked through. Then add a steamer basket into a large pot. Into the steamer basket, put your chopped potatoes and place cauliflower on the top. Steam these vegetables for about 25 minutes, until they are fork-tender. Once your sausages are browned, remove from the skillet and add to your onions.
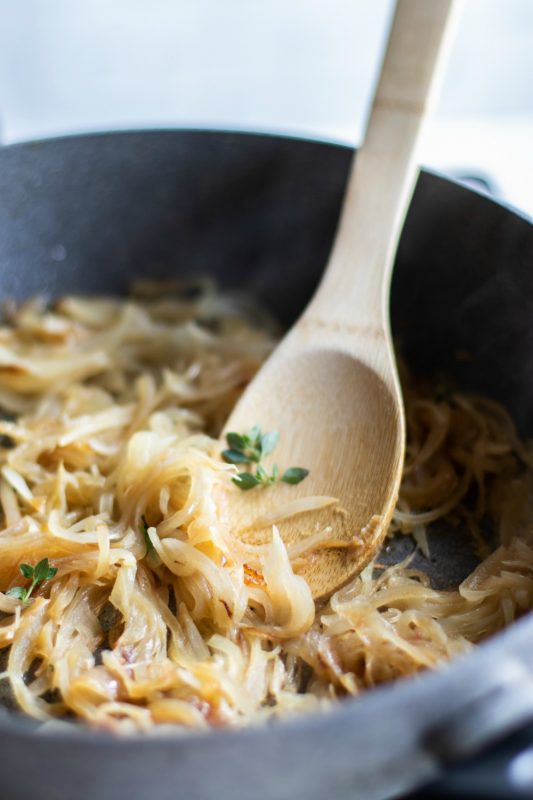
Flavor things up with your choice of spices, for this recipe we've included salt and pepper. Place your thinly chopped onions into a skillet to caramelize over medium heat. Do so for about 20 minutes, until the onions are tender and sweet and the caramel color is evenly spread.
Add your remaining ingredients into your skillet with your onions, except the arrowroot and water. Heat your mixture over medium heat and bring to a low simmer. Mix the arrowroot into the water and then pour in to thicken the gravy to your desired thickness
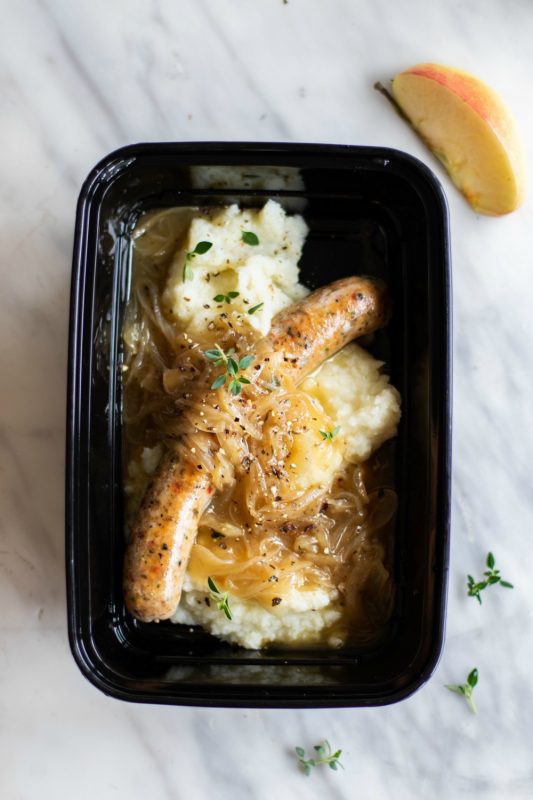
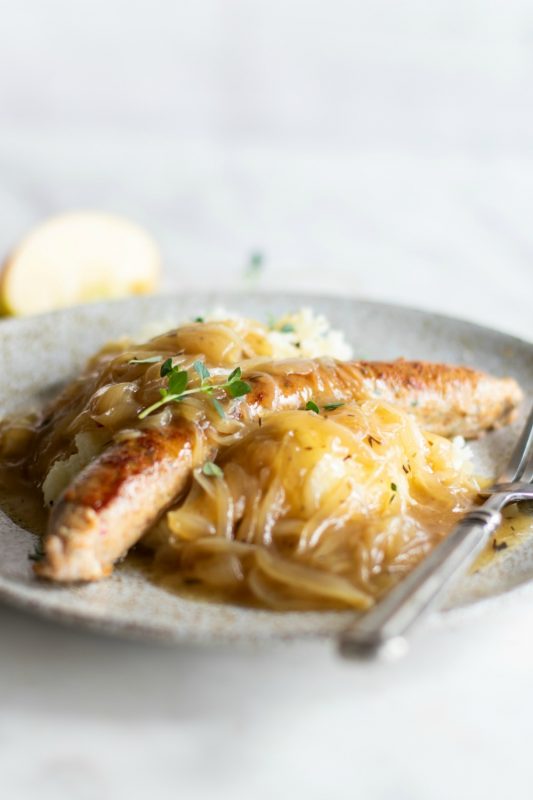
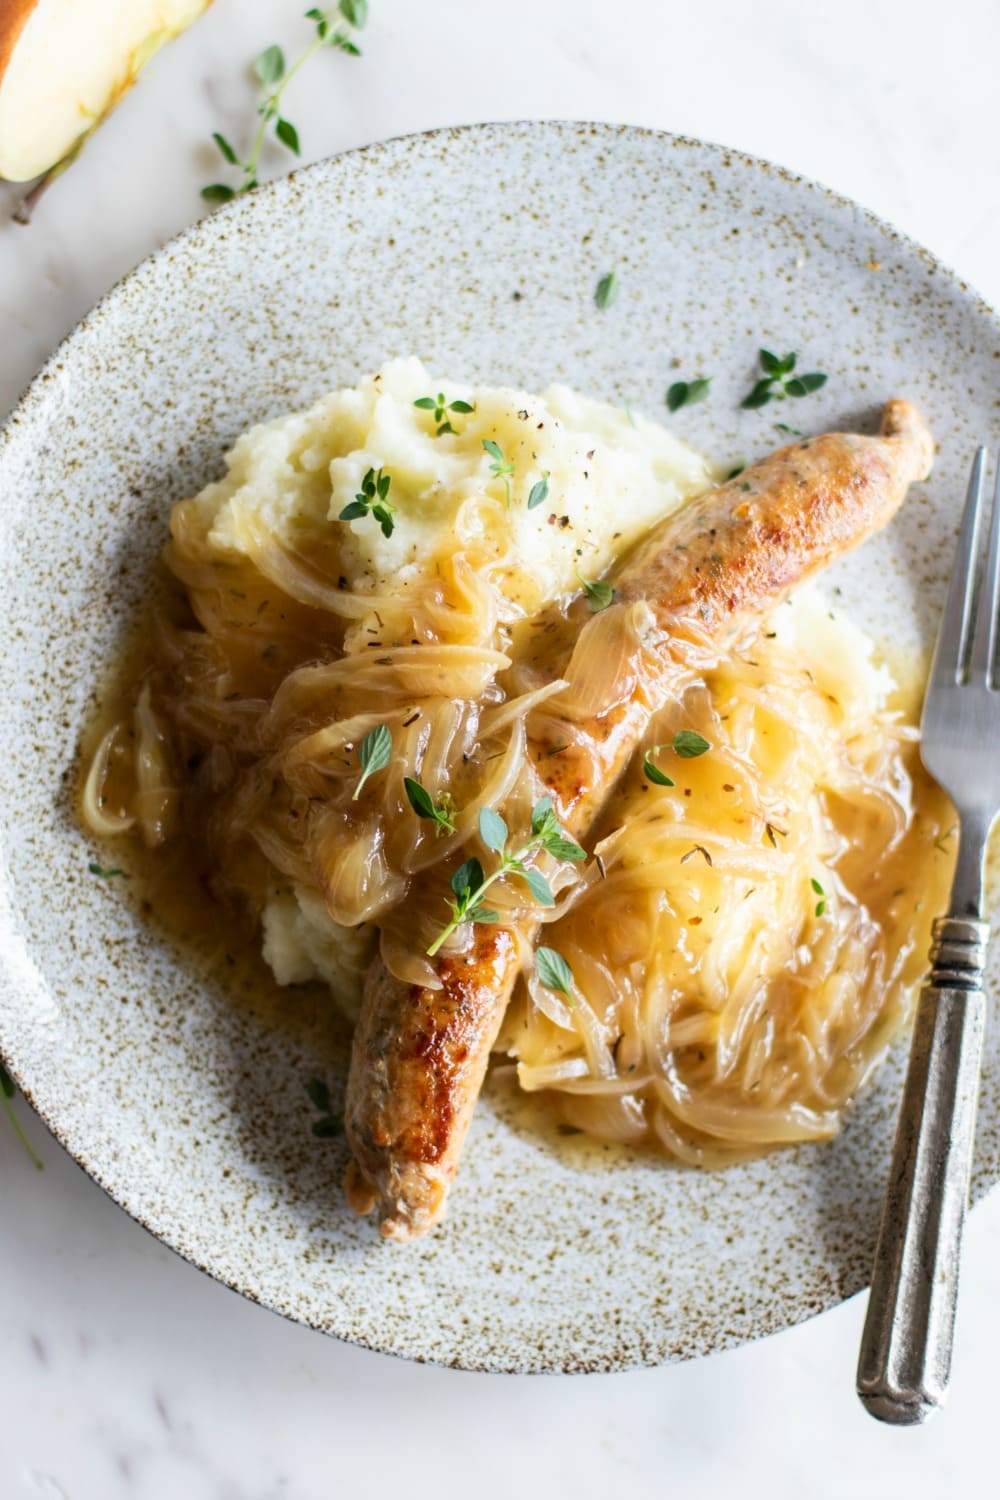
Are your potatoes and cauliflower fork tender? Awesome. Then drain and add to a food processor bowl or mixer bowl to mash. Once mashed, season with ghee, salt, and pepper. Serve the sausages over the mashed potatoes and cauliflower with the onion gravy as your topping. Delicious!

How To Portion this Whole30 meal prep recipe?
This meal prep ideas recipe will provide you with four hearty servings of our delightful sausage and mashed potatoes. These durable and freezer and heat approved airtight storage containers are perfect for storage and easy reheating!

More Sausage Meal Prep Recipes.
You didn't think this was our only sausage recipe, did you? If you did, we are happy to disappoint and provide you with a few more sausage options to keep things interesting!
- Italian Sausage Pasta Salad Meal Prep
- Keto Cajun Sausage Breakfast Scramble
- Sausage, Kale & Pomegranate Hash Meal Prep
- One Pan Roasted Brussels Sprouts, Grape & Sausage Meal Prep
- Sheet Pan Marmalade Sausage Meal Prep

Other Tips For Making Sausage And Mashed Potatoes.
There is always room for improvement. Let's look at a few ways we can make our sausage and mashed potatoes meal prep ideas recipe simply yummy.
- Dress your recipe with a caramelized onion gravy which will enhance your mash potatoes in ways you wouldn't think possible
- Use whichever sausage you prefer best, be it chicken, pork or turkey bearing in mind that each type of sausage carries along with it, a unique flavor.
- A steamer basket and the placement of the cauliflower on top of the potatoes ensures that the cauliflower does not absorb too much water.
This meal prep ideas recipe is a quick and easy lunch recipe which can provide you with the energy you need to face the day ahead. Have you already begun preparing your sausage and mashed potatoes? Let us know what you think about our inspired meal prep ideas recipe!


Whole30 Sausage and Mashed Potato Meal Prep Ingredients:
- 4 pork, chicken or turkey sausages, Whole30 compliant
- 1 tablespoon olive oil
- 4 cups cauliflower, chopped
- 2 potatoes, peeled and chopped
- 2 tablespoons ghee
- Salt and pepper, to taste
Caramelized Onion Gravy
- 1 cup chicken broth
- 2 onions, cut into long strips
- 1 teaspoon dijon, compliant
- Salt and pepper, to taste
- 1 teaspoon thyme
- ½ cup apple cider (optional - can sub extra chicken broth)
- 1 tablespoon arrowroot + 2 tablespoons water


Ingredients
Sausages and Mash
- 4 whole30 compliant sausages pork, chicken or turkey
- 1 tablespoon olive oil
- 4 cups cauliflower chopped
- 2 medium potatoes peeled and chopped
- 2 tablespoon ghee
- salt & pepper to taste
Caramelized Onion Gravy
- 2 large onions cut into long strips
- salt & pepper to taste
- ½ cup apple cider or chicken broth
- 1 cup chicken broth
- 1 teaspoon Dijon Mustard
- 1 teaspoon thyme
- 1 tablespoon arrowroot
- 2 tablespoon Water
Instructions
- In a large skillet, add olive oil and sausages, and cook until heated through or cooked through (depending on if sausages are precooked or raw).
- In a large pot, add a steamer basket, peeled and chopped potatoes, and then the cauliflower on top. Using the steamer ensures the cauliflower doesn't absorb too much water. Steam potatoes and cauliflower until fork-tender, about 25 minutes.
- Once sausages are browned, remove from the pan, and add the onions. Season well with salt and pepper.
- Continue caramelizing the onions over medium-low heat for about 20 minutes, until the color is evenly brown the onions are soft and sweet.
- Add the rest of the ingredients into the pan with the onions, except the arrowroot and water.
- Heat the mixture over medium-high heat and bring to a low simmer.
- Mix the arrowroot and water, and then drizzle into the gravy to thicken. Simmer until it reaches the desired thickness.
- Once the potatoes and cauliflower are fork-tender, drain, and add to a food processor bowl or mixer bowl, and mash. Season with ghee, salt, and pepper.
- Serve sausages over mashed potatoes and cauliflower, with the onion gravy on top.
Notes
Nutrition
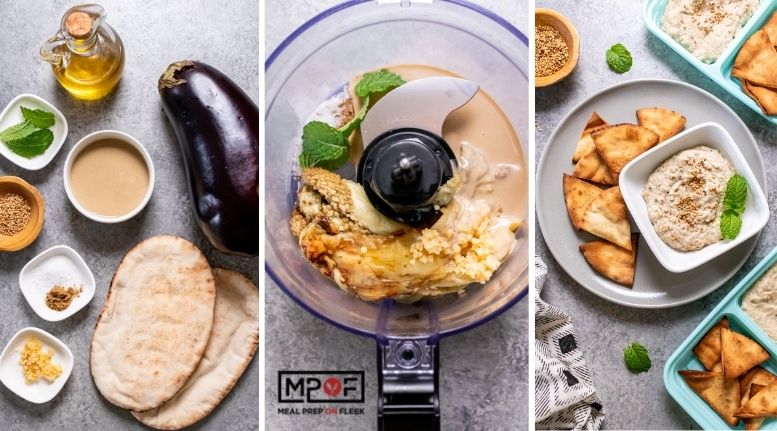
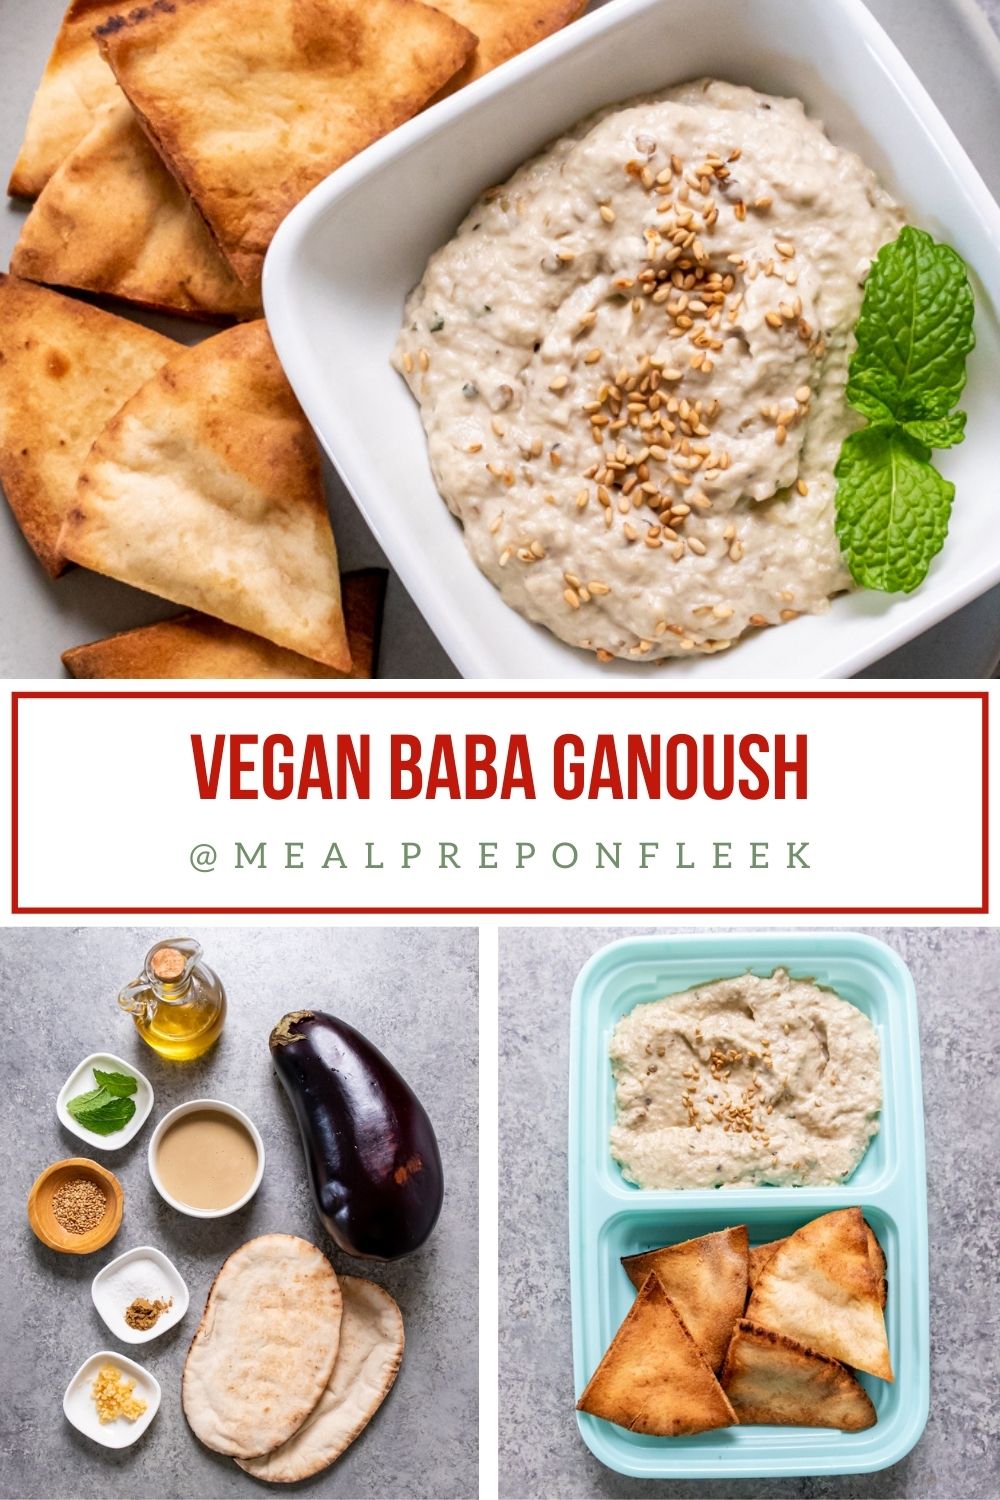
Baba Ghanoush (Vegan, GF)
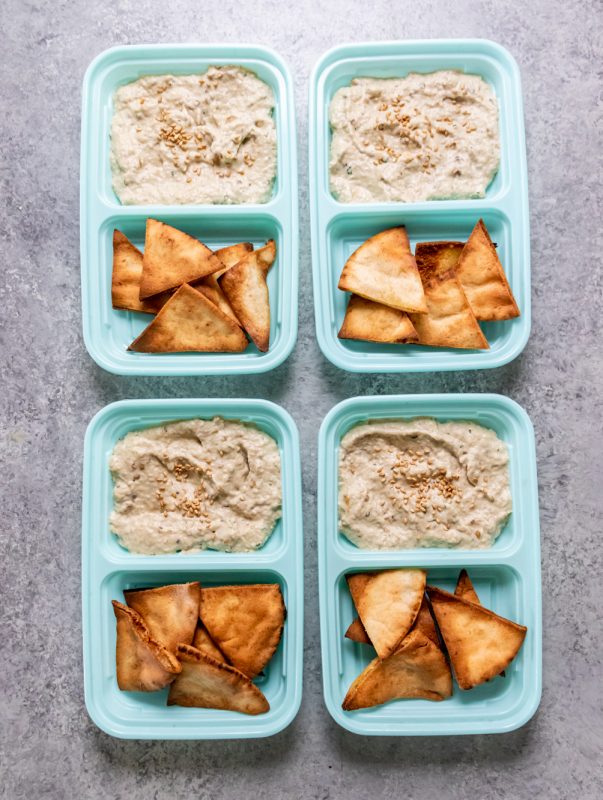
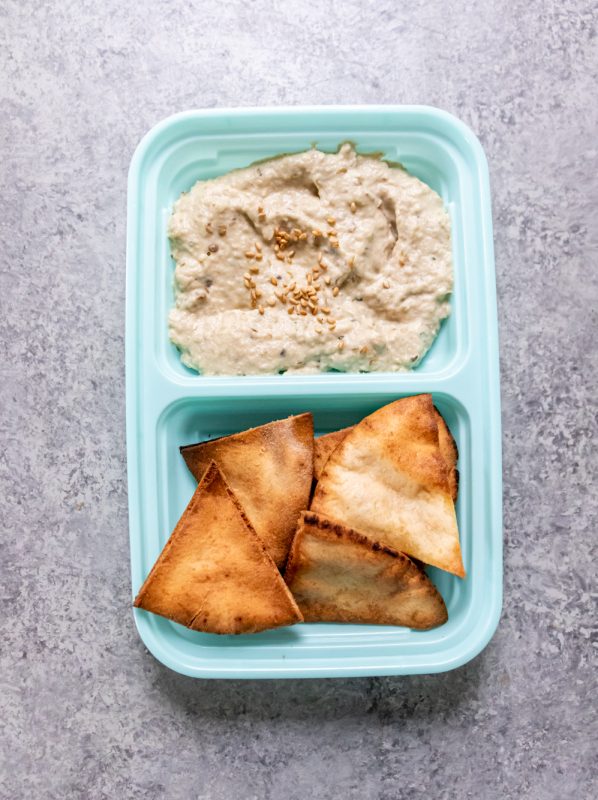
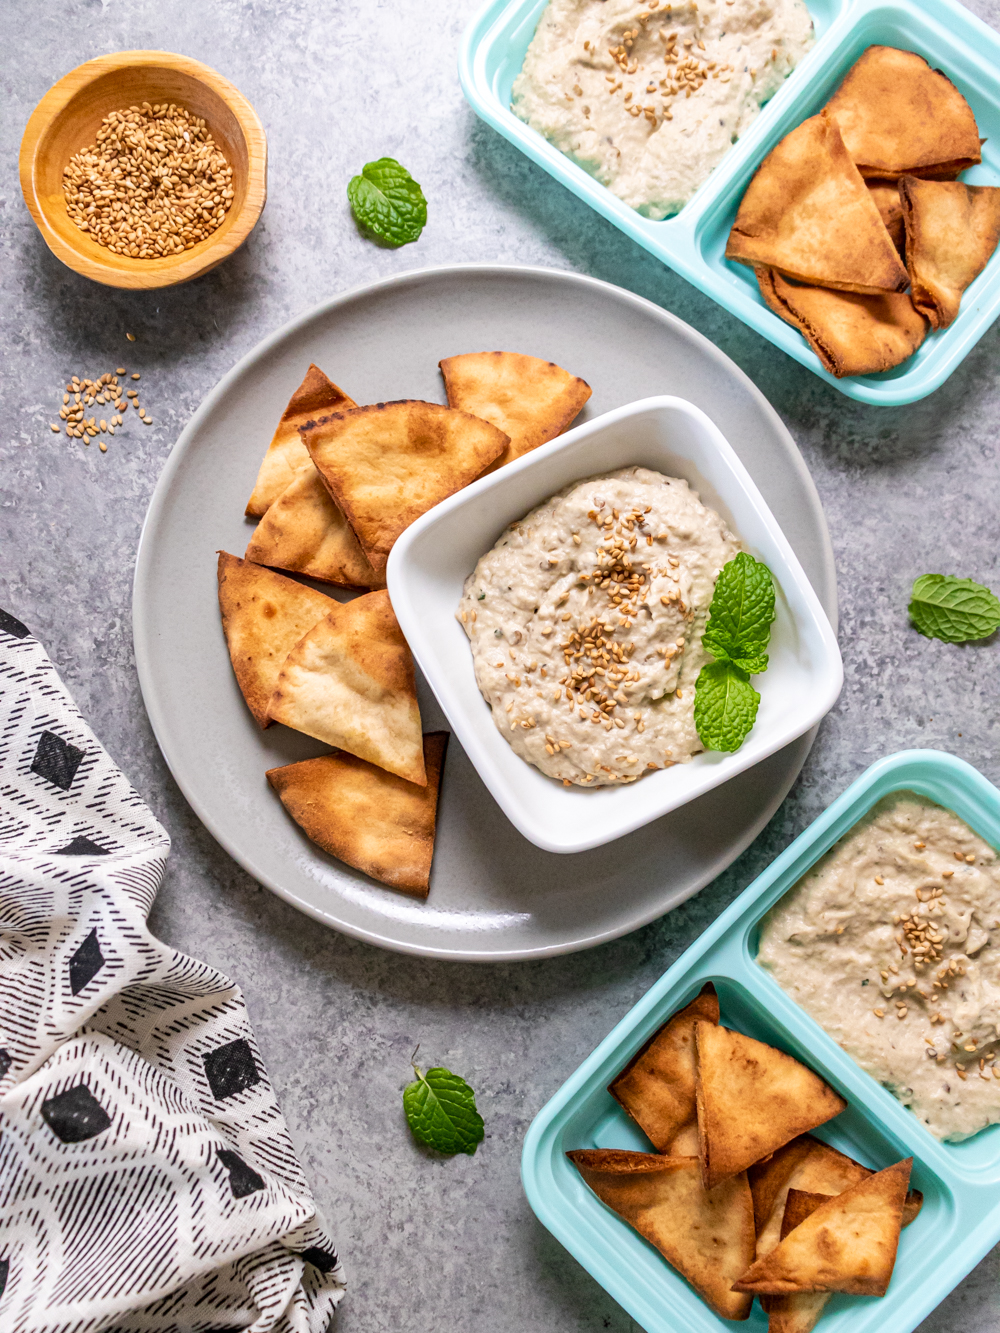
This Mediterranean-inspired vegan baba ghanoush made with roasted eggplant is the perfect snack with creamy texture, nutty sesame flavor and crunchy baked pita chips for dipping.
If you're an eggplant skeptic, let baba ghanoush convert you to the beauty of eggplant. It makes for a tasty and healthy dip that's versatile and goes equally well with pita chips as it does carrot or celery sticks. Yum! We can never have enough healthy snack options, can we?
(If you already love eggplant, you'll totally love our Eggplant Meatballs and Zoodle Meal prep!)
How to Make Vegan Baba Ghanoush
This comes together pretty simply. You just slice the eggplant in half, poke some holes in the flesh, and then roast it. Once it's roasted, you scoop out the flesh, and then add it to the bowl of a food processor. There, it takes a spin with a bunch of other healthy ingredients including tahini, which is a thick sauce/paste that's made from sesame seeds. (It's also a primary ingredient in hummus.)
Once the ingredients are processed together until smooth, you simply portion the baba ghanoush into the prep containers and you're good to go. It's naturally vegan and gluten-free, but if you need to keep it that way, serve it with gluten-free pita bread or chips.
Substitutions and Alterations for Vegan Baba Ghanoush
This recipe is a pretty straightforward version of baba ghanoush. That being said, you can always add a little more of one ingredient or another if you'd like to make that flavor more pronounced. Add a bit more mint, or up the earthy flavor of cumin, for example. Drizzle the top with a little olive oil, in addition to the sesame seeds.
And of course, for those of you who like garlic, add a smidge more of that if desired. The most important thing, though, when you're prepping food and cooking, is to taste as you go. So, you might find that the dip needs a little more salt, or cumin, or garlic. Or maybe you want to add some olive oil. It's up to you.
Tips for Tahini
Depending on the brand you buy, tahini can vary widely in its consistency. Sometimes it is difficult to get the tahini out of the jar. In those cases, once you scoop it out of the jar, add a couple of tablespoons of hot water to the bowl of the food processor. It will incorporate into the baba ghanoush more easily with a bit of extra liquid. (You can also use olive oil instead of water, if you prefer.)
How to Serve and Store Baba Ghanoush
A dip like this will keep for 5 or 6 days in the refrigerator. It has no dairy in it, so that helps keep it fresh for a little longer than other dips that do, like this incredible Mexican Street Corn dip.
Of course, pita wedges or crunchy pita chips are the go-to accompaniment for this Mediterranean snack, but there's a lot you can dip into this if you want to skip the carbs. We like going old-school with this and using carrot and celery sticks. Thinly sliced bell peppers would taste great, too.
READ MORE: Eggplant lovers unite! Eggplant Lasagna is calling your name!

Vegan Baba Ghanoush Ingredients:
For Baba Ghanoush
- 1 large eggplant
- 1 tablespoon olive oil
- ¼ cup tahini
- 4 medium mint leaves
- 1 teaspoon minced garlic
- ½ teaspoon salt
- ¼ teaspoon cumin
- 1 teaspoon toasted sesame seeds for topping
For Pita Chips
- 4 oz. gluten-free pita bread, sliced into triangles (Bfree brand, if gluten free)
- Olive oil cooking spray


Ingredients
For Baba Ghanoush
- 1 large eggplant
- 1 tablespoon olive oil
- ¼ cup tahini
- 4 medium mint leaves
- 1 teaspoon minced garlic
- ½ teaspoon salt
- ¼ teaspoon cumin
- 1 teaspoon toasted sesame seeds for topping
For Pita Chips
- 4 oz. gluten-free pita bread sliced into triangles (Bfree brand, if gluten free)
- Olive oil cooking spray
Instructions
- Preheat oven to 425ºF and line a large baking sheet with parchment paper. Slice eggplant in half lengthwise and use a fork to poke several holes in flesh. Brush with olive oil. Roast for 20 minutes. Using tongs, flip each eggplant and roast for 20 minutes longer. Cool at room temperature for 15 minutes.
- While the eggplant cools, reduce the oven temperature to 375ºF. Slice pita into triangles and spread on a baking sheet. Spray with olive oil cooking spray, and toss to coat. Bake for 8-10 minutes, until golden brown and crisp.
- Scoop the flesh out of the eggplant, and discard the skin. Add flesh, garlic, tahini, mint, cumin, and salt to a food processor and blend until smooth and creamy. Taste and adjust seasonings as needed.
- Spoon baba ghanoush into 4 snack containers and top with sesame seeds. Add pita chips tothe remaining compartments.
Nutrition
Stuffed French Toast Meal Prep

Although traditionally served warm, this stuffed french toast meal prep recipe is an easy and healthy, high-protein, breakfast that is best served chilled. Gluten-free. Vegetarian.

Our favorite day of the week would have to be Sunday. We get to sleep in, whip up a healthy, yet indulgent breakfast, head off to church, spend time with our families and then get our meal prep done for the week. Our least favorite day of the week; Monday. Or it was until this Stuffed French Toast Meal Prep recipe came into our lives and made our Monday mornings feel like Sundays.
Now, you may be thinking, "French Toast for meal prep?! No Way." But, did we steer you wrong with our pancake meal prep? What about our waffle meal prep? That's what we thought. 😉
Although traditionally served warm and yes, this stuffed french toast meal prep can be too, this easy and healthy, high-protein, breakfast recipe is actually best served chilled making it a meal prep dream. Personally, we just kind of pick it up and eat it with our hands like a sandwich, unless of course, you opt to add on the maple syrup and in that case, we recommend a fork. We don't think your co-workers want your sticky syrup fingers all over their Monday morning reports.
Stuffed French Toast Meal Prep Ingredients:
For The French Toast Casserole
8 slices low-calorie bread
½ cup egg whites
1 teaspoon ground cinnamon
½ teaspoon pure vanilla extract
¼ teaspoon salt
1 cup unsweetened almond milk
For The Filling:
4 ounces non-fat Greek yogurt
2 teaspoon pure vanilla extract
1 large egg
⅛ teaspoon liquid stevia*
¾ cup raspberries
¾ cup blueberries

Click here for more Breakfast Meal Prep Recipes


Ingredients
- 8 slices low calorie bread
- ½ cup liquid egg whites or 3 large egg whites
- 1 cup Unsweetened Almond Milk
- 1 teaspoon ground cinnamon
- ½ tsp Vanilla extract
Filling
- 4 ounces nonfat greek yogurt
- 2 teaspoon pure vanilla extract
- 1 large egg
- ⅛ teaspoon liquid stevia can replace with 2 tbs granulated sweetener, if desired
- ¾ cup raspberries**
- ¾ cup blueberries
Instructions
- Preheat oven to 350 degrees F
- Line a 8x8 baking pan with parchment paper OR spray generously with nonstick spray
- Place 4 slices of bread on the bottom of the 8x8 in pan (you will need to overlapt them a bit)
- Make the filling by mixing together all ingredients, except berries, until smooth and no lumps remain. Pour evenly over the top of the 4 slices of bread in your pan. (you may need to use a spoon to evenly spread it)
- Toss berries over filling and then place last 4 slices of bread on top. (again, you may need to overlap your bread slices)
- Press the bread down gently.
- In a bowl, mix together almond milk, egg whites, vanilla, cinnamon and salt. Pour evenly over the top of your bread.
- Press bread down again with the back of a spatula and ensure all slices are covered in the egg mixture.
- Bake for about 55 minutes or until fully cooked.
- Allow to cool for 30 minutes and then enjoy right away or divide between 4 meal prep containers.
- Can be enjoyed warm or chilled***. Serve with syrup and additional berries, if desired.
Notes
* Feel free to swap liquid stevia for 2 tablespoon coconut sugar or any granulated sweetener.
** You can use any berries you'd like or even chocolate chips.
***We much prefer this chilled. If you are going to enjoy for meal prep, eat chilled. Do not reheat in a microwave. If you are eating it at home and would like to reheat it, place 1 slice wrapped in foil, in a preheated 350 degree F oven and bake until heated.
Nutrition

Meal Prep Menu: 2022 Week 1
Spinach Artichoke Dip (Paleo, GF, Low Carb)
This Paleo Spinach Artichoke Dip is rich and filling, perfect for curbing midday hunger. Nutritional yeast adds cheesy flavor without the lactose of regular cheese. Gluten-free, too!

When you're following a paleo diet, you don't have to forgo snacks. But unfortunately, so many of the easiest snacks to grab have carbohydrates in them. Or dairy. Or both, or maybe they're served with both. Often, a dip like this one is served with crackers; you know you've seen the classic kind of spinach artichoke dip, dolloped into a hollowed-out bread bowl. This dip definitely isn't it!
The dip comes together by cooking the onions with some seasonings, along with the spinach and drained chopped artichokes. Never used artichokes before? Well, they're a little nutty and taste and this recipe uses the jarred artichoke hearts that are already chopped. Just drain them well and you're good to go.
How to Make this Spinach Artichoke Dip Vegan
If you want to make this dip without dairy, use dairy-free butter (such as a plant-based high-quality shortening) and dairy-free mayonnaise. Easy peasy!
Tips for Substitutions and Serving
The recipe calls for sliced carrots and celery, but feel free to mix it up. Use broccoli and/or cauliflower florets, or sliced bell peppers in an array of colors. Sliced mushrooms would work, too.
Don't have spinach or just want to use a different type of leafy green? Try using a mix of greens such as Swiss chard and/or chopped kale. If you have beet greens, those would be nice and earthly like spinach, too. (Avoid arugula; it's far too delicate a green and bitter in taste to really work well with this paleo spinach artichoke dip.)
How to Store Paleo Spinach Artichoke Dip
This dip will keep in the refrigerator in a sealed container (prep containers or otherwise!) for 3 to 4 days. It won't freeze well, so share it. (It's also a great dip for a party, especially if your guests are paleo and/or gluten-free, and/or dairy free.
READ MORE: How to Go Dairy Free and Not Hate It
Paleo Spinach Artichoke Dip Ingredients:
- 1 tbsp. ghee
- ¼ cup chopped onion
- 3 cups chopped fresh spinach
- 1 tsp. minced garlic
- ½ cup drained and chopped artichoke hearts
- ¼ tsp. cracked black pepper
- ½ cup Paleo mayonnaise*
- 1 tbsp. nutritional yeast
For Serving
- 1 cup carrot chips or sliced carrots
- 3 celery stalks, sliced into 3-inch pieces


Ingredients
- 1 tablespoon ghee
- ¼ cup chopped onion
- 3 cups chopped fresh spinach
- 1 teaspoon minced garlic
- ½ cup drained and chopped artichoke hearts
- ¼ teaspoon cracked black pepper
- ½ cup Paleo mayonnaise
- 1 tablespoon nutritional yeast
For Serving
- 1 cup carrot chips or sliced carrots
- 3 celery stalks sliced into 3-inch pieces
Instructions
- Melt ghee over medium heat in a medium skillet. Add onions and sauté 6-7 minutes, until softened. Add garlic, spinach, and artichokes. Continue to sauté for 5 minutes longer until spinach is wilted.
- Stir in mayonnaise, nutritional yeast, and black pepper until thoroughly mixed—Cook for 2 minutes longer.
- Spoon spinach artichoke dip into 4 (½ cup) compartments of 4 snack containers. Divide carrots and celery among the remaining compartments. Enjoy hot, warm, or chilled—it's good all three ways.
Notes
Nutrition
Tuna Poke Bowl Meal Prep
You don't need to spend a fortune on fancy poke bowls for takeout. You can do this at home, and it's much cheaper. Plus you can customize the ingredients as you see fit. Skip the canned tuna and upgrade one of summer's coolest dishes into the best Tuna Poke Bowl Meal Prep you have ever had! It's filled with fresh tuna, avocado, whole grain rice, and our favorite add-ins, such as mango, nuts, seeds, and onions for a well-balanced meal. It's super filling, more so than a sushi roll, even our easy avocado and mango sushi roll.
Poke bowls are so simple to assemble, full of fresh flavors, and have unbelievable macros! Sounds like it's time to grab our avocado!
How to Make Tuna Poke Bowls
Fresh tuna is marinated in some delicious ingredients (including coconut aminos and brown rice vinegar). Then, toss it with cubed mango, and add whatever else you want-rice or noodles, chopped nuts, avocado, spinach, green onion, and more. The whole point of this dish is that it's highly customizable.
Tuna Poke Bowl Meal Prep Ingredients
- 2 tablespoon coconut aminos
- 1 teaspoon brown rice vinegar or coconut vinegar
- 1 teaspoon toasted sesame oil
- 1 teaspoon maple syrup
- 1 teaspoon sesame seeds, plus more for garnish
- ½ teaspoon red pepper flakes, plus red jalapeño for garnish
- Pinch of garlic powder
- 1 pound sushi-grade tuna, cubed or sushi-grade salmon
- 1 avocado
- ½ mango, bite-size cubed
- Chopped nuts
- Cooked brown rice
- Cooked rice noodles
- Spinach
- Spring onion
What is Sushi Grade Tuna?
In short, this isn't the tuna you get out of a can. It's the kind of tuna that is of the highest quality and therefore tuna that you can eat raw, like sushi. (It's an unregulated term but one widely used.) Now, keep in mind it's not "raw" per se because the marinade does a good job of introducing acid into the situation in the form of the vinegar. In food science terms, it denatures the proteins in the fish, which is what happens when you heat and cook an animal protein. The acidic environment that's created makes it safe to eat the fish. (Have you ever had ceviche? Same idea.) This is what you want for your poke bowl meal prep.
Ask at the fish counter at the grocery store (or your fishmonger) if the tuna they sell is safe to eat raw. In general, sushi-grade fish will have a vibrant color and no smell. (All fresh fish has no smell!) And check the label if it's already shrink-wrapped at the store; it may indicate "sushi grade."

Tips for Tuna Poke Bowl Meal Prep
If you're completely freaked out by the idea of eating raw fish, feel free to quickly pan-sear the tuna on both sides before cutting it. This will help reduce the risk of any potential microbial contamination.
Substitutions and Alterations
- You might also encounter salmon that's labeled sushi grade. That will work, too.
- Add more mango, if desired.
- Use cauliflower rice instead of noodles or regular rice.
- If you can't find spring onions, use scallions instead.
- Add in chopped carrots, sliced cucumbers, and/or pickled ginger.
How to Store Tuna Poke Bowl Meal Prep
Once prepped, these poke bowls will keep for a few days. They're great to prep for lunch and they'll keep you full until dinner.
We don't recommend freezing a dish like this.
READ MORE: Cauliflower Rice Salmon Poke Bowl Meal Prep

Ingredients
- 2 tablespoon Coconut Aminos
- 1 teaspoon coconut vinegar
- 1 teaspoon sesame oil
- 1 teaspoon maple syrup
- 1 teaspoon Sesame Seeds
- ½ teaspoon red pepper flakes
- pinch Garlic Powder
- 1 pound sushi grade tuna
- ½ large Mango cubed
- Nuts chopped, if desired
- Brown rice if desired
- Rice noodles if desired
- Spring onions if desired
- Spinach if desired
Instructions
- Whisk together the coconut aminos, vinegar, syrup, oil, seeds, garlic powder and red pepper flakes in a medium mixing bowl.
- Add the cubed tuna, gently stir together to dress the tuna. Marinade for at least 10 minutes.
- Meanwhile, pit and cube the avocado of a similar size to the tuna. Add to the tuna, and gently mix together.
- Take your tray and scoop spinach, spring onion, rice, noodles, jalapeño, chopped nuts and top with tuna poke, mango and drizzle extra sesame seeds.
Notes
Nutrition
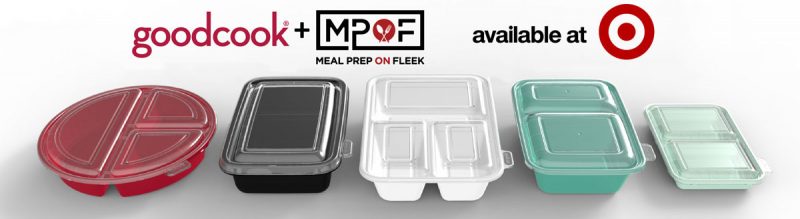
Meal Prep Menu: Week 52
Meal Prep Menu: Week 51
Meal Prep Menu: Week 50
Meal Prep Menu: Week 49
Meal Prep Menu: Week 48
Meal Prep Menu: Week 47
Meal Prep Menu: Week 46
Meal Prep Menu: Week 45
Meal Prep Menu: Week 44
Meal Prep Menu: Week 43
Tofu Breakfast Scramble
Thank you to GoodCook® for sponsoring this Tofu Breakfast Scramble Recipe post, and thank YOU for supporting the brands that help make Meal Prep On Fleek possible. All opinions are our own.

Wake up with this egg-free vegan scramble served with spicy breakfast potatoes. Crumbled tofu is seasoned with turmeric, garlic powder, salt, and pepper, taking on not only the look of scrambled eggs but the texture too. Sautéed vegetables round out this recipe and start the day off with antioxidants and vitamins to boot!

I love starting my day with a protein and fiber-rich breakfast combo! Since I've gotten into more plant-based recipes, I've found a new love for making my favorite breakfast dishes vegan. Who knew tofu made the best "egg" scramble?
This Sunday brunch-like meal prep has everything you'd want at a sit-down meal: a scramble, hearty potatoes, and fruit on the side for sweetness. The combination of these three components makes for one filling and satisfying start to your day! You won't find yourself hitting any mid-morning slumps after enjoying this breakfast scramble.
Let's talk about everyone's favorite part: the nutrient breakdown! YOu're probably wondering why I chose this combination to start the day, and you'd be asking a great question! I always like to have a balance of protein, carbs, and fruit/veg in my meals. That's one of the reasons why I use the white GoodCook® meal prep containers! They take almost all of the guesswork out of creating a balanced meal. The white containers have three compartments:
- one 2 cup compartment
- two 1 cup compartments
This makes it pretty easy for me! I always fill the 2-cup compartment with the part of the meal that has 2 food groups. In this case, it's the 'egg' scramble that has protein + veg. The other compartment I used for my starch (carb) and fruit. There is also some fat in the egg scramble, making this a well-rounded and balanced meal prep.
I know some of you might be skeptical about using tofu in place of eggs; believe me, I was too! But, let me tell you, you will never guess that they aren't eggs! I will sometimes add in nutritional yeast to give it a "cheesy" taste. Plus, recipes like this are great for reducing food waste. You can toss in whatever veggies you have lingering in your fridge/freezer to your scramble, swap the grapes for whatever fruit you have on hand, and even replace the potatoes with another kind, a side of oatmeal, toast, or hashbrowns.
Feel free to swap the tofu for eggs or egg whites if you're really not into the tofu thing. However, you will still use the same compartments in your meal prep containers to evenly portion out your food groups.
The white containers are also great for lunch and dinner recipes! This Sheet Pan Sriracha Salmon recipe is one of my go-to lunches, and this Watercress and Feta Stuffed Flank Steak is on repeat in my house weekly!
The GoodCook® meal prep containers come in a pack of 10, so you can make multiple meals with just one set! Plus, they are made with BPA-Free plastic, dishwasher, and microwaveable safe! You can't beat that for less than $10.00!
Tofu Breakfast Scramble Ingredients:
For Tofu Scramble
- 1 tablespoon olive oil
- 2 cups baby kale
- 1 cup chopped red bell pepper
- 1 (16 oz) block of firm tofu
- ½ teaspoon ground turmeric
- ¼ teaspoon garlic powder
- ½ teaspoon salt
- ¼ teaspoon black pepper
For Serving
- 1 tablespoon olive oil
- 4 cups baby potatoes, halved
- ¼ teaspoon paprika
- ¼ teaspoon chili powder
- ½ teaspoon salt
- Pinch of cayenne pepper
- 4 cups green and red grapes
- GoodCook® meal prep containers


Ingredients
For Tofu Scramble
- 1 tablespoon olive oil
- 2 cups baby kale
- 1 cup chopped red bell pepper
- 16 ounces block of firm tofu
- ½ teaspoon ground turmeric
- ¼ teaspoon garlic powder
- ½ teaspoon salt
- ¼ teaspoon black pepper
For Serving
- 1 tablespoon olive oil
- 4 cups baby potatoes halved
- ¼ teaspoon paprika
- ¼ teaspoon chili powder
- ½ teaspoon salt
- Pinch of cayenne pepper
- 4 cups green and red grapes
- GoodCook Meal Prep Containers
Instructions
- Preheat oven to 400ºF and line a medium baking sheet with parchment paper. Toss potatoes in olive oil, followed by paprika, chili powder, salt, and cayenne. Spread on a baking sheet and bake for 30 minutes, stirring potatoes after 15 minutes.
- While potatoes bake, crumble the tofu in a small bowl using a fork. Stir in the turmeric, garlic powder, salt, and pepper. Set aside.
- Heat olive oil in a large frying pan over medium heat, add bell pepper, and sauté for 5 minutes. Add crumbled tofu and kale. Sauté for 5 minutes longer, occasionally stirring until kale is wilted.
- Divide breakfast potatoes between small compartments of 4 white meal prep containers. Add grapes to the other small compartments and add tofu scramble to each large compartment.
Nutrition
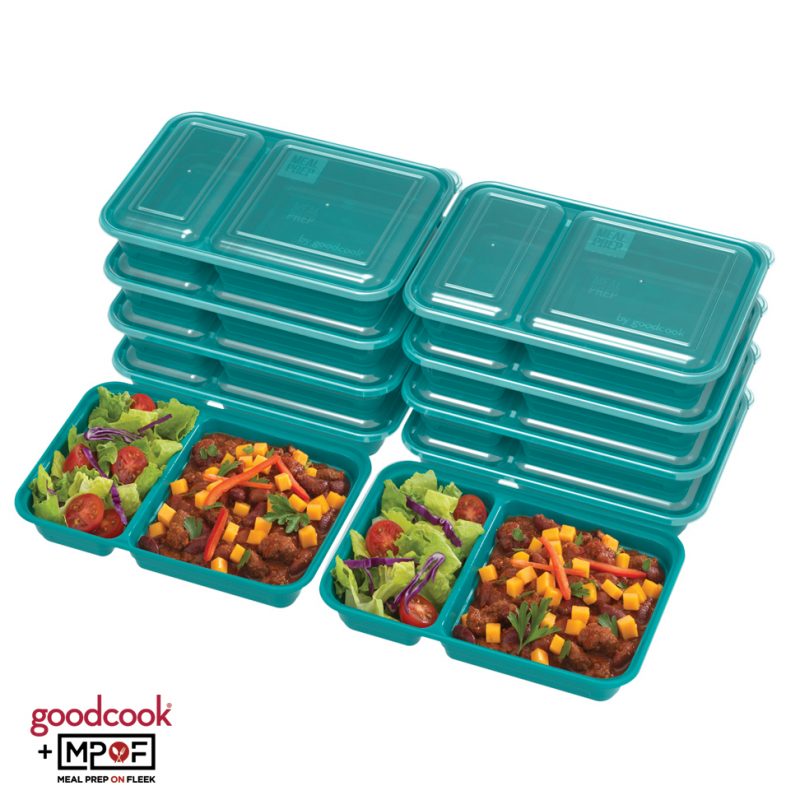
Meal Prep Menu: Week 42 (2500 Calories)
Vegan Meatballs with Lemon Dijon Sauce

These herb-filled vegan meatballs are made with hemp protein powder which contains all 9 essential amino acids. They bake up crisp on the outside while staying tender and moist on the inside. Served over sautéed zucchini noodles and topped with a creamy lemon Dijon sauce, this is a veggie-packed meal that satisfies.

Making vegan meatballs that have a good amount of protein in them is easier than you think! One of the struggles I often hear from people converting to a more plant-forward diet is that they can't get their protein in with vegan meals. Well, I am here to prove that it is easier and so much more delicious than you could imagine!
It is recommended that a male on a vegan diet consume around 63g of protein per day and a female 52 grams per day. Please keep in mind that these numbers will vary slightly by age, height, weight, and body composition. But they are a great minimum to shoot for.
When creating more vegan-based recipes, you normally think of things such as beans, lentils, and tofu to make a higher protein meal. But there are so many other delicious options on the market! For example, nutritional yeast is an excellent source of protein and B12. Just one tablespoon has 5g of protein. Seeds, such as hemp seeds or organic hemp protein, are also great sources!
The Now Real Food® Organic Hemp Protein has been part of my daily routine lately! I've been adding a scoop to my post-workout smoothie 4 days a week. I also enjoy mixing it into my oatmeal (it makes the oats eeeextra thick!) and then top the bowl off with some nut butter, fresh berries, and a few walnuts. I'll mix it into my yogurt bowl for a nighttime snack and finish it off with fruit and dark chocolate.
Those are my favorite, no-bake ways to use the organic hemp protein, but it also works so well in sweet and savory baked/cooked recipes. If you love protein pancakes for breakfast, you can replace ¼ cup of coconut flour in this recipe with ⅓ cup protein powder!
I highly recommend using the organic hemp protein in these mouthwatering vegan meatballs with a tangy lemon dijon sauce for a savory recipe. Swoon! 😍 The meatballs are crispy on the outside and soft inside (IMO, just the way a perfect meatball should be!)! I served them over zoodles because I know many people trying to eat more plant-forward say there are 'too many carbs' in a vegan diet, so the zoodles keep the carbs and calories a bit lower. However, serving these in a pita to make a sandwich or over pasta would be my preferred choice to increase the calories a bit! If serving with pasta, I recommend adding a veggie such as steamed broccoli. Gotta feed that body if it's working out!
The other thing I love about this meatball recipe is that the meatballs are freezer-friendly! Hello, batch meal prepping! I like to bake mine and then freeze them for quick reheating later, but you can also freeze them unbaked and cook them as needed.
The lemon dijon sauce is so good you'll want to keep a jar of it on hand in the fridge to top other things like tofu, tempeh, or even fish if you're into seafood!
Ok, enough chatter about all the ways to use this extra tasty protein powder that is full of essential fatty acids, fiber, iron, and protein: all things a plant-based diet should include. It's time to grab some, and let me know how you use it!
Vegan Meatballs with Lemon Dijon Sauce Ingredients:
For Meatballs
- 2 ½ cups cooked instant brown rice, cooled until warm
- ½ cup Now Real Food® Organic Hemp Protein
- 2 tablespoon nutritional yeast
- 2 tablespoon olive oil
- ½ cup chopped parsley
- ¼ cup fresh basil leaves
- 2 garlic cloves, peeled
- 1 teaspoon sea salt
- ¼ teaspoon black pepper
For Lemon Dijon Sauce
- 1 cup unsweetened plant-based milk (flax, almond, oat, etc.)
- 2 tablespoon lemon juice
- 1 tablespoon Dijon mustard
- 2 tablespoon coconut aminos
- ¼ teaspoon dried dill
- ½ teaspoon cornstarch
For Serving
- 2 tablespoon olive
- 4 cups zucchini noodles
- Salt and pepper to taste


Ingredients
For Meatballs
- 2 ½ cups cooked instant brown rice cooled until warm
- ½ cup Now Real Food® Organic Hemp Protein
- 2 tablespoon nutritional yeast
- 2 tablespoon olive oil
- ½ cup chopped parsley
- ¼ cup fresh basil leaves
- 2 cloves garlic peeled
- 1 teaspoon sea salt
- ¼ teaspoon black pepper
For Lemon Dijon Sauce
- 1 cup unsweetened plant-based milk flax, almond, oat, etc.
- 2 tablespoon lemon juice
- 1 tablespoon Dijon mustard
- 2 tablespoon coconut aminos
- ¼ teaspoon dried dill
- ½ teaspoon cornstarch
For Serving
- 2 tablespoon olive oil
- 4 cups zucchini noodles
- Salt and pepper to taste
Instructions
- Preheat oven to 350ºF and line a baking sheet with parchment paper. Add ingredients for meatballs to a food processor. Pulse until thoroughly mixed.
- Roll mixture into 12 medium-sized meatballs and place on baking sheet. Bake for 20-25 minutes.
- While meatballs bake, whisk together ingredients or lemon Dijon sauce in a saucepan. Heat over medium heat until simmering, about 5 minutes. Whisk regularly until sauce has thickened, about 2 minutes. Remove from heat and cool sauce slightly.
- Heat 2 tablespoons olive oil over medium heat in a medium skillet and add zucchini noodles. Sauté for 3-4 minutes-season with salt and pepper.
- Place 3 meatballs in large compartments of 4 teal meal prep containers. Divide sauce between 4 small cups and place next to meatballs. Divide zucchini noodles between small compartments.
Nutrition
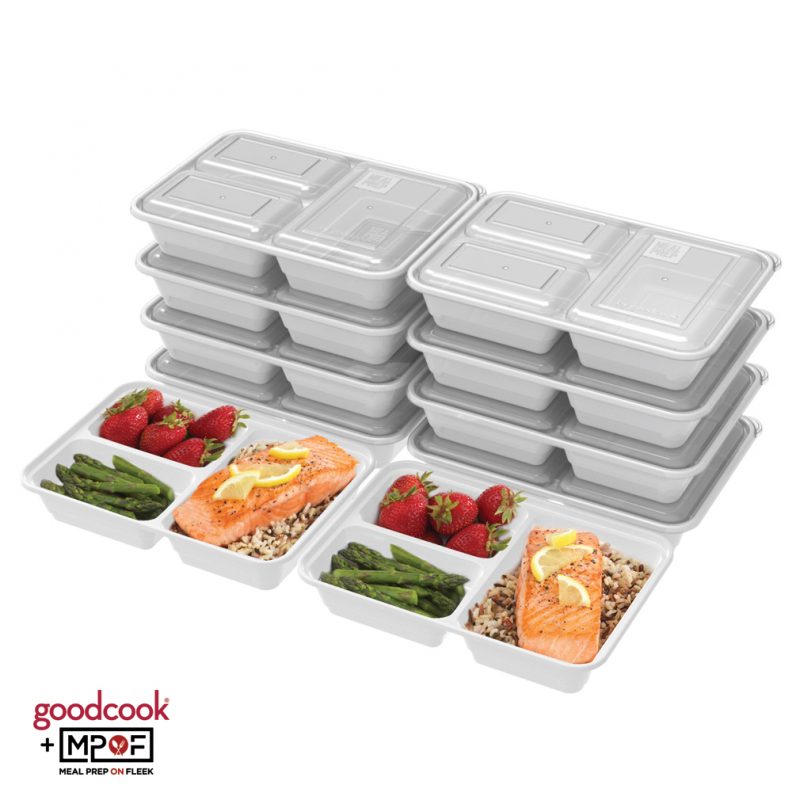
Meal Prep Menu: Week 41 (2500 Calories)
Meal Prep Menu: Week 40
- « Previous Page
- 1
- …
- 22
- 23
- 24
- 25
- 26
- …
- 30
- Next Page »