Diet
-
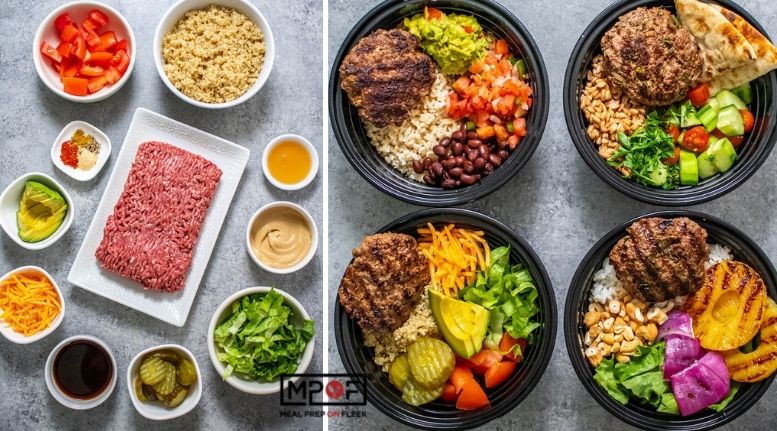
Loaded Lean Beef Burger Bowls - 4 Ways!
-
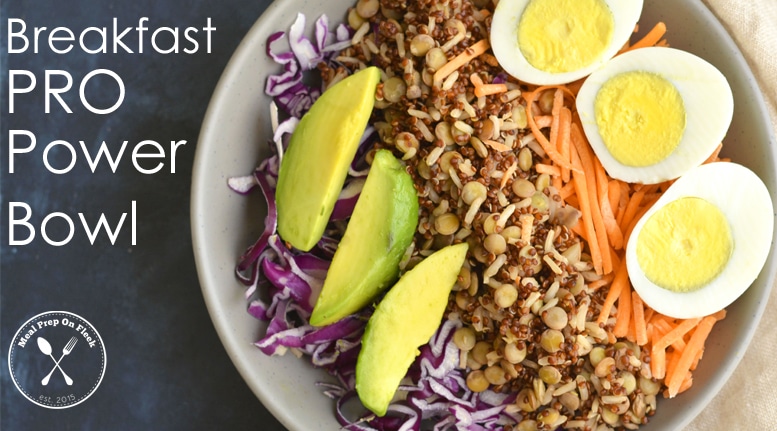
Breakfast PRO Power Bowl
-
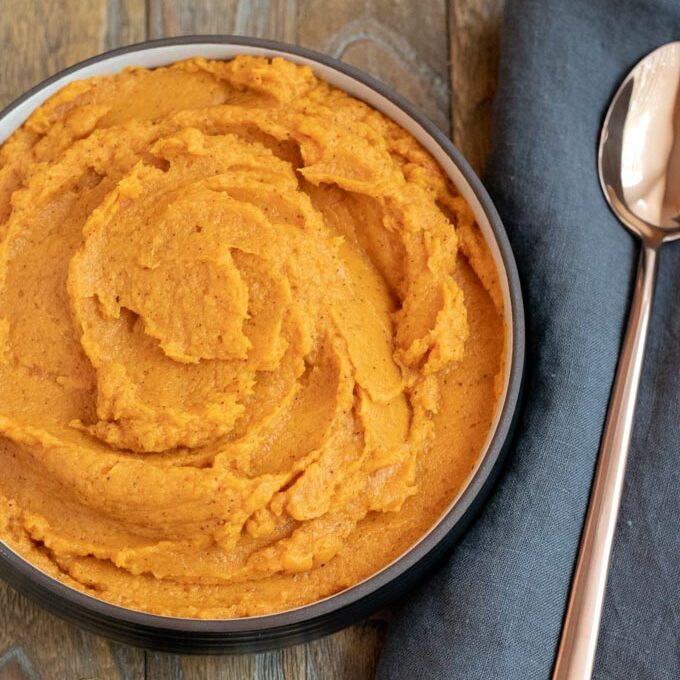
Craving Mashed Potatoes? Try these Healthy Alternatives
-
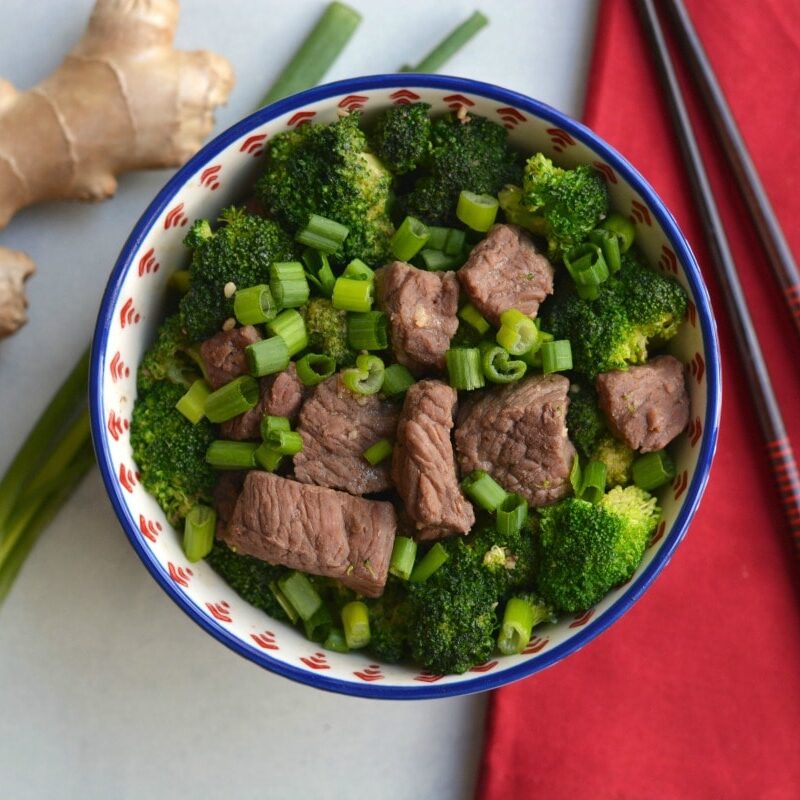
Easy Low Carb Beef and Broccoli Stir Fry
-
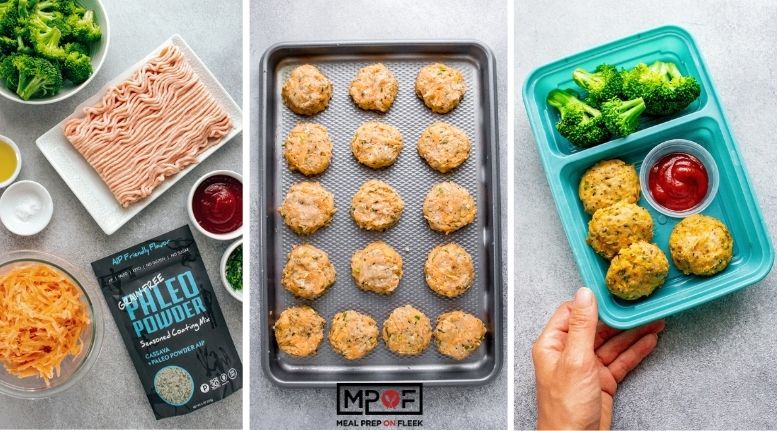
One Pan Asian Turkey Meatballs
-
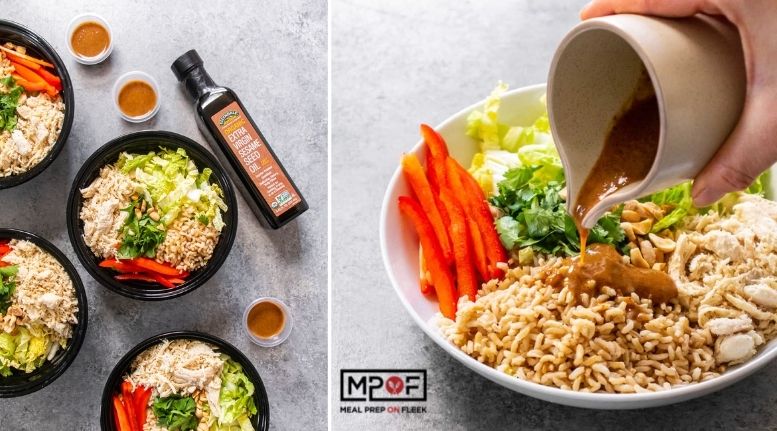
Asian Crunch Buddha Bowl - Flavorful Lunch Bowl
-
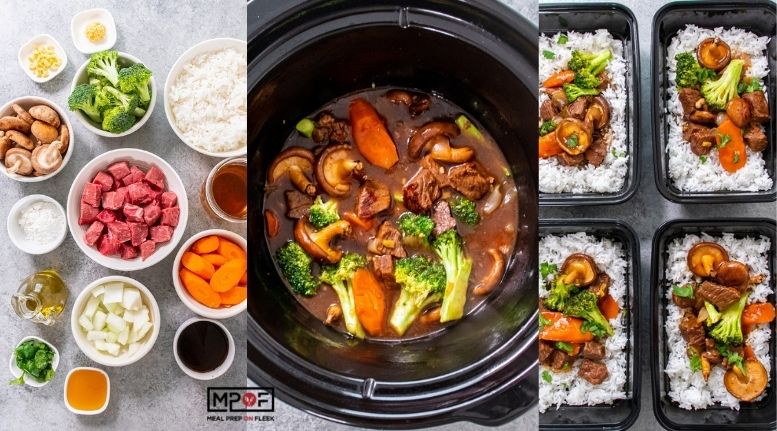
Extra Tender Slow Cooker Asian Beef Stew
-
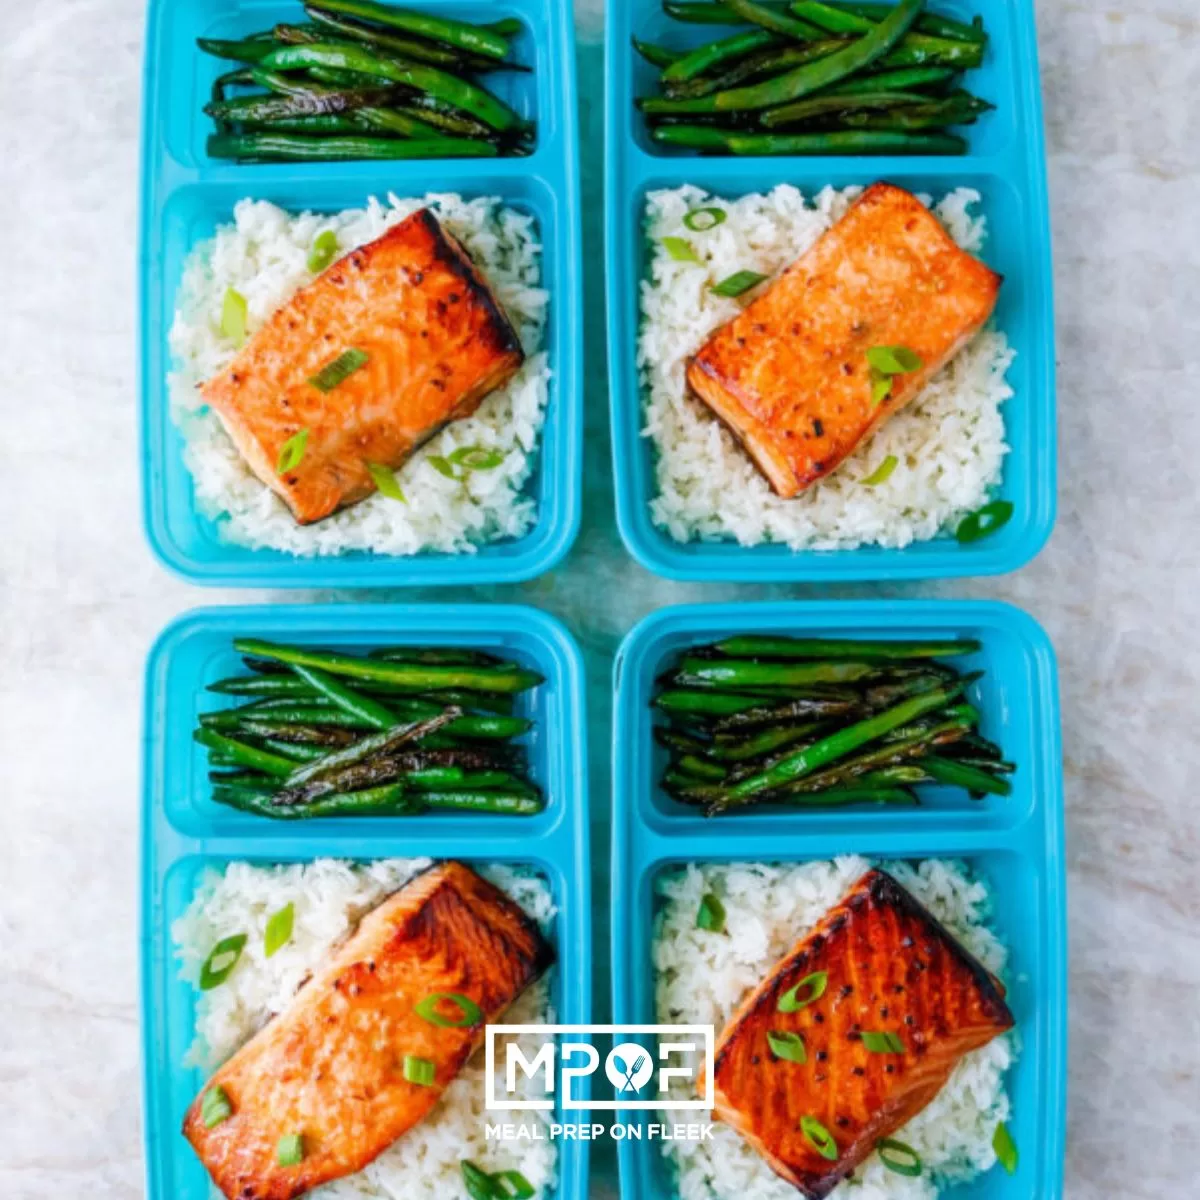
The Most Flavorful Asian Air Fryer Salmon
-
Pulled Pork Sliders With Sweet Potato Buns
-
Bacon Wrapped Chicken Meal Prep
-
Sweet Potato Chicken Poppers (AIP friendly)
-
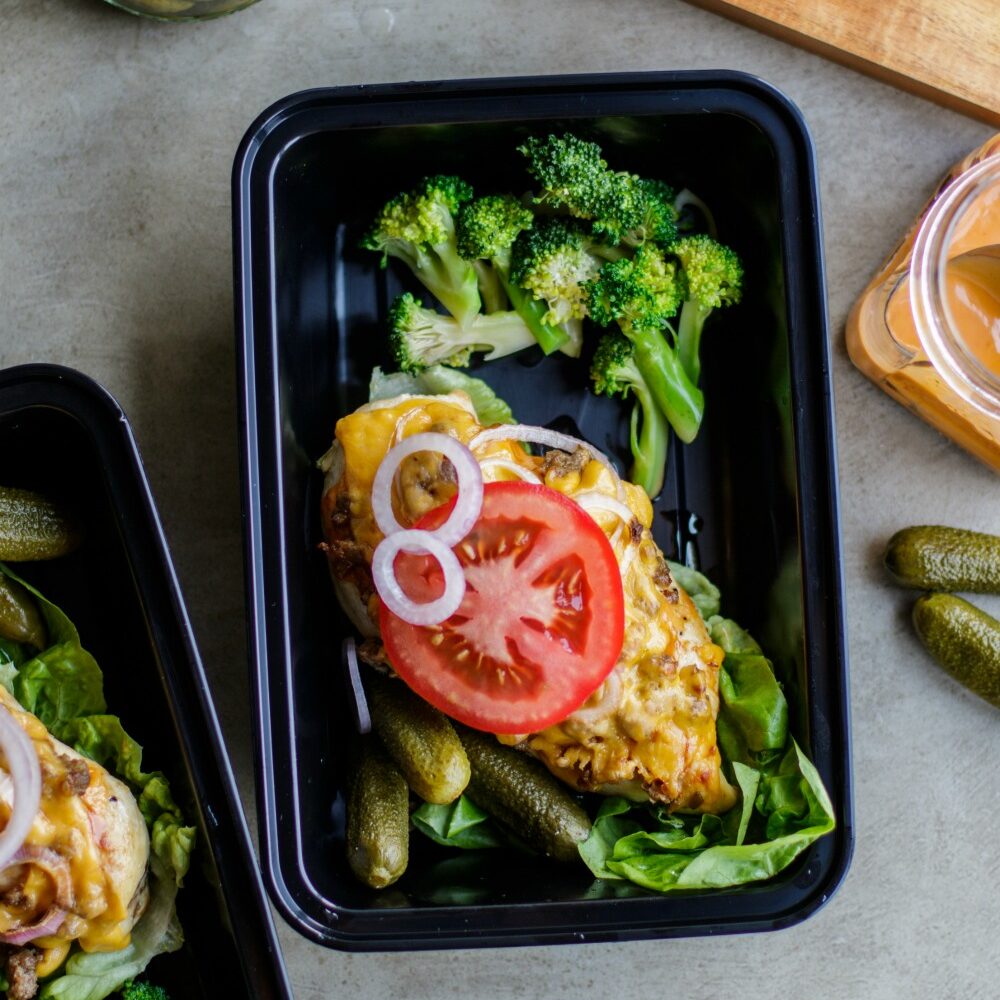
Cheeseburger Pizza Chicken Meal Prep
-
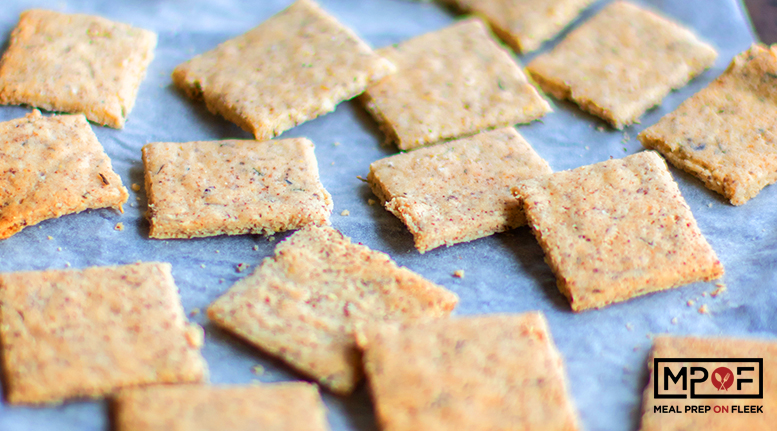
Keto Cracker Snack Boxes
-
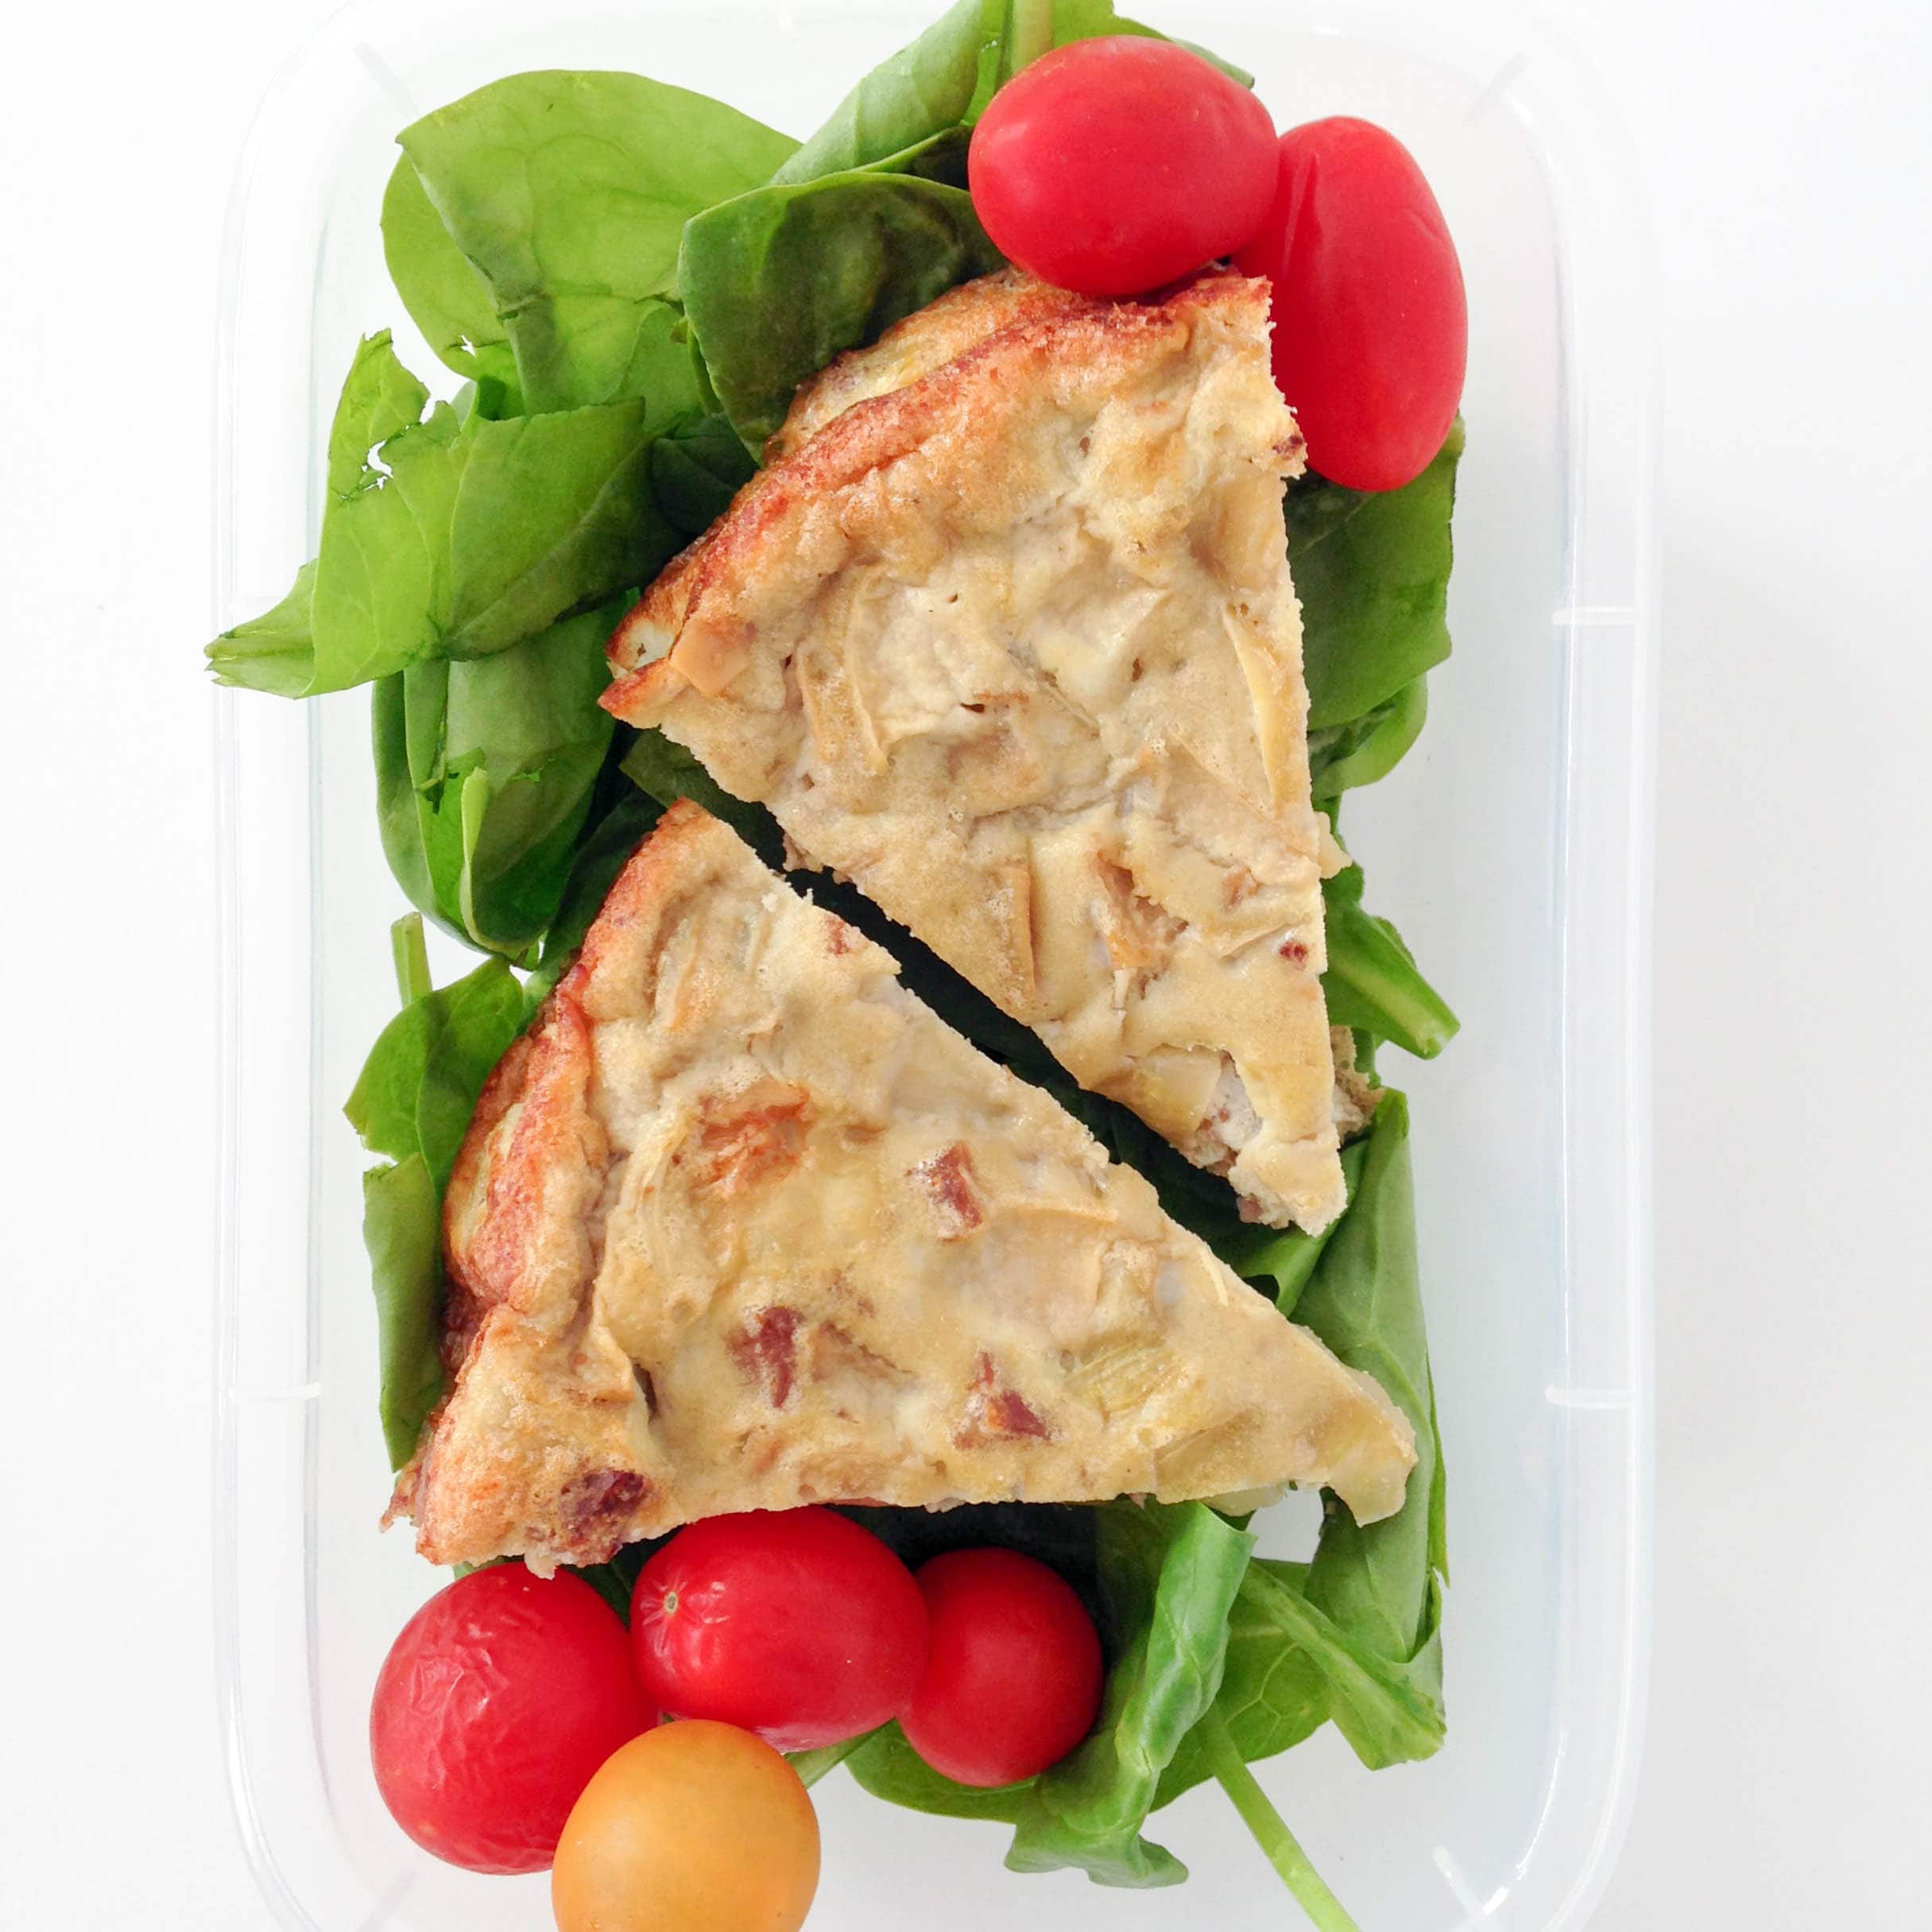
Warm Breakfast Frittata Meal Prep
-
17 Easy and Gluten-Free Meal Prep Recipes
-
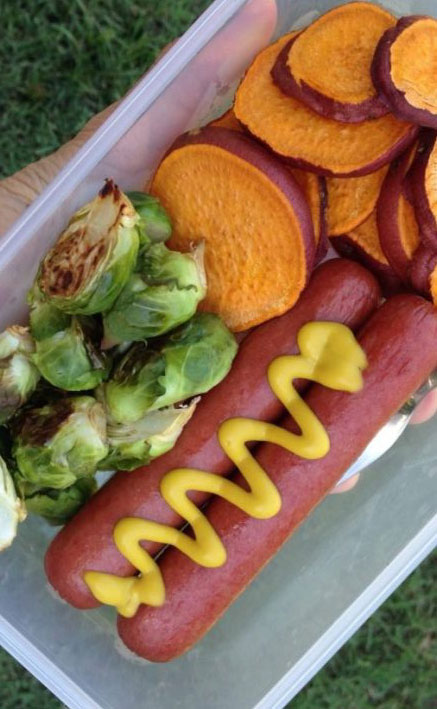
Hotdog Meal Prep - A Fun and Affordable Meal Idea!
-
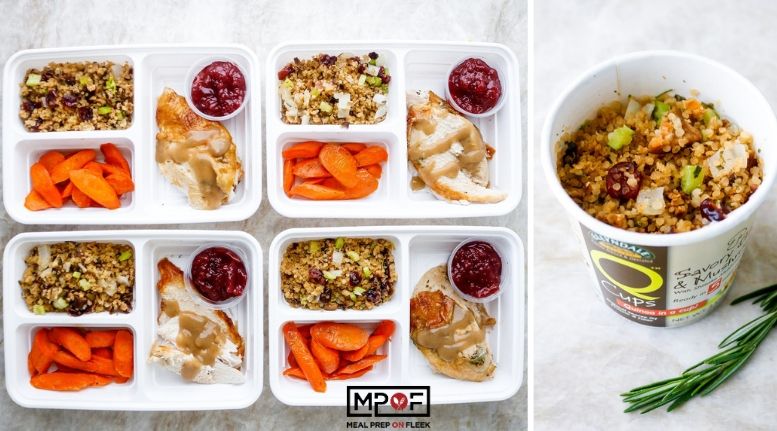
Single Serve Mushroom Q-Cup Stuffing
-
Low Carb Sun Dried Tomato Egg Cups
-
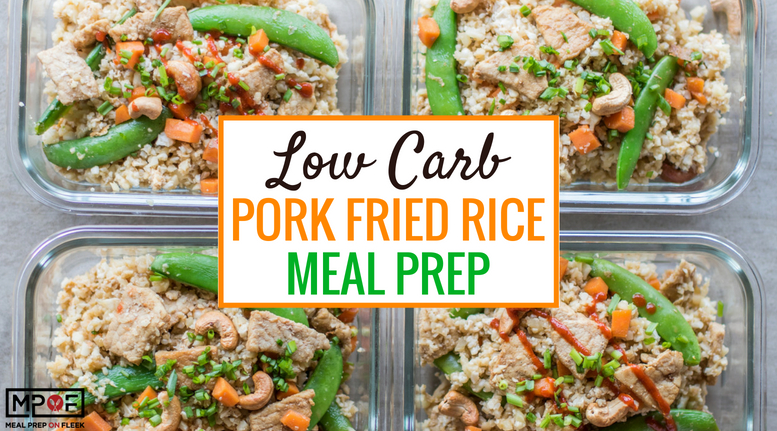
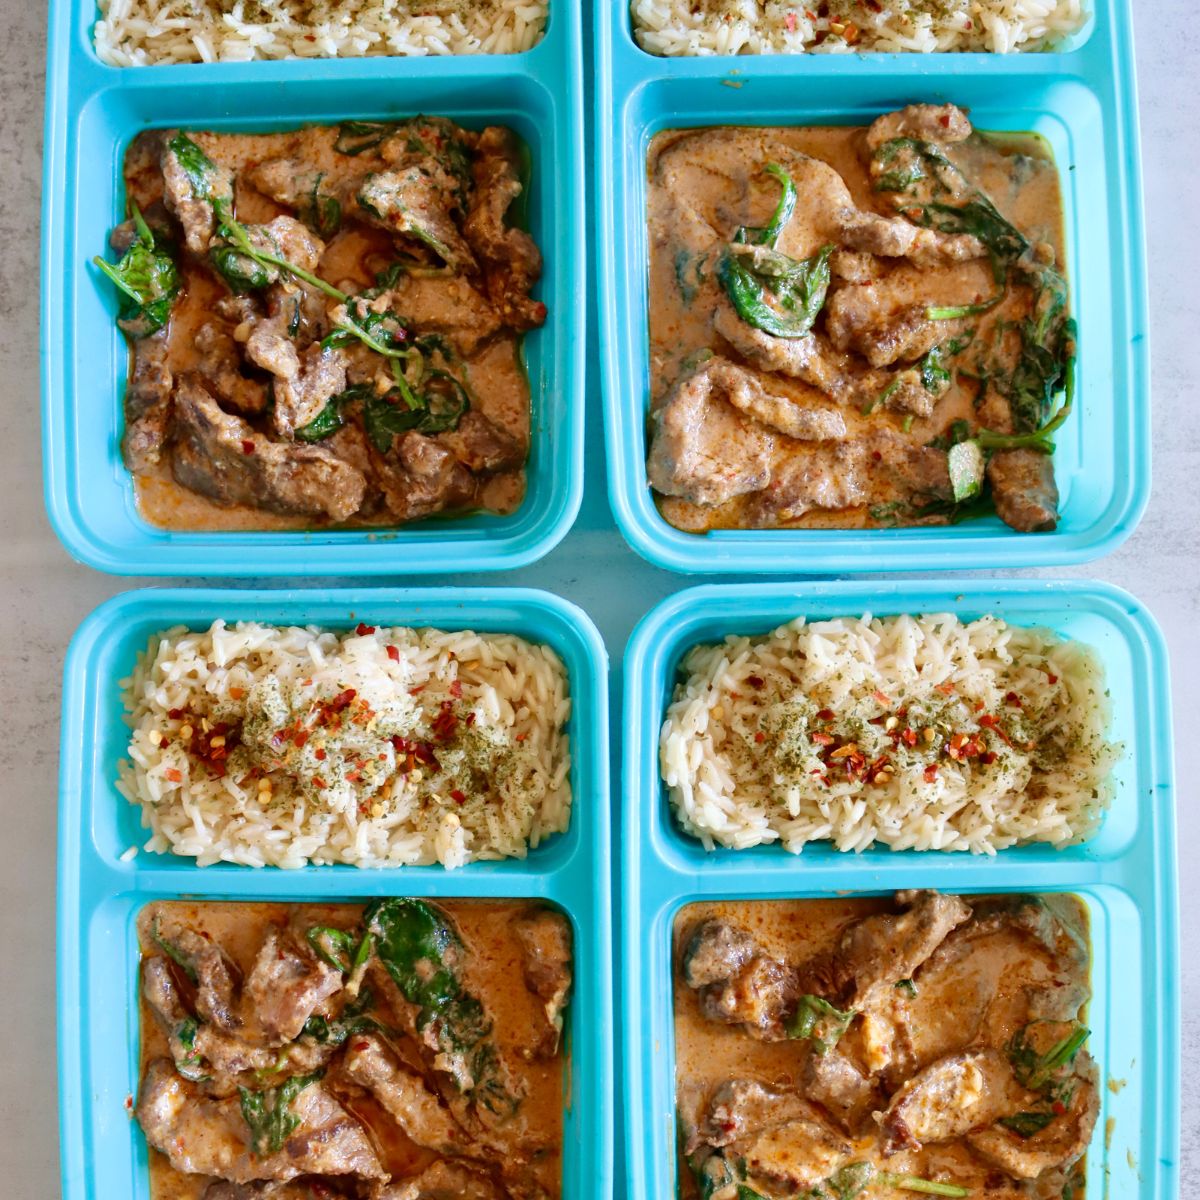
Low Carb Pork Fried Rice Meal Prep
-
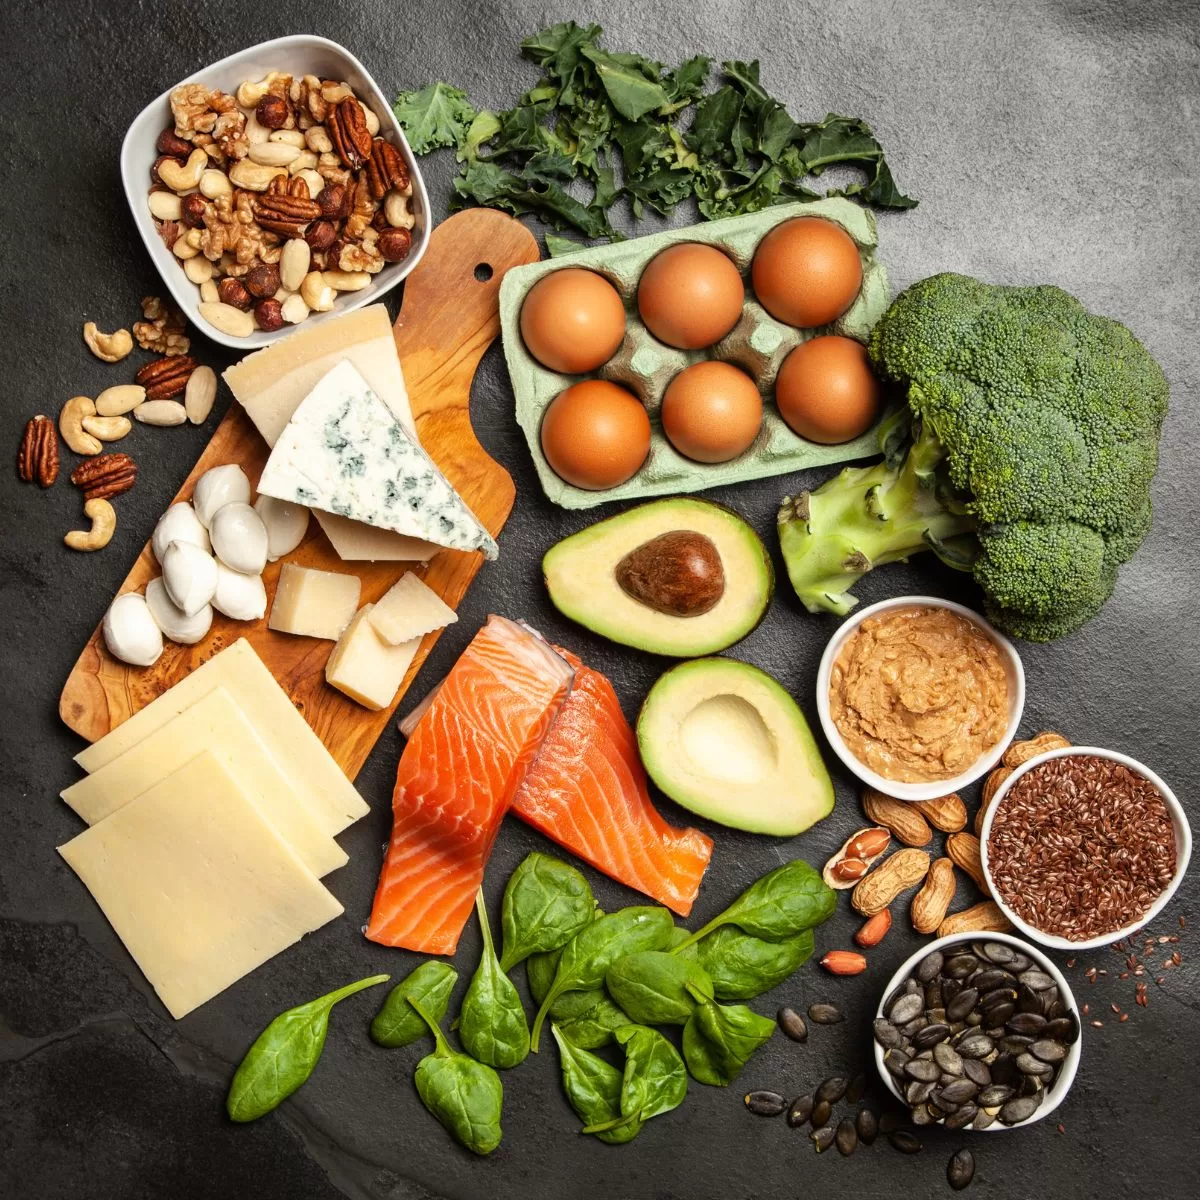
The Macrobiotic Diet
-
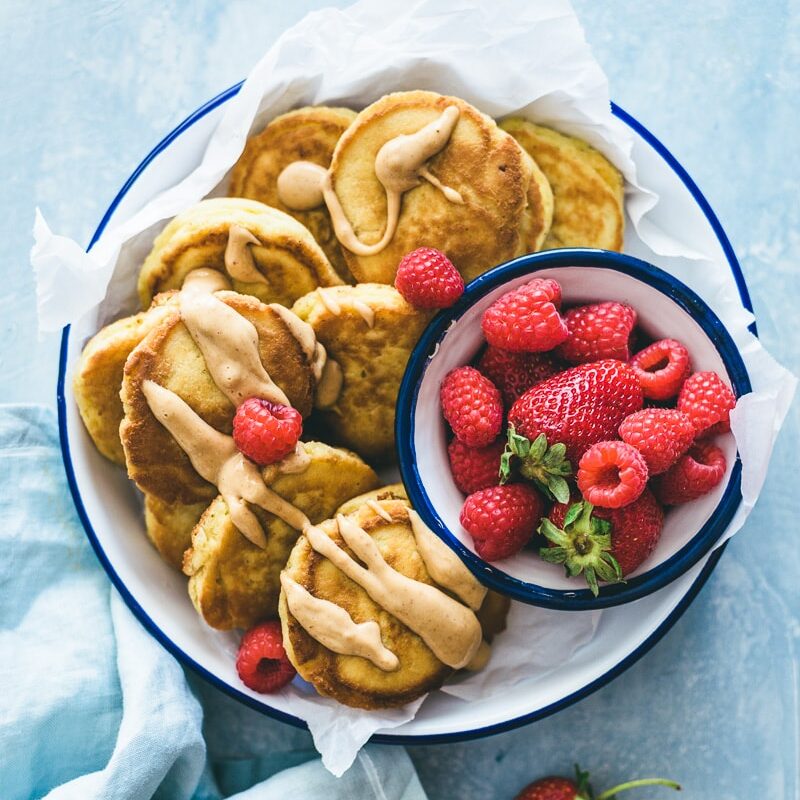
Yes, You CAN Meal Prep Pancakes!
-
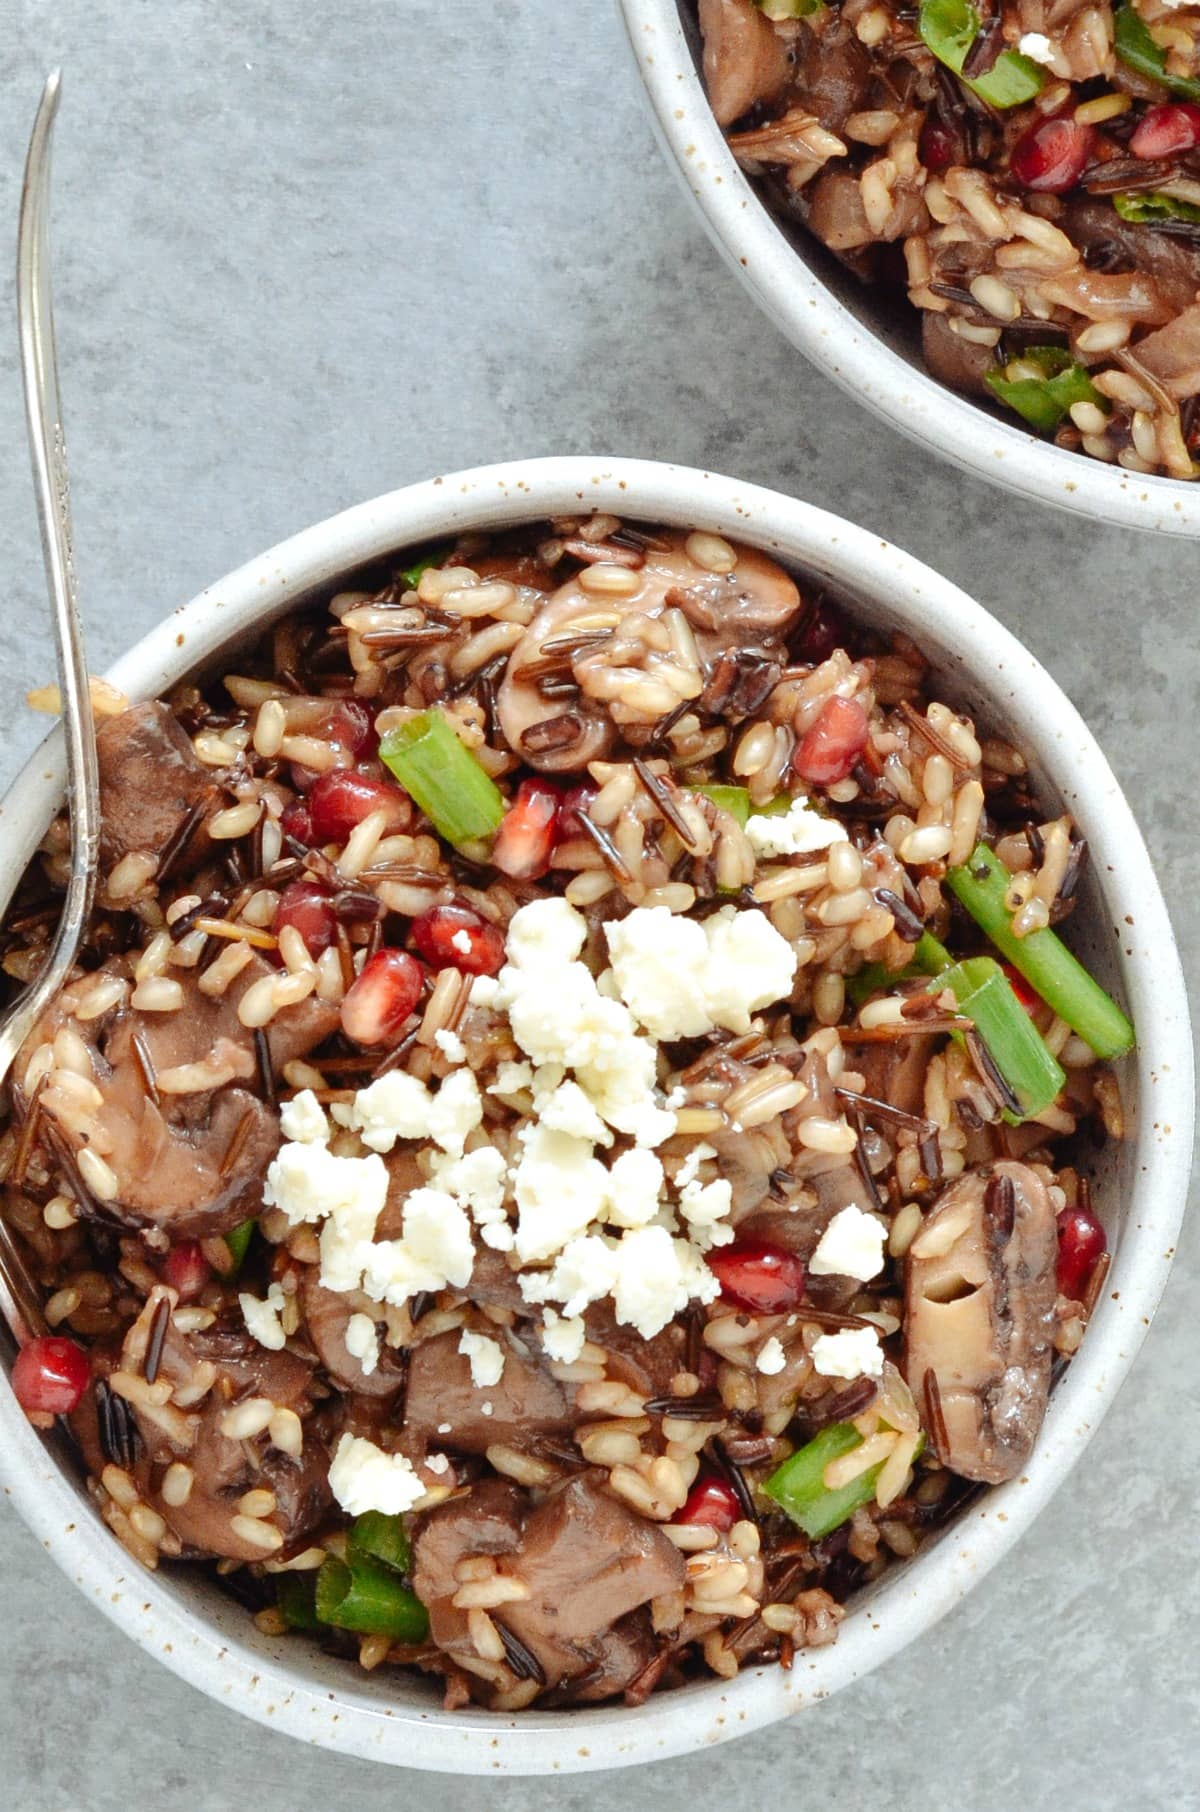
One Pan Mushroom, Pomegranate & Feta Wild Rice
-
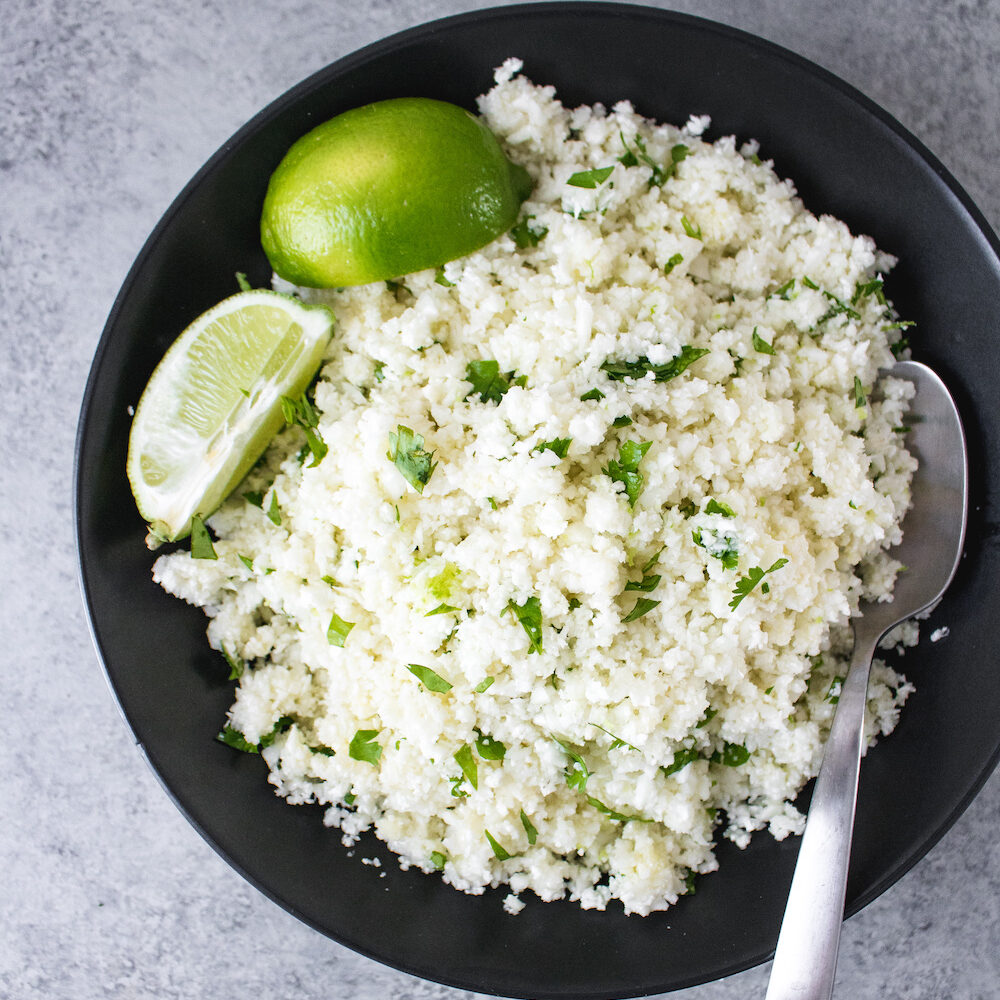
Cilantro Lime Cauliflower Rice
-
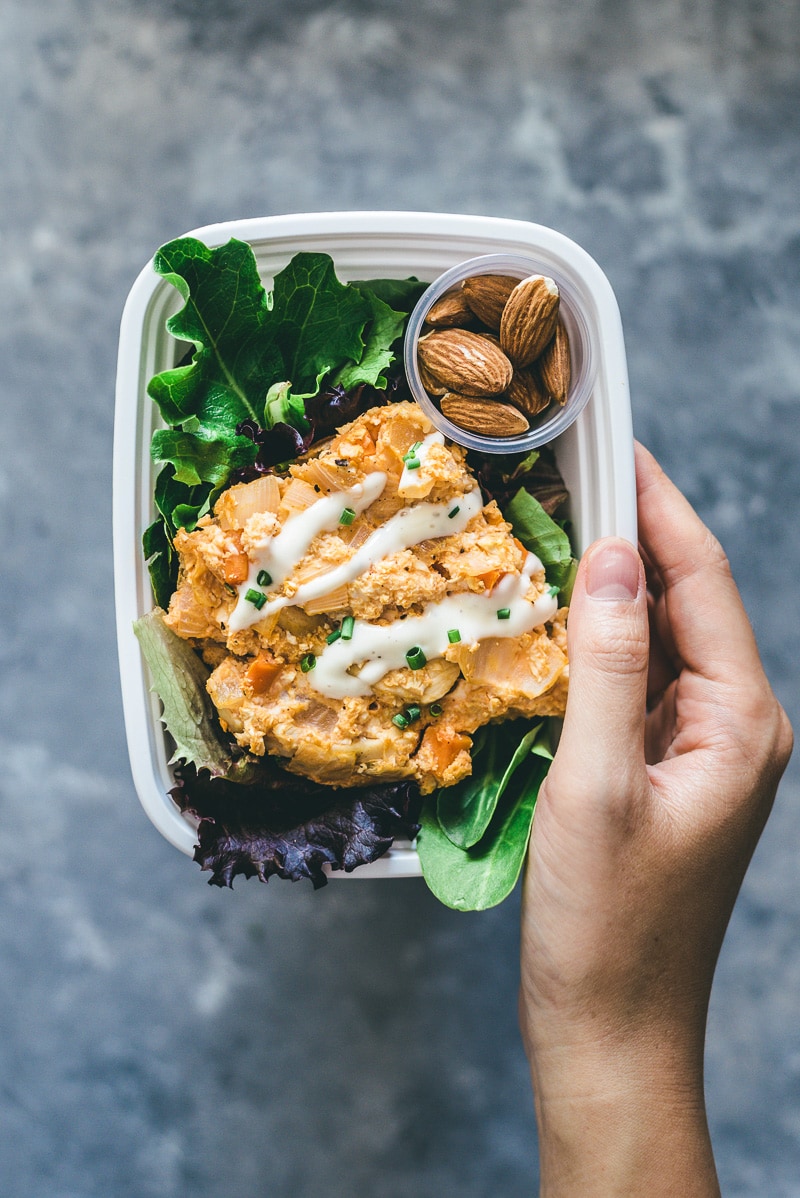
Baked Buffalo Chicken Casserole (GF, Whole30)
-
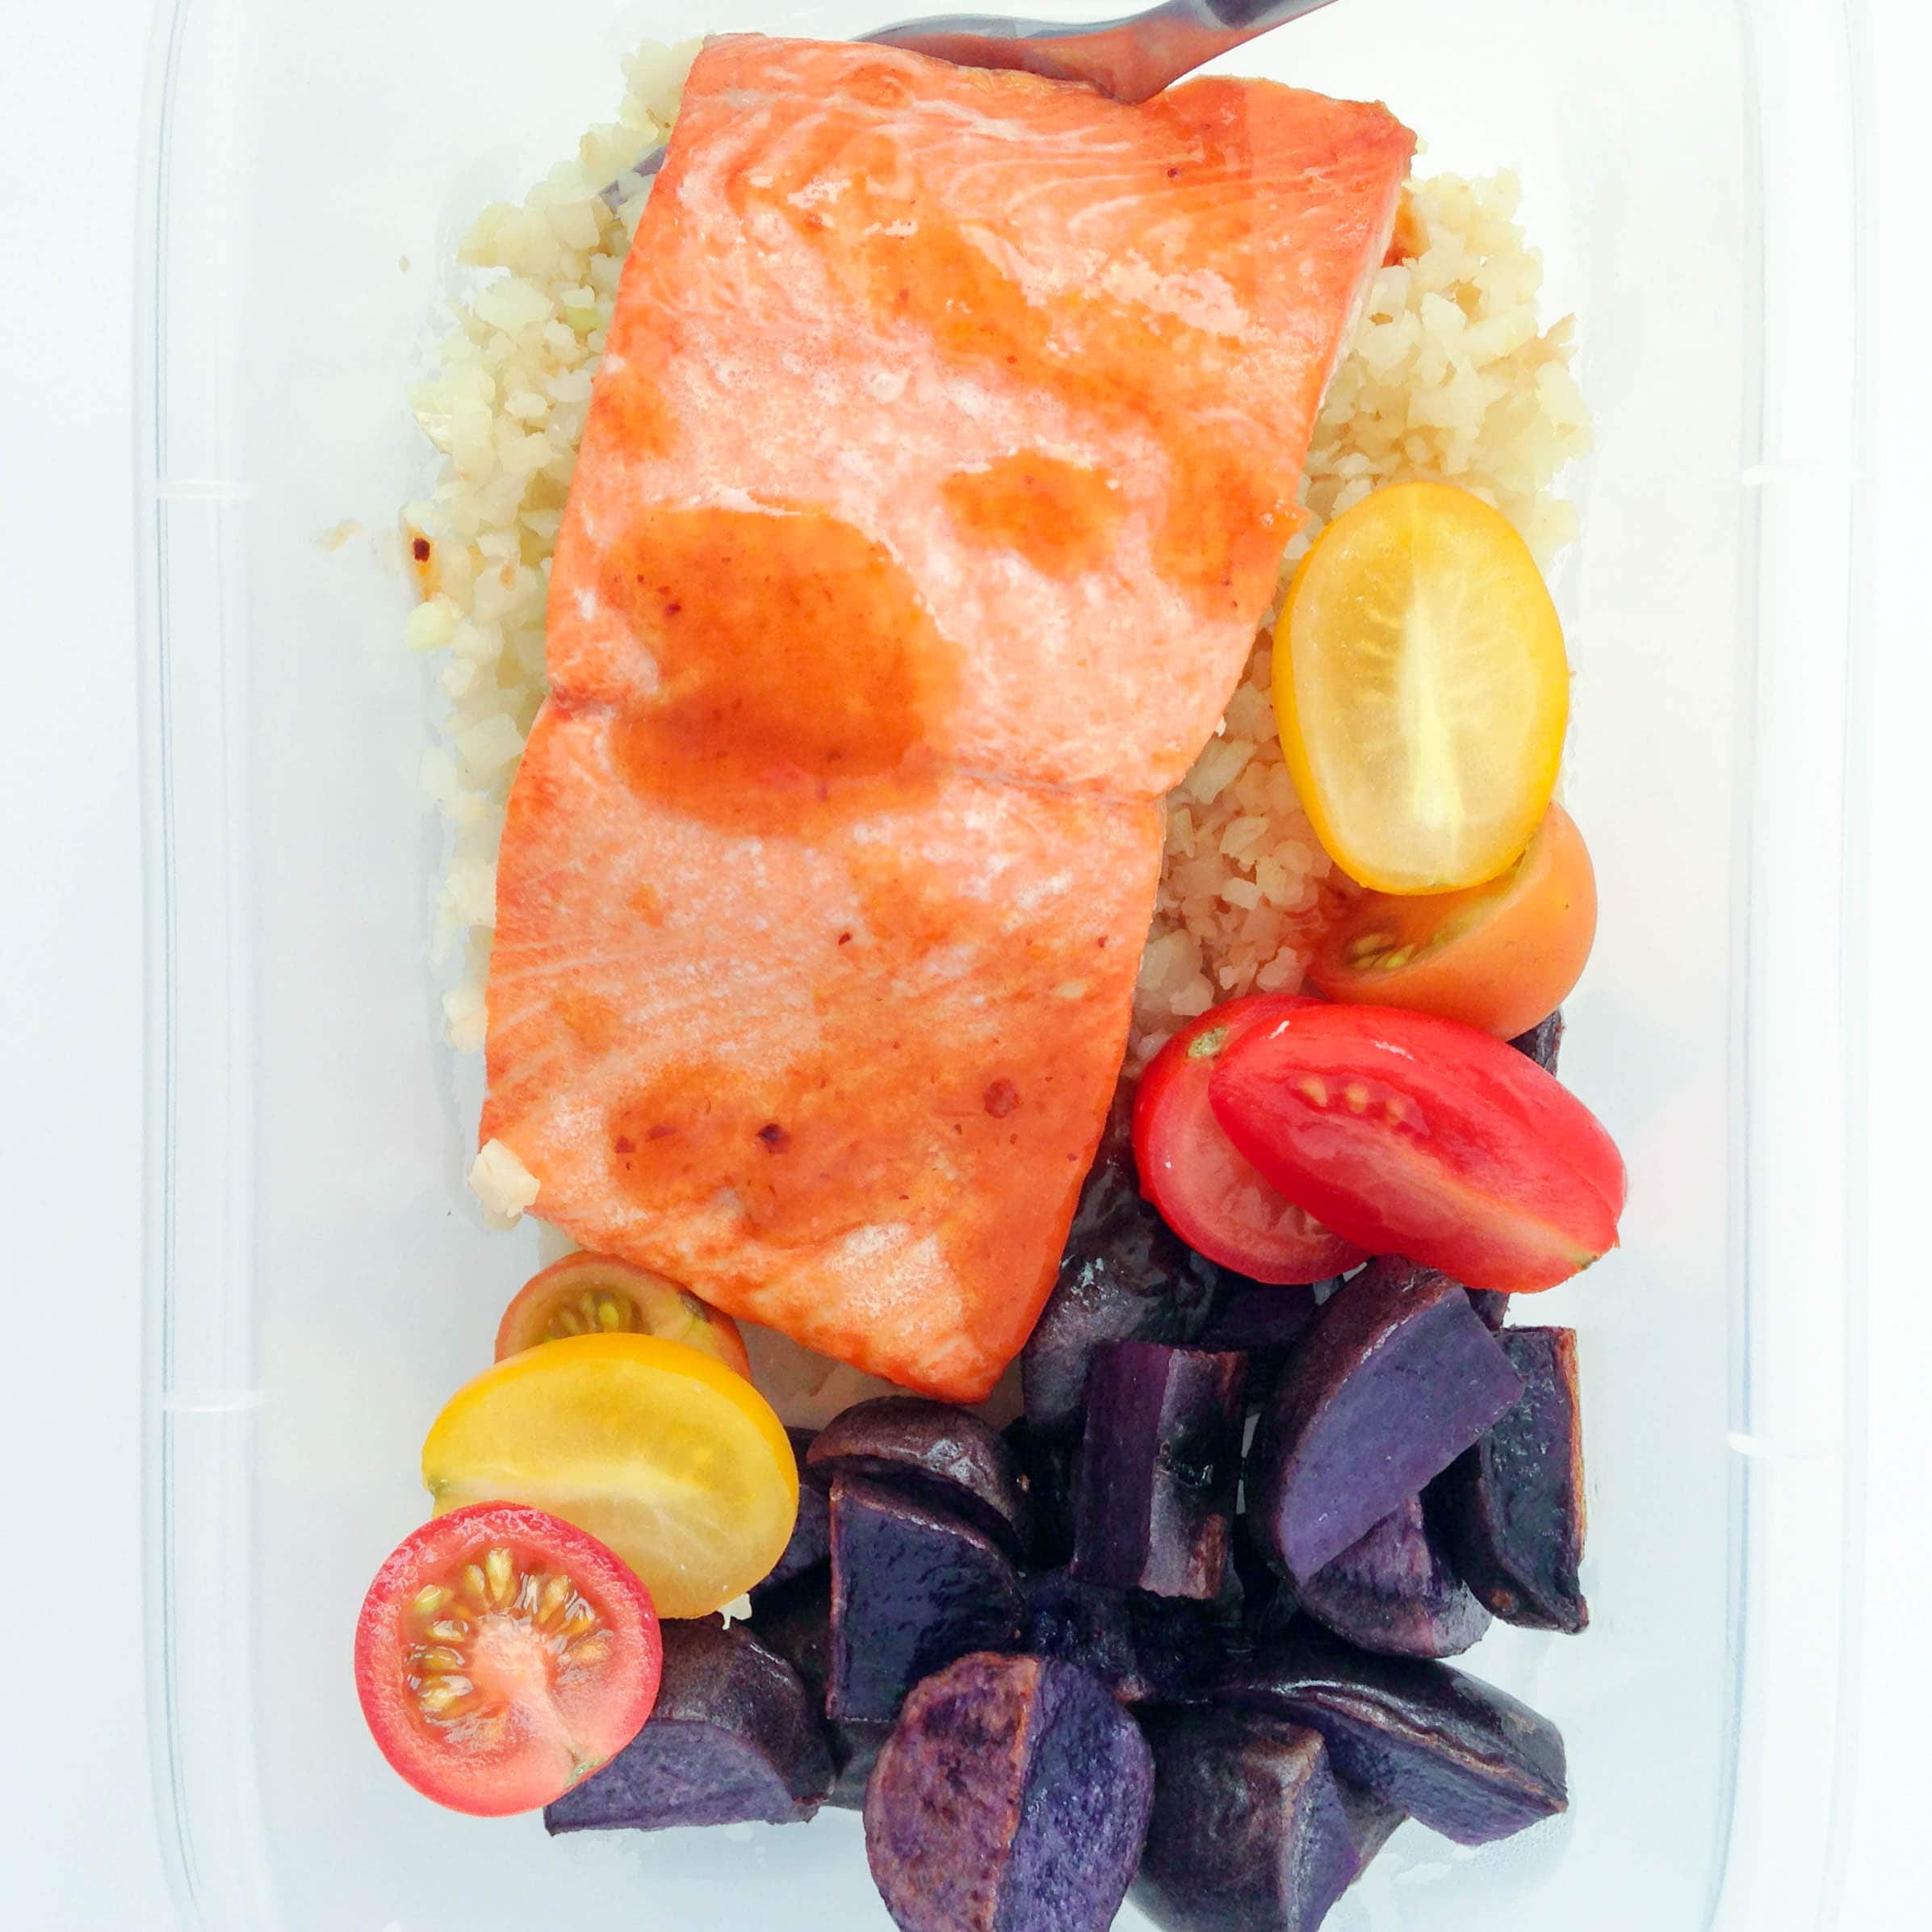
Sheet Pan Chipotle Eye Round Roast Meal Prep
-
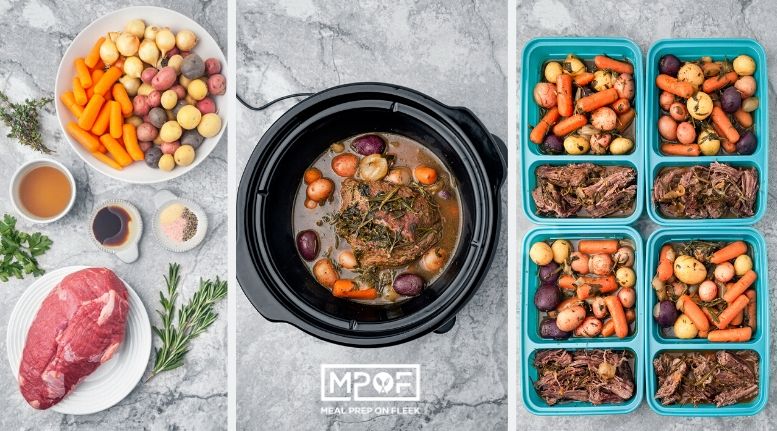
Pot Roast with Au Jus
-
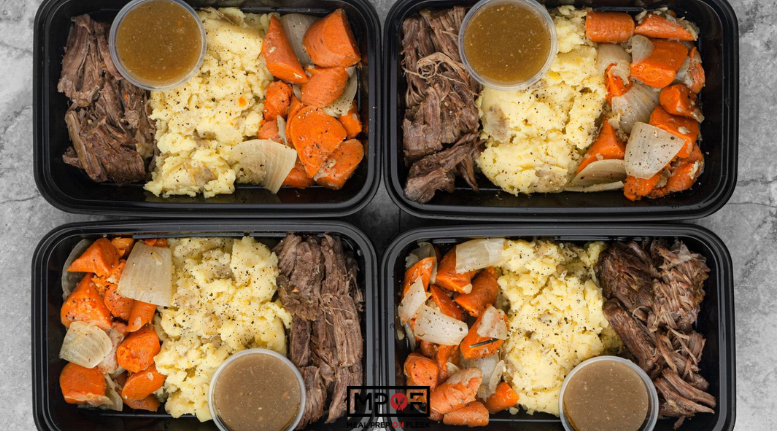
Instant Pot Roast with Mashed Potatoes
-
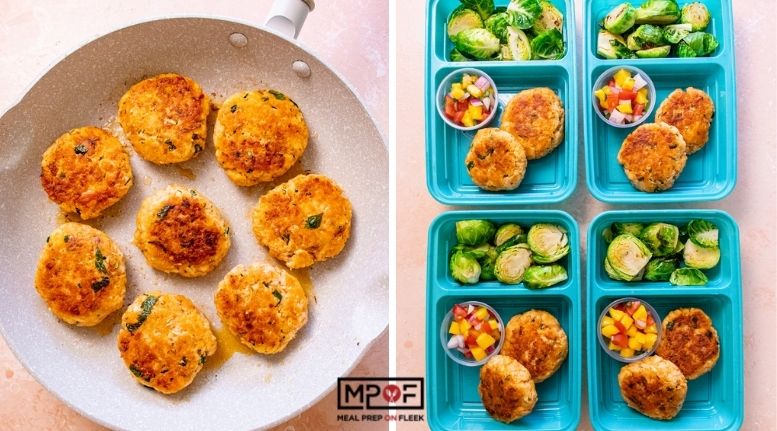
Salmon Cakes with Mango Salsa
-
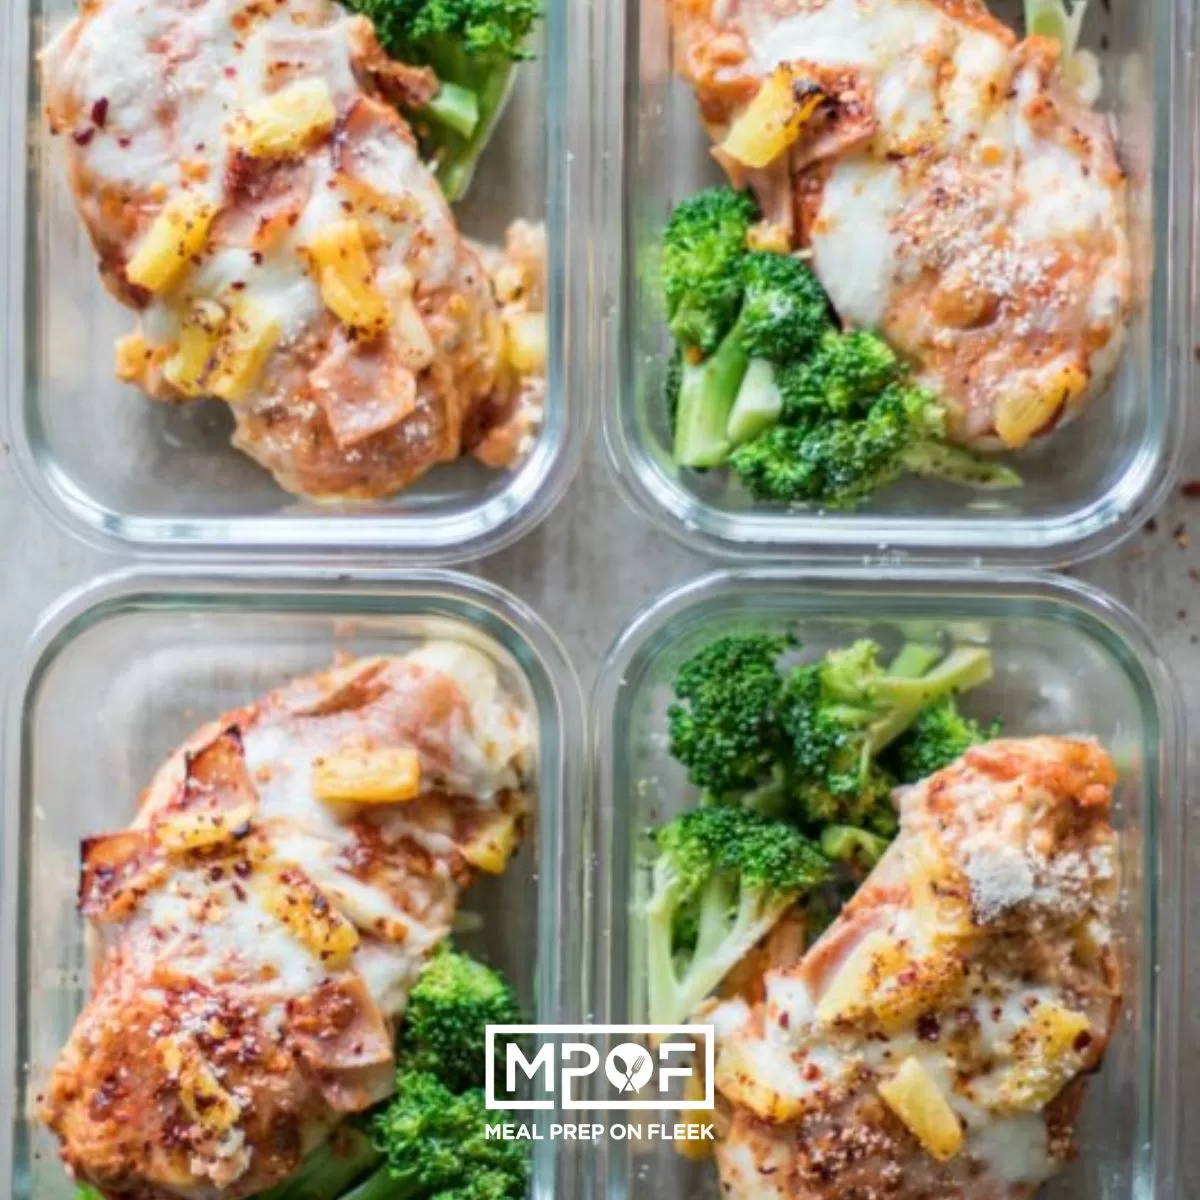
Hawaiian Pizza Chicken Meal Prep
-
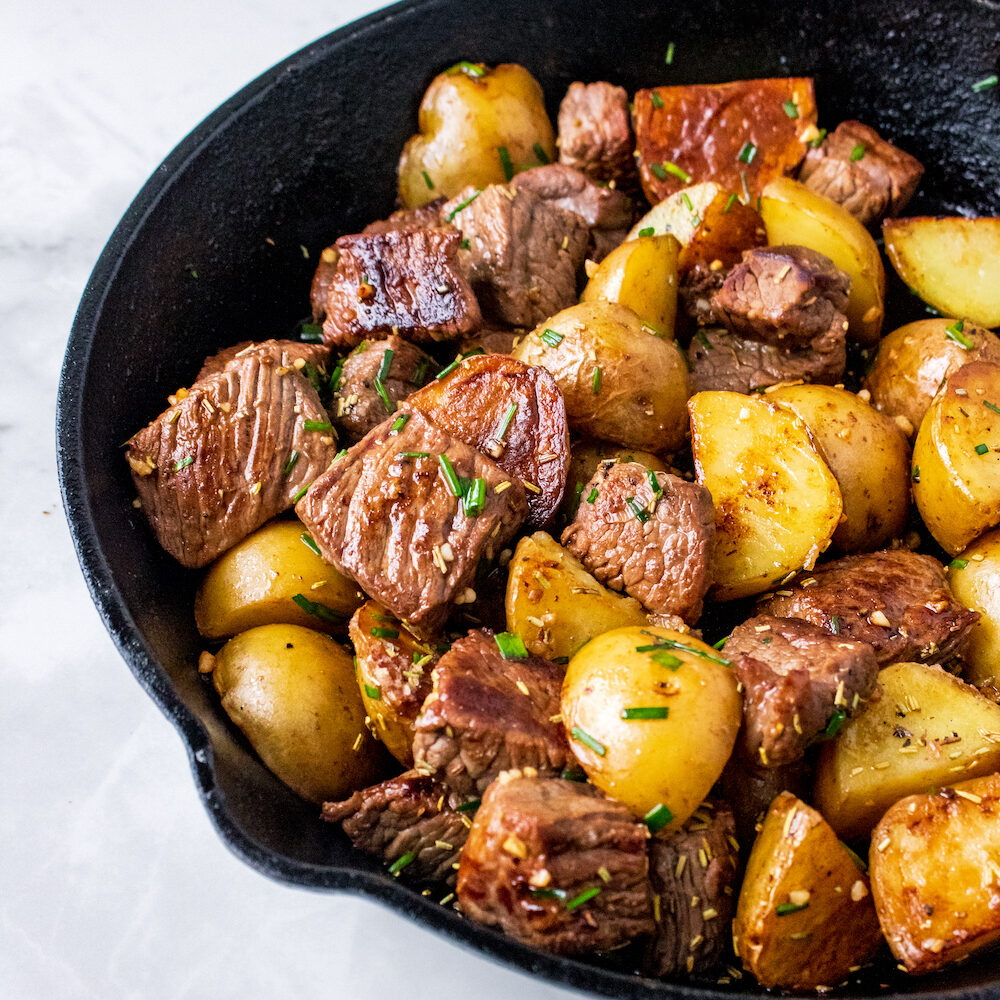
Easy Steak and Potato Bites
-
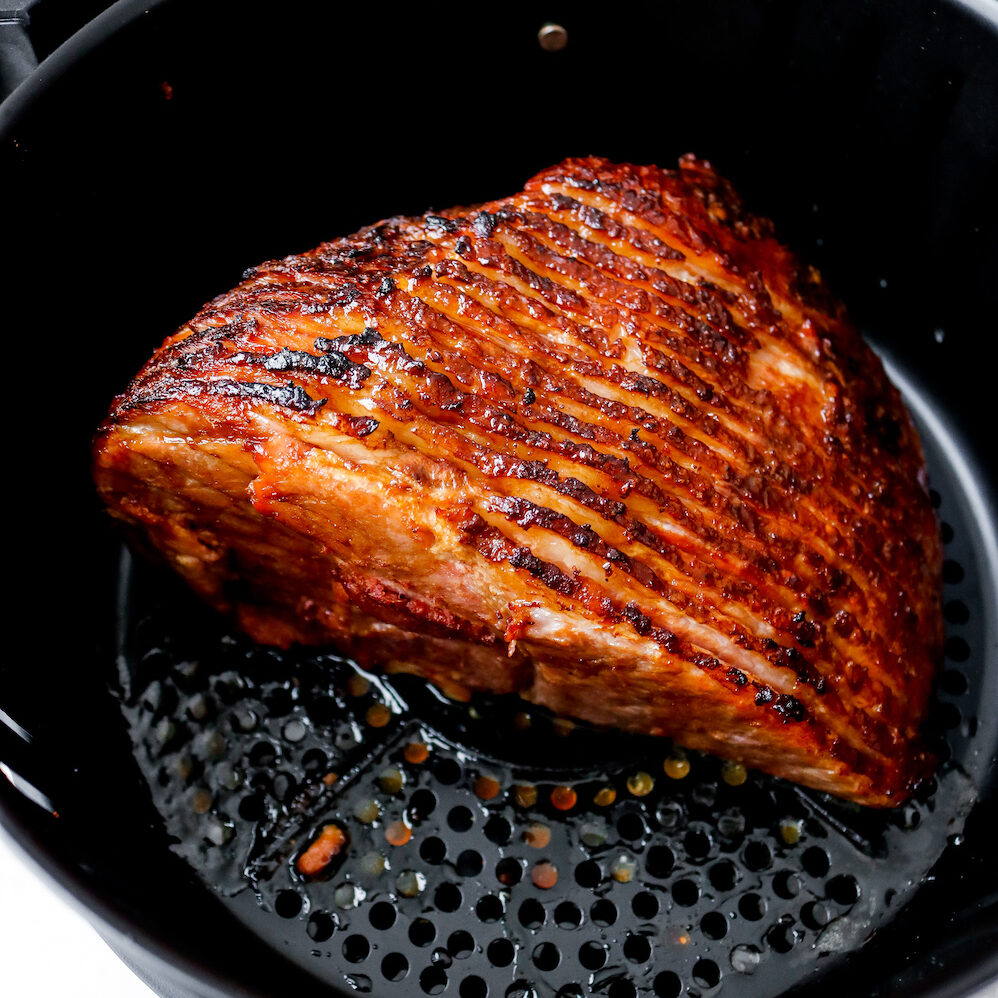
Air Fryer Molasses Dijon Ham with Roasted Vegetables
-
Garlic Pepper Beef
-
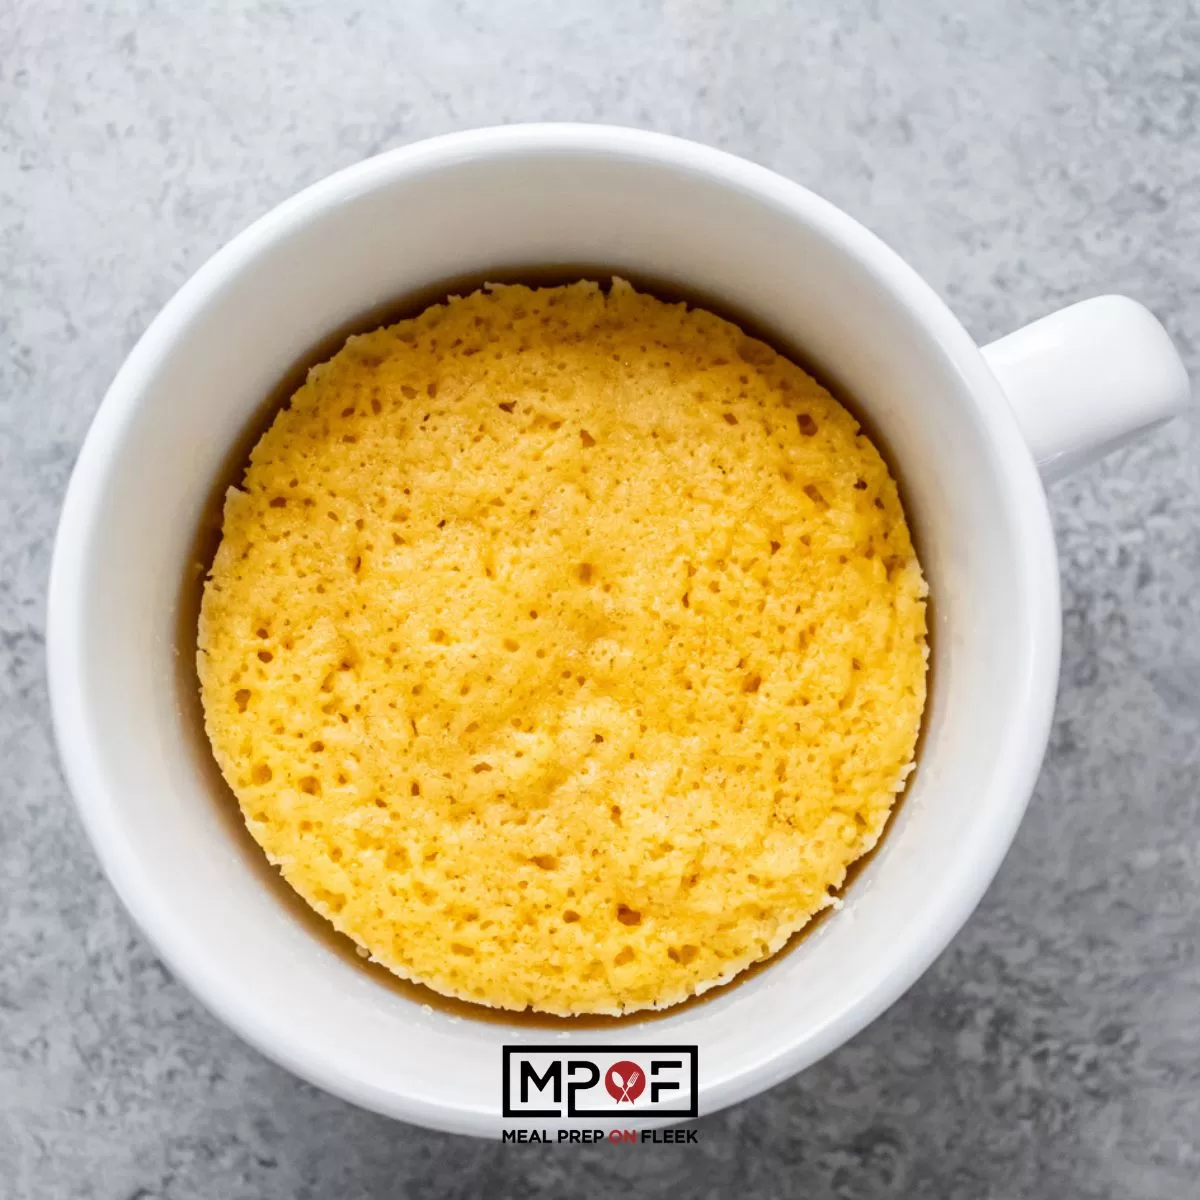
Keto Vanilla Mug Cake
-
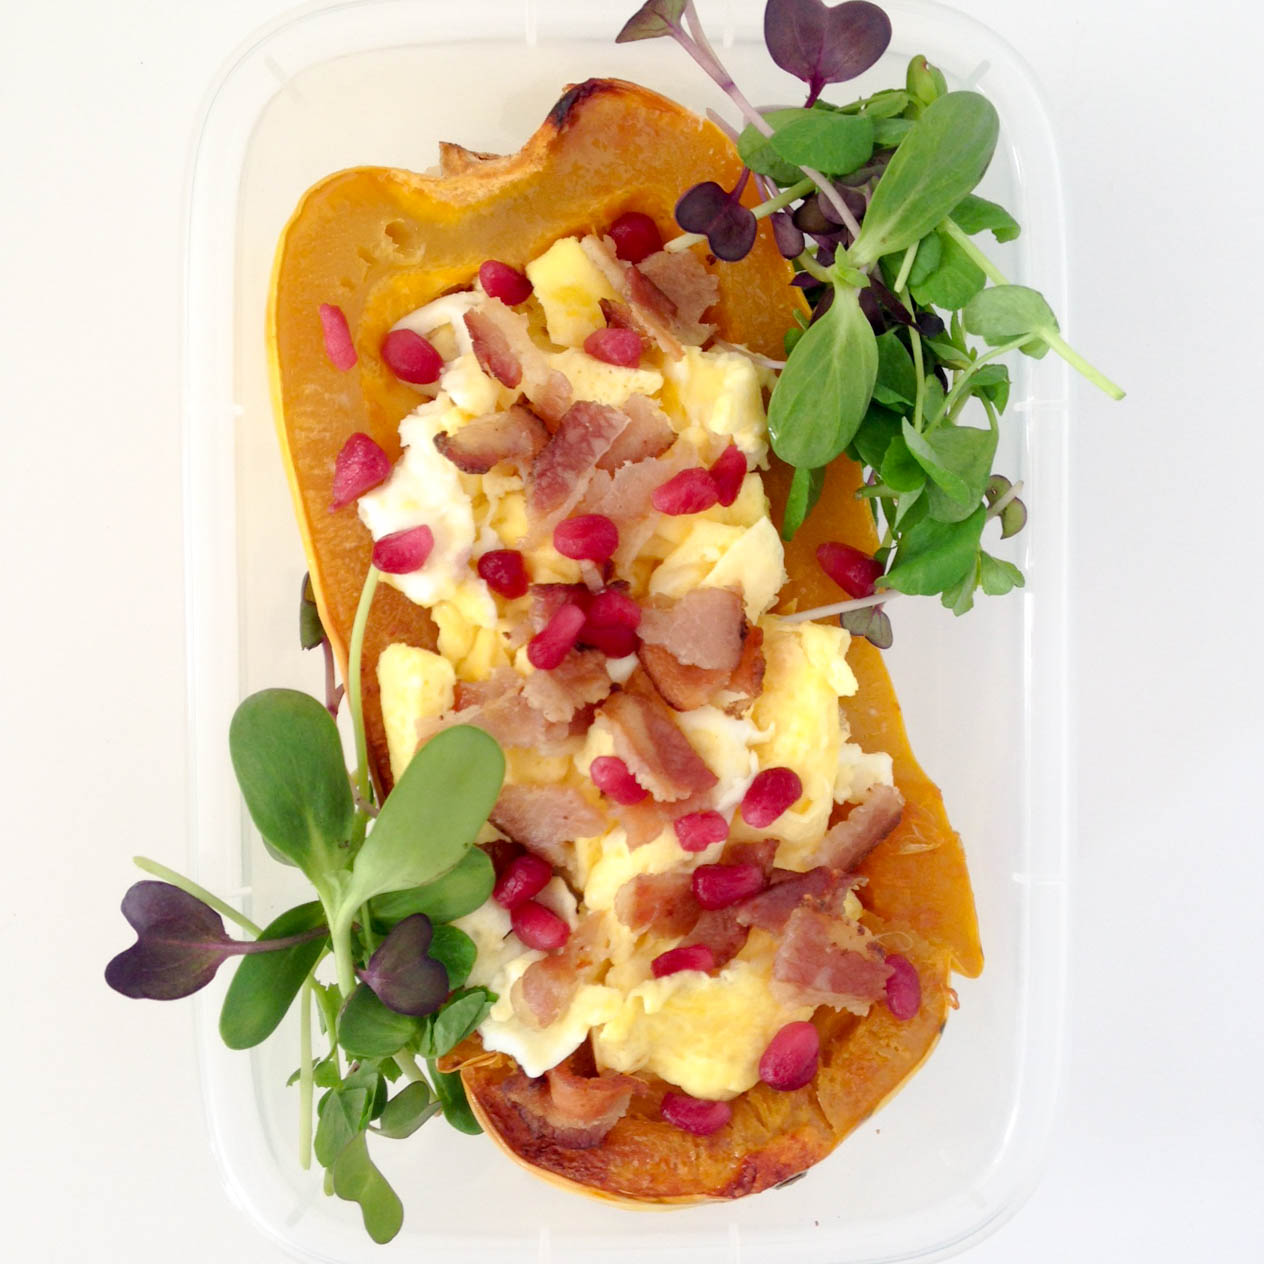
Stuffed Delicata Squash Breakfast Meal Prep
-
Spicy Meatball and Mashed Potato Meal Prep
-
Meatloaf and Mashed Potato Meal Prep (paleo, GF)
-
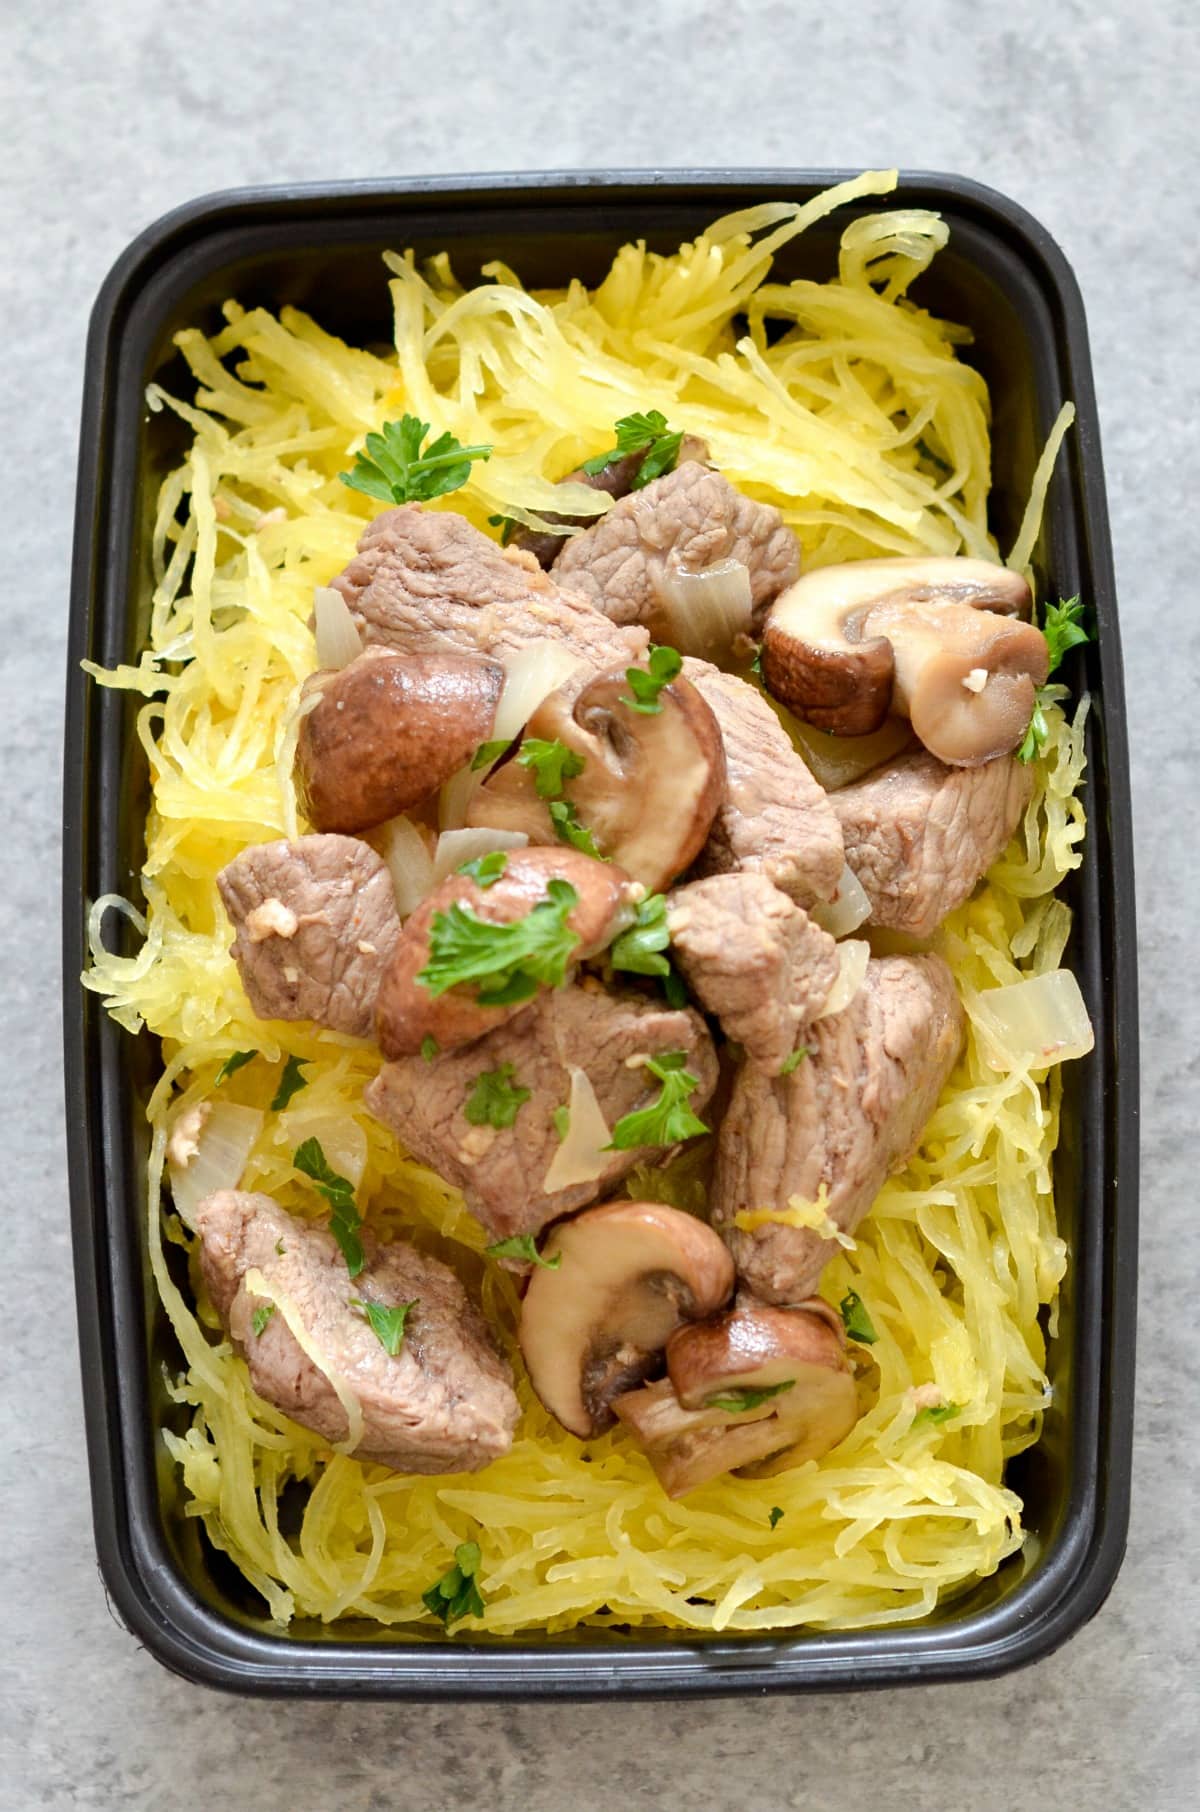
One Pan Beef Stroganoff (Paleo,GF)
-
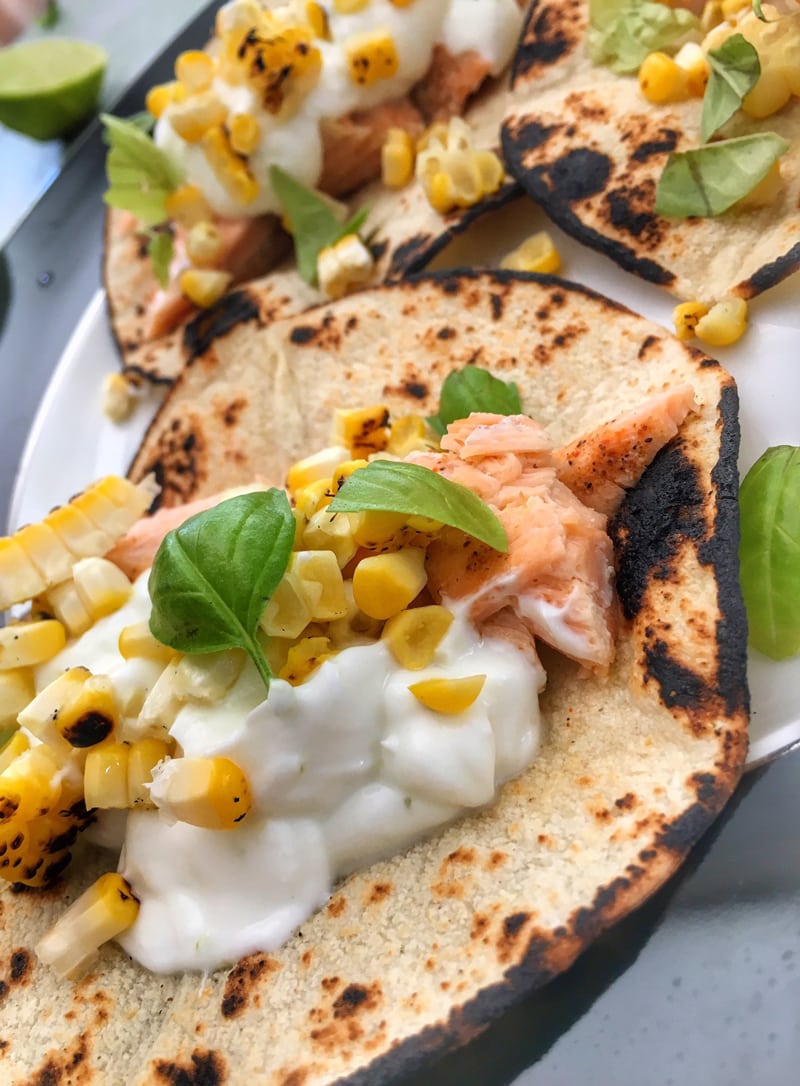
Salmon Tacos with Beets
-
Chicken Bacon Ranch Meal Prep
-
Chicken Sausage & Parsnip Fries Meal Prep
-
Ghost Pepper and Tamarind Salmon Meal Prep
-
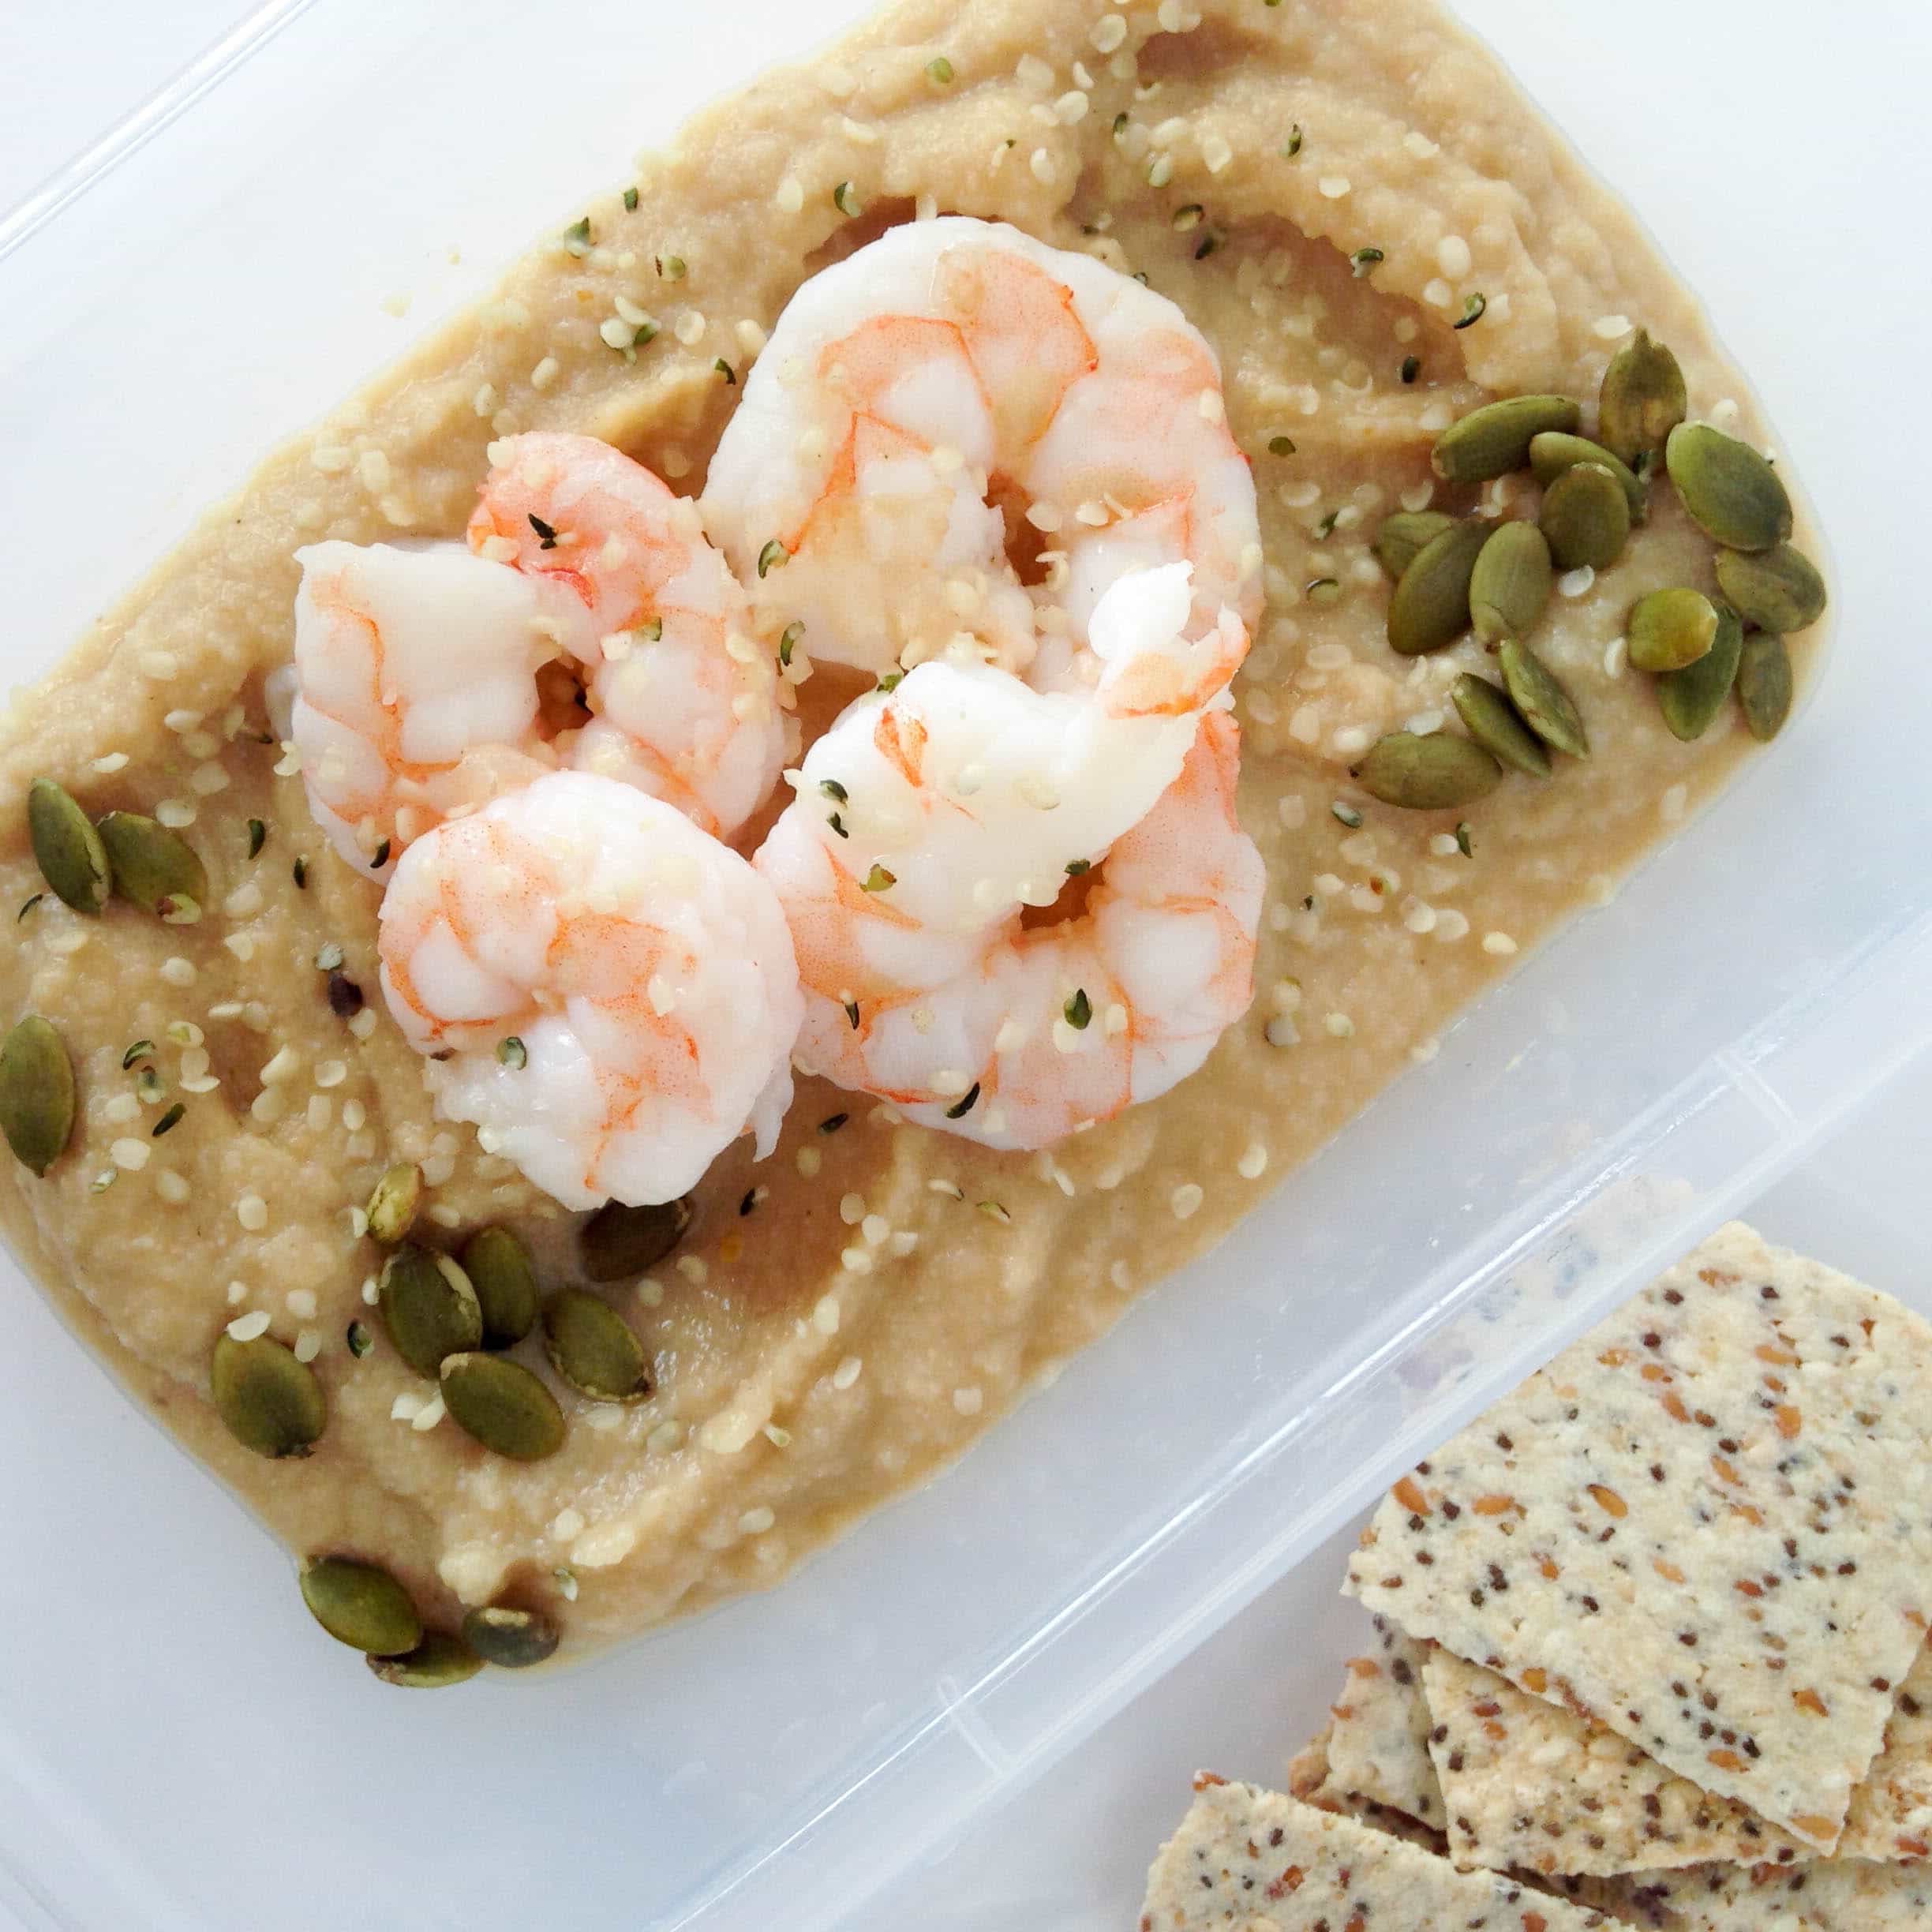
Cauliflower and White Bean Soup with Shrimp Meal Prep