Meal Prep on Fleek

  • Home
  • Recipes
    • Breakfast
    • Lunch
    • Dinner
    • Dessert
    • Side Dish
    • Snacks
    • By Diet
      • Gluten Free
      • Keto
      • Low Carb
      • Paleo
      • Vegan
      • Vegetarian
      • Whole30
  • Meal Prep Tips
  • Macro Calculator
  • Macro Meal Planner
  • Sign In
    • My Account
menu icon
go to homepage
  • Home
  • Recipes
    • Breakfast
    • Lunch
    • Dinner
    • Dessert
    • Side Dish
    • Snacks
    • By Diet
      • Gluten Free
      • Keto
      • Low Carb
      • Paleo
      • Vegan
      • Vegetarian
      • Whole30
  • Meal Prep Tips
  • Macro Calculator
  • Macro Meal Planner
  • Sign In
    • My Account
search icon
Homepage link
  • Home
  • Recipes
    • Breakfast
    • Lunch
    • Dinner
    • Dessert
    • Side Dish
    • Snacks
    • By Diet
      • Gluten Free
      • Keto
      • Low Carb
      • Paleo
      • Vegan
      • Vegetarian
      • Whole30
  • Meal Prep Tips
  • Macro Calculator
  • Macro Meal Planner
  • Sign In
    • My Account
×

Gluten Free Recipes

Enjoy a variety of gluten-free meal prep recipes that are both delicious and satisfying. From hearty Gluten-Free Pork Fried Rice to flavorful Crispy Chicken Bites, these dishes are crafted to fit seamlessly into your routine without compromising on taste or texture.

Garlic Pepper Beef

August 28, 2024 by Nick Quintero Leave a Comment

Garlic Pepper Beef with seasoned rice in meal prep containers
Table of Contents
  • Is Garlic Pepper Good on Steak?
  • Ingredients:
  • How to Store:
  • How to Reheat:
  • What Cut of Steak Is Used for Pepper Steak?
  • Why Is Pepper Steak So Tender?
  • What Is the Ratio for SPG?
  • Final Notes:
  • Here are a few more Meal Prep Recipes with Beef:

When you're short on time but still want a delicious, protein-packed meal, this 30 Minute Garlic Pepper Steak Meal Prep is the answer. Inspired by the viral Creamy Garlic Pepper Steak, this dish is a quick and easy way to enjoy a rich, flavorful meal that’s perfect for any day of the week. With tender flank steak, a creamy garlic sauce, and a boost of spinach, this meal prep is as nutritious as it is satisfying. Ready in just 30 minutes, it’s the perfect solution for a busy schedule without compromising on taste!

Is Garlic Pepper Good on Steak?

Yes, garlic pepper is an excellent seasoning for steak! The combination of garlic and pepper creates a robust flavor profile that enhances the natural taste of the meat. Garlic adds a rich, savory depth, while black pepper provides a hint of heat and spice. Together, they form a delicious crust on the steak when cooked, making each bite flavorful and aromatic. It's a popular choice for steak lovers who enjoy bold, savory flavors.

Ingredients:

  • 1 lb flank steak
  • 1 cup spinach
  • ¼ cup butter
  • ¼ cup cream cheese
  • ½ cup finely grated parmesan
  • 3 tablespoon olive oil
  • 1 cup milk
  • 1 teaspoon salt
  • 1 teaspoon black pepper
  • 1 teaspoon garlic powder
  • 1 teaspoon paprika
  • 1 teaspoon chili flakes
  • Optional: Serve with rice, topped with herb seasoning and red pepper

How to Store:

  • Seal the meal prep containers with tight-fitting lids and store them in the refrigerator. These meals will stay fresh for up to 4 days, making them perfect for lunch or dinner throughout the week.

How to Reheat:

  • To reheat, simply microwave each container for 1-2 minutes, or until the steak and sauce are warmed through. You can also reheat the meal in a skillet over medium heat for a few minutes, which helps maintain the texture of the steak and the creaminess of the sauce.

What Cut of Steak Is Used for Pepper Steak?

Pepper steak is traditionally made with cuts of beef that are tender and quick-cooking. The most common cuts used are flank steak, sirloin, or ribeye. These cuts are ideal because they cook quickly over high heat, which helps retain their tenderness and juiciness. Flank steak, in particular, is a popular choice because it has a rich, beefy flavor and is easy to slice into thin strips, which is typical for pepper steak recipes.

Why Is Pepper Steak So Tender?

Pepper steak is tender primarily due to the way the meat is prepared and cooked. The steak is usually sliced thinly against the grain, which helps break down the muscle fibers, making it easier to chew. Additionally, pepper steak is often cooked over high heat for a short period, which helps to sear the outside while keeping the inside tender and juicy. Marinating the steak before cooking can also help tenderize the meat by breaking down some of the proteins, resulting in a softer texture.

What Is the Ratio for SPG?

SPG stands for Salt, Pepper, and Garlic, a classic seasoning blend used for steak and other meats. The typical ratio for SPG is 1:1:1, meaning equal parts salt, pepper, and garlic powder. This balance ensures that each component complements the others, providing a well-rounded flavor profile. However, you can adjust the ratio to suit your taste preferences, adding more garlic for a stronger flavor or more pepper for extra heat.

Final Notes:

This 30 Minute Garlic Pepper Steak Meal Prep is a game-changer for anyone who loves bold flavors and quick meals. With tender steak, a creamy garlic sauce, and fresh spinach, this dish is both satisfying and nutritious. Perfect for meal prepping, it ensures you have a delicious, homemade meal ready whenever you need it. Whether you’re preparing for a busy workweek or looking for a quick dinner option, this recipe will keep you coming back for more.

Here are a few more Meal Prep Recipes with Beef:

  • Crockpot Beef with Sugar Snap Peas
  • Korean Beef Bowls
  • Five-Spice Beef and Broccoli
  • Kofta Kebab Meal Prep
  • Low Carb Philly Cheesesteak Meal Prep
Garlic Pepper Beef with seasoned rice in meal prep containers

Garlic Pepper Beef

This 30 Minute Garlic Pepper Steak Meal Prep is a game-changer for anyone who loves bold flavors and quick meals.
Print Recipe Pin Recipe Rate Recipe
Prep Time: 10 minutes minutes
Cook Time: 8 minutes minutes
Total Time: 20 minutes minutes
Course: dinner, Lunch
Cuisine: Asian, Filipino
Diet: Gluten Free
Keyword: Steak
Servings: 4 servings
Calories: 497kcal
Author: Nick Quintero

Ingredients

  • 1 lb flank steak
  • 1 cup spinach
  • ¼ cup butter
  • ¼ cup cream cheese
  • ½ cup finely grated parmesan
  • 3 tablespoon olive oil
  • 1 cup milk
  • 1 teaspoon Salt
  • 1 teaspoon Black Pepper
  • 1 teaspoon Garlic Powder
  • 1 teaspoon Paprika
  • 1 teaspoon Chilli Flakes
Get Recipe Ingredients

Instructions

  • Slice the steak into thin pieces and add in all the seasoning.
  • In a skillet, cook the steak over medium heat with butter until cooked to your desired temp.
  • For medium rare, it will take about 8-10 minutes.
  • Once the beef has cooked, add in the milk, cream cheese, parmesan, *extra seasoning if you want, and the spinach.
  • Once that has cooked down, distribute into your meal prep containers and serve with rice topped with herb seasoning and red pepper!

Video

Notes

Optional: Serve with ½ cup of white rice.  
The macros for a ½ cup of cooked white rice (approximately 79 grams) are as follows:
  • Calories: 100-120 kcal
  • Carbohydrates: 22-28 grams
  • Protein: 2-3 grams
  • Fat: 0-1 gram
 

Nutrition

Serving: 4oz | Calories: 497kcal | Carbohydrates: 7g | Protein: 32g | Fat: 38g | Saturated Fat: 17g | Polyunsaturated Fat: 2g | Monounsaturated Fat: 15g | Trans Fat: 0.5g | Cholesterol: 131mg | Sodium: 1034mg | Potassium: 602mg | Fiber: 1g | Sugar: 4g | Vitamin A: 1853IU | Vitamin C: 2mg | Calcium: 240mg | Iron: 2mg
Tried this recipe?Mention @mealpreponfleek or tag #mealpreponfleek!

Craving a delicious and easy meal prep idea? Try this 30 Minute Garlic Pepper Steak Meal Prep and share your experience with us! Use the hashtag #GarlicPepperSteak on social media to show off your cooking skills and inspire others to enjoy quick and tasty meals. Don’t forget to follow @mealpreponfleek for more easy meal prep recipes! Happy cooking!

Stuffed Delicata Squash Breakfast Meal Prep

November 14, 2023 by Nick Quintero Leave a Comment

stuff-delicata-squash-egg-bacon-meal-prep

There’s nothing like starting your day with a warm, hearty breakfast, especially when it’s made with wholesome, seasonal ingredients. This Roasted Delicata Squash Breakfast Meal Prep is an easy, healthy, and delicious way to enjoy a quick morning meal. By roasting up your favorite fall squash and filling it with breakfast goodness like scrambled eggs, crispy bacon, and a touch of sweetness from pomegranate seeds, you can have a satisfying and nutritious breakfast ready to go any day of the week. Let’s dive into this simple yet flavorful meal prep recipe!

stuff-delicata-squash-egg-bacon-meal-prep

Serves: 2

Ingredients:

  • 1 large delicata squash, roasted ($3.00)
  • 4 eggs, scrambled ($2.00)
  • 2 slices bacon, crumbled ($1.00)
  • ¼ cup pomegranate seeds ($1.00)

Total Prep Cost: $7.00
Cost Per Meal: $3.50

Method:

  1. Roast the Delicata Squash:
    • Preheat your oven to 400°F (200°C).
    • Cut the delicata squash in half lengthwise and scoop out the seeds. Place the squash halves on a baking sheet, cut side up, and drizzle with a little olive oil. Roast for 25-30 minutes, or until the squash is tender and golden brown.
  2. Prepare the Eggs and Bacon:
    • While the squash is roasting, cook the bacon slices in a skillet over medium heat until crispy. Remove the bacon from the skillet and crumble into pieces.
    • In the same skillet, scramble the eggs to your preferred level of doneness. You can add salt and pepper to taste.
  3. Assemble the Breakfast Meal Prep:
    • Once the delicata squash is roasted, let it cool slightly. Then, fill each squash half with scrambled eggs.
    • Top with crumbled bacon and a sprinkle of pomegranate seeds for a burst of color and sweetness.
    • Divide the filled squash halves into two meal prep containers for a convenient, ready-to-eat breakfast.

How to Store:

  • Seal the meal prep containers with tight-fitting lids and store them in the refrigerator. These breakfast meals will stay fresh for up to 3 days, making them a great option for busy mornings.

How to Reheat:

  • To reheat, simply microwave each container for 1-2 minutes, or until the squash and eggs are warmed through. If you prefer, you can also reheat the squash and eggs in a skillet over medium heat for a few minutes to maintain the texture of the ingredients.

This Roasted Delicata Squash Breakfast Meal Prep is the perfect way to enjoy a warm, hearty breakfast without spending a lot of time in the kitchen. With the rich, nutty flavor of delicata squash, savory scrambled eggs, crispy bacon, and sweet pomegranate seeds, this meal is a delicious and nutritious way to start your day. Whether you’re preparing for a busy week or just want to enjoy a cozy breakfast at home, this meal prep recipe has you covered.

Ready to start your mornings with a delicious and hearty breakfast? Try this Roasted Delicata Squash Breakfast Meal Prep recipe and share your creations with us! Use the hashtag #MealPrepOnFleek on social media to show off your meal prep skills and inspire others to enjoy wholesome, warm breakfasts. Happy cooking!

Salmon Tacos with Beets

May 12, 2024 by Nick Quintero 1 Comment

salmon tacos with roasted corn

Are you sick of summer yet? Yeah, didn't think so. Motivation to cook is admittedly harder to come by when the weather is extra-hot, but the good thing about summer food is that most of it can be made without an oven.

Salmon Tacos with Roasted Corn

One of the things that I'm more and more conscious of is the amount of time I spend looking for recipes or combinations that I want to meal prep for the upcoming week (especially during the summer). In fact, a recent study shows, people spend an average of 2 hours and 13 minutes every day thinking about hunger and meal choices, which adds up to 34 days each year. WHAT?! Crazy right? On top of that, I commute for about 100 miles per day, Mon-Fri, which calculates out to 637 hours, or 27 days, in my car. That's 61 days of my life that are limiting my productivity.... and lets not talk about sleep! OK, rant over.

This week, I made salmon tacos with roasted corn and beets, however since I'm not a fan of beets, I left them out.

Salmon Tacos With Beets and Corn

This recipe calls for steamed beets. You can steam them yourself or buy them pre-steamed in the refrigerated section at the supermarket. Start getting recipes like this emailed to you each week by clicking here

Servings 1
Cooking Time: 20 min

NUTRITION FACTS
537 calories, 19 g fat (3 g saturated), 59 g carbs,12 g fiber, 32 g protein

Ingredients:
1 salmon fillet (about 3 oz), skin removed, cut into 9 bite-sized pieces
¼ teaspoon cumin, plus more for yogurt sauce
1 sprinkle paprika
salt
pepper
1 teaspoon canola oil
¼://www.melissas.com/Organic-Baby-Beets-Peeled-Steamed-p/1448.htm" target="_blank" rel="nofollow noopener">steamed beets, cut into rough ½-inch pieces
¼ cup fresh corn kernels (from about ½ small ear)
1 tablespoon fresh mint, torn
3 small corn tortillas

Directions:
Season salmon with cumin, paprika, salt, and pepper.
In a large skillet over medium-high heat, heat 1 teaspoon oil.
Add salmon and cook, turning occasionally, until lightly browned on all sides, about 4 minutes.
Remove from skillet and set aside.
In a bowl, stir together yogurt, dill, lime zest, half the lime juice, and a sprinkle of cumin.
In another bowl, stir together beets, corn, mint, and salmon.
Wipe out skillet and return to medium heat.
Warm tortillas, about 1 minute per side.
Top tortillas with salmon and vegetables.
Garnish with yogurt sauce and remaining lime juice.

0717-salmon-tacos-beets-corn-lg

Salmon Tacos With Beets and Corn

Who doesn't love salmon tacos? This recipe calls for steamed beets. You can steam them yourself or buy them pre-steamed in the refrigerated section at the supermarket
Print Recipe Pin Recipe Rate Recipe
Prep Time: 10 minutes minutes
Cook Time: 10 minutes minutes
Total Time: 20 minutes minutes
Course: dinner, Lunch
Cuisine: American
Diet: Gluten Free
Keyword: Salmon, Tacos
Servings: 3 tacos
Calories: 576kcal
Author: Nick Quintero

Ingredients

  • 1 salmon fillet about 3 oz, skin removed, cut into 9 bite-sized pieces
  • ¼ teaspoon cumin plus more for yogurt sauce
  • 1 sprinkle paprika
  • salt
  • pepper
  • 1 teaspoon canola oil
  • ¼ cup plain 2-percent-fat Greek yogurt
  • 1 teaspoon fresh dill chopped
  • ½ lime zest and juice, divided
  • 2 medium steamed beets cut into rough ½-inch pieces
  • ¼ cup fresh corn kernels from about ½ small ear
  • 1 tablespoon fresh mint torn
  • 3 small corn tortillas
Get Recipe Ingredients

Instructions

  • Season salmon with cumin, paprika, salt, and pepper.
  • In a large skillet over medium-high heat, heat 1 teaspoon oil.
  • Add salmon and cook, turning occasionally, until lightly browned on all sides, about 4 minutes.
  • Remove from skillet and set aside.
  • In a bowl, stir together yogurt, dill, lime zest, half the lime juice, and a sprinkle of cumin.
  • In another bowl, stir together beets, corn, mint, and salmon.
  • Wipe out skillet and return to medium heat.
  • Warm tortillas, about 1 minute per side.
  • Top tortillas with salmon and vegetables.
  • Garnish with yogurt sauce and remaining lime juice.

Nutrition

Serving: 3tacos | Calories: 576kcal | Carbohydrates: 57g | Protein: 47g | Fat: 19g | Saturated Fat: 3g | Polyunsaturated Fat: 7g | Monounsaturated Fat: 7g | Trans Fat: 1g | Cholesterol: 97mg | Sodium: 207mg | Potassium: 1444mg | Fiber: 10g | Sugar: 12g | Vitamin A: 937IU | Vitamin C: 18mg | Calcium: 194mg | Iron: 4mg
Tried this recipe?Mention @mealpreponfleek or tag #mealpreponfleek!
cajun salmon tacos with roasted corn
salmon taco recipe pin selfstarter

Peach Summer Rolls with Tahini Dipping Sauce

August 16, 2023 by Nick Quintero Leave a Comment

Peach Summer Rolls With Tahini Dipping Sauce blog

Celebrate the summer with these peach summer rolls! Filled to the brim with fresh healthy veggies, this meal prep recipe is sure to satisfy and nourish. Lovers of Asian cuisine delight—This remix of the traditional spring roll brings together an incredible flavor profile! Not just the rolls have incredible flavor, though. It’s the side of tahini dipping sauce that really brings all the sweet and savory notes into harmony!

These peach summer rolls are an excellent substitute for a salad! They work especially well as a meal prep option because they are so compact! In fact, when we made them, we could fit five rolls, plus a small ramekin of sauce into our one compartment meal prep container. Now that’s some smart meal prep!

Vegetarian Peach Summer Rolls with Tahini Dipping Sauce

Peach Summer Rolls With Tahini Dipping Sauce

Spring rolls get a summery twist by adding sweet sliced peaches. Don’t skip the tahini dipping sauce -- that is what pulls all the flavors together. The rice paper wrappers may begin to dry out after 3-4 days, but all they need is a light mist of water to soften and taste fresh again. If you’d like to add extra protein, shredded chicken, cooked shrimp, or garbanzo beans are all great additions.

Peach Summer Rolls With Tahini Dipping Sauce

Individually wrapped in rice paper, each serving of peach summer rolls has 11g of fat, 5g of protein, and only 228 calories. That means they’re keto-friendly, and because they contain no animal products, they’re vegan-friendly too! We think these peach summer rolls would be great as a lighter-fare lunch option, but if you want extra protein, shrimp, chicken, or garbanzo beans make excellent additions.

Usually when we hear “leafy greens,” we think spinach or kale. But these peach summer rolls contain mint and basil as their leafy greens! Don’t think they’re any less healthy though—Basil, in particular, has antioxidant and anti-inflammatory properties, and has even been shown to fight cancer! Speaking of mint, consider making these  Mint Chocolate Energy Bites for dessert! If you love Thin Mint Girl Scout cookies, then this is the keto dessert for you!

Peach Summer Rolls With Tahini Dipping Sauce

Peach Summer Rolls with Tahini Dipping Sauce Ingredients:

Summer Rolls:
12 rice paper wrappers
1 large peach, sliced
1 cucumber, cut in matchsticks
2 cups purple cabbage, shredded
1 cup basil
½ cup fresh mint

Tahini Dipping Sauce:
¼ cup tahini
¼ cup coconut milk, canned
3 tablespoons lime juice
2 tablespoons coconut aminos
½ tablespoon honey
¼ teaspoon sea salt
Sriracha chili sauce, to taste

Peach Summer Rolls With Tahini Dipping Sauce

Of course, we cannot forget about the fabulous keto-friendly tahini dipping sauce! Interestingly, the name “tahini” originates from the Arabic word tahana, or “to grind”. This makes sense, as tahini itself consists of ground sesame seeds. Sesame seeds hold an interesting past as well—The first recorded mention of sesame was found in a 4000-year-old cuneiform document. Remember as you eat this rich dipping sauce, that its historical value is rich as well!

Don’t be fooled by the creaminess of the dipping sauce! We promise it’s 100% keto friendly. In fact, it’s good for you! Instead of soy sauce, this meal prep recipe calls for coconut milk, which contains MCTs (medium chain triglycerides). MCTs have been shown to reduce appetite and caloric intake, which helps the liver produce ketones. Did you know that sesame seeds are also highly nutritious? They are a naturally-occurring source of omega-3 and omega-6 fatty acids, manganese, amino acids, and calcium! Want to get in on more sesame seed action? Check out our meal prep recipe for Peanut Butter Protein Squares or even our recipe for  Sesame Salmon with Bok Choy and Mushrooms!

Peach Summer Rolls With Tahini Dipping Sauce

This peach summer roll meal prep recipe makes 4 servings, and takes 25 minutes to prepare! Try making these rolls for friends, or take your family out for a picnic with them--Summer is here! ? We think this meal prep recipe is a crisp, tasty, and healthy way to cool off, and we think you will agree!

Peach Summer Rolls With Tahini Dipping Sauce blog
Peach Summer Rolls With Tahini Dipping Sauce

Peach Summer Rolls with Tahini Dipping Sauce

Spring rolls get a summery twist by adding sweet sliced peaches. Don’t skip the tahini dipping sauce -- that is what pulls all the flavors together.
Print Recipe Pin Recipe Rate Recipe
Prep Time: 25 minutes minutes
Total Time: 25 minutes minutes
Course: Lunch
Cuisine: Asian
Keyword: Meal Prep
Servings: 4 meals
Calories: 226kcal
Author: Nick Quintero

Ingredients

Summer Rolls

  • 12 rice wrappers
  • 1 large peach sliced
  • 1 Cucumber cut into match sticks
  • 2 cups Purple Cabbage shredded
  • 1 cup basil
  • ½ cup fresh mint

Tahini Dipping Sauce

  • ¼ cup tahini
  • ¼ cup coconut milk Canned, full fat
  • 3 tbs lime juice
  • 2 tbs Coconut Aminos
  • ½ tbs Honey
  • Sea Salt to taste
  • sriracha chili sauce optional
Get Recipe Ingredients

Instructions

  • Prepare the dipping sauce by adding all the ingredients to a blender, and processing until smooth. This can be done by hand but is easier in a blender.
  • Set up a station with bowls of each ingredient. You will also need a cutting board, and a pie plate filled with warm water to soften the rice paper.
  • Start by dipping a sheet of rice paper in water, making sure both sides are wet. Do not allow the rice paper to fully soften in the water. It will continue to soften once you’ve set it on the cutting board.
  • Start filling your roll by adding the basil and mint leaves, and then adding cucumbers, shredded cabbage, and peaches.
  • Fold the top and bottom of the rice paper to the center, and then roll the paper from left to right, tightly packing the rolls.
  • Repeat with the rest of the rice paper wrappers.
  • Serve with dipping sauce.

Notes

Nutrition for 1 out of 4 servings:
5g Protein | 30g Carbs | 11g Fat | 4g Fiber | 228 Calories

Nutrition

Serving: 1meal | Calories: 226kcal | Carbohydrates: 30g | Protein: 5g | Fat: 11g | Fiber: 4g
Tried this recipe?Mention @mealpreponfleek or tag #mealpreponfleek!

Chicken Bacon Ranch Meal Prep

August 24, 2022 by Nick Quintero Leave a Comment

Chicken Bacon Ranch Meal Prep

Take the 'naughty' out of your Chicken Bacon Ranch Meal Prep with this healthy, flavorful and whole30 compliant idea!

Chicken Bacon Ranch Meal Prep

Craving something indulgent but still want to stick to your health goals? Look no further than this Chicken Bacon Ranch and Purple Sweet Potatoes Meal Prep! This dish is the perfect combination of flavor and nutrition, making you feel like you're indulging without the guilt. Made with wholesome, whole ingredients, this meal is Whole30 compliant and can be prepped for less than $4 per meal. Ready to enjoy a meal that’s as tasty as it is healthy? Let’s get started!

Serves: 4

Ingredients:

  • 1 lb chicken tenders ($1.99)
  • 2 large purple sweet potatoes, sliced ($2.00)
  • 2 cups spinach (optional)
  • ½ cup Whole30 compliant ranch dressing ($2.00)
  • ½ cup crumbled bacon or bacon bits ($1.50)
  • Oil (for roasting)
  • Seasoning (salt, pepper, garlic powder, or your favorite blend)

Total Prep Cost: $7.49
Cost Per Meal: Less than $4.00

Instructions:

  1. Prepare the Oven:
    • Preheat your oven to 375 degrees F.
    • Line a baking sheet with foil for easy cleanup.
  2. Roast the Purple Sweet Potatoes:
    • Slice the purple sweet potatoes into even pieces. Place them in a bowl and toss with a bit of oil to coat.
    • Spread the potato slices in a single layer on the lined baking sheet.
    • Roast in the preheated oven for about 10 minutes to start softening them up.
  3. Bake the Chicken Tenders:
    • After the potatoes have roasted for 10 minutes, remove the baking sheet from the oven.
    • Season the chicken tenders with salt, pepper, and any other preferred seasoning. Place the chicken on the same baking sheet with the sweet potatoes.
    • Return the baking sheet to the oven and bake for an additional 8-10 minutes, or until the chicken is cooked through and no longer pink in the center.
  4. Assemble the Meal Prep Containers:
    • Once the chicken and potatoes are cooked, let them cool slightly before assembling.
    • Evenly divide the roasted sweet potatoes and chicken tenders among four meal prep containers.
    • Optional: Add a handful of fresh spinach to each container for extra greens.
    • Top each serving with 2 tablespoons of Whole30 compliant ranch dressing and sprinkle with crumbled bacon or bacon bits for that classic chicken bacon ranch flavor.

How to Store:

  • Seal the meal prep containers with tight-fitting lids and store them in the refrigerator. These meals will stay fresh for up to 4 days, making them a convenient option for lunches or dinners throughout the week.

How to Reheat:

  • To reheat, simply microwave each container for 1-2 minutes, or until the meal is warmed through. For the best texture, you can also reheat the chicken and potatoes in a skillet over medium heat. Add the ranch dressing and bacon bits after reheating to maintain their flavor and freshness.

This Chicken Bacon Ranch and Purple Sweet Potatoes Meal Prep is the perfect way to enjoy a hearty, satisfying meal without compromising your health goals. With its delicious combination of savory chicken, crispy bacon, and creamy ranch, all balanced by the natural sweetness of purple sweet potatoes, this dish will quickly become a weekly staple. Plus, it's Whole30 compliant and easy on the budget!

Ready to indulge in a deliciously healthy meal? Try this Chicken Bacon Ranch and Purple Sweet Potatoes Meal Prep and share your creations with us! Use the hashtag #MealPrepOnFleek on social media to show off your meal prep skills and inspire others to enjoy flavorful, guilt-free meals. Happy cooking!

Meal Prep on the Grill

September 27, 2022 by Nick Quintero Leave a Comment

who says you cant meal prep on the grill

Would you believe this whole meal prep was done on the grill? Yes, every item! It can be as easy as that! Plus, think of all of the electricity you save by taking it outside!

If you're looking for a meal prep that's simple, healthy, and delicious, this Grilled Salmon & Asparagus Meal Prep is just what you need! With just a few ingredients and minimal effort, you can have a nutritious and satisfying meal ready to go. The combination of succulent coho salmon, crisp asparagus, and refreshing jicama makes for a balanced meal that’s perfect for busy weekdays. Fire up the grill and let's get started!

Grilled Salmon and Asparagus Meal Prep

who says you cant meal prep on the grill

Ingredients:

  • 1 lb coho salmon, portioned into 4 fillets ($16.00)
  • 1 lb jicama, sliced ($3.00)
  • 1 lb asparagus ($3.00)
  • Ghee (for coating)

Total Meal Prep Cost: $22.00
Cost Per Meal: $5.50

Method:

  1. Prep the Ingredients:
    • Start by preparing the salmon fillets, jicama slices, and asparagus. Pat the salmon fillets dry with a paper towel to help them sear better on the grill.
    • Melt a generous amount of ghee and coat each salmon fillet, jicama slice, and asparagus spear. This will not only add flavor but also help prevent sticking on the grill.
  2. Grill the Ingredients:
    • Preheat your grill to medium-high heat.
    • Place the salmon fillets skin-side down on the grill, alongside the jicama slices and asparagus. Grill the salmon for about 4-5 minutes per side, or until it flakes easily with a fork and reaches an internal temperature of 145°F.
    • Grill the jicama slices and asparagus for about 5-7 minutes, turning occasionally, until they are tender and have nice grill marks.
  3. Assemble the Meal Prep Containers:
    • Once everything is grilled to perfection, let the ingredients cool slightly before assembling.
    • Evenly divide the grilled salmon, jicama, and asparagus among four meal prep containers. This not only makes the meal visually appealing but also ensures you’re getting a variety of nutrients in every bite.
  4. Storage and Serving:
    • Seal the containers tightly and store them in the refrigerator. Enjoy these meals within 4 days to maintain their freshness and flavor.
    • When ready to eat, simply reheat in the microwave for 1-2 minutes or enjoy it cold—salmon tastes great both ways!

Conclusion: This Grilled Salmon & Asparagus Meal Prep is a quick and easy way to enjoy a healthy and balanced meal throughout the week. With just a few simple ingredients, you can create a delicious and satisfying dish that’s packed with protein, fiber, and essential nutrients. Perfect for lunch or dinner, this meal prep is sure to become a staple in your weekly rotation.

Ready to simplify your meal prep with this tasty recipe? Fire up the grill and give this Grilled Salmon & Asparagus Meal Prep a try! Share your meal prep creations with us on social media using the hashtag #MealPrepOnFleek. Let’s inspire others to eat healthy and delicious meals!

Roasted Chicken and Winter Persimmons Make This Sweet & Savory Meal Prep

August 13, 2022 by Nick Quintero Leave a Comment

Roast Chicken and Winter Persimmons

Meal prep doesn't have to be just about separate components of proteins, veggies, and fruits. Why not combine flavors for a harmonious dish that satisfies all your taste buds? Our Roast Chicken & Winter Persimmons meal prep is the perfect example of blending sweet and savory into one delightful and easy meal. This recipe brings together the succulence of roast chicken with the unique sweetness of persimmons, paired with the fresh crunch of broccoli and creamy richness of avocado.

Roast Chicken and Winter Persimmons

Serves: 4

Ingredients:

  • 1 lb roast chicken breast ($8.00)
  • 2 large persimmons, sliced ($3.00)
  • 2 cups broccoli florets, steamed ($2.00)
  • 2 avocados, sliced ($3.00)

Total Prep Cost: $16.00
Price Per Meal: $4.00

Find more Meal Prep Recipes Under $4 HERE

Method:

  1. Prepare the Ingredients:
    • Begin by roasting your chicken breast until fully cooked and golden. Allow it to cool before slicing.
    • Steam the broccoli florets until they are vibrant and tender-crisp.
    • Slice the persimmons and avocados just before assembling to maintain freshness.
  2. Assemble the Meal Prep Containers:
    • Evenly divide the roast chicken slices between the four containers.
    • Add equal portions of sliced persimmons, steamed broccoli, and sliced avocados to each container.
    • Ensure the containers are sealed tightly to keep the ingredients fresh.

How to Reheat:

Reheating this meal prep is simple, but you'll want to preserve the integrity of each ingredient:

  • Chicken and Broccoli: Remove the avocado and persimmon slices and set aside. Microwave the chicken and broccoli together for about 1-2 minutes until warmed through. Be careful not to overheat as this can dry out the chicken.
  • Avocado and Persimmons: These are best enjoyed cold or at room temperature, so add them back to your dish after heating the other components.

This Roast Chicken & Winter Persimmons meal prep is a testament to the beauty of combining different flavors and textures. Whether you’re in the office or on the go, this meal ensures a delicious, balanced, and satisfying lunch without the fuss of separate components. Dive into the sweet and savory world where every bite is a delightful surprise!

Ready to take your meal prep to the next level with these tantalizing flavors? Give this recipe a try, and don't forget to share your photos and experiences on social media! Tag us with #MealPrepOnFleek to show off your culinary creation. Enjoy the simplicity and deliciousness of having everything in one bite!

Veggie Supreme Pizza Chicken Meal Prep

January 31, 2023 by Nick Quintero 4 Comments

Veggie Supreme Pizza Chicken Meal Prep will load you up with veggies, but on pizza! Can't get a much healthier meal prep than that! We love this for lunch or dinner, or both.

This veggie supreme pizza chicken meal prep is pizza, but not as you might normally know it. But you know if you're following a keto diet, pizza is really tough. And there's something really specific and nagging about a pizza craving. (We know, it's the cheese, right?) So, whether you are new to keto or you are just looking to up your protein but don't want to abandon the concept of pizza, we have just the trick. Chicken serves as the base for this "pizza," which is topped with sliced peppers and onions, along with olives and cheese. This delicious meal prep is keto, gluten-free, and low carb. Yay!


Veggie Supreme Pizza Chicken Meal Prep

Veggie Supreme Pizza Chicken Meal Prep Ingredients

  • 1 pound chicken breast, pounded thin
  • ½ cup pizza sauce
  • 3 oz mozzarella cheese
  • 2 ounces feta
  • ½ small red onion, thinly sliced
  • ¼ cup black olives, thinly sliced
  • ½ cup green, yellow, and/or red peppers, thinly sliced
  • ¼ cup mushrooms, thinly sliced
  • Salt and pepper, as desired
  • ¼ cup cherry tomatoes, halved
  • Fresh basil, if desired
  • 2 cups broccoli

How to Make Veggie Supreme Pizza Chicken Meal Prep

You'll start with the chicken breasts, which you'll season with salt and pepper and top with pizza sauce in a casserole dish or on a rimmed baking sheet. Then, the chicken "pizza" bakes in the oven for about ten minutes. At that point, you'll take the dish out of the oven and then add all the veggies, and the cheese. Return the dish to the oven and bake a little longer. While all of that is happening steam some veggies if you want even more veggies with this healthy meal prep.

How to Store and Serve Veggie Pizza Chicken Meal Prep

We love making this veggie chicken pizza meal prep because it reheats well in the oven—just cover the chicken loosely with foil so nothing burns. But shhhh, here's a secret: It's also kind of good cold. I mean, if you like cold pizza, you'll probably not eating this dish cold. Truth! Transfer to meal prep containers and serve accordingly. 

You can also totally freeze this pizza chicken meal prep with no ill effects. Honestly! The cheese might need some freshening up after it's defrosted and reheated, but no one ever really said no to more cheese, right? 

Substitutions and Alterations 

You can really vary this any way you like. We recommend sticking with chicken, but you could use steak if you wanted.

Vary the cheeses you use on top. A combination of cheddar, mozzarella, and/or Monterey jack works great. We like feta here because it gives this dish a bit of salty tang. 

Switch up the veggies, too. Just make sure you slice them thinly so they cook quickly and are easy to eat. Try fresh mushrooms, seasonal tomatoes, or sliced pepperoni or sausage. You could also quickly saute spinach or kale, and top the "pizza" with some greens before adding the cheese. It's your call!

Tip for Keeping Pizza Chicken Keto

Keep this keto by using your favorite no-sugar pizza sauce. Carbs and sugars lurk in processed foods like tomato-based sauces, so don't be shy about reading labels.

MORE PIZZA! AND CHICKEN! AND MORE PIZZA CHICKEN!

  • Pizza Chicken Meal Prep Recipe
  • Hawaiian Pizza Chicken Meal Prep
  • Low Carb Pizza Meal Prep Recipe
Veggie Supreme Pizza Chicken Meal Prep

Veggie Supreme Pizza Chicken Meal Prep

Veggie Supreme Pizza Chicken Meal Prep is a high protein, low-carb way to satisfy your pizza craving and sneak in extra veggies! Keto. Low Carb. Gluten Free. 
Print Recipe Pin Recipe Rate Recipe
Prep Time: 10 minutes minutes
Cook Time: 20 minutes minutes
Total Time: 30 minutes minutes
Course: Main Dish
Cuisine: American
Diet: Gluten Free
Keyword: Chicken, Meal Prep
Servings: 4 meals
Calories: 394kcal
Author: Nick Quintero

Ingredients

  • 1 pound boneless, skinless chicken breasts pounded thin
  • ½ cup pizza sauce
  • 3 ounces shredded mozzarella
  • 2 ounces feta cheese
  • ½ small red onion thinly sliced
  • ¼ cup sliced black olives
  • ½ cup peppers thinly sliced
  • ¼ cup mushrooms thinly sliced
  • ¼ cup cherry tomatoes cut
  • Salt & pepper to taste
  • Fresh basil optional
  • 2 cups broccoli steamed or roasted
Get Recipe Ingredients

Instructions

  • Preheat oven to 375 degrees F.
  • Place chicken on a rimmed baking sheet or casserole dish, sprinkle with salt and pepper, and top with pizza sauce. Bake for 8 to 10 minutes.
  • Remove from the oven and top the chicken with mozzarella cheese and vegetables.
  • Bake for an additional 6-10 minutes or until the cheese has melted and the vegetables are tender.
  • Top with fresh basil, if desired. Serve with steamed broccoli, if desired.
  • Portion into air-tight meal prep containers, seal them, and refrigerate until ready to eat. Or serve right away!

Notes

Nutrition for 1 out of 4 servings (including broccoli on side)
35g P | 10.5g C | 9.5g F | 3g Fiber | 254 Calories

Nutrition

Serving: 1meal | Calories: 394kcal | Carbohydrates: 8g | Protein: 57g | Fat: 14g | Saturated Fat: 6g | Polyunsaturated Fat: 1g | Monounsaturated Fat: 4g | Trans Fat: 0.03g | Cholesterol: 175mg | Sodium: 720mg | Potassium: 1186mg | Fiber: 2g | Sugar: 3g | Vitamin A: 793IU | Vitamin C: 62mg | Calcium: 220mg | Iron: 2mg
Tried this recipe?Mention @mealpreponfleek or tag #mealpreponfleek!

Grain Free Granola

August 11, 2024 by Nick Quintero 2 Comments

Grain Free Strawberry Coconut Granola Multi Container 2

If you’ve ever gone hiking, on a road trip, or been on a plane, then you probably know the power of granola! As a dry food, it can go anywhere for a healthy snack in a pinch! But if you add yogurt and honey, it satisfies your hunger and sweet tooth at the same time!

This Grain-Free Granola meal prep recipe goes one step further to make your gut happy: we replaced the grains. People who really focus on the paleo diet believe that humans did not evolve to digest dairy, legumes, and grains well. They believe that eating these foods could even increase health risks. 

That’s why we created this Grain Free Granola at MPOF - to provide your body with the energy boost it needs. Enjoy it as a light lunch or snack option without any additives, preservatives, or chemicals. And true to our brand, we love providing you with options that make cooking fun and easy.

Ditch the grains and make this Paleo-friendly sheet pan granola, coated in a sticky honey glaze, perfect for breakfast or dessert! 

Grain Free Granola

How long will Grain Free Granola last for?

Granola is dry food so you can leave it out of the fridge for about 2 or 3 days as long as it is stored in an airtight container. For longer than a few days, store your meal prep recipe in meal prep containers in the fridge. Use a glass mason jar or snack-size meal prep container so you can add the yogurt and honey to spice things up.

Can Grain Free Granola be frozen?

Absolutely! It’s nuts and dried berries so this simple meal prep recipe will freeze very well for just about as long as you need. But we recommend storing it for up to 6 months. 

First, allow the granola to cool completely, then pack it in an airtight freezer-safe container. Gently press down on the granola so that there aren’t large air pockets in the jar, which could lead to freezer burn. Leave about ¼ inch headspace at the top. Place it in the freezer. 

Defrosting - Best Practice: Set the jars on the counter overnight to defrost at room temperature. 

Note - If you allow it to defrost in the refrigerator, it will take much longer and the dried fruit will be tougher.

Grain Free Granola

How do you make Grain Free Granola?

This meal prep recipe is ready in four steps: mixing the seeds and nuts and berries, baking and storing. The first three steps are easy, and so is the fourth: 

Perhaps the most mouth-watering part of it all is adding dollops of Greek yogurt and a teaspoon of honey to the side when it’s time to portion this Grain-Free Granola.

How to portion Grain-Free Granola?

Divide your baked Grain-Free Granola into four even portions using the snack-size meal prep container for the following week or weeks. 

Grain Free Granola

More Granola meal prep recipes:

  • Go with the grain but without the gluten in Easy Gluten Free Fall Breakfast Granola
  • One of our favorites is Peanut Butter – Chocolate Chip Granola Recipe – Gluten-Free – Healthy Snack Ideas
  • Stretch your brain but not your gut with 16 Gluten Free Meal Prep Recipes To Try This Week 

Other tips for making Grain Free Granola:

  1. Serve Grain Free Granola in a dual compartment 
  2. Spring for organic strawberries if you can find them
  3. Get local honey - it’s healthier for you because it puts you in sync with your local environment
Grain Free Granola

Grain-Free Granola Ingredients:

For Granola

  • 1 cup of raw almonds
  • 1 cup raw cashews 
  • 1 cup unsweetened coconut flakes
  • 1 cup freeze-dried strawberries 
  • ½ cup pumpkin seeds 
  • 2 tablespoon coconut oil
  • 3 tablespoon honey 
  • 1 teaspoon vanilla extract 
  • ⅛ teaspoon sea salt 

For Serving 

  • 2 cups Greek yogurt
  • 14 tsp. honey 
Grain Free Granola

Grain Free Granola

Ditch the grains and make this Paleo-friendly sheet pan granola, coated in a sticky honey glaze, perfect for breakfast or dessert! 


Print Recipe Pin Recipe Rate Recipe
Prep Time: 10 minutes minutes
Cook Time: 30 minutes minutes
Total Time: 40 minutes minutes
Course: Snack
Cuisine: American
Keyword: gluten free, Meal Prep, paleo, snack
Servings: 4 meals
Calories: 396kcal
Author: Nick Quintero

Ingredients

For Granola

  • 1 cup raw almonds
  • 1 cup raw cashews
  • 1 cup unsweetened coconut flakes
  • 1 cup freeze-dried strawberries
  • ½ cup pumpkin seeds
  • 2 tablespoon coconut oil
  • 3 tablespoon honey
  • 1 teaspoon vanilla extract
  • ⅛ teaspoon sea salt

For Serving

  • 2 cups Greek yogurt
  • 4 teaspoon honey
Get Recipe Ingredients

Instructions

  • Preheat oven to 300ºF and line a baking sheet with parchment paper.
  • Add nuts and seeds to a bowl. Melt coconut oil, honey, and vanilla extract over medium-low heat for 5 minutes. Stir well. Pour over nut mixture in a bowl and stir well to coat.
  • Spread mixture on a baking sheet and sprinkle with sea salt. Bake for 25 minutes or until golden brown. Remove pan from oven and stir in freeze-dried strawberries. Cool mixture for 30 minutes. Divide the granola in half and store half for the following week. Evenly divide the remaining half into your meal pre containers and serve with yogurt with a drizzle of honey.

Notes

*Save 4 servings of the granola in an airtight container for the following week. 

Nutrition

Serving: 1meal | Calories: 396kcal | Carbohydrates: 21.5g | Protein: 19.3g | Fat: 26.2g
Tried this recipe?Mention @mealpreponfleek or tag #mealpreponfleek!

Sugar-Free Coconut Balls (Fat Bombs)

July 31, 2024 by Nick Quintero 11 Comments

Sugar Free Coconut Balls - Meal Prep Recipe

These sugar free coconut balls are naturally sweetened with coconut, cinnamon, and stevia. A no-bake, low-carb snack you can’t go wrong with! 

It's snack attack time and Fat Bombs are all the rage! We can't live without snacks during the work week. We start early in the morning, and have breakfast and lunch. But probably like you, by mid-afternoon we are in need of a little pick-me-up before our workout, or before the drive home to make dinner and do all the things. Sure, we love energy balls, too, but this meal prep recipe has a special place in our hearts. This is where recipes like Sugar-Free Coconut Balls 'roll' in. (Yeah, we just went there!)

Why Make Sugar-Free Coconut Balls?

Sugar Free Coconut Balls

These healthy, no-bake bites are just the thing to keep your energy up and your sugar cravings away. The natural sweetness of coconut is incredible and coconut butter makes them delectable and satisfying. They are quick and easy to make, keto-friendly, paleo-friendly, vegan and gluten-free. How often do you find a recipe that checks off ALL of those boxes? This is the definition of healthy meal prep--er, snack prep.  It's a bit of a unicorn of a recipe, something that works for almost anyone you know and a must for any coconut lover!

Sugar Free Coconut Balls

Sugar-Free Coconut Balls Ingredients

  • 1 cup coconut butter 
  • 1 cup unsweetened shredded coconut 
  • ½ tsp. cinnamon 
  • Stevia powder to taste 

How to Make Sugar-Free Coconut Balls (Fat Bombs)

This couldn't be simpler. Melt the coconut butter, along with the cinnamon and stevia powder to taste in a double boiler. What's that? It's simply a heat-safe bowl you can place over the top of a pot of water on your stovetop. Heat the water in the pot until it boils and then the bowl rests over top (it has to be the same diameter as the pot). We use a double boiler here because it gently melts ingredients. Please, do not microwave these ingredients in order to melt them, or you'll just end up with a mess. And a mess does not coconut balls make!

Transfer to the fridge to let it chill and set up, and then roll into balls. Once you've rolled them into balls, pop them back into the fridge to set for about 20 to 30 minutes. Then, finally, roll the balls in shredded unsweetened coconut. Delicious! 

Coconut Oil Vs. Coconut Butter

You might be familiar with coconut oil, but not coconut butter. The latter contains ingredients that the oil does not. Namely, coconut butter is made from the fruit of the coconut, or the meat, along with the oil. It's pureed and you can use it like a spread—think of it like a tropical peanut butter of sorts.

How to Serve Coconut Balls

If you are like us your snacks also double as desserts, so come meal prep time on Sunday you can count this recipe as a double win. To go the dessert route, serve alongside some sliced mango or pineapple, or both. Or maybe even papaya. They are also really good with berries, too. 

How to Store Sugar-Free Coconut Balls

There are no two ways about it. These little treats need to be refrigerated to stay firm. You don't want them at room temperature because they will get gloppy and melt.

Tips for Coconut Balls

  • Keep these bites chilled. There is nothing more terrible than melted Sugar-Free Coconut Balls all over the bottom of your lunch box. An ice pack, please!
  • A little stevia goes a LONG way. If you've never worked with it before, add a teensy bit (like ¼ teaspoon or so) to see how it tastes. Or skip it entirely!
  • Instead of cinnamon, try nutmeg or cardamom with these coconut balls. 
  • We also like ½ teaspoon of vanilla extract or, if you're really loving the tropical vibe, ½ tsp. of coconut extract just makes this taste even better. 

More Energy Ball Recipes:

  • Mint Chocolate Energy Bites
  • Cinnamon Apple Protein Bites
  • Protein Peanut Butter Energy Bites
  • Cinnamon Almond Butter Protein Balls
Sugar Free Coconut Balls

Sugar-Free Coconut Balls

These sugar-free coconut balls are naturally sweetened with coconut, cinnamon, and stevia. It's a no-bake, low-carb snack you can’t go wrong with!
Print Recipe Pin Recipe Rate Recipe
Prep Time: 40 minutes minutes
Total Time: 40 minutes minutes
Course: Snack
Cuisine: American
Keyword: Meal Prep
Servings: 12 balls
Calories: 196kcal
Author: Nick Quintero

Ingredients

  • 1 cup coconut butter
  • 1 cup unsweetened shredded coconut
  • ½ teaspoon ground cinnamon
  • stevia powder to taste
Get Recipe Ingredients

Instructions

  • Combine coconut butter, cinnamon, and stevia in a glass bowl over a double boiler and heat until everything melts.
  • Transfer the bowl to the refrigerator for 20 to 30 minutes until firm but still pliable. Remove from the refrigerator and roll into 12 balls.
  • Return the balls to refrigerator for another 20 to 30 minutes to set.
  • Sprinkle the shredded coconut onto a plate. Remove the coconut balls from the oven and roll them in the coconut.
  • Keep refrigerated in a covered, airtight container for up to 14 days or freeze for up to a month.

Notes

WW Smart Points= Green:5  Blue:5  Purple:5
__
Nutrition for 1 out of 12 balls:
2g Protein || 18g Fat || 6g Carbs || 196 Calories

Nutrition

Serving: 1ball | Calories: 196kcal | Carbohydrates: 6g | Protein: 2g | Fat: 18g
Tried this recipe?Mention @mealpreponfleek or tag #mealpreponfleek!

3 Easy Power Salad Bowls for Meal Prep

August 7, 2024 by Nick Quintero Leave a Comment

Fall Harvest Power Salad

Power Salad bowls are a delicious and nutritious way to make lunch or dinner easy and loaded with flavor! Flavors such as Fall Harvest, Steak, Blue Cheese & Kale, and Greek Arugula will keep your tastebuds coming back for more! No boring salads, or meal prep recipes, around here! 

Greek Arugula Power Salad 

If there is one thing we love around here, it's salads. No, we don't mean boring salads with lettuce, tomato, cucumbers, and balsamic vinegar. Nope, it's a flavorful, hearty, protein-packed, bowl with a good combination of mix-ins! 

The possibilities for salad combos are endless, just endless! But, it doesn't matter how you create your salad, if it's getting soggy before you're eating it during the week, it's going to be straight-up terrible.

That’s why we were so excited to see GoodCook® launch their new salad meal prep containers that are bowl-shaped! Not only are they the perfect shape and size for these three nutrient-dense power salad bowl recipes, but they also come with a 2-ounce condiment cup on top to ensure that your main salad ingredients don’t get soggy between Sunday meal prep and when you enjoy them during the week. We want to shake hands with the genius who came up with that! No more soggy salads around here! 

Plus, they have a domed shape lid that makes shaking all of those tasty salad ingredients, with your dressing, together extra easy! You won't have to worry about trying to mix your salads and having them fall out of the bowl or not be evenly coated.

Size Matters! 

And if you're wondering, which we know you macro counters are, the main compartment is 4 cups in size, which makes it just right for getting a balance of protein, carbs, veggies, and healthy fats. Try to stick with about 2 cups greens/veggies, ½ cup protein, ½ cup starch, ¼ cup healthy fats, and ¼ cup fun toppings like dried fruit. 

We have even found the dressing container (see that fun little 2-ounce dressing holder on the side!) to work great for salsa, olives, cheese, nuts, seeds, dried fruits, etc! Heck, it even works if you want to take a bit of salt and pepper with you for a meal. We all know how salt will wilt your greens real quick! 

Let’s take a look at these 3 easy power salad bowl meal prep recipes that we are currently eating on repeat!  

Kale Steak Power Salad

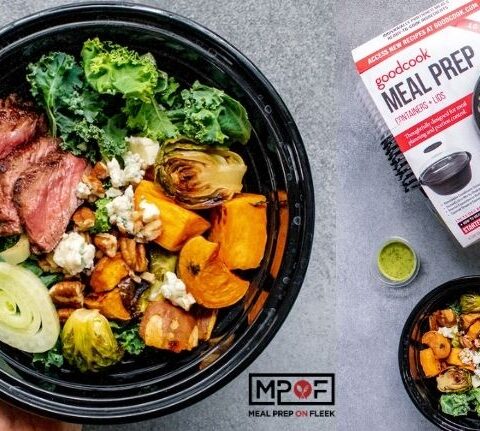
Kale Steak Power Salad 

This steak and blue cheese bowl is full of rich flavor that keeps your taste buds guessing! Crunchy fennel adds licorice depth while tangy blue cheese complements the robust steak. This salad is great for cooler months with comforting roasted Brussels sprouts and sweet potatoes. 

To make this salad, you will need:

For Lemon Herb Dressing  

  • ¼ cup olive oil  
  • ¼ cup fresh lemon juice  
  • ½ cup fresh parsley  
  • 1 tablespoon raw honey  
  • 1 teaspoon dried basil  
  • 1 teaspoon dried thyme  
  • ½ teaspoon sea salt  
Kale Steak Power Salad 

For Steak  

  • 2 teaspoon olive oil for greasing  
  • 1 lb. sirloin or strip steak 
  • 1 teaspoon sea salt 
  • ¼ teaspoon cracked black pepper  

For Salad  

  • 2 tablespoon olive oil 
  • 2 cups chopped sweet potatoes  
  • 2 cups halved Brussels sprouts  
  • 8 cups shredded kale  
  • ½ cup thinly sliced fennel bulb 
  • ½ cup blue cheese 
  • ⅓ cup chopped pecans 
  • ½ cup lemon herb dressing  (above)  

You can grab the full recipe HERE!

Kale Steak Power Salad 

Fall Harvest Power Salad

Fall Harvest Power Salad

This autumn-inspired salad is made with a mix of raw and roasted vegetables. Butternut squash adds staying power. Tangy cranberries and crunchy walnuts add fall flavor. Use ready-made rotisserie chicken for quick and easy prep! 

To make this salad, you will need:

For Lemon Herb Dressing  

  • ¼ cup olive oil  
  • ¼ cup fresh lemon juice  
  • ½ cup fresh parsley  
  • 1 tablespoon raw honey  
  • 1 teaspoon dried basil  
  • 1 teaspoon dried thyme  
  • ½ teaspoon sea salt  
Fall Harvest Power Salad

Ingredients  For Salad

  • 8 cups watercress  
  • 1 lb. cooked shredded chicken breast (rotisserie recommended)  
  • 4 cups peeled/cubed butternut squash  
  • ½ cup dried cranberries  
  • ½ cup raw walnuts   
  • ½ cup lemon herb dressing  (recipe above)

You can find the full recipe HERE! 


Greek Arugula Power Salad

Greek Arugula Power Salad 

Lemon herb dressing doubles as a quick marinade for chicken in this Mediterranean-inspired bowl. It’s rich in protein from both white beans and chicken with plenty of veggies to keep the salad interesting like feta cheese, olives, and tomatoes.

To make this salad, you will need:

For Lemon Herb Dressing  

  • ¼ cup olive oil  
  • ¼ cup fresh lemon juice  
  • ½ cup fresh parsley  
  • 1 tablespoon raw honey  
  • 1 teaspoon dried basil  
  • 1 teaspoon dried thyme  
  • ½ teaspoon sea salt  

For Chicken 

  • 1 lb. chicken breast 
  • 2 tablespoon lemon-herb dressing  
Greek Arugula Power Salad 

For Salad  

  • 8 cups arugula  
  • 1 cup grape tomatoes, halved  
  • 1 cup chopped baby cucumber  
  • 1 cup white beans, drained 
  • ½ cup green olives  
  • ½ cup sliced red onion  
  • ½ cup feta cheese  
  • ⅓ cup lemon herb dressing  

Check out the full recipe HERE! 

If you're looking for more ways to use these hand meal prep bowls, make sure to check out our 3 ways to make grain bowls, our vegan oatmeal with sauteed apple recipe, or get creative with your own meals and show us what you make in these bowls! 

3 Easy Power Salad Bowl Meal Prep Recipes

Sheet Pan Crispy Tofu and Broccoli

January 29, 2023 by Nick Quintero Leave a Comment

Vegan Sheet Pan Crispy Tofu and Broccoli

Craving Chinese takeout? We know that feel, meal prep fam. But we also know how bad it can be for you if you order it in from your local Chinese restaurant. Loaded with sodium, trans fats, sugars, gluten, and preservatives, traditional American Chinese food is a sure-fire way to mess with any healthy meal plan you may be following. This is especially true for vegetarians because even if you order a meat-free dish, there are absolutely no guarantees that it will be 100% free of all animal products.

But, to our takeout-craving reader, don’t think your cravings will go unsatiated. Rest assured, here at MPOF we understand you, and that’s why today we’re thrilled to resolve these takeout cravings with today’s meal prep idea—A crispy tofu and broccoli sheet pan recipe fit for even the most discerning of Chinese royalty! We especially dedicate this meal p

Vegan Sheet Pan Crispy Tofu and Broccoli

How long will this Sheet Pan Crispy Tofu and Broccoli last for? 

We recommend eating all portions of this meal prep idea within 3-5 days, as this length of time is the refrigerated shelf life of both tofu and broccoli.

Can this Sheet Pan Crispy Tofu and Broccoli be frozen?

Yes, absolutely! We suggest consuming this meal prep idea 3-5 months from the original date of freezing

Vegan Sheet Pan Meal Prep Recipe

How do you make this Sheet Pan Crispy Tofu and Broccoli?

One of the best parts about this meal prep idea is that it’s simple to make! Begin the process by pressing the tofu. This can be achieved by placing it on a cutting board between a few pieces of paper towel and another cutting board or heavy plate, then allowing it to sit for 20-30 minutes to extract all excess moisture (remember that this step is vital for crispy tofu). Next, preheat your oven to 435°. Cut tofu into 1-inch cubes and place into a bowl, drizzling with sesame oil, coconut aminos, and arrowroot. Gently toss to evenly coat the tofu in these ingredients. Add the chopped broccoli to a bowl, drizzle with sesame oil, and season with salt and pepper.

Once this has been completed, it’s time to begin cooking your tofu! Add the 1-inch tofu cubes to a large baking tray, making sure to leave some space around each piece for uniform texture and cooking. Add the broccoli pieces to the other side of the tray and bake for 25 minutes, remembering to toss all tray ingredients once halfway through. To make the delicious teriyaki sauce, add coconut aminos, honey, rice wine vinegar, sriracha, ginger, and sea salt to a saucepan, and whisk while heating over medium heat. Bring to a boil for 1 minute. Finish the cooking process by serving your freshly-crisped tofu and seasoned broccoli over your choice of regular or cauliflower rice!

Vegan Sheet Pan Meal Prep Recipe

How to portion this Sheet Pan Crispy Tofu and Broccoli?

Because there are three primary ingredients to this meal prep idea, we recommend using three-compartment containers for serving or taking it on the go! For more information about containers read our Ultimate Guide to Meal Prep Containers blog!

Vegan Sheet Pan Crispy Tofu and Broccoli

More Asian-inspired tofu meal prep ideas:

We love tofu and Oriental flavors, too! Check out this Thai Chili Tofu Sheet Pan Meal Prep idea, our  $3 Edamame Pasta with Tofu and Veggies, or these General Tso’s Cauliflower Bowls for your next set of lunch or dinner prepped meals!

Other tips for making this Sheet Pan Meal Prep Recipe:

  • When preparing the tofu to be baked, remember that you have to drain the excess moisture in order for it to have those crispy edges you crave!
Sheet Pan Crispy Tofu and Broccoli

Vegan Teriyaki Tofu and Broccoli Ingredients:

  • 1 package extra-firm tofu
  • 1 tablespoon sesame oil
  • 3 tablespoons coconut aminos (or 2 tablespoons tamari)
  • 1 tablespoon arrowroot
  • 6 cups broccoli
  • 1 tablespoon sesame oil
  • Salt and pepper, to taste

Teriyaki Sauce

  • ½ cup coconut aminos
  • 2 tablespoons honey
  • 2 tablespoons of rice wine vinegar
  • 1 teaspoon sriracha
  • ¼ teaspoon ginger
  • Pinch of sea salt, to taste

To Serve:

  • Rice or cauliflower rice
  • Sesame seeds, to garnish
  • Green onions, to garnish

Swaps and Alterations:

Also, if you're gluten-free, you probably already have the ingredients on hand to make your own breading, here's How to Make Gluten-Free Breading.

Vegan Sheet Pan Crispy Tofu and Broccoli

Teriyaki Tofu and Broccoli

An easy vegan sheet pan meal perfect for any night of the week! If you’re craving take out, this recipe is for you. A honey-sweetened teriyaki sauce is easy to make and adds the flavor you crave.
Print Recipe Pin Recipe Rate Recipe
Prep Time: 15 minutes minutes
Cook Time: 25 minutes minutes
Total Time: 40 minutes minutes
Course: Main Dish
Cuisine: American, Asian
Keyword: Meal Prep, Tofu
Servings: 4 meals
Calories: 437kcal
Author: Nick Quintero

Ingredients

  • 1 package extra-firm tofu
  • 2 tablespoon sesame oil divided
  • 3 tablespoon Coconut Aminos or 2 tablespoon tamari sauce
  • 1 tablespoon arrowroot flour
  • 6 cups Broccoli
  • 1 tablespoon sesame
  • salt & pepper to taste

Teriyaki Sauce

  • ½ cup Coconut Aminos
  • 2 tablespoon Honey
  • 2 tablespoon rice wine vinegar
  • 1 teaspoon Sriracha
  • ¼ teaspoon Ginger
  • Sea Salt to taste

To Serve

  • 4 cups Brown Rice cooked (can sub cauliflower rice)
  • Sesame Seeds optional
  • green onions optional
Get Recipe Ingredients

Instructions

  • Press tofu by placing it on a cutting board between several sheets of paper towels, and placing a heavy plate or another cutting board on top. Allow it to sit for 20-30 minutes to drain all excess moisture. **This step is important to ensuring crispy edges on the tofu.
  • Preheat oven to 435.
  • Cut tofu in 1-inch cubes, and put in a bowl. Drizzle tofu with sesame oil, coconut aminos, and arrowroot, and gently toss to evenly coat.
  • Add chopped broccoli to a bowl, and drizzle with sesame oil, and season with salt and pepper.
  • On a large baking tray, add tofu, making sure to leave some space around the cubes for baking. Add broccoli to the other end of the baking tray.
  • Bake tofu and broccoli for 25 minutes, tossing once midway for even browning and crisping.
  • To make the teriyaki sauce, add all ingredients to a saucepan, and whisk while heating over medium heat. Allow it to boil for about 1 minute while whisking to thicken.
  • Serve crispy tofu and broccoli over rice or cauliflower rice, drizzled with teriyaki sauce.

Notes

Nutrition for 1 out of 4 servings:
16.9g Protein | 64.3g Carbs | 13.8g Fat | 6.9g Fiber | 437 Calories 

Nutrition

Serving: 1meal | Calories: 437kcal | Carbohydrates: 64.3g | Protein: 16.9g | Fat: 13.8g | Fiber: 6.9g
Tried this recipe?Mention @mealpreponfleek or tag #mealpreponfleek!

Pesto Noodles With Crispy Chicken Bites

January 30, 2024 by Nick Quintero 2 Comments

Pesto Noodles With Crispy Chicken Bites

No doubt about it, pasta is freaking fantastic. Not to mention, versatile! It’s the heart and soul of so many delicious dishes, from hearty bolognese with zesty red sauce, to delectable, creamy white sauce dishes like fettuccine. Unfortunately though, not all people can enjoy traditional wheat pasta for health reasons, like gluten allergy or Celiac disease. If you’re one of these people, we want you to know that here at MPOF, we’ve been there before, and we really care about making your dietary experience as enjoyable as possible! We believe that what we choose to eat shouldn’t be restrictive, but instead liberating, pleasantly surprising, and most of all, empowering! And it’s for our gluten-free friends especially that we present today’s meal prep recipe—Pesto Noodles with Crispy Chicken Bites! 

To make this recipe accessible to those of us who do not consume gluten, we use Palmini noodles—A special kind of gluten-free noodle made from delicious, tender palm hearts! But what about the breading on the chicken, you ask? For this, we offer the simple solution of gluten-free breadcrumbs, which can be easily obtained at any health food store. 

For a healthier, gluten-free twist on an Italian-influenced dish, give this recipe a shot for your meal prep this week! We think you’ll be saying mamma mia!

Pesto Noodles With Crispy Chicken Bites

This lightened-up pasta dish uses hearts of palm noodles instead of traditional pasta and gets topped with crispy baked herb chicken bites for irresistible texture! 

How long will Pesto Noodles With Crispy Chicken Bites last for?

Like most pasta dishes, we found that the pasta and chicken portion to last between 3-5 days. However, caprese salad will only last for a maximum of 3 days in the fridge, so consider eating everything within that time frame, or giving a portion to a friend!

Can Pesto Noodles With Crispy Chicken Bites be frozen?

Yes, you can partly freeze this dish! We recommend freezing the noodles and chicken in separate freezer bags though, to maintain consistency. We do not recommend the freezing of Caprese salad, however.

Pesto Noodles With Crispy Chicken Bites

Pesto Noodles With Crispy Chicken Bites Ingredients: 

For Chicken Bites 

  • 1 lb. boneless skinless chicken breast, sliced into bite-sized pieces 
  • 1 large egg  
  • ½ cup gluten-free breadcrumbs  
  • 1 teaspoon dried basil  
  • ½ teaspoon dried oregano  
  • 1 teaspoon paprika 
  • 1 teaspoon sea salt 
  • ¼ teaspoon cracked black pepper  
  • ¼ teaspoon garlic powder  
Pesto Noodles With Crispy Chicken Bites

For Pesto Palmini Noodles  

  • 2 15 oz cans Palmini noodles, drained 
  • ½ cup olive oil 
  • 3 tablespoon grated Parmesan cheese  
  • 1 ½ cups fresh basil leaves  
  • ½ teaspoon minced garlic  
  • ¼ teaspoon sea salt  

For Caprese Salad 

  • 3 cups halved cherry tomatoes 
  • ½ cup halved mozzarella balls 
  • 1 tablespoon chopped basil 
  • 2 teaspoon red wine vinegar 
  • 1 teaspoon olive oil  
  • Sea salt and black pepper to taste  

How do you make Pesto Noodles With Crispy Chicken Bites?

One of the best parts of this meal prep recipe is that it comes together quickly—in just 50 minutes! You can begin the process of making it by preheating your oven to 400ºF and lining a baking sheet with parchment paper. Now get out two bowls. In one, whisk the egg, and in the other, mix together the gluten-free breadcrumbs as well as the seasonings. Dunk 5-6 chicken bites at a time in the egg, shake off excess, and coat all sides in breadcrumb mixture. Place the chicken bites on a baking sheet, and bake for 30 minutes.

Now it’s time to prepare the noodles, while waiting for the baking to finish! Begin by combining olive oil, parmesan cheese, basil, garlic and sea salt into a food processor, until all ingredients are thoroughly mixed. Add drained palmini noodles to a medium skillet over medium heat, and pour your pesto sauce on top. Use tongs to coat the noodles, and heat for 4-5 minutes until warmed through. 

To make caprese salad, simply stir mozzarella balls, cherry tomatoes, olive oil, basil, and red wine vinegar together in a medium mixing bowl, then divide into the small compartments of four separate meal prep containers. Do the same with the warmed pesto noodles into the larger compartments, and top and top with 5-6 chicken bites.

Pesto Noodles With Crispy Chicken Bites

How to portion Pesto Noodles With Crispy Chicken Bites?

Being that this meal prep recipe has both a main dish and a side dish, we recommend portioning into dual-compartment meal prep containers! 

Pesto Noodles With Crispy Chicken Bites

More gluten free chicken and noodles meal prep recipes:

We just love chicken at MPOF, and we even have a number of chicken-based recipes that are all gluten-free, too! Here are just a few, for your future meal prep consideration:

  • Air Fryer Chicken Parmesan
  • Chicken Ramen Meal Prep
  • Cold Chicken Soba Noodle Meal Prep
  • Sesame Chicken & Broccoli Stir Fry Meal Prep
Pesto Noodles With Crispy Chicken Bites

Other tips for making Pesto Noodles With Crispy Chicken Bites:

  • Palmini noodles can be substituted for your favorite gluten-free pasta!
  • Keep in mind that caprese salad doesn’t store for very long, so make sure you eat it within 2 days of making it.
  • To neutralize the flavor of palmini noodles, soak them in almond milk for 45 minutes.
  • Also, if you're gluten-free, you probably already have the ingredients on hand to make your own breading, here's How to Make Gluten-Free Breading.
Pesto Noodles With Crispy Chicken Bites

Pesto Noodles With Crispy Chicken Bites

This lightened-up pasta dish uses hearts of palm noodles instead of traditional pasta and gets topped with crispy baked herb chicken bites for irresistible texture!
Print Recipe Pin Recipe Rate Recipe
Prep Time: 15 minutes minutes
Cook Time: 35 minutes minutes
Total Time: 50 minutes minutes
Course: dinner, Lunch, Main Dish
Cuisine: Italian
Keyword: Chicken, dinner, lunch, Meal Prep
Servings: 4 meals
Calories: 456kcal
Author: Nick Quintero

Equipment

  • Air Fryer

Ingredients

For Chicken Bites

  • ½ lb. boneless skinless chicken breast sliced into bit sized pieces
  • 1 large egg
  • ½ cup gluten-free breadcrumbs
  • 1 teaspoon dried basil
  • ½ teaspoon dried oregano
  • 1 teaspoon paprika
  • 1 teaspoon sea salt
  • ¼ teaspoon cracked black pepper
  • ¼ teaspoon garlic powder

For Pesto Palmini Noodles

  • 2 15 oz cans Palmini noodles drained
  • ½ cup olive oil
  • 3 tablespoon grated Parmesan cheese
  • 1 ½ cups fresh basil leaves
  • ½ teaspoon minced garlic
  • ¼ teaspoon sea salt

For Caprese Salad

  • 3 cups halved cherry tomatoes
  • ½ cup halved mozzarella balls
  • 1 tablespoon chopped basil
  • 2 teaspoon red wine vinegar
  • 1 teaspoon olive oil
  • Sea salt and black pepper to taste
Get Recipe Ingredients

Instructions

  • Preheat oven to 400ºF and line a baking sheet with parchment paper. Whisk egg in a shallow bowl and combine breadcrumbs and seasonings in a separate shallow bowl. Add 5-6 chicken bites to egg mixture at a time. Shake off excess egg and place chicken into breadcrumb mixture, coating all sides. Place onto baking sheet. Bake for 30 minutes.
  • While chicken bakes, combine olive oil, parmesan cheese, basil, garlic and sea salt to a food process and pause until thoroughly combined. Add drained palmini noodles to a medium skillet over medium heat and for pesto sauce on top. Use tongs to toss noodles to coat. Heat for 4-5 minutes to warm noodles through.
  • Stir together ingredients for caprese salad in a medium mixing bowl. Divide between 4 small compartments of teal MPOF containers. Divide pesto noodles between large compartments and top with 5-6 chicken bites.

Video

Nutrition

Calories: 456kcal | Carbohydrates: 24.9g | Protein: 40.1g | Fat: 23.9g | Fiber: 7.4g
Tried this recipe?Mention @mealpreponfleek or tag #mealpreponfleek!

Crispy Fish Sticks

June 17, 2023 by Nick Quintero 2 Comments

Crispy Fish Sticks

Are you a fan of fish and chips, but need a gluten-free version? Then look no further than our gluten-free and Paleo-friendly Crispy Fish Stick fish meal prep recipe! We dredge pieces of flaky cod fillets in herb-seasoned Paleo powder, bake them to crispy perfection, and serve with lemon wedges along with a side of sweet potato fries. Our crispy fish sticks are a filling and healthy meal for lunch or dinner, and this fish meal prep recipe is easy peasy. 

Crispy Fish Sticks

This childhood favorite gets a grown-up reboot using Paleo-friendly almond flour coating that’s full of herb and lemon flavor. A side of sweet potato fries adds fiber and staying power, keeping you full.  

How long will Crispy Fish Sticks last for?

Your crispy fish sticks will last up to 4 days in the refrigerator. Store your four crispy fish sticks meals in airtight containers for maximum freshness. 

Can Crispy Fish Sticks be frozen?

You can! If you want to freeze the entire meal, use containers, not freezer bags. Our MPOF meal prep containers are freezer safe and keep your meals together for easy reheating and eating on the go. 

Crispy Fish Sticks

Crispy Fish Sticks Ingredients:

For Fish Sticks 

  • 20 oz. cod fillets 
  • 2 large eggs, beaten  
  • ¼ cup tapioca flour  
  • ½ cup Paleo Powder Almond + Flax + Paleo Powder Herbed Salt Free Blend  
  • ½ teaspoon sea salt  

For Sweet Potato Fries 

  • 1 lb. sweet potatoes 
  • 1 tablespoon olive oil  
  • ½ teaspoon sea salt  
  • ¼ teaspoon cracked black pepper  

For Serving  

  • 4 lemon wedges  
  • ½ cup Paleo ketchup (we used primal kitchen)  
Crispy Fish Sticks

How do you make Crispy Fish Sticks?

Here comes the fun part! Cooking this fish meal prep recipe is short and easy. You don't need many ingredients and we cook everything using one pan. Plus, your oven does most of the work and you spend less than 30 minutes preparing the meal. 

Gather your ingredients, grab your sheet pan, and some bowls for dipping and dredging the fish. Preheat your oven, line your sheet pan with parchment paper, and cut half-inch thick sweet potato fries. Toss them in a bowl of olive oil, black pepper, & sea salt then place them on the baking sheet. Now, it's time to prepare the fish sticks. You need three bowls for dipping and dredging. Cut your cod filets into 1 ½-inch thick pieces and cover in tapioca flour, egg, and Paleo powder. Add the fish to the sheet pan with the fries and cook for 30 minutes total, tossing and flipping the sweet potato fries halfway through cooking. Once your 30 minutes are up, remove your crispy fish and fries from the oven and get ready to plate it up!

How to portion Crispy Fish Sticks?

Get four dual-compartment meal prep containers. Place fish, lemon wedges, and Paleo ketchup in the bigger compartment and the sweet potato fries in the smaller compartment. Store and enjoy! 

Crispy Fish Sticks

More fish meal prep recipes:

  • Baked Fish and Chips Meal Prep
  • Sheet Pan Salmon Fajitas
  • Broiled Cod with Mango Relish
  • Asian Air Fryer Salmon
  • Sheet Pan Salmon Burgers
  • Baked Salmon with Blackberry Quinoa Salad
  • Sheet Pan Shrimp Fajitas
  • Cauliflower Tabouli and Salmon Meal Prep
  • Sheet Pan Sriracha Honey Glazed Salmon
  • Salmon Cobb Salad Meal Prep
  • Cauliflower Rice Salmon Poke Bowl Meal Prep
  • Apricot Salmon Meal Prep
  • Teriyaki Salmon & Pineapple Skewer Meal Prep
  • Turmeric Ginger Salmon in Foil Meal Prep
  • Smoked Salmon & Lentil Breakfast Salad
  • SELFStarter Review + Salmon Tacos w/ Beets Recipe
  • Coconut Sugar Sriracha Shrimp Meal Prep
  • Sesame Salmon with Baby Bok Choy and Mushrooms
  • Easy Avocado + Mango Sushi Roll
  • Shrimp Quinoa Broccoli Meal Prep | Garlic Shrimp Recipe
  • One Pan Baked Cod and Veggies
  • Easy Chile Lime Salmon Meal Prep
  • Perfectly Seared Scallops Meal Prep
  • Ghost Pepper & Tamarind Salmon Meal Prep
  • Apricot Sesame Chicken & Shrimp Meal Prep Recipe
Crispy Fish Sticks

Other tips for making Crispy Fish Sticks:

  • We use cod, but you can also use halibut or catfish. 
  • If you don't want to dip your fish in eggs, you can use heavy cream or only olive oil. 
  • Don't overcrowd your sheet pan so everything can cook evenly. 
  • This fish meal prep recipe doesn't have to be Paleo or gluten-free if you don't want it to be. Replace the Paleo powder and tapioca flour with all-purpose flour and Panko breadcrumbs. You can even use crushed up potato chips or cereal as "breadcrumbs." 
  • Also, if you're gluten-free, you probably already have the ingredients on hand to make your own breading, here's How to Make Gluten-Free Breading.
Crispy Fish Sticks
Crispy Fish Sticks

Crispy Fish Sticks

This childhood favorite gets a grown-up reboot using Paleo-friendly almond flour coating that’s full of herb and lemon flavor. A side of sweet potato fries adds fiber and staying power, keeping you full. 
Print Recipe Pin Recipe Rate Recipe
Prep Time: 20 minutes minutes
Cook Time: 30 minutes minutes
Total Time: 50 minutes minutes
Course: dinner, Lunch, Main Course
Cuisine: American
Keyword: dinner, gluten free, lunch, paleo, pescatarian, Sheet Pan
Servings: 4 meals
Calories: 540kcal
Author: Nick Quintero

Ingredients

For Fish Sticks

  • 20 oz. cod fillets
  • 2 large eggs beaten
  • ¼ cup tapioca flour
  • ½ cup Paleo Powder Almond + Flax + Paleo Powder Herbed Salt Free Blend
  • ½ teaspoon sea salt

For Sweet Potato Fries

  • 1 lb. sweet potatoes
  • 1 tablespoon olive oil
  • ½ teaspoon sea salt
  • ¼ teaspoon cracked black pepper

For Serving

  • 4 lemon wedges
  • ½ cup Paleo ketchup primal kitchen
Get Recipe Ingredients

Instructions

  • Preheat oven to 375F and line a large baking sheet with parchment paper. Slice sweet potatoes into ½-inch-thick strips and toss in olive oil, sea salt, and black pepper in a medium mixing bowl, spread on the bottom half of pan.
  • Add tapioca flour to a shallow bowl, beaten egg to another, and Paleo Powder and sea salt to a third bowl. Blot cod fillets with a paper towel and slice into 1 ½ -2-inch-thick pieces.
  • Coat each piece lightly with tapioca flour then dip in egg, shaking off excess and finally dredge in Paleo Powder. Place fish sticks on baking sheet ½ inch apart. Bake for 15 minutes. Gently toss sweet potato fries and return to oven for 15 minutes longer.
  • Divide sweet potato fries between 4 1-cup compartments of teal MPOF containers. Add 3-4 fish sticks to the large compartments and add ketchup and lemon wedges alongside fish sticks.

Video

Nutrition

Calories: 540kcal | Carbohydrates: 65g | Protein: 25g | Fat: 14g | Fiber: 6g
Tried this recipe?Mention @mealpreponfleek or tag #mealpreponfleek!

Crispy Sheet Pan Tofu

June 22, 2023 by Nick Quintero Leave a Comment

Crispy Sheet Pan Tofu

Tofu is a huge part of a vegan diet. It's packed with the nutrients vegans need and is a convenient staple that goes with everything. However, eating the same thing gets boring. To avoid vegan boredom, we've come up with a savory sheet pan idea for tofu! Our Crispy Sheet Pan Tofu is breaded with gluten-free flour and Paleo powder and paired with a unique, sweet sauce for dipping. Sound intriguing? Continue reading for more information about and the recipe for Crispy Sheet Pan Tofu!

Crispy Sheet Pan Tofu

This vegan sheet pan tofu is high in protein and baked instead of fried in a pecan and flaxseed breading that needs no extra seasoning. Served alongside roasted broccoli and a creamy peanut sauce for a complete meal!  

How long will Crispy Sheet Pan Tofu last for?

Crispy Sheet Pan Tofu will last up to 5 days. Store your sheet pan meal in covered container sans dipping sauce. Storing the sauce and tofu together will make the tofu soggy. You can store your crispy sheet pan tofu dipping sauce in a covered plastic sauce cup. 

Can Crispy Sheet Pan Tofu be frozen?

Yes, you can freeze Crispy Sheet Pan Tofu. We hear the tofu takes on another texture and tastes even better than it did before! To freeze your crispy sheet pan tofu, let it cool, then transfer it to another pan and cover with plastic wrap. Lay it flat in the freezer. You can also quick-freeze the tofu to solidify it and store it in freezer bags. 

Crispy Sheet Pan Tofu

Crispy Sheet Pan Tofu Ingredients:

For Tofu  

  • 1 lb. extra firm tofu 
  • ⅓ cup gluten-free flour  
  • ⅔ cup Pecan Flaxseed Paleo Powder  
  • ½ cup unsweetened dairy free milk  

For Serving 

  • 4 cups broccoli florets 
  • 2 tablespoon olive oil  
  • ¼ teaspoon sea salt  

For Dipping Sauce  

  • ¼ cup creamy peanut butter 
  • 2 tablespoon water 
  • 2 tablespoon lime juice  
  • 1 tablespoon coconut aminos 
  • 1 tablespoon agave nectar  
Crispy Sheet Pan Tofu

How do you make Crispy Sheet Pan Tofu?

Crispy Sheet Pan Tofu is an easy sheet pan meal prep idea that takes less than 40 minutes. You only spend 15 minutes preparing the meal to cook and all you're really doing is chopping and coating your tofu before baking it at 400 degrees. You need to remove excess water from your tofu before slicing it into 12 pieces and coating it in gluten-free flour, dairy-free milk, and Paleo powder. To remove the water, cut your tofu into 6 pieces, place the pieces on a towel, and put a heavy pan on top of the pieces for 15 minutes so the pan squeezes the water out. Then cut your 6 pieces into 12, dip into your three-part batter mix, and bake on a sheet pan lined with parchment paper. You can cook your broccoli or any vegetable side you choose on the sheet pan with the tofu. To make the sauce, combine all of the sauce ingredients into a bowl and mix thoroughly until smooth and tasty. 

How to portion Crispy Sheet Pan Tofu?

Line up 4 teal MPOF meal prep containers and place three pieces of tofu in the 1-cup slot with dipping sauce in a covered plastic cup. Add a half-cup of broccoli to each container to complete the meal. 

Crispy Sheet Pan Tofu

More tofu meal prep recipes:

  • Orange Sesame Tofu and Snap Peas
  • Sheet Pan Crispy Tofu and Broccoli
  • Thai Chili Tofu Sheet Pan Meal Prep
  • Apricot Cucumber Tofu Steak Meal Prep
  • Tofu Tikka Masala
  • $3 Edamame Pasta with Tofu and Veggies
  • Watercress Spring Rolls
Crispy Sheet Pan Tofu

Other tips for making Crispy Sheet Pan Tofu:

  • Bake your tofu on a silicone baking mat for beautiful and delicious caramelization. 
  • After you cube and press your tofu, add seasonings like smoked paprika, toasted sesame seeds, black pepper, garlic powder, and even gluten-free soy sauce. 
  • Use this sheet pan meal prep recipe for stir fry recipes! We have a few of them, including Thai Chili Tofu Sheet Pan Meal Prep. This or any stir fry recipe will work (you can substitute meat for crispy sheet pan tofu). Crispy sheet pan tofu gives stir fry recipes a savory texture, and you can pair your stir fry with Cilantro Lime Cauliflower Rice. 
  • Also, if you're gluten-free, you probably already have the ingredients on hand to make your own breading, here's How to Make Gluten-Free Breading.
Crispy Sheet Pan Tofu

Crispy Sheet Pan Tofu

This vegan sheet pan tofu is high in protein and baked instead of fried in a pecan and flaxseed breading that needs no extra seasoning. Served alongside roasted broccoli and a creamy peanut sauce for a complete meal! 
Print Recipe Pin Recipe Rate Recipe
Prep Time: 15 minutes minutes
Cook Time: 33 minutes minutes
Total Time: 38 minutes minutes
Course: dinner, Lunch, Main Course
Cuisine: American
Keyword: dinner, gluten free, lunch, Sheet Pan, Tofu, vegan, vegetarian
Servings: 4 meals
Calories: 464kcal
Author: Nick Quintero

Ingredients

For Tofu

  • 1 lb. extra firm tofu
  • ⅓ cup gluten-free flour
  • ⅔ cup Pecan Flaxseed Paleo Powder
  • ½ cup unsweetened dairy free milk

For Serving

  • 4 cups broccoli florets
  • 2 tablespoon olive oil
  • ¼ teaspoon sea salt

For Dipping Sauce

  • ¼ cup creamy peanut butter
  • 2 tablespoon water
  • 2 tablespoon lime juice
  • 1 tablespoon coconut aminos
  • 1 tablespoon agave nectar
Get Recipe Ingredients

Instructions

  • Preheat oven to 400ºF and line a baking sheet with parchment paper.
  • Slice tofu into 6 slices. Place tofu slices between a clean kitchen towel and set a heavy pan on top for 15 minutes to help remove moisture.
  • Slice tofu into 12 pieces. Add gluten-free flour to a shallow bowl, dairy-free milk to a separate bowl, and Paleo Powder to a third shallow bowl.
  • Dip each piece of tofu in gluten-free flour followed by milk and lastly in Paleo Powder. Place on the top half of the baking sheet and bake for 15 minutes.

Video

Nutrition

Calories: 464kcal | Carbohydrates: 25g | Protein: 19g | Fat: 26g | Fiber: 6g
Tried this recipe?Mention @mealpreponfleek or tag #mealpreponfleek!

Air Fryer Crispy Zucchini Chips

February 24, 2023 by Nick Quintero Leave a Comment

Crispy zucchini chips are so good in the air fryer! A little gluten-free breading and a little time in the air fryer and you've got yourself a quick, healthy snack!

Are you looking for a tasty and healthy snack that's easy to make and perfect for satisfying your cravings? Look no further than air fryer zucchini chips! These crispy and delicious chips are made using a simple and straightforward process that involves thinly slicing zucchini and cooking it in an air fryer. The result is a snack that's bursting with flavor, low in calories, and packed with nutrients. It also happens to be gluten-free, because we're using gluten-free breadcrumbs and flour to make this happen.

crispy air fried zucchini chips

Air Fryer Crispy Zucchini Chips Ingredients

  • 2 eggs
  • 2 small zucchini
  • ⅔ cup gluten-free breadcrumbs
  • ¼ cup grated Parmesan cheese
  • ¼ cup gluten-free flour
  • 1 tsp Italian seasoning
  • ½ tsp salt
  • 1 cup gluten-free ranch dressing

One of the best things about air fryer zucchini chips is that they're a healthy and guilt-free snack that you can enjoy anytime. Zucchini is a low-calorie vegetable that's rich in vitamins and minerals. These include Vitamin C, potassium, and folate. Plus, cooking zucchini in an air fryer eliminates the need for added fat and calories that come with deep frying.

Another thing that's awesome? Making these in the summertime is a great way to use fresh zucchini. Chances are, you or someone you know will grow this vegetable, which tends to be prolific, and you'll find some on your doorstep. And then the next question you may have, once you've exhausted all the options (which invariably include zucchini quick bread), is "What do I do with all this zucchini?!?"

How to Make Crispy Zucchini Chips

Slice the zucchini thinly. Get your bowls set up for dredging and dipping. Flour goes in one bowl, beaten eggs in another, and then the breadcrumbs, finally, in a third. Once they're all dipped and ready to go, fry them in the air fryer, most likely in batches. And it's that easy, we promise.

If you don't have an air fryer, these are easy to make in the oven as well. This baked zucchini chips recipe breaks it down for you, but it's really easy. It'll just take a bit more time in the oven.

How to Store and Serve Crispy Zucchini Chips

Well, like most things that come out of the air fryer, these are best as soon as they're made, when they're warm but not too hot to eat. We love them with dippable sauces and dressings like homemade ranch (it's a revelation, try it!), blue cheese, or even a good store-bought Caesar or goddess dressing.

You can meal prep these, and that's how we've shown them here. You might consider reheating them quickly in the air fryer when serving, but you don't have to. They will get a bit more crispy again if you do that. They will get a tad soggy in the fridge if you go the prep route.

So the next time you're looking for a tasty and healthy snack, give air fryer zucchini chips a try. They're easy to make and perfect for satisfying your cravings without ruining your diet. Enjoy!

Substitutions and Alterations

Season the breadcrumbs however you like. We just happen to enjoy Italian seasoning. Thyme, parsley, marjoram, chives, dill, all of those would work. Additionally, if you don't need to make this as a gluten-free recipe, feel free to use regular breadcrumbs and all-purpose flour.

Also, if you're gluten-free, you probably already have the ingredients on hand to make your own breading, here's How to Make Gluten-Free Breading.

MORE CRISPY AIR-FRIED GOODNESS!

  • Air Fried Crispy Chicken
  • Air Fried Parmesan Broccoli
  • Air Fryer Egg Rolls
Crispy Zucchini Chips 1000x1000

Air Fryer Crispy Zucchini Chips

These crispy and delicious zucchini chips are made using a simple and straightforward process that involves thinly slicing zucchini and cooking it in an air fryer.
Print Recipe Pin Recipe Rate Recipe
Prep Time: 15 minutes minutes
Cook Time: 20 minutes minutes
Total Time: 35 minutes minutes
Course: Side Dish, Snack
Cuisine: American
Diet: Gluten Free, Low Calorie
Keyword: snack, Zucchini
Servings: 4 servings
Calories: 397kcal
Author: Nick Quintero

Equipment

  • 1 Air Fryer

Ingredients

  • 2 eggs
  • 2 small zucchini
  • ⅔ cup gluten-free breadcrumbs
  • ¼ cup grated Parmesan cheese
  • ¼ cup gluten-free flour
  • 1 teaspoon Italian seasoning
  • ½ teaspoon salt
  • 1 cup gluten-free ranch dressing
Get Recipe Ingredients

Instructions

  • Slice zucchini into ¼-inch thick slices.
  • Add flour to a small bowl, beat eggs in a second small bowl, and combine breadcrumbs, Parmesan cheese, Italian seasoning and salt in a third bowl.
  • Working in 2 batches, dip each slice of zucchini in flour followed by egg mixture allowing excess to run back into bowl. Coat in breadcrumb mixture and place in air fryer leaving a small amount of space between each zucchini slice.
  • Air fry at 400ºF for 8-9 minutes. Repeat with remaining zucchini.
  • Divide zucchini chips among 4 compartments of 4 MPOF snack containers. Divide ranch dressing among remaining 4 compartments.

Video

Nutrition

Serving: 1meal | Calories: 397kcal | Carbohydrates: 22g | Protein: 8g | Fat: 31g | Saturated Fat: 6g | Polyunsaturated Fat: 16g | Monounsaturated Fat: 7g | Trans Fat: 0.01g | Cholesterol: 103mg | Sodium: 972mg | Potassium: 88mg | Fiber: 1g | Sugar: 3g | Vitamin A: 205IU | Vitamin C: 0.1mg | Calcium: 98mg | Iron: 1mg
Tried this recipe?Mention @mealpreponfleek or tag #mealpreponfleek!

Sheet Pan Salmon Burgers

July 24, 2024 by Nick Quintero Leave a Comment

Salmon-Burgers-Multiple-Container-4-601x800-1

Looking make the best Salmon Burgers? Here's a meal prep recipe for creating some incredible sheet pan salmon burgers.

Sheet Pan Salmon Burgers

With so many fish to choose from, salmon has a reputation as one of the healthiest, most-sought after fish. How many praises can we sing for these upstream-swimmers? Salmon are rich in Omega-3 Fatty Acids, a healthy source of protein, and are full of B vitamins and potassium and selenium and antioxidants. What does this mean? Salmon helps your stress get lower, your hair get nicer, your heart beat stronger, your bones get solid, and boosts your energy.

When it comes to which salmon to choose, there are many! In this Sheet Pan Salmon Burgers, we recommend Sockeye Salmon. It has a bit more healthy oils than other salmons and has a deep red flesh. Sockeye are known as "reds" because their flesh turns deep red when they swim against the stream to spawn. In case you’re curious, a few other salmon types include: Chinook, Coho, Humpback, Atlantic and Silverbrite. Are you hungry yet?

Sheet Pan Salmon Burgers

Switch up your usual burger routine with these Paleo salmon burgers! Almond flour steps in for breadcrumbs along with fresh herbs and a creamy red pepper aioli that doubles as a dipping sauce for sweet potato fries! 

Sheet Pan Salmon Burgers Ingredients:

For Salmon Burgers 

  • 12 oz cooked sockeye salmon (use code MEALPREPONFLEEK for 10% off) 
  • ½ cup blanched almond flour
  • 1 large egg
  • 1 tablespoon lemon zest
  • 1 tablespoon minced chives
  • 1 tablespoon fresh chopped dill
  • ½ teaspoon minced garlic
  • ½ teaspoon sea salt
  • ¼ teaspoon paprika
  • 4 leaf lettuce leaves for serving
  • ¼ a red onion, thinly sliced

For Sweet Potato Fries

  • 2 medium sweet potatoes
  • 1 tablespoon olive oil
  • ½ teaspoon sea salt
  • ¼ teaspoon black pepper

For Roasted Red Pepper Aioli

  • ⅔ cup mayonnaise, dairy free for paleo/whole30
  • ¼ cup jarred roasted red bell peppers, drained
  • 1 teaspoon lemon juice
Sheet Pan Salmon Burgers

How long will Sheet Pan Salmon Burgers last for?

First, you have two days of fridge-time to cook your salmon burgers if it’s raw and in the fridge. Once your Sheet Pan Salmon Burgers are cooked, count on eating your meal prep in two days or less. If you need more time, move them to the freezer! 

Looking for more Proven Recipes - Perfect for Meal Prep? Save 10% on every tip, trick, and “Ah-ha!” moment from over 10 years of meal prepping! Enjoy more time, money and homecooked meals with WWL’s Meal Planner!

Can Sheet Pan Salmon Burgers be frozen?

Yes! Cooked salmon can be frozen for four to six months, according to the U.S. Food and Drug Administration.

Sheet Pan Salmon Burgers

How do you make Sheet Pan Salmon Burgers?

First, you’ll form the patties in a mixing bowl with all the ingredients. Second, bake the Salmon Burgers for 15 minutes, turn them over, and bake for another 15. This gives you time to take care of the Sweet Potato Fries.

Parchment paper works great to line your baking sheet for the Sweet Potato Fries. Make sure to toss them gently to coat with a drizzle of olive oil.

For Roasted Red Pepper Aioli - it couldn’t be easier! Combine ingredients for red pepper aioli in a blender and blend.

Sheet Pan Salmon Burgers

How to portion Sheet Pan Salmon Burgers?

This meal prep recipe has three complementary parts - the burger, the fries and the side of Roasted Red Pepper Aioli. When you’re ready to go, Sheet Pan Salmon Burgers would travel well in Dual Compartment Meal Prep Containers to keep everything separate. If you’re using bread or lettuce as a bun, consider the Three Compartment Meal Prep Container.

More Salmon meal prep recipes:

  • Try Asian Air Fryer Salmon for a light and flavorful meal prep recipe
  • Enjoy Cauliflower Tabouli and Salmon Meal Prep for a uniquely veggie-rich side
  • Spice things up with Sheet Pan Sriracha Honey Glazed Salmon
  • Mandarin Orange Salad With Salmon and Sesame Dressing
  • Sheet Pan Salmon and Veggies

Other tips for making Sheet Pan Salmon Burgers:

  • Remember to store your bun separately from your salmon burger to prevent the bun from getting soggy. To stay paleo - use lettuce as your bun!

  • This meal prep recipe is a great way to use leftover salmon from one of our other MPOF recipes.

  • If you are purchasing large orders of salmon to stock up, get it vacuum-sealed and store it in your freezer for up to eight months.

  • When thawing cooked salmon burgers, pat them dry with a paper towel before reheating. We suggest using an oven to reheat your sheet pan salmon burgers to preserve the flavor and firmness. After thawing, eat cooked salmon within 24 hours.

Sheet Pan Salmon Burgers

Sheet Pan Salmon Burgers

Switch up your usual burger routine with these Paleo salmon burgers! Almond flour steps in for breadcrumbs along with fresh herbs and a creamy red pepper aioli that doubles as a dipping sauce for sweet potato fries!
Print Recipe Pin Recipe Rate Recipe
Prep Time: 10 minutes minutes
Cook Time: 30 minutes minutes
Total Time: 40 minutes minutes
Course: dinner, Lunch, Main Course
Cuisine: American
Keyword: dinner, gluten free, lunch, Meal Prep, paleo, Salmon
Servings: 4 meals
Calories: 649kcal
Author: Nick Quintero

Equipment

  • sheet pan

Ingredients

For Salmon Burgers

  • 12 oz sockeye salmon or salmon of choice
  • ½ cup blanched almond flour
  • 1 large egg
  • 1 tablespoon lemon zest
  • 1 tablespoon minced chives
  • 1 tablespoon fresh chopped dill
  • ½ teaspoon minced garlic
  • ½ teaspoon sea salt
  • ¼ teaspoon paprika
  • 4 leaf lettuce leaves for serving
  • ¼ large red onion thinly sliced

For Sweet Potato Fries

  • 2 medium sweet potatoes
  • 1 tablespoon olive oil
  • ½ teaspoon sea salt
  • ¼ teaspoon black pepper

For Roasted Red Pepper Aioli

  • ⅔ cup mayonnaise
  • ¼ cup jarred roasted red bell peppers drained
  • 1 teaspoon lemon juice
Get Recipe Ingredients

Instructions

  • Preheat oven to 425ºF and line a large baking sheet with parchment paper. Chop sweet potatoes into ½ inch thin French fries and place in a medium mixing bowl. Drizzle olive oil over fries and season with salt and pepper. Gently toss to coat. Spread fries on the bottom half of baking pan.
  • In a separate medium mixing bowl, combine ingredients for salmon burger. Mix thoroughly. Use hands to form mixture into 4 patties. Place onto baking sheet ½ inch apart. Bake for 15 minutes. Carefully flip burgers using a spatula and gently toss sweet potato fries. Return to oven for 15 minutes longer. Cool 5 minutes.
  • Combine ingredients for red pepper aioli in a blender and blend until smooth. Divide between 4 small sauce cups.
  • Place 1 lettuce leaf in the large compartment of 4 teal MPOF container. Set a salmon burger on top and place thinly sliced onion on top. Divide sweet potato fries between 4 smaller compartments.

Notes

If you are wanting a bun for your burger, store it on the side to prevent the bun from getting soggy. 

Nutrition

Calories: 649kcal | Carbohydrates: 22.2g | Protein: 30.5g | Fat: 48.4g | Fiber: 4.5g
Tried this recipe?Mention @mealpreponfleek or tag #mealpreponfleek!

Low Carb Philly Cheesesteak Meal Prep

February 27, 2024 by Nick Quintero 11 Comments

Low Carb Philly Cheesesteak Meal Prep is an unapologetically delicious way to eat a cheesesteak, without all the carbs. Think of it like a cheesesteak in a bowl!

Ok, meal prep fam, are you ready for this?

Did you know that the average cheesesteak has about 900 calories, 40 grams of fat, and 80 grams of carbs? And the average store-bought or deli-made cheesesteak is also typically quite a sodium bomb. We've seen single sandwiches that reportedly contain almost an entire day’s worth of sodium! Yikes. We love the classic savory and gooey sandwich, but we knew there had to be a different way to enjoy it. One of those ways happens to involve removing the carbohydrate factor.

Low Carb Philly Cheesesteak Meal Prep

What's the Story of the Philly Cheesesteak?

According to the city of Philadelphia’s official tourism board, the original Philly cheesesteak was invented by two hot dog vendors in the 1930’s, brothers Pat and Harry Olivieri. Tired of ever-present hot dogs, the story goes that the brothers bought some steak from a local butcher for a change in their own lunches. They grilled the steak with some fresh onions and spread the mixture on an Italian roll. They were about to dig in when a cab driver drove by, caught a whiff, and stopped to ask the brothers Olivieri for a steak sandwich. Less than ten years later the Olivieris opened the first brick-and-mortar Philly Steak Shop, though cheese still wouldn’t be added to make the classic namesake for another twenty years. Pat’s King of Steaks still stands in Philadelphia, and is open 24/7!

Low Carb Philly Cheesesteak Meal Prep

How to Lighten Up the Philly Cheesesteak

While we love the original, and acknowledge that we might upset one or two Philadelphians with our adaptation, we really wanted to take on the challenge of lightening up the classic cheesesteak. As a result, this recipe has quickly become one of our favorite meal prep recipes. The use of only one skillet makes cooking this Philly cheesesteak meal prep a breeze, and everything comes together in about ten minutes! Truth!

Don’t worry, this meal prep still packs a big flavor punch: crunchy onion and bell pepper, soft portobello mushrooms, delicious Provolone cheese, and tangy Worcestershire sauce, all on top of tender, thinly sliced sirloin steak. Honestly, we’re drooling just typing this.

Are you ready to make your own Low-Carb Philly Cheesesteak Meal Prep? You mean leave the bun behind forever.

Low Carb Philly Cheesesteak Meal Prep

Low-Carb Philly Cheesesteak Meal Prep Ingredients

  • 12 ounces grass-fed sirloin steak
  • ½ tablespoon olive oil
  • 1 medium pepper
  • 1 medium onion
  • 6 ounces portobello mushrooms
  • 2 tablespoon Worcestershire sauce
  • Salt & pepper, to taste
  • 3 slices provolone cheese
  • Fresh herbs, for garnish
Low Carb Philly Cheesesteak Meal Prep

How to Make Low-Carb Philly Cheesesteak

This is really as easy as it sounds. You're basically cooking onions, peppers, and the best sirloin steak you can find (we like grass-fed here especially since it's the star of the show) in one big skillet. At the end, you'll melt some gorgeous provolone cheese on top. (Purists might say you should use Cheez-Whiz instead for this low-carb cheesesteak meal prep, but we won't go there because cheesesteak lore is already pretty contentious as it is!)

Low Carb Philly Cheesesteak Meal Prep

How to Store and Serve Low-Carb Philly Cheesesteak Meal Prep

This all goes together in one single meal prep container. Cover and stick it in the fridge. You can reheat it in the microwave or in a low oven until it's totally hot all over again. Add a little steak sauce on top if you want to bring some more zest into the picture! It's so filling, and you've got your veggies, protein, and fat all in one meal. You won't likely need much else to eat! This will keep for 3 to 4 days, and while you can freeze it, it's really best within a couple days of being prepped. You might find you need a bit more cheese when you reheat it. If you can live with such a fate, then go for it!

Low Carb Philly Cheesesteak Meal Prep

More Awesome Steak Meal Preps to Try!

  • Philly Cheesesteak Breakfast Casserole
  • Sheet Pan Philly Cheesesteak
  • Freezer-Friendly Steakhouse Chili
  • Steak and Avocado Salad Bowl
  • Steak and Broccoli Stir Fry
  • Sheet Pan Steak and Veggies
  • Steak and Sweet Potato Meal Prep Combo
Low Carb Philly Cheesesteak Meal Prep blog

References:

https://www.livestrong.com/article/182971-south-philly-cheese-steak-nutritional-information/
Philadelphia Cheese Steak History and Recipe
Low Carb Philly Cheesesteak Meal Prep

Low Carb Philly Cheesesteak Meal Prep

Low Carb Philly Cheesesteak Meal Prep is a fast, simple and flavorful recipe that is made with only 7 ingredients. A gluten-free recipe that comes together in less than 15 minutes and works for lunch or dinner. 
Print Recipe Pin Recipe Rate Recipe
Prep Time: 5 minutes minutes
Cook Time: 10 minutes minutes
Total Time: 15 minutes minutes
Course: Lunch, Main Dish
Cuisine: American
Diet: Gluten Free
Keyword: Beef, Meal Prep
Servings: 3 meals
Calories: 310kcal
Author: Nick Quintero

Ingredients

  • 12 ounces grass fed sirloin steak or steak of choice (can sub chicken), thinly sliced
  • ½ tbs olive oil
  • 1 medium bell pepper sliced
  • 1 medium onion sliced
  • 6 ounces portobello mushrooms sliced
  • 2 tablespoon Worcestershire sauce
  • 3 slices provolone cheese
  • Salt to taste
  • Black pepper to taste
Get Recipe Ingredients

Instructions

  • Heat oil in a nonstick skillet over medium heat. Add the sirloin steak and cook for 2 to 3 minutes. Flip the meat and cook for 2-3 minutes more.
  • Add in onion and peppers, and cook for 3 to 4 minutes or until fork tender.
  • Add in sliced mushrooms, Worcestershire sauce, salt, and pepper and cook for 3 minutes.
  • Add provolone on top and cover your pan so the cheese melts.
  • Remove from the stovetop, allow to cool slightly, and then divide among your meal prep containers.
  • Top with fresh herbs, if desired (such as parsley).

Video

Notes

WW Smart Points= Green:7  Blue:7  Purple:7
__
Nutrition for 1 out of 3 servings:
35g Protein | 10g Carbs | 14g Fat | 310 Calories | Fiber 2g

Nutrition

Serving: 1meal | Calories: 310kcal | Carbohydrates: 10g | Protein: 35g | Fat: 14g | Fiber: 2g
Tried this recipe?Mention @mealpreponfleek or tag #mealpreponfleek!


Greek Arugula Power Salad

November 18, 2020 by Nick Quintero Leave a Comment

Greek Arugula Power Salad 

This zesty power salad bowl is perfect for people who are constantly on-the-go! It's quick, satisfying, and light while packing in protein and other essential nutrients. Our Greek Arugula Power Salad is perfect for lunch as a main dish, and the recipe itself takes less than 15 minutes. Who's ready to give their chicken salads a twist? 

We take one pound of chicken breast and cook it in a lemon-herb dressing, then place it over 8 cups of fresh arugula and add traditional Greek salad flavors using vegetables like olives, cucumbers, onions, and tomatoes. We also add one cup of white beans to add more protein and make it into a power salad bowl.

Greek Arugula Power Salad 

Lemon herb dressing doubles as a quick marinade for chicken in this Mediterranean-inspired bowl. It’s rich in protein from both white beans and chicken with plenty of veggies to keep the salad interesting like feta cheese, olives, and tomatoes. 

How long will Greek Arugula Power Salad last for?

Our Greek arugula power salad will last for 4 to 5 days when stored properly and placed in the refrigerator. The best way to store and preserve this meal is in our Good Cook® Meal Prep Bowl. 

Can Greek Arugula Power Salad be frozen?

You can freeze leftover salad, but store the chicken and vegetables separately. Place the salad leftovers in separate freezer bags and put the bags in one of our meal prep salad bowls.

Greek Arugula Power Salad 

Greek Arugula Power Salad  Ingredients:

For Lemon Herb Dressing  

  • ¼ cup olive oil  
  • ¼ cup fresh lemon juice  
  • ½ cup fresh parsley  
  • 1 tablespoon raw honey  
  • 1 teaspoon dried basil  
  • 1 teaspoon dried thyme  
  • ½ teaspoon sea salt  

For Chicken 

  • 1 lb. chicken breast 
  • 2 tablespoon lemon-herb dressing  

For Salad  

  • 8 cups arugula  
  • 1 cup grape tomatoes, halved  
  • 1 cup chopped baby cucumber  
  • 1 cup white beans, drained 
  • ½ cup green olives  
  • ½ cup sliced red onion  
  • ½ cup feta cheese  
  • ⅓ cup lemon herb dressing  

For Serving

  • 4 Good Cook® meal prep bowls
Greek Arugula Power Salad 

How do you make Greek Arugula Power Salad?

This power salad bowl is super easy to make! 

  1. Combine and blend the lemon-herb dressing ingredients in a blender or NutriBullet. Set aside 2 tablespoons for marinating the chicken. Pour 2 tablespoons of dressing on diced chicken and marinate in the refrigerator for 30 minutes. Put the remaining dressing in the refrigerator until you're ready to pack the salad.
  2. Cook marinated chicken in a cast-iron skillet for 10 to 15 minutes. Once cooked, let the chicken cool for five minutes. 
  3. Grab your arugula, onions, tomatoes, beans, and olives and combine everything in a bowl.
Greek Arugula Power Salad 

How to portion Greek Arugula Power Salad?

Put 2 cups of arugula into four containers and top with tomatoes, cucumber, beans, olives, feta cheese, red onion, and chicken. Pack dressing into 4 sauce cups and store them with your power salad bowls. When you're done with portioning, place your meals in the refrigerator until you're ready to take them with you for lunch. 

More power salad bowl meal prep recipes:

Power salad bowls are easy lunches that make you feel unstoppable thanks to their nutritional content. Here's a few more!

  • Middle Eastern Breakfast Salad Bowls
  • Fall Harvest Power Salad
  • Kale Steak Power Salad 
  • Thai Crunch Quinoa Grain Bowl Bowl
Greek Arugula Power Salad 

Other tips for making Greek Arugula Power Salad:

  • Drain excess dressing from marinated chicken before cooking so you don't have a soggy power salad bowl. 
  • You can freeze salad bowls, but doing so can make them less flavorful. 
  • Cut your chicken, tomatoes, and onions into bite-sized portions. 
  • Use dry arugula. Wash, drain, and pat dry or use pre-washed, bagged arugula. 
  • Drizzle your salad with dressing, then toss and mix your salad well right before eating.
Greek Arugula Power Salad 

Greek Arugula Power Salad 

Lemon herb dressing doubles as a quick marinade for chicken in this Mediterranean-inspired bowl. It’s rich in protein from both white beans and chicken with plenty of veggies to keep the salad interesting like feta cheese, olives and tomatoes. 
Print Recipe Pin Recipe Rate Recipe
Prep Time: 10 minutes minutes
Cook Time: 14 minutes minutes
Total Time: 24 minutes minutes
Course: dinner, Lunch, Main Dish
Cuisine: American, Greek
Diet: Gluten Free
Keyword: cheese, Chicken, gluten free, high protein, power bowl, salad
Servings: 4 meals
Calories: 416kcal
Author: Nick Quintero

Ingredients

For Lemon Herb Dressing

  • ¼ cup olive oil
  • ¼ cup fresh lemon juice
  • ½ cup fresh parsley
  • 1 tablespoon raw honey
  • 1 teaspoon dried basil
  • 1 teaspoon dried thyme
  • ½ teaspoon sea salt

For Chicken

  • 1 lb. chicken breast
  • 2 tablespoon lemon-herb dressing from recipe above

For Salad

  • 8 cups arugula
  • 1 cup grape tomatoes halved
  • 1 cup chopped baby cucumber
  • 1 cup white beans drained
  • ½ cup green olives
  • ½ cup sliced red onion
  • ½ cup feta cheese
  • ⅓ cup lemon herb dressing recipe above
Get Recipe Ingredients

Instructions

For Dressing

  • Combine ingredients for dressing in a blender or Nutri-bullet and blend until smooth. Refrigerate until serving.

For Chicken and Salads

  • Add diced chicken and 2 tablespoons of dressing to a small bowl, stir to coat chicken. Marinate for 30 minutes in the refrigerator.
  • Heat a cast-iron skillet over medium heat for 2 minutes. Drain excess marinade from chicken and add to hot skillet. Cook until chicken is golden brown on all sides, about 10-12 minutes stirring occasionally. Cool at room temperature for 5 minutes.
  • Add 2 cups arugula to 4 GoodCook round containers and top with tomatoes, cucumber, beans, olives, feta cheese, red onion, and chicken. Add dressing to 4 sauce cups included in the package. Store in refrigerator until enjoying.

Video

Nutrition

Calories: 416kcal | Carbohydrates: 53g | Protein: 33g | Fat: 20g | Fiber: 14g
Tried this recipe?Mention @mealpreponfleek or tag #mealpreponfleek!

Pineapple Coconut Overnight Oats Meal Prep

June 15, 2023 by Nick Quintero Leave a Comment

Pineapple coconut overnight oats are delicious, tropical, vegan, and gluten free. Boost it with collagen or protein powder!

Overnight oats are everywhere these days, and for good reason! Not only are oats incredibly nutritious, they’re also easy to make. We love how versatile they are; almost any flavor and topping combination will taste great. Oats are a blank slate!

And our favorite part about overnight oats? They make great meal prep ideas! Overnight oats are delicious, healthy, and satisfying, and if you spend just a few precious minutes prepping on Sunday evening- they’ll be ready for you all week!

What's So Great About These Overnight Oats?

Pineapple Coconut Oats Meal Prep

We wanted this breakfast meal prep idea to be a bit of a break from the norm. The usual suspects make their appearance of course, because who doesn’t love a splash of omega-rich chia seeds? Each serving of these overnight oats is a quick trip to the tropics with a blast of sweet and tangy pineapple and delicious coconut shavings.

And in case you need a little extra nutritional boost, our recipe makes room for a scoop of your favorite protein or collagen powder. Each serving of oats contains 13 grams of protein on its own though, so any powder or nut butter you add is making that number that much more plump!

Pineapple Coconut Oats Meal Prep

Pineapple Coconut Overnight Oats Meal Prep Ingredients

  •  1 cup GF rolled oats
  • 4 teaspoon white chia seeds
  • ¼ cup shredded unsweetened coconut flakes
  • 1 cup frozen pineapple
  • 2 cups coconut milk
  • 2 teaspoon lime juice
  • 1 scoop Vanilla protein powder (optional) or collagen protein powder
  • 1 TBS maple syrup

Nutrition of Oats

Speaking of a serving of oats, we’ve got some more to share with you about the nutrition of oats. One serving of these overnight oats will also provide you with 191% of your daily value of manganese (a trace mineral that's important for many bodily functions), along with magnesium, antioxidants, B vitamins, iron, and zinc. And most importantly? Oats are loaded with a powerful soluble fiber called beta-glucan. Once digested, this fiber helps you to stay fuller longer, supports healthy blood sugar and cholesterol levels, and feeds good gut bacteria.

How to Make Pineapple Coconut Overnight Oats

Overnight oats are mercifully easy to pull off. Because that's what you need to the night before, right? Just a little kitchen puttering and then pop it in the fridge. Combine the ALL of the ingredients (except the optional granola) in a bowl and then divide between two glass jars with an airtight lid. Stick them in the fridge for a few hours and up to overnight is optimal.

Pineapple Coconut Oats Meal Prep

How to Store and Serve Overnight Oats

Since the storing is part of the prepping, there's not much to do here. Eat it right out of the jar! Add some granola on top! Top with more shredded coconut and some granola, for some crunchy contrast. We don't recommend freezing this, though! Just a heads up! Keep them in the fridge for up to 4 days.

Pineapple Coconut Oats Meal Prep

How to Customize Overnight Oats

  • Mango would be amazing with coconut, either in addition the pineapple or instead of it! Plus, it's still tropical that way!
  • You can use frozen or fresh fruit in this recipe; it's fine either way.
  • Feel free to add things like hemp seeds (a tablespoon or two), or maybe even flax seeds, for extra nutrients and protein (in the case of hemp, naturally).
  • Skip the protein powder or go chocolate instead of vanilla for a totally different taste.
  • Swap the maple syrup for honey or agave nectar.
  • Use a different kind of plant-based milk.
Pineapple Coconut Oats Meal Prep

Pineapple Coconut Oats Meal Prep

Vegan and gluten-free breakfast that’s perfect for busy mornings! Packed with tropical coconut and pineapple flavors and an optional protein powder boost.
Print Recipe Pin Recipe Rate Recipe
Prep Time: 10 minutes minutes
Total Time: 10 minutes minutes
Course: Breakfast
Cuisine: American
Keyword: Meal Prep
Servings: 2
Calories: 394kcal
Author: Nick Quintero

Ingredients

  • 1 cup rolled oats gluten free, if needed
  • 4 teaspoon chia seeds
  • ¼ cup shredded unsweetened coconut
  • 1 cup frozen pineapple
  • 2 cups coconut milk full fat or unsweetened low calorie
  • 2 teaspoon lime juice
  • 1 scoop vanilla protein powder or collagen powder
  • 1 tbs dark maple syrup
  • granola optional
Get Recipe Ingredients

Instructions

  • Divide all ingredients between two mason jars and whisk with a fork to combine.
  • Refrigerate overnight. In the morning, stir and serve with your favorite granola.
  • Leftovers keep in the fridge for 5 days.

Notes

Nutrition for 1 out of 2 servings:
17g Protein | 49g Carbs | 16g Fat | 10g Fiber | 394 Calories
*nutrition facts calculated using 1 scoop of Vital Protein Collagen Powder

Nutrition

Serving: 1serving | Calories: 394kcal | Carbohydrates: 49g | Protein: 17g | Fat: 16g | Fiber: 10g
Tried this recipe?Mention @mealpreponfleek or tag #mealpreponfleek!
Pineapple Coconut Overnight Oats Meal Prep

Keto Snowball Cookies

December 12, 2019 by Nick Quintero Leave a Comment

Keto Snowball Cookies

Thank you to Now Foods for sponsoring this Keto Snowball Cookies recipe post, and thank YOU for supporting the brands that help make Meal Prep On Fleek possible. All opinions are our own. 

Keto Snowball Cookies

These keto snowball cookies bring the holiday cheer without all of the sugar and carbs! Monk fruit and erythritol step in to sweeten along with healthy fats from walnuts and almond meal for a guilt-free snack. 

Keto Snowball Cookies

Would you think it is possible to enjoy a holiday cookie that is sugar-free, keto-friendly, grain-free and gluten-free? If you don't think it is, we guarantee you that this Keto Snowball Cookie recipe will change your mind! 

Snowball cookies were one of our favorites growing up. We remember making them with our grandmother in the traditional way; flour, sugar, butter, and pecans. We would have powdered sugar all over our faces and then pop those little bite-sized cookies into our mouth, one by one. But, since having to go gluten-free, we wanted to remake this delicious dessert. 

We have also been a bit more mindful of the amount of sugar we are using in all recipes. This is why we have been including the Now Foods monk fruit and erythritol in our recipes over the last year. If you aren't familiar with erythritol, we highly recommend checking out this article! 

Keto Snowball Cookies

How we made the swaps: 

We spent some time swapping ingredients to make a *healthier* version (not that the OG recipe isn't good for you in moderation) and came up with a twist that will fit almost any dietary need! So, what did we swap?

We replace the white flour for almond meal (or almond flour would work), we swapped the traditional use of pecans with walnuts to create our own fun twist, and we replaced the regular sugar with vanilla monk fruit sweetener, and then replaced the powdered sugar with powdered erythritol. We kept the regular butter, but if you are vegan or dairy-free you would use a dairy-free butter replacement. 

Not only will this recipe be a hit at your holiday party, but each little cookie comes with a nutritional punch (but, you don't need to tell anyone that!) 

  • Almonds contain fiber, protein, and help lower blood sugar levels
  • Walnuts contain a high level of Vitamin E, are full of antioxidants, and are known to reduce inflammation
  • Erythritol is an antioxidant and helps improve blood vessel function
  • Monk fruit contains anti-inflammatory properties and has no calories or carbs. This makes monk fruit safe for people with diabetes and aligns with a keto, vegan, gluten-free, and dairy-free diet. 

The flavors of the Now Foods Monk Fruit don't stop at vanilla (although that is our go-to). They also make an unflavored and a chocolate flavor. The chocolate is delicious mixed into your coffee in the morning! 

Keto Snowball Cookies

How to convert from dry to liquid sweetener:

If you are looking to add monk fruit into some of your other holiday baking recipes, here is a quick conversion:

Sugar = Liquid Monk Fruit Sweetener

  • 1 teaspoon sugar = ⅛ tsp 
  • 1 tablespoon sugar = ⅜ tsp
  • ¼ cup sugar = 1 ½ tsp
  • ⅓ cup sugar = 2 tsp
  • ½ cup sugar = 3 tsp
  • 1 cup sugar = 2 Tbsp

The only thing to be mindful of is if a dry sweetener is needed to bind. So, for example, a cake or brownie recipe might need dry sugar to make it bake correctly. This might require swapping the dry sugar for additional flour if using monk fruit to make sure that it bakes and binds correctly. You can swap dry sugar 1:1 with erythritol, though. 

KETO SNOWBALL COOKIE PRO TIP: you should freeze the dough for 20-30 minutes instead of putting it in the refrigerator for an hour to speed up the process. Do not try to bake these right after making the dough or they will spread and flatten out. 

You can serve these as is at your next holiday party or meal prep them with your favorite sides! We paired ours with macadamia nuts and some of our keto chocolate for the ultimate sweet keto snack box! 

Keto Snowball Cookies

Keto Snowball Cookies Ingredients: 

Cookies

  • ¾ cup almond meal
  • 1 cup raw walnuts, finely chopped 
  • ½ cup softened unsalted butter 
  • ¼ cup granulated erythritol
  • 1 ½ teaspoon liquid vanilla monk fruit 
  • Pinch of sea salt 
  • ½ cup powdered erythritol for rolling 

Optional Sides

  • 1 cup macadamia nuts
  • keto chocolate 
Keto Snowball Cookies

Keto Snowball Cookies

These low carb snowball cookies bring the holiday cheer without all of the sugar and carbs! Monk fruit and erythritol step in to sweeten along with healthy fats from walnuts and almond meal for a guilt-free snack.
Print Recipe Pin Recipe Rate Recipe
Prep Time: 15 minutes minutes
Cook Time: 20 minutes minutes
Passive Time: 1 hour hour
Total Time: 1 hour hour 35 minutes minutes
Course: Dessert, Snack
Cuisine: Italian
Keyword: dessert, gluten free, keto, low carb, Meal Prep, snack
Servings: 18 cookies
Calories: 124kcal
Author: Nick Quintero

Ingredients

  • ¾ cup almond meal
  • 1 cup raw walnuts finely chopped
  • ½ cup softened unsalted butter
  • ¼ cup granulated erythritol
  • 1 ½ teaspoon liquid vanilla monk fruit
  • Pinch of sea salt
  • ½ cup powdered erythritol for rolling

Serving pairing suggestion:

  • 1 cup macadamia nuts
  • 1 recipe keto chocolate
Get Recipe Ingredients

Instructions

  • Combine butter and granulated erythritol in a medium mixing bowl. Cream together using a hand mixer for 30 seconds. Stir in almond meal, walnuts, vanilla monk fruit sweetener and sea salt to form a dough. Refrigerate for 1 hour to firm dough. This will help prevent the cookies from spreading in the oven so do not skip.
  • Preheat oven to 325ºF and line a medium baking sheet with parchment paper. Scoop out 1 tablespoon mounds of dough and roll into a ball. Place cookies on baking sheet 2 inches apart. Bake for 20 minutes, rotating cookie sheet after 10 minutes. Cool cookies at room temperature on cookie sheet for 20 minutes to allow cookies to firm.
  • Add powdered erythritol to a small bowl. Roll each cookie in powder and place 3 cookies in one compartment of 4 snack size MPOF containers. Add sugar-free chocolate and macadamia nuts to the other compartment.

Video

Notes

Nutrition facts are for 1 cookie only. 

Nutrition

Calories: 124kcal | Carbohydrates: 7.7g | Protein: 2.2g | Fat: 11.6g | Saturated Fat: 4g | Cholesterol: 14mg | Sodium: 1mg | Potassium: 56mg | Fiber: 1g | Sugar: 1g | Vitamin A: 158IU | Vitamin C: 1mg | Calcium: 24mg | Iron: 1mg
Tried this recipe?Mention @mealpreponfleek or tag #mealpreponfleek!
Keto Snowball Cookies

Savory Almond Butter Chicken Thigh Skillet

December 9, 2020 by Nick Quintero Leave a Comment

Savory Almond Butter Chicken Thigh Skillet

Thank you to Now Foods for sponsoring this Savory Almond Butter Chicken Thigh Skillet recipe post, and thank YOU for supporting the brands that help make Meal Prep On Fleek possible. All opinions are our own. 

Savory Almond Butter Chicken Thigh Skillet

This savory almond butter chicken thigh recipe is a one-pan meal that is full of nutty flavor. The recipe is low carbs, high in protein, and sweetened with a low glycemic sweetener, organic 1:1 monk fruit to add a slight sweetness to the recipe without a sugar spike!  

Savory Almond Butter Chicken Thigh Skillet

The holiday season is filled with sweet treats like low carb pecan pie bars, snowball cookies, and cheesecake. But, for those of us looking to balance out those sweet treats, or for those of us (like myself) who are more into savory recipes, we've got you covered! This Savory Almond Butter Chicken Thigh Skillet is actually the best of both worlds; savory and sweet. It has predominantly savory flavors with a hint of sweetness from the new Now Foods Organic 1:1 Monk Fruit replacement. We guarantee you won't even need a sweet treat after a dish like this! 

Savory Almond Butter Chicken Thigh Skillet

We prepared this easy-to-make, one-pan meal for meal prep this week, but also plan on serving it as a main dish option on our holiday table. A chicken dish like this accommodates the dietary needs of many of our guests, so it's a no-brainer when it comes to including this recipe! 

From low carb to gluten-free, to low glycemic, grain-free, high-protein, whole-ingredients, etc. It accommodates just about everyone, minus your vegetarian and vegan friends. However, if you have some guests that don't eat meat, you can easily swap the chicken thighs in this Savory Almond Butter Chicken Thigh Skillet for Tofu! It has the same great flavor, sans the meat. 

Say what?! An organic 1:1 monk fruit in a savory dish?

Yes, you read that right! If you have never tried sweetening up a savory dish, we highly recommend it. They deliver all of the flavors you crave in a way that you can enjoy at any meal of the day! Plus, the sauce, which is sweetened with the organic 1:1 monk fruit, is not just limited to this dish! As mentioned above, it is delicious with tofu! But, it also works so well with ground beef, roasted cauliflower, served over a stuffed baked potato, mixed with lentils, and drizzled over your favorite buddha bowl. 

We love to keep a jar of this sauce on-hand for jazzing up a quick weeknight meal. When we make a large batch, we double all of the ingredients, place them into a glass jar, shake them up (or mix), and then sealed and keep in the fridge until ready we are ready to use it. 

So, whether you are trying to add some new flavors to your holiday table or just looking to make your meal prep so much more delicious, organic 1:1 monk fruit we recommend grabbing a bag of , throwing on your favorite holiday songs, and get cooking in your kitchen! 

Savory Almond Butter Chicken Thigh Skillet Ingredients:

For Sauce

  • ⅓ cup unsalted/unsweetened almond butter  
  • ⅔ cup full fat coconut milk  
  • 3 tablespoon coconut aminos  
  • 2 tablespoon lime juice  
  • 1 tablespoon NOW Foods Organic 1:1 Monk Fruit Sweetener  
  • ½ teaspoon ground coriander  
  • ½ teaspoon ground turmeric  
  • ¼ teaspoon ground ginger  
Savory Almond Butter Chicken Thigh Skillet

For Chicken

  • Salt and pepper to taste  
  • 1 tablespoon olive oil or ghee  
  • 1 lb. boneless skinless chicken thighs, sliced into 2-inch pieces and excess fat trimmed  
  • 1 teaspoon minced garlic  
  • 1 cup chopped red bell pepper  
  • ½ cup fresh chopped cilantro  
  • 2 tablespoon chopped raw almonds  

For Serving

  • 1 tablespoon olive oil  
  • 2 cups baby broccoli, ends trimmed 
  • 1 cup sliced red onion  
  • Salt and pepper to taste  
Savory Almond Butter Chicken Thigh Skillet

Savory Almond Butter Chicken Thigh Skillet

This savory almond butter chicken thigh recipe is a one-pan meal that is full of nutty flavor. The recipe is low carbs, high in protein, and sweetened with a low glycemic sweetener to add a slight sweetness to the recipe without a sugar spike!
Print Recipe Pin Recipe Rate Recipe
Prep Time: 10 minutes minutes
Cook Time: 35 minutes minutes
Total Time: 45 minutes minutes
Course: dinner, Lunch, Main Dish
Cuisine: Indian
Keyword: Chicken, chicken thighs, coconut milk, dinner, gluten free, low carb, lunch, main dish
Servings: 4 meals
Calories: 491kcal
Author: Nick Quintero

Ingredients

For Sauce

  • ⅓ cup unsalted/unsweetened almond butter
  • ⅔ cup full fat coconut milk
  • 3 tablespoon coconut aminos
  • 2 tablespoon lime juice
  • 1 tablespoon Now Foods Organic 1:1 Monk Fruit Sweetener
  • ½ teaspoon ground coriander
  • ½ teaspoon ground turmeric
  • ¼ teaspoon ground ginger

For Chicken

  • Salt and pepper to taste
  • 1 tablespoon olive oil or ghee
  • 1 lb. boneless skinless chicken thighs sliced into 2-inch pieces and excess fat trimmed
  • 1 teaspoon minced garlic
  • 1 cup chopped red bell pepper
  • ½ cup fresh chopped cilantro
  • 2 tablespoon chopped raw almonds

For Serving

  • 1 tablespoon olive oil
  • 2 cups baby broccoli ends trimmed
  • 1 cup sliced red onion
  • Salt and pepper to taste
Get Recipe Ingredients

Instructions

  • Whisk together ingredients for the sauce in a medium mixing bowl. Set aside.
  • Heat olive oil over medium-high heat in a medium skillet. Blot chicken pieces dry with a paper towel and season with salt and pepper. Add chicken thighs and brown for 6 minutes. Add bell pepper and garlic to pan and sauté for 2 minutes longer.
  • Pour sauce on top to cover chicken and vegetables. Stir well. Bring to a simmer and reduce heat to medium-low. Simmer for 12-15 minutes, until chicken is cooked through.
  • Divide almond chicken between 4 teal MPOF containers and top with cilantro.
  • Clean pan and return to stove. Heat 1 tablespoon of olive oil over medium heat and add onions. Sauté for 5 minutes. Add broccoli to pan and stir. Cover with lid and cook 6-7 minutes longer, until broccoli is tender.
  • Divide broccoli and onions between small compartments of teal containers. Sprinkle with salt and pepper, then stir. Cover with lid and cook 6-7 minutes longer, until broccoli is tender.
  • Divide broccoli and onions between small compartments of teal containers. Sprinkle with salt and pepper.

Video

Nutrition

Calories: 491kcal | Carbohydrates: 21g | Protein: 26g | Fat: 33g | Sodium: 585mg | Fiber: 9g
Tried this recipe?Mention @mealpreponfleek or tag #mealpreponfleek!
Savory Almond Butter Chicken Thigh Skillet

Cauliflower Rice Salmon Poke Bowl Meal Prep

August 24, 2018 by Nick Quintero Leave a Comment

Whole30 Cauliflower Rice Salmon Poke Bowl Meal Prep blog

Cauliflower Rice Salmon Poke Bowl Meal Prep (Whole30 compliant)

Poke (pronounced, “po-kay”) is a dish made of raw diced fish, veggies, chili peppers, and spices. It’s also one of the main dishes of Native Hawaiian cuisine! There are two traditional kinds of poke—A fatty tuna (known as aku), and octopus (known as he’e). In this poke bowl meal prep recipe, we put a modern twist on the traditional by incorporating a cheaper, equally-delicious alternative—Salmon! Salmon is packed with omega-3s, vitamin D, choline, and selenium—a combo sure to boost brain and immune functions. There are many more health benefits too, such as anti-inflammatory properties, lowered stroke risk, and improved bone health!

Cauliflower Rice Salmon Poke Bowl Meal Prep

Ingredients commonly found in traditional poke (like soy sauce, honey, and white rice) can potentially threaten a state of ketosis. So for you keto peeps, we’ve substituted some of those ingredients for healthier alternatives! In this poke bowl meal prep recipe, in place of white rice, we use cauliflower rice. You can get this one of two ways: 1) Buy 1 package of frozen riced cauliflower, or 2) Make your own Cauliflower Rice. Cauliflower has impressive nutritional value in itself, boasting high potassium, calcium, and dietary fiber levels

You’ll notice that this salmon poke bowl meal prep recipe calls for the use of rice vinegar. Well, rice vinegar does a couple of different things. First of all, it adds some of the sweet acidity of honey and soy sauce—While second of all preserving your meals for as long as possible!

Cauliflower Rice Salmon Poke Bowl Meal Prep

Cauliflower Rice Salmon Poke Bowl Meal Prep Ingredients:

1 teaspoon avocado oil

1 head cauliflower, grated, or cub one package frozen cauliflower rice

2 8 oz. salmon filets

2 carrots, shredded

2 cucumbers, thinly sliced

1 avocado, thinly sliced

1 TBS rice vinegar

1 green onion, thinly sliced

Sesame seeds, for serving

Cauliflower Rice Salmon Poke Bowl Meal Prep

Health Benefits of this Cauliflower Rice Salmon Poke Bowl Meal Prep

One of the tastiest parts of our poke bowl meal prep is its use of fresh avocado and avocado oil. Avocado has amazing velvety flavor, but it’s an amazing superfood! In fact, they have a whole host of health benefits to reap. For example, did you know that avocados have more potassium than bananas? Other nutrients include folate and vitamins B, C, E, and K—And best of all, they’re packed with fiber! Fiber is a kind of carbohydrate that is insoluble to your body that is essential for feeling full for longer and healthy blood sugar regulation.

Because most of the ingredients in this salmon poke bowl meal prep recipe are fresh and raw, all the time you’ll need to prep it will be around 20 minutes! This recipe makes 4 servings, which we recommend storing in separate one-compartment meal prep containers.

Cauliflower Rice Salmon Poke Bowl Meal Prep

Another reason we love this recipe is that its veggies galore! Not only do you get a healthy serving of cauliflower in this poke bowl meal prep, but a big helping of cucumbers and carrots, too. Cucumbers have amazing nutritional value! With high anti-inflammatory, and anti-cancer benefits, cucumbers are known to aid high blood pressure, weight loss, and diabetes. Ever heard that old saying, “Carrots are good for the eyes”? Well, they are, but they also make for perfect skin, and a healthy heart and kidneys!

Reign in the summer with this cauliflower rice salmon poke bowl meal prep recipe! We recommend garnishing it with green onions and sprinkling with sesame seeds. For more delicious salmon ideas, check out our article, 35 Simple Salmon Meal Prep Recipes!

Cauliflower Rice Salmon Poke Bowl Meal Prep

Cauliflower Rice Salmon Poke Bowl Meal Prep

Whole30 Cauliflower Rice Salmon Poke Bowl Meal Prep

Keto Cauliflower Rice Salmon Poke Bowl Meal Prep

Cauliflower Rice Salmon Poke Bowl Meal Prep

Cauliflower Rice Salmon Poke Bowl Meal Prep

Poke bowl with wild salmon, crunchy raw veggies, and cauliflower rice.
Print Recipe Pin Recipe Rate Recipe
Prep Time: 20 minutes minutes
Total Time: 20 minutes minutes
Course: Lunch, Main Dish
Cuisine: Asian
Keyword: Meal Prep, Salmon
Servings: 4 meals
Calories: 334kcal
Author: Nick Quintero

Ingredients

  • 1 teaspoon avocado oil
  • 1 head cauliflower grated (can use one package of frozen riced cauliflower, if desired)
  • 16 ounces wild caught salmon
  • 2 Carrots shredded
  • 1 medium Avocado thinly sliced
  • 1 tbs rice vinegar
  • 1 green onion thinly sliced
  • Sesame Seeds for serving, optional
Get Recipe Ingredients

Instructions

  • Prepare cauliflower rice on the stovetop by cooking over medium heat in a bit of avocado oil for 8-10 minutes, until lightly browned and softened. Set aside.
  • Cube the raw salmon into small chunks and season with a bit of Himalayan sea salt and a splash of rice vinegar.
  • Wash clean and chop all the veggies and avocado.
  • To assemble, divide cauliflower rice between containers and top with sliced veggies, avocado, raw salmon, green onion, and a splash more of rice vinegar and white sesame seeds. Keeps in the fridge for 4 days.

Notes

WW Smart Points= Green:7  Blue:4  Purple:4
__
 
Nutrition for 1 out of 4 meals:
24g Protein | 16.1g Carb | 20g Fat | 7.2g Fiber | 334 Calories

Nutrition

Serving: 1meal | Calories: 334kcal | Carbohydrates: 16.1g | Protein: 24g | Fat: 20g | Fiber: 7.2g
Tried this recipe?Mention @mealpreponfleek or tag #mealpreponfleek!

Chicken Carnitas Nachos

March 11, 2024 by Nick Quintero 2 Comments

Chicken Carnitas Nachos

We're making chicken carnitas nachos healthy again! Our Chicken Carnitas Nachos lunch meal prep recipe is a unique and flavorful meal that can be enjoyed guilt-free. We made chicken carnitas nachos Whole30 compliant by swapping out tortilla chips for sweet potato chips. The creative replacement adds depth to the flavor profiles of this meal while making it nutritious.

Chicken Carnitas Nachos

This Whole30 compliant nacho recipe uses baked sweet potato chips instead of tortilla chips and instant pot carnitas-style chicken, for a protein-rich meal that satisfies!

How long will Chicken Carnitas Nachos last for?

Chicken carnitas will last for 3 to 5 days. To optimize the time of freshness, store chicken carnitas in a shallow airtight container or gallon bag. Be sure to let all of the air out of the bag before sealing and storing it in the refrigerator.

Can Chicken Carnitas Nachos be frozen?

Absolutely! You can freeze chicken carnitas for up to 3 months. The sweet potato chips can be frozen as well. Store them in a quart-sized freezer bag, letting out all the air before sealing and storing. This entire meal can be frozen, but we recommend making fresh pico de gallo.

Chicken Carnitas Nachos

Chicken Carnitas Nachos Ingredients:

For Carnitas

  • 1 ½ lb. boneless skinless chicken breast
  • 2 teaspoon ground cumin
  • ½ teaspoon chipotle powder or smoked paprika
  • ½ cup chicken stock
  • ½ teaspoon garlic powder
  • 1 teaspoon dried oregano
  • ½ teaspoon sea salt

And Pico De Gallo

  • 1 cup chopped tomato
  • ⅓ cup chopped red onion
  • ⅓ cup chopped cilantro
  • ¼ teaspoon sea salt

For Sweet Potato Chips

  • 1 lb. sweet potatoes, thinly sliced to ⅛ inch
  • ½ teaspoon sea salt
Chicken Carnitas Nachos

How do you make Chicken Carnitas Nachos?

Chicken Carnitas Nachos is a pretty simple lunch meal prep recipe that's done in an hour. The meal takes just 10 minutes to prep and your instant pot and oven do all of the work for you.

Take care of the easiest part first. Makes sense, right? Make your pico de gallo and separate it into 4 plastic sauce cups. Refrigerate the pico de gallo portions until the rest of your meal is ready. Next, preheat your oven to 400 degrees. Get your sliced sweet potato pieces and place them on the baking sheet. You'll need to make the chips in two batches and flip them halfway through baking.

Chicken Carnitas Nachos

While your sweet potato chips are baking, make the chicken carnitas. For the carnitas, grab your instant pot and carnitas ingredients. Combine the ingredients and put them in the instant pot. Lock the lid, close the pressure valve, and cook using the chicken setting for 15 minutes.

Once the instant pot timer goes off, let the pot depressurize. Then open the pressure valve and shred chicken with two forks. Transfer shredded chicken to the baking sheet and pour the remaining liquid from the pot onto your chicken carnitas. Lastly, boil the carnitas on the middle oven rack for 6-7 minutes until the chicken is crispy. We're so excited for you!

Chicken Carnitas Nachos

How to portion Chicken Carnitas Nachos?

Portioning is easy since you're doing it as you cook. Your pico de gallo is already divided into 4 plastic cups, right? So all you need now is 4 dual-compartment meal prep containers, sweet potato chips, and chicken carnitas. Place your chicken carnitas and pico de gallo in the bigger part of the container and the sweet potato chips in the smaller part. Cover, store, and enjoy for lunch!

More Carnitas meal prep recipes:

Did you enjoy this lunch meal prep recipe? Then try our Mushroom Carnitas Burrito Bowls and Slow Cooker Keto Pork Carnitas Bowls.

We also have 16 Keto Crock-Pot Recipes for Easy Low-Carb Meals.

Chicken Carnitas Nachos

Other tips for making Chicken Carnitas Nachos:

  • Make yourself extra chicken carnitas for a deliciously fun Taco Tuesday.
  • Use fresh lime juice in your carnitas for extra flavor. Also, try cilantro or ground coriander.
  • Taste your food as you go. Every good chef does!
  • Carnitas is a versatile dish. You can use chicken, pork, or go vegan. See our other carnitas meal prep recipes above.
  • Allow your shredded chicken to sit its juices for an additional 20-30 minutes for extra juicy chicken carnitas!
Chicken Carnitas Nachos

Chicken Carnitas Sweet Potato Nachos

This Whole30 compliant nacho recipe uses baked sweet potato chips instead of tortilla chips and instant pot carnitas-style chicken, for a protein-rich meal that satisfies!
Print Recipe Pin Recipe Rate Recipe
Prep Time: 10 minutes minutes
Cook Time: 51 minutes minutes
Total Time: 1 hour hour 1 minute minute
Course: dinner, Lunch, Main Course
Cuisine: Mexican
Diet: Gluten Free
Keyword: Chicken, gluten free, instant pot, low calorie, paleo, whole30
Servings: 4 meals
Calories: 325kcal
Author: Nick Quintero

Equipment

  • Instant Pot

Ingredients

For Carnitas

  • 1 ½ lbs. boneless skinless chicken breast
  • 2 teaspoon ground cumin
  • ½ teaspoon chipotle powder or smoked paprika
  • ½ cup chicken stock
  • ½ teaspoon garlic powder
  • 1 teaspoon dried oregano
  • ½ teaspoon sea salt

For Pico De Gallo

  • 1 cup chopped tomato
  • ⅓ cup chopped red onion
  • ⅓ cup chopped cilantro
  • ¼ teaspoon sea salt

For Sweet Potato Chips

  • 1 lb. sweet potatoes thinly sliced to ⅛ inch
  • ½ teaspoon sea salt
Get Recipe Ingredients

Instructions

  • Stir together ingredients for pico de gallo and divide between 4 small sauce cups. Refrigerate until assembling meal prep containers.
  • Preheat oven to 400ºF and place a wire cooling rack on top of a medium baking sheet. Working in two batches, spread sweet potato slices on the baking sheet and bake for 10 minutes. Carefully flip sweet potatoes and bake an additional 10-12 minutes, or until edges of sweet potatoes are curled. Repeat with remaining sweet potatoes. Sprinkle baked sweet potato chips with sea salt and transfer to the 1 cup compartments of 4 MPOF teal containers.
  • While sweet potato chips bake, combine ingredients for carnitas in an instant pot. Lock lid and close pressure valve. Press chicken setting for 15 minutes.
  • Once the timer goes off, allow the instant pot to depressurize and open the pressure valve.
  • Shred the chicken with 2 forks and transfer to a baking sheet. Pour liquid from the instant pot over shredded chicken and broil on center rack of the oven for 3 to 4 minutes to crisp chicken lightly.
  • Evenly divide carnitas between 4 large compartments of teal containers and place a cup for pico de gallo next to carnitas.

Notes

WW Smart Points= Green:6  Blue:3  Purple:0

Nutrition

Serving: 1meal | Calories: 325kcal | Carbohydrates: 29g | Protein: 40g | Fat: 5g | Saturated Fat: 1g | Polyunsaturated Fat: 1g | Monounsaturated Fat: 2g | Trans Fat: 0.02g | Cholesterol: 110mg | Sodium: 1122mg | Potassium: 1216mg | Fiber: 5g | Sugar: 7g | Vitamin A: 16395IU | Vitamin C: 12mg | Calcium: 85mg | Iron: 3mg
Tried this recipe?Mention @mealpreponfleek or tag #mealpreponfleek!

Balsamic Sausage and Veggie Meal Prep

July 7, 2019 by Nick Quintero Leave a Comment

Balsamic Sausage and Veggie Meal Prep

Balsamic Sausage and Veggie Meal Prep

Balsamic Sausage and Veggie Meal Prep

Ah, summertime. The time for friends, family, and perfect weather. The days are longer and the nights are shorter. Because nights are shorter, dinnertime can feel rushed or overlooked. The idea of getting takeout or grilling sounds better, right? So if you're looking for a quick and delicious meal to share with friends and family, we've got an Italian Balsamic Sausage and Veggie dish that can be enjoyed in many ways!

Balsamic Sausage and Veggie Meal Prep

Our Balsamic Sausage and Veggies recipe is an easy sheet pan recipe that is ready to enjoy in an hour. It's also nutritious and filling for being a simple sausage and veggies recipe. This sausage and veggie meal prep recipe is also ideal for lunch as an earthy, flavorful pick-me-up. The roasted vegetables are seasoned with garlic, parsley, basil, pepper, lemon, and a balsamic glaze. Classic Italian seasonings that never disappoint! Other than the taste, we appreciate that Balsamic Sausage and Veggies is a versatile meal. You can pair it with pasta, make it into a salad, or eat it alone. You can even swap out the sausage with a vegan substitute. Oh, how we love a savory and easy sheet pan recipe!

Balsamic Sausage and Veggie Meal Prep Ingredients:

  • 4 Fully Cooked Italian Sausages (cut at an angle into ¾” thick slices) (use whole30 compliant, if needed)
  • 3 Medium Zucchinis (sliced into ¾” thick semi-circles)
  • 3 Medium Yellow Summer Squash (sliced into ¾” thick semi-circles)
  • 3 Roma Tomatoes (quartered)

Marinade:

  • ¼ C. Avocado Oil
  • 3 Garlic Cloves (minced or grated)
  • 5 Tbsp. Balsamic Glaze
  • 2.5 Tbsp. Italian Seasoning
  • 1 Tbsp. Fresh Italian/Flat leaf Parsley (roughly chopped)
  • 1 Tbsp. Fresh Basil (roughly chopped)
  • ¼ tsp. Pink Himalayan Salt
  • ¼ tsp. Ground Black Pepper
  • Juice of 1 Lemon
Balsamic Sausage and Veggie Meal Prep

How long will Balsamic Sausage and Veggies last for?

This meal will last for up to 4 days when kept in the refrigerator. For optimal freshness, keep leftover sausage and veggies in a shallow airtight container. 

Can Balsamic Sausage and Veggies be frozen?

Yes, it can. When you're ready to freeze sausage and veggies leftovers, put it in a resealable freezer bag (don't forget to label the bag first). Be sure to remove excess air from the bag before sealing. Balsamic Sausage and Veggies can last for six months in the freezer, but thaw and enjoy sooner if you can. Frozen sausage and veggies will lose their flavor after 3 months. 

How do you make Balsamic Sausage and Veggies?

It's an easy sheet pan recipe, so pretty much gather all of your ingredients, put the prepped food on a lined sheet pan, and cook it in a preheated oven. For starters, preheat the oven to 420 degrees. While the oven is preheating, make your balsamic marinade. Then add the sausage and veggies, making sure they're fully coated in the marinade. Once the oven is heated and food is prepped, place your sausage and veggies on a foil-lined sheet pan. Let the recipe cook on the middle rack for 15 minutes. You'll know it's done when the veggies are tender and the sausage is seared. 

Balsamic Sausage and Veggie Meal Prep

How to portion this meal prep recipe:

Once your meal is cooked, place sausage on top of the vegetables. You want to have more veggies than sausage. This easy sheet pan recipe yields four servings. When you're ready to store and save additional meals, divvy up the sausage and veggies. You can store in a one-compartment meal prep container or a two-compartment container if you want the sausage and vegetables separate. If you opt for the two-compartment container, put the sausage in the smaller slot. 

More Sausage meal prep recipes:

MPOFers, would like more sausage? Then check out these other sausage and vegetable meal prep recipes: 

Vegetarian Italian Sausage Egg Cups

Fall Harvest Sausage Salad

Caprese Pesto Sausage Pasta

Chicken Apple Sausage and Veggies

Beef Breakfast Sausage Egg Cups

Italian Sausage Pasta Salad Meal Prep

Loaded Sausage and Bacon Breakfast Casserole

Sweet 'N Spicy Jalapeno Sausage Fried Rice

Sheet Pan Meal Prep Breakfast – French Toast Sticks & Sausage

Sausage and Mashed Potato Meal Prep

Sheet Pan Marmalade Sausage Meal Prep

Sausage, Kale & Pomegranate Hash Meal Prep

One Pan Roasted Brussels Sprouts, Grape and Sausage Meal Prep

Keto Bacon Sausage Meatballs

One Pan Whole30 Sausage and Veggie Meal Prep

Balsamic Sausage and Veggie Meal Prep

Other tips for making Balsamic Sausage and Veggies:

  • Get creative! Use different sausages. You can use vegan sausage, turkey sausage, chicken sausage, and others. 
  • For best sheet pan cooking results, keep your sausage and vegetable cuts thick enough to enjoy but thin enough to cook thoroughly. Cuts should be no more than 1" thick and cut the sausage into angle slices. 
  • Spread out sausage and vegetables for even cooking. 
  • The better the sheet pan, the better the sheet pan recipes come out! Here's an affordable, high-quality sheet pan if you're looking. 
Meal Prep on Fleek x GoodCook recommended Meal Prep Containers
Balsamic Sausage and Veggie Meal Prep

Balsamic Sausage and Veggie Meal Prep

You’re sure to have this Balsamic Sausage and Veggies Meal Prep recipe on repeat thanks to the delicious combo of Italian sausage and veggies in a simply made marinade! As a bonus, it’s also SO simple to make!
Print Recipe Pin Recipe Rate Recipe
Prep Time: 45 minutes minutes
Cook Time: 15 minutes minutes
Total Time: 1 hour hour
Course: Lunch, Main Dish
Cuisine: American
Keyword: Meal Prep, Sausage
Servings: 4 meals
Calories: 449kcal
Author: Nick Quintero

Ingredients

Base

  • 4 fully cooked Italians Sausages cut on an angle into ¾" slices
  • 3 medium zucchini cut into ¾" semi-circles
  • 3 medium yellow summer squash cut into ¾" semi-circles
  • 3 medium Roma Tomaotes quartered

Marinade

  • ¼ cup avocado oil
  • 3 cloves garlic minced
  • 1.5 tablespoon balsamic glaze use regular balsamic for whole30
  • 1 ¼ tablespoon Dried Italian Seasoning
  • 1 tablespoon fresh Italian parsley
  • 1 tablespoon fresh basil roughly chopped
  • ¼ teaspoon Salt
  • ¼ teaspoon black pepper
  • 1 Lemon juiced
Get Recipe Ingredients

Instructions

  • Preheat oven to 420℉ and line a large baking sheet with foil.
  • In a medium bowl, whisk together marinade ingredients until well-combined.
  • Next, toss sausage slices and cut veggies in the marinade until coated. Cover bowl, place in the fridge for ~30 minutes to marinate.
  • Spread marinaded sausage, veggies, and marinade onto a foil lined baking sheet (spreading everything in an even layer, avoid overcrowding).
  • Bake on middle rack for 15 minutes (flipping sausage slices half way through cooking), or until veggies are tender, yet firm, and sausage is seared.
  • Serve, store, and enjoy!

Notes

Nutrition for 1 out of 4 servings:
19.5g Protein | 15.2g Carbs | 36.6g Fat | 2.8g Fiber | 449 Calories
 

Nutrition

Serving: 1meal | Calories: 449kcal | Carbohydrates: 15.2g | Protein: 19.5g | Fat: 36.6g | Fiber: 2.8g
Tried this recipe?Mention @mealpreponfleek or tag #mealpreponfleek!

Cremini Mushroom Meatloaf

September 26, 2019 by Nick Quintero 1 Comment

Are you ready for some comfort food people? Our oven-baked cremini mushroom meatloaf dinner aims only to satisfy. A healthy combination of: 

  • minced cremini mushrooms, 
  • fresh and dried seasoning, 
  • almond flour and 
  • tomato sauce 

And voila a delicious masterpiece is created. The accompanying sides add a paleo twist with mashed cauliflower which is rich in vitamin C. Plus, our sauteed broccoli provides the healthy whole30 component. As the icing on top, in an hour and 15 minutes, you can have your cremini mushroom meatloaf and its side servings. Let’s get started!

Cremini Mushroom Meatloaf

Nothing says comfort food like an oven-baked meatloaf and mashed potatoes. This Paleo version ditches the potatoes for vitamin-c rich herbed mashed cauliflower for a stick to your ribs dinner that satisfies! 

Cremini Mushroom Meatloaf

Health Benefits Of Cremini Mushrooms

Want to know what’s so special about cremini mushrooms? Listen up cause they:

  • Are a good source of vitamins and minerals which fight chronic diseases.
  • Decrease the body’s ability to produce blood vessels which fuel the growth of cancerous tumors.
  • Help to boost the immune system to reduce fatigue and muscle weakness.
  • Act as fuel for the brain to reduce brain fog and prevent symptoms which contributes to decision fatigue.


Nutrition Facts For Cremini Mushrooms 

Nutritional facts which may surprise you about these tasty mushrooms are:

  • Rich in potassium, pantothenic acid, and potassium.
  • Contain additional minerals such as copper, selenium, thiamine, zinc, and niacin.
  • Low in calories.
  • Rich in protein and carbohydrates.
  • A source of vitamin D and vitamin B6.

Why You Should Eat More Cremini Mushrooms

Have a look at a few other reasons why you should consider increasing your intake of these healthy mushrooms:

  • Protects from gut-related ailments such as leaky gut syndrome
  • Reduces inflammation
  • Prevents oxidative injury
  • Restores one of the body’s most abundant minerals - potassium!
Cremini Mushroom Meatloaf

Versatility Of Cremini Mushrooms In Recipes

Our recipe calls for the cremini mushrooms to be sauteed with onions, garlic, with olive oil in a skillet. Then this flavorful sauteed mixture is then added to lean ground beef, egg, flour, and additional seasonings to create our meatloaf delight. As an added benefit our meal prep containers have the ideal compartment divisions to enhance the visual appeal of your meal. Awesome, right!

However, these ‘Royal Trumpet’ as they are sometimes called, are rather versatile. They may be:

  • Baked
  • Grilled
  • Sauteed
  • Used raw in salads
  • Dried and ground into a powder to be used in a variety of recipes
Cremini Mushroom Meatloaf
Meal Prep Containers by Meal Prep on Fleek x Goodcook

How Cremini Mushrooms Add Flavor To A Recipe 

These mushrooms have a mild earthy taste which is rich and excites the taste buds! Yummy!

Why Cremini Mushrooms Are A Good Swap For Meat

These mushrooms are a great boost in assisting those who wish to transition to vegan living. When you love meat, it’s a natural desire, at first, to indulge in the occasional meaty experience. Well, cremini mushrooms provide that meaty texture and are often referred to as the ‘poor man’s steak’. How about that nickname to just make using it as a meat option a perfect fit.

Why not indulge in this mushroom substitute which provides the flavor of meat, you love, but with a healthier combination of minerals and vitamins? Eat your way to health and create your cremini mushroom meatloaf, today!

And yes, MPOF has a few other mushroom recipes available for you to experiment with as you adopt a healthy lifestyle. Check out this amazing breakfast mushroom recipe! What’s your take on cremini mushrooms? We’d love to know.

Cremini Mushroom Meatloaf

Cremini Mushroom Meatloaf Ingredients:

For Meatloaf 

  • 1 lb. 85% lean ground beef
  • 1 large egg 
  • ½ cup minced white onion 
  • 1 cup minced cremini mushrooms
  • ½ teaspoon minced garlic 
  • 1 teaspoon dried oregano 
  • ½ cup blanched almond flour 
  • 1 teaspoon dried basil 
  • ½ teaspoon sea salt 
  • ¼ teaspoon black pepper 
  • 1 cup tomato sauce 

For Cauliflower Mashed Potatoes 

  • 6 cups cauliflower florets 
  • 2 tablespoon melted ghee 
  • 1 teaspoon minced garlic 
  • 1 teaspoon dried chives 
  • ¼ teaspoon sea salt 

For Baby Broccoli

  • 10 oz. baby broccoli, trimmed 
  • 1 tablespoon ghee
  • sea salt and pepper to taste 
Cremini Mushroom Meatloaf

Cremini Mushroom Meatloaf

Nothing says comfort food like an oven-baked meatloaf and mashed potatoes. This Paleo version ditches the potatoes for vitamin-c rich herbed mashed cauliflower for a stick to your ribs dinner that satisfies!
Print Recipe Pin Recipe Rate Recipe
Prep Time: 15 minutes minutes
25 minutes minutes
Total Time: 1 hour hour 15 minutes minutes
Course: dinner, Lunch, Main Dish
Cuisine: American
Keyword: gluten free, paleo, whole30
Servings: 4 meals
Calories: 554kcal
Author: Nick Quintero

Ingredients

For Meatloaf

  • 1 lb. 85% lean ground beef
  • 1 large egg
  • 1 cup minced cremini mushrooms
  • ½ cup minced white onion
  • ½ teaspoon minced garlic
  • ½ cup blanched almond flour
  • 1 teaspoon dried oregano
  • 1 teaspoon dried basil
  • ½ teaspoon sea salt
  • ¼ teaspoon black pepper
  • 1 cup tomato sauce

For Cauliflower Mashed Potatoes

  • 6 cups cauliflower florets
  • 2 tablespoon melted ghee
  • 1 teaspoon minced garlic
  • 1 teaspoon dried chives
  • ¼ teaspoon sea salt

For Baby Broccoli

  • 10 oz. baby broccoli trimmed
  • 1 tablespoon ghee
  • sea salt and pepper to taste
Get Recipe Ingredients

Instructions

  • Heat oven to 400ºF and line a medium baking sheet with parchment paper. Heat olive oil over medium heat in a medium skillet and add onions. Sauté for 5 minutes. Stir in garlic and mushrooms, sauté 5 minutes longer. Cool 5 minutes.
  • Combine ground beef, mushroom mixture, egg, almond flour, oregano, basil, sea salt and pepper in a medium mixing bowl and use hands to thoroughly combine. Form mixture into an oval loaf shape on the prepared baking sheet. Brush with ¼ cup tomato sauce and bake for 50 minutes.
  • While meatloaf bakes, boil cauliflower florets in 4 cups of water until fork-tender, about 15 minutes. Drain cauliflower and transfer to the food processor along with ghee, chives, garlic, and sea salt. Blend until smooth.
  • Heat ghee over medium heat in a medium skillet for 2 minutes. Add broccoli and sauté for 6 minutes, turning once.
  • Cool meatloaf at room temperature for 5 minutes before slicing. Serve alongside mashed cauliflower and broccoli with extra tomato sauce.

Video

Nutrition

Serving: 1g | Calories: 554kcal | Carbohydrates: 23.8g | Protein: 31.5g | Fat: 37.1g
Tried this recipe?Mention @mealpreponfleek or tag #mealpreponfleek!

Greek Meatballs

February 2, 2020 by Nick Quintero Leave a Comment

Greek Meatballs

Homemade Traditional Greek Meatballs

Greek food is known for its fresh, zesty, and savory meal flavorings. It's one of our favorite cuisines for that reason! Mediterranean dishes are nutritious and give us a break from common cuisine with its worldly flavor infusions. 

The most popular Greek dishes are gyros, kabobs, baklava, and Greek salad. Entrees are usually meats paired with rice, pita bread, and a side salad. Since we appreciate the balanced simplicity of traditional Greek meals, we decided to share our Greek meatballs meal prep recipe with you today. 


Greek Meatballs

These herb-filled meatballs are an exotic spin on classic meatballs with robust herbs like dill, mint, and oregano. Served alongside tangy lemon rice and fresh tomato, cucumber, and olive salad, it’s like a trip to the Greek islands without leaving your house!  


How long will Greek Meatballs last for?

Greek meatballs will last for 3 to 4 days in the refrigerator when properly stored. The entree (Greek meatballs with rice and salad) will last for four days. A fresh salad will last 3 days. To avoid soggy salad and still save time, chop and store salad vegetables separately in produce saver containers. When you're ready to go, toss the salad ingredients together and add the salad to your meal. 

Can Greek Meatballs be frozen?

Yes, you can freeze Greek meatballs. Store them in containers, freezer wrap, or heavy-duty freezer bags. Greek meatballs can be frozen for up to 4 months. You can even freeze the rice with the meatballs, but be sure to do that as soon as the rice is cooked. Label and store Greek meatballs by themselves or the meal prep recipe (we don't recommend freezing the salad).


Greek Meatballs

Greek Meatballs Ingredients: 

For Meatballs  

  • 1 lb. 96% lean ground beef  
  • 2 large eggs  
  • 1 cup gluten-free breadcrumbs  
  • 2 tablespoon chopped dill 
  • 1 tablespoon chopped fresh mint  
  • 1 teaspoon dried oregano  
  • ½ teaspoon garlic powder  
  • ¼ cup finely crumbled feta cheese  
  • ½ teaspoon sea salt  
  • ¼ teaspoon cracked black pepper  
  • 2 teaspoon olive oil for cooking  


Greek Cucumber Salad 

  • 2 cups chopped cucumber 
  • 1 cup grape tomatoes, halved 
  • ⅓ cup pitted kalamata olives, chopped  
  • ¼ cup thinly sliced red onion  
  • 1 tablespoon red wine vinegar 
  • 1 teaspoon olive oil 
  • 1 teaspoon dried oregano  
  • ¼ teaspoon sea salt  
  • ⅛ teaspoon cracked black pepper  


For Lemon Rice 

  • 1 cup dry basmati rice  
  • 2 cups chicken stock  
  • 1 tablespoon olive oil  
  • 1 tablespoon lemon zest  
  • 3 tablespoon lemon juice  
  • ¼ cup chopped parsley  
  • 1 teaspoon dried basil  
  • 1 teaspoon sea salt  
  • ⅛ teaspoon cracked black pepper  

Greek Meatballs

Greek Meatballs


How do you make Greek Meatballs?

It's super easy! The entire Greek Meatballs meal prep recipe is ready in under an hour. 

Start by making your salad. Put the salad in a medium bowl with lid and store in the fridge while you make the rest of the meal. Once the salad is done, make the rice. Heat your chicken stock over medium heat, bringing it to a slight boil. Then add dry rice and cook for 15 minutes. 

As the rice cooks, gather your meatball ingredients and mix them into a medium bowl. Form 12 meatballs. At this point, check on your rice. It should be almost done. Wash your hands, then add the zesty flavors to the rice once it's done. Cover cooked rice for warmth and set it aside. 

Now for the fun part - the Greek meatballs! If you already formed your meatballs, it's time to cook them. If not, then that's alright. You can prep the meatballs as the rice cooks or wait until the rice is done. Either way, heat 1 teaspoon (tsp) of olive oil in a skillet over medium heat for one minute. Put half of your meatballs into the skillet. Cook for a total of 4 minutes, flipping the meatballs after 2 minutes for browning. When the four minutes are up, cover the meatballs with a lid and let them cook thoroughly for 10-12 minutes. When the first batch is done, repeat the process for the second batch. 

And that's it! A complete Greek meal in less than an hour. Opa!


Greek Meatballs


How to portion Greek Meatballs?

Line up four two-compartment meal prep containers. Divide rice evenly between them (about 1 cup per container). The rice goes into the bigger compartment and the salad goes into the smaller one. Add 3 meatballs to the rice with a lemon slice and you're ready to go!


Greek Meatballs


More Meatballs meal prep recipes:

Who doesn't love a good meatball? They're delicious, easy, and fun to make! Here are some more meatballs recipes to hit a home run with: 

Honey Garlic Mushroom Meatballs

Molasses Bourbon BBQ Glazed Chicken Meatballs

One Skillet Spaghetti Squash & Meatballs

Mozzarella Stuffed Meatballs

Eggplant Meatballs and Zoodle Meal Prep

Cranberry BBQ Vegan Meatballs

Cheesy Keto Chicken Meatballs

Keto Bacon Sausage Meatballs

Carrot Meatballs With Mint Cauliflower Rice

20 Minute Paleo Thai Almond Butter Turkey Meatballs


Other tips for making Greek Meatballs:

This meal prep recipe is pretty easy. But there are some important things to note about the star of the show - the meatballs. 

  • Start here: The Ultimate Guide To Meatballs Recipes. We wrote this especially for you, meatball lover!

  • Use high-quality, fresh ground meat. 

  • If these meatballs are too lean for you, you can mix lean meat with fattier meat. The fat gives your meatballs moisture and flavor. 

  • Mix ingredients with clean hands or a wooden spoon. Mix everything together until it looks cohesive. Keep from over-mixing or you will mess up the texture. 

  • When rolling the meatballs, put a little olive oil on your hands so the crumbs don't stick to you. Roll them lightly. Keep from rolling firm meatballs so they can cook thoroughly and absorb all of the combined delicious flavors! 

  • Don't skip browning! The 4-minute cook time, in the beginning, is for searing. Start cooking for two minutes, flip, then cover and finish cooking. 

  • Add tzatziki sauce for added Greek authenticity! 


Greek Meatballs

Greek Meatballs

Greek Meatballs

These herb-filled meatballs are an exotic spin on classic meatballs with robust herbs like dill, mint, and oregano. Served alongside tangy lemon rice and fresh tomato, cucumber, and olive salad, it’s like a trip to the Greek islands without leaving your house!
Print Recipe Pin Recipe Rate Recipe
Prep Time: 15 minutes minutes
Cook Time: 32 minutes minutes
Total Time: 47 minutes minutes
Course: dinner, Lunch, Main Dish
Cuisine: Greek, Mediterranean
Keyword: Beef, dinner, gluten free, lunch, Meal Prep, Meatballs
Servings: 4 meals
Calories: 604kcal
Author: Nick Quintero

Ingredients

For Meatballs

  • 1 lb. 96% lean ground beef
  • 2 large eggs
  • 1 cup gluten-free breadcrumbs
  • 2 tablespoon chopped dill
  • 1 tablespoon chopped fresh mint
  • 1 teaspoon dried oregano
  • ½ teaspoon garlic powder
  • ¼ cup finely crumbled feta cheese
  • ½ teaspoon sea salt
  • ¼ teaspoon cracked black pepper
  • 2 teaspoon olive oil for cooking

Greek Cucumber Salad

  • 2 cups chopped cucumber
  • 1 cup grape tomatoes halved
  • ⅓ cup pitted kalamata olives chopped
  • ¼ cup thinly sliced red onion
  • 1 tablespoon red wine vinegar
  • 1 teaspoon olive oil
  • 1 teaspoon dried oregano
  • ¼ teaspoon sea salt
  • ⅛ teaspoon cracked black pepper

For Lemon Rice

  • 1 cup dry basmati rice
  • 2 cups chicken stock
  • 1 tablespoon olive oil
  • 1 tablespoon lemon zest
  • 3 tablespoon lemon juice
  • ¼ cup chopped parsley
  • 1 teaspoon dried basil
  • 1 teaspoon sea salt
  • ⅛ teaspoon cracked black pepper
Get Recipe Ingredients

Instructions

  • Stir together ingredients for Greek salad in a medium mixing bowl. Cover and refrigerate while preparing other recipes.
  • Heat chicken stock in a medium saucepan over medium heat until boiling. Add rice and cook until Fully cooked, about 15 minutes. Turn heat off and stir in remaining ingredients. Cover with lid to keep warm.
  • While rice is cooking, combine ingredients for meatballs in a medium mixing bowl and thoroughly mix with clean hands. Form mixture into 12 meatballs. Heat 1 teaspoon of olive oil over medium heat in a skillet for 1 minute. Add 5-6 meatballs and cook for 4 minutes, turning after 2 minutes for even browning. Reduce heat to medium-low, cover with lid and cook for 10-12 minutes longer to cook meatballs through. Transfer to a bowl and cover to keep warm. Add another teaspoon of olive oil to pan and repeat with remaining meatballs.
  • Divide lemon rice between large compartment of 4 MPOF teal containers and place 3 meatballs on top. Divide Greek salad between 4 small compartments.

Video

Notes

WW Smart Points= Green:14  Blue:13  Purple:13

Nutrition

Calories: 604kcal | Carbohydrates: 63.8g | Protein: 39.8g | Fat: 21.1g | Fiber: 3.5g
Tried this recipe?Mention @mealpreponfleek or tag #mealpreponfleek!


15 Unique Salad Meal Prep Recipes

April 19, 2023 by Nick Quintero Leave a Comment

Salad meal prep takes the time and effort out of putting a salad together. Oh, you'll be so stoked to have these healthy meal preps ready for lunch or dinner!

Luckily for meal prepping, there are countless combinations of vegetables, fruits, pasta, meats, and more that can be considered a salad. It can be a bit overwhelming, and that's kind of why people often get into a rut with salad, or sometimes skip it altogether.

Why Salad Meal Preps?

Salad can be a surprisingly creative, fun, and versatile meal prep, once you've become aware of a few things. First, when comes to keeping salad fresh for a few days, it can be tricky by not impossible because leafy greens are delicate. Sometimes we like to store them separately from the rest of the salad until you're ready to eat. Adding dressing too soon makes things soggy, so we like to toss things before serving if possible. But caveats aside, salad meal preps are great for lunch or dinner. We've put together our favorite tasty 15 recipes for your salad meal prepping needs!

Chicken Quinoa Salad 

This salad is a crowd favorite that mixes delicious fruit, healthy quinoa, protein-packed chicken, and plenty of crunch and zest.

(Carbs: 32g - Protein: 64g - Fat: 7g) 

Mediterranean Roasted Eggplant Salad

Roasted eggplant is a Mediterranean and Middle Eastern favorite, especially if you can get it slightly smoked. You'll need slices of pita to soak up the dressing from this delicious salad.

(Carbs: 63g - Protein: 11g - Fat: 20g) 

Kale Steak Power Salad

This salad is perfect for lunch or dinner, with its mix of vegetables, roasted Brussels sprouts, and cheese—not to mention steak! Once you assemble this, you'll see why it's so good.

(Carbs: 33g - Protein: 48g - Fat: 39g) 

Greek Arugula Power Salad

This veggie-heavy salad prep is healthy, energizing, and boosts your day. Chicken and white beans make it high in protein.

(Carbs: 53g - Protein: 33g - Fat: 20g) 

Fall Harvest Power Salad

We love mixing nuts and chicken in a nice salad, and this one is out-of-this-world delicious, with flavorful butternut squash and almonds.

(Carbs: 45g - Protein: 29g - Fat: 25g) 

Chicken BLT Pasta Salad

When you are craving a Bacon-Lettuce-Tomato (BLT) in salad form, look no further than this modern take on a classic sandwich. Trust us. It's hard to resist the creamy dressing, salty bacon, and bright, juicy, bites of tomato.

(Carbs: 52g - Protein: 31g - Fat: 11g) 

Fall Harvest Sausage Salad

Get your macros with this amazingly simple sausage salad! With a balance of leafy greens, sausage, nuts, cheese, and dressing, you'll want to bring this salad meal prep into the rotation.

(Carbs: 47g - Protein: 27g - Fat: 29g) 

Italian Sausage Pasta Salad

Look at this salad. It's a complete meal in one bowl, with sausage, pasta, veggies, and cheese.

(Carbs: 39g - Protein: 37g - Fat: 31g) 

Middle Eastern Breakfast Salad

It may say "breakfast," but go ahead. Eat this for lunch and dinner, as well! Also, you'll love the dash of smoked paprika on top.

(Carbs: 32g - Protein: 10g - Fat: 12g) 

Vegetarian Cobb Salad

This Cobb salad is for vegetarians and anyone in the mood for a delicious salad! With loads of tasty flavors from vegetables, eggs, and avocado, this meal can suit the whole family.

(Carbs: 23g - Protein: 10g - Fat: 31g) 

Salmon Cobb Salad

Mix things up with this salmon Cobb salad! You've been wanting to eat more fish throughout the week. Plus, this salad brings additional protein and healthy fats.

(Carbs: 12g - Protein: 25g - Fat: 30g) 

Summer Breakfast Salad

Breakfast salads are becoming the big thing in today's culinary world, adding much-needed greens and nutrients in a tasty way.

(Carbs: 26g - Protein: 22g - Fat: 46g) 

Vegan Chopped Chickpea Greek Salad

Bright, colorful, flavorful, and healthy, this chickpea Greek salad is a perfect dish to switch things up with instead of that tired, boring, iceberg salad you've been eating.

(Carbs: 62g - Protein: 16g - Fat: 27g) 

Gluten Free Caesar Pasta Salad

Invented in Tijuana, Mexico, in the 1920s, the Caesar salad is still one of the most iconic salads around. This gluten-free version makes it a tasty salad even more people can enjoy!

(Carbs: 43g - Protein: 20g - Fat: 21g)

Maple Roasted Kabocha Squash & Quinoa Salad

Quinoa and kabocha squash make this salad extremely flavorful, along with cilantro and pomegranate. This is a must-try salad that is great for meal prepping. It's also a good side dish.

(Carbs: 49g - Protein: 5g - Fat: 8g)

Rotisserie Chicken Salad Recipe

Bacon Ranch Chicken and Veggies Foil Packets

September 11, 2022 by Nick Quintero 2 Comments

Chicken Bacon Ranch Foil Packets

Fun and Easy Foil Pack Dinner Idea

Winner, winner chicken dinner! This bacon ranch chicken foil pack turn into an eye-catching main dish with a special ingredient that is sure to add a smile to everyone's face - BACON! Bacon is a staple food in most American diets. It is mainly enjoyed in the morning for breakfast, but bacon can also be enjoyed during lunch or dinner. Today, we're going to show you how! 

At MPOF, we love offering simple ways to eat healthy without sacrificing flavor. This low-carb and gluten-free bacon ranch chicken meal is a delicious start! The meal prep time is only 15 minutes but you end up with four separate meals. Each serving has 25 grams of protein and only 6 grams of carbohydrates. 

Our Bacon Ranch Chicken and Veggies recipe are a gluten-free, low-carb, and high-protein recipe. Not to mention it is colorful and smells divine! Your family will want to devour it in minutes. We bet you’re hungry now, so let’s get right into the recipe! 

BONUS: Here is a recipe to make your own, Homemade Ranch Dressing

Bacon Ranch Chicken and Veggies Foil Packets

This Bacon Ranch Chicken and Veggie Foil Packets recipe come together in no time at all and packs in the flavor with a healthy dose of veggies to boot!

Chicken Bacon Ranch Meal Prep Idea

How long will Chicken Foil Packets last?

Although the star of the dish is bacon, it is a chicken dish. Chicken can last in the refrigerator for 3-4 days. Up to four days of storage is okay for this dish since you will have four prepped meals. 

Can Chicken Foil Packets be frozen?

The ingredients for this meal prep recipe are meant to be cooked all together. This yields a simple 4 portions so it can be used up in less than a week depending on the size of your family. The goal of our meal prep recipes is to make your life easier. We recommend that you avoid freezing this particular meal prep recipe.

If you’re looking for freezable chicken recipes, try our hearty & belly-warming chicken soups and stews. 

Chicken Bacon and Veggies Ingredients

How do you make Dinner Foil Packets? 

Wash and chop the veggies. Toss them in some olive oil, salt, and some black pepper. Once all the ingredients are prepped, place everything into foil packets. Ensure the packets are sealed before transferring them onto the baking sheet. Bake at 375 degrees to 30 to 35 minutes. 

How do you portion Chicken Foil Packets?

Our favorite part about this bacon meal prep idea is that it portions itself! All you have to do is prepare the meal and place it in the separate aluminum foil packets (thus, the recipe name). After baking and cooling, voila! You have four portioned out high-protein meals. Easy, right?

If this meal prep idea is for dinner when returning home from a busy day, then store in a one-compartment glass container. Glass can go into the oven for reheating. We highly recommend this or similar glass meal prep containers. 

Bacon Ranch Chicken and Veggies Foil Packets

More Chicken Bacon Ranch Recipes?

Oh yes, of course! We love this combination so much and figure you do too. These healthy, delicious, and simple meal prep ideas are totally gluten-free. Here are more Chicken Bacon Ranch meal prep recipes: 

  • Whole30 Chicken Bacon Ranch Meal Prep

  • Chicken Bacon Ranch Meal Prep

This recipe features only bacon. We all love bacon 🙂 

  • Bacon-Wrapped Potato Wedges

Bacon Ranch Chicken and Veggies Meal Prep Idea
Meal Prep on Fleek Recommended Meal Prep Containers

Other tips for making Bacon Ranch Chicken and Veggies Foil Packets?

  1. Meal prep containers for storage and heating  - If our Bacon Ranch Chicken and Veggies Foil Packets meal are for lunch on the go, then store in a plastic container. Plastic containers are light and convenient. When taking this dish with you, use a single or dual-compartment meal prep container. 
  2. Use a variety of cheeses and sides - Our Bacon Ranch Chicken and Veggies recipe calls for shredded cheddar cheese. But we like to make healthy eating and meal prepping fun & adventurous! You can substitute cheddar cheese for: 
    1. Mozzarella
    2. American
    3. Monterey Jack
    4. Gouda - if you’re feeling fancy. 

This is such a beautiful and abundant main dish, but we don’t mind a little something extra on the side. The sides should be light and flavorful that compliment the dish. Something like:

  • Sweet potatoes wedges with tahini  
  • Roasted kabocha squash quinoa salad 
  • Vegetarian Cobb salad meal prep 

If you want to keep it simple, serve this Bacon Ranch Chicken and Veggies on a bed of spinach. 

Chicken Bacon Ranch Foil Packs

Bacon Ranch Chicken and Veggies Foil Packets Ingredients:

  • 1 Lb. Chicken Breast (boneless; skinless), cut into 1” pieces
  • 4 Bacon Strips
  • ¾ of 1 Packet Ranch Dressing Powder Mix
  • 2 C. Fresh Cauliflower Florets
  • 2 C. Fresh Broccoli Florets
  • ¾ C. Shredded Cheddar Cheese
  • 2 Tbsp. Extra Virgin Olive Oil (divided in half)
  • ½ tsp. Ground Black Pepper
  • ¼ tsp. Himalayan Pink Salt
  • 2 Cups Fresh Spinach
  • 2 ears corn on the cob, halved
Bacon Ranch Chicken and Veggies Foil Packets

Bacon Ranch Chicken and Veggies Foil Packets

This Bacon Ranch Chicken and Veggie Foil Packets recipe comes together in no time at all and packs in the flavor with a healthy dose of veggies to boot!
Print Recipe Pin Recipe Rate Recipe
Prep Time: 15 minutes minutes
Cook Time: 30 minutes minutes
Total Time: 40 minutes minutes
Course: dinner, Lunch, Main Course
Cuisine: American
Keyword: Bacon, Chicken, Meal Prep
Servings: 4 meals
Calories: 484kcal
Author: Nick Quintero

Ingredients

  • 1 Lb. Chicken Breast boneless; skinless, cut into 1” pieces
  • 4 Bacon Strips
  • ¾ of 1 Packet Ranch Dressing Powder Mix
  • 2 Fresh Cauliflower Florets
  • 2 Fresh Broccoli Florets
  • ¾ Shredded Cheddar Cheese
  • 2 Tbsp. Extra Virgin Olive Oil divided in half
  • ½ tsp. Ground Black Pepper
  • ¼ tsp. Himalayan Pink Salt
  • 2 Cups Fresh Spinach
  • 2 ears corn on the cob halved
Get Recipe Ingredients

Instructions

  • Preheat oven to 375℉ and cut 4 sheets of foil that are ~6”-8” wide — set aside.
  • Place bacon strips on a foil-lined baking sheet — bake until crispy, then remove from oven.
  • While the bacon crisps up, prepare the veggies by tossing cauliflower and broccoli in 1 tablespoon of extra virgin olive oil, salt, and pepper until coated. Place an equal amount of veggies onto each pre-cut foil sheet. Set aside.
  • Next, toss chicken breast in remaining 1 tablespoon of olive oil until coated. Then, add ranch dressing powder mix and toss until chicken is coated. Place an equal amount of chicken on top of the veggies.
  • Top with cheddar cheese and tear up or cut up bacon strips (roughly one strip per foil packet and sprinkle on top.
  • Pull up foil edges and pinch/roll together edges to make a seal for the packet. Place sealed foil packets onto a baking sheet, on middle oven rack. Bake for 30—35 minutes, or until chicken has reached an internal temperature of 165℉ and is cooked through. Be careful as you unwrap finished foil packets as there will be lots of steam! **Alternatively: Place foil packets on a grill heated to medium/high and let cook for 20-25 minutes, or until chicken has cooked through (internal temperature 165℉). Again, be careful as you unwrap finished foil packets as there will be lots of steam!
  • Serve with optional sides, store, and enjoy!

Nutrition

Serving: 1meal | Calories: 484kcal | Carbohydrates: 22.3g | Protein: 49g | Fat: 26.6g | Fiber: 4.3g
Tried this recipe?Mention @mealpreponfleek or tag #mealpreponfleek!

Instant Pot Beef Barbacoa 

April 17, 2020 by Nick Quintero 6 Comments

Instant Pot Beef Barbacoa 

Imagine yourself coming home to the smoky and fragrant smells of instant pot beef barbacoa! Made with chuck beef roast, garlic, cumin, and chipotle powder, our Instant Pot Beef Barbacoa recipe is an easy dinner idea that will warm your soul. Barbacoa is known as a traditional Mexican dish, but it originated in the Caribbean. Barbacoa refers to the way we cook the meat, which is slow until the meat is tender and succulent. You can slow cook beef, goat, or sheep and call it barbacoa.

How long will Instant Pot Beef Barbacoa last for?

The shredded chuck beef roast will last for 4 days in the refrigerator. Store your beef barbacoa in an airtight container and put it in the fridge to enjoy with sides or as tacos!

Can Instant Pot Beef Barbacoa be frozen?

Yes. Store your beef barbacoa in freezer bags for up to 3 months. We recommend labeling the bags before storing the meat.

Instant Pot Beef Barbacoa 

This fall apart smoky beef barbacoa is made in the instant pot for a quick-cooking Keto meal that satisfies.

Instant Pot Beef Barbacoa 

keto-meal-prep-book-banner-2

Instant Pot Beef Barbacoa Ingredients:

  • 2 lbs. chuck beef roast
  • 1 teaspoon olive oil
  • 1 cup sliced white onion
  • ⅔ cup beef stock
  • 1 tablespoon tomato paste
  • 2 teaspoon ground cumin
  • 1 teaspoon minced garlic
  • 1 teaspoon dried oregano
  • 1 teaspoon sea salt
  • ½ teaspoon chipotle powder

For serving

  • 4 cups cilantro lime rice (can use cauliflower rice)
  • ⅓ cup chopped cilantro
  • ⅓ cup chopped red onion
  • 4 lime wedges

Instant Pot Beef Barbacoa 

How do you make Instant Pot Beef Barbacoa?

Start by getting ready to prep our easy dinner idea. Grab your ingredients and get ready for a simple, 10-minute prep.

Turn your instant pot on and set it to "sauté." Add olive oil. Then cut the chuck beef roast into 5-6 chunks and remove excess fat. Blot the beef with a paper towel and place it into your instant pot for 8 minutes total, stirring the meat at the 4-minute mark. When the meat is brown, press "cancel" on your instant pot. Start adding your warming spices and fragrant vegetables for flavoring; so add the garlic, onions, oregano, cumin, tomato paste, chipotle powder, and sea salt. Stir all of that flavorful goodness together and add the beef stock to it. Secure the lid and close the vent cap. Use the "manual" or "meat/chicken" setting to cook the chuck beef roast for 60 minutes. Your instant pot beef barbacoa will be ready for shredding after the pot depressurizes.

While the beef barbacoa is cooking, heat your lime cilantro cauliflower rice in a lightly oiled skillet over medium heat for 6-7 minutes. Stir the cauliflower rice while cooking. Set the rice aside and wait for the beef to be done. (If you're making yourself a plate, we recommend cooking the cauliflower rice when the beef barbacoa is almost done, around the 45-minute mark). When the barbacoa finishes cooking and the pot depressurizes, remove the beef from the pot for shredding. Shred the meat with two forks on a cutting board, then place the beef back into the pot for additional stirring for complete flavoring.

That's it! A satisfying meal after those busy days. We told you this was an easy dinner idea!

Instant Pot Beef Barbacoa 

How to portion Instant Pot Beef Barbacoa?

Grab 4 MPOF dual-compartment meal prep containers. Add the beef barbacoa to the smaller compartment and the cauliflower rice to the bigger compartment. Top your beef barbacoa with red onion, cilantro, and a lime wedge.

More Instant Pot meal prep recipes:

Having an instant pot makes meal prepping so easy! That's why we feature instant pot recipes often.

Instant Pot Cashew Chicken

Instant Pot Roast with Mashed Potatoes

Instant Pot Minestrone Soup

Instant Pot Beef BBQ Ribs

Instant Pot Chicken Enchilada Soup

Instant Pot Ranch Chicken

Instant Pot Moroccan Chicken Meal Prep

Check out these recipes and more in our 20+ Meal Prep Instant Pot Recipes

Instant Pot Beef Barbacoa 

Other tips for making Instant Pot Beef Barbacoa:

  • Start by checking out our guide to instant pot cooking. Avoid these Top 10 Instant Pot Mistakes – That You're Probably Making.

  • Turn this easy dinner idea into an easy lunch idea by making Instant Pot Beef Barbacoa Meal Prep Bowls.

  • Mix in some fresh lime juice after shredding and let the beef rest on "warm" for 20 minutes.

  • For an extra spicy kick, use chipotle chilies.

  • You can use beef barbacoa for tacos, burritos, salads, nachos, quesadillas, and enchiladas.

  • Top beef barbacoa with lettuce, cheese tomatoes, radishes, guacamole, or salsa.

Instant Pot Beef Barbacoa 

Instant Pot Beef Barbacoa 

Instant Pot Keto Beef Barbacoa

This fall apart smoky beef barbacoa is made in the instant pot for a quick cooking Keto meal that satisfies.
Print Recipe Pin Recipe Rate Recipe
Prep Time: 10 minutes minutes
Cook Time: 1 hour hour 15 minutes minutes
Total Time: 1 hour hour 25 minutes minutes
Course: dinner, Lunch, Main Course
Cuisine: American
Keyword: Beef, gluten free, keto, low carb, paleo, whole30
Servings: 4 meals
Calories: 407kcal
Author: Nick Quintero

Equipment

  • Instant Pot

Ingredients

  • 2 lbs. chuck beef roast
  • 1 teaspoon olive oil
  • 1 cup sliced white onion
  • ⅔ cup beef stock
  • 1 tablespoon tomato paste
  • 2 teaspoon ground cumin
  • 1 teaspoon minced garlic
  • 1 teaspoon dried oregano
  • 1 teaspoon sea salt
  • ½ teaspoon chipotle powder

For Servings:

  • 4 cups cilantro lime cauliflower rice
  • ⅓ cup chopped cilantro
  • ⅓ cup chopped red onion
  • 4 lime wedges
Get Recipe Ingredients

Instructions

  • Turn instant pot to sauté setting and add olive oil. Cut beef into 5-6 chunks and remove any excess fat. Blot dry with a paper towel. Place beef in instant pot and sauté for 8 minutes, turning after 4 minutes to brown meat. Press cancel. Add onions, tomato paste garlic, oregano, cumin, chipotle powder, and sea salt to pot and stir. Pour in beef stock. Secure lid and close vent cap. Press meat/chicken or manual setting for 60 minutes.
  • While beef cooks, heat cilantro lime cauliflower rice over medium heat in a large pan for 6-7 minutes, stirring occasionally. Divide rice between 4 teal MPOF 2 cup compartments.
  • Allow the instant pot to depressurize before removing the lid. Place beef on cutting board and shred with 2 forks. Return to pot and stir. Divide the beef between 4 teal MPOF 1 cup compartments and top with cilantro, red onion, and lime wedges.

Nutrition

Calories: 407kcal | Carbohydrates: 16g | Protein: 52g | Fat: 19g | Sodium: 728mg | Fiber: 4g
Tried this recipe?Mention @mealpreponfleek or tag #mealpreponfleek!

Cajun Stuffed Peppers

July 31, 2022 by Nick Quintero Leave a Comment

Cajun Stuffed Peppers

Give yourself a spicy pick-me-up with this savory healthy lunch idea — Cajun Stuffed Peppers! Cajun cuisine is best-known and enjoyed in Louisiana. The flavorful seasonings and spicy notes are why people love Cajun cuisine. If you're a big fan of Cajun cuisine, you'll love this recipe. You can enjoy this meal prep recipe for lunch and dinner, or serve it as an appetizer at your next gathering with friends & family. Our easy lunch meal prep recipe gives you authentic Cajun flavors including celery, onion, and peppers. The tasty, aromatic trio makes up the holy trinity of Cajun cuisine. After trying this recipe, you'll know why!

Cajun Stuffed Peppers

The Best Keto Stuffed Peppers!

These spicy, Cajun-style stuffed peppers are high protein, high fiber meal with staying power. Paleo compliant and zero added sugars make this recipe ideal for Whole30 lifestyles.

Cajun Stuffed Peppers

How long will Keto Cajun Stuffed Peppers last for?

Cajun Stuffed Peppers will last for 4 days when stored in an airtight container. You can store them in a glass or plastic container. 

Can Cajun Stuffed Peppers be frozen?

You can freeze cajun stuffed peppers for at least 3 months. We recommended that you don't freeze them for over 3 months or else they lose flavor.

To freeze your peppers, make sure they have completely cooled. You can either wrap them in plastic wrap individually and store in a freezer bag or place the peppers in a casserole dish and cover with aluminum foil. Your cajun stuffed peppers go from frozen to ready in 20-30 minutes at 300 degrees in the oven.

Cajun Stuffed Peppers
keto-meal-prep-book-banner-2

Cajun Stuffed Peppers Ingredients: 

For Stuffed Peppers

  • 4 bell peppers
  • 2 tablespoon grass-fed ghee
  • ¼ cup chopped white onion
  • ¼ cup chopped celery
  • ¼ cup chopped carrot
  • 1 lb. 93% lean ground beef
  • 1 (6 oz.) can tomato paste
  • 2 tablespoon Whole30 compliant hot sauce (Frank’s, Tabasco)
  • 2 tablespoon Cajun seasoning
  • 1 cup cilantro lime rice (swap for cauliflower to decrease carbs)

For Cajun Seasoning

  • 2 teaspoon paprika
  • 1 teaspoon dried oregano
  • 1 teaspoon dried thyme
  • ½ teaspoon sea salt
  • ½ teaspoon garlic powder
  • ½ teaspoon onion powder
  • ½ teaspoon black pepper
Cajun Stuffed Peppers


How do you make Cajun Stuffed Peppers?

Cajun Stuffed Peppers is an easy, healthy lunch idea to prepare. Grab your ingredients and let's get started! Once you prep the meal, it will take 50 minutes to cook. Prep time is only 10 minutes, so your oven does all the work.

Start by preheating your oven to 375 degrees. Find a baking pan (about 9x13) and line it with parchment paper. Set the pan aside and get ready to cut the peppers. Cut the peppers lengthwise and remove the seeds. Once you cut the peppers, heat your ghee over medium heat in a medium skillet. Add carrots, celery, and onion to the heated ghee and sauté for 7 minutes. Move your fragrant-smelling vegetables to the side of the skillet to make room for the lean ground beef. Break up the beef and brown for 5 minutes. Stir in your tomato paste and hot sauce. Cook for 3 minutes and remove from heat. Next, add the cauliflower rice and Cajun seasoning. Mix well.

Now that you have your savory stuffing, spoon the beef stuffing mixture into the bell peppers. Bake the cajun stuffed pepper for 30-35 minutes until the peppers are tender. 

How to portion Cajun Stuffed Peppers?

Find a spatula and transfer the peppers into four single-compartment meal prep containers, like the ones seen here (these are our very own MPOF meal prep containers).

Cajun Stuffed Peppers

More Stuffed Peppers meal prep recipes: 

We hope you enjoyed our Cajun Stuffed Peppers! If you did, try these similar healthy lunch ideas (peppers can spice and speed up your metabolism). 

  • Sheet Pan Zesty Stuffed Poblano Peppers
  • Simple Stuffed Enjoya Bell Peppers
  • Buffalo Chicken Stuffed Pepper Meal Prep
  • Bacon Jalapeño Poppers
Cajun Stuffed Peppers

Other tips for making Cajun Stuffed Peppers:

  • Cut down cooking time and keep your stuffing from overcooking by precooking your peppers on the stove, in the oven, or the microwave. 

  • Another way to save on time is to use leftovers as bell pepper stuffing. 

  • Don't over-stuff your peppers so everything can cook evenly. You may want to over-stuff but avoid it. 

  • Use an instant thermometer to track the doneness of your peppers. You want your Cajun stuffed peppers to reach 160 degrees. 

  • To keep peppers from falling over in the oven, wrap each one in aluminum foil cups. 

  • For sides, pair cajun stuffed peppers with bread, salad, or potatoes for a complete meal. If you have them for dinner, enjoy your stuffed peppers with a cold beer. 

  • Add cheese if you wish! Mexican, feta, Monterey Jack — whichever cheese your heart desires. 

Cajun Stuffed Peppers

Whole30 Cajun Stuffed Bell Peppers

These spicy, Cajun style stuffed peppers are high protein, high fiber meal with staying power. Paleo compliant and zero added sugars make this recipe ideal for Whole30 lifestyles.
Print Recipe Pin Recipe Rate Recipe
Prep Time: 10 minutes minutes
Cook Time: 50 minutes minutes
Total Time: 1 hour hour
Course: dinner, Lunch, Main Course
Cuisine: Mexican
Keyword: dinner, keto, low carb, lunch, paleo, whole30
Servings: 4 meals
Calories: 369kcal
Author: Nick Quintero

Ingredients

For Stuffed Peppers

  • 4 medium bell peppers
  • 2 tablespoon grass fed ghee
  • ¼ cup chopped white onion
  • ¼ cup chopped celery
  • ¼ cup chopped carrot
  • 1 lb. 93% lean ground beef
  • 6 ounces tomato paste
  • 2 tablespoon Whole30 compliant hot sauce Frank’s, Tabasco
  • 2 tablespoon Cajun seasoning
  • 1 cup cilantro lime cauliflower rice

For Cajun Seasoning

  • 2 teaspoon paprika
  • 1 teaspoon dried oregano
  • 1 teaspoon dried thyme
  • ½ teaspoon sea salt
  • ½ teaspoon garlic powder
  • ½ teaspoon onion powder
  • ½ teaspoon black pepper
Get Recipe Ingredients

Instructions

  • Preheat oven to 375ºF and line a 9x13 baking pan with parchment paper. Slice bell peppers in half lengthwise and remove seeds. Heat ghee over medium heat in a medium skillet. Add carrots, celery, and onion. Sauté for 7 minutes. Move vegetables to the side of the skillet. Add ground beef and break up into small pieces with a spatula. Brown for 5 minutes. Stir in tomato paste and hot sauce. Cook 3 minutes longer. Remove from heat.
  • Add cauliflower rice and Cajun seasoning. Stir well to combine. Scoop mixture into bell pepper halves and place in baking pan. Bake for 30-35 minutes, until peppers are tender. Use a spatula to transfer 2 pepper halves into 4 black MPOF containers.

Nutrition

Calories: 369kcal | Carbohydrates: 20g | Protein: 27g | Fat: 22g | Sodium: 2102mg | Fiber: 7g
Tried this recipe?Mention @mealpreponfleek or tag #mealpreponfleek!

Tempeh Burrito Bowls

July 5, 2021 by Nick Quintero Leave a Comment

Tempeh Burrito Bowls

Thank you to GoodCook® for sponsoring this Tempeh Burrito Bowls Recipes post, and thank YOU for supporting the brands that help make Meal Prep On Fleek possible. All opinions are our own. 

Tempeh Burrito Bowls

Skip takeout and make this easy vegan burrito bowl complete with tangy cilantro-lime rice. Crumbled tempeh takes on the texture of ground meat and gets seasoned up with Mexican spices for a protein-rich meal. 

Tempeh Burrito Bowls

What's your "why?" Why do you meal prep? What about meal prep makes your life better? For us, it's saving money, keeping our portions in check, and feeding our bodies delicious, nutrient-dense foods. These Tempeh Burrito Bowls are a shining example of all of those things! 

Yes, don't get us wrong, we love us some takeout, but our wallets, not so much! That's why we look to homemade takeout remix recipes like these burrito bowls! For less than one takeout meal, we can have four days worth of meals that will nourish our minds and bodies! Plus, when we divide the ingredients into our portion-controlled meal prep containers, we know that we are getting the right balance of protein, carbs, and healthy fats (plus veggies!) in our meals! 

The red, three-compartment meal prep containers are one of our go-to containers because they are labeled with the specific foods groups:

  • 1 cup for grains
  • 1 cup for protein
  • 2 cups for veggies/fruits

This takes meal prepping a step further by removing all the guesswork out of creating a balanced meal. On top of that, who doesn't need a little pick-me-up during the middle or end of the day? There is just something about that red color that makes our eyes open a little wider, or is it the food inside? Probably both. 😉

Ok, back to the food! So, we went with a vegan spin on these burrito bowls! We are trying to eat more plant-based meals and less meat, and these tempeh burrito bowls are such an easy way to do that! The only swap you need to make from a regular burrito bowl is using tempeh in place of ground chicken or beef. But, if you just love your chicken or beef, use it! There is no right or wrong way to make a meal prep that works for you! 

We made every ingredient from scratch here, but you can use a store-bought salsa in place of the corn and black bean salsa below to save some time! Another time-saving hack, although not as cost-effective, would be to buy pre-riced cauliflower. If you do this, please make sure it isn't frozen. It should come from the fresh produce section at your grocery store. The frozen version will leave you with extra soggy cauli-rice that won't taste good by day four. 

We kept the burrito bowls pretty simple, but feel free to finish yours off with sliced avocado, sour cream, shredded cheese (use vegan, if needed), queso fresco, etc.! We are here to provide an easy and delicious recipe but always encourage you to do what works for you! 

If you're bored with all our food talk and just wanna know where you can grab those awesome containers, head here! You will get 10 in your pack, which is enough for two people or two meals per day for one! 

Tempeh Burrito Bowls Ingredients:

For Taco Tempeh

  • 1 lb. tempeh, crumbled into small pieces
  • 1 tablespoon olive oil
  • 2 tablespoon tomato paste 
  • ¼ cup water 
  • 1 teaspoon ground cumin
  • 1 teaspoon chili powder
  • ½ teaspoon dried oregano
  • ½ teaspoon salt 

For Cilantro Lime Rice

  • 1 tablespoon olive oil 
  • 6 cups riced cauliflower
  • ¼ cup lime juice
  • ¼ cup finely chopped cilantro
  • ½ teaspoon salt 

For Fire Roasted Corn and Black Bean Salsa

  • 1 cup chopped tomatoes
  • 1 cup drained black beans
  • 1 cup fire-roasted corn, thawed
  • ⅓ cup chopped red onion 
  • 2 tablespoon chopped cilantro
  • 1 tablespoon minced jalapeno 
  • ¼ teaspoon sea salt

For Serving

  • 4 GoodCook® Meal Prep Containers
Tempeh Burrito Bowls

Tempeh Burrito Bowls

Skip takeout and make this easy vegan burrito bowl complete with tangy cilantro-lime rice. Crumbled tempeh takes on the texture of ground meat and gets seasoned up with Mexican spices for a protein-rich meal.
Print Recipe Pin Recipe Rate Recipe
Prep Time: 15 minutes minutes
Cook Time: 13 minutes minutes
Total Time: 38 minutes minutes
Course: dinner, Lunch, Main Course
Cuisine: Mexican
Keyword: dinner, gluten free, lunch, plant based, Tempeh, vegan, vegetarian
Servings: 4 meals
Calories: 450kcal
Author: Nick Quintero

Ingredients

For Taco Tempeh

  • 1 lb. tempeh crumbled into small pieces
  • 1 tablespoon olive oil
  • 2 tablespoon tomato paste
  • ¼ cup water
  • 1 teaspoon ground cumin
  • 1 teaspoon chili powder
  • ½ teaspoon dried oregano
  • ½ teaspoon salt

For Cilantro Lime Rice

  • 1 tablespoon olive oil
  • 6 cups riced cauliflower
  • ¼ cup lime juice
  • ¼ cup finely chopped cilantro
  • ½ teaspoon salt

For Fire Roasted Corn and Black Bean Salsa

  • 1 cup chopped tomatoes
  • 1 cup drained black beans
  • 1 cup fire roasted corn thawed
  • ⅓ cup chopped red onion
  • 2 tablespoon chopped cilantro
  • 1 tablespoon minced jalapeno
  • ¼ teaspoon sea salt
Get Recipe Ingredients

Instructions

  • Stir together ingredients for salsa in a small bowl. Refrigerate while preparing other ingredients.
  • Heat olive oil over medium heat in a large skillet. Add cauliflower and sauté for 3 minutes. Stir in lime juice, cilantro and salt. Cook for 2-3 minutes longer. Divide cauliflower rice between large compartments of 4 Three Compartment Good Cook meal prep containers.
  • Wipe skillet clean and return to stovetop over medium heat. Add 1 tablespoon of oil. Add tempeh crumbles and heat for 2 minutes. Stir in tomato paste, water, cumin, chili powder, oregano and salt. Cook for 4-5 minutes. Divide tempeh taco meat and salsa between remaining 2 small compartments of containers.

Nutrition

Calories: 450kcal | Carbohydrates: 43g | Protein: 30g | Fat: 21g | Fiber: 11g
Tried this recipe?Mention @mealpreponfleek or tag #mealpreponfleek!

Steak Fajita Meal Prep

July 4, 2019 by Nick Quintero Leave a Comment

Steak Fajita Meal Prep

Ready to spice up your meal prep recipes list? We've got just the savory treat! Our Steak Fajita Meal Prep recipe is the ultimate Tex-Mex dish for lunch or dinner. 

The history of fajitas dates back to the cowboy days in West Texas. Mexican ranchers worked for the least desirable part of the steer to eat. The cut is known as "skirt steak" and was given to ranchers as part of their payment for the work they did. The ranchers took their payment and turned it into something more desirable - the steak fajita! The word "fajita" comes from the Spanish word "faja," which means "belt." That makes sense since the cut is skirt steak. Kind of cool, right?

Fast-forward to now and the steak fajita is a well-known, delicious Mexican restaurant treat and staple. Talk about making lemons out of lemonade! 

Steak fajitas are grilled strips of skirt steak inside a tortilla with bell peppers. This meal prep recipe is truly authentic. They're easy to make and easier to devour! 

Without further ado, let's get into this meal prep recipe. Vamanos! 

Steak Fajita Meal Prep

How long will Steak Fajita Meal Prep last for? 

Your cooked Steak Fajita Meal Prep will last for 3 to 4 days in the refrigerator. If you have a vacuum sealer, use that to store your steak fajitas in the fridge. If not, wrap the steak fajitas in freezer paper, then in a freezer bag. The point of this is to keep air away from the steak so it won't dry out. 

Can Steak Fajita Meal Prep be frozen?

Of course! You can either wrap steak fajitas in heavy-duty aluminum foil, freezer paper, or freezer bags. Again, you can also vacuum seal steak strips. Also, we recommend always using a freezer bag, unless you use a container. There are some high-quality airtight freezer containers out there that will do the trick! Keep in mind that cooked Steak Fajita Meal Prep will last for up to 3 months in the freezer. So label and date the container or bag. 

To freeze the cooked peppers, lay them out on a baking sheet with wax paper. Then place the baking sheet in the freezer for one hour. Remove the baking sheet and put the peppers in a freezer back. Be sure to leave at least a half-inch of bag space. Frozen cooked peppers last from 4 to 6 months. 

Presta! Steak Fajita Meal Prep is frozen and enjoyed later. 

Steak Fajita Meal Prep

Steak Fajita Meal Prep Ingredients:

  • Siete brand Cassava Flour Tortillas (for keto, skip the tortillas and serve over lettuce)
  • 2 lbs. Skirt Steak (large pieces of fat and tendons trimmed off)
  • 1 Red Bell Pepper (sliced into ½” strips)
  • 1 Yellow Bell Pepper (sliced into ½” strips)
  • 1 Green Bell Pepper (sliced into ½” strips)
  • 1 large White Onion (sliced into ½: strips)
  • Half Bunch Fresh Cilantro
  • 2 Limes (quartered)
  • 1 Tbsp. Avocado Oil
  • 1 tsp. Ground Black Pepper
  • ½ tsp. Himalayan Pink Salt
  • Optional: Sliced Avocado, Salsa, Sour Cream, Plain Greek Yogurt

Marinade Base:

  • ⅓ C. Tamari
  • ⅓ C. Avocado Oil
  • ⅓ C. Lime Juice (~4 Limes)
  • 2 Tbsp. Coconut Sugar
  • 2 tsp. Minced Garlic Cloves
  • 5 tsp. Ground Cumin
  • 5 tsp. Chili Powder
  • 1 tsp. Smoked Paprika
  • 1 tsp. Dried Oregano
Steak Fajita Meal Prep

How do you make Steak Fajita Meal Prep?

The first thing you're going to do is make your Steak Fajita Meal Prep marinade from the sweet and savory marinade ingredients. Use the marinade to coat your skirt steak. Let the steak settle in the marinade in the refrigerator for at least 4 hours or overnight. Once your skirt steak is marinated, grill it. After grilling the steak, cook the vegetables in a cast-iron skillet on your grill. While the veggies are cooking, char the tortillas. Your Steak Fajita Meal Prep is done in 20 minutes. The only thing left is to enjoy them! 

How to portion Steak Fajita Meal Prep?

Use a 3-compartment meal prep container to store Steak Fajita Meal prep. Put the tortillas, toppings, sauce, and sour cream in the largest compartment. Use a plastic cup for sour cream and sauce storage. Use the remaining two compartments for the steak fajitas and bell peppers. 

Steak Fajita Meal Prep

More Steak meal prep recipes:

Steak is packed with protein and pretty low in fat depending on the cut. You can use it for stews, stir fry, fajitas, burritos, tacos, or by itself with sides. Steak is versatile and can be meal prepped in multiple ways and for every meal! Here are more delicious steak meal prep ideas: 

  • Steak, Sweet Potato and Apple Hash Meal Prep
  • Brazilian Style Skirt Steak Meal Prep
  • Chimichurri Steak Meal Prep
  • Low Carb Philly Cheesesteak Meal Prep
  • Grilled Steak & Garlic Roasted Potato Meal Prep
  • Steak and Egg White Salsa Verde Breakfast Wraps
  • Steak and Brussels Sprout Stir-Fry Meal Prep
  • Give This Low Carb Cajun Steak Meal Prep A Try!
  • Steak and Veggie Meal Prep
  • Jamaican Beef Stew
  • DIY Burrito Bowls For Every Diet
  • Korean Beef Bowls
  • Pesto Beef Kabob Meal Prep
  • Sheet Pan Steak and Veggies

Other tips for making Steak Meal Prep recipes:

  • Salt your skirt steak before marinating it for more moisture and robust flavors. 
  • Leave your skirt steak out for 20 to 30 minutes at room temperature before grilling. Doing this will ensure fast and thorough cooking. 
  • Searing your Steak Fajita Meal prep will bring flavors to the forefront. 
  • You can eliminate tortillas and make Steak Fajita Meal Prep lettuce wraps for Paleo diets. 
  • Replace sour cream with plain Greek yogurt for greater nutritional value. 
Steak Fajita Meal Prep
Meal Prep on Fleek x Goodcook recommended Meal Prep Containers
Steak Fajita Meal Prep

Steak Fajita Meal Prep

This deliciously marinated, grilled steak and fresh veggie steak fajita meal prep recipe is sure to make your mouth water! 
Print Recipe Pin Recipe Rate Recipe
Prep Time: 4 hours hours
Cook Time: 20 minutes minutes
Total Time: 4 hours hours 20 minutes minutes
Course: Lunch, Main Dish
Cuisine: Mexican
Keyword: Meal Prep, Steak
Servings: 6 meals
Calories: 630kcal
Author: Nick Quintero

Ingredients

  • 12 Siete Cassava Tortillas or tortillas of choice
  • 2 pounds skirt steak trimmed of fat and tendons
  • 1 medium red bell pepper sliced into ½" strips
  • 1 medium yellow bell pepper sliced into ½" strips
  • 1 medium green bell pepper sliced into ½" strips
  • 1 large white onions sliced into ½" strips
  • ½ bunch Fresh cilantro
  • 2 limes quartered
  • 1 tablespoon avocado oil
  • 1 teaspoon ground black pepper
  • ½ teaspoon Sea Salt

Marinade

  • ⅓ cup tamari
  • ½ cup avocado oil
  • ⅓ cup fresh lime juice about 4 limes
  • 2 tablespoon Coconut Sugar
  • 2 teaspoon Minced Garlic
  • 1.5 teaspoon cumin
  • 1.5 teaspoon Chili Powder
  • 1 teaspoon smoked paprika
  • 1 teaspoon dried orgegano

Optional, for serving

  • sliced avocado
  • salsa
  • Sour Cream or greek yogurt
Get Recipe Ingredients

Instructions

  • In a large bowl/baking dish, whisk together all marinade ingredients until combined.
  • Place skirt steak in marinade dish, flipping over a couple times until well-coated in marinade mixture. Cover and place in fridge to marinate for 4 hours to overnight.
  • When skirt steak has finished marinating and ready to cook, remove from marinade (discard marinade) and pat steak dry with a paper towel.
  • Next, heat grill to high (~600℉—700℉).
  • Once heated, place skirt steak onto grill. Cover with grill lid and let steak sear/cook for ~5 minutes on each side until reaching internal temperature of ~170℉ (for medium cooked), or adjust time until cooked to desired level.
  • Remove steak from grill (but don’t turn grill off) and let skirt steak rest on a plate or cutting board for ~5–10 minutes, prior to cutting so as to retain moisture and flavor.
  • While the meat rests, place a large cast-iron skillet on still heated grill — once skillet has heated up, add oil and veggies. Cook for ~10 minutes, or until tender, but firm, and lightly charred.
  • While the veggies are cooking, also place tortillas straight onto the grill and lightly char/heat them on each side (~1-2 minutes per side). Then, set tortillas aside.
  • Once rested, slice steak against the grain into ¼” thick strips (drizzle any juices on top of cut strips for added flavor and moisture.
  • When ready to eat, assemble fajitas by placing veggies and steak strips onto tortillas, top with cilantro, squeeze of lime, and any optional ingredients.
  • Serve, store, and enjoy!

Notes

Nutrition for 1 out of 6 servings (not including optional sides)
34.2g Protein | 37.8g Carbs | 37.1g Fat | 5.5g Fiber | 630 Calories

Nutrition

Serving: 1meal | Calories: 630kcal | Carbohydrates: 37.8g | Protein: 34.2g | Fat: 37.1g | Fiber: 5.5g
Tried this recipe?Mention @mealpreponfleek or tag #mealpreponfleek!

Steak, Sweet Potato and Apple Hash Meal Prep

August 3, 2022 by Nick Quintero 6 Comments

Whole30 Shredded Steak, Sweet Potato & Apple Hash Meal Prep blog

Steak, Sweet Potato, and Apple Hash Meal Prep

Spoiler alert! This meal does not consist of any ‘hash’! LOL. This culinary masterpiece is made up of chopped potatoes, meat, vegetables and apples for a twist. Can I hear someone say yum yum let’s have some! We plan on keeping these meal prep ideas coming peeps. So let’s dig into our new meal prep ideas recipe. Our steak sweet potato apple meal prep is that delicious flavorful fall hash you’ve been searching for.

Whole30 Shredded Steak, Sweet Potato, & Apple Skillet Meal Prep ---4

How Long Will Steak Meal Prep Last For?

As with most cooked meats, at room temperature, consume within two hours. Refrigerated, in the proper airtight meal prep container, your steak sweet potato apple meal prep can last for 4 to 5 days.

Can Sweet Potato Apple Meal Prep be frozen?

These meal prep ideas hash creation can be frozen for up to 3 months! But once you allow yourself to indulge in the tasty goodness, a month may not see the last serving.

Whole30 Shredded Steak, Sweet Potato, & Apple Skillet Meal Prep ---4

How do you make Steak Sweet Potato Apple Meal Prep?

I know you can’t wait to get started. Gather your ingredients, measuring utensils, mixing and other items you need to get this meal prep ideas recipe, a reality. 

Get that trusty skillet ready over a medium-high fire and add a TBS of avocado oil. Once warm, add your chopped sweet potatoes and apple. Season with a pinch of Himalayan sea salt and black pepper, then cover your skillet. Stir often to prevent sticking and allow to cook for 10 to 15 minutes, until soft and tender.

Prepare a separate skillet with the remaining 1 TBS of avocado oil left and heat over a medium-high fire. Add your sliced steak and season with a pinch of Himalayan sea salt and black pepper. Cook for 8 to 10 minutes until all the sides are properly browned. Smell that delicious aroma!

Combine your skillet contents. But before you do so, drain the excess oil from the skillet you used to prepare your steak. Once you have done so, transfer your steak to the sweet potato and apple hash. 

Season further with some thyme and sage. Then cook the mixture for another 5 minutes to infuse those fragrant seasonings into your steak sweet potato apple meal prep. There you have it, another awesome meal prep ideas recipe for your enjoyment!

Sweet Potato and Apple Hash Meal Prep Ingredients

How to portion Steak Sweet Potato Apple Meal Prep?

This appetizing meal prep ideas recipe can provide four servings. 

More  Steak Meal Prep Recipes

Just when you thought you had seen it all, here we come with more steak meal prep ideas recipes for just you!

  • Apricot Cucumber Tofu Steak Meal Prep
  • Grilled Steak & Garlic Roasted Potato Meal Prep
  • Steak and Veggie Meal Prep
  • Chimichurri Steak Meal Prep
  • Low Carb Philly Cheesesteak Meal Prep
Cubbed Sweet Potatoes

Other Tips For Making this Sweet Potato Meal Prep Idea.

We have you covered, people. Here are a few tips for improving this sweet potato meal prep recipe.

  • Consider diving your hash using four meal prep containers. Airtight containers are perfect for helping to keep your hash fresh and free from absorbing fridge odors and microbe spoilage. Then store in the fridge. Always reheat before serving.
  • Ensure that your steak is thinly sliced so that it can be easily flavored by the ingredients of the sweet potato and apple hash.
  • Feel free to add your favorite spices to flavor your meal if the spices we have aren’t quite your flavor. If you aren’t familiar with some of the ingredients, just remember you’re in good hands, so trust our recipe to be healthy and delicious.

If you enjoy steak and hash, this meal prep ideas recipe is perfect for you! Come on, try our steak sweet potato apple meal prep recipe today.

Sweet Potato and Apple Hash Meal Prep

Steak, Sweet Potato & Apple Hash Meal Prep Ingredients:

  • 1 lb Thinly Sliced Beef
  • 2 large sweet potatoes, chopped
  • 1 teaspoon dried thyme
  • 2 large apples, core and diced
  • ¼ teaspoon Himalayan sea salt
  • 2 TBS avocado oil
  • ½ teaspoon sage
  • Black pepper
Whole30 Shredded Steak, Sweet Potato & Apple Hash Meal Prep blog

Steak, Sweet Potato & Apple Hash Meal Prep

The perfect fall hash with steak, sweet potato, and apples with thyme and sage.
Print Recipe Pin Recipe Rate Recipe
Prep Time: 20 minutes minutes
Cook Time: 20 minutes minutes
Total Time: 40 minutes minutes
Course: Breakfast
Cuisine: American
Keyword: Beef, Meal Prep, Steak
Servings: 4 meals
Calories: 336kcal
Author: Nick Quintero

Ingredients

  • 1 pound thinly sliced steak or beef of choice
  • 2 large sweet potatoes chopped
  • 2 large apples cored and chopped
  • 2 tbs avocado oil
  • 1 teaspoon dried thyme
  • ½ teaspoon dried sage
  • ¼ teaspoon Salt
  • Pepper
Get Recipe Ingredients

Instructions

  • Add 1 TBS avocado oil to a large skillet over medium-high. Once warm, add the sweet potato and apple with a pinch of Himalayan sea salt and black pepper. Cover and cook for 10-15 minutes, stirring often, until soft and tender.
  • In a separate large skillet, add the remaining 1 TBS of avocado and heat over medium-high. Add the sliced beef with a pinch of Himalayan sea salt and black pepper and cook for 8-10 minutes, until all sides are well browned.
  • Drain any excess oil, then transfer the steak to the apple and sweet potato hash.
  • Season with thyme and sage, and cook another 5 minutes to allow the flavors to meld.
  • Divide hash between 4 meal prep containers and store in the fridge for 4-5 days. Reheat before serving.

Notes

Nutrition for 1 out of 4 servings:
28.8g Protein | 34g Carbs | 10.3g Fat | 6.1g Fiber | 336 Calories

Nutrition

Serving: 1meal | Calories: 336kcal | Carbohydrates: 34g | Protein: 28.8g | Fat: 10.3g | Fiber: 6.1g
Tried this recipe?Mention @mealpreponfleek or tag #mealpreponfleek!

Sesame Chicken and Broccoli Stir Fry

June 14, 2024 by Nick Quintero Leave a Comment

Keto Sesame Chicken & Broccoli Stir Fry Meal Prep

Sesame Chicken & Broccoli Stir Fry is loaded with awesome veggies and a super flavorful sesame sauce for a healthy meal prep!

This quick and easy healthy chicken meal prep is served with steamed broccoli and tossed in a flavorful chili garlic sauce. It's also loaded with zucchini noodles, or zoodles, which makes it keto, along with the monkfruit sweetener to balance out the flavors. This dish is the definition of "sweet heat," my friends! 

Keto Sesame Chicken & Broccoli Stir Fry Meal Prep

Keto Sesame Chicken & Broccoli Stir Fry Meal Prep Ingredients:

For the chicken:

  • 1 ½ pounds chicken breast, sliced thin or into bite-sized cubes
  • 1 teaspoon kosher salt
  • ½ teaspoon ground black pepper
  • 2 tablespoon avocado oil
  • 6 cups (14 oz) broccoli florets, steamed

For the sauce:

  • 6 tablespoon reduced-sodium soy sauce
  • 3 tablespoon rice vinegar
  • 1 tablespoon chili garlic sauce
  • 2 teaspoon minced ginger
  • 2 garlic cloves, minced
  • 1 tablespoon sesame oil
  • 2 teaspoon Lakanto Monk Fruit sweetener with erythritol
  • 1 teaspoon xanthan gum
  • 1 tablespoon water
Keto Sesame Chicken & Broccoli Stir Fry Meal Prep

How to Make Low Carb Sesame Chicken and Broccoli

First off, you'll need a spiralizer, or access to one. Or maybe you're lucky and your grocery store preps lots of veggies for cooking and sells them ready to go, in the produce department. The spiralizer is the magical tool that turns zucchini into noodles, or "zoodles." 

Here's how this comes together. Start the chicken in a skillet and cook it in batches if things get too crowded in the pan. Then, while that's happening, whisk together all the ingredients for the sauce in a bowl. It might look like a lot, but chances are, you've got some of these ingredients on hand if you are already following a keto diet. Combine the sauce, chicken, and broccoli in the pan and stir until everything comes together for a few minutes. It's that easy. Serve it all over zoodles or rice.

Keto Sesame Chicken & Broccoli Stir Fry Meal Prep

How to Store

Once prepped and transferred into sealed, airtight containers, you can keep these meals for 4 to 5 days. You can also prep and freeze everything in this sesame chicken dish if you'd like, except the zoodles, which won't fare so well on reheating. Zucchini is very watery. Just freeze it in sealed, airtight plastic bags and label it with the date and contents. You can defrost it in the microwave or in the refrigerator overnight (always an easy way to bring proteins back to life). We've also tossed frozen chunks of this meal into a hot pan with a little bit of oil.

Keto Sesame Chicken & Broccoli Stir Fry Meal Prep

Substitutions and Alterations

Switch out the broccoli for cauliflower, or use a combination of both veggies. 

Sesame chicken also tastes great with green beans and sliced bell peppers. Use what you have on hand if you want to be frugal.

Use regular rice or soba noodles if desired. Or pasta. Or rice: choose among brown, white, or cauliflower rice. You might have some at your table who aren't excited about zoodles. (We get it! Kids can be funny sometimes).

Try using coconut oil instead of avocado oil, if you don't have the latter (it can be pricey!). Coconut oil imparts a less neutral taste, but it will get the pan hot enough.

In terms of proteins, this sesame chicken stir fry works with steak, shrimp, and tofu, as well. Adjust the cooking times accordingly; shrimp cooks the fastest, followed by tofu and then steak.

Keto Sesame Chicken & Broccoli Stir Fry Meal Prep

Tip

Garnish the top with some sesame seeds if desired, or a drizzle of sesame oil to amp up the flavors.

READ MORE: More broccoli, more stir fry, please! Steak and Broccoli Stir Fry!

Keto Sesame Chicken & Broccoli Stir Fry Meal Prep

Sesame Chicken & Broccoli Stir Fry Meal Prep

This quick and easy chicken dish is served with steamed broccoli and tossed in a flavorful chili garlic sauce.
Print Recipe Pin Recipe Rate Recipe
Prep Time: 15 minutes minutes
Cook Time: 10 minutes minutes
Total Time: 25 minutes minutes
Course: Main Dish
Cuisine: Asian
Keyword: Chicken, Meal Prep
Servings: 4 meals
Calories: 354kcal
Author: Nick Quintero

Ingredients

  • 1.5 pounds Chicken Breast cut into bite sized pieces
  • 1 teaspoon Salt
  • 2 tbs avocado oil
  • 6 cups broccoli florets

Sauce

  • 6 tbs reduced sodium soy sauce
  • 3 tbs rice wine vinegar
  • 1 tbs chili garlic sauce
  • 2 teaspoon minced ginger
  • 2 cloves garlic minced
  • 1 tbs sesame oil
  • 2 teaspoon lankanto monk fruit sweetener with erythritol
  • 1 teaspoon xanthum gum
  • 1 tbs Water
Get Recipe Ingredients

Instructions

  • Toss sliced chicken in salt and pepper. Cook chicken in two batches. Heat one tablespoon of avocado oil in a large skillet over medium heat high. Add half chicken and cook about 3-4 minutes on each side. Transfer cooked chicken to clean bowl. Add remaining tablespoon of oil in skillet and cook remaining chicken.
  • In a medium bowl, whisk together soy sauce, rice vinegar, chili garlic sauce, minced ginger, minced garlic, sesame oil, sweetener, xanthan gum, and water. Add sauce to large skillet and set over medium high heat. Once sauce starts to boil, reduce heat. Add cooked chicken and steamed broccoli and toss to coat in sauce. Remove from heat. Serve over zucchini noodles or cauliflower rice.

Video

Notes

WW Smart Points= Green:6  Blue:4  Purple:4
__
Nutrition for 1 out of 4 servings:
45g Protein | 16.5g Carbs | 13g Fat | 4.2g Fiber | 354 Calories

Nutrition

Serving: 1serving | Calories: 354kcal | Carbohydrates: 16.5g | Protein: 45g | Fat: 13g | Fiber: 4.2g
Tried this recipe?Mention @mealpreponfleek or tag #mealpreponfleek!
Low Carb Sesame Chicken & Broccoli Meal Prep blog

Gluten-Free Thai Peanut Stir Fry Meal Prep

June 12, 2024 by Nick Quintero Leave a Comment

Gluten Free Thai Peanut Stir Fry

Gluten-free Thai Peanut Stir Fry Meal Prep is made with lean beef, broccoli, and peppers tossed with a Thai peanut sauce and served over brown rice. 

Gluten Free Thai Peanut Stir Fry

Peanut butter is one of the best pantry staples and it comes in handy for this easy meal prep recipe. This recipe isn't tough to execute at all. With a few more pantry staples in addition to the beloved peanut butter, you can make this takeout-worthy dish at home, without the expense (and extra unknown ingredients) from takeout food.

Gluten Free Thai Peanut Stir Fry

Gluten-Free Thai Peanut Stir Fry Meal Prep Ingredients

  • 1 cup cooked brown rice
  • 1 lb lean beef, cubed or pre-sliced for stir fry
  • 3 cups broccoli, roughly chopped
  • 1 bell pepper
  • 1 clove garlic
  • 3 tablespoon Bragg's liquid aminos or coconut aminos
  • ... Unlock the recipe below for full ingredients list, instructions, and macros.
Broccoli and chopped peppers on a wooden cutting board

How to Make Gluten-Free Thai Peanut Stir Fry Meal Prep

This dish starts with some sesame oil in a pan, with some garlic. Cook the beef in the sesame oil and garlic, and then set aside. Then, add the broccoli and bell pepper and saute until tender. The sauce is easy, too. In a small bowl, just whisk together the liquid aminos, peanut butter, rice wine vinegar, and lime juice. Add it to the pan with the beef and veggies and stir together until it's combined and heated through. 

Never worked with liquid aminos before? It's a great soy sauce substitute for those who can't have gluten, or if you just want to avoid soy. 

How to Serve Thai Peanut Stir Fry

This is a one-bowl kind of meal, to serve right with the rice. We like adding a little extra heat with the chili flakes and cilantro is always welcome as a garnish in a Thai stir fry. You can also garnish it with some chopped peanuts, which would taste great. (Toast them beforehand in a dry skillet until fragrant for extra peanutty goodness). 

Gluten Free Thai Peanut Stir Fry

How to Store Gluten-Free Thai Peanut Stir Fry

Once you've made this meal you can of course eat it right away (yum!) and serve to your family, or you can prep it for the week. To reheat, turn it all out onto a skillet with a tiny bit of sesame oil over medium heat, and stir to combine. It should reheat really easily this way, without the danger of the microwave drying out the rice. A microwave will work but it runs the risk of making the protein a little rubbery and drying out the rice, although you can always add some liquid to the rice and reheat that separately in the microwave if you like. 

Feel free to freeze this entire dish. You'd be surprised by how well rice does in the freezer. You can take the whole thing right from the freezer and dump it into a hot skillet with a little oil and in minutes you've got a brand-new meal waiting for you. Or, of course, microwave it or defrost in the fridge overnight and then reheat it in a skillet. 

Substitutions and Alterations 

  • Other veggies besides broccoli can be used here. We like cauliflower with this Thai peanut beef stir-fry, and extra bell peppers wouldn't hurt, either.
  • Skip the peanut butter and use almond butter, cashew butter, or a seed butter if desired. 
  • Use chicken instead of beef, or tofu if you want to make this dish vegan. 
  • Use white rice or cauliflower rice instead.
Gluten Free Thai Peanut Stir Fry

Tip

To make more servings or servings with more veggies, double the peppers and broccoli in this recipe. (Note: Your macros will be different if you do this.)

Prep the rice ahead of time and pull it out to come to room temperature from the fridge when you start cooking this stir fry. Then, toss the rice into the pan at the end of cooking along with everything else to warm it up, without drying it out. 

READ MORE: All Thai, All the Time with Thai Chicken Tenders with Creamy Almond Dipping Sauce and Thai Basil Chicken Meal Prep!


Gluten Free Thai Peanut Stir Fry

Gluten-Free Thai Peanut Stir Fry Meal Prep

Homemade gluten-free Thai peanut sauce is tossed with strips of lean beef, broccoli, and peppers. Served over a bed of hearty brown rice for a well-balanced lunch or dinner. 
Print Recipe Pin Recipe Rate Recipe
Prep Time: 10 minutes minutes
Cook Time: 15 minutes minutes
Total Time: 25 minutes minutes
Course: Main Dish
Cuisine: Thai
Diet: Gluten Free
Keyword: Beef, Meal Prep
Servings: 4 meals
Calories: 348kcal
Author: Nick Quintero

Ingredients

  • 1 cup brown rice cooked
  • 1 lb beef cubed or sliced
  • 3 cups broccoli roughly chopped
  • 1 medium bell pepper chopped
  • 1 clove garlic minced
  • 3 tbs coconut aminos or soy sauce if not gluten free
  • 2 tbs peanut butter
  • 1 tbs rice wine vinegar
  • 1 tbs sesame oil
  • 1 teaspoon lime juice
  • cilantro for garnish
  • chili flakes for garnish
Get Recipe Ingredients

Instructions

  • Heat sesame oil in a wok or large, deep skillet over medium heat. Add the garlic and cook just until it becomes fragrant, 1 to 2 minutes.
  • Add beef and cook about three minutes on each side, just until it develops a little bit of color.
  • Add the peppers and broccoli to the pan and cook over medium-high heat for 5 minutes, stirring frequently.
  • In a small bowl, whisk together the aminos, peanut butter, rice wine vinegar, and lime juice.
  • Add the sauce to the pan and stir to combine everything evenly. Cook for about 5 minutes, stirring frequently to ensure the sauce is evenly distributed.
  • Evenly divide into meal prep containers. Top with chopped cilantro and chili flakes, if desired.

Notes

Nutrition per serving:
30g Protein | 21g Carbs | 17g Fat | 348 Calories

Nutrition

Serving: 1meal | Calories: 348kcal | Carbohydrates: 21g | Protein: 30g | Fat: 17g
Tried this recipe?Mention @mealpreponfleek or tag #mealpreponfleek!


Gluten Free Thai Peanut Stir Fry Meal Prep

Easy & Delicious Buffet Style Meal Prep

June 13, 2022 by Nick Quintero Leave a Comment

Easy & Delicious Buffet Style Meal Prep

Simplify your meal prep with this buffet style lunchbox hack that combines different proteins, starches, veggies, and sauces to create 4 lunches! Each has its own unique flavors for an easy meal that is healthy and delicious.

Easy & Delicious Buffet Style Meal Prep

If you've been slacking on your meal prep lately because it has felt like "too much," or you've just gotten a bit tired of counting macros, don't worry; we've got you covered today! 

When life gets busy, or we need extra time to recharge on the weekends, we always turn to buffet style meal prepping. This style of meal prepping takes less time on the weekends, keeps our meals varied during the week (hello, no food boredom), and allows us a mental break from macro tracking so we can spend some time intuitively eating. It's an all-around win because we know that if we skip meal prep altogether, we won't feel good mentally or physically by the end of the week, and our wallets won't be happy with us either.

Insert this Easy & Delicious Buffet Style Meal Prep to save the day! The key to being successful with this is to pick ingredients that can either be bought pre-cooked or can be cooked up quickly. And when it comes to intuitively eating, it's Meal Prep Containers that will save you! Not only do these bento box-style containers help you keep everything organized and easy to transport, but they also have separate compartments for your ingredients, so things don't get mushy by the end of the week. Each container has a small and large compartment, plus a removable tray to keep sauces and dressings separate. You could also use them for additional snacks or dessert. You can always count on us to include dessert! 

Now that you know what you need to be successful with this prep let's look at the ingredients and then dive into some of the combinations we created! 

READY TO SAY, “GOODBYE” TO FORGETTING TO MEAL PLAN, FOOD BOREDOM, AND “FINDING MOTIVATION.”

And say “YES” to more new recipes, consistent meal planning, money saving and homecooked meals! Sigh Up for our Meal Planning Program with WWL HERE (Free Trial)

Easy & Delicious Buffet Style Meal Prep

Easy & Delicious Buffet Style Meal Prep Ingredients: 

  • 4 oz. sliced cooked Italian sausage
  • 4 oz. baked chicken strips
  • 4 oz. baked tofu, cubed 
  • 2 oz. cooked gluten-free pasta 
  • 1 ½ cups cooked rice
  • ½ cup drained chickpeas 
  • 1 cup roasted broccoli
  • 1 cup roasted golden baby potatoes
  • 2 cups baby spinach 
  • 1 cup grape or cherry tomatoes 
  • ⅓ cup guacamole 
  • ⅓ cup salsa 
  • ⅓ cup marinara sauce
  • ⅓ cup tahini sauce 
  • ¼ cup shredded Parmesan cheese
  • Meal Prep Containers
Easy & Delicious Buffet Style Meal Prep

Box Combo #1

Chicken-Based

white rice + baked chicken + salsa + guacamole

Easy & Delicious Buffet Style Meal Prep

Box Combo #2

Tofu Based (vegan-friendly)

white rice + tofu + tahini + cherry tomatoes + spinach 

Easy & Delicious Buffet Style Meal Prep

Box Combo #3

Meat-Based

pasta + sausages + pasta sauce + spinach + parmesan cheese

Easy & Delicious Buffet Style Meal Prep

Box Combo #4

Chickpea-Based (vegan-friendly)

roasted potatoes + chickpeas + tahini + spinach + cherry tomatoes

Easy & Delicious Buffet Style Meal Prep

Of course, feel free to make any ingredient swaps you'd like! 

  • Hate white rice? Use brown rice, quinoa, or couscous instead! 
  • Chicken can be subbed with tofu or more beans to make it lant-based, as can the sausages. 
  • The tofu and chickpeas can be swapped for chicken, beef, or shrimp. 
  • Roasted potatoes can be subbed with sweet potatoes, rice, or pasta. 
  • Any combination of veggies can be used. 
  • Unsure of tahini? Use a dressing that you like instead! 

This is the great part of buffet-style meal prepping; you can mix and match what you and your family members alike, so everyone gets a meal that meets their nutritional goals! 

Are you ready to start prepping? Grab your containers, head to the store, and then tag us on YOUR easy combos you make! 

Easy & Delicious Buffet Style Meal Prep

Easy and Delicious Buffet Style Meal Prep

Simplify your meal prep with this buffet style lunchbox hack that combines different proteins, starches, veggies, and sauces to create 4 lunches! Each has its unique flavors for an easy healthy, and delicious meal.
Print Recipe Pin Recipe Rate Recipe
Prep Time: 5 minutes minutes
Cook Time: 15 minutes minutes
5 minutes minutes
Total Time: 25 minutes minutes
Course: dinner, Lunch
Cuisine: American
Diet: Gluten Free
Keyword: Buffet Style Meal Prep, Chicken, Sausage, Tofu
Servings: 4 meals
Author: Nick Quintero

Ingredients

  • 4 oz. sliced cooked Italian sausage
  • 4 oz. baked chicken strips
  • 4 oz. baked tofu cubed
  • 2 oz. cooked gluten-free pasta
  • 1 ½ cups cooked rice
  • ½ cup drained chickpeas
  • 1 cup roasted broccoli
  • 1 cup roasted golden baby potatoes
  • 2 cups baby spinach
  • 1 cup grape or cherry tomatoes
  • ⅓ cup guacamole
  • ⅓ cup salsa
  • ⅓ cup marinara sauce
  • ⅓ cup tahini sauce
  • ¼ cup shredded Parmesan cheese
  • 4 meal prep containers
Get Recipe Ingredients

Instructions

To make lunch boxes: Combine a protein, starch, veggies, and sauce from each bento box or use the following combinations to create four unique lunches.

  • Before preparing, make sure that your pasta, rice, chicken, sausages, tofu, potatoes and broccoli are cooked if they weren't purchased pre-cooked or frozen.
  • Box 1: pasta, marinara, and Italian sausage in large compartment + spinach and shredded cheese in small compartments.
  • Box 2: rice + chicken strips in the large compartment, salsa + guacamole in small compartments.
  • Box 3: potatoes, garbanzo beans, tahini in the large compartment, roasted broccoli + cherry tomatoes in small compartments.
  • Box 4: rice, tofu, tahini sauce in the large compartment, spinach + cherry tomatoes in small compartments.

Notes

*Since these are meal suggestions, macros aren't provided. Feel free to use a tool such as My Fitness Pal to calculate the macros. 
Tried this recipe?Mention @mealpreponfleek or tag #mealpreponfleek!
Easy & Delicious Buffet Style Meal Prep

Beet Hummus Veggie Dipper Snacks

June 22, 2018 by Nick Quintero 1 Comment

Beet Hummus Veggie Dipper Snacks

Beet Hummus Veggie Dipper Snacks

Have you ever been to a holiday or office party and seen a big tray of fresh veggies with a dipping sauce? Well, in a party situation it might be the healthiest option among the table of hors d'oeuvres, but today we’re going to make it healthier. You don’t even have to wait until your next party event to have it, either!

Beet Hummus Veggie Dipper Snacks

Easy Meal Prep Snack!

The meal prep recipe that we’re showing you is one that our vegan and vegetarian readers will love—Beet hummus veggie dipper snacks! The part of this recipe we’ll be making healthy is the dipping sauce. Normally the veggie trays you can get at the store come with ranch dressing. It can taste good, but the nutrition facts for Hidden Valley ranch (for example) might surprise you! Just 2 tablespoons of the stuff has 2.4g of saturated fat, 10mg of cholesterol, and 328mg of sodium—That’s a ton of bad macros for how little you get!

Beet Hummus Veggie Dipper Snacks

Beet Hummus Veggie Dipper Snacks Ingredients:

¼ cup tahini

¼ cup lemon juice

1 cup roasted beets, diced

2 tablespoons olive oil

1 clove garlic, minced (or more, to taste)

¼ teaspoon sea salt (or more, to taste)

1 can chickpeas, rinsed and drained

Assorted vegetable sticks (1 cup each carrots, cucumbers and peppers)

Beet Hummus Veggie Dipper Snacks

Beet Hummus Nutritional Information:

On the other hand, these beet hummus veggie dipper snacks have amazing nutritional value! One single snack jar provides 14g of protein, 29g of healthy fats, and a whopping 9mg of fiber! Much of this has to do with the chickpeas involved in making the hummus. Cup for cup, chickpeas have 14.5g of protein, and 35g of fiber—So if you’re looking for a meal that’s really going to fill you up, these veggie dipper snacks are totally for you! Otherwise, consider giving this Quinoa Chickpea Taco Salad or Chickpea Curry With Jasmine Rice meal prep recipe a try!

Beet Hummus Veggie Dipper Snacks

And how about those beets...

Another very healthy element of these hummus veggie dipper snacks is that the hummus contains beets! Beets are amazing because they have so many nutrients, but yet so few calories. They also have 20% of your folate RDI, and 16% of your manganese RDI. Vitamins aside, beets are believed to a whole host of health benefits—improved digestion, improved brain function,  possible weight loss properties, and many others.

Beet Hummus Veggie Dipper Snacks

Tahini is a great ingredient because

...It has healthy benefits too, and is totally good for you in many ways. Rich in nutrients like potassium, magnesium, and calcium, tahini is known to have anti-inflammatory benefits, as well as well as improve your cardiovascular health by regulating blood pressure! It can also aid in weight loss and liver detoxification, and his high in vitamins B and E.

Beet Hummus Veggie Dipper Snacks

In a rush to school or the office? No problem, we’ve been there! Making these beet hummus veggie dipper snacks saves you so much time and stress—It takes only 10 minutes to whip it up! Then, once you’ve done all the cooking you’ll need to do , just grab a simple mason jar, pack your hummus in at the bottom, and fill with fresh-cut veggies you enjoy. We found using 1 cup of carrots, cucumbers, and peppers.

Beet Hummus Veggie Dipper Snacks

Beet Hummus Veggie Dipper Snacks

A vibrant, summery hummus made with sweet roasted beets. Having a delicious and protein rich dip ready makes snacking on vegetables enticing.
Print Recipe Pin Recipe Rate Recipe
Prep Time: 10 minutes minutes
Total Time: 10 minutes minutes
Course: Snack
Cuisine: Mediterranean
Keyword: Beets, Meal Prep
Servings: 5 snacks
Calories: 421kcal
Author: Nick Quintero

Ingredients

  • ¼ cup tahini
  • ¼ cup lemon juice
  • 1 cup roasted beets
  • 2 tbs olive oil
  • 1 clove garlic minced
  • ¼ teaspoon Salt
  • 1 can chickpeas rinsed and drained
  • 3 cups assorted veggies carrots, cucumbers, peppers
Get Recipe Ingredients

Instructions

  • Add tahini and lemon juice to a food processor bowl, and process until a thickened paste forms (about 1 minute).
  • Add beets, olive oil, garlic and sea salt, and process until very smooth, about 2-3 minutes.
  • Add half of the chickpeas, and continue to process another 2 minutes.
  • Add the rest of the chickapea, and process again, until a very smooth dip is formed.
  • Taste, and adjust the sea salt, lemon, and garlic to taste.
  • Add ⅕ of the hummus (about ⅓ cup) to the bottom of jars, or in individual containers. Pack with lots of thinly sliced vegetables for dipping.

Notes

Nutrition for 1 out of 5 snack jars:
14g P | 28g C | 29g F | 9g Fiber | 421 calories

Nutrition

Serving: 1jar | Calories: 421kcal | Carbohydrates: 28g | Protein: 14g | Fat: 29g | Fiber: 9g
Tried this recipe?Mention @mealpreponfleek or tag #mealpreponfleek!

Shish Tawook Meal Prep

June 8, 2019 by Nick Quintero Leave a Comment

Shish Tawook Meal Prep

Shish Tawook Meal Prep

If you're looking for an easy and convenient lunch that's similar to quality worldly takeout, this meal prep idea is just for you! Lunchtime takeout is nice. The adventure of trying new cuisines and socializing is fun. But it can also be time-consuming. Here at Meal Prep on Fleek, our goal is to offer you meal prep ideas that are healthy, simple, time-saving, and flavorful. Shish Tawook hits the nail on the head! 

Shish Tawook (aka Shish Taouk) is a savory and vibrant Middle Eastern meal. It is very filling and nutritionally balanced. The flavor profile of this meal is absolutely amazing! The combination of spices with Greek yogurt gives the chicken a savory taste. The chicken is paired with a cool & refreshing salad, tangy sauce, and soft pita bread. 

Shish Tawook Meal Prep

How long will Shish Tawook last for?

The portioned meals will last for 4 days in your refrigerator. For guaranteed freshness, store your Shish Tawook meals in a bento-style meal prep container.

Can Shish Tawook be frozen?

Yes, you can freeze Shish Tawook. But note that you should only freeze the chicken, pita bread, and sauce. After cooking and enjoying, chill your leftover chicken in the fridge before freezing. The chicken can be stored in a durable freezer bag for up to 3 months. The same storage instructions apply to the bread and sauce. But the gluten-free pita bread will last one month in the freezer while the sauce will last for up to 6 months in the freezer. We do not recommend freezing the salad because of its high water content. Frozen salad wilts, so always serve fresh salad with Shish Tawook. When you're ready to defrost later, place the chicken, bread, and sauce in the refrigerator overnight to thaw.

Shish Tawook Meal Prep

How do you make Shish Tawook?

Shish Tawook is super easy to make! All you have to do is marinate and cook the chicken and whisk together sauce ingredients. It only takes 10 minutes to cook this restaurant-quality tasting meal. 

First, you start by marinating the chicken. Make the marinade by combining and mixing all of its ingredients in a bowl. Then mix in the chicken and marinate in your fridge anywhere from 1 to 24 hours. Now that your chicken is fully marinated, all there is to do is cook it and make the sauce. Prepare the sauce while the chicken is cooking and plate the pita bread and salad. 

Serve cooked chicken on top of the pita bread and salad with a little bit of sauce drizzled on top. That's it! Easy-peasy and yummy. 

Shish Tawook Meal Prep

How to portion Shish Tawook?

Our Shish Tawook meal prep idea yields four meals. Divide the chicken and salad up into 4 meals and add one piece of gluten-free pita bread to each serving. 

Shish Tawook Meal Prep

More Middle Eastern Shish meal prep recipes:

Shish Tawook is a Middle Eastern kabob dish without the kabab skewers. If you enjoyed this meal prep idea, try our Cauliflower Fried Rice with Legumes and Chicken Shish Kabobs and Kofta Kebab Meal Prep.

Shish Tawook Meal Prep

Shish Tawook Meal Prep Ingredients: 

Shish Tawook Chicken Base:

  • 2 lbs. Chicken Breast (boneless, skinless; cut into 1.5”—2” pieces)
  • ¾ C. Greek Yogurt (plain, unsweetened)
  • Juice of half a Lemon
  • 3 Tbsp. Avocado Oil (plus separate 2 Tbsp. for cooking)
  • 5 Tbsp. Tomato Paste
  • 1 tsp. Sumac
  • 1 tsp. Dried Thyme
  • 1 tsp. Paprika
  • ¼ tsp. Pink Himalayan Salt
  • ¼ tsp. Ground Black Pepper
  • 4 Gluten-Free Pitas (lightly toasted)

Salad Base:

  • 2 Large Heads of Romain Lettuce (~6 cups worth chopped)
  • 1 Bunch Red Radishes (thinly sliced)
  • ¼ C. Sliced Red Onion
  • Optional: Fresh Flat Leaf/Italian Parsley

Dressing:

  • 2 Tbsp. Extra Virgin Olive Oil
  • 5 Tbsp. Red Wine Vinegar
Meal Prep on Fleek x GoodCook Meal Prep Containers
Shish Tawook Meal Prep

Shish Tawook Meal Prep

This easy Shish Tawook Meal Prep recipe is sure to be your new favorite thanks to the bright flavors of lemon, cool yogurt, and perfectly marinated chicken. Gluten-free. 
Print Recipe Pin Recipe Rate Recipe
Prep Time: 1 hour hour
Cook Time: 10 minutes minutes
Total Time: 1 hour hour 10 minutes minutes
Course: Lunch, Main Dish
Cuisine: Turkish
Keyword: Chicken, Meal Prep
Servings: 4 meals
Calories: 576kcal
Author: Nick Quintero

Ingredients

  • 2 pounds Chicken Breast boneless, skinless and cut into 2" pieces
  • ¾ cup non-fat Greek Yogurt or yogurt of choice (plain and unsweetened)
  • ½ large Lemon juiced
  • 3 tablespoon avocado oil
  • 1.5 tablespoon tomato paste
  • 1 teaspoon sumac
  • 1 teaspoon dried thyme
  • 1 teaspoon paprika
  • ¼ teaspoon Sea Salt
  • ¼ teaspoon black pepper
  • 4 gluten-free pitas

Salad Base

  • 2 large head romaine lettuce
  • 1 bunch red radish thinly sliced
  • ¼ cup red onion sliced
  • parsley optional

Dressing

  • 2 tablespoon olive oil
  • 1.5 tablespoon red wine vinegar
Get Recipe Ingredients

Instructions

  • To create the marinade mix together in a large bowl all shish tawook base ingredients, except for the chicken and pitas. Once the marinade is combined, stir in chicken until well-coated. Marinate in fridge for 1 hour (or up to overnight).
  • When the chicken has finished marinating, heat a skillet over medium-high heat, then add 2 tablespoons avocado oil.
  • Place each piece of chicken into the pan and cook for ~3–5 minutes per side or until chicken has fully cooked-through, reaching internal temperature of 165℉ (careful not to over crowd the pan or disrupt chicken during the searing/cooking process).
  • While the chicken is cooking, in a small bowl, whisk dressing ingredients together until emulsified and in a large bowl, toss salad veggie ingredients together. Set Aside.
  • Once everything is ready to enjoy, serve the salad over the pita, top with shish tawook chicken, and a drizzle of dressing.
  • Serve, store, and enjoy!

Notes

Nutrition for 1 out of 6 servings:
51.4g Protein | 37.2g Carbs | 24.8g Fat | 8g Fiber | 576 Calories

Nutrition

Serving: 1meal | Calories: 576kcal | Carbohydrates: 37.2g | Protein: 51.4g | Fat: 24.8g | Fiber: 8g
Tried this recipe?Mention @mealpreponfleek or tag #mealpreponfleek!

Vegetarian Jambalaya

February 14, 2021 by Nick Quintero Leave a Comment

Vegetarian Jambalaya

Are you looking for a delicious, vegetarian spin on a savory meal? Try making our vegetarian jambalaya! Our Vegetarian Jambalaya is full of flavor that compliment cauliflower rice and steamed green beans. There’s nothing as satisfying as eating a super tasty, fast, and nutritious vegetarian meal prep recipe! This is the perfect vegetarian meal for beginner vegetarians, and those who’ve been vegetarian for years. The comforting flavors and meal heartiness from our vegetarian jambalaya leaves everyone wanting more! 

Fun fact: Jambalaya originated in South Louisiana and has its origins in French and Spanish cuisines, especially the paella and jambalaya Spanish dish.


Vegetarian Jambalaya

This veggie-packed jambalaya is a plant-based delight with a meaty vegetarian sausage adding protein and spicy cajun-style seasoning.  Use your favorite plant-based bratwurst or andouille sausage to compliment the flavors of the dish.


How long will Vegetarian Jambalaya last for?

Vegetarian Jambalaya will keep fresh for about 3-4 days in the refrigerator, along with the sides. For maximum freshness, store this vegetarian meal prep recipe in our three-compartment Good Cook® meal prep container. You can also store the Jambalaya and sides separately in single-compartment meal prep containers. Reheat your vegetarian Jambalaya meal by steaming, microwaving, or stove top in a pan.

Can Vegetarian Jambalaya be frozen?

You can freeze vegetarian Jambalaya for about 2-3 months. Just be sure to freeze the Jambalaya and sides separately, in freezer bags or freezer-friendly storage containers. Freezing the meal in parts ensures that the legumes and veggies maintain their taste and texture. Sausages and some veggies may become flabby when reheated. So if you plan on freezing this vegetarian meal prep recipe, don’t cook the sausage and vegetables all the way through.


Vegetarian Jambalaya

Vegetarian Jambalaya Ingredients:

For Jambalaya  

  • 2 tablespoon olive oil  
  • 2 links vegetarian (gluten-free) sausage, (Bratwurst flavor from Beyond Meat) 
  • 1 cup chopped celery 
  • 1 cup chopped green bell pepper  
  • ½ cup chopped carrots 
  • ½ cup chopped sweet white onion  
  • 1 cup vegetable stock  
  • ¼ cup tomato paste  
  • 2 tablespoon hot sauce  
  • 1 ½ tsp Paleo Pink Powder   
  • 1 teaspoon dried oregano  
  • 1 teaspoon dried thyme 
  • 1 cup frozen chopped okra  


For Serving  

  • 4 cups cooked cauliflower rice  
  • 4 cups steamed green beans  
  • Salt and pepper to taste  


Vegetarian Jambalaya


How do you make Vegetarian Jambalaya?

This vegetarian meal prep recipe brings forth a medley of fresh and flavorful ingredients that leave that tantalizing feel with each bite. You’d think that such an intricate meal takes forever to cook and prep, right? Well, not our vegetarian Jambalaya! It’s an easy-to-make meal prep recipe that is ready in under one hour. 

Let’s start by cooking the sausage. We use gluten-free sausage by Beyond Meat because it tastes just like a restaurant-style Bratwurst! To cook the sausage, heat olive oil over medium heat in a Dutch oven or large skillet. Add the entire sausage links to your heated skillet. Keep turning the sausage links in the pan for about 6-8 minutes until they brown. Once fully browned, set the sausage aside to cool for a few minutes before slicing. Next, put onion, carrots, bell pepper, and  celery into the oiled skillet or pan and sauté for 5 minutes while stirring regularly. Then add vegetable stock, tomato paste, hot sauce, Paleo Pink Powder seasoning, oregano, and thyme to the pan. Bring everything to a simmer and cook for 18-20 minutes stirring occasionally. You’ll know the combination is done when the vegetable stock is absorbed and carrots are tender. Finish cooking by stirring in sliced sausage and okra, then cook for an additional five minutes. That’s the last step and your vegetarian Jambalaya is ready for plating!

Be sure to cook the sides while cooking the Jambalaya so everything finishes together. Unless you have a batch of cauliflower rice already prepared. We have a standalone recipe for cauliflower rice here.


Vegetarian Jambalaya


How to portion Vegetarian Jambalaya?

Divide the vegetarian Jambalaya meal prep recipe into four of our Good Cook Meal Prep 3 Compartments containers. Put the cauliflower rice and steamed green beans into each of the 1-cup compartments, and put the Jambalaya into the 2-cup compartments.


Vegetarian Jambalaya


More Vegetarian meal prep recipes:

We have so many vegetarian meal prep recipes for breakfast, lunch, and dinner! Here are a few to get you started.

One Pot Jambalaya Meal Prep 

Cajun Sausage Breakfast Scramble

Vegetarian Chorizo and Quinoa Stuffed Peppers

Vegetarian Italian Sausage Egg Cups

Vegetarian Cobb Salad Meal Prep


Also check out: 


6 Vegetarian Meal Prep Ideas for Next Week

Buffet Style Meal Prepping: Vegetarian


Vegetarian Jambalaya


Other tips for making Vegetarian Jambalaya:


  • You can substitute the sausages with chickpeas or kidney beans to switch things up and keep the meal gluten-free.


  • Use spices and legumes or veggies of your preference. Thyme, oregano, and red pepper flakes are traditional flavor suggestions. 


  • Feel free to use fresh okra instead of frozen okra.


  • Use soy sauce or Tamari sauce as a salt replacement.


Vegetarian Jambalaya

Vegetarian Jambalaya

Vegetarian Jambalaya

This veggie-packed jambalaya is a plant-based delight with a meaty vegetarian sausage adding protein and spicy cajun-style seasoning. Use your favorite plant-based bratwurst or andouille sausage to compliment the flavors of the dish.
Print Recipe Pin Recipe Rate Recipe
Prep Time: 10 minutes minutes
Cook Time: 38 minutes minutes
Total Time: 48 minutes minutes
Course: dinner, Lunch, Main Course
Cuisine: African, American
Keyword: gluten free, low calorie, vegan, vegetarian
Servings: 4 meals
Calories: 291kcal
Author: Nick Quintero

Ingredients

For Jambalaya

  • 2 tablespoon olive oil
  • 2 links vegetarian gluten-free sausage, (Bratwurst flavor from Beyond Meat)
  • 1 cup chopped celery
  • 1 cup chopped green bell pepper
  • ½ cup chopped carrots
  • ½ cup chopped sweet white onion
  • 1 cup vegetable stock
  • ¼ cup tomato paste
  • 2 tablespoon hot sauce
  • 1 ½ teaspoon Paleo Pink Powder
  • 1 teaspoon dried oregano
  • 1 teaspoon dried thyme
  • 1 cup frozen chopped okra

For Serving

  • 4 cups cooked cauliflower rice
  • 4 cups steamed green beans
  • Salt and pepper to taste
Get Recipe Ingredients

Instructions

  • Heat olive oil over medium heat in a Dutch oven or large skillet. Brown sausage for 6-8 minutes, turning regularly. Set sausage aside to cool for a few minutes, then slice into thin slices.
  • Add celery, bell pepper, carrots, and onion to oil and sauté for 5 minutes, stirring regularly. Add vegetable stock, tomato paste, hot sauce, Paleo Pink Powder seasoning, oregano, and thyme to the pan. Bring to a simmer and cook for 18-20 minutes, until stock reduces and carrots are tender stirring occasionally.
  • Stir in sliced sausage and okra. Cook 5 minutes longer.

Nutrition

Calories: 291kcal | Carbohydrates: 28g | Protein: 14g | Fat: 17g | Fiber: 14g
Tried this recipe?Mention @mealpreponfleek or tag #mealpreponfleek!

  • « Previous Page
  • 1
  • 2
  • 3
  • 4
  • …
  • 11
  • Next Page »

Footer

↑ back to top

About

  • Privacy Policy
  • Disclaimer
  • Terms & Conditions
  • Accessibility Policy

Newsletter

  • Sign Up! for emails and updates

Contact

  • Contact
  • Services
  • Media Kit
  • FAQ

As an Amazon Associate I earn from qualifying purchases.

Copyright © 2024 Foodie Pro on the Feast Plugin

Rate This Recipe

Your vote:


A rating is required
A name is required
An email is required